
There's something about lemon baking that makes the whole kitchen smell like a different season entirely. I made my first batch of these on a cold February afternoon when I was completely over chocolate and needed something that felt bright and alive — and the moment this batter hit the oven, I stood in my kitchen just breathing it in. The smell alone sold me before I'd taken a single bite.
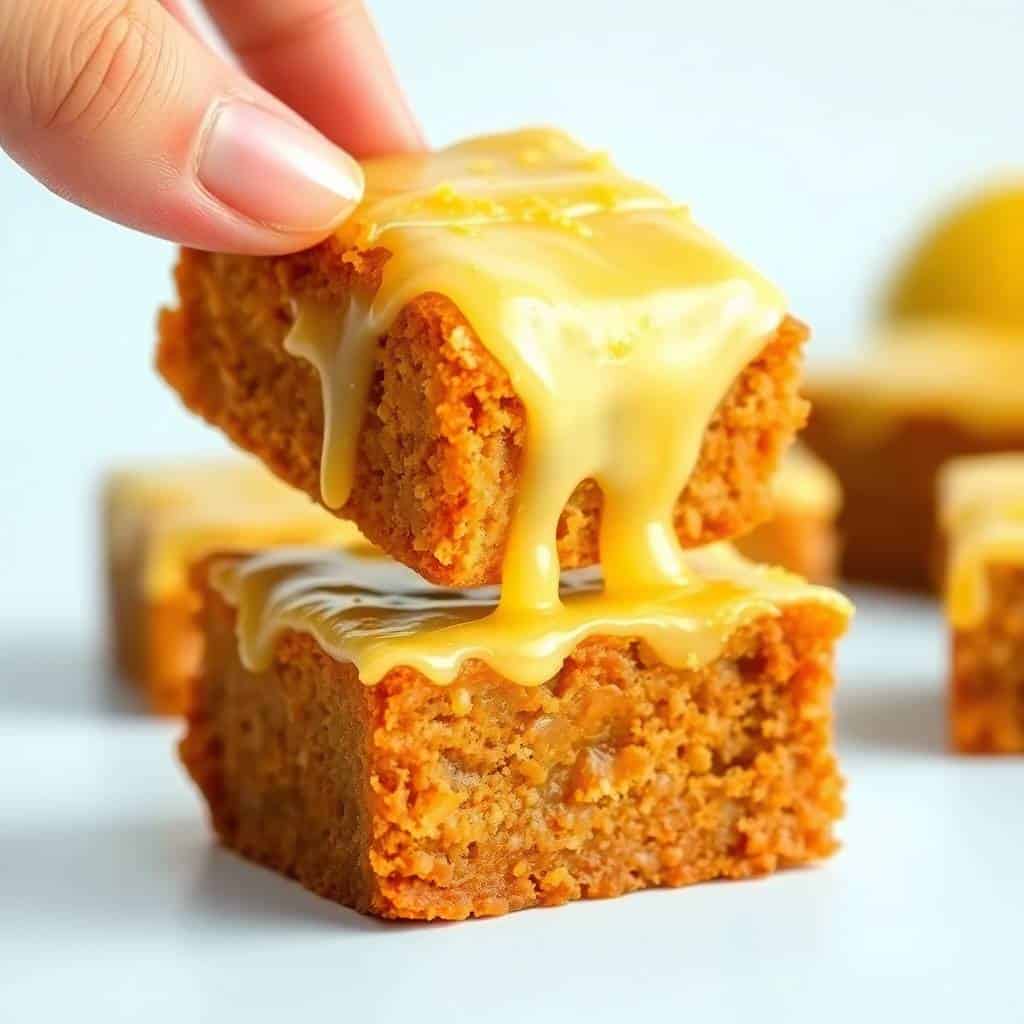
What makes these bars work is that the lemon doesn't just show up in the glaze — it runs through every layer. There's zest and juice in the batter itself, then more of both in the glaze on top. The texture is genuinely brownie-like: dense, slightly fudgy, chewy at the edges. The glaze poured over still-warm bars soaks in just slightly at the edges and sets to a shiny finish in the centre that looks like you spent a lot more time than you did. I've brought these to enough brunches now that I finally wrote the recipe down properly, because I kept getting texts asking for it.
Zainab, who usually only wants chocolate anything, ate three of these in one sitting and then asked me if I could make them again the following weekend. My husband had them with his afternoon tea and said they tasted "clean" — which is his way of saying he liked them. These bars also happen to be one of the few baked goods that genuinely get better on day two, once the lemon flavour has had overnight to settle. If you're a fan of citrus desserts, you'll also want to check out my Mini No-Bake Lemon Cheesecake Tarts — they're just as easy and use the same basic pantry setup.
One thing to set expectations on: this isn't a quick pour-and-walk-away situation with the glaze. The timing of when you glaze matters — too hot and it runs off, too cold and it just sits on top without adhering properly. I'll walk you through the right window below. Other than that, this is genuinely a one-bowl, 15-minute active-time recipe. Let's get into it.
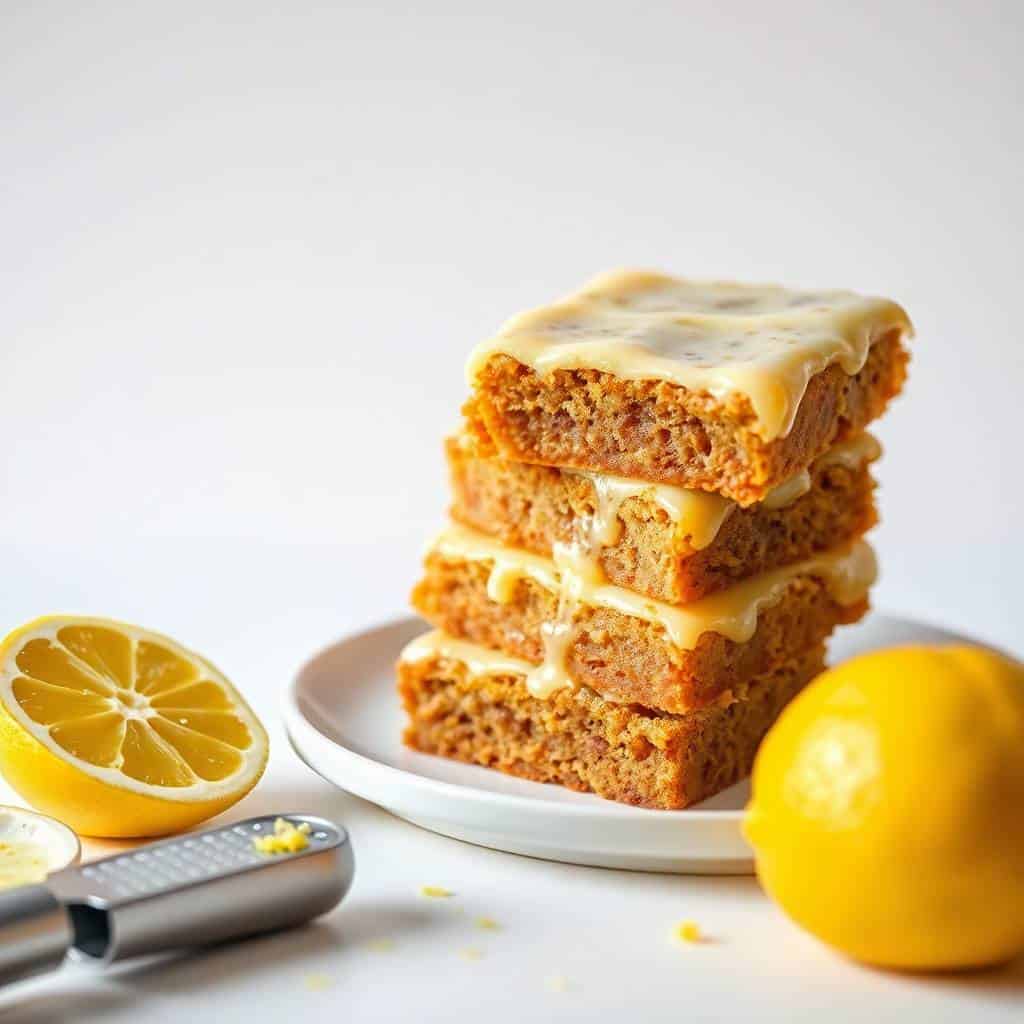
Why You'll Love This Recipe
- The lemon actually comes through: I've had "lemon" bars that barely tasted like anything. These aren't that. Fresh zest and juice in both the batter and the glaze means the citrus is present in every single bite, not just a faint background note. There's no bottled juice in this recipe — the real stuff makes a real difference and you can taste it.
- Brownie texture without the chocolate: The same butter-to-flour ratio and egg structure that makes a chocolate brownie fudgy and chewy does identical work here. The interior is dense and moist, the edges set up and hold their shape when sliced, and the whole thing has that slightly chewy pull that makes you go back for another piece. People who are skeptical about a non-chocolate brownie change their minds after one bite.
- Everything is already in your kitchen: Two lemons, flour, sugar, butter, eggs, baking powder, salt, powdered sugar. That's the whole list. I've made these on complete impulse on a Tuesday afternoon without going to the store. If you have lemons, you have everything you need.
- Under an hour start to finish: Active prep is about 12 minutes. The oven takes 20–25. The glaze takes literally 2 minutes to whisk together while the bars cool. If you refrigerate for an hour before slicing (which I strongly recommend), you're looking at just over an hour total — and most of that time you're doing something else entirely.
- They travel and keep well: The bars hold their shape at room temperature, the glaze doesn't smear when you stack them with parchment between layers, and they keep in the fridge for five days. I make a double batch whenever I'm bringing dessert to anything — one pan for wherever we're going, one pan for home. Both disappear at roughly the same speed.
Ingredients
- 1 cup all-purpose flour
- ¾ cup granulated sugar
- ¼ teaspoon fine salt
- ½ cup unsalted butter, melted and cooled slightly
- 2 large eggs, at room temperature
- Zest of 1 lemon (about 1 tablespoon)
- 2 tablespoons fresh lemon juice
- ½ teaspoon vanilla extract
For the lemon glaze:
- ½ cup powdered sugar, sifted
- 1–2 tablespoons fresh lemon juice
- Zest of ½ lemon (optional, but I always add it)
Directions
- Preheat and prep the pan: Preheat your oven to 350°F (175°C). Line an 8×8-inch baking pan with parchment paper and leave a generous overhang on at least two sides. Those overhangs are handles — they let you lift the whole slab out cleanly after chilling, which makes getting neat squares so much easier than cutting in the pan.
- Mix the dry ingredients: In a large bowl, whisk together the flour, sugar, and salt. Getting the dry ingredients combined first means the wet ingredients distribute more evenly when you add them, which helps avoid overworking the batter later.
- Add the wet ingredients: In a separate bowl (or just a measuring cup), combine the melted butter, eggs, lemon zest, lemon juice, and vanilla. Pour the wet mixture into the dry ingredients and stir with a spatula or wooden spoon until just combined. Stop the moment the last streak of flour disappears — overmixing at this stage builds gluten and gives you tough bars instead of fudgy ones. The batter will be thick, glossy, and slightly sticky.
- Pour and bake: Pour the batter into the prepared pan and spread it into an even layer right to the corners. Bake for 25–28 minutes, until the top is set and lightly golden at the edges and a toothpick inserted in the centre comes out with just a few moist crumbs. If it comes out with wet batter, give it 3 more minutes. Don't overbake — these bars should be just slightly underdone when they come out; they carry over in the hot pan.
- Make the glaze: While the bars cool on a wire rack, whisk together the sifted powdered sugar, lemon juice, and lemon zest in a small bowl until smooth and pourable. It should coat the back of a spoon but still flow. If it's too thick, add lemon juice a half teaspoon at a time. Too thin, add a tablespoon of powdered sugar. Taste it — it should be bright, tart, and sweet all at once.
- Glaze and set: Pour the glaze over the bars when they're still slightly warm but not hot — about 15–20 minutes out of the oven. That's the window where the glaze adheres properly without running off. Spread it to the edges with a spatula and let the bars cool completely at room temperature until the glaze sets. For the cleanest slices, refrigerate for at least 1 hour before cutting. Wipe the knife between each cut.
Tips for Success
- Use fresh lemons — not bottled juice: I know bottled juice is convenient, but it genuinely doesn't work the same way here. Bottled juice has preservatives that affect the texture of the glaze and lacks the aromatic oils that make fresh lemon taste like, well, lemon. The zest especially matters — the oils in fresh lemon zest are where most of the floral brightness lives. Two medium lemons will cover everything this recipe needs, batter and glaze, with a little to spare.
- Don't overmix once the flour goes in: The first time I made these I treated them like a cake batter and kept stirring to make sure everything was perfectly smooth. The bars came out noticeably tougher than they should have been. Now I fold with a spatula and stop as soon as the flour is incorporated — even if there's the faintest trace at the edges of the bowl, one final fold will get it without overdoing it.
- The glaze timing window is real: Pouring glaze onto completely cold bars means it just sits on the surface and may not adhere evenly. Pouring it onto still-hot bars means it melts off or absorbs completely and you lose the visible set finish. The 15–20 minute mark after the pan comes out of the oven is the sweet spot — the warmth helps the glaze bond and soak in fractionally at the edges while still setting firm in the centre.
- Refrigerate before you slice: Even after the glaze sets at room temperature, the interior of the bars is much easier to cut cleanly when cold. A cold bar holds its shape when you lift it, the glaze doesn't crack or slide, and you get those clean straight edges that look put-together. I use a sharp chef's knife and wipe the blade with a damp cloth between every single cut — this makes a noticeable difference in how the slices look.
- Taste your lemons before you start: Lemons vary a lot. Some are mild and almost sweet; some are intensely acidic and almost sharp. I've had batches where I added a tiny bit more zest because the lemons were particularly mild and the batter tasted flat. Tasting the juice and zest before committing lets you adjust slightly and ensures the finished bars have the right balance regardless of what your fruit brings.
Variations
- White chocolate chips: Fold ½ cup of white chocolate chips into the batter just before pouring into the pan. The sweetness and creaminess of white chocolate works genuinely well against the tart lemon — they balance each other instead of competing. The chips are also visually striking against the pale gold interior when you slice the bars. This is the version I'd bring to a bake sale.
- Fresh berry topping: Press fresh raspberries or blueberries gently into the glazed surface before the glaze sets fully. The tartness of raspberries is a natural pairing with lemon, and the deep red against the white glaze looks significantly more elaborate than the effort it takes. Use fresh berries here — frozen ones release too much liquid and the glaze goes weepy.
- Meyer lemon version: Meyer lemons are sweeter and more floral with lower acidity — less sharp than a standard Eureka lemon and more of a mandarin-adjacent roundness. Bars made with Meyer lemons are noticeably gentler and work well for anyone who finds standard lemon too tart. If you go this route, add an extra half tablespoon of zest to compensate for the lower acidity, otherwise the flavour can taste slightly flat.
- Lemon-lime combination: Replace 1 tablespoon of the lemon zest in the batter with lime zest, and add 1 tablespoon of lime juice alongside the lemon juice. The lime adds a slightly more tropical, aromatic quality to the base and makes the citrus flavour more complex than straight lemon alone. You can do the same with the glaze — half lemon, half lime juice — for a fully blended citrus result.
- Gluten-free swap: Substitute the all-purpose flour with a quality 1:1 gluten-free baking blend. King Arthur Measure for Measure and Bob's Red Mill 1-to-1 (both easy to find at Walmart or on Amazon) work well here. The texture will be very slightly more crumbly but the flavour is identical. Start checking with a toothpick at the 20-minute mark, as gluten-free flours can bake a touch faster.
Serving and Storage
Serving
These bars are best served slightly chilled or at room temperature — straight from the fridge they're firm and satisfying, and after sitting out for 10–15 minutes the lemon flavour opens up a bit more. They work alongside a cup of tea or coffee in the afternoon, as a light dessert after dinner, or as part of a brunch spread where their brightness stands out against richer baked goods. If you want to dress them up before serving, scatter a little fresh lemon zest over the glazed surface right before they hit the table — the bright yellow against the white glaze looks genuinely striking without any extra work. For a full brunch spread, I sometimes put these out alongside my Strawberry Cream Cheese Pie — the two together cover both citrus and berry in one dessert table.
Storage
Store cut bars in a single layer, or stacked with parchment paper between layers, in an airtight container in the refrigerator for up to 5 days. The glaze sets firmer when chilled and the lemon flavour actually deepens overnight — day-two bars are genuinely better than day-one. For longer storage, wrap individual bars tightly in plastic wrap and place in a freezer-safe bag. They keep in the freezer for up to 2 months. To thaw, transfer to the fridge overnight or leave at room temperature for 30–45 minutes. Don't microwave them — the glaze melts unevenly and the interior goes gummy.

Frequently Asked Questions
Can I freeze lemon brownies?
Yes, these freeze really well for up to 2 months. Wrap each bar individually in plastic wrap and then put them in a freezer-safe bag or airtight container to prevent freezer burn. The glaze holds up through freezing and thawing without cracking or losing its finish. To thaw, transfer to the fridge overnight or let them sit at room temperature for 30–45 minutes. Avoid the microwave — the heat is uneven and will melt the glaze and make the interior gummy.
Can I double the recipe?
Easily. Use a 9x13-inch baking pan and increase the baking time to 25–30 minutes, starting to test with a toothpick at the 25-minute mark. The bars will be slightly thinner in the larger pan but they'll have the same fudgy texture and lemon flavour. Double the glaze quantities too — a 9x13 surface needs significantly more glaze than an 8x8 to cover it properly.
Do I need to refrigerate lemon brownies?
I recommend it for the best texture and flavour — the glaze sets firmer when chilled and the lemon flavour deepens overnight. That said, the bars are fine at room temperature for up to 2 days in an airtight container, and the glaze will stay set. If your kitchen is warm or humid, refrigerate them — warmth makes the glaze sticky and soft.
Can I skip the lemon glaze?
You can, but it makes a real difference. The glaze is the second hit of lemon that makes these bars taste unmistakably citrusy rather than just faintly lemony. If you'd rather skip it, dust the cooled bars with powdered sugar right before serving — it's a simpler finish that still looks nice and prevents the bars from sticking when stacked.
What's the best type of lemon to use?
Standard lemons — Eureka or Lisbon, which are what you'll find at any grocery store — are the best choice. Their higher acidity produces that bright, sharp lemon flavour that makes the bars distinctive. Meyer lemons are a good alternative if you prefer a sweeter, more floral result with less tartness; if you go that route, add an extra half tablespoon of zest to keep the flavour intensity up. The one thing to avoid is bottled lemon juice — it lacks the aromatic complexity of fresh and the preservatives affect both the flavour and the glaze texture.
These lemon brownies have become one of my most-reached-for recipes when I need something that isn't chocolate and isn't a layer cake project. The combination of the fudgy, dense interior and the set, glossy glaze on top makes them feel considered without being complicated. One bowl. Basic ingredients. A refrigerator to finish the job.
I make a double batch almost every time now — one pan goes wherever we're going, one pan stays home. Both are gone within two days. The white chocolate chip version is worth trying once you've made the original, and the Meyer lemon version is genuinely good for anyone who prefers a softer, more floral citrus note over the sharper standard lemon bite. If you're in a citrus phase, my Mini No-Bake Lemon Cheesecake Tarts are another one worth bookmarking — no oven required and the same bright lemon character.
If you make these, drop a comment below and let me know whether you went with the plain glaze or tried one of the variations. I always want to know how the glaze-to-bar ratio lands for other people — it's the thing I get asked about most every time I bring these somewhere. 🍋✨

LEMON BROWNIES WITH LEMON GLAZE
Ingredients
For the Lemon Brownies:
- 1 cup all-purpose flour
- ¾ cup granulated sugar
- ¼ teaspoon salt
- ½ cup unsalted butter melted
- 2 large eggs
- Zest of 1 lemon
- 2 tablespoons fresh lemon juice
- ½ teaspoon vanilla extract
For the Lemon Glaze:
- ½ cup powdered sugar
- 1 –2 tablespoons fresh lemon juice
- Zest of ½ lemon optional
Instructions
Preheat Oven:
- Preheat your oven to 350°F (175°C). Line an 8×8-inch baking pan with parchment paper or lightly grease it.
Make the Brownie Batter:
- In a mixing bowl, whisk together flour, sugar, and salt. In another bowl, combine melted butter, eggs, lemon zest, lemon juice, and vanilla. Add wet ingredients to dry and mix until just combined.
Bake:
- Pour the batter into the prepared pan and spread evenly. Bake for 25–28 minutes, or until a toothpick inserted in the centre comes out clean. Allow to cool completely.
Prepare the Glaze:
- In a small bowl, whisk together powdered sugar and lemon juice until smooth. Add lemon zest for extra flavour if desired.
Glaze the Brownies:
- Once cooled, drizzle or spread the lemon glaze over the brownies. Let the glaze set before slicing.
Notes
Lemon brownies can be made a day in advance. Store in an airtight container once the glaze is set. Flavour Boost:
Add a few drops of lemon extract for a more intense lemon flavour. Serving Ideas:
Great with tea or coffee, and perfect for spring brunches, picnics, or holiday dessert trays. Allergy-Friendly Options:
Use plant-based butter and egg alternatives to make it dairy-free and vegan. Storage Tips:
Keep in an airtight container at room temperature for up to 3 days, or refrigerate for up to a week.





Comments
No Comments