
Saad asked me to make these three weeks in a row before I finally sat down and wrote the recipe out properly. He called them "the marshmallow cookies" and would check on the oven every two minutes while they baked. That's how I knew this one was worth keeping.
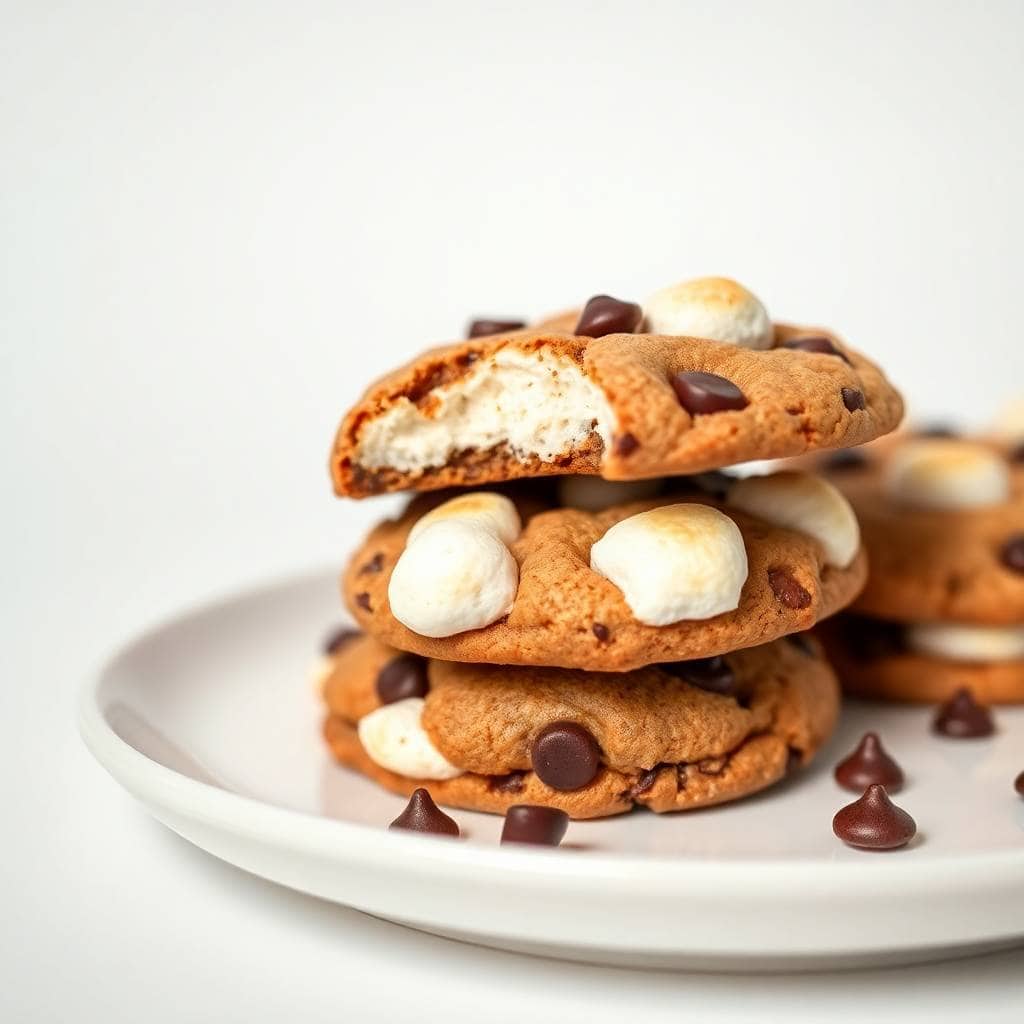
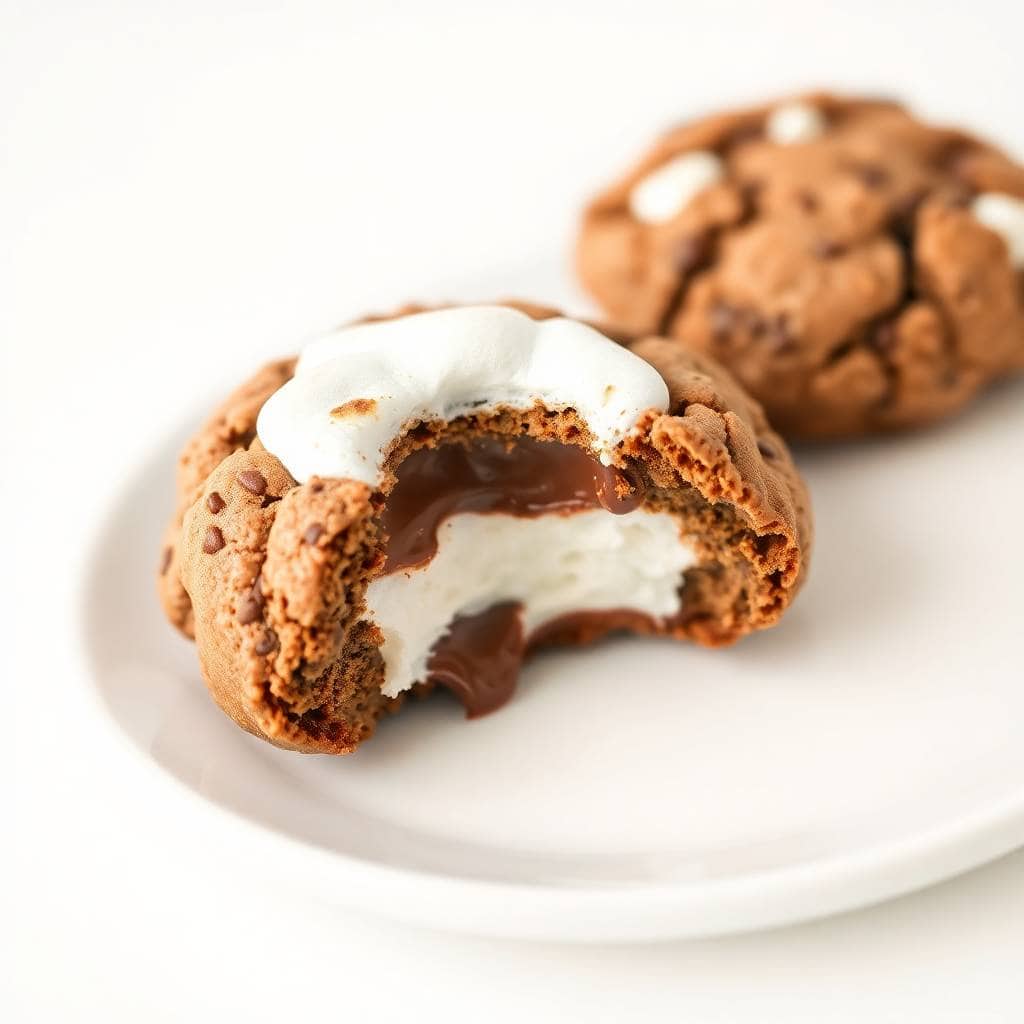
These hot cocoa cookies are exactly what they sound like — a rich, fudgy chocolate cookie base with a marshmallow pressed right into the center that puffs and melts in the last two minutes of baking. The cocoa powder in the dough gives them a deep chocolate flavor, and the chocolate chips add little pockets of extra richness throughout. I've made these with both Dutch-process and regular unsweetened cocoa — both work, though the Dutch-process gives a slightly darker, more intense result.
I make a double batch every time now, because a single batch disappears before they've fully cooled. They're good at room temperature, but if you microwave one for ten seconds the next day, the marshmallow gets gooey all over again and honestly that might be even better. If you're looking for another no-fuss holiday treat, my Sugar Cookie Fudge comes together just as fast and goes great on a cookie tray alongside these.
One thing I'll warn you about upfront: don't skip the chilling step. I tried it once because I was impatient and the cookies spread into thin, flat discs. Still tasted fine, but they weren't the thick, chewy rounds I was going for. Thirty minutes in the fridge makes all the difference — use that time to clean up the kitchen or brew yourself a cup of tea.
Why You'll Love This Recipe
- That marshmallow center is the whole point: When you press the marshmallow half into the hot cookie and slide it back into the oven, it puffs up and gets slightly golden on the edges. It's soft and sticky and honestly looks impressive for how little effort it takes. Saad thinks it looks like a real bakery cookie, which is high praise from a nine-year-old.
- The dough uses pantry staples: Everything in this recipe — butter, sugar, eggs, flour, cocoa powder — is probably already in your kitchen. No specialty ingredients, nothing you'd need to order online. I grab my cocoa powder from Walmart or Aldi and it works perfectly well.
- They're great for gifting and cookie swaps: These cookies look festive and hold up well for a few days, which makes them one of my go-to options when I need to bring something to a holiday gathering. Stack them in a box with parchment between the layers and they travel well. People always ask for the recipe.
- Kids can actually help: The marshmallow step is the most fun part and Zainab loves doing it. She presses each marshmallow half onto a cookie with very serious concentration. It's a good activity for little hands, and the result is something they're genuinely proud of.
- You can make the dough ahead: The dough keeps in the fridge for up to two days, so you can mix it the night before and bake fresh the next day. This is how I handle holiday baking when I don't want to do everything at once — spread the work out and the day of baking is easy.
Ingredients
- 1 cup unsalted butter, softened
- 1 cup granulated sugar
- ⅔ cup light brown sugar, packed
- 2 large eggs
- 2 teaspoons vanilla extract
- 2¼ cups all-purpose flour
- ½ cup unsweetened cocoa powder (I use regular unsweetened; Dutch-process works too for a deeper color)
- 1 teaspoon baking soda
- ½ teaspoon salt
- 1 cup semi-sweet chocolate chips
- 12 large marshmallows, halved (cut with scissors — much easier than a knife)
- Optional: chocolate drizzle, festive sprinkles, or crushed candy canes for topping
Directions
- Step 1: Whisk the dry ingredients — In a medium bowl, whisk together the flour, cocoa powder, baking soda, and salt until evenly combined. Set aside. This takes about 30 seconds and saves you from cocoa lumps in the finished dough.
- Step 2: Cream the butter and sugars — In a large bowl, beat the softened butter with both sugars until the mixture looks pale and fluffy, about 2–3 minutes with a hand mixer. If you don't have a hand mixer, a wooden spoon and some effort gets you there — it just takes a few extra minutes.
- Step 3: Add eggs and vanilla — Beat in the eggs one at a time, then the vanilla extract. The mixture should look smooth and glossy at this point.
- Step 4: Combine and fold in chips — Add the dry ingredient mixture to the wet mixture gradually, mixing just until no dry streaks remain. Don't overmix once the flour goes in. Fold in the chocolate chips with a spatula.
- Step 5: Chill the dough — Cover the bowl with plastic wrap and refrigerate for at least 30 minutes, or up to 2 days. This step is not optional — the dough firms up significantly and the cookies bake into thicker, chewier rounds instead of spreading flat.
- Step 6: Preheat and scoop — Preheat your oven to 350°F (175°C). Line a baking sheet with parchment paper. Scoop the dough into balls (about 2 tablespoons each) and place them about 2 inches apart on the sheet.
- Step 7: First bake — Bake for 9–10 minutes, until the edges look set but the centers still seem slightly underdone. They'll continue cooking on the hot pan, so pulling them early is the right call.
- Step 8: Add the marshmallows — Remove the baking sheet from the oven and quickly press a marshmallow half (cut side down) into the center of each cookie. Return to the oven for 1–2 more minutes, just until the marshmallows puff and turn slightly golden.
- Step 9: Cool and decorate — Let the cookies rest on the baking sheet for 5 minutes before moving to a wire rack. Add a drizzle of melted chocolate or a pinch of sprinkles while the marshmallows are still soft if you're going that route.
Tips for Success
- Use scissors to cut the marshmallows: A knife drags and sticks. Kitchen scissors dipped in water cut marshmallows cleanly in two seconds each. I learned this after wrestling with a knife and ending up with mangled, uneven halves on my first batch. Scissors changed everything.
- Don't overbake the first round: The cookies should look underdone when you pull them out for the marshmallow step. The centers will be soft and slightly shiny — that's correct. They set up as they cool, and if you bake them until they look done, they'll be dry by the time you eat them.
- Work fast with the marshmallows: Have your marshmallow halves ready before you open the oven. You want to press them on and get the pan back in the oven quickly so you don't lose too much heat. I pre-cut all my marshmallows and line them up on the counter while the first bake happens.
- Bake one tray at a time: If you crowd the oven with two trays, the heat doesn't circulate evenly and the cookies on the lower rack tend to overbake on the bottom. I know it's slower, but one tray at a time gives you consistent results every time.
- Let butter come to room temperature properly: This matters more than people think. Cold butter won't cream with the sugar — you'll just get a lumpy mixture that never gets fluffy. I take mine out about an hour before I start baking. If you forgot, you can cut it into small cubes and microwave in 5-second bursts until it's just soft, not melted.
Variations
- Peppermint hot cocoa version: Add ½ teaspoon of peppermint extract to the dough along with the vanilla. Crush a candy cane and sprinkle the pieces over the warm marshmallow right after the second bake. This is my husband's favorite version — he'll eat three of these in one sitting, which is not something I usually see from him with cookies.
- Dark chocolate version: Swap the semi-sweet chips for dark chocolate (70% cacao or higher). The bittersweet chocolate against the sweet marshmallow is a really nice contrast, and the cookies taste more grown-up. This is my personal preference when I'm baking these for adults rather than kids.
- Mexican hot chocolate version: Add ½ teaspoon cinnamon and a tiny pinch of cayenne to the dry ingredients. This is inspired by the spiced chocolate drinks I've tried — it gives the cookies a warmth that sneaks up on you. Start with just a pinch of cayenne; you can always add more next time once you know how much heat you like.
- Mini marshmallow version: Instead of halved large marshmallows, press 4–5 mini marshmallows onto each cookie for the second bake. They melt faster and spread more evenly across the surface. Good option if you have a bag of minis already open. If you love no-bake treats with a similar vibe, my No-Bake Coconut Cream Balls are another great holiday option.
- Gluten-free version: I haven't personally tested this one, but a 1:1 gluten-free flour blend (like Bob's Red Mill or King Arthur's measure-for-measure) should work as a straight swap for the all-purpose flour. The texture may be slightly different, so chill the dough a little longer — at least 45 minutes — to help it hold its shape.
Serving and Storage
Serving
These are best served slightly warm — about 10 minutes out of the oven when the marshmallow is still soft and a little stretchy. Pair them with a mug of hot cocoa if you want the full experience. At holiday gatherings I set them out on a plate next to something like my 7-Layer Butterscotch Chip Cookie Bars and they always go first. If you're gifting them, layer in a box with parchment paper between each row so the marshmallows don't stick together.
Storage
Store in an airtight container at room temperature for up to 5 days. The marshmallow will firm up a bit as they sit, but a 10-second microwave zap brings them right back to gooey. For longer storage, freeze the baked cookies in a single layer first, then transfer to a zip-lock bag — they keep for up to 2 months. The unbaked dough also freezes well; roll into balls before freezing and bake straight from frozen, adding 2 extra minutes to the bake time.

Frequently Asked Questions
Why do I have to chill the dough — can I skip it?
I tried skipping it once and ended up with flat, thin cookies that spread across the whole pan. The chilling firms up the butter in the dough, which slows the spread during baking and gives you a thicker, chewier result. Thirty minutes is the minimum — if you have time, an hour is even better.
Can I freeze the cookie dough to bake later?
Yes, and this is actually how I prep for the holidays. Roll the dough into balls, freeze them on a sheet pan until solid, then transfer to a freezer bag. When you're ready to bake, pull them out and bake straight from frozen at 350°F — just add 1–2 extra minutes to the bake time. You still add the marshmallow at the end the same way.
Can I use mini marshmallows instead of large ones?
Absolutely. Press 4–5 mini marshmallows onto each cookie instead of a halved large one. They melt a bit faster, so watch the oven closely during that last minute or two. The coverage is more even across the surface of the cookie, which some people actually prefer.
How do I stop the marshmallows from sliding off?
Press them cut-side down into the center of the cookie with a little firm pressure — don't just rest them on top. The warmth of the cookie softens the marshmallow base slightly and helps it grip. Getting the pan back in the oven quickly also helps, because the marshmallow starts to melt into the cookie surface within the first minute.
Can I make these a day ahead for a party or cookie swap?
Yes. Bake them the day before and store in an airtight container at room temperature. The marshmallow firms up overnight but the cookie itself stays soft. If you want that fresh, gooey texture for your guests, microwave individual cookies for 8–10 seconds right before serving — it brings the marshmallow back to life.
These hot cocoa cookies have become one of those recipes I come back to every single December. They're not complicated — the steps are straightforward and the ingredient list is short — but they have this quality where they feel like an occasion. Something about the puffed marshmallow on top makes people stop and look before they eat one.
I make a double batch now every time, because a single batch of 24 cookies disappears faster than I can cool them on the rack. My husband is not much of a sweets person, but he'll always take one of these warm. That says something. If you're putting together a holiday tray, these sit nicely alongside the Sugar Cookie Fudge — the colors and textures contrast well and people can grab a little of both.
If you try these, I'd genuinely love to know how they turned out for you. Holiday baking is one of those things where everyone's oven is slightly different and everyone's kitchen is a little chaotic, so your version might look a bit different from mine — and that's completely fine. The marshmallow might lean, the chocolate might drizzle unevenly. It's still going to taste good. 🍫☕🎄

HOT COCOA COOKIES
Ingredients
For the Cookies:
- 1 cup unsalted butter softened
- 1 cup granulated sugar
- ⅔ cup light brown sugar packed
- 2 large eggs
- 2 teaspoons vanilla extract
- 2 ¼ cups all-purpose flour
- ½ cup unsweetened cocoa powder
- 1 teaspoon baking soda
- ½ teaspoon salt
- 1 cup semi-sweet chocolate chips
For Topping:
- 12 large marshmallows halved
- Optional: chocolate drizzle or sprinkles
Instructions
Preheat Oven:
- Preheat oven to 350°F (175°C). Line a baking sheet with parchment paper.
Make Cookie Dough:
- In a large bowl, cream together butter and both sugars until fluffy. Beat in eggs and vanilla. In another bowl, whisk flour, cocoa powder, baking soda, and salt. Gradually add dry ingredients to wet, mixing until combined. Fold in chocolate chips.
Scoop and Bake:
- Scoop dough into balls and place on baking sheet, 2 inches apart. Bake for 9–10 minutes.
Add Marshmallows:
- Remove cookies from oven and press a marshmallow half into the center of each. Return to oven for 1–2 minutes, just until marshmallows puff.
Cool and Serve:
- Let cool slightly before transferring to a wire rack. Add optional drizzle or festive sprinkles on top.
Notes
The dough can be chilled for up to 2 days before baking. Storage:
Store in an airtight container for up to 5 days, or freeze for longer storage. Serving Idea:
Serve with mugs of real hot cocoa for the ultimate cozy treat!
If you liked these, here are a few more recipes from my kitchen you might want to try next:
- Sugar Cookie Fudge (No-Bake Holiday Treat with Sprinkles)
- No-Bake Coconut Cream Balls (Melt-in-Your-Mouth Bites)
- 7-Layer Butterscotch Chip Cookie Bars (No Mixer Needed)





Comments
No Comments