
I made this red velvet strawberry cheesecake for the first time on a whim before Eid, and I genuinely wasn't sure it was going to work. Red velvet as a crust instead of a filling? I'd never tried that before. But I pressed the crumbs into the pan, poured the cheesecake batter on top, and crossed my fingers — and honestly, when I sliced into it the next morning, I stood in my kitchen a little stunned at how good it looked.
What makes this work is the contrast. The red velvet crust has that faint cocoa flavor that keeps it from being just a sweet crumble, and the cheesecake layer is dense and creamy without being heavy. The strawberry topping on top — just warmed jam and fresh sliced berries — ties everything together without making it feel overly fussy. I've made fancier-looking desserts that tasted like nothing. This one tastes exactly as good as it looks.
My husband doesn't usually get excited about dessert — he'd rather have a second helping of dinner — but he asked me to save him two slices of this before the kids could get to it. Zainab ate her piece and then immediately asked if she could have the leftover one in the morning. I let her. It's actually even better the next day once it's had a full night in the fridge.
One thing worth setting expectations on: this isn't a quick weeknight dessert. It takes about an hour to bake, then you need at least 4 hours of chilling time — overnight is better. If you're making it for a party or a celebration, start it the day before. It's the kind of dessert that rewards planning ahead. If you're looking for something faster, my mini lemon drop cakes come together much more quickly. But if you have the time, this one is absolutely worth it.
Why You'll Love This Recipe
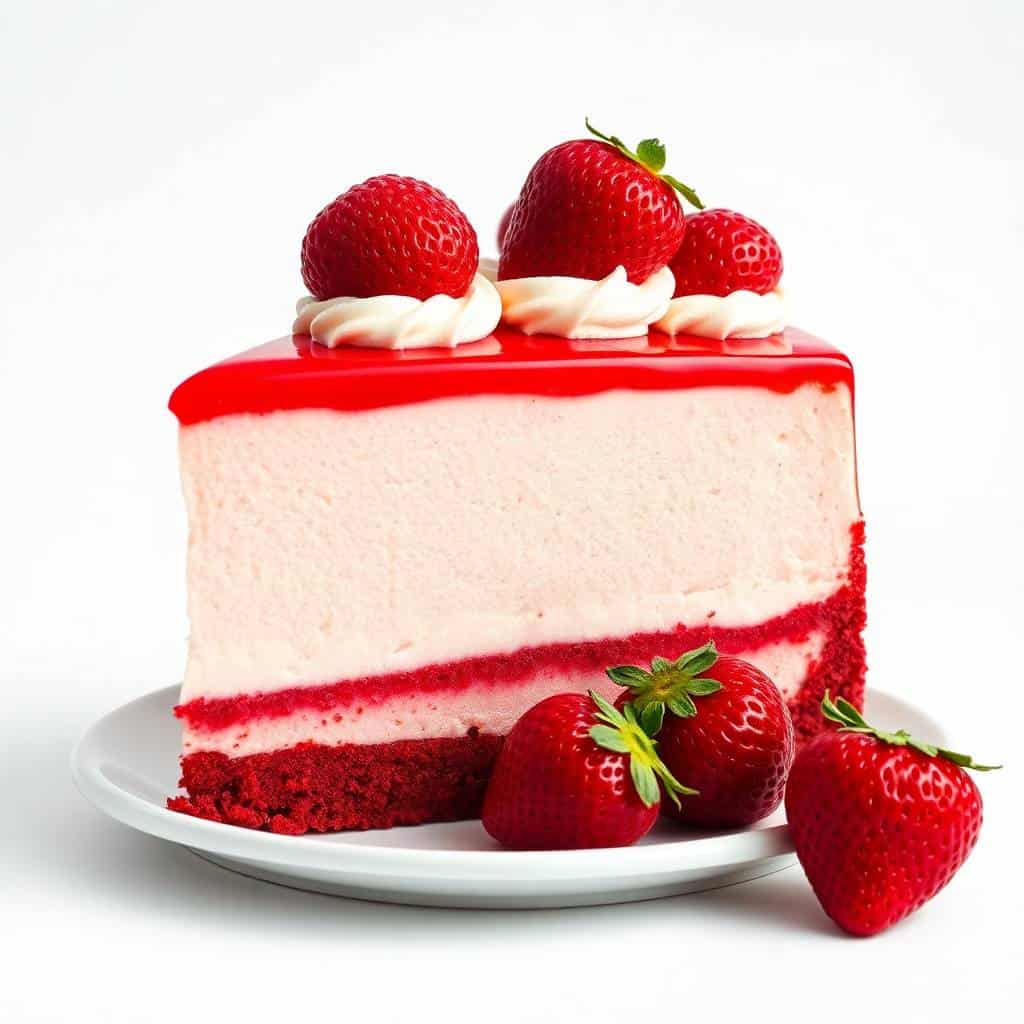
- The layers actually taste different from each other: A lot of layered desserts look impressive but every bite tastes the same. This one doesn't. The crust has a cocoa-tinged depth from the red velvet crumbs, the filling is tangy and rich from the cream cheese and sour cream, and the strawberry topping is bright and a little sweet. You get something different in every forkful depending on how thick you slice it.
- It's make-ahead friendly: I made this at 9pm the night before a gathering and it was sitting in the fridge by 10pm. By the time people came over the next afternoon, it had chilled perfectly and all I had to do was top it with the strawberries and glaze. No last-minute stress. For a dessert this impressive-looking, that matters a lot.
- You don't need any fancy equipment: I don't own a stand mixer. I use a hand mixer I got for about $20, and it does everything this recipe needs. A 9-inch springform pan is really the only specialty item — you can find one at Walmart or any grocery store for under $15. Everything else is a mixing bowl, a spatula, and an oven.
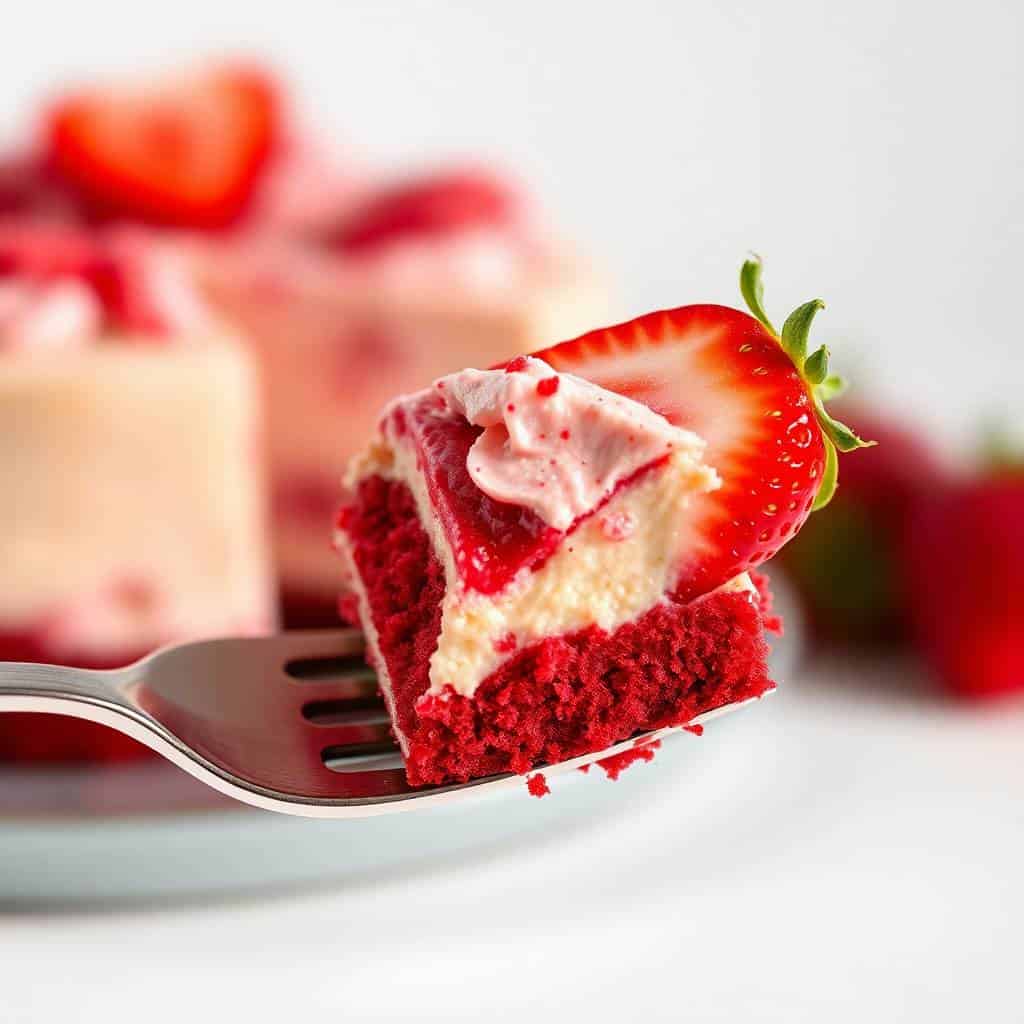
- The red velvet crust is a real upgrade from regular graham cracker: Graham cracker crusts are fine, but they don't add much flavor on their own. The red velvet crumbs bring actual cocoa taste to the base, and when you bite through all three layers together you get this moment where the chocolatey bottom meets the tangy cheesecake and sweet strawberry on top. It works in a way I didn't fully expect until I tried it.
- It looks like you spent all day on it: I'm not going to pretend this is a casual dessert to look at. The red crust peeking out under the white cheesecake layer, topped with bright red strawberries — it's genuinely striking. I've brought this to a birthday dinner and a family iftar and people always ask where I ordered it from. I find that satisfying every single time.
Ingredients
- For the Red Velvet Crust:
- 1 ½ cups crushed red velvet cake crumbs (store-bought red velvet cake or red velvet cookies work great)
- ¼ cup melted unsalted butter
- 1 tablespoon cocoa powder
- For the Cheesecake Filling:
- 16 oz (2 packages) cream cheese, softened — leave it out on the counter for at least 30 minutes
- ¾ cup granulated sugar
- 1 teaspoon vanilla extract
- 2 large eggs
- ½ cup sour cream
- 1 tablespoon cornstarch
- For the Strawberry Topping:
- 1 cup fresh strawberries, sliced
- ¼ cup strawberry jam or glaze (warmed slightly so it spreads easily)
- Whipped cream for garnish (optional)
Directions
- Preheat the oven: Set your oven to 325°F (160°C) and grease a 9-inch springform pan. Getting the oven fully up to temperature before you put the cheesecake in matters — I've rushed this step and ended up with uneven baking.
- Make the crust: Combine the red velvet crumbs, melted butter, and cocoa powder in a bowl and mix until the crumbs look like damp sand. Press the mixture firmly and evenly into the bottom of the pan — I use the bottom of a measuring cup to press it flat. Bake for 10 minutes, then set aside to cool slightly while you make the filling.
- Make the cheesecake filling: Beat the softened cream cheese and sugar together until completely smooth — no lumps. This is why room temperature cream cheese matters. Add the vanilla and then the eggs one at a time, beating just until each one is incorporated. Don't overmix once the eggs go in. Fold in the sour cream and cornstarch until combined.
- Assemble and bake: Pour the cheesecake filling over the cooled crust and smooth the top with a spatula. Bake for 45–50 minutes, until the edges are set but the center still has a gentle wobble when you nudge the pan. Turn off the oven and crack the door open — leave the cheesecake inside for a full hour. This slow cooldown is what prevents cracking.
- Chill: Once the cheesecake has cooled to room temperature, wrap it and refrigerate for at least 4 hours, but overnight is genuinely better. The texture firms up significantly and the flavor deepens overnight.
- Add the strawberry topping: When you're ready to serve, warm the strawberry jam briefly (30 seconds in the microwave) so it's spreadable. Spoon it over the top of the chilled cheesecake and lay the sliced strawberries on top. Add whipped cream around the edges if you like. Slice and serve cold.
Tips for Success
- Cold cream cheese is the enemy: The first time I made cheesecake years ago, I pulled the cream cheese straight from the fridge and wondered why my filling had little lumps no matter how long I beat it. Cold cream cheese doesn't blend smoothly — it fights you. Take it out 30 minutes before you start, and the whole process becomes much easier. Same goes for the eggs.
- Stop mixing once the eggs go in: Beating the batter too much after you add the eggs incorporates extra air, which causes the cheesecake to puff up in the oven and then sink and crack as it cools. Mix just until the eggs disappear — then stop. A spatula fold is fine at the end to incorporate the sour cream and cornstarch.
- The slow oven cooldown is not optional: I know it feels unnecessary to leave the cheesecake in the turned-off oven for an hour, but it genuinely matters. Rapid temperature changes cause the surface to crack. Both times I've skipped this step, I got cracks. Every time I've done it properly, the top comes out clean. Set a timer so you don't forget it's in there.
- Press the crust firmly and evenly: A loose crust crumbles when you try to slice the cheesecake and makes a mess of the layers. Use the flat bottom of a measuring cup or a drinking glass to press the crumbs down hard. Get the edges too — they tend to be thinner and fall apart first. Baking the crust for 10 minutes before adding the filling helps it hold its structure.
- Add the strawberries right before serving: I learned this after storing a fully topped cheesecake overnight — the strawberries release moisture and the jam gets watery and the top looks sad by the next morning. Keep the topping separate in the fridge and add it in the 10 minutes before you serve. It takes almost no time and makes a big difference in how it looks on the table.
Variations
- Chocolate ganache layer: Pour a thin layer of dark chocolate ganache (just melted chocolate chips and a splash of heavy cream) over the cooled crust before you add the cheesecake batter. Let it set for 10 minutes first so it doesn't swirl into the filling. This is the version my husband requests — it makes the whole thing taste slightly more intense and less sweet.
- Mixed berry topping: Swap the strawberries for a mix of raspberries, blueberries, and blackberries. Use raspberry jam instead of strawberry for the glaze. The tartness of the mixed berries cuts through the richness of the cheesecake in a really nice way — I made this version in summer when strawberries weren't great at the market and it was arguably better.
- Mini individual cheesecakes: Line a muffin tin with cupcake liners and press about a tablespoon of crust mixture into each one. Divide the cheesecake filling between the cups and bake at 325°F for about 20–22 minutes. These are great for parties because people can serve themselves without slicing. I've made these for gatherings and they disappear faster than the full cake does. For another individual-sized dessert idea, the French toast churro bites are also a hit at my table.
- Cookie crust instead of red velvet: If you don't have red velvet cake or cookies on hand, crushed Oreos (with the filling scraped out, or left in — your call) make an excellent substitute. The crust comes out darker and more intensely chocolate-flavored, which works beautifully with the pale cheesecake layer above it. This isn't the traditional version, but it's a good weeknight shortcut.
- Whipped cream border: Pipe or spoon sweetened whipped cream around the outer edge of the cheesecake before adding the strawberries in the center. It looks like it came from a bakery and takes about 3 minutes. I use store-bought whipped cream in the can when I'm short on time — no shame in it.
Serving and Storage
Serving
Serve this cheesecake cold, straight from the fridge. Run a sharp knife under hot water and wipe it dry between each slice — this gives you clean cuts that show off the layers. The strawberry topping and glaze should go on right before you serve, not before. If you're serving it at a party, I'd suggest slicing it in the kitchen and plating individually rather than bringing the whole cake to the table for people to cut themselves — the layers look much cleaner when they're already sliced.
Storage
Store the cheesecake covered in the refrigerator for up to 4 days. Keep the strawberry topping separate if possible — store sliced strawberries in a small container and add them fresh each time. For longer storage, you can freeze individual slices: wrap each slice tightly in plastic wrap, then in foil, and freeze for up to 2 months. Thaw overnight in the fridge. The texture is slightly softer after freezing but still very good.
Frequently Asked Questions
Can I use store-bought red velvet cake for the crust?
Yes, and honestly that's what I do most of the time. Buy a small red velvet cake or a pack of red velvet cookies from the store, crumble them up, and mix with melted butter and cocoa powder. It saves time and works just as well as baking the cake from scratch. Just make sure the crumbs are fine enough — larger chunks don't press into an even layer.
How do I stop my cheesecake from cracking on top?
Three things help: use room-temperature ingredients so the batter is smooth, don't overmix after you add the eggs, and cool the cheesecake slowly in the turned-off oven with the door cracked for a full hour before moving it. If you still get a small crack, just cover it with the strawberry topping and nobody will ever know.
Can I make this cheesecake the day before?
Yes — in fact I'd encourage it. The cheesecake is significantly better after a full night in the fridge. The filling firms up, the flavors settle, and it slices much more cleanly than it does after just a few hours. Just hold off on adding the strawberry topping until right before you serve it.
Can I use frozen strawberries instead of fresh?
You can, but you need to thaw them completely and drain off the liquid first — frozen strawberries release a lot of water as they thaw, and if that gets onto the cheesecake it'll make the top soggy. Pat them dry with paper towels before using. Fresh strawberries are much better here if you can get them.
Do I need a springform pan, or can I use a regular cake pan?
A springform pan makes removal much easier since the sides unlatch and you can slide the cheesecake off cleanly. If you don't have one, you can line a regular 9-inch cake pan with parchment paper leaving some overhang on the sides to lift it out — it works, but it's more delicate. Springform pans are inexpensive (under $15 at Walmart) and worth having if you plan to make cheesecake more than once.
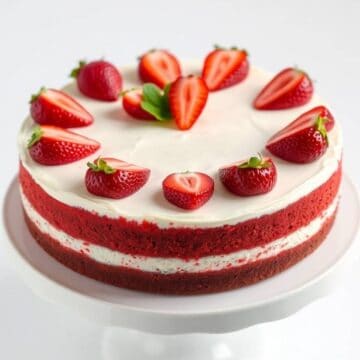
HEAVENLY RED VELVET STRAWBERRY CHEESECAKE
Ingredients
For the Red Velvet Crust:
- 1 ½ cups crushed red velvet cake crumbs or red velvet cookies
- ¼ cup melted butter
- 1 tablespoon cocoa powder
For the Cheesecake Filling:
- 16 oz 2 packages cream cheese, softened
- ¾ cup granulated sugar
- 1 teaspoon vanilla extract
- 2 large eggs
- ½ cup sour cream
- 1 tablespoon cornstarch
For the Strawberry Topping:
- 1 cup fresh strawberries sliced
- ¼ cup strawberry jam or glaze
- Whipped cream for garnish (optional)
Instructions
- Preheat the Oven: Preheat oven to 325°F (160°C). Grease a 9-inch springform pan.
- Make the Crust: In a bowl, mix red velvet crumbs, melted butter, and cocoa powder until combined. Press the mixture firmly into the bottom of the pan. Bake for 10 minutes, then set aside.
- Prepare the Cheesecake Filling: In a large bowl, beat cream cheese and sugar until smooth. Add vanilla and eggs one at a time, beating just until combined. Mix in sour cream and cornstarch.
- Assemble and Bake: Pour the cheesecake batter over the crust. Bake for 45–50 minutes, or until the center is just set. Turn off the oven and let the cheesecake cool inside with the door slightly open for 1 hour.
- Chill and Top: Once cooled, refrigerate for at least 4 hours or overnight. Before serving, top with strawberry slices and warm strawberry jam or glaze. Garnish with whipped cream if desired.
Notes
- Make Ahead: This cheesecake can be made a day ahead and chilled overnight for the best flavor.
- Customizing the Flavor: Add a layer of chocolate ganache between the crust and cheesecake for an extra decadent twist.
- Serving Suggestions: Perfect for Valentine’s Day, birthdays, or holiday celebrations.
- Allergy-Friendly Options: Substitute dairy-free cream cheese and butter for a lactose-free version.
- Storage Tips: Store leftovers covered in the refrigerator for up to 4 days.
I've made a lot of cheesecakes over the years — plain New York style, no-bake, with caramel, with chocolate — and this red velvet strawberry version has become the one I keep coming back to for occasions where I want something that looks as good as it tastes. The red velvet crust was the thing I wasn't sure about at first, and now it's my favorite part. It adds this subtle cocoa depth at the bottom that you'd miss if it weren't there.
If you're making this for a gathering, I can't stress enough how much better it is after a full night in the fridge. I've rushed the chilling time twice and both times the texture was softer and the slices didn't hold as cleanly. The overnight version is a different dessert — firmer, more flavorful, easier to serve. Build the overnight rest into your plan and you'll be glad you did.
If you're in a baking mood after this and want something on a smaller scale, my Easter basket cookies are a fun project to do with kids — Saad loves decorating them. And if you want to round out a full dessert spread, the gnome cookies are always a crowd favorite at my table. But honestly, this cheesecake stands entirely on its own. Slice it, plate it cold, and watch people's faces. That's always my favorite





Comments
No Comments