
I first made this cream puff cake for a birthday party and nearly talked myself out of it three times before I started. Choux pastry has a reputation for being fussy, and honestly, that reputation is not entirely wrong. But here's what I figured out after a couple of tries: it's less about skill and more about patience. If you don't rush it, it works.
This version is the 9x13 baking dish kind, not a towering croquembouche — though I've included notes for building the tower shape if you want to go that route. The baked cream puffs get layered into a dish with a cream cheese and vanilla pudding filling, then topped with a simple chocolate drizzle. The filling is made with instant pudding and Cool Whip, which I know sounds too easy, but it sets beautifully overnight and tastes genuinely good. I'm not going to pretend this is classic French pastry. It's my version, and it works for the home kitchen.
I usually make this when I need something impressive that can be done the day before. It's become my go-to for birthdays and Eid gatherings — I make the cream puffs in the morning, the filling while they cool, and assemble everything by afternoon so it can chill overnight. Zainab calls it "the chocolate cloud cake" and requests it every single year. If you're looking for another make-ahead dessert that holds up well, my pavlova recipe follows a similar logic — do the work ahead, assemble close to serving.
One thing to set expectations on: the cream puffs will soften as they sit in the filling overnight. If you want them to keep more texture, assemble closer to serving time — maybe two to three hours ahead instead of overnight. Both ways work, but they give you a different result. The overnight version is almost like an éclair cake. The shorter chill gives you more distinct layers.

Why You'll Love This Recipe
- You can make it the day before: The whole thing has to chill for at least four hours anyway, so you're not scrambling the morning of a party. I usually assemble it the night before and pull it straight from the fridge when guests arrive. The filling has had time to settle, the puffs are soft and custardy, and it slices cleanly. One less thing to stress about on the day.
- The choux pastry is simpler than it sounds: I was scared of it the first time. But it's really just butter, water, flour, and eggs cooked in a saucepan — no mixer needed, no special equipment. A wooden spoon and some elbow grease is all it takes. The dough comes together in about fifteen minutes and the oven does the rest.
- The filling is surprisingly rich: Instant vanilla pudding mixed with cream cheese and Cool Whip sounds shortcut-y, but the cream cheese adds a tang that stops it from being cloyingly sweet. It sets firm enough to layer without collapsing. I've tested this with full-fat and low-fat cream cheese — full-fat wins every time for texture.
- The chocolate topping takes five minutes: Just chocolate chips, a splash of milk, and a knob of butter melted together. You pour it over the top and it sets into a soft ganache-style layer. I've done it on the stovetop and in the microwave in thirty-second bursts — both work fine.
- It feeds a crowd without fuss: A 9x13 dish serves twelve to fifteen people easily. I make a double batch when I'm hosting a larger gathering because the first dish disappears before I've even set out the plates properly. It's also the kind of dessert that travels well — cover it with foil and it goes in the car without drama.
Ingredients
- Cream Puffs:
- 1 cup water
- ½ cup (1 stick) unsalted butter, cut into cubes
- ¼ teaspoon salt
- 1 cup all-purpose flour
- 4 large eggs
- Filling:
- 2 (3.4 oz) packages instant vanilla pudding mix
- 4 cups whole milk
- 1 (8 oz) package cream cheese, softened to room temperature
- 1 cup powdered sugar
- 1 (12 oz) container frozen whipped topping, thawed (Cool Whip or store brand)
- Chocolate Topping:
- ½ cup semi-sweet chocolate chips
- 2 tablespoons milk
- 1 tablespoon unsalted butter
Directions
- Make the choux pastry: In a medium saucepan, combine the water, butter, and salt. Bring to a boil over medium heat, stirring until the butter is fully melted. Remove from heat and immediately stir in the flour all at once with a wooden spoon until a smooth dough forms and pulls away from the sides of the pan. This should take about a minute. The dough will look like a ball and feel slightly dry to the touch — that's what you want.
- Add the eggs: Beat in the eggs one at a time, mixing well after each addition before adding the next. The dough will look slippery and separated at first — keep stirring and it comes back together. By the fourth egg it should be smooth, glossy, and thick enough to hold a shape when you scoop it. Let it cool for five minutes if it feels very warm before adding eggs.
- Bake the cream puffs: Preheat your oven to 400°F (200°C) and line two baking sheets with parchment paper. Drop rounded tablespoons of dough onto the sheets, leaving about 2 inches between each puff. Don't open the oven door during baking — this is the most important rule with choux. Bake for 25 to 30 minutes until deeply golden brown and puffed. Let cool completely on a wire rack before touching them.
- Make the filling: In a large bowl, whisk the instant pudding mix and milk together for about two minutes, then let it stand for five minutes to thicken. In a separate bowl, beat the softened cream cheese and powdered sugar together until smooth — no lumps. Gradually mix the pudding into the cream cheese mixture, then fold in the thawed whipped topping gently. The filling should be thick and creamy.
- Assemble the cake: In a 9x13 inch baking dish, arrange half of the cooled cream puffs in a single layer. Cut them in half if they're too large to fit neatly. Pour half the filling over this layer and spread it evenly. Add the second layer of cream puffs, then pour the remaining filling over the top.
- Make the chocolate topping: In a small saucepan over low heat, melt the chocolate chips, milk, and butter together, stirring constantly until smooth. Alternatively, microwave in 30-second bursts, stirring between each. Once smooth, pour evenly over the filling layer.
- Chill: Cover the dish and refrigerate for at least 4 hours, or overnight if you can manage it. The filling needs time to set properly and the flavors come together much better after a full night in the fridge.

Tips for Success
- Don't open the oven while the puffs are baking: I know it's tempting, especially if they're taking longer than expected. But opening the door lets cold air in and causes the steam inside the puffs to collapse. I learned this the hard way — my first batch came out looking like flat discs. Leave the oven alone for the full 25 minutes at minimum, and wait until they're genuinely deep golden brown before checking.
- The cream cheese must be fully softened: Cold cream cheese clumps badly and you'll end up with a lumpy filling no matter how hard you beat it. I take it out of the fridge at least an hour before I start. If I forget (it happens), I cut it into cubes and let it sit for 20 minutes — that speeds things up. A smooth filling makes a real difference to the final texture.
- Measure your flour accurately: Choux pastry is one of those things where eyeballing the flour doesn't work. Too much and the puffs come out dense. Too little and they don't hold their shape. I spoon the flour into the measuring cup and level it off — don't scoop directly from the bag, which packs in extra flour.
- Cool the puffs completely before assembling: If the cream puffs are even slightly warm when you add the filling, the Cool Whip starts to melt and the whole thing gets soupy. I usually bake them in the morning and leave them on the rack until afternoon. They'll be fully cool and the texture will be right for layering.
- Give it the full chill time: Four hours is the minimum, but overnight genuinely gives a better result. The filling firms up, the chocolate topping sets into a clean layer, and everything holds together when you slice it. If you're serving it at a party, make it the evening before — it's one less task on the day and the cake is actually better for it.
Variations
- Chocolate filling instead of vanilla: Swap the vanilla pudding for chocolate instant pudding. It makes the whole dessert more intensely chocolatey and pairs really well with the chocolate topping — basically an éclair cake in a dish. My husband prefers this version. I keep it as vanilla for Zainab and do a small separate dish of the chocolate version for him when I have extra filling.
- Strawberry or raspberry layer: Add a layer of fresh sliced strawberries or a few spoonfuls of raspberry jam between the cream puffs and the filling. It cuts through the richness nicely and makes it feel a bit more like a fruit dessert. Good for summer gatherings where you want something that feels a little lighter.
- Cinnamon spice version: Add ½ teaspoon cinnamon and a pinch of cardamom to the cream puff dough, and use butterscotch pudding instead of vanilla. It gives the whole thing a warm, spiced flavor that works beautifully in autumn and winter. If you enjoy baking with warm spices, my cinnamon roll cookies follow a similar flavor profile and are worth having in your rotation.
- Tower/croquembouche style: If you want to build the dramatic tower shape, skip the 9x13 dish. Make the caramel from the original recipe (1 cup sugar + ¼ cup water, cooked without stirring until golden amber), fill each puff with pastry cream or whipped cream, then dip the bottom of each puff in hot caramel and stack them into a cone shape on a serving platter. Work quickly because caramel hardens fast. This version is genuinely impressive for weddings or milestone birthdays — just assemble it within two hours of serving.
- Individual portions: Instead of one big dish, layer the puffs and filling into individual glasses or ramekins. Makes serving much easier at a party — no slicing, no mess, and everyone gets a clean portion. I do this when I'm hosting a sit-down dinner rather than a buffet-style gathering.
Serving and Storage
Serving
Serve the cake cold, straight from the fridge. It slices best when it's been chilled for at least four hours — the filling is firm, the layers are defined, and it holds its shape on the plate. I use a sharp knife and wipe it clean between cuts if I want neat slices. For a party buffet, I just cut it into rough squares — no one cares about perfect edges when the dessert tastes like this. Set it out no more than 30 minutes before serving; it softens quickly at room temperature and gets harder to slice cleanly.
Storage
Keep it covered in the fridge for up to 3 days. After that the cream puffs get quite soft and the filling starts to weep a little at the edges. I cover it loosely with plastic wrap — tight wrapping sometimes presses into the chocolate topping and makes a mess. Do not freeze this. The Cool Whip filling doesn't thaw well and the cream puffs lose their texture entirely. If I know I won't finish it in three days, I make a half batch in an 8x8 pan instead.

Frequently Asked Questions
Why are my cream puffs flat?
This almost always comes down to one of three things: opening the oven door too early, undercooking the dough in the saucepan before adding the eggs, or adding the eggs too fast without letting each one incorporate fully. The dough needs to cook in the pan long enough to dry out slightly — about a minute of stirring over low heat after it comes together. And once they're in the oven, leave the door shut until the timer goes off.
Can I make the cream puffs ahead of time?
Yes, and I'd encourage it. Baked and cooled cream puffs keep in an airtight container at room temperature for up to two days. If they soften a little, you can pop them in a 300°F oven for five minutes to crisp them back up before assembling. Once they're in the dish with the filling, they'll soften as they chill anyway — so getting them slightly crisped before assembly gives a better texture in the final cake.
Can I use homemade whipped cream instead of Cool Whip?
You can, but it won't hold as firmly after chilling. Cool Whip is stabilized, which is why the filling stays set for three days in the fridge. Homemade whipped cream tends to deflate and weep after a few hours. If you want to skip the Cool Whip, fold in 1½ cups of heavy cream whipped to stiff peaks and plan to serve the cake within a few hours of assembling rather than leaving it overnight.
My chocolate topping is too thick — how do I fix it?
Add milk one teaspoon at a time while stirring over low heat until it loosens to a pourable consistency. The ratio in this recipe gives a fairly thin drizzle, but chocolate chips vary in cocoa butter content and some brands seize up thicker than others. If it firms up before you pour it, just reheat it gently — it comes back to smooth easily.
Can I make this gluten-free?
I haven't tested it myself, so I can't say for certain, but a few readers have told me that a 1:1 gluten-free flour blend works reasonably well for the choux pastry. The puffs may not rise quite as high, but they still hold together. Make sure your pudding mix is also gluten-free — most instant pudding brands are, but it's worth checking the label.
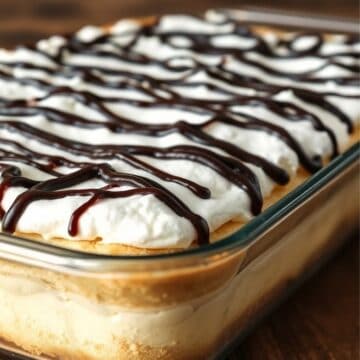
Cream Puff Cake
Ingredients
Cream Puffs:
- 1 cup water
- ½ cup (1 stick) unsalted butter, cut into cubes
- ¼ teaspoon salt
- 1 cup all-purpose flour
- 4 large eggs
Filling:
- 2 (3.4 ounce) packages instant vanilla pudding mix
- 4 cups milk
- 1 (8 ounce) package cream cheese, softened
- 1 cup powdered sugar
- 1 (12 ounce) container frozen whipped topping, thawed (Cool Whip or similar)
Chocolate Topping:
- ½ cup semi-sweet chocolate chips
- 2 tablespoons milk
- 1 tablespoon butter
Instructions
- Make the cream puffs: In a medium saucepan, combine the water, butter, and salt. Bring to a boil over medium heat, stirring until the butter is melted. Remove from heat. Quickly stir in the flour until a smooth dough forms and pulls away from the sides of the pan.
- Add eggs: Beat in the eggs one at a time, mixing well after each addition. The dough will be smooth and glossy.
- Bake cream puffs: Drop rounded tablespoons of dough onto baking sheets lined with parchment paper, leaving about 2 inches between puffs. Bake at 400°F (200°C) for 25-30 minutes, or until golden brown and puffed up. Let cool completely on a wire rack.
- Make the filling: In a large bowl, whisk together the instant pudding mixes and milk for 2 minutes. Let stand for 5 minutes to thicken. In a separate bowl, beat the softened cream cheese and powdered sugar until smooth. Gradually add the pudding mixture to the cream cheese mixture, mixing well. Fold in the thawed whipped topping.
- Assemble the cake: In a 9x13 inch baking dish, arrange half of the cooled cream puffs in a single layer. You can cut them in half if they are too large. Pour half of the filling over the cream puffs. Add another layer of cream puffs, followed by the remaining filling.
- Make the chocolate topping: In a small saucepan, melt the chocolate chips, milk, and butter over low heat, stirring constantly until smooth. Alternatively, you can melt these ingredients in the microwave in short bursts, stirring between each burst.
- Pour chocolate topping: Pour the melted chocolate topping evenly over the filling.
- Chill: Cover the dish and refrigerate for at least 4 hours, or preferably overnight, to allow the filling to set and the flavors to meld.
Notes
- Cream Puff Baking: Don't open the oven door while the cream puffs are baking, as this can cause them to deflate.
- Cooling Cream Puffs: Make sure the cream puffs are completely cooled before assembling the cake.
- Filling Consistency: The filling should be thick and creamy.
- Chocolate Topping: You can adjust the amount of milk in the chocolate topping to achieve your desired consistency.
- Storage: Store the cake in the refrigerator for up to 3 days.
This is one of those desserts I keep coming back to because it's genuinely less stressful than it looks. The choux pastry takes maybe twenty minutes of actual work, the filling comes together in one bowl, and the hardest part is waiting for it to chill. I've made it for birthday parties, for Eid, for a school potluck — it always gets eaten down to the last square and someone always asks for the recipe.
{"@context":"https://schema.org","@type":"Article","headline":"CREAM PUFF CAKE","description":"This elegant Cream Puff Cake, also known as a Croquembouche or religious cake, is a showstopping dessert. An impressive and delicious treat!","datePublished":"2025-02-04T04:55:05+00:00","dateModified":"2025-03-19T22:42:07+00:00","author":{"@type":"Person","name":"Sana Umer","url":"https://forfoodiefriends.com/about/","description":"Self-taught home cook with 10+ years of kitchen experience. Mom of two who develops every recipe in her own kitchen.","jobTitle":"Recipe Developer & Food Blogger","image":"https://forfoodiefriends.com/wp-content/uploads/sana-umer-author-photo.jpg"},"publisher":{"@type":"Organization","name":"For Foodie Friends","url":"https://forfoodiefriends.com/","logo":{"@type":"ImageObject","url":"https://forfoodiefriends.com/wp-content/uploads/forfoodiefriends-logo.png"}},"mainEntityOfPage":{"@type":"WebPage","@id":"https://forfoodiefriends.com/cream-puff-cake/"},"image":"https://forfoodiefriends.com/wp-content/uploads/2025/02/CREAM-PUFF-CAKE-3.jpg"}




Comments
No Comments