
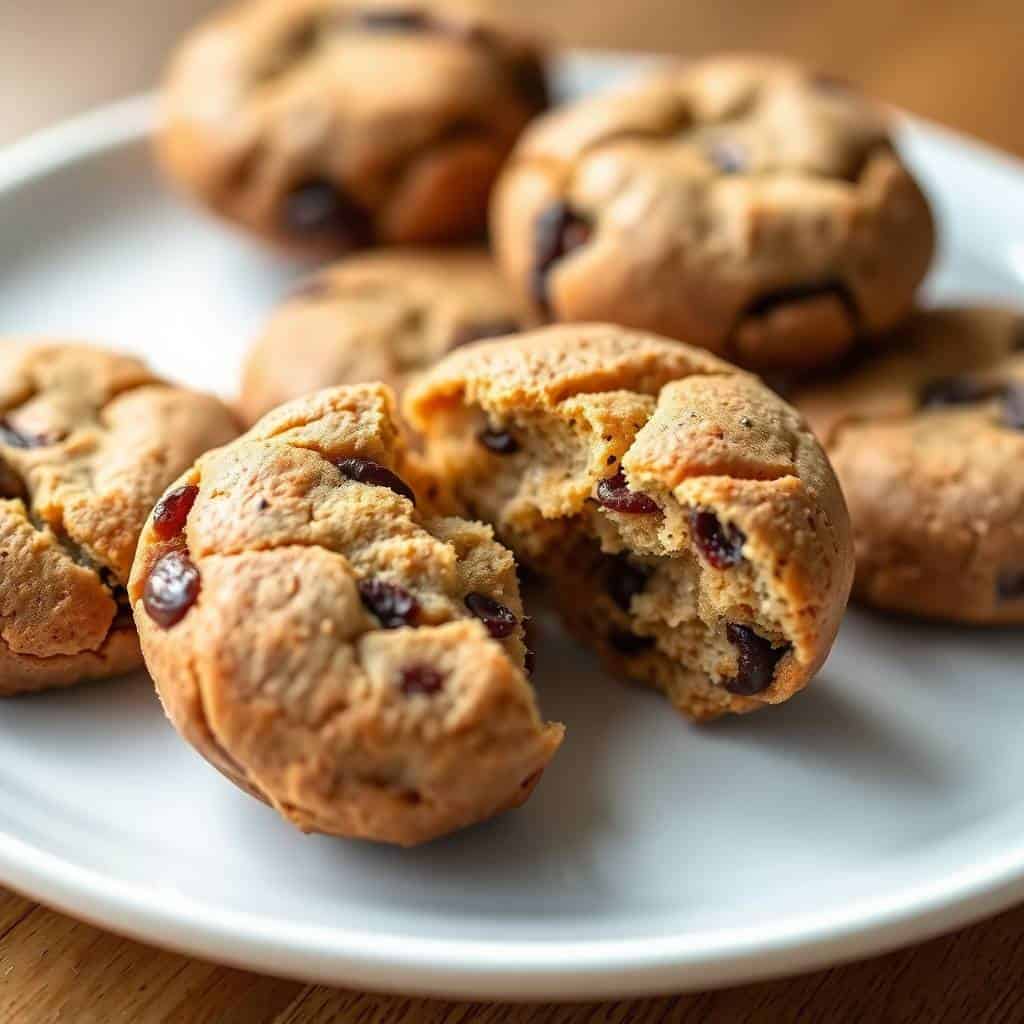
I made these coffee cookies for the first time on a rainy afternoon when I had a craving for something sweet but also desperately needed caffeine. I figured — why not combine the two? The first batch was a little flat because I skipped chilling the dough, and they spread into sad, thin discs. The second batch, though? That's when I understood what these cookies were supposed to be: thick, chewy, with real coffee flavor running through every bite.
What makes this recipe work is the instant espresso powder. Don't swap it for brewed coffee — I tried that once and the dough turned into soup. Espresso powder dissolves right into the butter and sugar mixture and gives you that bold, roasted flavor without messing with the texture. I use two full tablespoons because I like a strong coffee punch, but you can back it down to one tablespoon if you want something more subtle. The brown sugar keeps these cookies soft and chewy for days, which is part of why I make a double batch every single time.
My husband absolutely loves these. He's the coffee drinker in our house — three cups a day, minimum — and he said these taste like a proper coffee shop cookie, not a homemade one. Saad and Zainab both tried one and immediately reached for something sweeter, which honestly just meant more for us. These are very much an adult cookie, and I'm not mad about it. I make them on weekends when I want something to have alongside my morning cup, and they're good enough that I've started stashing a few in the freezer so I always have some ready.
One thing to know going in: you have to chill the dough. I know it's tempting to skip that step, but 30 minutes in the fridge is what separates flat cookies from properly thick ones. If you're planning ahead, the dough can actually sit in the fridge overnight, which makes the coffee flavor even more pronounced. And if you're a dessert baker who likes something on the lighter end, you might also enjoy my lemon dump cake with fresh berries — a completely different vibe but just as easy to pull together.

Why You'll Love This Recipe
- Real coffee flavor that actually comes through: A lot of "coffee" baked goods taste vaguely mocha and then disappear. These don't. Two tablespoons of espresso powder gives you a bold, roasted taste you can actually identify. I've made these for friends who said they don't usually like coffee-flavored desserts, and they went back for seconds. The coffee flavor is there but it's balanced — it doesn't taste like you're eating a shot of espresso.
- Chewy centers with slightly crisp edges: This is the texture I spent a few batches chasing. The combination of brown sugar (which holds moisture) and the right bake time gets you there. Pull them out when the edges look set but the centers still look slightly underdone — they firm up on the tray as they cool. If you wait until they look fully baked in the oven, they'll be dry by the time you eat them.
- Everything comes from your pantry: Flour, butter, sugar, eggs, vanilla, baking soda, salt — and one box of instant espresso powder that costs about $4 at most grocery stores. I get mine from Walmart or sometimes Trader Joe's. No specialty ingredients, no trips to a baker's supply shop. If you bake at all, you probably already have everything except the espresso powder.
- Make-ahead dough that actually improves overnight: I often mix the dough the night before and bake in the morning. Refrigerating the dough overnight concentrates the coffee flavor in a way that's noticeably better than baking it fresh. You can also freeze the scooped dough balls and bake them straight from frozen — just add a couple of minutes to the bake time. This is the only cookie I make where the frozen version tastes just as good as fresh.
- Works with or without chocolate chips: I've made both versions many times. Without chips, the coffee flavor is front and center — clean and roasted. With dark chocolate chips, it becomes more of a mocha cookie. With white chocolate chips, it's sweeter and a little unexpected in the best way. My husband prefers the dark chocolate version. I actually like the plain ones best when I'm having them with coffee, because nothing competes with the flavor.
Ingredients
- 1 cup unsalted butter, softened
- 1 cup brown sugar, packed
- ½ cup granulated sugar
- 2 large eggs
- 2 teaspoons vanilla extract
- 2 tablespoons instant coffee or espresso powder (I use King Arthur or Medaglia d'Oro — both easy to find)
- 2½ cups all-purpose flour
- 1 teaspoon baking soda
- ½ teaspoon salt
- 1 cup chocolate chips or chunks, optional (dark, semisweet, or white all work)
Directions
- Whisk your dry ingredients: In a medium bowl, whisk together the flour, baking soda, and salt. Set this aside — you'll add it to the wet mixture later. Getting this combined beforehand means the baking soda distributes evenly and you don't end up with pockets of it in the finished cookie.
- Cream the butter and sugars: In a large bowl, beat the softened butter with both sugars until the mixture is pale and fluffy. This takes about 2–3 minutes by hand with a wooden spoon, or about 90 seconds with a hand mixer. Don't rush this step — properly creamed butter gives the cookies a lighter texture and helps them bake evenly.
- Add the eggs, vanilla, and espresso powder: Beat in the eggs one at a time, then add the vanilla and espresso powder. Mix until everything is smooth and the coffee is fully dissolved into the batter. At this point the mixture will smell incredible — like a coffee shop in your kitchen.
- Combine wet and dry: Gradually add the flour mixture to the wet ingredients, stirring until a soft dough forms. Don't overmix once the flour goes in — stir just until you no longer see dry streaks. If you're adding chocolate chips, fold them in now.
- Chill the dough: Cover the bowl with plastic wrap and refrigerate for at least 30 minutes. I often chill it for an hour or even overnight. This step is not optional if you want thick cookies — the cold fat spreads more slowly in the oven and gives you that bakery-style height.
- Preheat and scoop: When you're ready to bake, preheat your oven to 350°F (175°C) and line a baking sheet with parchment paper. Scoop tablespoon-sized portions of dough and place them about 2 inches apart on the sheet. A cookie scoop makes this faster, but a spoon works fine.
- Bake and cool: Bake for 10–12 minutes, until the edges look set and the tops are just barely losing their shine. The centers will look slightly underdone — that's correct. Let them sit on the baking sheet for 5 minutes before moving them to a wire rack, because they firm up as they cool.
Tips for Success
- Don't skip chilling the dough: I know I already said this in the directions, but it's worth repeating because the first time I made these I was impatient and baked them straight from mixing. They spread out flat and thin and weren't chewy at all — just crispy around the edges with nothing in the center. Thirty minutes in the fridge changes the whole result. If you want even better cookies, chill overnight.
- Use espresso powder, not brewed coffee: I tried substituting brewed coffee once to see what would happen. The dough got too wet, the cookies spread everywhere, and the coffee flavor was actually weaker because of the extra liquid diluting everything. Espresso powder or instant coffee granules are concentrated — they give you more flavor with no liquid added. Any brand works. I've used Nescafé in a pinch and it was totally fine.
- Pull them out while they look underdone: The hardest part of this recipe is trusting the timing. At 10–12 minutes, the edges will be set but the centers will still look soft and slightly shiny. That's exactly when you take them out. They'll finish setting on the hot tray during those 5 minutes of resting time. I overbaked my second batch because I was nervous, and they were much drier the next day.
- Let your butter actually soften: Cold butter doesn't cream properly — you end up with lumps and the cookies bake unevenly. Take the butter out of the fridge about an hour before you start, or if you forgot (I always forget), cut it into small cubes and let it sit for 20 minutes. You're looking for butter that dents easily when you press it but isn't greasy or melted at the edges.
- Try a pinch of flaky salt on top before baking: I started doing this halfway through my testing and now I can't stop. A few flakes of Maldon or even regular kosher salt pressed onto each dough ball right before it goes in the oven sharpens the coffee flavor and cuts the sweetness slightly. It sounds small but it makes these cookies taste noticeably more complex.
Variations
- Mocha cookies with dark chocolate: Fold in 1 cup of dark chocolate chips or roughly chopped dark chocolate (70% or higher). The bitterness of dark chocolate and the roasted coffee flavor push each other in a really good direction. This is the version my husband requests most often, and honestly it's the one I'd serve to guests if I wanted to impress without doing much extra work.
- White chocolate and espresso: Swap the dark chips for white chocolate chips. The sweetness of white chocolate plays really nicely against the slightly bitter coffee base. This one is a bit more dessert-forward — less "adult coffee cookie," more "treat tray at a party." I've brought these to school events and they disappear fast.
- Spiced coffee cookies: Add ½ teaspoon of cinnamon and a pinch of cardamom to the dry ingredients. In Pakistan, cardamom and coffee are a natural pairing — my mom adds cardamom to her qehwa and I started applying the same logic here. It gives the cookies a warm, slightly floral note underneath the coffee. Saad tried these and actually liked them, which surprised me.
- Chocolate-dipped coffee cookies: Bake the cookies plain, let them cool completely, then dip half of each cookie into melted dark or milk chocolate. Set them on parchment until the chocolate firms up. These look like proper bakery cookies and make a nice edible gift. I've packaged them in cellophane bags tied with ribbon and given them to neighbors during the holidays.
- Espresso sandwich cookies: Bake the cookies slightly smaller than usual so you get more of them, then sandwich two together with a filling of espresso buttercream (butter, powdered sugar, a teaspoon of espresso powder, and a splash of cream). It's more work but it feels special. If you enjoy layered desserts like this, my cookies and cream cake roll has the same kind of crowd-pleasing energy.
Serving and Storage
Serving
These are best served at room temperature, ideally within an hour of coming off the cooling rack when the edges are still a little crisp and the center is still soft. My husband eats them with his morning coffee. I prefer them in the afternoon with a cappuccino. If you want to warm them slightly, 10 seconds in the microwave does it — don't go longer or the chocolate chips (if you used them) get too melted and greasy. For a full dessert spread alongside these cookies, something like a lemon dump cake gives you a bright, citrusy contrast to the deep coffee flavor.
Storage
Store baked cookies in an airtight container at room temperature for up to 5 days. They stay soft because of the brown sugar — I actually think they're slightly chewier on day two than day one. For longer storage, freeze the baked cookies in a zip-lock bag for up to 2 months; let them thaw at room temperature for about 20 minutes before eating. If you'd rather freeze the dough, scoop it into balls first, freeze on a tray until solid, then transfer to a bag. Bake from frozen at 350°F and add 2 extra minutes to the bake time.

Frequently Asked Questions
Can I use brewed coffee instead of espresso powder?
I'd strongly recommend sticking with instant coffee or espresso powder. I tried brewed coffee once and the dough became too wet — the cookies spread flat and the coffee flavor was actually weaker than expected because of all the added liquid. Espresso powder is concentrated, so a couple tablespoons pack a lot of flavor without changing the dough consistency at all.
Can I skip chilling the dough?
You can, but you'll get flatter, crispier cookies instead of thick and chewy ones. I learned this the hard way on my first batch. The chilling step solidifies the fat in the dough, which means the cookies hold their shape in the oven instead of spreading out immediately. Even 30 minutes makes a real difference — and if you chill overnight, the coffee flavor actually deepens.
Can I freeze the cookie dough?
Yes, and this is honestly one of my favorite things about this recipe. Scoop the dough into balls, freeze them on a tray until solid, then transfer to a freezer bag. They'll keep for up to 2 months. Bake straight from frozen at 350°F — just add 2 extra minutes to the bake time and you'd never know they weren't freshly mixed.
How much caffeine is in each cookie?
Not a lot — the 2 tablespoons of espresso powder spread across an entire batch of cookies means each one has a small amount of caffeine, much less than a cup of coffee. Most adults won't feel anything noticeable. That said, I wouldn't give these to young kids before bedtime, and I do tell anyone I'm baking for that they contain coffee, just in case.
What type of chocolate chips work best in this recipe?
Semisweet and dark chocolate both pair really well with the coffee flavor — the slight bitterness in both complements the roasted notes in the cookie. White chocolate is sweeter and creates more of a contrast, which some people prefer. Milk chocolate works too, though it can make the overall cookie taste very sweet. I usually use whatever I have open in the pantry, and it always turns out fine.
COFFEE COOKIES
Ingredients
- 1 cup unsalted butter softened
- 1 cup brown sugar packed
- ½ cup granulated sugar
- 2 large eggs
- 2 teaspoons vanilla extract
- 2 tablespoons instant coffee or espresso powder
- 2 ½ cups all-purpose flour
- 1 teaspoon baking soda
- ½ teaspoon salt
- 1 cup chocolate chips or chunks optional
Instructions
Preheat Oven:
- Preheat oven to 350°F (175°C). Line a baking sheet with parchment paper.
Cream Butter and Sugar:
- In a large bowl, beat butter, brown sugar, and granulated sugar until light and fluffy.
Add Eggs and Flavouring:
- Beat in eggs, vanilla extract, and instant coffee until smooth.
Mix Dry Ingredients:
- In another bowl, whisk flour, baking soda, and salt. Gradually mix into the wet ingredients.
Add Chocolate (Optional):
- Fold in chocolate chips if using.
Scoop and Bake:
- Drop spoonfuls of dough onto the prepared sheet. Bake for 10–12 minutes or until edges are set.
Cool and Serve:
- Let cool on the baking sheet for 5 minutes, then transfer to a wire rack.
Notes
- Make Ahead: Dough can be chilled for up to 2 days or frozen for a month.
- Customizing the Flavour: Add a pinch of cinnamon or swap chocolate chips for white chocolate.
- Serving Suggestions: Serve with iced coffee, cappuccino, or milk.
- Allergy-Friendly Options: Use dairy-free butter and egg substitute for vegan cookies.
- Storage Tips: Store in an airtight container at room temperature for up to 5 days.
I've made a lot of cookies over the years — chocolate chip, snickerdoodle, shortbread, all of it — but these coffee cookies have quietly become one of my most-made recipes. There's something about baking something that smells exactly like your morning cup of coffee that makes the whole process feel more satisfying than usual. I put a batch together on Sunday mornings while the house is still quiet, and by the time everyone wakes up, the kitchen smells incredible.
What I keep coming back to is how simple the ingredient list is. Two tablespoons of espresso powder does more work than you'd expect. The brown sugar keeps everything soft for days. And the chill time — which feels like a hassle the first time — becomes second nature once you've seen the difference it makes. I usually mix the dough after dinner and bake the next morning. Barely any effort, and the cookies come out noticeably better for it.
If you're looking for more baking projects that come together without a lot of fuss, my cookies and cream cake roll is worth trying next — it looks impressive but it's more forgiving than it looks. And if you want something on the savory side to balance out all the baking, my dragon chicken is a completely different direction but one of the most requested recipes on this site.
{"@context":"https://schema.org","@type":"Article","headline":"COFFEE COOKIES","description":"Coffee cookies are soft, chewy, and packed with real coffee flavor—perfect for dessert lovers who enjoy a caffeine kick.","datePublished":"2025-06-26T10:34:28+00:00","dateModified":"2026-05-03T21:10:46+00:00","author":{"@type":"Person","name":"Sana Umer","url":"https://forfoodiefriends.com/about/","description":"Self-taught home cook with 10+ years of kitchen experience. Mom of two who develops every recipe in her own kitchen.","jobTitle":"Recipe Developer & Food Blogger","image":"https://forfoodiefriends.com/wp-content/uploads/sana-umer-author-photo.jpg"},"publisher":{"@type":"Organization","name":"For Foodie Friends","url":"https://forfoodiefriends.com/","logo":{"@type":"ImageObject","url":"https://forfoodiefriends.com/wp-content/uploads/forfoodiefriends-logo.png"}},"mainEntityOfPage":{"@type":"WebPage","@id":"https://forfoodiefriends.com/coffee-cookies/"},"image":"https://forfoodiefriends.com/wp-content/uploads/2025/06/COFFEE-COOKIES.jpg"}





Comments
No Comments