
I made these Christmas tree meringues for the first time two years ago on a whim, and I honestly wasn't expecting much. I had leftover egg whites from a custard I'd made the day before, a bag of green sugar sprinkles I'd bought on impulse, and about two hours to spare. What came out of that oven looked like a proper festive scene — tiny, bright green trees lined up on the tray, each one holding its shape perfectly. I stood there a little stunned, because meringues had always intimidated me.
The thing about meringues is that they sound technical, but they're really not — as long as you respect a few rules. Clean bowl, room-temperature egg whites, and patience when adding the sugar. That's basically it. I use green gel food coloring (not liquid — more on that in the tips), a star piping tip, and some sprinkles the kids throw on. The result is light, crisp on the outside, just barely chewy in the center, and sweet without being cloying. They look like they came from a fancy bakery, and I made them in my regular kitchen with my regular hand mixer.
Zainab is completely obsessed with these. She asked to be the official sprinkle-decorator the first time I made them, and that has not changed. Every December she reminds me before I've even bought the eggs. We usually make a double batch — one to eat at home and one to pack into little cellophane bags for her teachers and our neighbors. They hold up beautifully for days, which makes them one of my favorite things to bake ahead of a holiday gathering. If you're looking for more festive desserts this season, my Christmas Baklava with Honey-Spice Syrup is another make-ahead treat that always disappears fast.
One important heads-up before you start: do not try to make these on a rainy or very humid day. I learned this the hard way — my first attempt was on a damp November afternoon and they came out sticky and soft no matter how long I baked them. Pick a dry day, and they'll behave perfectly. Everything else is straightforward, I promise.

Why You'll Love This Recipe
- They look impressive but aren't difficult: The first time I served these at a holiday get-together, three people asked if I'd ordered them from somewhere. The trick is the star piping tip — it does all the work of making them look like actual trees. If you've never piped meringue before, these are a genuinely good starting point because the shape is forgiving and the swirl hides any wobbles.
- Naturally gluten-free and dairy-free: I have a few friends with dietary restrictions, and meringues are one of the rare festive treats that genuinely work for everyone at the table. No substitutions needed, no separate batch. That's a real relief when you're already juggling a dozen things during the holidays.
- Great for making ahead: I almost always bake these two to three days before I need them. They store in an airtight container at room temperature and stay perfectly crisp. On the day of the party, I just arrange them on a platter and they look like I made them that morning. That kind of no-stress baking is what the holidays need more of.
- Kids can genuinely help: The sprinkle step is made for small hands. Zainab treats it like an art project every time. The piping is something older kids can try too, especially once you show them the swirl-and-lift motion. It's one of those recipes where the process is half the fun.
- Pantry-friendly ingredients: Egg whites, sugar, cream of tartar, vanilla, and a drop of green gel coloring. That's it. I usually have everything except the gel coloring on hand, and a small bottle costs almost nothing at Walmart or any baking aisle. No specialty store required.
Ingredients
- 4 large egg whites, room temperature
- 1 cup granulated sugar
- ¼ teaspoon cream of tartar
- ½ teaspoon vanilla extract
- Green gel food coloring (a small bottle from Walmart or any baking section works fine)
- Star-shaped sprinkles or white nonpareils, for decorating (optional)
Directions
- Preheat and prep your pans: Set your oven to 200°F (93°C) and line two baking sheets with parchment paper. Low and slow is how meringues work — they're not actually baking so much as drying out, so the low temperature is non-negotiable.
- Beat the egg whites: In a completely clean, dry bowl, beat the egg whites and cream of tartar together on medium speed until soft peaks form. Any trace of grease in the bowl will prevent the whites from whipping properly, so wipe it out with a paper towel and a splash of white vinegar first if you're unsure.
- Add the sugar gradually: With the mixer running on high, add the sugar one tablespoon at a time. This is the step where patience matters most — rushing the sugar in causes grainy, weeping meringue. Keep beating until the mixture is thick, glossy, and holds stiff peaks. Rub a little between your fingers; if it still feels gritty, keep going another minute or two.
- Add the vanilla and coloring: Beat in the vanilla extract, then add green gel food coloring a tiny bit at a time until you reach the shade you want. I usually go for a deep Christmas-tree green, which takes about 4–5 drops. Fold gently at the end so you don't knock the air out.
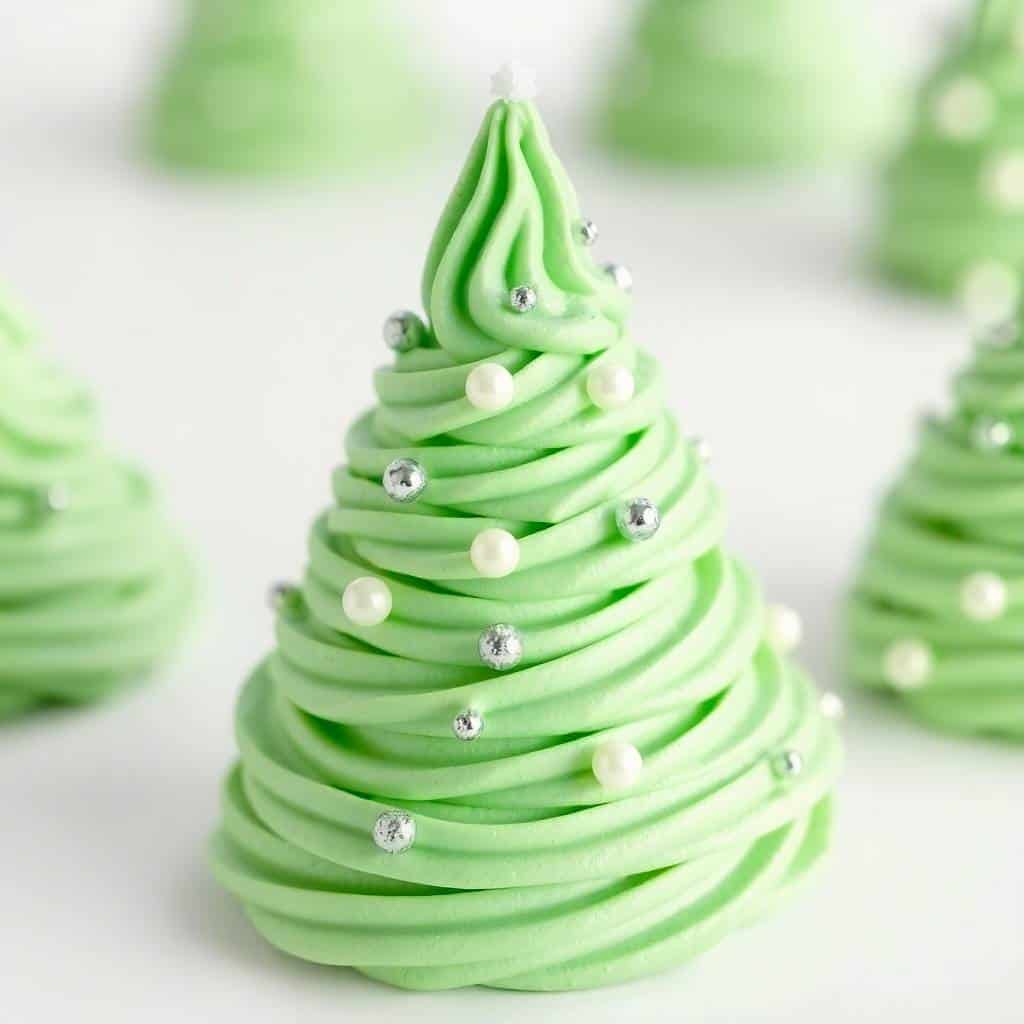
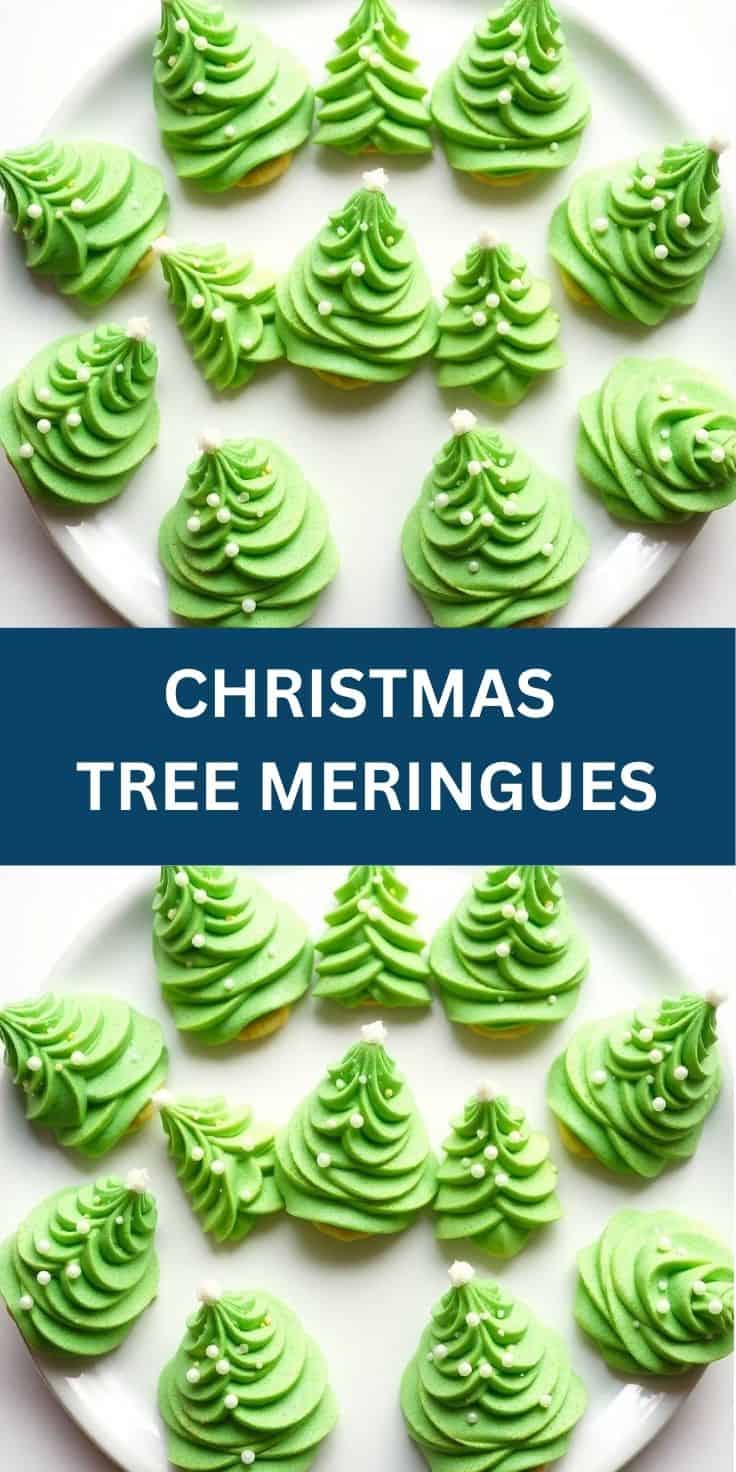
- Pipe the tree shapes: Transfer the meringue to a piping bag fitted with a large star tip. Pipe small tree shapes onto the parchment — start with a wider base, then swirl upward in tighter circles, finishing with a small point at the top. They don't have to be perfect; the texture of the star tip makes them look great regardless.
- Add the decorations: Scatter star sprinkles or nonpareils over the piped trees right away, before the surface dries. Zainab does this part and takes it very seriously.
- Bake and cool: Bake for 1 hour 15 minutes. Then turn the oven off and leave the meringues inside with the door closed for another hour. This slow cooling prevents cracking and keeps the texture right. Don't rush this part — opening the oven too early is one of the most common reasons meringues crack or collapse.
- Store when fully cool: Once completely cool to the touch, transfer to an airtight container. They'll stay crisp at room temperature for up to two weeks.
Tips for Success
- Room-temperature egg whites are not optional: Cold egg whites whip, but they don't reach the same volume as room-temperature ones. I usually set mine out about 30 minutes before I start. If I forget, I place the eggs (still in the shell) in a bowl of warm water for 10 minutes — not hot, just warm. It makes a real difference in how much air you get into the meringue.
- Use gel coloring, not liquid: Liquid food coloring adds extra moisture to the meringue, which can soften the structure and make it harder to pipe clean shapes. Gel coloring is concentrated, so a tiny amount gives a bright color without affecting the texture. I buy the Wilton gel set from Walmart — it has all the colors I need and lasts forever.
- Don't skip the slow cooling: The first time I made these, I turned off the oven and pulled them out after about 20 minutes because I was impatient. Half of them cracked across the top and the centers were slightly sticky. Letting them cool inside the oven — with the door closed or just barely cracked — lets the temperature drop gradually, and that's what keeps them smooth and properly dry all the way through.
- Add sugar slowly and test for graininess: If you rush the sugar addition, the meringue won't fully dissolve it, and your trees will have a slightly gritty texture when you eat them. After the sugar is all in, pinch a small bit of the meringue between your fingers. If it feels sandy, keep beating. Smooth means you're good to go.
- Bake on a dry day: Humidity is the enemy of meringue. If it's raining or particularly muggy outside, the meringues absorb moisture from the air and turn sticky no matter how long you bake them. I once tried to push through on a wet day and they never fully set — they were sticky and soft right out of the oven. Wait for a dry day. It's genuinely worth it.
Variations
- Peppermint meringue trees: Swap the vanilla for ¼ teaspoon of peppermint extract. It gives them a cool, candy-cane flavor that works really well with the sweet meringue base. I'd also crush a few candy canes and scatter them over the top before baking — the pink and white bits against the green look beautiful and the flavor is properly festive.
- Chocolate drizzle finish: Once the meringues are completely cool, melt a few tablespoons of dark or white chocolate and drizzle it over the trees with a spoon. White chocolate looks like snow on the green trees, which is a nice effect. Let it set at room temperature before packing them away — don't refrigerate or the meringue softens.
- Mini meringue kisses: Instead of tree shapes, just pipe small round kisses. They bake in the same time, they're easier to pipe if you're new to this, and they pack perfectly into jars. I've given these as part of a little holiday gift basket alongside some brownies or blondies and it's always well-received.
- Snowy coconut trees: Sprinkle a small pinch of fine shredded coconut over each tree right after piping. It toasts very lightly in the oven and looks like snow on the branches. The coconut flavor is subtle but adds a nice texture contrast to each bite.
- Red and white trees: Skip the green entirely and use red gel coloring for a different look, or pipe half the batch green and half red. The mix on a platter looks really striking. This is also a good option if you're making these for a non-Christmas holiday gathering and want a more neutral color palette.
Serving and Storage
Serving
Arrange the trees on a white platter or a wooden board for the most visual impact — the green stands out beautifully against a neutral background. They also work as edible cake toppers: just press a few into the frosting of a simple white or chocolate cake and it looks instantly festive. I've also packed them individually in small cellophane bags tied with ribbon for neighbor gifts, and people are always delighted. If you're putting together a full holiday dessert spread, these pair really nicely with something rich alongside — a slice of Christmas Baklava next to a little pile of meringue trees looks like a proper dessert table.
Storage
Store in an airtight container at room temperature for up to 2 weeks. The key word is airtight — any exposure to air (or humidity) will make them go soft and sticky. Do not refrigerate them; the moisture in the fridge will ruin the texture within a day. If you're stacking layers in the container, place a sheet of parchment between each layer so the sprinkles don't scratch or stick. They freeze surprisingly well too — lay them flat in a single layer in a freezer-safe container and they'll keep for up to a month. Let them come to room temperature inside the sealed container so they don't crack from the temperature change.
Frequently Asked Questions
Can I make these meringues on a humid or rainy day?
I wouldn't recommend it. Meringues absorb moisture from the air during and after baking, which leaves them sticky and soft instead of crisp. I've tried it on a damp day and they never properly set — even after the full baking and cooling time. If you're in a humid climate, try running your air conditioning in the kitchen, and make sure your storage container is sealed the moment the meringues are cool.
Can I use liquid food coloring instead of gel?
Gel is really the better choice here. Liquid coloring adds extra water to the meringue, which can weaken the structure and make it harder to pipe clean, defined shapes. If gel isn't available near you, use liquid sparingly — just a drop or two — and add it slowly while watching the consistency. Gel food coloring is sold in most Walmart and Target baking aisles, usually in a small four-pack.
What if I don't have a piping bag or star tip?
A zip-top bag with one corner snipped off works as a basic piping bag — the trees won't have the defined star-tip texture, but they'll still hold their shape. For the star tip specifically, they're inexpensive and widely available; a basic Wilton set runs about $10 at Walmart and comes with multiple tips that you'll use for other things too. If you skip the tip entirely, you can also just dollop the meringue into rough tree shapes with a spoon — they won't look as polished, but they'll taste exactly the same.
How do I know when the meringues are fully baked?
They should lift cleanly off the parchment paper without sticking, feel dry and hollow-light when you pick one up, and have no sticky or soft spots anywhere on the surface. If they're still tacky at the base, put them back in for another 15 minutes and check again. Remember to let them cool fully inside the oven before doing your final check — they firm up significantly as they cool.
Can I make these ahead of time for a party?
Yes, and I actually prefer to. Making them two to three days ahead means the baking stress is completely off the day of the event. Store them in an airtight container at room temperature, away from any steam or humidity in the kitchen. They'll be just as crisp and beautiful on day three as they were the day you baked them. I've made them up to five days ahead with no issues at all.
CHRISTMAS TREE MERINGUES
Ingredients
- 4 large egg whites room temperature
- 1 cup granulated sugar
- ¼ teaspoon cream of tartar
- ½ teaspoon vanilla extract
- Green gel food colouring
- Star-shaped sprinkles or white nonpareils optional
Instructions
Preheat and Prep:
- Preheat oven to 200°F (93°C). Line two baking sheets with parchment paper.
Make the Meringue:
- In a clean, dry mixing bowl, beat egg whites and cream of tartar on medium speed until soft peaks form. Slowly add sugar, 1 tablespoon at a time, beating on high until stiff, glossy peaks form and sugar is dissolved. Beat in vanilla and a small amount of green gel food colouring.
Pipe the Trees:
- Transfer meringue into a piping bag fitted with a large star tip. Pipe meringue into small tree shapes, swirling upward. Top each with a star sprinkle or decorate with nonpareils.
Bake:
- Bake for 1 hour 15 minutes. Turn off oven and leave meringues inside to cool for 1 hour with the door closed.
Notes
- Make Ahead: Meringues can be made up to 5 days in advance and stored in an airtight container.
- Customizing the Look: Try red or white meringues for a colour variation, or use peppermint extract for a twist.
- Serving Suggestions: Great for dessert platters, cookie exchanges, or as cute edible decorations on cakes.
- Allergy-Friendly Options: These meringues are naturally gluten-free and dairy-free.
- Storage Tips: Store in a cool, dry place in an airtight container. Avoid humidity to keep them crisp.
Every December I think I'm going to try some elaborate new holiday baking project, and then I end up coming back to these meringue trees anyway. They're the thing my family actually wants, the thing that gets photographed and shared, and the thing I'm least stressed about making. Three ingredients I almost always have, one bowl, and a couple of hours mostly spent waiting for the oven to do its job. That's a good recipe in my book.
What I like most about them is how long they keep. I can bake a big batch on a quiet Sunday afternoon, tuck them away in a tin, and pull them out for the school party, the neighbor gift, and the Christmas Eve dessert table — all from the same batch. If you want to round out your holiday baking, my Christmas Baklava with Honey-Spice Syrup is another one worth adding to your list. It's richer and more involved, but it's also spectacular alongside something light like these meringues.
If you give these a go, I hope Zainab's method of aggressive sprinkle decoration brings you as much joy as it brings us. Don't skip the slow oven cooling, pick a dry day, and use the gel coloring — those three things are what stand between a sticky disappointment and a tray full of beautiful little green trees. 🎄✨
If you liked these, you might also enjoy:
- Christmas Baklava with Honey-Spice Syrup (Holiday Dessert Gift)
- Brownies or Blondies — A Classic Baking Choice
-
{"@context":"https://schema.org","@type":"Article","headline":"CHRISTMAS TREE MERINGUES","description":"Whimsical Christmas tree meringues are light, crispy, and fun to make, perfect for festive treats or edible decorations.","datePublished":"2025-06-04T10:31:26+00:00","dateModified":"2026-05-03T21:22:54+00:00","author":{"@type":"Person","name":"Sana Umer","url":"https://forfoodiefriends.com/about/","description":"Self-taught home cook with 10+ years of kitchen experience. Mom of two who develops every recipe in her own kitchen.","jobTitle":"Recipe Developer & Food Blogger","image":"https://forfoodiefriends.com/wp-content/uploads/sana-umer-author-photo.jpg"},"publisher":{"@type":"Organization","name":"For Foodie Friends","url":"https://forfoodiefriends.com/","logo":{"@type":"ImageObject","url":"https://forfoodiefriends.com/wp-content/uploads/forfoodiefriends-logo.png"}},"mainEntityOfPage":{"@type":"WebPage","@id":"https://forfoodiefriends.com/christmas-tree-meringues/"},"image":"https://forfoodiefriends.com/wp-content/uploads/2025/05/CHRISTMAS-TREE-MERINGUES.jpg"}






Comments
No Comments