
Saad asked if we could make "the chocolate Oreo balls that look like tree ornaments" three days before Christmas last year, and I realized I'd never actually written down what I did. It's one of those projects that sounds like a craft project but ends up being the most eaten thing on the table.
What I love about these is that they're genuinely no-bake and genuinely simple — melt chocolate, dip cookies, add sprinkles, done. I've made fancier holiday treats that took two hours and got half the reaction. These take maybe 30 minutes of active time, most of which is the kids decorating their own. The hardest part is getting the chocolate to the right consistency so it coats cleanly without being too thick.
We make these every December now. Zainab takes the decorating very seriously — she has a system involving exactly three sprinkle colors and she will not deviate from it. Saad just piles everything on and calls it abstract art. Both versions taste the same, which is the beauty of this recipe. If you're looking for more no-bake holiday treats, my Sugar Cookie Fudge uses a similar approach and is just as easy to make with kids.
One thing to know going in: these are treat ornaments, not actual hanging ornaments. The chocolate isn't strong enough to support real weight on a branch. We set ours on a little tray near the tree, or box them up as gifts. The ribbon or pretzel loop is mostly decorative — it completes the "ornament" look without you actually needing to hang anything.
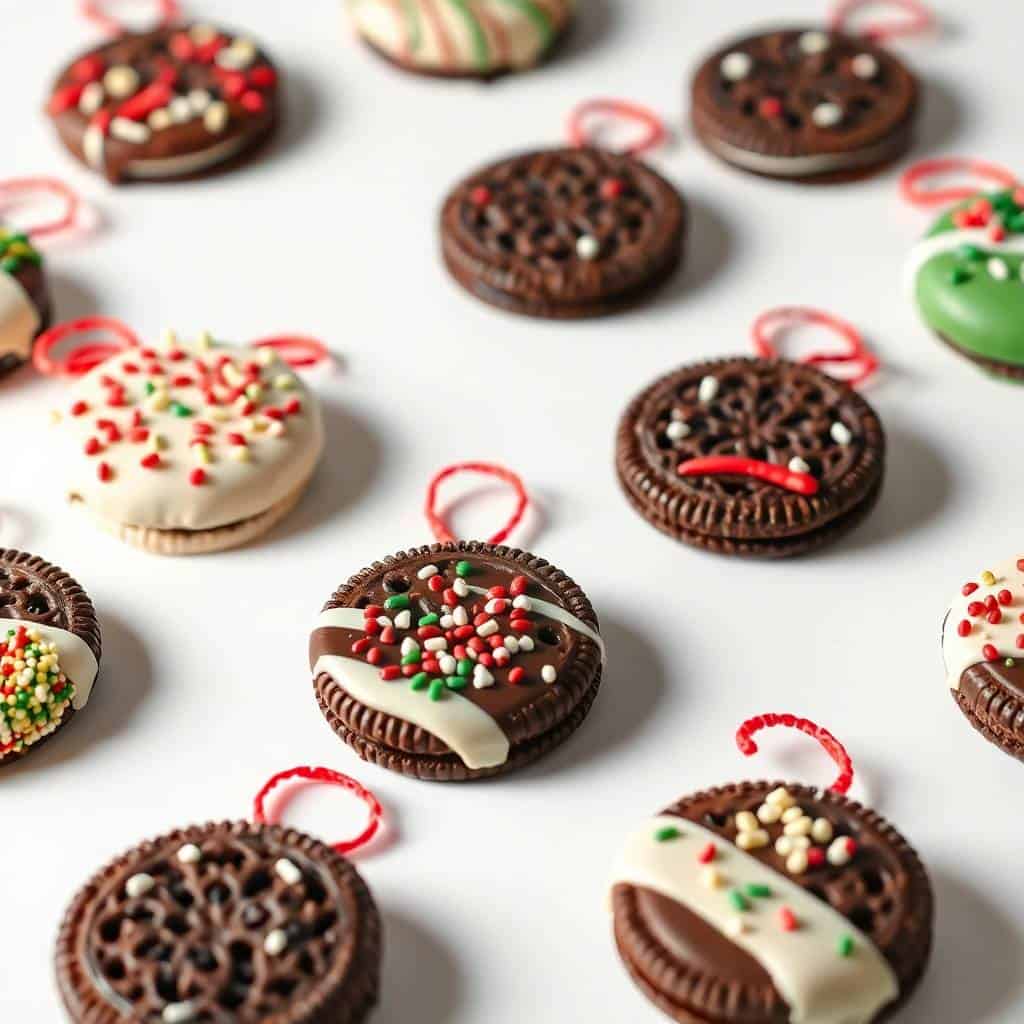
Why You'll Love This Recipe
- No oven, no stress: This is a fully no-bake recipe, which matters a lot in December when my oven is already committed to six other things. You just need a microwave and a sheet pan. I've done these while the cookies for the holiday cookie box were still baking in the oven — total overlap, no conflict.
- Kids can actually do most of it: I hand Zainab and Saad their own bowls of sprinkles and let them go. The only part I do myself is the chocolate dipping, since hot chocolate and kids is a combination I've decided not to test. Everything after that — the decorating, the candy cap on top, the pretzel loop — they handle completely.
- They make genuinely good gifts: I've packaged these in little cellophane bags tied with ribbon and given them to Saad and Zainab's teachers, our neighbors, and my husband's coworkers. They look like something from a bakery. Nobody needs to know it took 30 minutes and the kids made half of them.
- You can make them ahead: I usually make a double batch two days before Christmas. They keep perfectly at room temperature in an airtight container for up to five days, so there's no last-minute scramble. The chocolate actually sets firmer and cleaner after sitting overnight.
- Endlessly customizable with whatever you have: Different sprinkles, different Oreo flavors, crushed candy cane, mini M&Ms — all of it works. I've never made the exact same version twice and they always turn out fine. It's the kind of recipe that's forgiving of improvisation.
Ingredients
- 12 Oreo cookies (regular, double-stuffed, or any flavor you like)
- 1 cup white candy melts or white chocolate chips
- Mini peanut butter cups or Rolos (for the ornament "cap" on top)
- Assorted holiday sprinkles or mini M&Ms
- Red, green, and gold icing tubes or gel (for drawing designs)
- Mini pretzels or string licorice (optional, for the hanging loop look)
- Parchment paper
Directions
- Step 1: Melt the chocolate — Put your white candy melts or white chocolate chips in a microwave-safe bowl and microwave in 30-second intervals, stirring between each one. It usually takes me 2–3 intervals. You want it smooth and pourable but not so thin it slides right off the cookie — if it's too runny, let it sit for a minute to thicken slightly.
- Step 2: Set up your decorating station — Line a baking sheet with parchment paper. Set out your sprinkles, mini M&Ms, icing tubes, and candy caps before you start dipping. Once the Oreo is coated, you have maybe 60 seconds before the chocolate starts to set, so you don't want to be hunting for the red sprinkles mid-dip.
- Step 3: Dip the Oreos — Using a fork, lower each Oreo into the melted chocolate. Flip it once to coat both sides, then lift it up and tap the fork gently against the side of the bowl to shake off the excess. Place it flat on the parchment paper. Don't skip the tapping step — the first time I didn't do this, I ended up with a thick puddle of chocolate under each cookie instead of a clean coating.
- Step 4: Decorate immediately — While the chocolate is still wet, add your sprinkles and press on the candy cap (mini peanut butter cup or Rolo) at the top of each Oreo. This is where the kids take over in my house. The sprinkles need to go on before the chocolate sets or they won't stick.
- Step 5: Add the optional loop — If you want the full ornament effect, press a small piece of pretzel or a loop of string licorice into the candy cap while it's still soft enough to hold it. It's purely decorative but it does complete the look.
- Step 6: Chill to set — Refrigerate the whole tray for about 15 minutes until the chocolate is fully hardened. After that, they're ready to serve, package, or display.
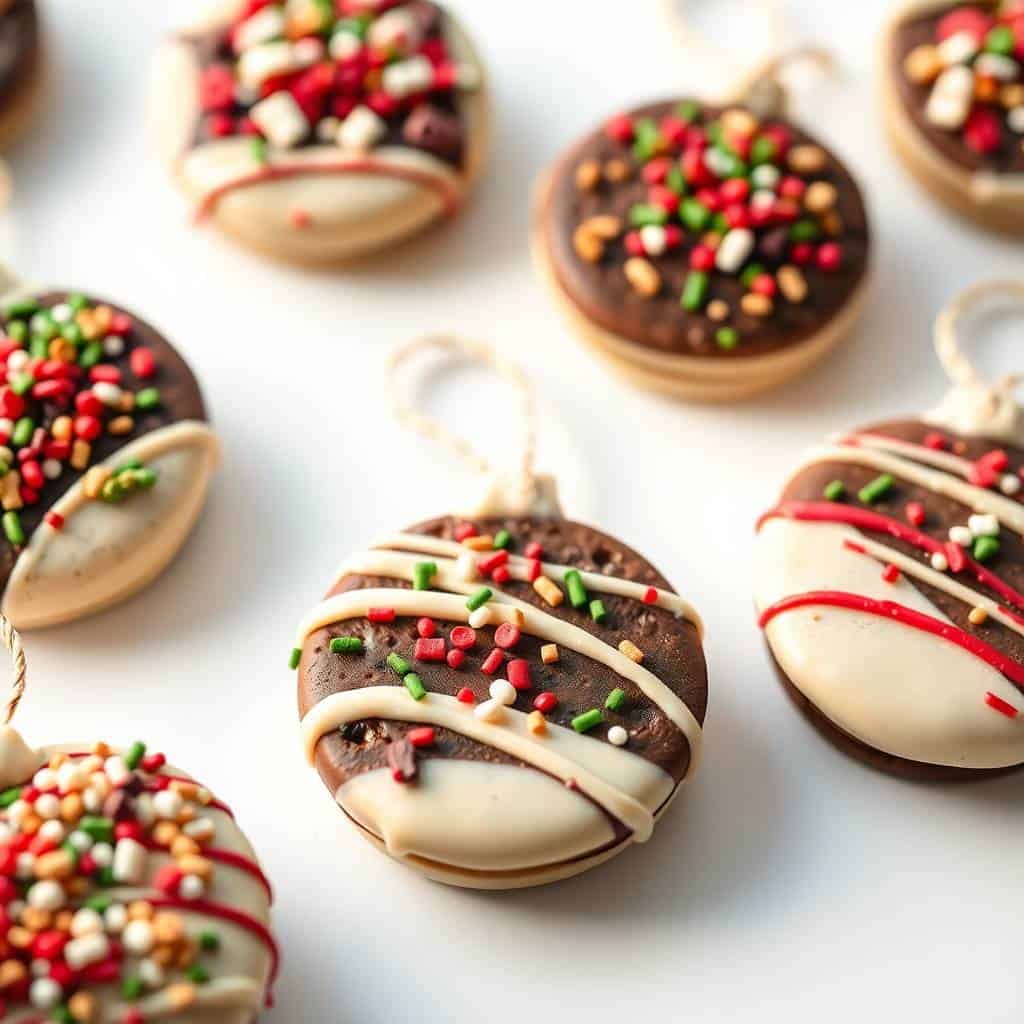
Tips for Success
- Use candy melts instead of regular white chocolate chips if you can find them: Regular white chocolate chips can seize up in the microwave if you go even 10 seconds too long — I've ruined a whole batch that way. Candy melts (Wilton makes them, Walmart and Michaels usually carry them) are specifically designed for dipping and are much more forgiving. If white chocolate chips are all you have, add a teaspoon of coconut oil before melting to help it stay smooth.
- Work quickly but in small batches: I dip 3-4 Oreos at a time, decorate those, then dip the next set. If you dip all 12 at once and then try to go back and add sprinkles, half of them will already be set and nothing will stick. Smaller batches feel slower but the results are much cleaner.
- Press the candy cap on firmly: The mini peanut butter cup or Rolo needs a little pressure to stick to the wet chocolate. If you just set it on top gently, it slides off once the chocolate sets. Press it down slightly so it sinks into the coating a little — that's what holds it in place after chilling.
- Don't skip the parchment paper: I tried wax paper once thinking it was the same thing. The chocolate stuck to it and when I peeled the Oreos off, the coating cracked on half of them. Parchment releases cleanly every time. It's a small thing but it matters.
- If the chocolate thickens while you're working, reheat in 10-second bursts: The melted chocolate will start to firm up as it sits out, especially in a cool kitchen. Don't try to push through with thick chocolate — your coating will be lumpy. A quick 10 seconds in the microwave, a stir, and it's workable again.
Variations
- Peppermint crush version: After dipping, sprinkle crushed candy canes over the wet chocolate before it sets. The peppermint and white chocolate combination is genuinely good, and it looks festive without needing extra icing. I use a zip-lock bag and a rolling pin to crush the candy canes — no food processor needed.
- Dark chocolate dip: Swap the white candy melts for dark chocolate melting wafers. The contrast between the dark chocolate shell and bright sprinkles actually looks really striking. My husband prefers this version — he's not a white chocolate person. It also sets faster in the fridge, which helps if you're working with impatient kids.
- Mint Oreo base: Use mint-flavored Oreos instead of the regular ones. The mint filling combined with white chocolate is a classic holiday flavor. This version works especially well with the peppermint crush topping — double mint, but it works. I found mint Oreos at Walmart last December right around the holidays.
- Two-tone drizzle: Dip in white chocolate, let it set halfway, then drizzle melted milk chocolate over the top in thin lines. It looks more elaborate than it is. Zainab asked me if I'd bought these from a bakery the first time I did this, which was high praise from a seven-year-old.
- Golden Oreo version: Golden Oreos dipped in white chocolate look like little snow-covered ornaments. Top with white nonpareils or silver edible glitter and they have a completely different, more elegant feel — good for gifting to adults who might want something less candy-colored.
Serving and Storage
Serving
These look best arranged on a little tray or wooden board near the tree, or set out on the dessert table at a holiday gathering. They're individual servings, so no cutting or plating needed — people just pick one up. For gifting, I stack 3–4 in a small cellophane bag, tie it with ribbon, and attach a little tag. They always get a good reaction. If you're doing a holiday baking spread, these pair well alongside something like my Waffle Cookies — two totally different textures and flavors on the same tray.
Storage
Keep them in an airtight container at room temperature for up to 5 days. They don't need to be refrigerated after the initial setting chill — in fact, taking them in and out of the fridge can cause the chocolate to get a white bloom on the surface (totally harmless but not pretty). If your kitchen runs warm, a cool spot on the counter or a cool pantry shelf works fine. Don't stack them directly on top of each other without a layer of parchment between them or the sprinkles will press into the chocolate below.

Frequently Asked Questions
Can I use flavored Oreos instead of regular ones?
Yes, and I'd actually encourage it. Mint Oreos, peanut butter Oreos, and Golden Oreos all work great. The only thing I'd watch for is that some specialty Oreos have a stronger filling flavor that might compete with whatever chocolate you're using — which isn't necessarily a bad thing, just something to consider when you're pairing flavors.
Can I make these a few days ahead?
Absolutely. I usually make them 1–2 days ahead and they're fine. Once fully set, store them in an airtight container at room temperature and they'll keep up to 5 days. Making them the day before actually gives the chocolate time to set completely firm, which makes them easier to handle and package.
My chocolate keeps seizing up — what am I doing wrong?
A few things can cause this. Overheating is the most common — go in 30-second intervals and stir between each one, even if it doesn't look melted yet. The residual heat does a lot of the work. Even a tiny amount of water getting into white chocolate can also cause it to seize — make sure your bowl and fork are completely dry. Switching to candy melts instead of chocolate chips solves the problem almost entirely.
How do I get the ribbon or pretzel loop to stay on?
Press the loop into the candy cap (the Rolo or mini peanut butter cup) while the chocolate is still soft, right after you attach the cap to the Oreo. If the chocolate has already set, use a small dab of leftover melted chocolate as glue. Hold it in place for about 10 seconds and then let it chill — it'll hold fine after that.
Are these actually sturdy enough to hang on the tree?
Honestly, no — and I wouldn't try it. The chocolate coating isn't strong enough to support the weight, and the loop is really just decorative. We display ours on a tray near the tree or use them as gift packaging. If you really want them on the tree, put them in a small clear ornament bag first so the cookie is supported, and hang that instead.
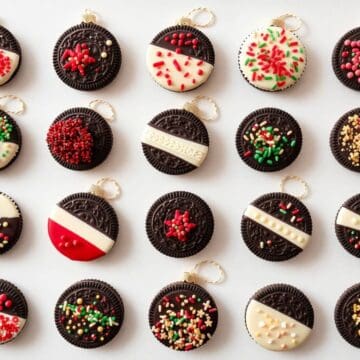
CHRISTMAS OREO ORNAMENTS
Ingredients
- 12 Oreo cookies
- 1 cup white candy melts or white chocolate chips
- Mini peanut butter cups or Rolos for ornament tops
- Assorted holiday sprinkles or mini M&Ms
- Red green, and gold icing tubes or gel
- Mini pretzels or string licorice for hanging loops – optional
- Parchment paper
Instructions
Melt Chocolate:
- Melt white candy melts or chocolate chips in the microwave in 30-second intervals, stirring until smooth.
Coat the Oreos:
- Dip each Oreo into the melted chocolate using a fork. Tap off excess and place on parchment paper.
Decorate:
- Before the coating sets, add sprinkles, mini M&Ms, or icing designs. Attach a mini peanut butter cup or Rolo at the top as the ornament cap.
Chill:
- Refrigerate for about 15 minutes until chocolate hardens.
Optional Loop:
- Insert a small piece of pretzel or string licorice into the candy cap for a hanging effect.
Notes
This is a perfect project for children—set out all toppings and let them decorate their own ornaments! Storage:
Keep in an airtight container at room temperature for up to 5 days.
This is one of those recipes I come back to every year without even thinking about it — it's just become part of how we do December. The kids remember making them, which matters more to me than the recipe itself. I like that there's no way to mess it up badly enough that it's not still delicious — even the ones that look like they were decorated by a four-year-old (some were) taste exactly the same.
If you want to build out a no-bake holiday treat situation, these pair really naturally with my Sugar Cookie Fudge — both come together without turning on the oven and both hold up well in gift boxes. For something a little more involved that's still great for the holidays, the Triple Layer Strawberry Cake is what I make when I actually want to bake something impressive.
Make a double batch if you're giving any away — twelve goes faster than you'd think once people see them on the table. And set up the decorating station before you start dipping. That's the one thing I always forget and then scramble to fix mid-chocolate. 🎄🍫✨
If you liked this, here are a few more things you might want to make:
- Sugar Cookie Fudge (No-Bake Holiday Treat with Sprinkles)
- Waffle Cookies
- Triple Layer Strawberry Cake
- Strawberry Cream Cheese Breakfast Pastries (Flaky, Sweet, Easy)
- Strawberry Cheesecake Cinnamon Rolls (Soft, Fluffy Brunch Treat)





Comments
No Comments