
I've made a lot of chocolate cookies over the years, but these lava brownie cookies are the ones my kids lose their minds over. The first time I made them, I pulled them out of the oven a full three minutes too early because I was convinced they weren't done — and honestly? That was a happy accident. The centers were so molten they practically pooled onto the plate, and Saad declared them the best thing I'd ever made. That's a high bar in our house.
What makes these different from a regular chocolate cookie is the technique: you melt the butter and chocolate together instead of creaming cold butter with sugar. That one step is what gives you the brownie-like fudginess — dense, shiny, slightly crackly on top — instead of a cakey cookie. The hidden chocolate chunk in the center melts during baking and creates that lava effect when you break one open. It's not a complicated recipe, but it does have a few small details that matter, and I'll walk you through all of them.
I make these most often in the evening when the kids have finished their homework and everyone needs something to look forward to. They bake in about 10 minutes, so the wait is short enough that nobody gets impatient. I've also made them for Eid gatherings and packed them into little boxes as gifts — they travel better than you'd think, especially once they've cooled. If you're already browsing desserts, my bee cake pops are another one that kids go completely wild for.
One important thing: you have to chill the dough. I know it's tempting to skip that step when the smell of melted chocolate is already filling your kitchen, but cold dough holds its shape and keeps the center thick enough to stay gooey. Twenty minutes in the fridge is all it takes. Don't skip it.
Why You'll Love This Recipe
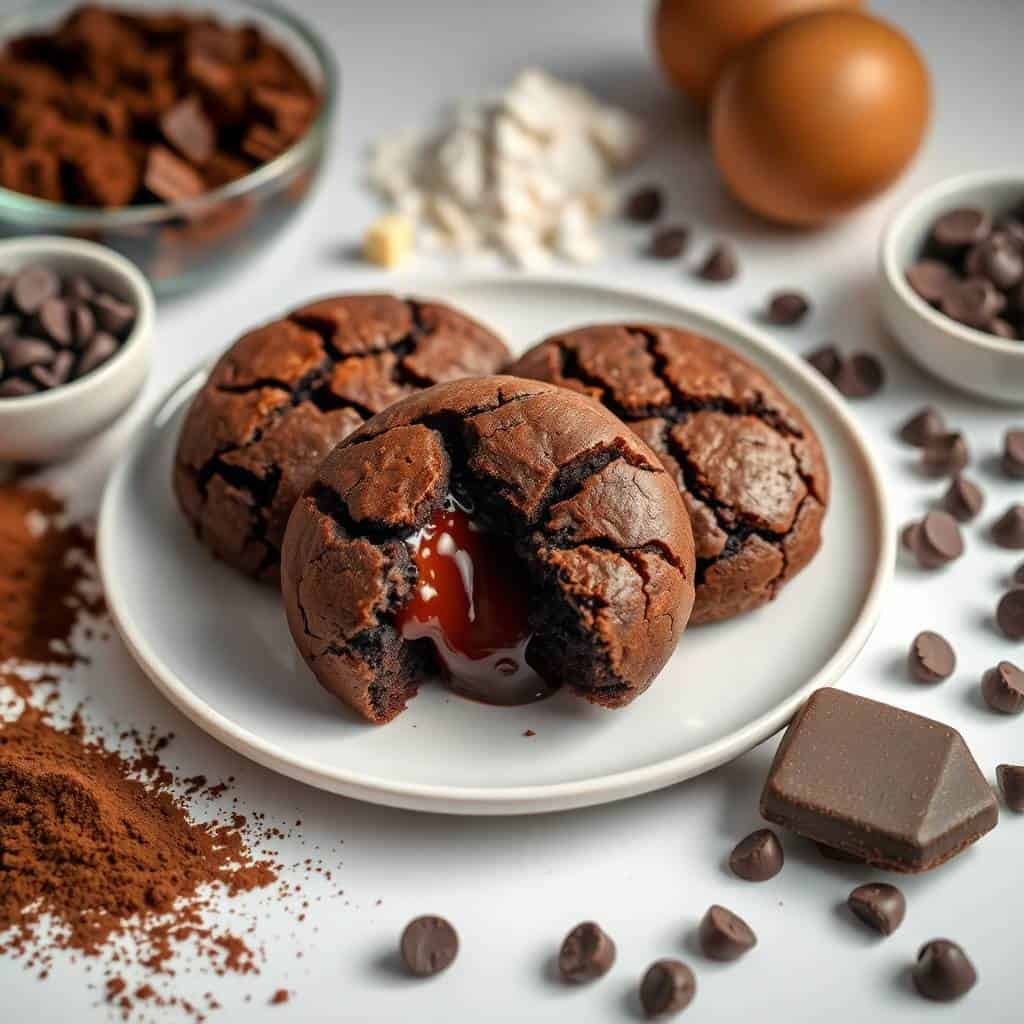
- That molten center is real: This isn't a marketing promise — if you bake these for 10 to 12 minutes and let them rest for five, you will crack one open and watch chocolate flow. The key is wrapping the dough around a solid chocolate chunk, which melts at a lower temperature than the cookie dough sets. I've tested this with chocolate chips, chocolate chunks, and Lindt truffles — all three work, but the truffle gives you the most dramatic lava.
- Brownie texture in cookie form: Because you're starting with melted chocolate and butter rather than creamed butter, the dough behaves more like brownie batter. The finished cookie is dense and fudgy, with that characteristic shiny, crackly top that brownies get. It's genuinely the best of both formats, and I say that as someone who has baked both separately for years.
- Basic pantry ingredients: Flour, cocoa powder, eggs, butter, two kinds of sugar, vanilla — everything here is already in your kitchen. The only thing you might need to grab is good-quality semisweet chocolate for both the dough and the filling. I usually use Ghirardelli or Trader Joe's Pound Plus, both of which are easy to find and give you a deep, rich flavor without being too bitter.
- 10 to 12 minutes bake time: Once the dough is chilled and shaped, these go from oven to table incredibly fast. I make a double batch every single time because one batch disappears before everyone has had their second cookie. If you're making them for a gathering, you can shape the dough balls the night before and bake them fresh right before you serve them.
- They reheat beautifully: Ten seconds in the microwave the next day and the center goes molten again. My husband actually prefers them slightly reheated because the edges stay chewy while the inside gets warm again. I store them in an airtight container on the counter — not the fridge, which makes them go dry — and they're still good on day three or four.
Ingredients
- 1 cup unsalted butter
- 8 oz semisweet chocolate, chopped (Ghirardelli or Trader Joe's Pound Plus both work well)
- 1 cup granulated sugar
- ½ cup brown sugar, packed
- 2 large eggs
- 2 teaspoons vanilla extract
- 1¼ cups all-purpose flour
- ½ cup cocoa powder (Dutch-process gives richer color, but regular unsweetened works fine)
- 1 teaspoon baking powder
- ¼ teaspoon salt
- 12–15 chocolate chunks or chocolate truffles (for the lava filling)
Directions
- Melt the chocolate and butter: In a heatproof bowl set over a pot of barely simmering water (or in the microwave in 30-second bursts), melt the butter and chopped chocolate together, stirring until completely smooth. Set it aside to cool for about 5 minutes — if it's too hot when you add the eggs, they'll scramble.
- Mix the wet ingredients: Whisk the granulated sugar and brown sugar into the cooled chocolate mixture until combined. Add the eggs one at a time, then the vanilla, and whisk until the batter looks glossy and slightly thick. This takes about a minute of real whisking.
- Add the dry ingredients: In a separate bowl, whisk together the flour, cocoa powder, baking powder, and salt. Add this to the chocolate mixture and fold gently with a spatula until just combined — stop as soon as you don't see dry streaks. Overmixing here makes the cookies tough.
- Chill the dough: Cover the bowl and refrigerate for at least 20 minutes. The dough will firm up from a loose batter into something you can actually scoop and shape. Don't skip this — I tried once and the cookies spread completely flat.
- Shape the cookies: Scoop about 2 tablespoons of dough, flatten it slightly in your palm, and press a chocolate chunk or truffle into the center. Wrap the dough up and around it, rolling it into a smooth ball so the filling is fully enclosed. Place on a parchment-lined baking sheet, spacing them about 2 inches apart.
- Bake: Bake at 350°F (175°C) for 10 to 12 minutes, until the edges look set and the tops have that crackly sheen but the centers still look slightly underdone. They'll continue to set as they cool, so trust the timer more than your eyes.
- Cool briefly and serve: Let the cookies rest on the baking sheet for 5 minutes before moving them. This rest time is what lets the lava center thicken to the right consistency — pull them off the pan immediately and the filling runs everywhere.

Tips for Success
- Don't skip the chilling step: I learned this the hard way my second time making these — I was in a rush and put the dough straight onto the sheet pan. The cookies spread into flat discs with no structure and no molten center because the filling had nowhere to stay. Twenty minutes in the fridge makes the dough stiff enough to hold its shape around the chocolate chunk. If you have time, you can chill it up to 2 days in advance.
- Use good chocolate for the filling: The chunk in the center is what becomes your lava, so it's worth using something you'd actually eat on its own. I've used Ghirardelli chocolate chips, Trader Joe's dark chocolate chunks, and Lindt 70% truffles. The truffles give the most dramatic flowing center because they're already soft inside. Chocolate chips work but produce a thicker, less fluid result.
- Pull them out when they look underdone: The single most common mistake with these is overbaking. The edges should look set and the top should have that crackly skin, but the center should still look soft and slightly puffed. If it looks fully baked all the way across, it's already overdone. My oven runs hot, so I check at 9 minutes and usually pull them at 10.
- Let the chocolate mixture cool before adding eggs: This step is easy to rush because the bowl smells incredible and you just want to get the dough made. But if the melted chocolate is still hot when the eggs go in, you'll end up with scrambled bits of cooked egg in your batter. Five minutes of cooling is enough — touch the bottom of the bowl and it should feel warm but not hot.
- Seal the dough around the filling completely: If there's any gap where the chocolate chunk is peeking through, that's where the filling will leak out during baking instead of staying molten inside. Take an extra few seconds to pinch and smooth the dough into a proper ball. It makes a real difference in the final result.
Variations
- Salted caramel center: Press a soft caramel candy or a spoonful of thick caramel sauce (frozen in ice cube trays first so it holds its shape) into the center instead of chocolate. The result is a sweet, buttery lava that plays beautifully against the dark chocolate cookie. I sprinkle a pinch of flaky sea salt on top before baking when I do this version.
- Peanut butter center: Freeze small balls of peanut butter (about 1 teaspoon each) until firm, then wrap the cookie dough around one of those instead of the chocolate chunk. It bakes into a creamy, nutty center that's different from the original but just as satisfying. My husband prefers this version — he's been asking me to make it every other week lately.
- Espresso brownie cookies: Add 1 teaspoon of instant espresso powder to the dry ingredients. You won't taste coffee exactly, but it deepens the chocolate flavor significantly — it's the same reason I add a splash of brewed coffee to my chocolate cakes. This is my personal favorite version when I'm making these just for the adults.
- Nutty crunch: Fold ½ cup of roughly chopped walnuts or pecans into the dough along with the dry ingredients. The nuts add a toasty crunch against the fudgy cookie that I really like. This is the version I'd bring to a gathering because it looks slightly more dressed up when you can see the nuts in the crackly top.
- Mint chocolate: Add ¼ teaspoon of peppermint extract to the wet ingredients and use a mint chocolate truffle (like Andes mints or a Ferrero Raffaello-style mint piece) as the filling. The combination of cool mint and warm chocolate is something I make specifically around the holidays. Zainab asks for this version every December without fail.
Serving and Storage
Serving
Serve these warm, about 5 minutes out of the oven — that's when the center is at peak lava. A scoop of vanilla ice cream on the side is the obvious move, and it works beautifully because the cold ice cream melts slightly against the warm cookie. If you want to keep it simpler, a dusting of powdered sugar is all they need. I've also served them alongside a cocktail like my charred cinnamon pineapple old fashioned for a dessert-and-drink situation when we have friends over — the warm spice in the drink pairs surprisingly well with dark chocolate.
Storage
Store cooled cookies in an airtight container at room temperature for up to 4 days. Don't refrigerate them — cold air dries them out and kills the fudgy texture. To reheat, microwave a single cookie for 10 seconds and the center goes molten again, almost like it just came out of the oven. For longer storage, freeze the shaped, filled dough balls (before baking) on a sheet pan, then transfer to a zip-lock bag. They keep frozen for up to a month. Bake straight from frozen at 350°F — add 2 extra minutes to the bake time.

Frequently Asked Questions
Why are my cookies not gooey inside?
Almost always overbaking. These need to come out of the oven while the center still looks soft — the residual heat from the pan finishes them during the 5-minute rest. If they look fully set in the oven, they'll be fully solid by the time you eat them. Also check that you fully enclosed the chocolate filling inside the dough ball with no gaps, because if it leaked out during baking there's nothing left to go molten.
Can I freeze the dough balls before baking?
Yes, and I actually recommend it. Shape and fill the dough balls, freeze them on a sheet pan until solid, then transfer to a zip-lock bag. They keep for up to a month. Bake straight from frozen at 350°F and add about 2 minutes to the bake time. This is how I prep for Eid or when I know I'll want cookies but won't have time to make dough from scratch.
Can I use milk chocolate instead of dark for the dough?
You can, but the cookies will taste noticeably sweeter and less intense. The combination of milk chocolate in the dough plus the added granulated and brown sugar makes for a very sweet result. I'd recommend sticking with semisweet or dark chocolate for the dough base and reserving milk chocolate for the filling center if you want a milder lava. That balance works better.
How do I stop the cookies from spreading too thin?
Chill the dough — that's the main fix. Cold dough holds its shape in the oven long enough for the edges to set before the center has a chance to spread out. If you chilled the dough and they're still spreading, your butter might have been too warm when you melted it, or the dough wasn't chilled long enough. Twenty minutes is the minimum; 30 is better if your kitchen runs warm.
Can I make these gluten-free?
I haven't tested this myself, so I can't give you exact results, but a quality 1:1 gluten-free flour blend — the kind with xanthan gum already in it, like Bob's Red Mill 1-to-1 or King Arthur Measure for Measure — should work reasonably well here. Because the recipe relies so heavily on melted chocolate and eggs for structure, it's more forgiving than most baked goods when you swap the flour. Just don't use almond flour or coconut flour; those behave completely differently.
These lava brownie cookies have become one of my most-made desserts over the past couple of years, and I think it's because they sit right at the intersection of easy and impressive. The technique isn't complicated, but the result looks like something from a proper dessert menu. When I crack one open at the table and the chocolate runs out, whoever is watching always asks for the recipe.
I make these when we have guests coming and I want to put something special on the table without spending the whole afternoon in the kitchen. I also make them on quiet Friday evenings when the kids have been particularly good all week and I want to do something a little extra. That 10-minute bake time means even a spontaneous craving is genuinely achievable. If you're looking for another dessert that takes some effort but not too much, my bee cake pops are a fun project for weekends when the kids want to help in the kitchen.
One last thing I want to say: this isn't a fancy bakery recipe that requires tempering chocolate or precision thermometers. It's a home recipe that works in a regular kitchen with regular equipment. I make it with a wooden spoon, a single mixing bowl, and a sheet pan I've had for six years. That's genuinely all you need. 🍫✨

CHOCOLATE LAVA BROWNIE COOKIES
Ingredients
For the Cookies:
- 1 cup unsalted butter
- 8 oz semisweet chocolate chopped
- 1 cup granulated sugar
- ½ cup brown sugar
- 2 large eggs
- 2 teaspoons vanilla extract
- 1 ¼ cups all-purpose flour
- ½ cup cocoa powder
- 1 teaspoon baking powder
- ¼ teaspoon salt
For the Lava Filling:
- 12 –15 chocolate chunks or chocolate truffles
Instructions
- Melt Chocolate & Butter: In a heatproof bowl, melt butter and chocolate together until smooth. Let cool slightly.
- Mix Wet Ingredients: Whisk in granulated sugar and brown sugar. Add eggs and vanilla; mix until fully combined.
- Combine Dry Ingredients: In another bowl, whisk together flour, cocoa powder, baking powder, and salt.
- Make the Dough: Add the dry ingredients to the chocolate mixture and stir until a soft dough forms. Chill for 20 minutes.
- Shape the Cookies: Scoop dough, flatten slightly, and place a chocolate chunk/truffle in the center. Wrap dough around it to form a ball.
- Bake: Bake at 350°F (175°C) for 10–12 minutes until set on the edges but soft in the center.
- Cool & Serve: Let cool 5 minutes before serving to keep the molten center gooey.
Notes
- Make Ahead: Chill dough for up to 2 days or freeze filled dough balls for up to 1 month.
- Customizing the Flavor: Use caramel-filled chocolate, peanut butter cups, or mint chocolate centers.
- Serving Suggestions: Serve warm with ice cream or drizzle with chocolate syrup.
- Allergy-Friendly Options: Use dairy-free butter and vegan chocolate for a plant-based version.
- Storage Tips: Store in an airtight container for 3–4 days; microwave 10 seconds to re-melt the center.
If you made these and loved them, here are a few more recipes from my kitchen





Comments
No Comments