
I have a confession: I used to eat raw cookie dough straight from the bowl, and I still do it now when I think no one's watching. The difference is that this cookie dough pie gives me an actual excuse to do it — no sneaking required, no guilt, and no worrying about getting sick. The filling is fully safe to eat because the flour is heat-treated and there are no eggs anywhere in sight.
What makes this pie work is the whipped cream folded into the cookie dough base. The first time I made it, I skipped that step because I didn't feel like washing another bowl. The result was a dense, heavy slab that tasted fine but sliced like a brick. Once I added the whipped cream properly, the filling became light and almost mousse-like — still rich, but not overwhelming. That extra bowl is worth it.
Zainab asked me to make this for her birthday instead of a regular cake, and I'll be honest, that surprised me. She's usually a chocolate cake kid. But she'd had a bite of this at her friend's house and wouldn't stop talking about it. I made one for the party and another one for us at home — because I knew the party one wouldn't last five minutes. I was right. If you're looking for something just as fun but easier to make in the morning, my cinnamon roll muffins are worth bookmarking too.
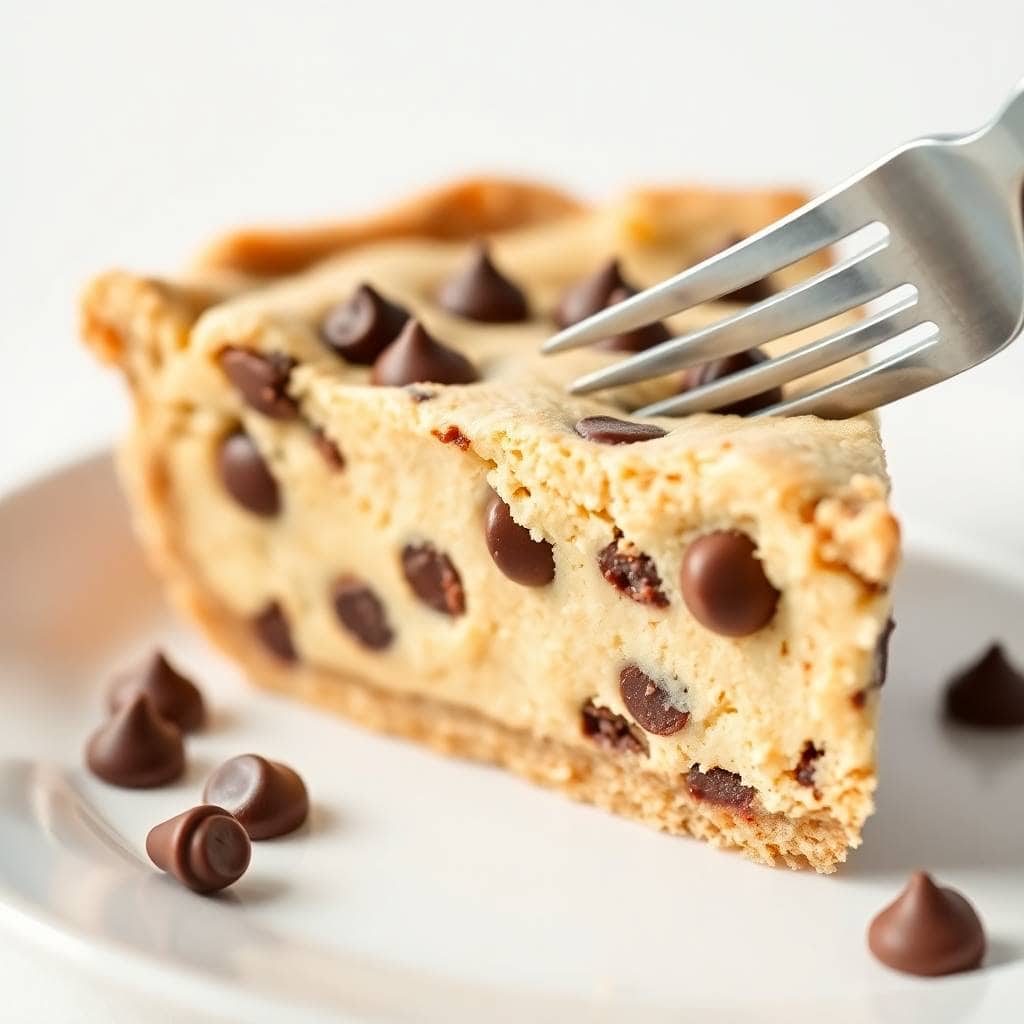
One thing to know going in: this pie needs at least 3 to 4 hours in the fridge before it slices properly. I know it's tempting to cut into it after an hour. Don't. It'll still taste good but it won't hold its shape, and then you'll end up eating it with a spoon out of the pan, which is less elegant than you'd hope. Plan ahead and chill it overnight if you can — it's actually better the next day.

Why You'll Love This Recipe
- No oven needed for the filling: Once you heat-treat the flour (5 minutes in a 350°F oven or a quick spin in the microwave), the rest of this recipe is completely no-bake. On a hot summer day when turning on the oven for an actual cake feels miserable, this is what I reach for. The only heat involved is optional — and brief.
- The raw dough is actually safe: I've eaten plenty of raw cookie dough in my life and just accepted the risk. This version removes that concern entirely — no eggs, and the flour is heat-treated to kill off any bacteria. I can hand a slice to Zainab without that little moment of hesitation.
- It comes together in about 20 minutes: The active work here is minimal — cream butter and sugar, stir in the flour and chips, fold in whipped cream, fill the crust, refrigerate. That's genuinely it. I've made this on a Tuesday evening after dinner and had it ready by Thursday with no stress.
- It looks like you worked a lot harder than you did: A chilled slice of this pie looks genuinely impressive on a plate. The Oreo crust is dark and crisp, the filling is pale and studded with chocolate chips, and if you add a drizzle of melted chocolate on top, it looks like something from a bakery case. Nobody needs to know it took you 20 minutes.
- You can make it the day before: This is a proper make-ahead dessert — and unlike most make-ahead things, it's actually better after sitting overnight. The filling firms up beautifully, the crust stays crisp, and you don't have to think about dessert on the day you're already cooking everything else. For holiday tables or birthday parties, that's a real advantage.
Ingredients
- For the Crust:
- 1½ cups chocolate cookie crumbs (Oreos work great — about 18 cookies crushed fine)
- 5 tablespoons unsalted butter, melted
- For the Cookie Dough Filling:
- 1 cup unsalted butter, softened (leave it out 30 minutes before you start)
- ¾ cup brown sugar, packed
- ½ cup granulated sugar
- 2 teaspoons vanilla extract
- 2 cups all-purpose flour, heat-treated (see directions — this step is not optional)
- ¼ teaspoon salt
- ¼ cup milk (whole milk gives the best result, but 2% works too)
- 1 cup mini chocolate chips
- For the Topping (Optional but recommended):
- Whipped cream
- Chocolate drizzle or extra mini chips for garnish
Directions
- Heat-treat the flour: Spread the flour on a baking sheet and bake at 350°F (175°C) for 5 minutes, then let it cool completely before using. You can also spread it on a microwave-safe plate and microwave in 30-second bursts, stirring between each, until it reaches 165°F on an instant-read thermometer. Don't skip this step — raw flour carries the same bacteria risk as raw eggs, and heat-treating takes almost no effort.
- Make the crust: Mix the chocolate cookie crumbs with the melted butter until the mixture looks like wet sand. Press it firmly and evenly into a 9-inch pie dish — use the bottom of a measuring cup to pack it tight. Slide it into the fridge while you make the filling so it holds its shape.
- Cream butter and sugars: Beat the softened butter with the brown sugar and granulated sugar until the mixture is light in color and fluffy. A hand mixer on medium speed takes about 2 minutes; by hand with a wooden spoon takes about 4 minutes and a bit of effort. The creamier you get it here, the smoother the final filling will be.
- Add vanilla and milk: Stir in the vanilla extract, milk, and salt. Mix until everything is smooth and well combined. The mixture might look slightly loose — that's fine, it'll firm up once the flour goes in.
- Add flour and chocolate chips: Add the cooled heat-treated flour and mix until fully incorporated with no dry streaks. Then fold in the mini chocolate chips. Taste the dough at this point — it should taste like raw cookie dough, which is the whole point.
- Whip the cream (if using in filling): In a separate bowl, whip the heavy cream with powdered sugar until stiff peaks form. I use a hand mixer for this, about 3 minutes on high. This step lightens the entire filling — I learned the hard way what happens when you skip it, and dense is an understatement.
- Combine and fill the crust: Gently fold the whipped cream into the cookie dough mixture in two or three additions. Don't stir aggressively — you want to keep the air in. Spoon the filling into the chilled crust and smooth the top with a spatula.
- Chill until firm: Refrigerate for at least 3 to 4 hours, or overnight if you can manage it. The pie should feel firm when you press the center lightly. Slice with a sharp knife and top with whipped cream and chocolate drizzle before serving.
Tips for Success
- Let the flour cool before adding it: I rushed this step once and added warm flour straight into the butter-sugar mixture. It melted the butter slightly and made the dough greasy and strange. Give it at least 10 to 15 minutes on the counter, or pop it in the fridge for 5 minutes if you're impatient like me.
- Soften the butter properly: Cold butter won't cream with sugar the way you need it to — you'll end up with lumps in your filling. Leave it out for 30 minutes before you start, or if you forgot (I always forget), cut it into small pieces and leave it for 15 minutes. Do not microwave it; melted butter will make the filling too soft to hold its shape.
- Pack the crust firmly: A loose crust will fall apart when you slice the pie. Press it with real pressure using the bottom of a measuring cup or a flat glass, working from the center outward and up the sides. Then chill it before adding the filling so it sets before it has to hold all that weight.
- Fold, don't stir, the whipped cream in: I know it's tempting to just mix it all together to save time, but stirring will deflate the cream and you'll lose the light, airy texture that makes this filling different from just eating cookie dough out of a bowl. Use a rubber spatula and fold gently in wide, slow strokes.
- Use a hot knife to slice: Run your knife under hot water, wipe it dry, then slice. The warmth cuts through the chilled filling cleanly without dragging. Wipe the blade between cuts for the neatest pieces — this is the one tip that makes the pie look as good on the plate as it does whole.
Variations
- Graham cracker crust instead of Oreo: The original recipe I started with used a graham cracker crust, and it's a slightly lighter, less intense option. If the chocolate-on-chocolate combination feels like too much for you, the graham cracker version balances the richness of the filling nicely. Both work — it's genuinely just a preference call.
- Peanut butter cookie dough filling: Add 3 tablespoons of creamy peanut butter to the butter-sugar mixture before you add anything else. The peanut butter flavor comes through in every bite without overpowering the chocolate chips. My husband actually prefers this version — he adds extra chips on top too, because of course he does.
- White chocolate chip version: Swap the mini chocolate chips for white chocolate chips and add ½ teaspoon of almond extract in place of half the vanilla. It becomes a completely different flavor profile — sweeter, almost candy-like — and it looks beautiful with the pale filling and white chips. Zainab would absolutely choose this version every time.
- Mini individual pies: Press the crust into a muffin tin lined with cupcake liners and divide the filling among them. They chill faster (about 2 hours is enough) and are much easier to serve at parties without the slicing stress. I've done this for school events and they disappeared faster than anything else on the table.
- Chocolate ganache drizzle on top: Melt ½ cup of dark chocolate chips with 2 tablespoons of heavy cream, stir until smooth, let it cool slightly, then drizzle over the chilled pie just before serving. It sets into a thin shell on top and adds a slightly bitter contrast to the sweet filling. If you enjoy chocolate-forward desserts, this finishing touch makes the whole thing feel extra intentional.
Serving and Storage
Serving
Serve this pie cold, straight from the fridge. I usually pull it out about 5 minutes before slicing just to take the very hard edge off — not to warm it, just to make slicing a little easier. A dollop of whipped cream on each slice is all it really needs, though a scoop of vanilla ice cream alongside it would not go unappreciated. In Pakistan, we'd end a meal with something like a kheer or a halwa, so this pie is a very different kind of dessert in our house — but my family has fully adopted it. For a full dessert spread at a party, this pairs well alongside something like festive cookies that guests can grab without needing a plate.
Storage
Cover the pie tightly with plastic wrap or store it in an airtight container in the fridge for up to 5 days. The crust stays reasonably crisp for the first 3 days, and after that it softens slightly but still tastes good. For longer storage, freeze the whole pie (or individual slices wrapped in plastic and then foil) for up to 2 months. Thaw overnight in the fridge before serving — don't thaw at room temperature or the filling gets too soft and loses its texture.

Frequently Asked Questions
Is the cookie dough filling really safe to eat without baking?
Yes, and this is the part people are most skeptical about until they understand why. Raw flour can carry bacteria just like raw eggs can, so heat-treating it first makes it safe. Since there are also no eggs in this filling, there's genuinely nothing to worry about. I've served this to my kids and to guests without a second thought.
Can I make this pie a day ahead?
Yes, and I'd actually encourage it. The pie is better after a full overnight chill — the filling firms up more evenly and the crust holds together better. I usually make it the evening before I need it, cover it, and slice it the next day. It takes one task completely off your plate on the day of.
Can I use regular chocolate chips instead of mini?
You can, but mini chips genuinely work better here. Regular chips are heavier and tend to sink to the bottom of the filling, especially once everything is folded together with the whipped cream. Mini chips stay distributed throughout, so you get chocolate in every bite rather than a cluster at the base. If regular chips are all you have, they'll still taste good — just expect a slightly uneven distribution.
Can I freeze this pie?
Yes. Wrap the whole pie tightly in plastic wrap and then a layer of foil, and freeze for up to 2 months. Thaw it overnight in the fridge before serving. I've done this when I made a double batch and had more pie than we could finish in 5 days — it holds up really well. Don't add the whipped cream topping before freezing; add it fresh after thawing.
What if I don't have a hand mixer or stand mixer?
I've made this by hand with a wooden spoon and it works fine. Creaming the butter and sugar takes more effort — about 4 to 5 minutes of vigorous stirring — but it gets there. For the whipped cream, a hand mixer really does make life easier, but if you don't have one, you can use a whisk and a cold bowl. Chill the bowl in the freezer for 10 minutes first; it helps the cream whip faster. It'll take 5 to 6 minutes of whisking by hand but it works.
Let's Wrap This Up
This pie has become one of those recipes I come back to whenever I need something that feels special without requiring a special amount of effort. Twenty minutes of actual work, a few hours of waiting, and you have a dessert that people talk about. I've brought it to gatherings where there were three other desserts on the table and it was still the first thing to go. I'm not saying that to brag — I'm saying it so you know the fridge time is absolutely worth it.
The thing I appreciate most about this recipe is that it's forgiving. You can swap the crust, adjust the chips, add peanut butter, skip the chocolate drizzle — it holds up through all of it. This isn't an exact science dessert where everything has to be precise. It's more like cookie dough you happen to put in a pie dish, and that's exactly why it works. I'm not claiming this is some elevated pastry chef creation — it's my version of a no-fuss dessert that tastes like nostalgia.
If you're building a full dessert spread and need something to serve alongside this, my cinnamon roll muffins are always a hit for brunch, and if you want something chocolatey for breakfast the next morning (no judgment), chocolate gravy and biscuits is a recipe I genuinely love. Make this pie once and I think you'll understand why it keeps ending up in rotation in my kitchen. 🍪🖤✨
CHOCOLATE CHIP COOKIE DOUGH PIE
Ingredients
For the Crust:
- 1½ cups chocolate cookie crumbs such as Oreos, crushed
- 5 tablespoons unsalted butter melted
For the Cookie Dough Filling:
- 1 cup unsalted butter softened
- ¾ cup brown sugar packed
- ½ cup granulated sugar
- 2 teaspoons vanilla extract
- 2 cups all-purpose flour heat-treated—see notes
- ¼ teaspoon salt
- ¼ cup milk
- 1 cup mini chocolate chips
For the Topping (Optional):
- Whipped cream
- Chocolate drizzle or sprinkles
Instructions
Prepare the Crust:
- Mix chocolate cookie crumbs and melted butter. Press into a 9-inch pie dish. Chill in fridge while preparing filling.
Make the Cookie Dough Filling:
- Beat butter and sugars until fluffy. Add vanilla and milk, mix well. Gradually add flour and salt, mixing until combined. Fold in chocolate chips.
Assemble the Pie:
- Spread the cookie dough filling evenly into the chilled crust.
Chill:
- Refrigerate for at least 2 hours to firm up before serving.
Add Topping (Optional):
- Top with whipped cream and chocolate drizzle if desired.
Notes
- Heat-Treating Flour: Microwave or bake flour as described to make it safe for raw consumption.
- Storage: Keep refrigerated up to 4 days.
- Serving Suggestion: Slice and serve with a scoop of vanilla ice cream for extra indulgence.
If you liked this, here are a few more recipes you might want to save:





Comments
No Comments