
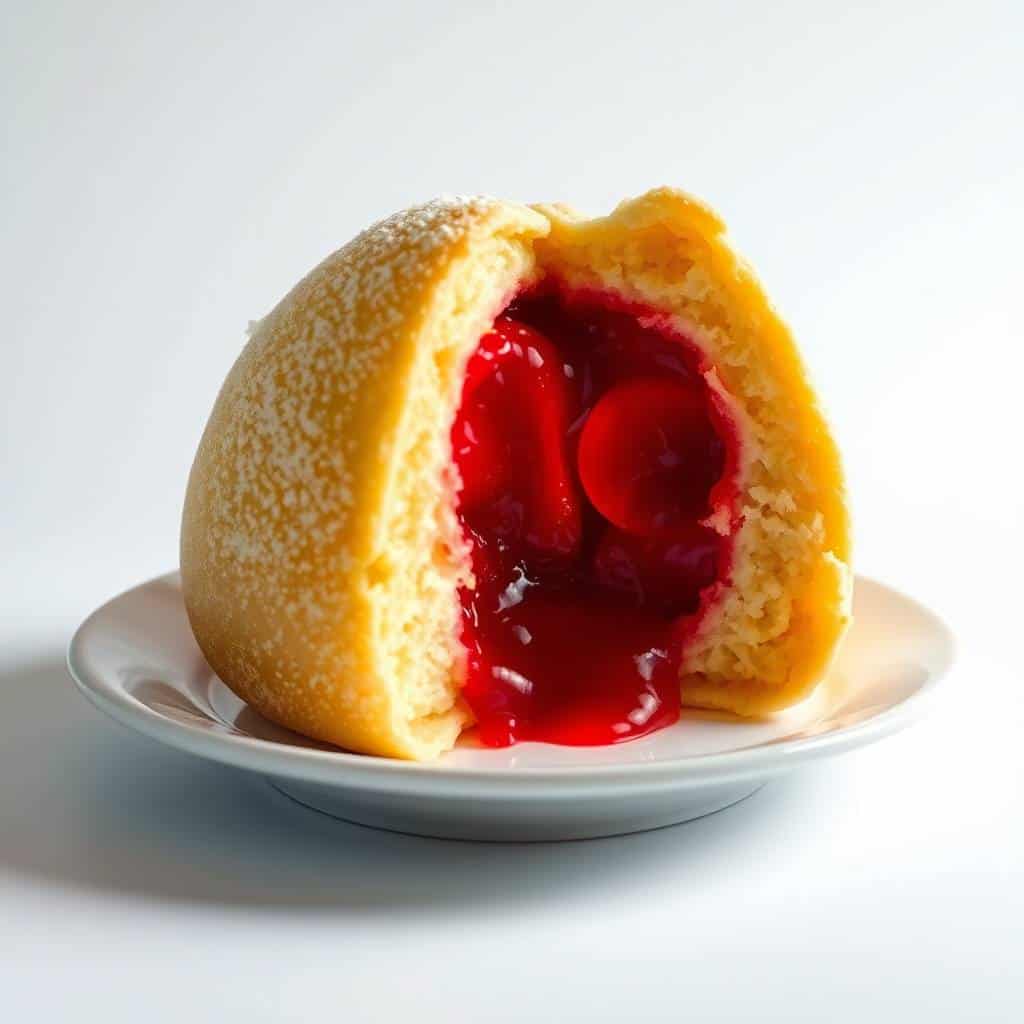
I discovered these cherry pie bombs completely by accident on a Tuesday night when I had a can of biscuit dough in the fridge and no plan for dessert. Saad had been asking for something sweet after dinner all week, and I had maybe 20 minutes before the kids' bedtime routine started. I figured I'd try stuffing cherry pie filling inside the dough rounds and see what happened. What came out of the oven that night was genuinely better than I expected — golden, a little crispy on the outside, warm and jammy in the middle.
What I like about this recipe is how forgiving it is. You don't need to be precise about anything except the sealing — if you don't pinch the edges properly, the filling bubbles out and makes a sticky mess on your pan. I found that out the first time I made these. The cherry juice caramelized and stuck to the parchment a bit, which wasn't the end of the world, but the sealed ones looked so much better. Now I pinch them firmly and double-check before they go in the oven.
My kids eat these warm, right off the pan. My husband likes them with a drizzle of icing and a cup of tea. I usually make a double batch because eight disappears immediately in this house — I don't even get to plate them nicely before someone reaches in. If you're bringing these to a potluck or brunch, people will assume you put in way more effort than you did, and I'm fine with that.
One thing to know going in: not all canned biscuit doughs behave the same way. The flaky-layers type (like Pillsbury Grands) tends to puff up more and gives you a fluffier bomb. The regular buttermilk biscuit style gives a slightly denser result. Both work. I've also made a version similar to my Strawberry Cheesecake Eggroll Bites where I added a spoonful of cream cheese inside with the cherry filling — that version was even harder to stop eating.
Why You'll Love This Recipe
- Done in under 20 minutes: I'm not exaggerating — from opening the biscuit can to pulling these out of the oven is about 18 minutes on a normal night. That's faster than most delivery estimates. On nights when I have nothing planned for dessert, this is my default move.
- No special equipment required: I flatten the dough with the bottom of a drinking glass. I seal the edges with my fingers. I use a regular sheet pan I've had for years. There's no rolling pin, no pastry brush I had to buy specially — I use a silicone brush I got at the dollar store for the egg wash.
- The filling is already done for you: A can of cherry pie filling from Walmart or Aldi does exactly what you need here. It's thick enough to stay inside the dough (mostly), sweet-tart enough to balance the buttery outside, and you don't need to adjust or cook it first. This is genuinely a three-ingredient dessert if you count the dough, the filling, and the butter.
- Kids will actually eat them: Saad went through three of these in one sitting the first time I made them. The handheld size matters — there's no slicing, no plates needed if you don't want them, and the filling doesn't drip everywhere once they've cooled for five minutes. They're the kind of thing kids pick up and just eat without needing encouragement.
- Works in the oven or air fryer: I've made these both ways. The oven gives a more even golden colour across the whole bomb. The air fryer makes them crispier on the outside, almost like a fried doughnut texture, which some people (my husband) actually prefer. Both versions take roughly the same amount of active time.
Ingredients
- 1 can (16 oz) refrigerated biscuit dough or crescent dough
- 1 cup cherry pie filling
- 2 tablespoons melted butter
- ¼ cup granulated sugar
- 1 teaspoon ground cinnamon
- Optional: powdered sugar for dusting, or mix with 1 tablespoon milk for a simple glaze
Directions
- Preheat the oven: Set your oven to 375°F (190°C) and line a baking sheet with parchment paper. Parchment really does matter here — the cherry filling that inevitably escapes a little will stick badly to an unlined pan and is a nightmare to clean.
- Flatten the dough: Separate the biscuits and use your fingers or the bottom of a glass to flatten each one into roughly a 3-inch circle. You don't need to be exact — you just need enough surface area to fold the edges up over the filling.
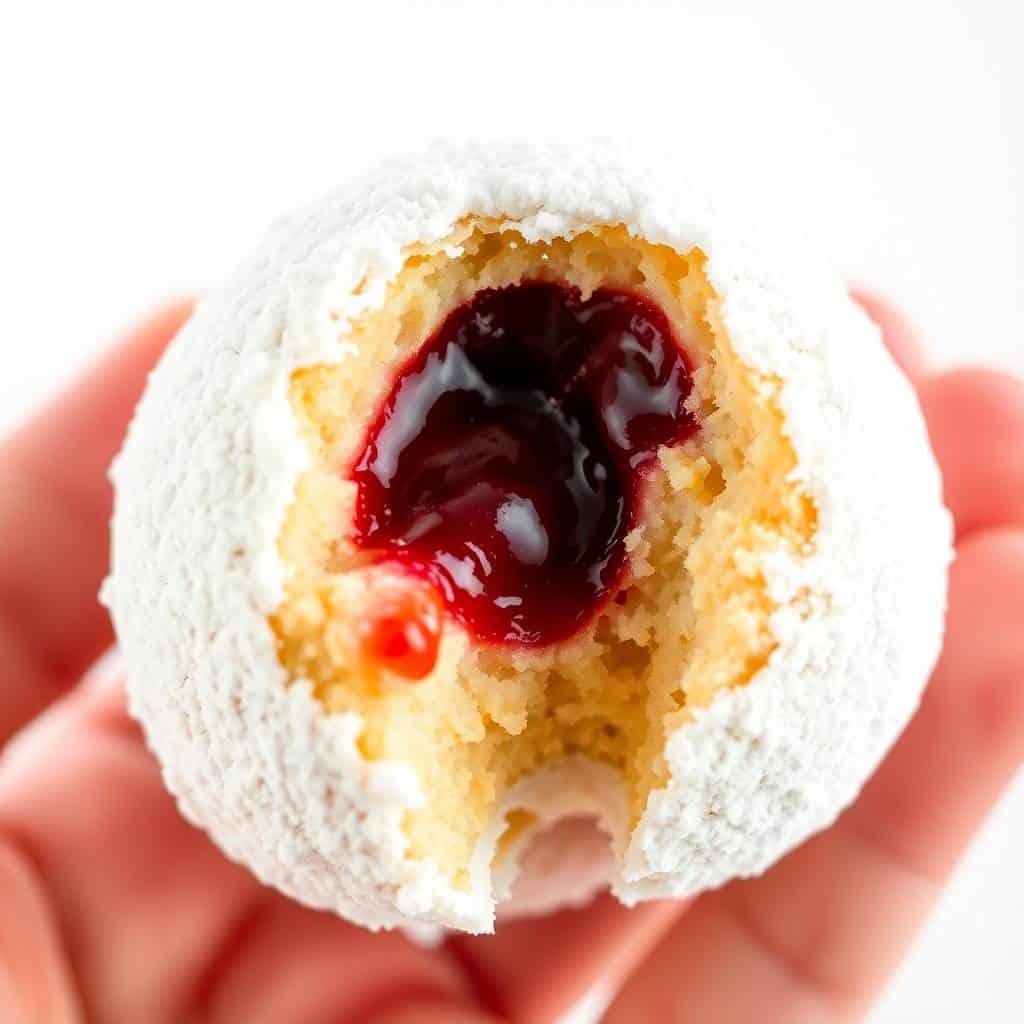
- Add the cherry filling: Spoon about 1 tablespoon of cherry filling into the centre of each round. Try to grab mostly the cherry pieces rather than a lot of the syrup — the syrup is what leaks and causes bursting. This is the lesson I learned the hard way.
- Seal tightly: Fold the dough up around the filling and pinch the edges firmly together. Shape each one into a ball and place seam-side down on the baking sheet. Press the seam against the pan slightly to help it stay closed.
- Brush and sprinkle: Brush the tops with melted butter, then mix the granulated sugar and cinnamon together and sprinkle over each bomb. The cinnamon sugar gives them that bakery-style finish and smells incredible while baking.
- Bake until golden: Bake for 10–12 minutes, until puffed and golden brown. They'll look done before they are sometimes — go by colour. Let them cool on the pan for at least 5 minutes before touching them; the filling inside stays very hot.
- Add toppings: Once slightly cooled, dust with powdered sugar or drizzle with a simple glaze made from powdered sugar and a splash of milk. Either way works — the cinnamon sugar on top already makes them taste finished even without extra topping.
Tips for Success
- Don't overfill: I know it's tempting to add more cherry filling — the can is right there and it looks like there's so much. But more than a tablespoon per bomb and you will have leaks. The dough can only stretch so far before it splits in the oven, and then you have cherry syrup burning on the pan. A heaped tablespoon is the upper limit.
- Cold filling is easier to work with: If your pie filling has been sitting at room temperature, it's runnier and harder to scoop without the syrup going everywhere. I keep the can in the fridge until I need it. Cold filling holds its shape better on the dough and makes sealing much easier.
- Pinch and press the seam against the pan: Just pinching the edges isn't always enough — I also press the sealed side down onto the baking sheet so the weight of the bomb helps keep it closed. This small step made a big difference in how many of mine actually stayed sealed.
- For the air fryer: Don't crowd the basket. I do four at a time maximum in a standard 5-quart air fryer, at 350°F for 8–10 minutes. They need space to puff up. Also, line the basket with a small piece of parchment if yours allows it — the sugar drips can be sticky.
- Wait before glazing: If you put a powdered sugar glaze on them straight from the oven, it just melts and disappears into the dough. Give them five minutes to cool first. The glaze will actually sit on top and look nice instead of turning invisible.
Variations
- Switch the filling: Apple pie filling works beautifully here, especially in autumn — I sometimes add a tiny pinch of extra cinnamon inside with the apple filling. Blueberry is also great and gives you this gorgeous purple peek when you bite in. Peach filling is my summer version. All of them use the same method and timing.
- Add cream cheese: Put half a teaspoon of softened cream cheese in the centre before adding the cherry filling. This gives you a cherry cheesecake flavour that is honestly hard to beat. It's richer, a little tangy, and it makes the inside creamier instead of just jammy. Let the cream cheese sit out for 15 minutes first so it's soft enough to work with easily.
- Cinnamon sugar coating: Instead of brushing with butter and sprinkling cinnamon sugar on top, you can roll the sealed bombs in melted butter and then in a bowl of cinnamon sugar before placing on the pan. This gives you full coverage — every part of the outside gets that spiced coating. My husband prefers this version.
- Chocolate drizzle: Melt a handful of semi-sweet chocolate chips in the microwave in 30-second bursts, stir smooth, and drizzle over cooled bombs. If you want something a little more put-together for a dessert tray — similar in feel to my Apple Crumble Cheesecake in terms of that layered dessert presentation — the chocolate drizzle really elevates these visually with almost no extra effort.
- Mini party version: Cut each biscuit round into two pieces and use half the filling per bomb. You'll get 16 smaller bites instead of 8 full-sized ones. These are better for party platters where people are grazing — easier to pick up in one bite and less mess.
Serving and Storage
Serving
Serve these warm — that's when the filling is gooey and the outside is still slightly crisp. A dusting of powdered sugar is all they really need, but a simple glaze (powdered sugar plus a splash of milk) makes them look more finished if you're putting them on a tray for guests. They also go well alongside a scoop of vanilla ice cream for dessert, or with coffee or tea for a mid-morning treat. In my house, they usually don't make it to a plate at all.
Storage
Store leftovers in an airtight container at room temperature for up to 2 days. If you want to keep them longer, refrigerate for up to 4 days — though the dough softens a bit in the fridge. Reheat in the oven at 325°F for about 5 minutes, or in the air fryer for 3–4 minutes, to bring back some of that crispness. I don't recommend microwaving them; the dough gets chewy and the filling gets scalding hot unevenly. You can also freeze baked bombs for up to 1 month — thaw at room temperature and reheat in the oven or air fryer before serving.

Frequently Asked Questions
Can I make these ahead of time?
Yes — assemble them, place on a parchment-lined tray, cover with plastic wrap, and refrigerate for up to 6 hours before baking. I've done this the night before a brunch and baked them fresh in the morning. They go straight from the fridge into the preheated oven; no need to bring them to room temperature first.
Can I freeze cherry pie bombs?
Yes. Bake them first, let them cool completely, then freeze in a single layer before transferring to a zip-lock bag. They keep well for up to a month. To reheat, thaw at room temperature for 20–30 minutes and warm in the oven at 325°F or in the air fryer for a few minutes until heated through.
Do I have to use egg wash?
Not for this version — since we're brushing with melted butter instead, the egg wash isn't necessary. Butter gives you a good golden colour and adds flavour. If you want a shinier finish, you can brush with a beaten egg before the butter-and-cinnamon-sugar step, but it's not required and the result without it is still great.
What can I use instead of canned pie filling?
If you have fresh cherries and about 10 extra minutes, you can cook them down with a tablespoon of sugar and a teaspoon of cornstarch until thickened. Let that cool before using it as filling. It'll be less sweet and more tart than the canned version. Frozen cherries (thawed and drained well) also work using the same method.
Why did my pie bombs burst open in the oven?
Almost always it's one of two things: too much filling, or the seam wasn't pinched firmly enough. Stick to about 1 tablespoon of filling per bomb and try to use more cherry pieces than syrup. When sealing, really press the edges together and then press the seam side down onto the pan — the weight helps keep it shut during baking.
These cherry pie bombs have become one of those recipes I keep coming back to because the effort-to-payoff ratio is genuinely hard to beat. Twenty minutes, one pan, ingredients that live in a pantry or fridge without taking up much space — and you get something warm and genuinely good at the end. I've made them on regular weeknights, brought them to a neighbour's house, and served them at a small family gathering where I didn't have time to make anything elaborate.
If you want to try something in a similar spirit — quick desserts that feel more put-together than the effort suggests — my Cranberry Cream Cheese Muffins are another one that always gets more compliments than they probably deserve. And if you're planning a full dessert spread and want something that takes a bit more time but really impresses, my Tiramisu Recipe is the one I make when I have a day to plan ahead.
I make a double batch almost every time now. Eight bombs for a family of four sounds like enough but it genuinely isn't. The second batch takes no extra prep time since everything is already out — just seal, brush, sprinkle, and bake. Keep a can of biscuit dough and a can of cherry pie filling in your kitchen and you'll always have a backup plan for dessert. 🍒✨
CHERRY PIE BOMBS
Ingredients
- 1 can 16 oz refrigerated biscuit or crescent dough
- 1 cup cherry pie filling
- 2 tablespoons melted butter
- ¼ cup granulated sugar
- 1 teaspoon ground cinnamon
- Optional: Powdered sugar for dusting
Instructions
Preheat Oven:
- Preheat oven to 375°F (190°C). Line a baking sheet with parchment paper.
Prepare the Dough:
- Separate the dough into individual biscuits or triangles. Flatten each piece slightly with your hands.
Add Filling:
- Spoon about 1 tablespoon of cherry pie filling into the center of each dough piece.
Seal and Shape:
- Fold dough around the filling and pinch to seal completely, forming a ball. Place seam-side down on the baking sheet.
Brush and Sprinkle:
- Brush each ball with melted butter. Mix sugar and cinnamon, then sprinkle over the tops.
Bake:
- Bake for 10–12 minutes or until golden brown. Let cool slightly.
Optional Topping:
- Dust with powdered sugar before serving if desired.
Notes
- Air Fryer Option: Air fry at 350°F (175°C) for 8–10 minutes until golden and crisp.
- Filling Variation: Try blueberry, apple, or Nutella for a twist.
- Serving Suggestion: Serve warm with vanilla ice cream or a drizzle of icing.
- Make Ahead: Assemble ahead and refrigerate for up to 6 hours before baking.
- Storage: Store leftovers in an airtight container at room temperature for up to 2 days.
If you made these and have a variation worth sharing, drop it in the comments — I genuinely read them. And if you're looking for more to bake this week, here are a few I think you'd like:
- Strawberry Cheesecake Eggroll Bites — same handheld dessert energy, different flavour
- Cranberry Cream Cheese Muffins — a good bake for when you have a little more time
- Apple Crumble Cheesecake — for when you want something that looks like you really tried
- Tiramisu Recipe — my no-bake Italian dessert that I make for every dinner party
- Purple Velvet Cake Recipe — when you want something showstopping for a celebration





Comments
No Comments