
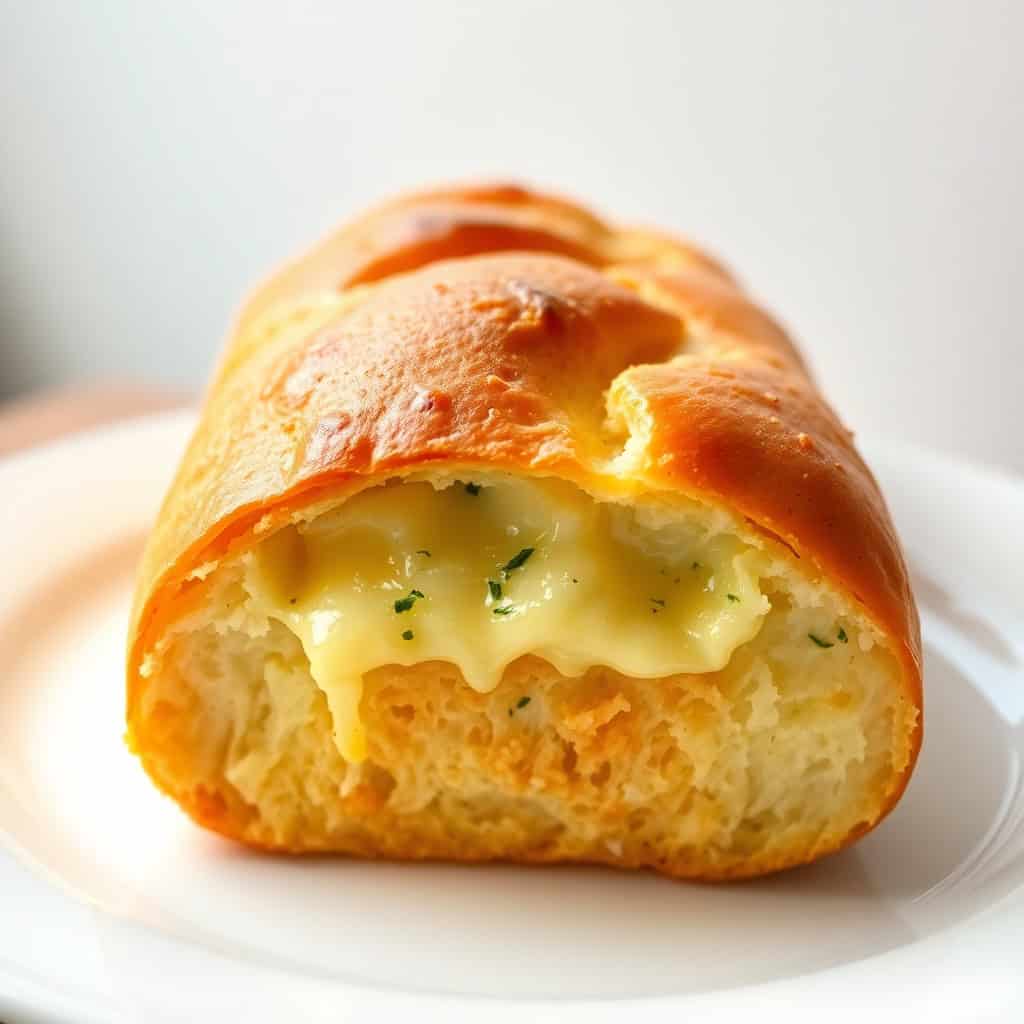
I made this cheesy garlic herb bread on a Tuesday night when I had nothing planned for dinner and a loaf of French bread sitting on the counter threatening to go stale. Fifteen minutes later, my kids were fighting over the last piece. That's basically the whole story.
What makes this version work is the garlic herb butter. I know that sounds basic, but I spent a long time just using plain butter and wondering why my cheesy bread tasted flat. The combination of garlic, parsley, oregano, and basil in the butter is what gives it that depth before the cheese even enters the picture. The cheese is generous — I use both mozzarella and cheddar because mozzarella gives you that stretch and cheddar gives you the flavor. Neither one alone does the full job.
My husband usually pairs this with something saucy — he loves it alongside my Cheesy Ranch Chicken because the bread soaks up the pan juices beautifully. Saad and Zainab eat it as a snack on its own, and honestly so do I when no one is looking. I keep a double batch of the garlic herb butter in the fridge now because once you've had this, you want it on standby.
One thing to know before you start: your butter needs to be properly softened, not just slightly less cold. I've tried to rush this and ended up with clumpy butter that didn't spread evenly — you'll get dry patches and then cheese that slides off in weird ways. Pull it out of the fridge at least 20 minutes before you start. That small thing makes the whole recipe easier.

Why You'll Love This Recipe
- It comes together in 15 minutes: I preheat the oven while I'm making the butter, and by the time the butter is mixed and spread, the oven is ready. The actual bake time is 10 to 15 minutes. On nights when I've run out of ideas and everyone is hungry, this is the recipe that saves dinner. It requires almost no cleanup either — one bowl for the butter, one baking sheet.
- The cheese-to-bread ratio is actually generous: A lot of cheesy bread recipes call for a thin sprinkle of cheese that barely covers the surface. This one uses a full cup and a half of shredded cheese — mozzarella and cheddar together — so you get proper coverage on every bite. If you add the optional Parmesan on top, it browns slightly and adds a nutty crust that I find myself picking off first.
- You probably already have everything you need: French or Italian bread from any grocery store, butter, garlic, dried herbs, and shredded cheese — that's the whole shopping list. I've made this with a loaf from Walmart and a bag of pre-shredded mozzarella from Aldi, and it came out just as good as when I used fresh-shredded. No specialty ingredients, no South Asian grocery run required.
- It's genuinely flexible: I've made this with sourdough, with a baguette, and once with thick-sliced sandwich bread when I was out of everything else. The flavor of the butter carries it regardless of the bread. The cheese options are wide open too — provolone, Monterey Jack, even pepper jack if you want heat. I'm not precious about it.
- Kids will actually eat it: This is not a small thing. Zainab goes through phases where she refuses everything I put in front of her, but cheesy garlic bread has never once been rejected. It's one of those reliable recipes I keep in my back pocket for nights when I can already sense dinner is going to be a battle.
Ingredients
- 1 loaf (about 1 pound) French bread or Italian bread
- ½ cup (1 stick) unsalted butter, softened — leave it out for 20 minutes, not just 5
- 2 cloves garlic, minced (or ½ teaspoon garlic powder if you're out of fresh)
- 1 tablespoon fresh parsley, chopped (or 1 teaspoon dried parsley)
- 1 teaspoon dried oregano
- ½ teaspoon dried basil
- ½ teaspoon salt
- ¼ teaspoon black pepper
- ½ cup shredded mozzarella cheese
- ½ cup shredded cheddar cheese (any good-melting cheese works here)
- ¼ cup grated Parmesan cheese (optional, but it adds a nice golden crust on top)
Directions
- Preheat the oven: Set your oven to 375°F (190°C). Do this first so it's fully hot by the time the bread is prepped — a cold oven will give you melted but not bubbly cheese, which isn't what we're going for.
- Slice the bread: Cut the loaf lengthwise but stop just before you cut all the way through. You want a hinge so the two halves open like a book but stay connected at the bottom. This keeps everything tidy in the oven and makes it easier to serve.
- Make the garlic herb butter: In a small bowl, combine the softened butter, minced garlic, parsley, oregano, basil, salt, and pepper. Mix until everything is evenly distributed. Taste it — it should smell strongly herby and garlicky. If it doesn't, add a pinch more of each herb.
- Spread the butter: Open the bread and spread the garlic herb butter generously over both cut surfaces. Don't be shy about getting into the edges and corners. The places that don't get enough butter are the places that taste bland.
- Add the cheese: Sprinkle the mozzarella and cheddar evenly over the buttered surfaces. Add the Parmesan on top if you're using it. Press the cheese down lightly so it doesn't all fall off when you transfer the bread to the baking sheet.
- Bake: Place the bread open-faced on a parchment-lined baking sheet. Bake for 10 to 15 minutes, until the cheese is fully melted, bubbling, and just starting to turn golden at the edges. If the cheese isn't browning much at the 15-minute mark, switch the oven to broil for 1 to 2 minutes — but stay right there, it goes from golden to burnt fast.
- Rest and serve: Let the bread sit for 2 to 3 minutes before cutting. This gives the cheese a moment to set up slightly so it doesn't all slide off the moment you touch it. Slice into portions and serve warm.
Tips for Success
- Soften the butter properly: I said this in the intro but it's worth repeating because I've ruined a batch by trying to rush it. Cold butter won't blend with the garlic and herbs — you end up with streaks of plain butter and clumps of herbs rather than a uniform spread. Room temperature means your finger leaves an impression in it easily. If you're in a hurry, cut the stick into small pieces and let them sit for 10 minutes — that speeds it up without melting it.
- Shred your own cheese if you can: Pre-shredded cheese works and I use it regularly, but it has a coating that makes it melt slightly less smoothly. Freshly shredded mozzarella or cheddar gives you that stretchy, fully melted result without any grainy texture. It takes maybe two extra minutes with a box grater. Not always worth the effort on a Tuesday night, but noticeable when you do it.
- Don't overbake: The first time I made this I left it in for 20 minutes because I got distracted. The cheese went rubbery and the bread edges got hard and dry. The sweet spot is the moment the cheese is fully melted and just starting to bubble with a little color at the edges — usually 12 to 13 minutes in my oven. Ovens vary, so start checking at 10 minutes.
- Use sturdy bread: A soft sandwich loaf will turn soggy under all that butter and cheese. You want a bread with some structure — French bread, Italian bread, sourdough, or a baguette. The crust should be firm enough that the bottom stays crisp even after baking. If your bread feels very soft when you press it, that's a sign it won't hold up well.
- Let it rest before cutting: Two to three minutes is all it takes. I know it's hard to wait when the bread comes out of the oven smelling like that, but cutting it immediately means the cheese slides off the top in one molten sheet. A short rest lets everything settle and you get cleaner slices.
Variations
- Spicy cheesy bread: Add ½ teaspoon of red pepper flakes to the garlic herb butter, or mix in a dash of hot sauce before spreading. My husband does this every single time without fail — he keeps the chili flakes next to the butter on purpose. It doesn't make it aggressively spicy, just adds a warm heat that cuts through the richness of all that cheese and butter.
- Pesto version: Spread a thin layer of basil pesto on the bread first, then add the garlic butter on top, then the cheese. This is the version I make when I want to feel a little more put-together. The pesto adds a herby, slightly bitter note that balances the richness beautifully. A jar of store-bought pesto from Trader Joe's or Walmart works perfectly here.
- Garlic Parmesan-only version: Skip the mozzarella and cheddar entirely and use just ¾ cup of grated Parmesan. It bakes up drier and crispier rather than melty and gooey — more like a garlic Parmesan crostini. I serve this version alongside the Garlic Parmesan Roasted Shrimp when I want the whole meal to feel cohesive.
- Pizza-style loaded bread: After spreading the butter and cheese, add whatever pizza toppings you have — pepperoni, sliced olives, chopped bell peppers, cooked crumbled sausage. This is what I make when my kids want pizza but I don't have time for actual pizza dough. It covers the craving completely and takes a fraction of the time.
- Pakistani-style version: Add ½ teaspoon of chaat masala and a small handful of finely chopped coriander leaves to the garlic herb butter. It sounds like an odd combination but it works — the chaat masala adds a tangy, slightly salty punch that makes the whole thing more interesting. This is not traditional anything, just my brain wanting to add South Asian flavor to everything I make. My husband loves this version the most.
Serving and Storage
Serving
Serve this warm, straight from the oven after that short 2 to 3 minute rest. It works as a side dish alongside almost any protein — pasta, grilled chicken, soups and stews. I serve it with a simple green salad when I want something light, or next to a bowl of tomato soup when I want something comforting. Cut it into thick slices for a side dish or smaller pieces if you're serving it as an appetizer for people to grab.
Storage
Leftover cheesy bread keeps in an airtight container in the fridge for up to 3 days. To reheat, wrap it loosely in foil and bake at 350°F (175°C) for about 10 minutes — this brings back most of the original texture. The microwave works in a pinch but the bread goes soft and the cheese gets a bit rubbery. I won't tell you not to use it, but the oven or even a dry skillet on medium heat gives you much better results. I don't recommend freezing the assembled bread — the texture of the cheese gets grainy after thawing. If you want to freeze something, freeze just the garlic herb butter in a small container and assemble fresh when you need it.
Frequently Asked Questions
Can I make this ahead of time?
Yes — you can assemble the bread with the butter and cheese, wrap it in foil, and keep it in the fridge for up to a few hours before baking. Just bake it straight from the fridge, adding an extra 3 to 5 minutes to the baking time since the bread will be cold going in. I do this when I'm prepping for a dinner and don't want to be assembling things at the last minute.
Can I use pre-shredded cheese?
You can, and I do it often. Pre-shredded cheese has a light coating that prevents clumping in the bag, which also means it melts slightly less smoothly than freshly shredded. For a weeknight snack, pre-shredded is fine. If you want the cleanest melt and stretchiest texture, shred your own off a block — it takes two minutes with a box grater.
Can I freeze cheesy bread?
I'd skip freezing the fully assembled bread — the cheese texture changes when it thaws and you lose that gooey quality. What I do instead is freeze the garlic herb butter mixture in a small container or wrapped in cling film like a log. When I want cheesy bread, I thaw the butter, slice fresh bread, and assemble from there. Takes five minutes and the result is the same as making it from scratch.
What can I use instead of fresh garlic?
Garlic powder works as a substitute — use about ½ teaspoon in place of 2 fresh cloves. The flavor is less sharp and more mellow, but it still comes through clearly in the butter. I've used garlic powder on plenty of occasions when I ran out of fresh and the bread was still very much worth eating. Honestly, I forgot the fresh garlic once and just used garlic powder and no one at the table noticed.
How do I keep the bread from getting soggy on the bottom?
Use sturdy bread — French or Italian loaves, sourdough, or a baguette. Soft sandwich bread absorbs the butter too quickly and goes limp. Also, bake the bread open-faced on the baking sheet rather than wrapping it in foil, which traps steam and softens the crust. The open bake is what keeps the bottom crisp while the top melts.
CHEESY BREAD
Ingredients
- 1 loaf (1 pound) French bread or Italian bread
- ½ cup (1 stick) unsalted butter, softened
- 2 cloves garlic, minced
- 1 teaspoon dried Italian herbs (or a mix of oregano, basil, and thyme)
- ½ cup shredded mozzarella cheese
- ½ cup shredded cheddar cheese (or any cheese that melts well)
- Optional: ¼ cup grated Parmesan cheese
Instructions
- Preheat oven: Preheat oven to 375°F (190°C).
- Prepare bread: Slice the bread lengthwise, but don't cut all the way through. You want to create a "hinge" so the bread can open like a book.
- Make garlic butter: In a small bowl, combine the softened butter, minced garlic, and Italian herbs.
- Spread garlic butter: Spread the garlic butter evenly inside the bread, between the slices.
- Add cheese: Sprinkle the shredded mozzarella and cheddar cheese (and Parmesan, if using) evenly over the garlic butter.
- Bake: Place the cheesy bread on a baking sheet lined with parchment paper. Bake for 15-20 minutes, or until the cheese is melted and bubbly and the bread is lightly golden brown.
- Serve: Let cool slightly before slicing and serving.
Notes
- Bread: You can use other types of bread, such as sourdough or even a baguette.
- Cheese: Feel free to use your favorite cheeses. Provolone, Monterey Jack, or pepper jack would also be delicious.
- Garlic: Fresh garlic is best, but you can substitute with garlic powder if needed.
- Herbs: You can use fresh herbs instead of dried herbs.
- Variations: You can add other toppings to the cheesy bread, such as chopped onions, bell peppers, olives, or pepperoni.
This is one of those recipes that I keep coming back to not because it's impressive but because it's reliably, consistently good. The garlic herb butter does most of the heavy lifting — once you've made it a few times you'll find yourself doubling the batch just to keep it in the fridge for the week. Spread on toast in the morning, stirred into pasta at night, used here on cheesy bread — it earns its place.
I make this most often on nights when dinner is something saucy or saucy-adjacent that needs something to mop it up with. It pairs especially well with my Cheesy Ranch Chicken — the two together feel like a proper meal without a lot of extra effort. If you're serving it to guests, do the pizza-style loaded version with pepperoni and bell peppers — it looks more put-together than the effort it takes.
If you're in a baking mood after this and want something sweet to follow, my Triple Layer Chocolate Candy Bars or the Red Velvet Bear Cookies make a fun dessert that the kids will love. Dinner, cheesy bread, and chocolate — that's a Tuesday well spent in my house. 🧀🍞✨
If you liked this recipe, you'll probably enjoy these too:
- Cheesy Ranch Chicken — great main dish to serve alongside this bread
- Garlic Parmesan Roasted Shrimp — same garlic-butter energy, ready in 20 minutes
-
{"@context":"https://schema.org","@type":"Article","headline":"CHEESY BREAD","description":"This easy Cheesy Bread recipe delivers warm, gooey, and flavorful goodness in every bite. Perfect as an appetizer, side dish, or snack!","datePublished":"2025-02-04T12:06:12+00:00","dateModified":"2025-03-20T22:05:16+00:00","author":{"@type":"Person","name":"Sana Umer","url":"https://forfoodiefriends.com/about/","description":"Self-taught home cook with 10+ years of kitchen experience. Mom of two who develops every recipe in her own kitchen.","jobTitle":"Recipe Developer & Food Blogger","image":"https://forfoodiefriends.com/wp-content/uploads/sana-umer-author-photo.jpg"},"publisher":{"@type":"Organization","name":"For Foodie Friends","url":"https://forfoodiefriends.com/","logo":{"@type":"ImageObject","url":"https://forfoodiefriends.com/wp-content/uploads/forfoodiefriends-logo.png"}},"mainEntityOfPage":{"@type":"WebPage","@id":"https://forfoodiefriends.com/cheesy-bread/"},"image":"https://forfoodiefriends.com/wp-content/uploads/2025/02/CHEESY-BREAD-3.jpg"}






Comments
No Comments