
I first made caramelitas on a rainy Friday afternoon when I had a bag of caramel candies sitting in my pantry and absolutely no plan. I'd seen the recipe floating around for years and kept putting it off because it sounded too simple to be that good. Then I made a batch, cut one bar while it was still warm, watched it fall apart in my hands, ate it anyway standing over the kitchen counter, and immediately understood why people make these on repeat.
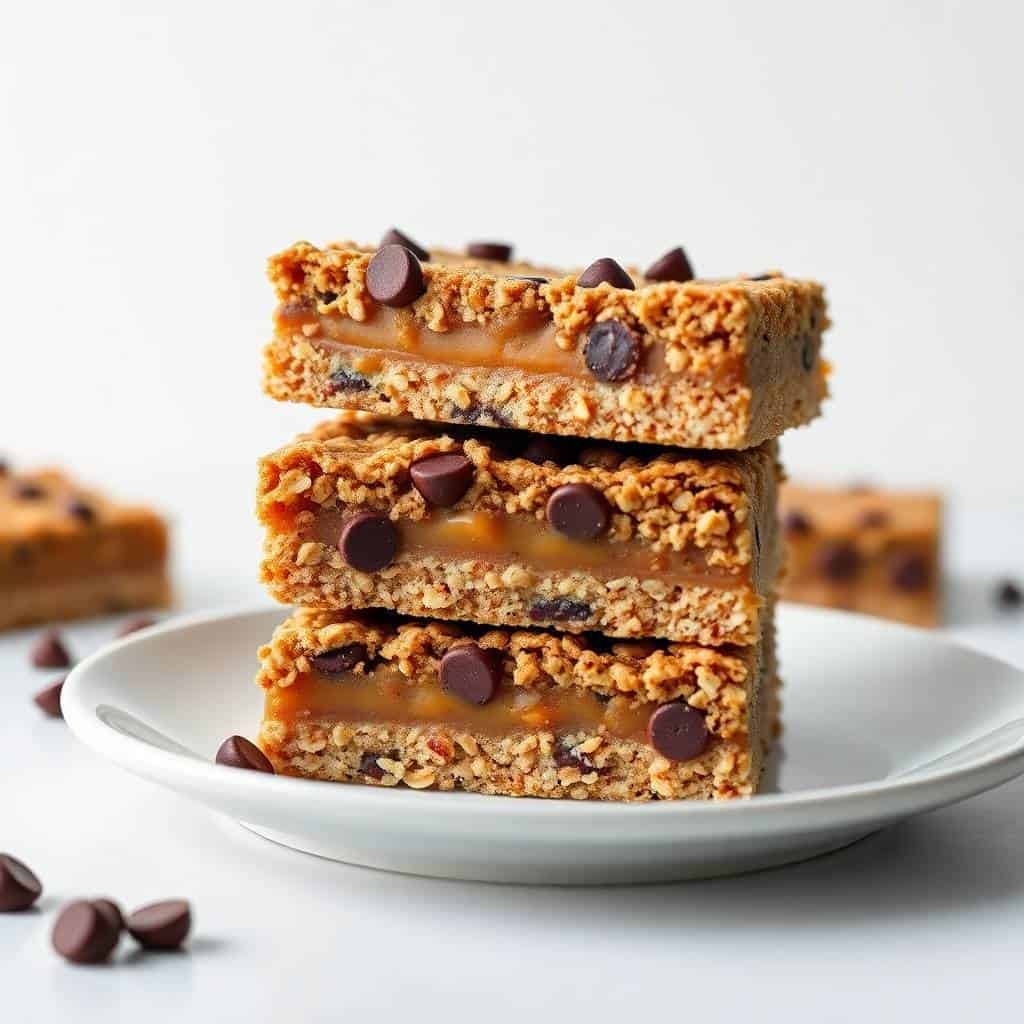
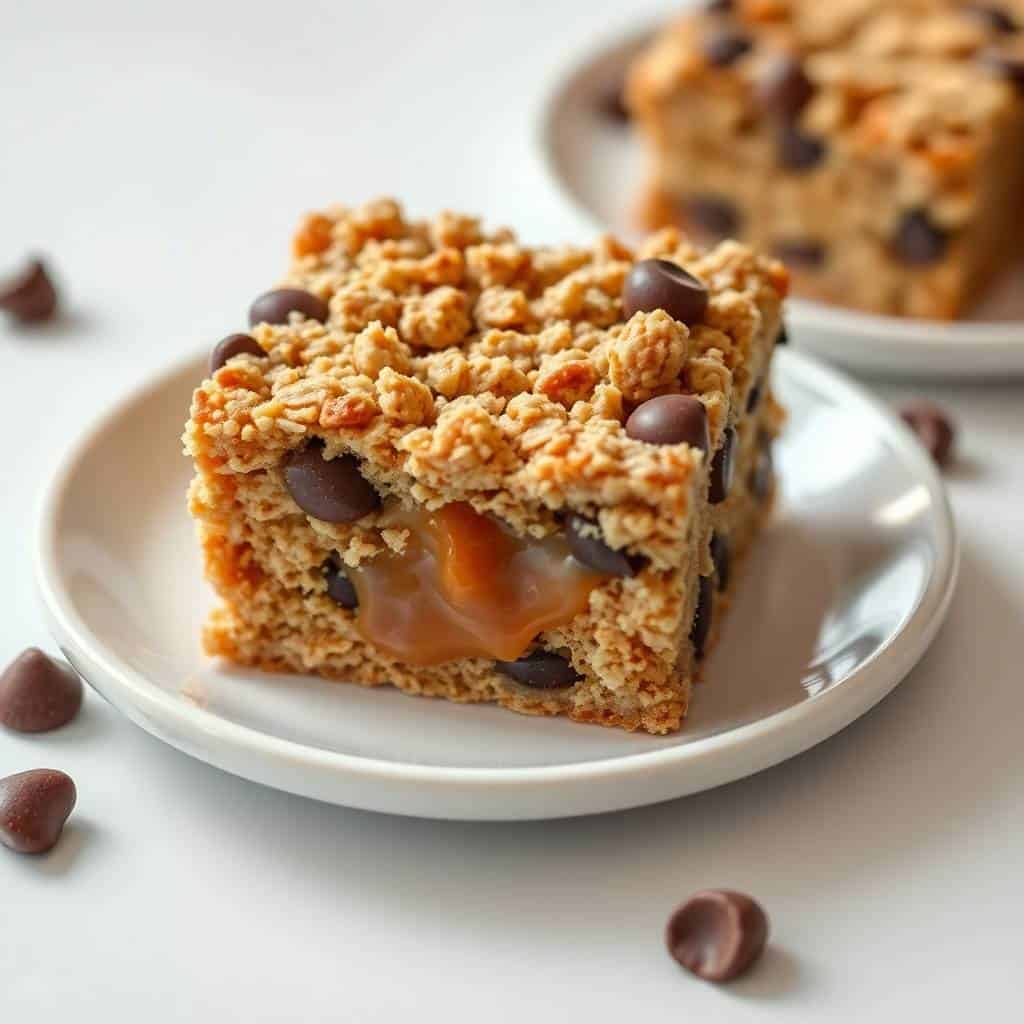
What makes these bars work is the layering. You get a buttery oat base, a sticky caramel middle, a layer of melted chocolate, and then more crumbled oat topping. Every bite has something going on — crunch from the oats, chew from the caramel, richness from the chocolate. I've made plenty of bar desserts over the years and these are the ones I keep coming back to because the ratio of effort to result is genuinely unmatched. One pan, one bowl, done.
My husband is the one who really pushed me to post this. He ate half the pan the first time I made them and then asked when I was making them again. Zainab likes them cold straight from the fridge the next morning, which I'll admit is also a solid way to eat them. I usually make a full 9x13 batch because they disappear before I can portion them out. If you're a fan of the Best Mackinac Island Fudge, this is the bar version of that same caramel-and-chocolate obsession.
One thing to know before you start: the hardest part is waiting for them to cool. Warm caramelitas are delicious but they will not slice cleanly, and you'll end up with a mess of gooey layers that, while still delicious, won't look like much. Give them at least an hour at room temperature, or cheat and put them in the fridge for 30 minutes. Patience is the only real skill this recipe requires.
Why You'll Love This Recipe
- One bowl, one pan: I mixed the oat dough in one bowl, melted the caramel in one small saucepan, and baked everything in a single 9x13 pan. Cleanup takes about five minutes. On weeknights when I'm already tired from dinner, that matters more than people admit.
- The texture is genuinely interesting: Most bar desserts are either soft or crunchy — these are both. The oat layers give you crunch and a little chew, the caramel is sticky and rich, and the chocolate chips melt into creamy pockets in the middle. It's the kind of thing where you finish one bar and immediately reach for another.
- It's made from pantry staples: Oats, flour, brown sugar, butter, caramel candies, chocolate chips. That's essentially it. I always have these on hand, which means I can make this without a special grocery run. Caramel bits from Walmart or Trader Joe's work perfectly — no need to hunt for anything fancy.
- They actually get better the next day: The first day they're great. The second day the caramel has fully set, the oat crust has absorbed just enough moisture from the filling, and every layer has settled into place. I've made these the night before a gathering more than once and they always hold up beautifully.
- They travel well: These bars don't crumble the way cookies do and they don't need to be refrigerated to stay fresh. Stack them in a container, bring them to a potluck or school bake sale, done. They've survived a 40-minute car ride in my bag multiple times without complaint.
Ingredients
- 1 cup unsalted butter, melted
- 1 cup packed brown sugar
- 1 teaspoon vanilla extract
- 2 cups all-purpose flour
- 1 cup old-fashioned rolled oats
- 1 teaspoon baking powder
- ½ teaspoon salt
- 1 cup caramel bits or soft caramel candies, chopped (like Kraft caramels — about 25–30 pieces)
- 1½ cups semi-sweet chocolate chips
- 1 cup chopped pecans or walnuts (optional, but my husband always votes yes)
Directions
- Prep your pan: Preheat the oven to 350°F (175°C). Line a 9x13-inch baking pan with parchment paper and leave some overhang on the sides — this is how you'll lift the bars out later without them breaking. Grease the parchment lightly if you want extra insurance.
- Make the oat dough: In a large bowl, combine the melted butter, brown sugar, and vanilla and stir until smooth. Add the flour, oats, baking powder, and salt and mix until everything comes together into a crumbly dough. It should hold when you press it between your fingers — if it feels too dry, add a teaspoon of water.
- Press the base layer: Press roughly two-thirds of the oat dough firmly into the bottom of your prepared pan in an even layer. Use your palm or the flat bottom of a measuring cup to press it down — this is what holds the bars together, so don't be gentle.
- Add the fillings: Scatter the caramel bits evenly over the pressed crust. Then sprinkle the chocolate chips over the caramel, followed by the nuts if you're using them. Try to get even coverage so every bar gets a bit of everything.
- Add the top layer: Crumble the remaining oat dough over the chocolate and caramel in small pieces. Don't try to press it into a solid layer — the crumbled texture is intentional and gives the top its signature look and crunch.
- Bake: Bake for 30–35 minutes until the top is golden brown and you can see the caramel bubbling up around the edges. The center might still look slightly underdone — that's fine. It firms up as it cools.
- Cool completely before cutting: This is the step I always want to skip and have learned not to. Let the pan cool at room temperature for at least an hour, then use the parchment overhang to lift it out onto a cutting board. Slice into bars with a sharp knife, wiping the blade between cuts for clean edges.
Tips for Success
- Use old-fashioned rolled oats, not instant: I made this with instant oats once when I ran out of rolled, and the texture was noticeably softer and almost mushy. Old-fashioned oats keep their shape during baking and give the bars that slight chew and structure. It's not a subtle difference — it matters.
- Press the base layer firmly: The first time I made these I pressed the base down too lightly and the bars crumbled when I tried to cut them. Use real pressure — the back of a flat measuring cup or just your palm. A packed base holds everything together once the caramel sets.
- Don't skip the parchment paper: I've tried greasing the pan directly and even with a well-greased pan the caramel sticks in the corners. Parchment with overhang lets you lift the whole slab out cleanly. A $3 roll from any grocery store is worth it.
- Caramel bits are easier than unwrapped candies: If you can find caramel bits (Kraft makes them and they're usually near the chocolate chips at Walmart or Target), use those. Unwrapping 30 individual caramel squares takes forever and your hands get sticky. Bits melt faster too.
- Cool before cutting — really: Warm caramelitas look like they're set but they're not. The caramel needs to firm up and the chocolate needs to resolidify. If you cut too early the bars will be gooey and fall apart. Thirty minutes in the fridge speeds this up if you're impatient, which I understand completely.
Variations
- Salted caramel version: After you spread the caramel layer, sprinkle a little flaky sea salt over it before adding the chocolate chips. It sounds simple but it completely transforms the flavor — the salt cuts through the sweetness and makes the caramel taste more complex. This is now my default version.
- White chocolate and cranberry: Swap the semi-sweet chips for white chocolate chips and add ⅓ cup of dried cranberries to the filling. It sounds like a holiday flavor but it works year-round. The tartness of the cranberries balances the sweetness of the caramel really well — and if you've tried my Red Velvet Bear Cookies, you know I love a fruit-and-chocolate pairing.
- With nuts: The recipe already lists pecans and walnuts as optional. I'll say that toasted pecans specifically are worth the extra step — toast them for 5 minutes in a dry skillet before adding and they develop a nuttier, richer flavor that holds up against the caramel and chocolate instead of getting lost.
- Add cinnamon to the oat dough: Stir ½ teaspoon of cinnamon into the oat dough. It doesn't make these taste obviously spiced — it just adds a background warmth that pairs nicely with the caramel. In the fall I add a little extra and sometimes a pinch of nutmeg.
- Dairy-free version: Use vegan butter (Earth Balance works well) in the oat dough, dairy-free caramel bits, and dairy-free chocolate chips. The texture is very similar and nobody I've served them to has noticed a difference. A good option if you're baking for someone who avoids dairy.
Serving and Storage
Serving
I serve these at room temperature, cut into 24 bars from a 9x13 pan — though you can cut them smaller if they're going to a party where people want just a taste. They're good with coffee, which cuts through the sweetness nicely. My husband and I eat them as an after-dinner dessert. Zainab prefers them straight from the fridge the next morning, which honestly gives them a satisfying fudge-like density I'm not mad about. If you're serving them at a gathering, place them on a platter in a single layer so the caramel doesn't stick the bars together.
Storage
Store bars in an airtight container at room temperature for up to 4 days. Separate layers with parchment paper if you're stacking them — the caramel can get sticky. For longer storage, refrigerate for up to 1 week (they actually get a bit firmer in the fridge, which I like). To freeze, wrap individual bars tightly in plastic wrap and freeze for up to 2 months. Thaw overnight in the fridge or for about an hour at room temperature before eating.
Frequently Asked Questions
Can I use caramel sauce instead of caramel bits or candies?
I'd stick with solid caramel bits or chopped soft caramel candies if you can. Caramel sauce tends to be too thin and can make the filling run and soak into the oat layers instead of staying in a distinct middle stripe. If caramel sauce is all you have, use a thick jarred variety — dulce de leche works better than the pourable kind — and reduce the quantity slightly.
Can I freeze caramelitas?
Yes, and they freeze really well. Wrap individual bars in plastic wrap, then place them in a freezer bag or airtight container. They keep for up to 2 months. Thaw overnight in the fridge or at room temperature for an hour. The texture holds up surprisingly well — the oat layers stay intact and the caramel doesn't get weird.
Can I use quick oats instead of old-fashioned rolled oats?
You can, but the bars will come out softer and the oat layer won't have the same chew and structure. I tested this once — quick oats almost dissolved into the dough and you couldn't really taste the distinct oat texture that makes caramelitas interesting. Old-fashioned oats are easy to find and worth it here.
Can I make these gluten-free?
Yes — swap the all-purpose flour for a 1:1 gluten-free baking flour (Bob's Red Mill or King Arthur both work) and use certified gluten-free oats. I haven't tested this version extensively, but the swap is straightforward and the overall structure of the recipe should hold up. Regular oats are sometimes processed in facilities that also handle wheat, so the certified label matters if you're baking for someone with celiac disease.
How do I get clean cuts without the bars falling apart?
Cool them completely first — that's 90% of the battle. Once they're fully cooled, use a sharp chef's knife and wipe the blade with a damp cloth between each cut. If the bars are still a little sticky, refrigerate them for 20 minutes before slicing. A bench scraper also works well if you have one, though a regular kitchen knife does the job fine.
CARAMELITAS
Ingredients
- 1 cup unsalted butter melted
- 1 cup packed brown sugar
- 1 teaspoon vanilla extract
- 2 cups all-purpose flour
- 1 cup old-fashioned rolled oats
- 1 teaspoon baking powder
- ½ teaspoon salt
- 1 cup caramel bits or soft caramel candies chopped
- 1 ½ cups semi-sweet chocolate chips
- 1 cup chopped pecans or walnuts optional
Instructions
Prepare the Base:
- Preheat oven to 350°F (175°C). Grease or line a 9x13-inch baking pan with parchment paper.
Make the Crust:
- In a large bowl, combine melted butter, brown sugar, and vanilla. Stir in flour, oats, baking powder, and salt until well mixed.
Press Base:
- Press about two-thirds of the crust mixture evenly into the prepared pan.
Add Fillings:
- Sprinkle caramel bits evenly over the crust layer. Next, add the chocolate chips and nuts (if using).
Top Layer:
- Crumble the remaining crust mixture evenly over the caramel and chocolate layers.
Bake:
- Bake for 30–35 minutes, or until golden brown and bubbly around the edges.
Cool and Cut:
- Allow to cool completely before cutting into bars.
Notes
These caramelitas have quietly become one of my most-requested things to bring anywhere. I've made them for school events, for a neighbor who had a rough week, for my husband's office once, and at least three times just because we had a rainy weekend and I wanted something to bake. They're the kind of recipe I trust because they've never let me down — not once across a dozen batches.
If you want to take them somewhere special, the salted caramel version (flaky sea salt over the caramel layer before adding the chocolate) is the one I'd bring. It's a small change that makes people think you know a lot more about baking than you do. I also keep a batch of these No-Bake Chocolate Clusters around when I want something sweet that requires zero oven time — good to have both options depending on the day.
Make them once and you'll understand why they've been around forever. The ingredients are cheap, the method is forgiving, and the result is something that genuinely satisfies. I'll be making another batch this weekend — double batch this time, because one pan is never enough in this house. 🍫🥄✨
If you liked these, here are a few more recipes from my kitchen you might want to save:
- Best Mackinac Island Fudge — if you love rich caramel-chocolate flavors, this fudge is the next step
- No-Bake Chocolate Clusters Kids Can Make — great when you want something sweet without turning on the oven
- Red Velvet Bear Cookies — soft, cocoa-rich, and always a hit at bake sales
- Protein Overnight Oatmeal — for the mornings after you've eaten three of these bars and need to balance things out
- Ham and Cheese Quiche — a savory option worth having in your back pocket when you need something for brunch





Comments
No Comments