
I made these bagel breakfast sliders for the first time on a Saturday when I had eight people coming over for brunch and absolutely no plan. I had mini bagels, a dozen eggs, a pack of bacon, and some cheddar — and I thought, let me just bake them all together in one pan and see what happens. They came out of the oven warm, golden, and cheesy, and every single one was gone in about twelve minutes.
What makes these work is the pull-apart approach. Instead of making individual sandwiches one at a time, you load everything into a baking dish together. The bagels trap all that melted cheese and buttery egg filling, and baking them covered first lets the cheese get properly gooey before you brown the tops. I brush the whole thing with garlic-butter before it goes in, and that's honestly what makes them taste like something you'd order at a brunch spot, not something you threw together on a Sunday morning.
My kids demolished these. Zainab asked if we could have them every weekend. My husband ate three and then started talking about whether we could put sriracha on the next batch (we can — and we did). If you're looking for something to serve a group without standing at the stove for an hour, this is it. I've also made a tray the night before, refrigerated it unbaked, and just slid it in the oven in the morning — works perfectly.
One thing to know before you start: scramble the eggs just until set, not fully cooked. They finish in the oven, and if you overcook them on the stovetop first, you'll end up with dry, rubbery filling. Pull them off the heat while they still look a little underdone. They'll be perfect by the time everything comes out of the oven. If you love pull-apart brunch bakes, my Hawaiian Rolls Sticky Buns use the same concept for a sweet version — worth keeping in your back pocket for brunch spreads.
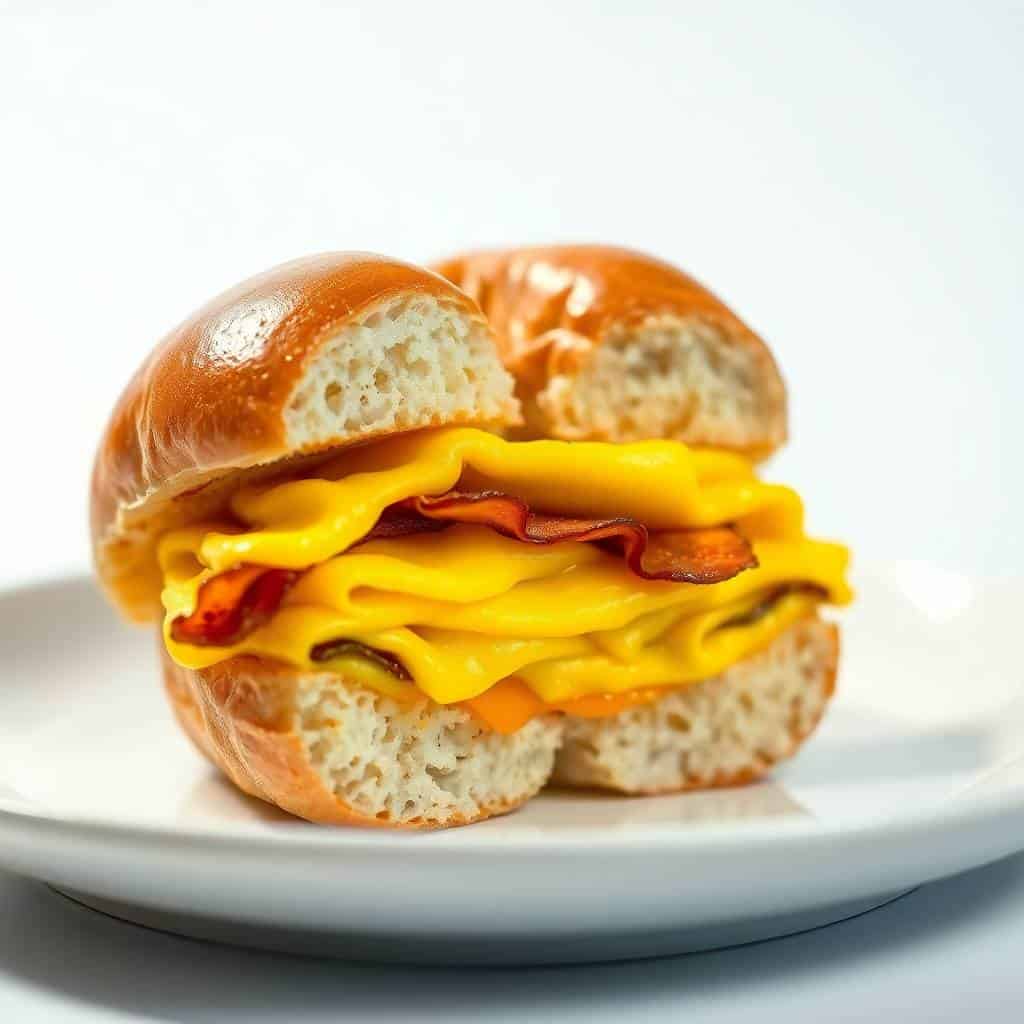
Why You'll Love This Recipe
- One pan, no chaos: Everything bakes together in a single 9x13 dish, which means I'm not flipping individual eggs or managing three different pans at once. On weekend mornings when I've already got coffee going and kids asking me questions, this matters. The oven does most of the work once you've assembled everything.
- Feeds a crowd without stress: I can make 6 sliders in the same time it would take me to make 2 individual egg sandwiches at the stove. For brunch gatherings or family weekends, that's a real difference. Everyone gets something warm and cheesy at the same time, which almost never happens in my house.
- Make-ahead friendly: Assemble the whole tray the night before, cover it, and refrigerate. In the morning you just pull it out while the oven preheats and bake. I've done this before early Eid mornings when we have family coming over and I don't want to be cooking first thing. It takes maybe 5 extra minutes of bake time straight from the fridge.
- Easy to customize for different tastes: My husband wants bacon. My kids want no onions. I want something with avocado. This recipe handles all of it because each slider is its own little unit — you can vary the fillings across the tray without any extra effort.
- Freezer-friendly: I wrap individually cooled sliders in foil and freeze them for up to a month. On weekday mornings when I have zero time, I pull one out, microwave it for about 90 seconds, and it's genuinely good. Not as crispy as fresh, but completely satisfying. This is probably the best meal-prep breakfast I've figured out so far.
Ingredients
- 6 mini bagels, sliced in half
- 6 large eggs
- ¼ cup milk
- 6 slices cooked bacon or sausage patties (turkey bacon works too)
- 6 slices cheddar cheese (or American, pepper jack, or whatever you have)
- 2 tablespoons butter, melted
- ½ teaspoon garlic powder
- ½ teaspoon onion powder
- Salt and pepper to taste
- Non-stick spray for greasing the pan
- Optional: sliced avocado, tomato, or spinach
Directions
- Step 1: Preheat the oven. Set your oven to 350°F (175°C) and grease a 9x13-inch baking dish with non-stick spray. Getting the dish ready before you start scrambling eggs means you're not fumbling around mid-assembly.
- Step 2: Scramble the eggs. Whisk together the eggs, milk, salt, and pepper in a bowl. Cook in a skillet over medium heat, stirring gently, and pull them off the heat while they still look slightly underdone — just barely set. They'll finish cooking in the oven and if you take them all the way here, they'll be dry by the time you serve.
- Step 3: Assemble the sliders. Place all the bottom halves of the mini bagels in the prepared baking dish in a single layer. Divide the scrambled eggs evenly across each bottom half, then lay your bacon or sausage on top, followed by a slice of cheese. Add any optional toppings at this point. Press the top bagel halves on firmly.
- Step 4: Brush with garlic butter. Mix the melted butter with garlic powder and onion powder and brush it generously over the tops of all the bagels. Don't skip this step — it's what gives the tops that golden, slightly savory finish that makes these taste like you put in more effort than you did.
- Step 5: Bake covered, then uncovered. Cover the dish tightly with foil and bake for 10 minutes. This traps steam and helps melt the cheese all the way through. Remove the foil and bake for another 5–7 minutes until the tops are lightly golden and everything looks toasty.
- Step 6: Rest and serve. Let the sliders cool for 2–3 minutes before pulling them apart. They'll be very hot straight out of the oven, and resting briefly lets the cheese settle so it doesn't all slide out when you lift them.
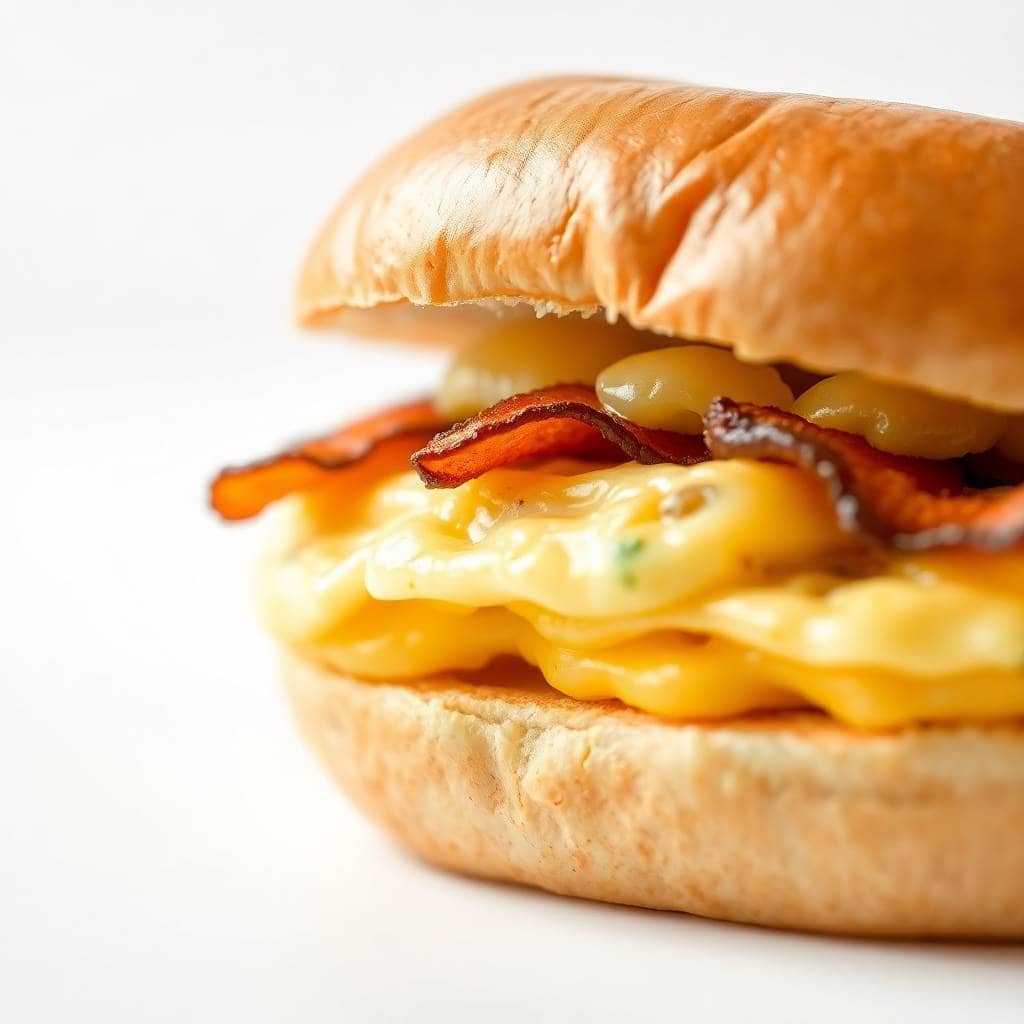
Tips for Success
- Undercook the eggs slightly on the stovetop: I learned this the hard way the first time I made these. I scrambled the eggs fully before assembling, and by the time the sliders came out of the oven, the filling was dry and a little rubbery. Now I pull the eggs off the heat when they're just barely set — still a little wet-looking. The oven finishes the job perfectly.
- Use fresh bagels, not day-old ones: Stale bagels get hard when they bake, and the chewy-soft texture is what makes these good. If your bagels are a day or two old, skip the bake step and toast them lightly before assembling instead, then just broil briefly to melt the cheese. It's a different method but salvages them.
- Cover tightly with foil for the first bake: If the foil is loose, the steam escapes and the cheese doesn't melt all the way through before the tops brown. Press the edges of the foil down around the dish snugly. It makes a real difference in how gooey everything gets.
- Don't skip the garlic butter: I tried a version without it once just to see if it was really necessary. The sliders were fine, but they tasted flat. The garlic-onion butter on top is a small thing that makes a noticeable difference in the final flavor. Two tablespoons is enough for a full tray — you don't need to drench them.
- If baking straight from the fridge, add 5 minutes: When I assemble the night before and refrigerate, I add about 5 extra minutes to the covered bake time. Cold ingredients take longer to heat through, and you want that cheese fully melted before you pull the foil. Just keep an eye on the tops during the uncovered portion — you want golden, not burnt.
Variations
- Smoked salmon and cream cheese: This is my personal favorite variation and honestly feels fancier than it is. Skip the scrambled eggs and bacon entirely. Spread cream cheese on the bottom bagel halves, layer on smoked salmon, add a few capers if you have them, and a slice of havarti on top. Bake as directed. It's a different vibe — more New York deli than Sunday brunch — and it's really good.
- Vegetarian version: Sauté a mix of sliced mushrooms, bell peppers, and spinach until softened, season well, and use that as your filling in place of the meat. Keep the scrambled eggs and cheese. This is actually the version I make most often for myself — it's filling without being heavy, and the mushrooms give it enough savory depth that you don't miss the bacon.
- Spicy version: Add a few slices of pickled jalapeño on each slider before baking, and swap the cheddar for pepper jack. My husband also drizzles hot sauce on his after they come out of the oven. If you like heat, this version is satisfying in a different way than the classic.
- Different cheeses: Cheddar is my default because it melts reliably and most people have it. But Swiss works really well with ham, mozzarella gives you a stretchier melt, and American cheese (the individually wrapped kind you find at Walmart or Costco) melts the smoothest of all. If you're feeding kids who are picky about cheese, American is the safe bet.
- Add avocado or tomato after baking: Don't put fresh avocado or tomato in before the oven — they go sad and watery. Slice them while the sliders bake, and layer them on right before serving. It adds freshness and some color to the plate, which matters when you're serving this at a brunch table.
Serving and Storage
Serving
I pull the whole baking dish straight to the table and let people grab their own. For brunch, I'll put out a bowl of sliced fruit, some hash browns I threw in the oven on a separate sheet pan, and a pitcher of juice — that's a full spread right there. If you're serving these as a weekday breakfast, one slider with a piece of fruit is honestly enough. Two if you've got hungry teenagers. For something a little lighter alongside, a simple salad or even just sliced cucumber and tomatoes works well. And if you're going full brunch spread, my Buffalo Shrimp Bites make a great savory starter to put out while the sliders bake.
Storage
Leftovers keep in an airtight container in the fridge for up to 3 days. To reheat, I wrap a slider in foil and pop it in the oven at 325°F for about 10 minutes — it comes out much better than microwaved, though the microwave works fine if you're in a rush (about 60–90 seconds). For freezing, let the sliders cool completely, wrap each one individually in foil, and freeze for up to 1 month. Reheat straight from frozen at 350°F for 15–18 minutes covered, then a few minutes uncovered to crisp the top back up.
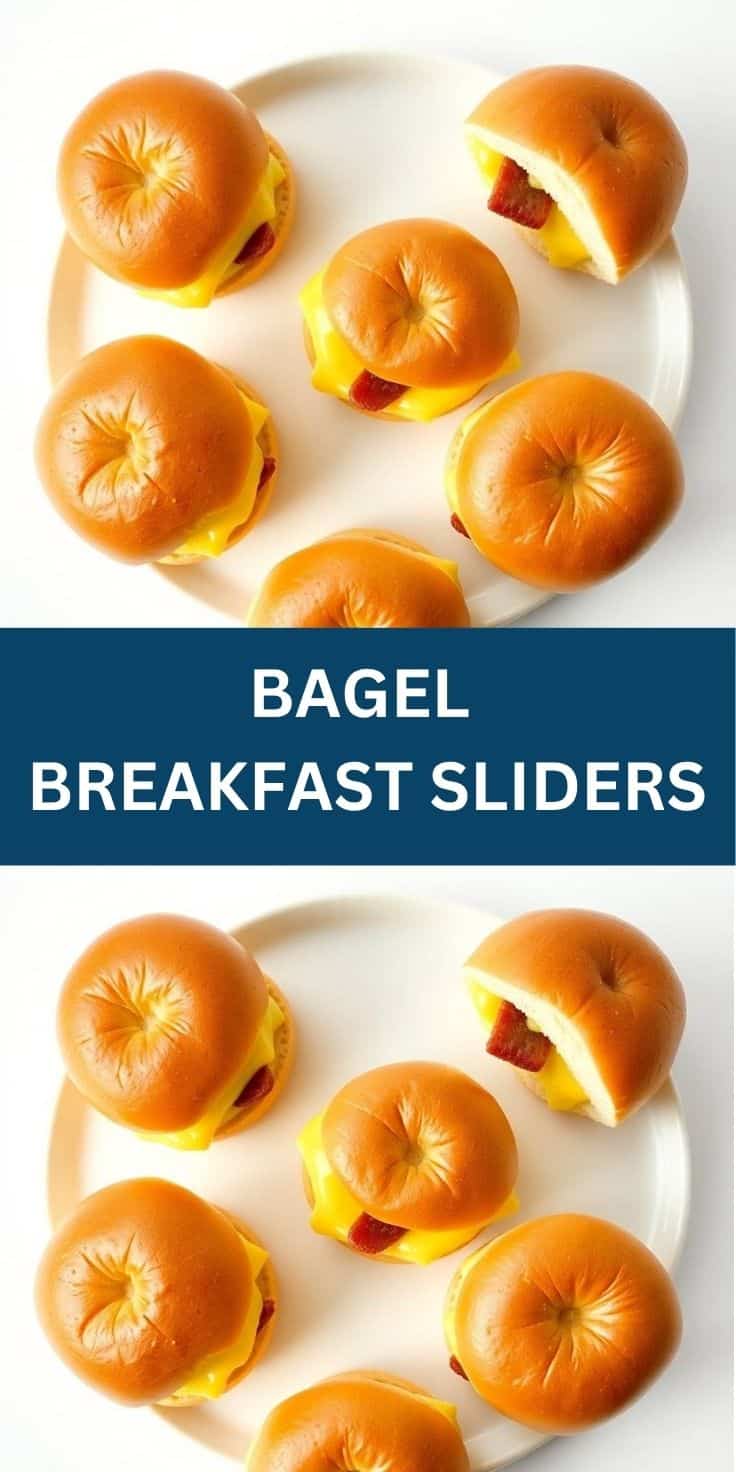
Frequently Asked Questions
Can I use regular-sized bagels instead of mini bagels?
You can, but the pull-apart effect works better with mini bagels since they fit snugly together in the dish. If you use regular bagels, they'll be more like individual open-faced sandwiches. You could cut them into quarters after baking to make them easier to share, which is a reasonable workaround if mini bagels aren't available at your store.
Can I make these the night before?
Yes, and I actually prefer doing this for weekend brunches. Assemble the whole tray, brush with the garlic butter, cover tightly with foil, and refrigerate overnight. In the morning, pull it out while you preheat the oven and add about 5 extra minutes to the covered bake time since everything is coming from cold. The results are just as good as baking it fresh.
Can I freeze bagel breakfast sliders?
Absolutely. Let them cool completely first, then wrap each slider individually in foil and put them in a zip-top freezer bag. They keep well for up to a month. To reheat from frozen, bake at 350°F for 15–18 minutes covered with foil, then uncover for a few minutes to re-crisp the top. Microwaving works too — about 2 minutes from frozen — but the texture is softer that way.
What cheese melts best in this recipe?
Cheddar is my default because most people have it and it melts reliably. American cheese (the kind from Walmart or Costco) melts the smoothest and gives you the most consistent gooey result. Pepper jack adds heat, Swiss works nicely with ham, and mozzarella gives you a stretchier pull. I'd avoid feta or goat cheese — they don't melt the same way and can make the filling feel dry.
How do I keep the eggs from getting rubbery?
The key is stopping early on the stovetop. Pull the scrambled eggs off the heat when they're just barely set — still slightly glossy and a little underdone-looking. They finish cooking inside the slider while it bakes. If you fully cook the eggs before assembling, by the time the sliders come out of the oven the eggs will be overcooked and dry. This was my biggest mistake when I first made these, and fixing it made a huge difference.

BAGEL BREAKFAST SLIDERS
Ingredients
- 4 small bagels sliced in half
- 4 large eggs
- 8 slices of cheese cheddar, American, or your favorite
- 8 slices cooked bacon sausage patties, or ham
- 2 tablespoons butter
- Salt and pepper to taste
- Optional: sliced avocado tomato, or spinach
Instructions
Prepare Eggs:
- In a bowl, whisk eggs with salt and pepper. Cook scrambled eggs in a nonstick skillet over medium heat until just set.
Toast Bagels:
- While eggs cook, toast bagel halves until golden.
Assemble Sliders:
- Place a slice of cheese on the bottom half of each bagel. Top with scrambled eggs, then bacon or sausage. Add optional toppings if desired.
Melt Cheese:
- Place assembled bottoms under a broiler or microwave briefly to melt the cheese slightly.
Finish Sliders:
- Top with the other bagel halves. Serve warm.
Notes
Cook the eggs and breakfast meat the night before. Assemble and toast just before serving. Customizing the Flavor:
Add hot sauce, pesto, or mustard for extra flavor. Serving Suggestions:
Serve with fresh fruit or a side salad for a balanced meal. Allergy-Friendly Options:
Use gluten-free bagels or dairy-free cheese as needed. Storage Tips:
Store wrapped in foil in the refrigerator for up to 2 days. Reheat gently before eating.
These bagel breakfast sliders have genuinely become one of my most-made brunch recipes — and I don't say that about many things. The combination of barely-set scrambled eggs, melted cheese, and that garlic butter top is simple but it works every time. What I love most is that the recipe doesn't require me to be organized or precise. It's forgiving, it's fast, and it scales up easily if I need to feed more people.
I've started keeping mini bagels in my freezer specifically for this recipe. I thaw them overnight in the fridge and they bake up just as well as fresh. If you're someone who does weekend meal prep, making a tray of these on Sunday and freezing them individually is one of the smarter breakfast moves I've found. You can also swap out the fillings week to week so you don't get bored — the smoked salmon version I mentioned in the variations section is worth trying at least once.
If you're building a bigger brunch spread around these, I'd also point you toward my Hawaiian Rolls Sticky Buns for a sweet counterpart — they're another pull-apart bake that goes in the oven at a similar temperature, so you can run both at once. And if you're cooking for people who like things with a little heat, the Buffalo Chicken Alfredo Penne is what I make when brunch turns into an all-day situation. These sliders are the kind of recipe I keep coming back to because they're reliable — and in my kitchen, reliable is everything. 🍳✨
If you liked this recipe, here are a few more from the site you might want to try:
- Hawaiian Rolls Sticky Buns (Pull-Apart Caramel Brunch Treat)
-
{"@context":"https://schema.org","@type":"Article","headline":"BAGEL BREAKFAST SLIDERS","description":"Bagel breakfast sliders are delicious, cheesy, and perfect for feeding a crowd. These mini sandwiches are ideal for mornings, brunch, or meal prep.","datePublished":"2025-06-14T08:05:35+00:00","dateModified":"2026-05-03T21:17:53+00:00","author":{"@type":"Person","name":"Sana Umer","url":"https://forfoodiefriends.com/about/","description":"Self-taught home cook with 10+ years of kitchen experience. Mom of two who develops every recipe in her own kitchen.","jobTitle":"Recipe Developer & Food Blogger","image":"https://forfoodiefriends.com/wp-content/uploads/sana-umer-author-photo.jpg"},"publisher":{"@type":"Organization","name":"For Foodie Friends","url":"https://forfoodiefriends.com/","logo":{"@type":"ImageObject","url":"https://forfoodiefriends.com/wp-content/uploads/forfoodiefriends-logo.png"}},"mainEntityOfPage":{"@type":"WebPage","@id":"https://forfoodiefriends.com/bagel-breakfast-sliders/"},"image":"https://forfoodiefriends.com/wp-content/uploads/2025/06/BAGEL-BREAKFAST-SLIDERS.jpg"}






Comments
No Comments