
I made these for the first time around the holidays last year, mostly because I had a bag of shredded coconut sitting in my pantry and no plan for it. I wasn't expecting much — but the first one I popped in my mouth tasted almost exactly like an Almond Joy bar, which immediately made me think I needed to make about four more batches.
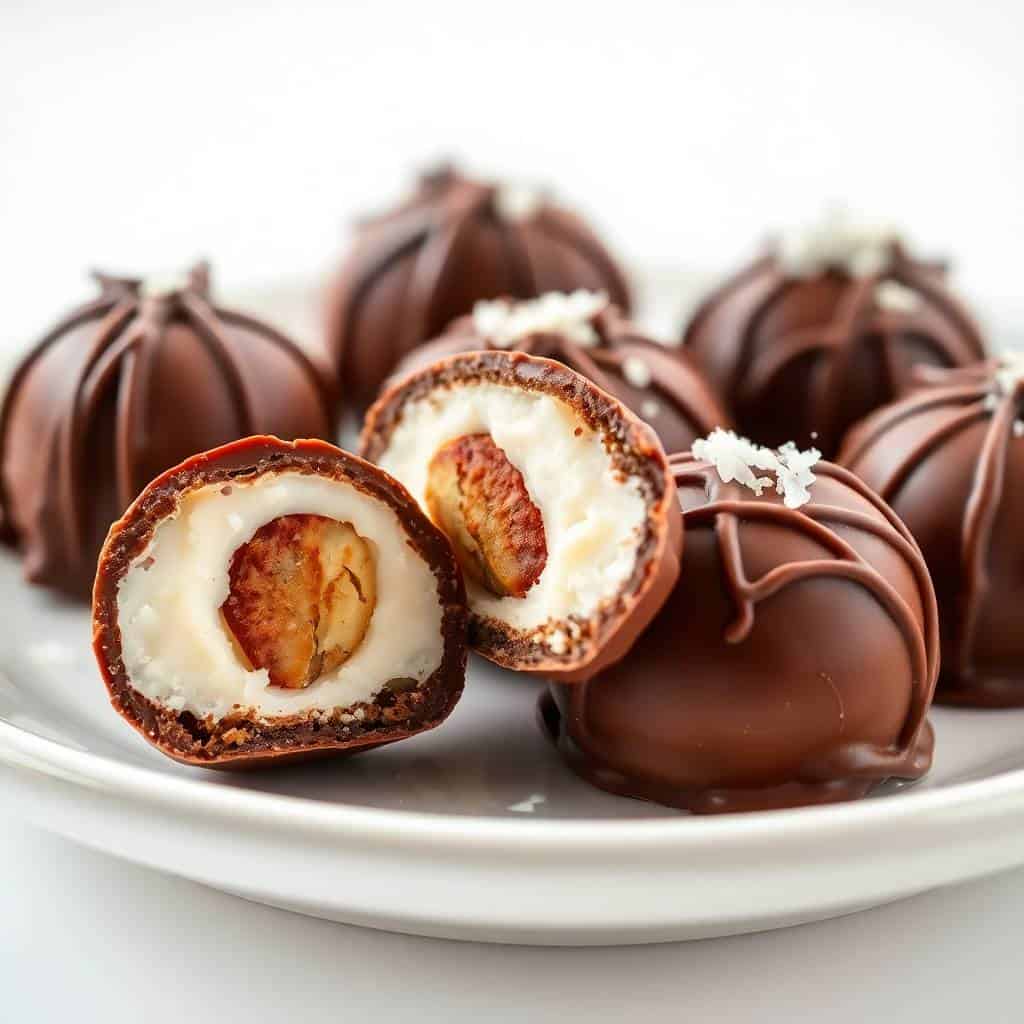
What makes these work is the ratio of coconut to condensed milk. Too much milk and the filling turns sticky and wet — I learned that the hard way on my first attempt, when I used ¾ cup and the balls refused to hold their shape. The amounts in this recipe give you a firm, rollable dough that actually cooperates. The whole almond pressed into the center is the detail that makes it feel intentional, not just a coconut ball dipped in chocolate.
Zainab is my chocolate-anything kid, so she was immediately invested in the dipping step. We made these together on a Saturday afternoon and she took her role very seriously. My husband ate six before I could pack any for gifting. I now make a double batch anytime these are on the menu, because one batch does not survive this household.
These are fully no-bake, which means no oven stress, no timing anxiety. The only patience required is the chilling time — you need the coconut balls firm before dipping, otherwise the chocolate coating pulls them apart. Give them a full hour in the fridge. If you're in a hurry, 20 minutes in the freezer works too. If you love no-bake desserts, my No-Bake Cheesecake Jars with Berries follow a similar approach — mix, chill, and done.
Why You'll Love This Recipe
- Tastes like the actual candy bar: I'm not exaggerating when I say these taste like an Almond Joy. The sweetened coconut, the whole almond in the center, the chocolate shell — it's all there. The difference is you control the quality of each component, so you can use good dark chocolate instead of whatever's in the candy wrapper.
- No oven, no stress: Some days I don't want to think about oven temperatures or baking times. These come together in a bowl and a microwave. I've made them at 10pm after the kids went to bed with zero effort. They're as low-pressure as desserts get.
- The texture is genuinely satisfying: Chewy coconut filling, that little crunch when you hit the almond, and a snappy chocolate shell. Every bite has three different textures happening at once. It doesn't feel like a simple homemade truffle — it feels like something you'd pick up from a chocolate shop.
- They look impressive with almost no skill required: Round ball, chocolate coating, maybe a drizzle of white chocolate on top — they look like they came from a box. I've given these as gifts and people always assume I spent hours on them. The secret is that the hardest step is rolling the balls, and even those don't need to be perfect.
- Make-ahead friendly: These actually get better after sitting in the fridge overnight — the coconut filling firms up even more and the chocolate shell sets properly. I usually make them a day before I need them, which takes all the pressure off. They keep well for a full week in the fridge.
Ingredients
- 2 cups sweetened shredded coconut
- ¾ cup sweetened condensed milk
- 1 teaspoon vanilla extract
- 24 whole almonds (raw or lightly toasted — toasted is better)
- 10 oz semi-sweet or dark chocolate chips (for coating)
- Optional: white chocolate chips or sprinkles for decorating
Directions
- Step 1: Mix the filling — In a medium bowl, combine the shredded coconut, sweetened condensed milk, and vanilla extract. Stir until everything is evenly coated and the mixture comes together into a sticky, holdable dough. It'll look shaggy at first — keep mixing and it'll come together.
- Step 2: Shape the truffles — Scoop out about 1 tablespoon of the mixture, press one whole almond into the center, then roll it between your palms into a smooth ball. Place each one on a parchment-lined baking sheet. Wet hands help here — the mixture won't stick as much.
- Step 3: Chill until firm — Refrigerate the tray for at least 1 hour, or freeze for 20 minutes if you're short on time. This step is non-negotiable — warm coconut balls will fall apart when you dip them. You want them cold and solid going into the chocolate.
- Step 4: Melt the chocolate — Put the chocolate chips in a microwave-safe bowl and heat in 30-second intervals, stirring between each one, until smooth. Don't rush this step — overheated chocolate seizes up and gets grainy. If it looks too thick, stir in ½ teaspoon of coconut oil to thin it out.
- Step 5: Dip each ball — Using a fork, lower each chilled ball into the melted chocolate, roll to coat, then lift and tap the fork gently against the edge of the bowl to let excess drip off. Set each one back on the parchment-lined tray.
- Step 6: Decorate and set — While the chocolate is still wet, drizzle white chocolate over the top or add a few sprinkles if you're feeling festive. Let them set at room temperature for about 15 minutes, or pop the tray back in the fridge for 10 minutes to speed it up.
- Step 7: Store or serve — Once the chocolate is fully hardened, transfer to an airtight container. Serve straight from the fridge or let them sit out for 5 minutes first — both work.
Tips for Success
- Use sweetened coconut, not unsweetened: I tried this with unsweetened coconut once thinking it would be healthier. The filling was drier, crumblier, and harder to roll — and it tasted flat. Sweetened shredded coconut is what gives the inside that chewy, moist texture. This isn't the recipe to swap it out.
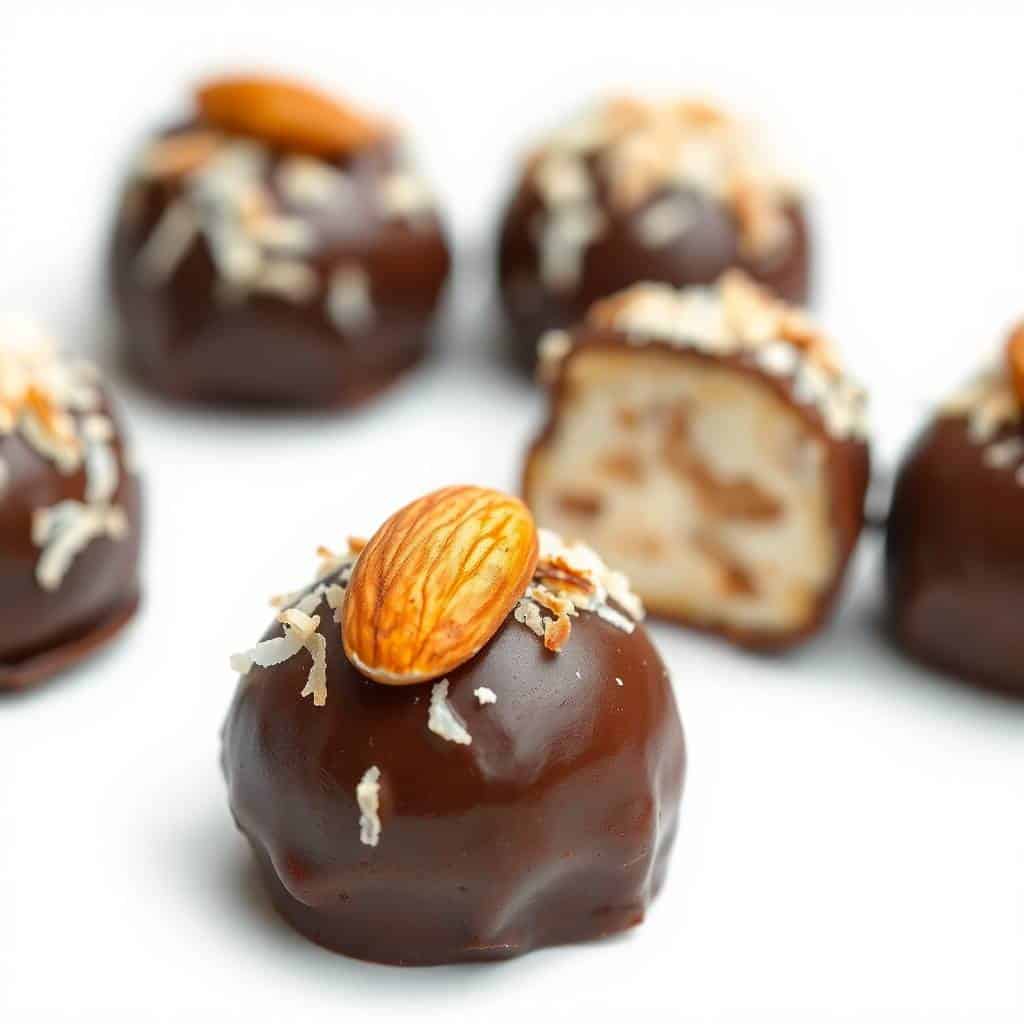
- Toast the almonds if you have 5 extra minutes: Spread them on a dry skillet over medium heat for about 4–5 minutes, shaking occasionally, until they smell nutty and turn slightly golden. You'll notice the difference immediately — raw almonds taste fine, but toasted almonds have this deeper, richer crunch that makes the whole truffle better.
- Don't skip the chill time before dipping: The first time I made these, I was impatient and dipped after only 15 minutes in the freezer. Half of them cracked apart in the chocolate. You need the filling cold and firm — at least 1 hour in the fridge, or 20 solid minutes in the freezer. Trust the wait.
- Add coconut oil to the chocolate if it's too thick: Chocolate chips vary in how they melt — some brands go silky smooth, others turn thick and paste-like. If your melted chocolate feels too heavy to coat smoothly, stir in ½ to 1 teaspoon of coconut oil. It thins the chocolate without affecting the flavor, and it actually helps the coating set with a slight sheen.
- Store in layers with parchment between them: Truffles are sticky once they've been sitting a while, especially if your fridge runs warm. I always put a sheet of parchment or wax paper between each layer in the container. Without it, you end up peeling them apart and the bottoms smear.
Variations
- Dark chocolate coating: Swap the semi-sweet chips for 70% dark chocolate chips and the whole truffle shifts into something less sweet and more sophisticated. My husband prefers this version — he finds the milk chocolate a bit too candy-bar sweet. Dark chocolate also sets firmer, which makes the snap more satisfying.
- Almond extract in the filling: Replace the vanilla with ¼ teaspoon of almond extract and the whole truffle leans harder into the almond flavor. It's a small change that makes a big difference — the filling smells and tastes almost marzipan-like. Don't use more than ¼ teaspoon though, it gets overpowering fast.
- Chopped almonds mixed into the filling: Instead of one whole almond in the center, stir ½ cup of roughly chopped almonds directly into the coconut mixture. Every bite gets some crunch that way, rather than one big hit in the middle. This also makes rolling faster since you don't have to press anything in.
- Bar-style instead of truffles: Press the coconut mixture into a parchment-lined 8x8 inch pan, lay the almonds across the top in rows, chill for an hour, then cut into rectangles and dip in chocolate. This is honestly faster if you're making a large batch for gifting — no individual rolling required.
- Vegan version: Use sweetened condensed coconut milk (Trader Joe's carries it, or check the baking aisle at most grocery stores) and dairy-free chocolate chips. The texture is slightly softer but the flavor holds up well. This is the version I'd make if I were bringing these to a gathering where I wasn't sure about dietary needs.
Serving and Storage
Serving
Serve these straight from the fridge or let them sit at room temperature for about 5 minutes first — the coconut filling softens just slightly and becomes even more pleasant that way. For a dessert table or gift box, set them in mini paper candy cups so they look tidy and don't roll around. They pair really well alongside something like my Vanilla Bean Mini Bundt Cakes if you're building a full dessert spread.
Storage
Store in an airtight container in the fridge for up to 1 week. Layer with parchment or wax paper between rows so they don't stick together. To freeze, place them in a single layer on a tray first until solid, then transfer to a zip-lock bag or container with parchment between layers. They'll keep in the freezer for up to 1 month. Thaw in the fridge overnight — don't thaw at room temperature or the chocolate can get a bit sweaty.

Frequently Asked Questions
Can I use unsweetened shredded coconut instead of sweetened?
You can, but the filling will be drier, less sweet, and harder to roll into smooth balls. Sweetened coconut is what makes the mixture stick together properly and gives you that chewy texture. If you only have unsweetened, add an extra tablespoon of condensed milk to compensate.
Can I use almond extract instead of vanilla?
Yes, and honestly it's a great swap. Almond extract deepens the almond flavor in the filling noticeably. Use only about ¼ teaspoon though — it's much stronger than vanilla and a little goes a long way. I've used both together (½ teaspoon vanilla + ¼ teaspoon almond) and that combination works really well too.
Why is my melted chocolate clumping or getting thick?
This usually means it got too hot. Melt in 30-second intervals and stir well between each one — the residual heat does more work than you'd expect. If it's already seized, stir in ½ to 1 teaspoon of coconut oil and gently reheat in 10-second bursts. That usually brings it back to a dippable consistency.
Do I have to toast the almonds?
No, raw almonds work fine. But toasting them for 5–7 minutes in a dry skillet over medium heat (or at 350°F in the oven) brings out a deeper, nuttier flavor that makes a real difference. I almost always do it now — it takes barely any extra time and the result is noticeably better.
Can I make these ahead of time for a party or gift?
These are actually ideal for making ahead. I usually make them the day before I need them — the filling firms up more overnight and the chocolate sets beautifully. They keep in the fridge for up to 1 week or in the freezer for 1 month, so you can make a big batch well in advance and pull them out when you need them.

ALMOND JOY TRUFFLES
Ingredients
- 2 cups sweetened shredded coconut
- ¾ cup sweetened condensed milk
- 1 teaspoon vanilla extract
- 24 whole almonds
- 10 oz semi-sweet or dark chocolate chips for coating
Instructions
Mix the Filling:
- In a medium bowl, combine shredded coconut, sweetened condensed milk, and vanilla extract. Mix until fully blended and sticky.
Form the Truffles:
- Scoop out about 1 tablespoon of mixture, press one almond into the center, and roll into a ball. Place on a lined baking sheet.
Chill the Balls:
- Refrigerate or freeze the coconut balls for about 1 hour until firm.
Coat with Chocolate:
- Melt chocolate chips in the microwave in 30-second intervals, stirring between each. Dip each ball into melted chocolate and return to the baking sheet.
Set and Serve:
- Let chocolate set at room temperature or chill until firm. Enjoy!
Notes
I've made a lot of no-bake desserts over the years — my No-Bake Cheesecake Jars get made almost every summer — but these truffles are the ones I come back to most often when I need something that travels well, keeps for days, and genuinely impresses people without requiring much from me. There's something about the combination of coconut and chocolate that feels festive no matter what time of year it is.
I've also started keeping a batch of these in the freezer as a kind of secret stash. Thirty seconds at room temperature and they're ready. My husband discovered this system, which means the stash never lasts as long as I intend it to. I've accepted this. I just make more.
If you give these a go, make sure you don't skip the almond-toasting step — that small thing elevates the whole truffle. And if you want to get fancy, a drizzle of white chocolate over the top takes about 30 extra seconds and makes them look like they came from a proper chocolate shop. Enjoy every bite. 🍫🥥✨
If you liked these truffles, here are a few more things from my kitchen you might want to try next:
- No-Bake Cheesecake Jars with Berries — creamy, pre-portioned, and zero oven time
- Vanilla Bean Mini Bundt Cakes — cute, individual cakes that are great for a dessert tray
- Pineapple Cinnamon Sugar Cookies — soft, chewy, and a little unexpected
- Blueberry Overnight Oats — for when you want something sweet but a little more sensible


Comments
No Comments