
The air fryer chicken breast problem is real — chicken breast has no fat reserves to protect it from overcooking, and the dry, stringy result has turned "dry chicken breast" into its own culinary category. The air fryer solves part of this problem by reducing cook time and circulating dry heat that caramelizes the exterior faster than a conventional oven — but it introduces the identical risk of overcooking, because the same efficiency that produces a juicy result at the right internal temperature produces a dry result at five degrees above it.
The three-step no-dry method that applies across all 21 recipes: pound the breast to even ½-inch thickness throughout (using a rolling pin with the breast inside a zip-lock bag — the step most people skip, which is why most people get dry chicken breast); season and rest at least 10 minutes so the salt begins working; and pull from the air fryer at 160°F internal temperature before resting 5 minutes, during which carryover cooking safely brings it to 165°F while keeping significantly more juice inside than cooking directly to 165°F would allow. These three steps, applied consistently, are the difference between juicy and dry every single time.
My husband tracks his protein and prefers chicken breast over thighs for lunch — he finds thighs too rich for the midday meal. The challenge is that the correct doneness for breast is approximately a four-minute window in a hot air fryer, which is why an instant-read thermometer is mandatory for this collection in a way it is merely advisory for thighs. Saad calls air fryer chicken breast "the flat chicken," and his willingness to eat it for dinner depends entirely on the topping. Plain seasoned breast earns a 6/10. Honey garlic glazed earns a 9/10. The Parmesan-crusted Chicken Parmesan earns an unsolicited compliment — the highest rating in the Saad system. Zainab applies whatever sauce is served to her rice rather than the chicken, suggesting the chicken is functioning as a sauce-delivery vehicle in her dinner strategy, but she eats it without complaint, which is its own category of success.
All 21 recipes use halal boneless skinless chicken breast. The same technique applies throughout: pound to even thickness, season and rest, cook at the specified temperature, pull at 160°F, rest 5 minutes before slicing. The flavoring, coating, or glaze is what distinguishes each recipe. For the father-in-law's cardiac soft-food diet, the lemon herb, honey garlic, tikka, and Greek-marinated versions are appropriate — lean protein, controllable sodium, soft enough when sliced thin. Whether you are building a weekly meal-prep rotation that stays juicy through Thursday, or simply wanting the definitive collection with a technique foundation that prevents the most common failure mode, these 21 recipes are the complete answer.
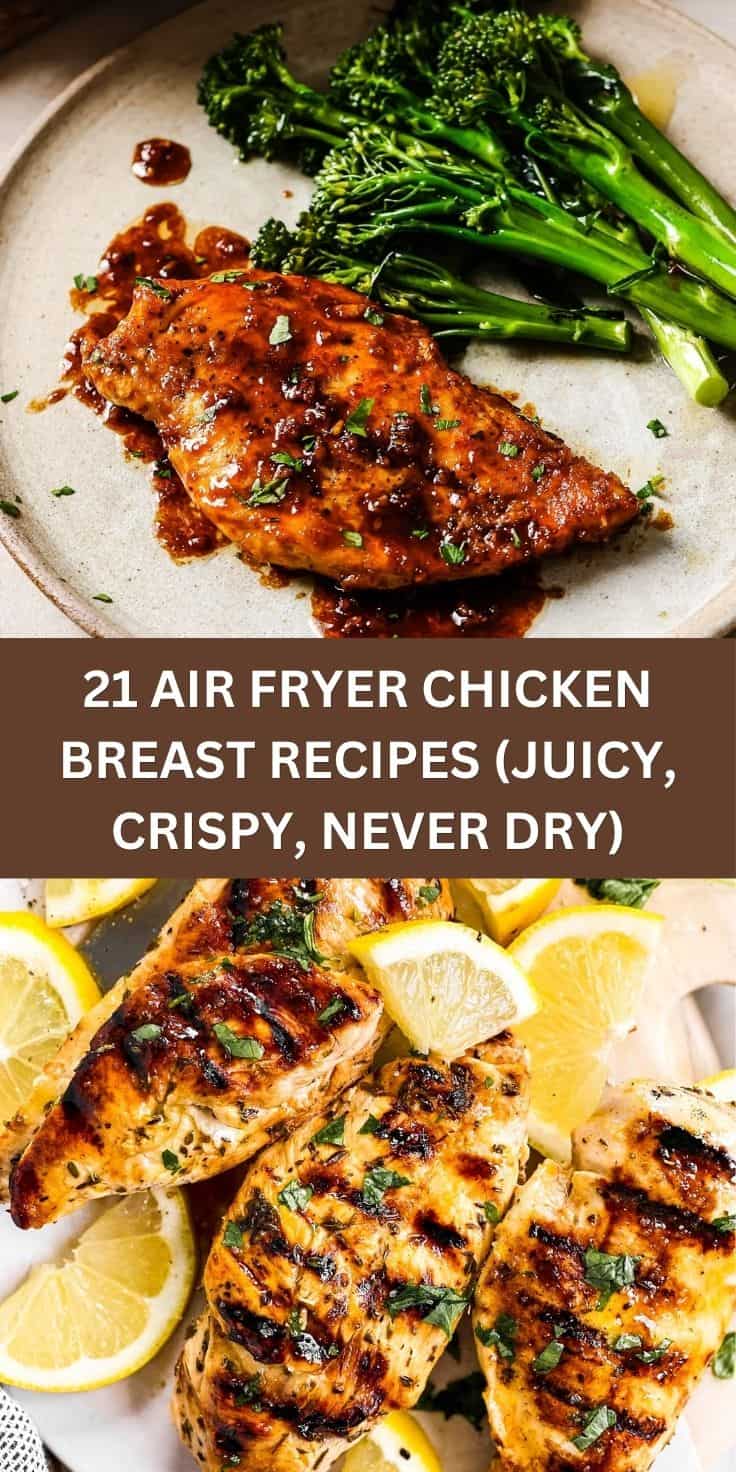
21 Air Fryer Chicken Breast Recipes (Juicy, Crispy, Never Dry)
21. Simple Seasoned Air Fryer Chicken Breast
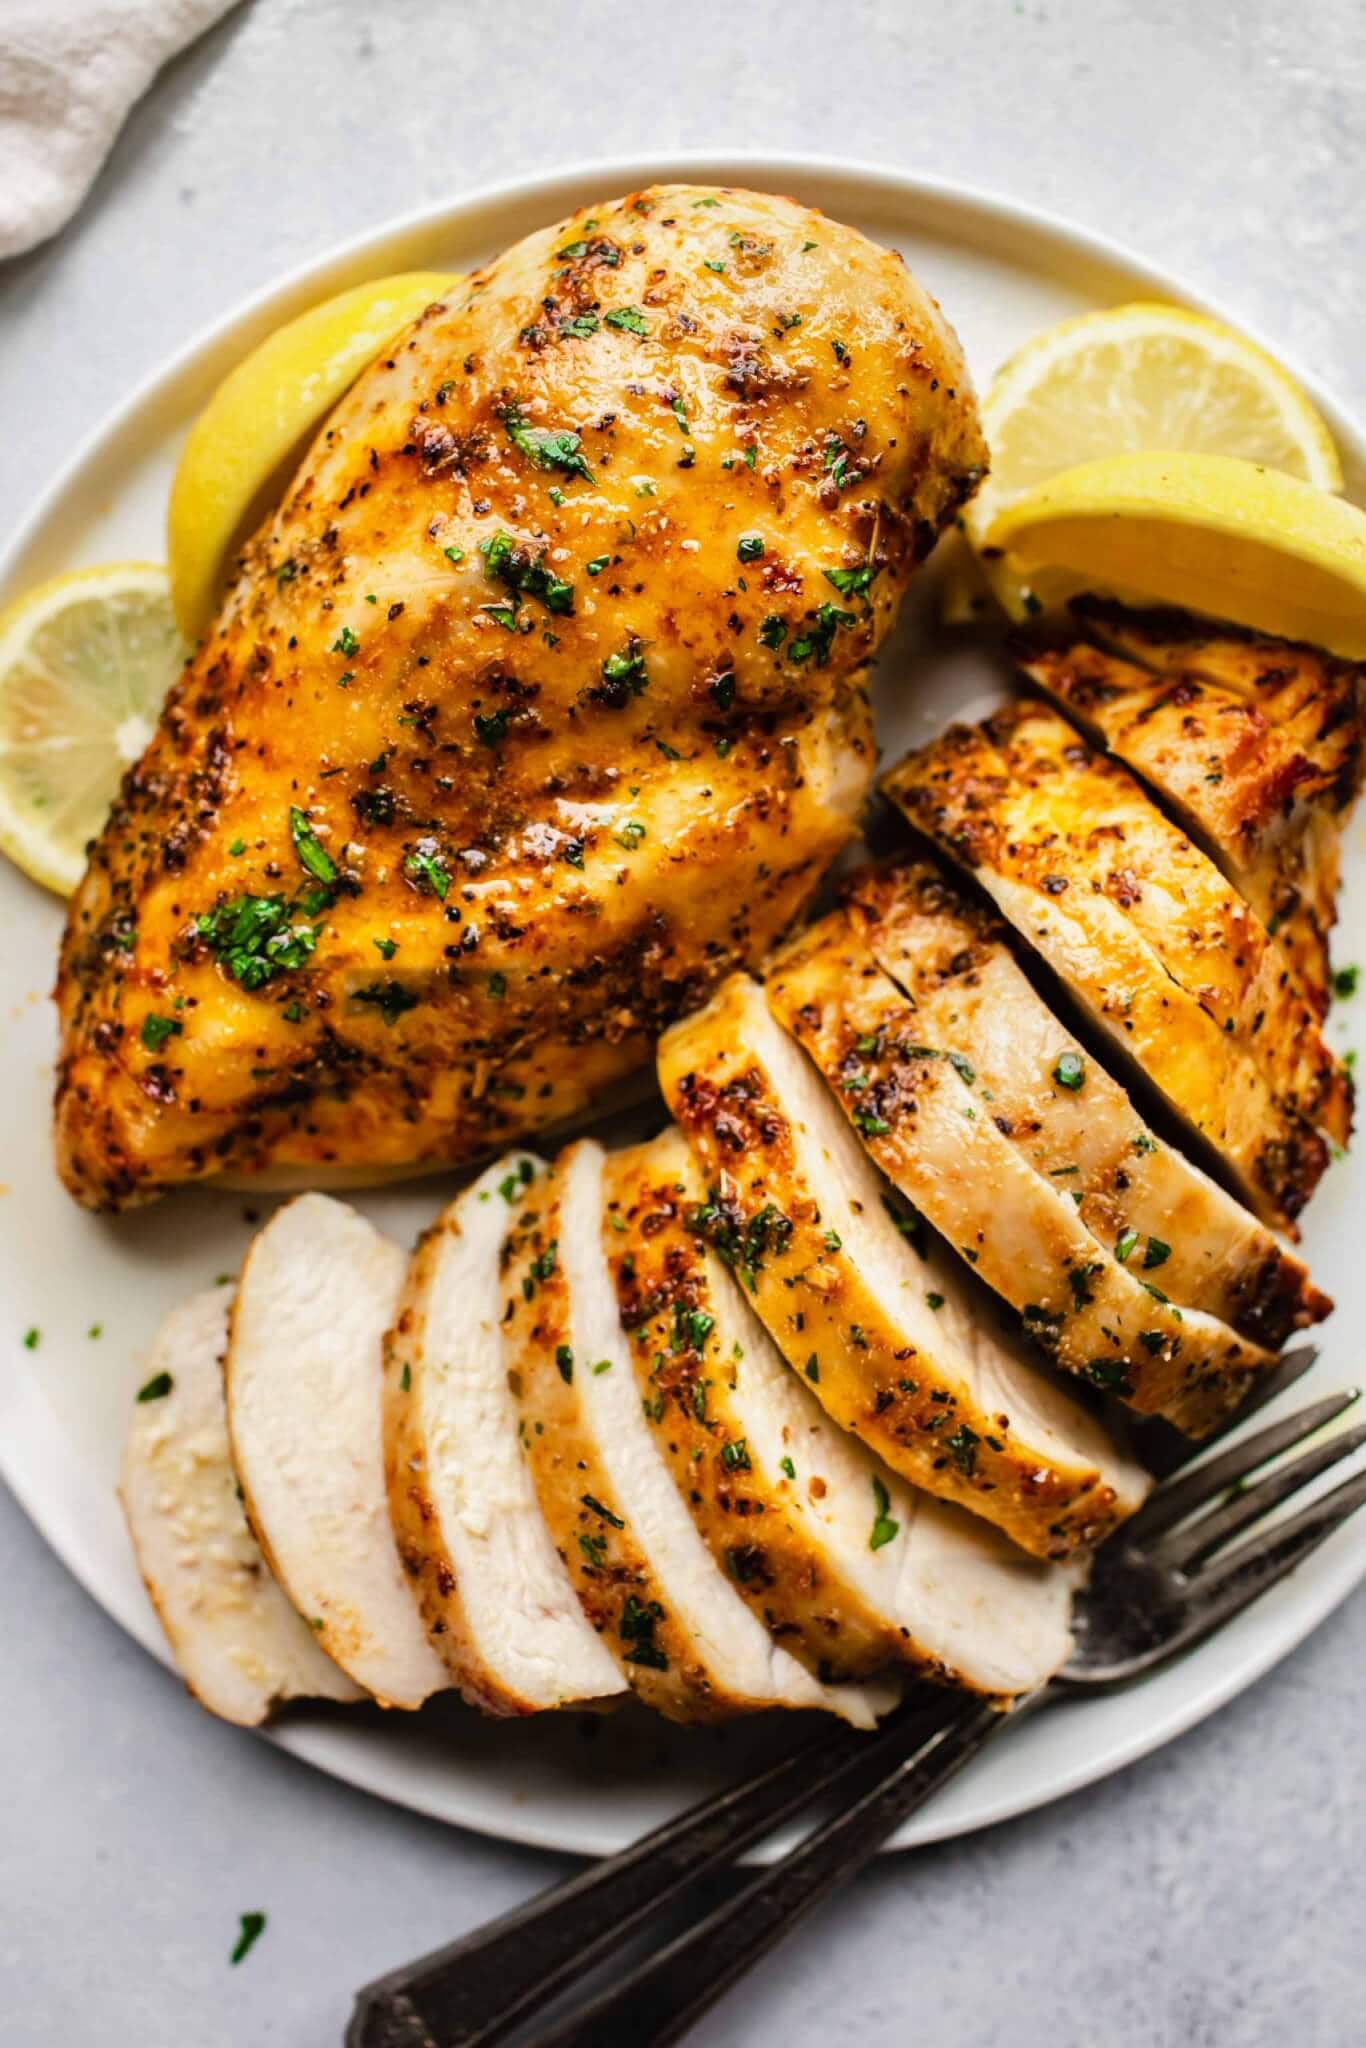
The foundation recipe. Master this before any other in this collection. Plain seasoned halal chicken breast using the three-step no-dry method. Mild enough to pair with any sauce, grain, or vegetable side. Total time approximately 29 minutes including pound and rest. ✅ Cardiac diet appropriate.
Ingredients
- 4 halal chicken breasts (about 6 oz each)
- 1 tablespoon olive oil
- 1 teaspoon garlic powder
- 1 teaspoon smoked paprika
- ½ teaspoon onion powder
- ½ teaspoon dried oregano
- 1 teaspoon salt
- ½ teaspoon black pepper
- Cooking oil spray
Instructions
- Place one breast inside a large zip-lock bag. Pound firmly with a rolling pin from the thickest point toward the edges until the entire breast is a uniform ½ inch thick throughout. Repeat with all four breasts. This step is not optional — it physically determines whether the breast cooks evenly or unevenly. An unevenly thick breast produces dry results no matter how carefully you manage the rest of the cook.
- In a small bowl, combine the garlic powder, smoked paprika, onion powder, dried oregano, salt, and black pepper and stir until completely blended. Drizzle the olive oil evenly over both sides of each pounded breast and rub it in so every surface — including all edges — is lightly coated. Sprinkle the seasoning evenly over both sides of each breast and press the spices gently into the oiled surface so they adhere rather than falling off during cooking.
- Place the seasoned breasts on a plate in a single layer and let them rest at room temperature for 10 full minutes. During this rest, the salt draws moisture to the surface and pulls it back into the breast — beginning a brief dry-brine that seasons the interior rather than just the outside.
- Preheat the air fryer to 380°F for 3 minutes. Spray the basket generously with cooking oil spray — this prevents sticking and ensures the underside crisps rather than steaming against the basket.
- Arrange the four breasts in the basket in a single layer with no overlapping and at least ½ inch of empty space between each breast. If your basket is small, cook in two separate batches. Crowded breasts steam each other rather than crisping, and you will lose the golden exterior that makes air fryer chicken breast worth making.
- Cook at 380°F for 7 minutes. Open the air fryer, use tongs to flip each breast, and spray the newly exposed tops lightly with cooking oil spray. Close and cook for 7 more minutes.
- At 14 minutes, insert an instant-read thermometer into the thickest part of one breast. If it reads 160°F or above, remove all breasts immediately and transfer to a cutting board. If below 160°F, cook in 2-minute increments and check after each. Do not cook past 165°F — breast meat begins to dry and tighten rapidly above this point.
- Let the breasts rest completely undisturbed for a full 5 minutes. Do not cut during this rest. The internal temperature will rise from 160°F to 165°F through carryover heat, and the muscle fibers will relax and reabsorb the juices that would otherwise pour out onto the cutting board if you cut immediately.
- After the full 5-minute rest, slice against the grain into ½-inch strips or serve whole. The interior should be completely white and cooked through, but should show visible moisture on the cut surfaces rather than the dry, tight, fibrous texture of overcooked breast.
20. Lemon Herb Chicken Breast

The version my husband considers genuinely dinner-worthy rather than merely functional protein. The lemon zest and Dijon mustard carry through the cooking process and survive the 14-minute cook intact, producing a breast that tastes seasoned all the way through to the center. Plan ahead — overnight marinating produces the best result. ✅ Cardiac diet appropriate.
Ingredients
- 4 halal chicken breasts, pounded to ½ inch
- Juice and finely grated zest of 2 large lemons
- 3 tablespoon olive oil
- 3 garlic cloves, minced as fine as possible
- 1 tablespoon fresh thyme leaves, stripped from stems
- 2 tablespoon fresh flat-leaf parsley, finely chopped
- 1 teaspoon Dijon mustard
- 1 teaspoon salt + ½ teaspoon black pepper
Instructions
- Pound each breast to ½ inch. Score each one 3 times on each side with a sharp knife making ¼-inch-deep cuts across the width of the breast. These cuts create channels for the marinade to penetrate below the surface layer, which produces flavor that reaches the center rather than just coating the outside.
- In a bowl, whisk together the lemon juice, lemon zest, olive oil, minced garlic, thyme, parsley, Dijon mustard, salt, and pepper until fully combined and emulsified. The Dijon keeps the oil and lemon juice blended together rather than separating. Taste — it should be bright, acidic, and garlicky.
- Place the scored and pounded breasts in a large zip-lock bag or a shallow baking dish. Pour the marinade over, turn each breast several times so all surfaces and the score cuts are coated. Seal or cover tightly. Refrigerate for a minimum of 30 minutes — overnight (12 to 24 hours) produces significantly better flavor penetration and a more tender finished breast.
- When ready to cook, remove the breasts from the refrigerator and let them sit at room temperature for 10 minutes. Remove each from the marinade and pat the surface lightly with paper towel — just a quick pat to remove excess dripping wet marinade, not a complete dry. Too much liquid on the surface steams in the air fryer instead of caramelizing, leaving a pale exterior rather than a golden crust.
- Preheat the air fryer to 380°F for 3 minutes. Spray the basket with cooking oil spray. Arrange the breasts in a single layer with space between each.
- Cook at 380°F for 7 minutes. Open and flip each breast with tongs — the underside should be golden-green from the lemon herb marinade browning against the hot basket. Spray the newly exposed tops lightly with cooking oil. Close and cook 7 more minutes.
- At 14 minutes, check the internal temperature at the thickest point. Pull at 160°F and transfer to a cutting board. If below 160°F, cook in 2-minute increments.
- Rest for 5 full minutes. The lemon herb marinade will have formed a fragrant, golden, herb-flecked coating on the surface. Slice across the grain at a slight angle and serve over a simple green salad with an additional squeeze of fresh lemon at the table, or slice into a grain bowl alongside roasted vegetables.
19. Honey Garlic Chicken Breast
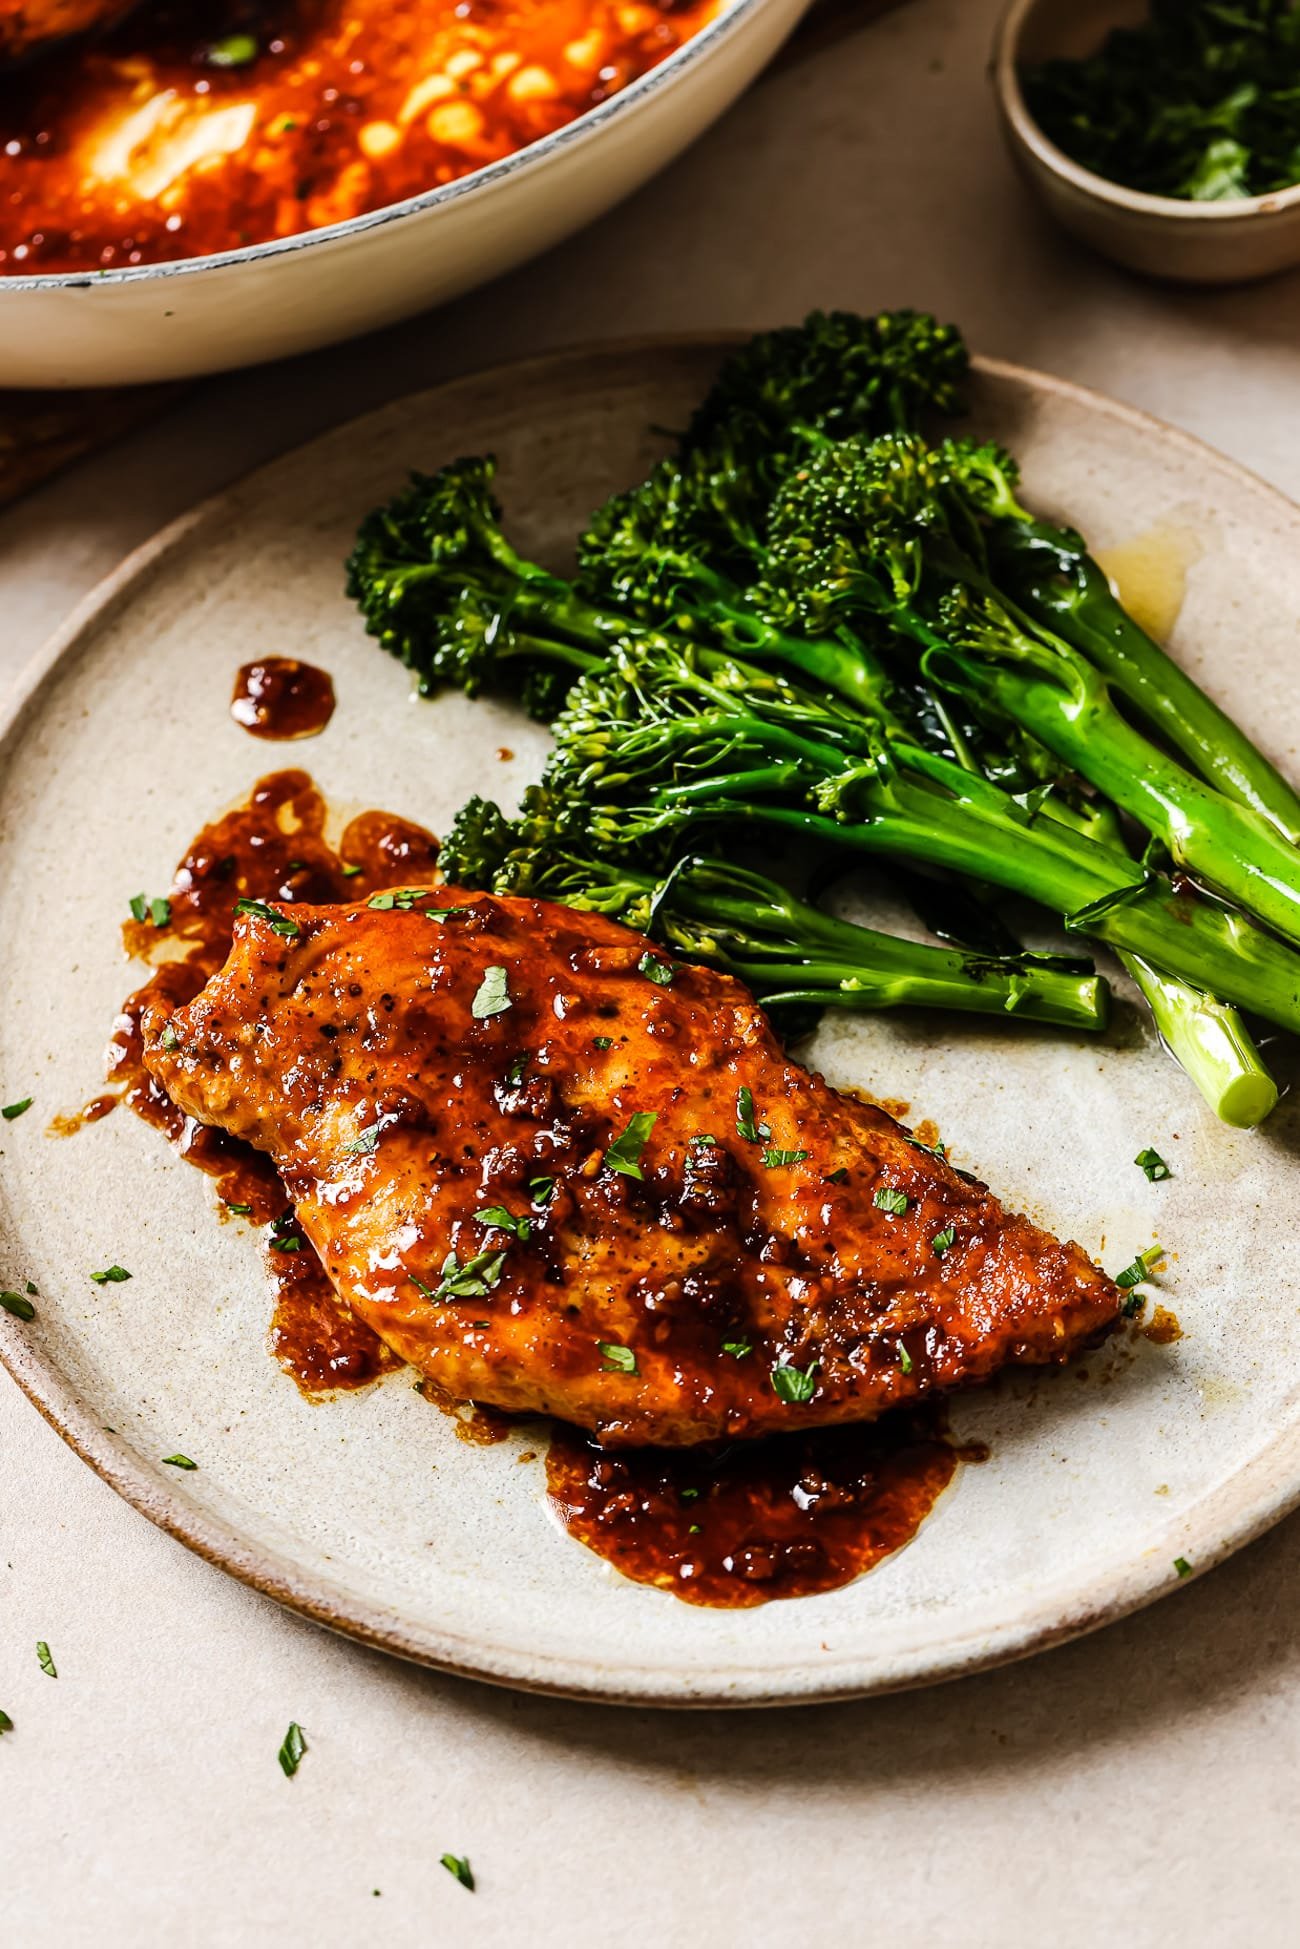
Saad's 9/10 air fryer chicken breast — the glaze is detectable by smell from the next room and produces his unprompted arrival at the dinner table. The critical technique is applying the glaze at the flip rather than at the start, which lets the surface seal before the sugar hits it, preventing burning while maximizing caramelization in the final 7 minutes.
Ingredients
- 4 halal chicken breasts, pounded to ½ inch
- 1 teaspoon salt + ½ teaspoon black pepper
- Cooking oil spray
- Honey garlic glaze: 3 tablespoon honey
- 2 tablespoon soy sauce
- 3 garlic cloves, minced very fine
- Juice of ½ lemon
- ½ teaspoon smoked paprika
- Steamed white rice and broccoli for serving
Instructions
- Pound breasts to ½ inch. Season both sides generously with salt and pepper, pressing in. Rest at room temperature 10 minutes.
- While the chicken rests, make the honey garlic glaze: in a small bowl, stir together honey, soy sauce, minced garlic, lemon juice, and smoked paprika until the honey is completely dissolved and the mixture is uniform and pourable. The garlic must be minced as fine as possible so it distributes evenly on the surface and caramelizes rather than burning in large chunks. Set the bowl of glaze and a pastry brush right beside the air fryer before you start cooking — you need both immediately at the flip without any searching.
- Preheat the air fryer to 380°F for 3 minutes. Spray the basket generously with cooking oil spray. Arrange the seasoned breasts in a single layer. Spray the tops lightly with oil. Cook at 380°F for 7 minutes — no glaze yet. The dry first cook creates a sealed, slightly caramelized surface that gives the glaze something to adhere to during the second half of cooking.
- At the 7-minute mark, open the air fryer immediately. Working quickly, use the pastry brush to apply the honey garlic glaze generously over the entire top surface of each breast — every edge, every area. The minced garlic pieces will be visible on the surface where they will toast and intensify in the final 7 minutes.
- Close the air fryer and cook for 7 more minutes at 380°F. The glaze will bubble, caramelize, and transform from a wet coating into a sticky, lacquered, deeply golden surface. In the final 2 minutes, if the glaze edges look very dark and close to burning, reduce to 360°F for the remaining time.
- At 14 minutes total, check the internal temperature at the thickest point. Pull at 160°F and transfer to a cutting board. While the breasts rest, brush any remaining glaze over each surface — the residual heat sets the fresh glaze into the caramelized surface. Rest the full 5 minutes.
- Slice across the grain into ½-inch diagonal strips. Fan the slices over steamed white rice. Spoon any glaze and juices that collected on the cutting board over the rice and chicken. Serve with steamed broccoli or snap peas alongside.
18. Cajun Chicken Breast

The most aromatic air fryer chicken in this collection during cooking — the smoked paprika and cayenne at 400°F fill the kitchen with a scent that announces dinner from two rooms away. The Cajun spice produces the darkest crust of any recipe here, and the ½-inch pound is especially critical because the high 400°F temperature will over-darken a thicker breast exterior before the center reaches temperature.
Ingredients
- 4 halal chicken breasts, pounded to exactly ½ inch
- 1 tablespoon olive oil
- Cajun rub: 1½ teaspoon smoked paprika + 1 teaspoon garlic powder + ½ teaspoon onion powder + ½ teaspoon cayenne (reduce to ¼ teaspoon for less heat) + ½ teaspoon dried thyme + ½ teaspoon dried oregano + ½ teaspoon black pepper + 1 teaspoon salt
- Fresh lime wedges, steamed rice, and corn for serving
Instructions
- Pound each breast to exactly ½ inch. This measurement matters more for Cajun breast than any other recipe because you are cooking at 400°F — a breast thicker than ½ inch at its center will take long enough to cook through that the Cajun spice crust will tip from caramelized-dark to burnt before the interior reaches 160°F.
- In a small bowl, combine all Cajun rub spices and stir thoroughly until completely uniform with no clumps. Break up any paprika lumps with the back of a spoon. The smoked paprika does most of the color work, the cayenne handles the heat, and the dried herbs provide the depth that makes this a genuine Cajun rub rather than just paprika and cayenne.
- Drizzle the olive oil over both sides of each breast and rub it in so every surface is coated. Apply the entire Cajun rub mixture generously to all surfaces of the four breasts, pressing firmly so the spices adhere to the oiled surface. Every area including the edges should have full coverage. Use all the rub.
- Rest the rubbed breasts at room temperature for 10 minutes. The salt draws moisture to the surface during this rest, helping the rub adhere even more firmly before cooking.
- Preheat the air fryer to 400°F for 3 minutes. The high temperature is intentional — it produces the near-blackened caramelized crust that makes Cajun cooking distinct. Spray the basket with cooking oil spray. Arrange the rubbed breasts in a single layer with space between each.
- Cook at 400°F for 7 minutes. When you open the air fryer at 7 minutes, the surface should show very significant dark browning — a very dark reddish-brown to near-black from the paprika and cayenne caramelizing at 400°F. This darkness is the CORRECT visual result, not burning. Use tongs to flip each breast. The basket-facing side should show an identical dark crust. Spray the newly exposed tops lightly with cooking oil spray.
- Cook for 7 more minutes at 400°F. At 14 minutes total, check the internal temperature at the thickest point. The ½-inch breast at 400°F should be at or above 160°F. Pull immediately at 160°F — do not cook past this at 400°F. Transfer to a cutting board.
- Rest for 5 minutes. Slice against the grain into strips and serve over steamed white rice with warmed corn, a squeeze of fresh lime over the entire plate, and simple coleslaw on the side.
17. Chicken Parmesan Breast

Saad's unsolicited-compliment dinner. The panko-Parmesan crust achieves genuine restaurant crunch without deep frying, and the three-step cook (bread, air fry, add toppings and finish) takes 18 minutes total in the basket. More positive feedback per minute of effort than any other recipe in this collection.
Ingredients
- 4 halal chicken breasts, pounded to ½ inch
- 2 large eggs
- 1 cup panko breadcrumbs
- ½ cup freshly grated Parmesan (not the shaker-can kind — the texture and flavor are completely different)
- 1 teaspoon Italian seasoning + ½ teaspoon garlic powder + 1 teaspoon salt + ½ teaspoon black pepper
- Cooking oil spray (used generously — this is what makes the panko golden)
- ½ cup good-quality marinara + 1 cup shredded mozzarella + fresh basil for finishing
- Pasta with additional marinara for serving
Instructions
- Pound each breast to ½ inch. Pat completely dry on all surfaces using paper towels — the surface must be dry for the egg coating to adhere properly. Season both sides lightly with a pinch of salt and pepper.
- Beat both eggs in a wide, shallow bowl until completely uniform with no egg-white streaks. In a separate wide, shallow bowl, combine the panko, freshly grated Parmesan, Italian seasoning, garlic powder, remaining salt, and pepper. Mix thoroughly with a fork so the Parmesan and seasonings are evenly distributed through every part of the panko — no clumps, no bare areas. The Parmesan mixed throughout the panko is what gives this crust its golden color and nutty depth.
- Working one breast at a time: lay the breast in the egg bowl and flip it so all surfaces are coated. Lift and hold above the bowl for a full 5 seconds, letting excess egg drip off. Too much egg makes the coating soggy rather than crispy. Lay the egg-coated breast in the panko bowl and press down firmly with your entire palm across the full surface, applying even pressure. Flip and press the second side firmly. Press the narrow edges into the panko as well. Every surface should have a dense, complete coating. Bare patches: dip that spot back in egg and re-press into the panko immediately. Transfer to a clean plate and repeat with the remaining breasts.
- Let the coated breasts rest on the plate for 5 minutes — this allows the egg to begin setting around the panko, creating a more cohesive crust that holds together through the flip in the air fryer.
- Preheat the air fryer to 380°F for 3 minutes. Spray the basket very generously with cooking oil spray — the oil on the basket surface creates the golden crispy underside crust. Arrange the coated breasts in a single layer. Spray the top surfaces very generously with cooking oil spray — do not be conservative. This spray is doing the work of a fryer full of oil, and insufficient spray produces pale, dry panko.
- Cook at 380°F for 6 minutes. Open the air fryer. Use a wide, thin spatula — not tongs — and slide it fully and completely under one breast before lifting. The breaded crust is fragile at this point and will crack if you try to flip by grabbing with tongs. Slide the spatula completely under, supporting the entire surface, and flip in one smooth, confident motion. The basket-facing side should be deeply golden and visibly crispy. Spray the newly exposed panko surface generously and repeat for all four breasts.
- Cook for 6 more minutes. At 12 minutes total, open the air fryer. Working quickly: spoon 1–2 tablespoons of marinara onto the top center of each breast and spread gently to within ½ inch of the crust edges — leave the crust perimeter uncovered so it stays crispy. Scatter shredded mozzarella generously over the marinara on each breast.
- Close and cook for 3 more minutes at 380°F. The mozzarella will melt completely, bubble, and begin showing light golden spots. At 15 minutes total, check internal temperature from the side of the breast. At ½-inch thick and 15 minutes, it should be at or above 160°F. Pull immediately.
- Transfer each breast to a serving plate using the wide spatula, keeping the mozzarella topping in place. Tear 2–3 fresh basil leaves over the melted mozzarella while still hot — the heat gently wilts them. Serve immediately over pasta with additional warmed marinara sauce poured over the pasta (not over the chicken, so the crust stays crispy). Best eaten within 5 minutes of plating.
16. Tikka-Marinated Chicken Breast
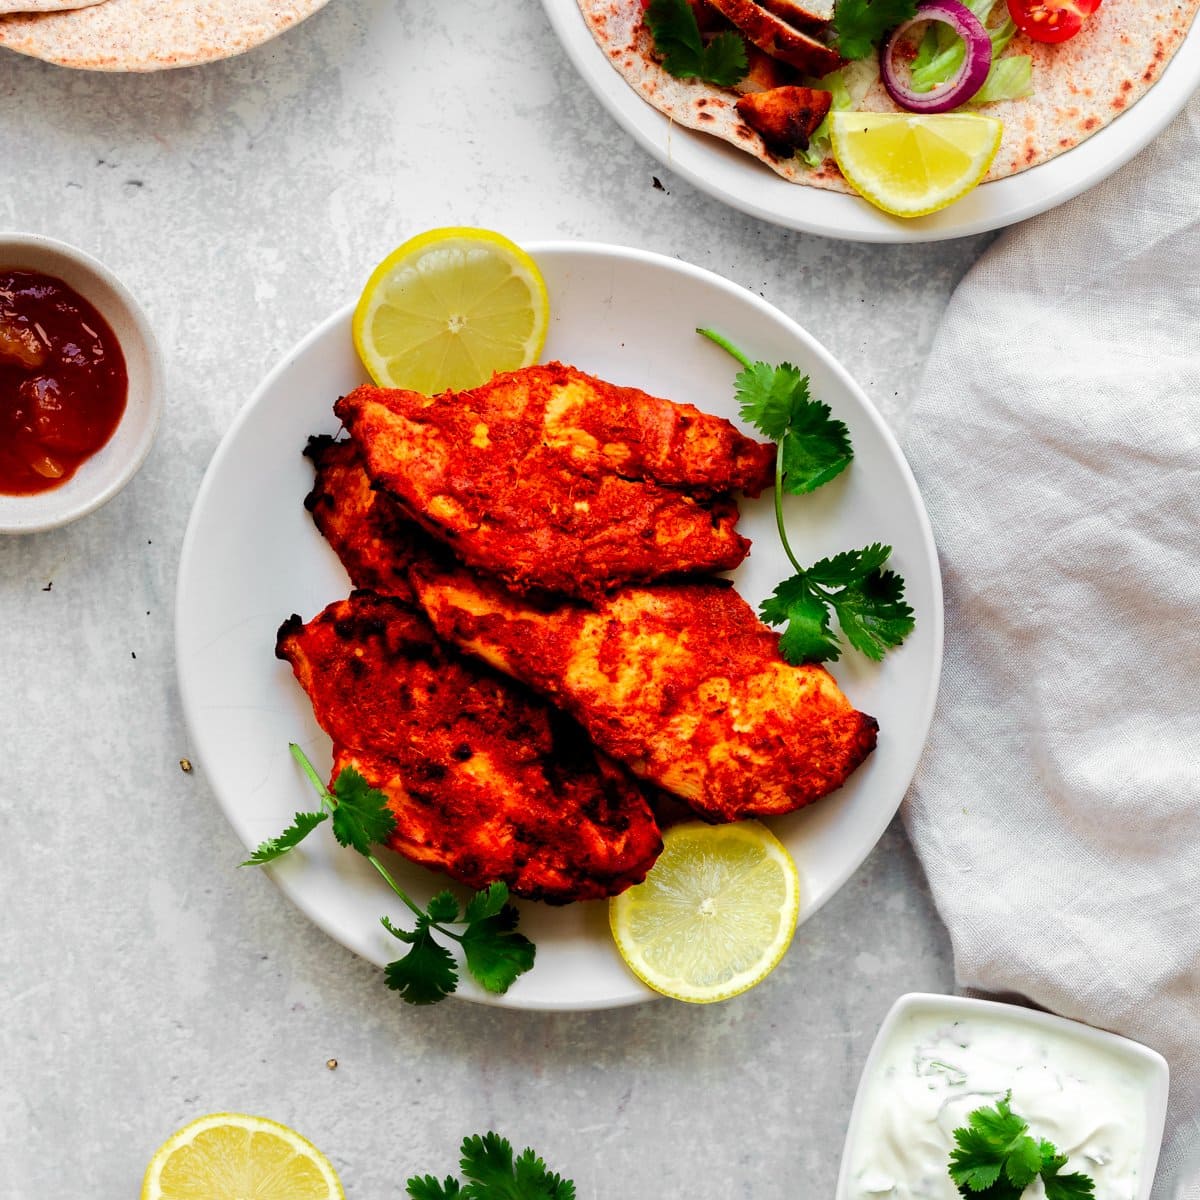
The yogurt both flavors and tenderizes the breast, making the overnight version significantly more flavorful and more forgiving on the dry-chicken window than same-day marinating. The Kashmiri chili gives the breast its deep brick-red color and the mild heat my mother in Pakistan considers the minimum acceptable spice level for any chicken preparation. ✅ Cardiac diet appropriate when sliced thin with sauce on the side.
Ingredients
- 4 halal chicken breasts
- ½ cup full-fat plain yogurt
- 1½ tablespoon Kashmiri chili powder (not cayenne — Kashmiri chili is mild and very red)
- 1 teaspoon garam masala + 1 teaspoon cumin + 1 teaspoon coriander
- 4 garlic cloves grated + 1 inch fresh ginger grated + juice of 1 lemon + 1 teaspoon salt
- Mint chutney: 1 cup fresh mint + ½ cup cilantro + 1 green chili + juice of 1 lemon + 1 garlic clove + salt — blend smooth
- Basmati rice and lemon-dressed red onion for serving
Instructions
- Score each breast 3–4 times on each side using a sharp knife, making cuts about ¼ inch deep across the width of the breast. These cuts create channels for the marinade to reach below the exterior surface. Scoring is especially important for yogurt-based marinades because the thick yogurt does not penetrate meat the way thinner liquid marinades do.
- In a large bowl, combine the yogurt, Kashmiri chili powder, garam masala, cumin, coriander, grated garlic, grated ginger, lemon juice, and salt. Stir thoroughly until every ingredient is fully incorporated — the mixture should be a completely uniform deep red-orange color with no streaks or dry spice pockets.
- Add the scored breasts to the marinade and use your hands to turn each breast repeatedly, working the marinade into all the score cuts with your fingers. Every surface should be thickly coated. Cover tightly with plastic wrap and refrigerate overnight — 12 to 24 hours. The lemon acid and yogurt enzymes together tenderize the protein fibers, and the spices penetrate progressively deeper over the full overnight window.
- Remove from the refrigerator 15 minutes before cooking. Pound each marinated breast gently to ½ inch through the marinade coating — the coating gets pressed into the surface as you pound, which is beneficial. Make the mint chutney: blend all chutney ingredients until completely smooth. Refrigerate until serving.
- Preheat the air fryer to 400°F for 3 minutes. Do NOT spray the basket — the yogurt marinade provides enough fat to prevent sticking. Place the breasts in a single layer without wiping the marinade off — you want the full thick coating on the surface so it caramelizes and chars during cooking.
- Cook at 400°F for 7 minutes. Open the air fryer and inspect the surface: the yogurt marinade should show significant caramelization and charring — dark spots forming, the color deepening from raw red-orange to a much darker reddish-brown with blackened areas. This is exactly correct — it should look like restaurant-quality tikka, not pale oven-roasted chicken. Flip each breast with tongs, scraping any stuck marinade from the basket back onto the breast.
- Cook for 7 more minutes at 400°F. The surface now facing up develops the same beautiful charred tikka crust. At 14 minutes total, check the internal temperature at the thickest point of the breast — insert the thermometer into the actual center of the meat, not at a charred surface area. Pull at 160°F and transfer to a cutting board.
- Rest for 5 minutes. Slice across the grain into thin strips — approximately ¼ inch thick, thinner than the ½-inch slice used for other recipes. Thin slicing is what makes tikka chicken eat the way it does at a good restaurant. Serve over fluffy basmati rice with cold mint chutney on the side and lemon-dressed sliced red onion alongside.
15. Greek-Marinated Chicken Breast
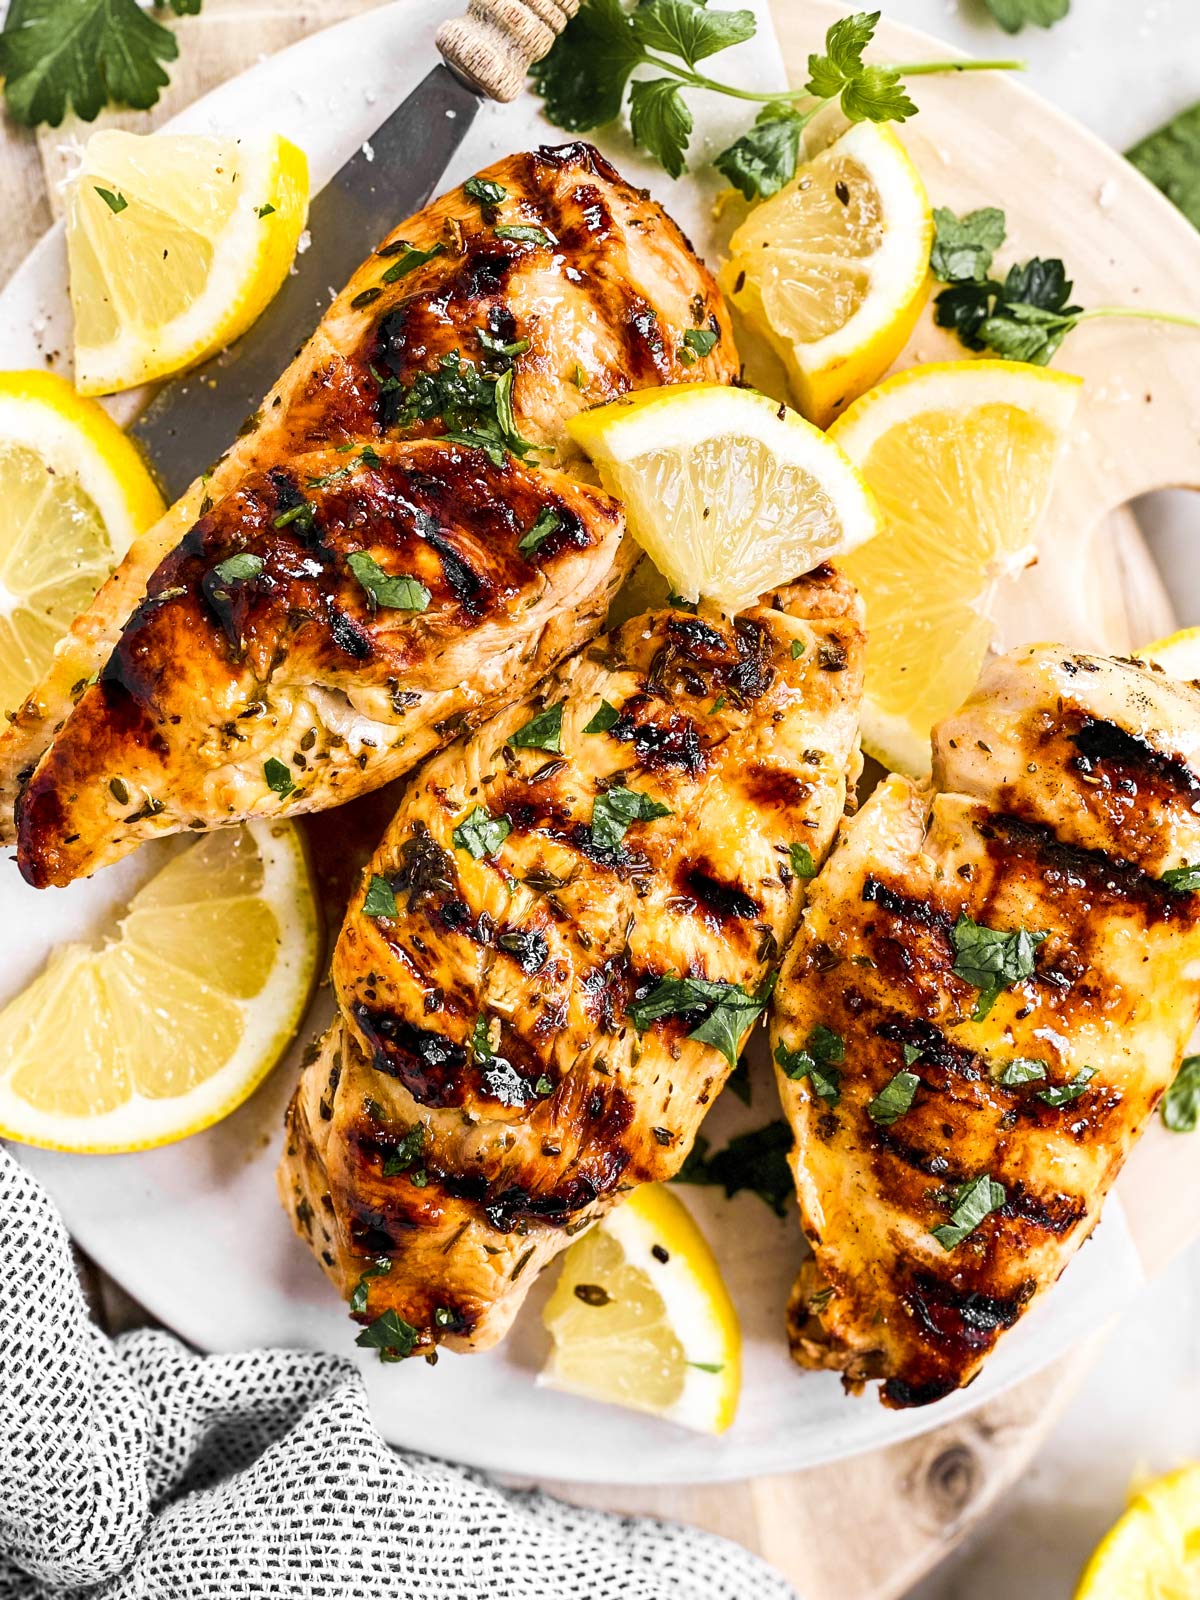
A pinch of cinnamon is the detail that separates Greek-style from Italian-style oregano-chicken — at ⅛ teaspoon it adds depth without ever reading as cinnamon. Also Zainab's preferred dinner when Greek salad is served underneath it, which she eats around the tomatoes in a very specific pattern she considers perfectly efficient. ✅ Cardiac diet appropriate.
Ingredients
- 4 halal chicken breasts
- 3 tablespoon olive oil + juice of 2 large lemons + 4 garlic cloves minced + 2 teaspoon dried oregano + ⅛ teaspoon cinnamon + 1 teaspoon salt + ½ teaspoon pepper
- Greek salad: 1 English cucumber + 1 cup cherry tomatoes + ½ cup Kalamata olives + ½ cup crumbled feta + ½ small red onion — dressed with 3 tablespoon olive oil + juice of 1 lemon + ½ teaspoon oregano + salt
- Tzatziki and warm pita for serving
Instructions
- Score each breast 3 times on each side with a sharp knife making ¼-inch-deep cuts. Pound each breast to ½ inch after scoring — scoring first then pounding allows the score cuts to open slightly during pounding, creating wider channels for the marinade.
- In a bowl, whisk together the olive oil, lemon juice, minced garlic, dried oregano, cinnamon, salt, and pepper until fully combined. The cinnamon should be truly just a pinch — ⅛ teaspoon maximum — entirely undetectable as cinnamon in the finished dish, present only as a deeper undertone in the oregano-lemon profile that makes people ask what is different about this compared to standard herb chicken.
- Place the scored and pounded breasts in a shallow dish or large zip-lock bag. Pour the marinade over, turning the breasts so every surface and the score cuts are coated. Seal or cover tightly. Refrigerate for a minimum of 30 minutes — overnight is best, with the lemon acid tenderizing the breast fibers progressively over the full marinating window.
- While the chicken marinates, prepare the Greek salad: dice the cucumber into half-rounds, halve the cherry tomatoes, thinly slice the red onion, and combine in a large bowl with the olives and feta. Whisk together the dressing and pour over the salad. Toss, cover, and let sit at room temperature — the salad improves as it rests.
- Remove the marinated breasts from the refrigerator 10 minutes before cooking. Pat the surface lightly to remove excess dripping marinade. Preheat the air fryer to 380°F for 3 minutes. Spray the basket lightly with cooking oil spray.
- Arrange the breasts in a single layer. Cook at 380°F for 7 minutes. Open and flip each breast with tongs — the underside should be golden with good color from the oregano and lemon marinade. Spray the newly exposed tops lightly with oil. Cook 7 more minutes.
- Check internal temperature at 14 minutes. Pull at 160°F. Transfer to a cutting board and rest 5 minutes. Slice at a gentle diagonal across the grain into wide, thin slices. Divide the Greek salad among four plates. Fan the warm chicken slices over the top of the salad — the heat slightly wilts the leaves and warms the feta beneath. Add a squeeze of additional lemon over the chicken. Place a generous spoonful of tzatziki alongside and serve with warm pita.
14. Pesto-Coated Chicken Breast
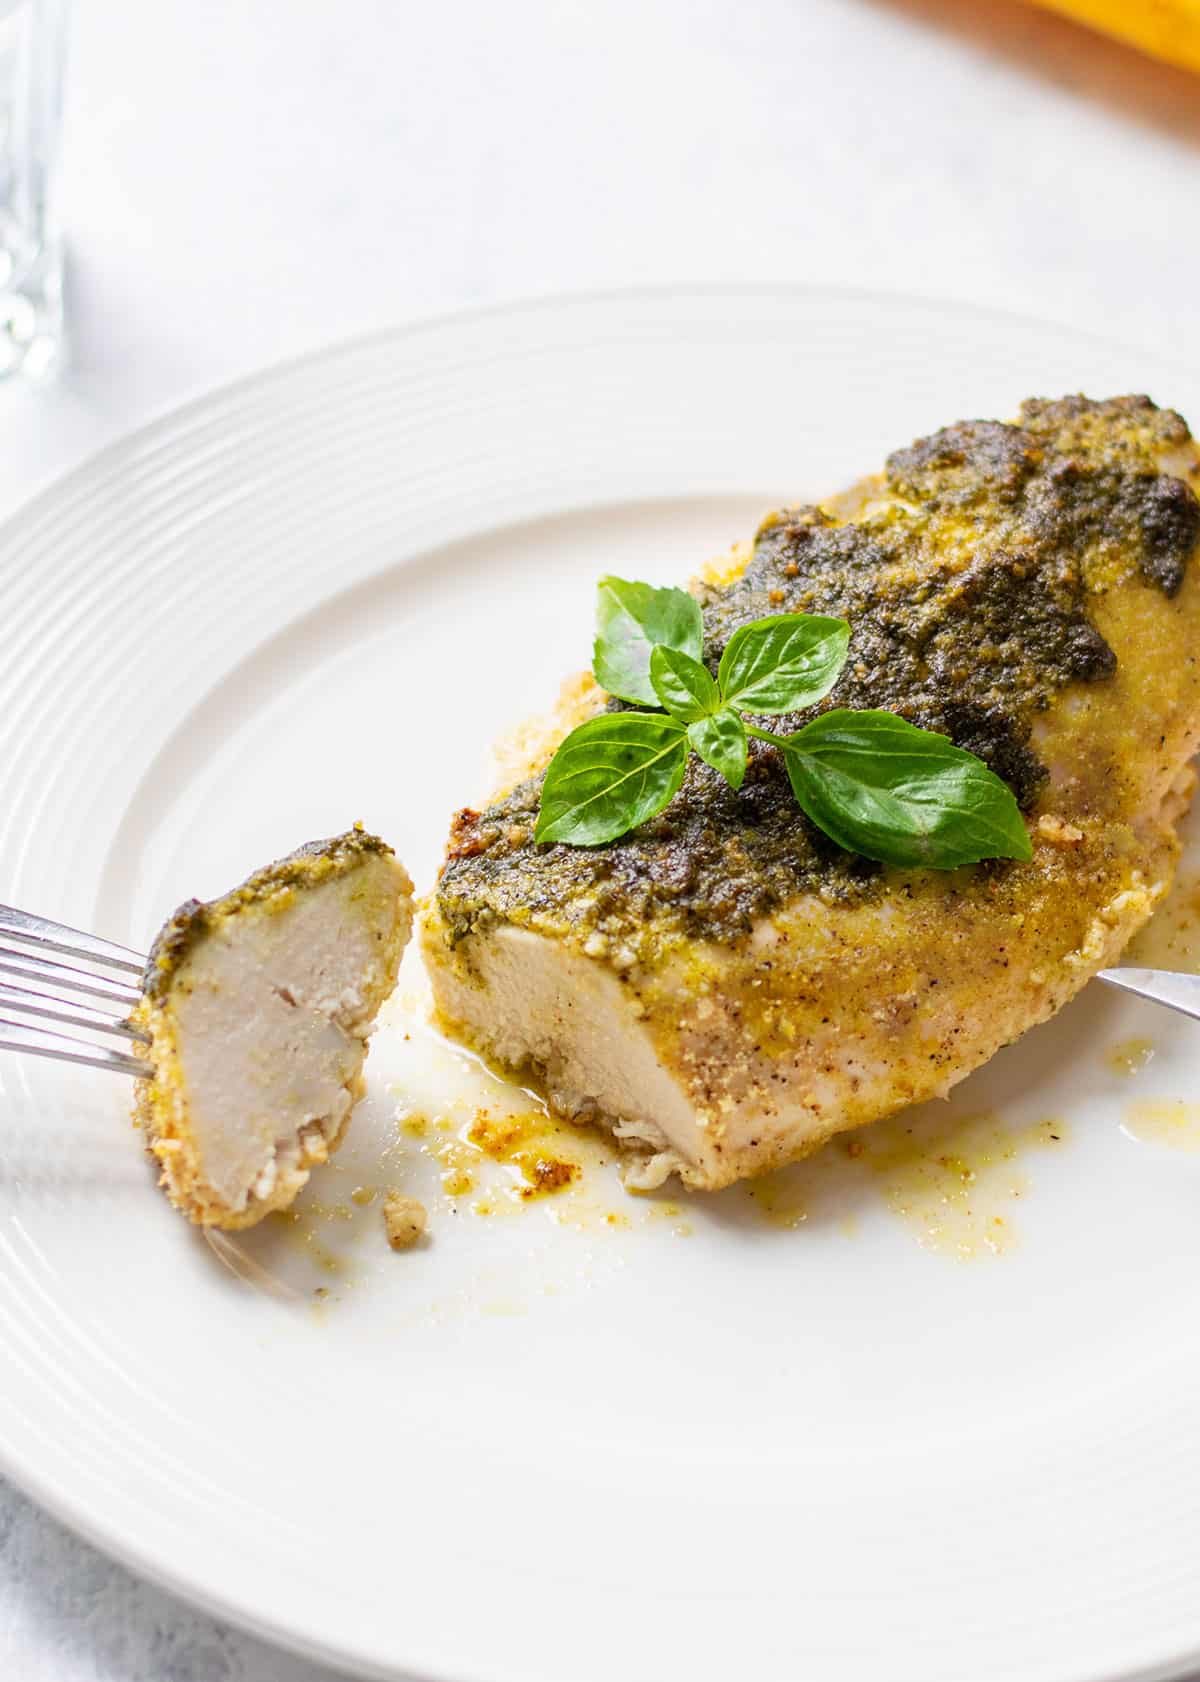
The pesto acts simultaneously as marinade, coating, and sauce — the basil-garlic-Parmesan fat base seals the breast exterior during cooking, keeping the interior moist while the surface caramelizes to a golden herb crust. The most aromatic air fryer preparation in this collection during cooking.
Ingredients
- 4 halal chicken breasts, pounded to ½ inch
- 4 tablespoon good-quality basil pesto (1 tablespoon per breast)
- 3 tablespoon freshly grated Parmesan cheese
- ½ teaspoon salt + ¼ teaspoon black pepper
- Additional pesto thinned with 1 tablespoon pasta water for serving over pasta
Instructions
- Pound breasts to ½ inch. Season lightly with salt and pepper on both sides.
- Using a spoon or pastry brush, spread 1 tablespoon of pesto over both sides of each breast — approximately ½ tablespoon per side. The pesto layer should be thin and even, like a light coat of paint that covers every part of the surface including the edges. Not thick like frosting — just a visible, complete film across every inch of both sides of each breast.
- Sprinkle the grated Parmesan evenly over the top pesto-coated surface of all four breasts. The Parmesan forms an additional thin crust layer on top of the pesto, adding texture and flavor beyond what the pesto alone provides.
- Let the coated breasts rest at room temperature for 10 minutes. The pesto acts as a brief marinade during this window and the salt begins working into the surface.
- Preheat the air fryer to 375°F for 3 minutes. The specific temperature of 375°F rather than 380°F or 400°F is intentional: the fresh basil in pesto caramelizes well at 375°F but browns too aggressively and develops a slightly bitter quality at higher temperatures. Spray the basket with cooking oil spray. Arrange the breasts Parmesan-side up in a single layer.
- Do NOT spray the top surfaces of the pesto-coated breasts. The pesto contains sufficient olive oil to self-baste the exterior during cooking, and any additional oil spray on top would cause the pesto to pool away from the surface rather than staying adhered as it cooks.
- Cook at 375°F for 7 minutes. Open the air fryer. Use a wide, thin spatula — not tongs — and slide it completely and slowly under each breast before attempting to lift. The pesto coating on the bottom surface will have formed a golden, caramelized crust that needs full support from below when flipping or it will crack and separate. Flip each breast in one confident motion. The pesto side now facing up should show deep golden-green caramelization. Cook for 7 more minutes.
- Check internal temperature at 14 minutes. Pull at 160°F and transfer to a cutting board. Rest for a full 5 minutes — pesto-coated chicken releases more juice during the rest than any other preparation in this collection. Slice against the grain and serve over pasta tossed with additional pesto thinned with pasta water, finishing with shaved Parmesan and a squeeze of lemon.
13. Buffalo Shredded Chicken Breast
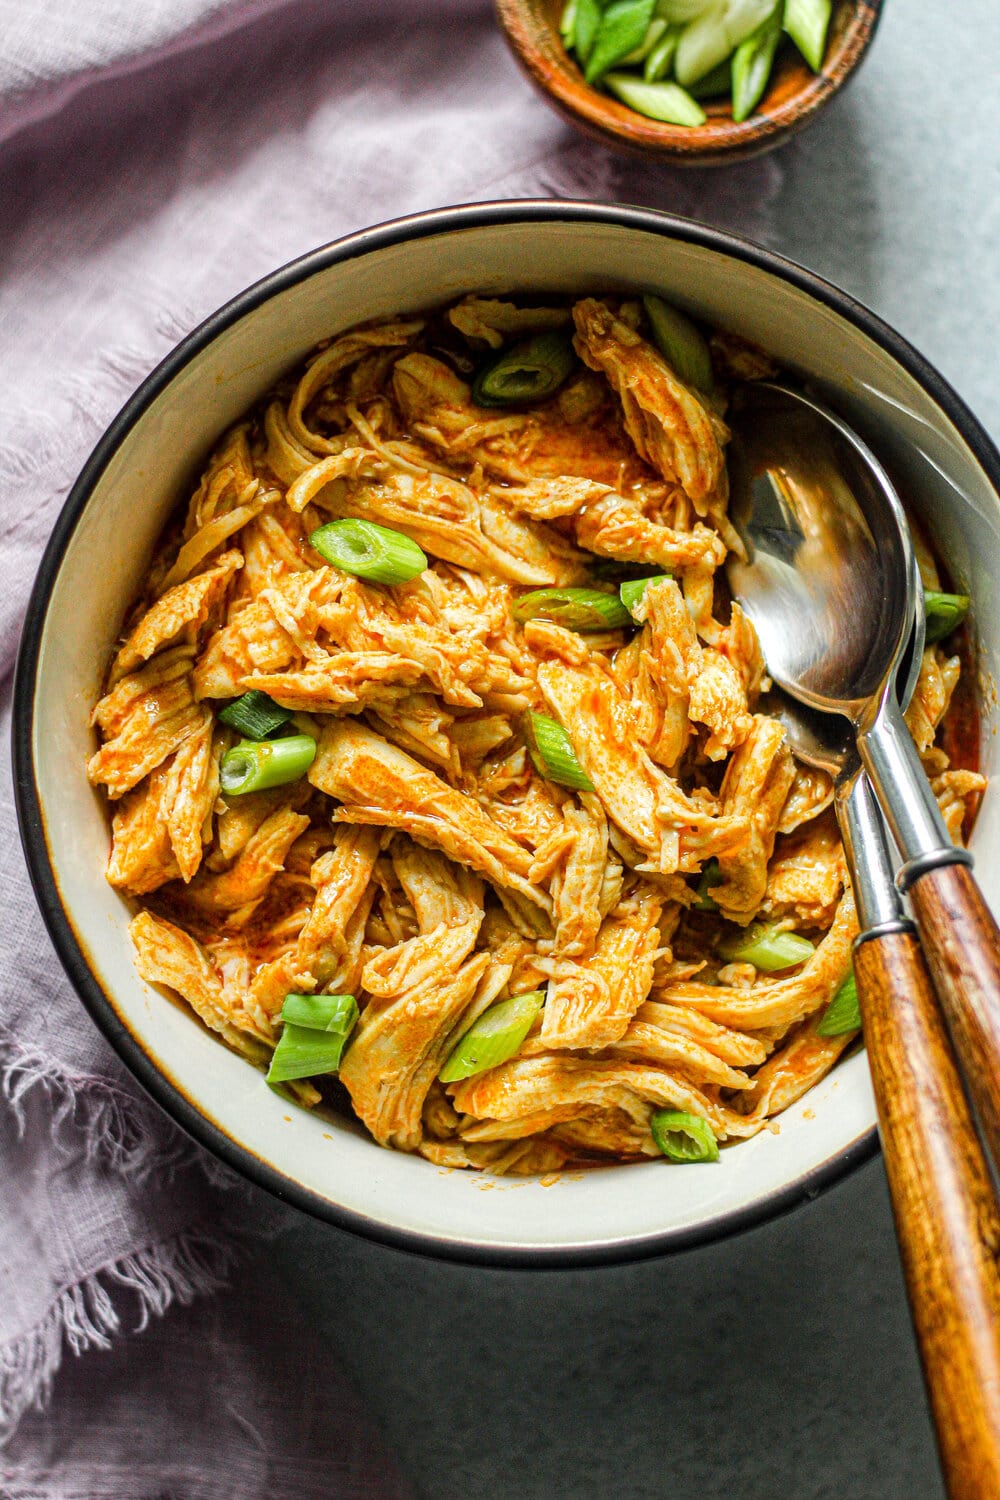
The most versatile preparation in the collection. Cook four breasts on Sunday and use the shredded buffalo chicken in four different formats across the week — rice bowls Monday, wraps Tuesday, salads Wednesday, quesadillas Thursday. My husband's preferred meal-prep protein when the week needs maximum flexibility from a single Sunday cook.
Ingredients
- 4 halal chicken breasts, pounded to ½ inch
- 1 teaspoon salt + 1 teaspoon garlic powder + ½ teaspoon onion powder + ½ teaspoon smoked paprika
- Cooking oil spray
- Buffalo sauce: 4 tablespoon halal hot sauce + 2 tablespoon unsalted butter melted + 1 teaspoon honey
- Rice, celery sticks, and ranch dressing for serving
Instructions
- Pound breasts to ½ inch. Combine the salt, garlic powder, onion powder, and smoked paprika and stir to blend. Spray both sides of each breast with cooking oil spray, then sprinkle the seasoning over all surfaces and press in gently. Rest 10 minutes at room temperature.
- While the chicken rests, make the buffalo sauce: stir together the hot sauce, melted butter, and honey until completely smooth. The butter is what makes buffalo sauce cling to shredded chicken rather than sliding off — it emulsifies with the vinegar-based hot sauce and creates a slightly thick coating consistency. The honey takes the edge off the vinegar sharpness without making the sauce detectably sweet. Set aside at room temperature — do not refrigerate, as you need it warm when you add it to the hot shredded chicken.
- Preheat the air fryer to 380°F for 3 minutes. Spray the basket with cooking oil spray. Arrange the seasoned breasts in a single layer. Cook at 380°F for 7 minutes. Open the air fryer, flip each breast with tongs, spray the tops lightly, and cook 7 more minutes. Pull at 160°F internal temperature.
- Transfer the hot cooked breasts immediately to a large cutting board or bowl — do not rest before shredding. Shredding happens immediately while the chicken is as hot as possible, because hot chicken shreds into long, clean strands more easily than chicken that has begun to cool and firm back up. Using two forks held parallel, insert them into the breast from both ends and pull in opposite directions along the grain of the meat. The breast should separate into long fibrous strands. Work through each breast completely until no large pieces remain.
- Immediately while the shredded chicken is still steaming hot — do not wait even 2 minutes — pour the buffalo sauce over the shredded chicken and toss with the two forks until every strand is evenly coated. The heat of the freshly shredded chicken slightly warms and thins the butter-hot sauce mixture, allowing it to penetrate between the strands rather than sitting on top of a cold surface. This is the step that creates even flavor in every single bite.
- Taste and adjust — more hot sauce for more heat, more melted butter for more richness. Serve immediately in bowls over steamed rice with celery sticks and ranch dressing, or in warm flour tortilla wraps with shredded romaine. For meal prep: refrigerate in a sealed container up to 4 days. To reheat: place in a microwave container, stir in a splash of additional hot sauce, cover with a damp paper towel, and microwave on medium power for 90 seconds.
12. Harissa Chicken Breast
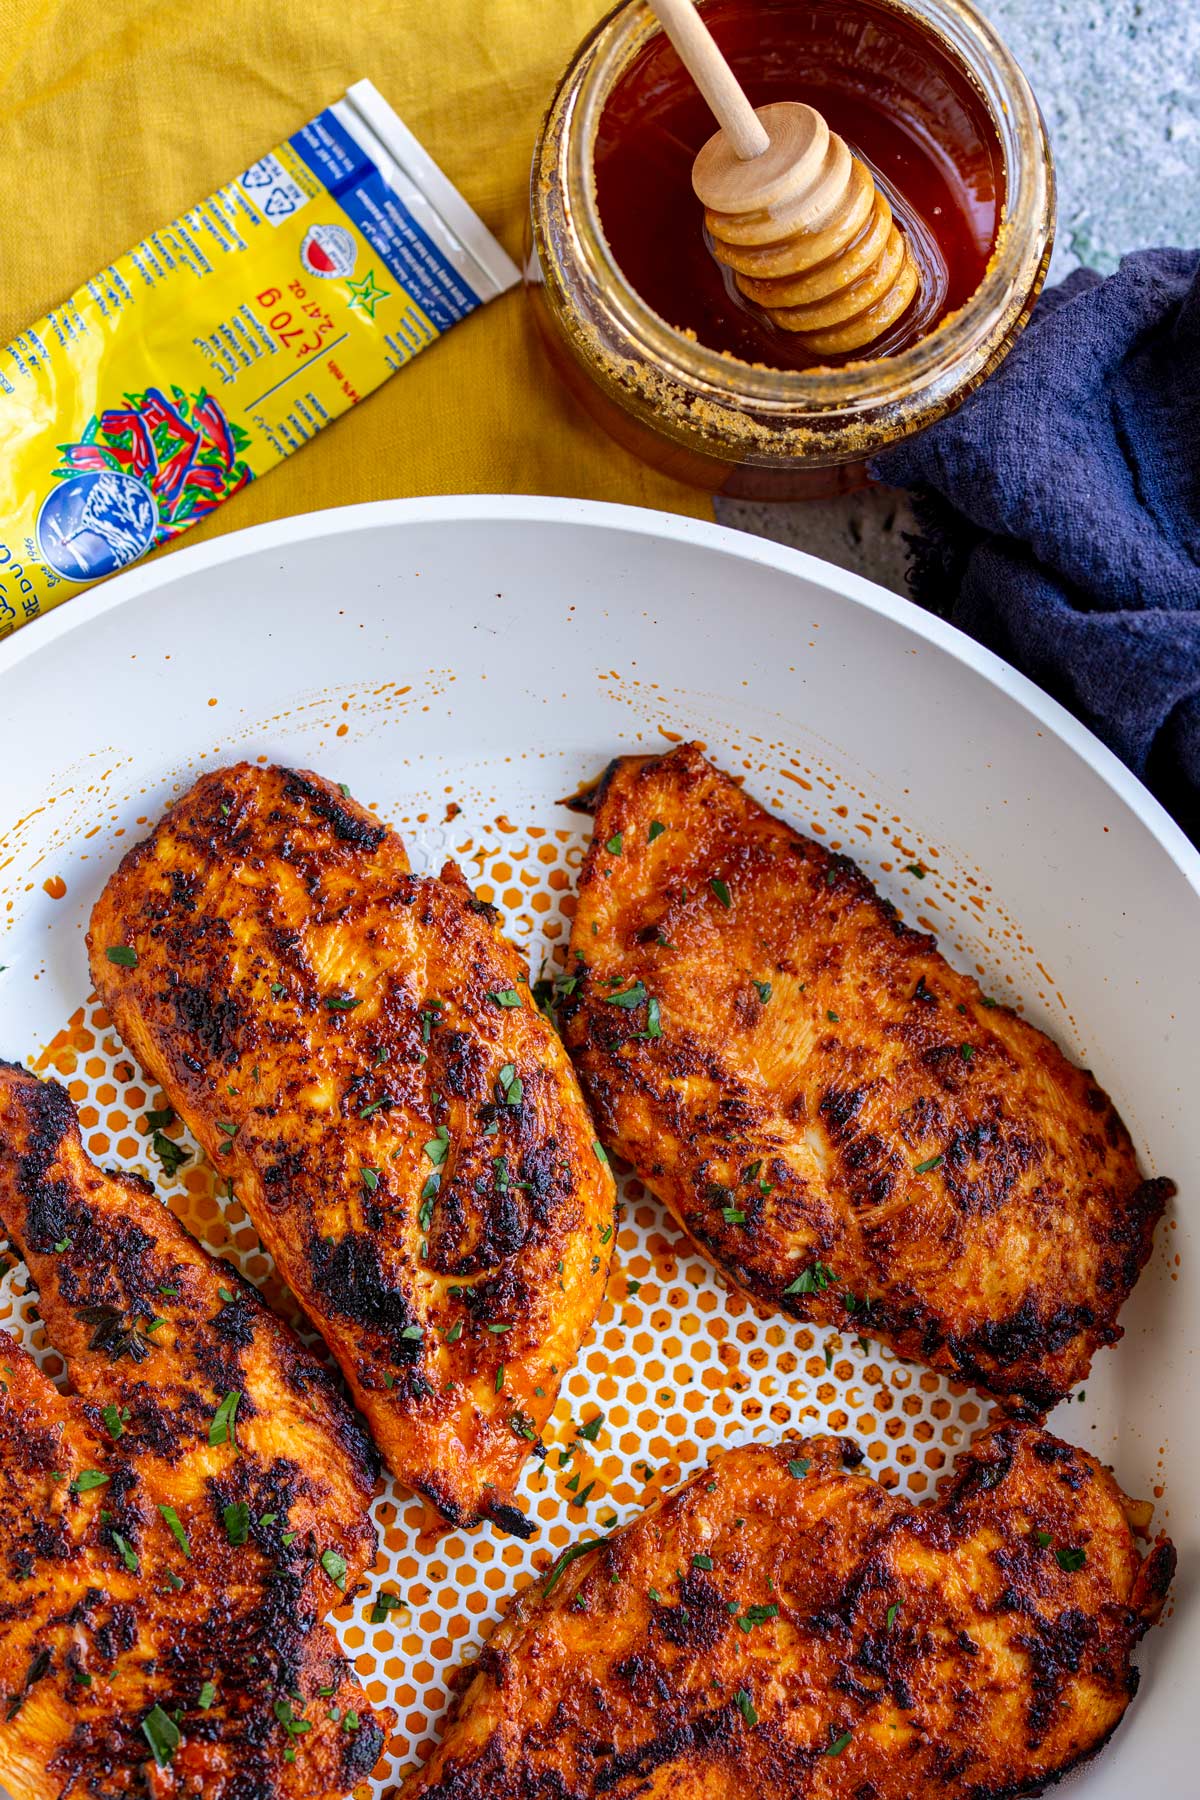
Harissa paste functions as both marinade and crust simultaneously, forming a dark red, slightly charred surface that caramelizes beautifully rather than burning at 380°F. The quickest route to a North African-flavored weeknight dinner — the harissa does all the flavor work.
Ingredients
- 4 halal chicken breasts, pounded to ½ inch
- 3 tablespoon harissa paste + 1 tablespoon olive oil + juice of 1 lemon + 1 teaspoon salt
- Herb yogurt: ½ cup plain yogurt + 2 tablespoon fresh mint chopped + juice of ½ lemon + 1 garlic clove grated + salt
- 1½ cups dry couscous steamed in 2½ cups boiling broth with olive oil and salt
- Pomegranate seeds for serving
Instructions
- Score each breast 2–3 times per side with a sharp knife making ¼-inch-deep cuts. Pound to ½ inch after scoring.
- Stir together the harissa paste, olive oil, lemon juice, and salt in a small bowl until completely smooth. The olive oil loosens the paste and the lemon adds brightness. The coating should be thick enough to cling visibly to the breast surface — if it seems too thin, add another ½ tablespoon of harissa paste.
- Spread the harissa coating generously over both sides of each breast and into the score cuts — a full, thick, visible coating on all surfaces. Cover with plastic wrap and marinate at room temperature for 15 minutes minimum, or refrigerate for up to 24 hours.
- Make the herb yogurt: stir together the yogurt, chopped fresh mint, lemon juice, grated garlic, and salt. Cover and refrigerate until serving — it is specifically meant to be served cold alongside the hot chicken, and the temperature contrast is part of the dish design.
- Prepare the couscous: place the dry couscous in a large heatproof bowl. Drizzle with a tablespoon of olive oil and a pinch of salt, toss, then pour the boiling broth over it. Stir once, then cover tightly with a plate or plastic wrap. Let steam undisturbed for exactly 5 minutes. Uncover and fluff vigorously with a fork, breaking up all clumps. It should be fully tender, light, and fluffy.
- Preheat the air fryer to 380°F for 3 minutes. Do not spray the basket — the olive oil in the harissa coating prevents sticking. Place the coated breasts in a single layer.
- Cook at 380°F for 7 minutes. Open the basket — the harissa coating should have deepened significantly in color, going from raw reddish-orange to a very dark, almost mahogany surface with some char spots. This is correct. Flip with tongs and cook for 7 more minutes. Check internal temperature at 14 minutes. Pull at 160°F. Rest 5 minutes. Slice across the grain and serve over the fluffy couscous with cold herb yogurt spooned alongside and pomegranate seeds scattered over the top.
11. Teriyaki Chicken Breast
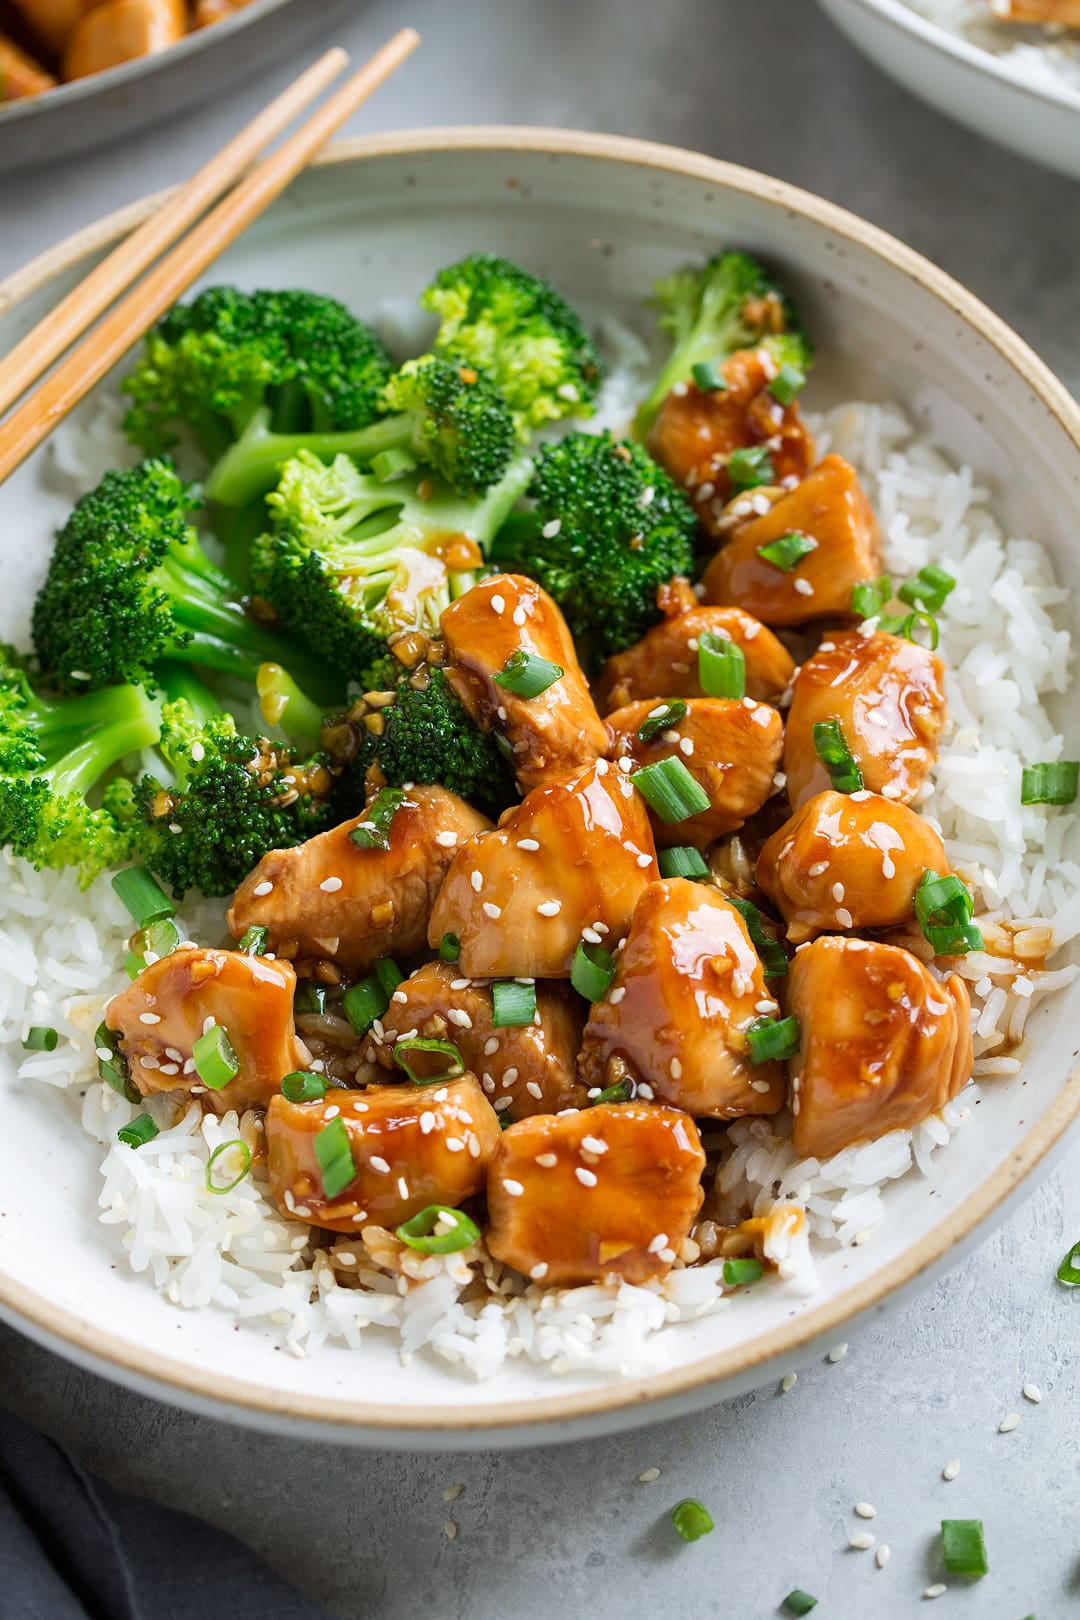
The most visually polished dinner from this collection — the lacquered honey-soy glaze, the white rice, the sesame seeds, and the green onion produce a plate that reads restaurant quality regardless of the 20-minute total cook time.
Ingredients
- 4 halal chicken breasts, pounded to ½ inch
- 1 teaspoon salt (light — the glaze provides virtually all the rest of the flavor)
- Teriyaki glaze: 3 tablespoon soy sauce + 2 tablespoon honey + 2 tablespoon mirin + 2 garlic cloves minced very fine + ½ teaspoon grated ginger + optional: 1 teaspoon cornstarch dissolved in 1 tablespoon cold water to thicken
- Sesame seeds, sliced green onion, steamed white rice, steamed broccoli for serving
Instructions
- Pound breasts to ½ inch. Season both sides with just salt — no other dry seasoning. The teriyaki glaze provides virtually all the flavor in this recipe, and additional dry spices will compete with and muddle the clean soy-honey-garlic profile.
- Make the teriyaki glaze: in a small saucepan over medium heat, combine the soy sauce, honey, mirin, minced garlic, and grated ginger. Stir to dissolve the honey. Bring to a gentle simmer. If using the cornstarch slurry, stir it in now. Cook at a gentle simmer for 3–4 minutes, stirring frequently, until the glaze has reduced slightly and coats the back of a spoon. Remove from the heat and set aside at room temperature with a pastry brush ready, both right beside the air fryer where you can grab them immediately at the flip.
- Start the rice cooking now so it finishes alongside the chicken. Preheat the air fryer to 380°F for 3 minutes. Spray the basket with cooking oil spray. Arrange the salted breasts in a single layer. Cook at 380°F for 7 minutes with no glaze applied — the dry first cook builds a sealed surface that gives the glaze something to adhere to in the second half of cooking.
- Open the air fryer at exactly 7 minutes. Working quickly, use the pastry brush to apply the teriyaki glaze generously and evenly over the entire top surface of each breast — every edge, every area. The minced garlic pieces in the glaze will toast and intensify in the final 7 minutes of cooking.
- Close the air fryer and cook for 7 more minutes at 380°F. The glaze bubbles and caramelizes, forming a deep amber, lacquered surface. In the final 2 minutes, if the glaze edges look very dark and smoke appears, reduce to 360°F for the remaining time.
- At 14 minutes total, check the internal temperature at the thickest point. Pull at 160°F. Transfer to a cutting board. Brush any remaining glaze over each surface while still hot — the residual heat sets the fresh glaze into the caramelized surface during the rest. Rest 5 full minutes.
- Slice at a slight diagonal across the grain into ½-inch strips. Fan the slices over steamed white rice. Scatter sesame seeds generously over the chicken and rice. Add thinly sliced green onion over the top. Spoon any glaze and juices that collected on the cutting board over the plated chicken. Serve steamed broccoli alongside.
10. Coconut Lime Chicken Breast
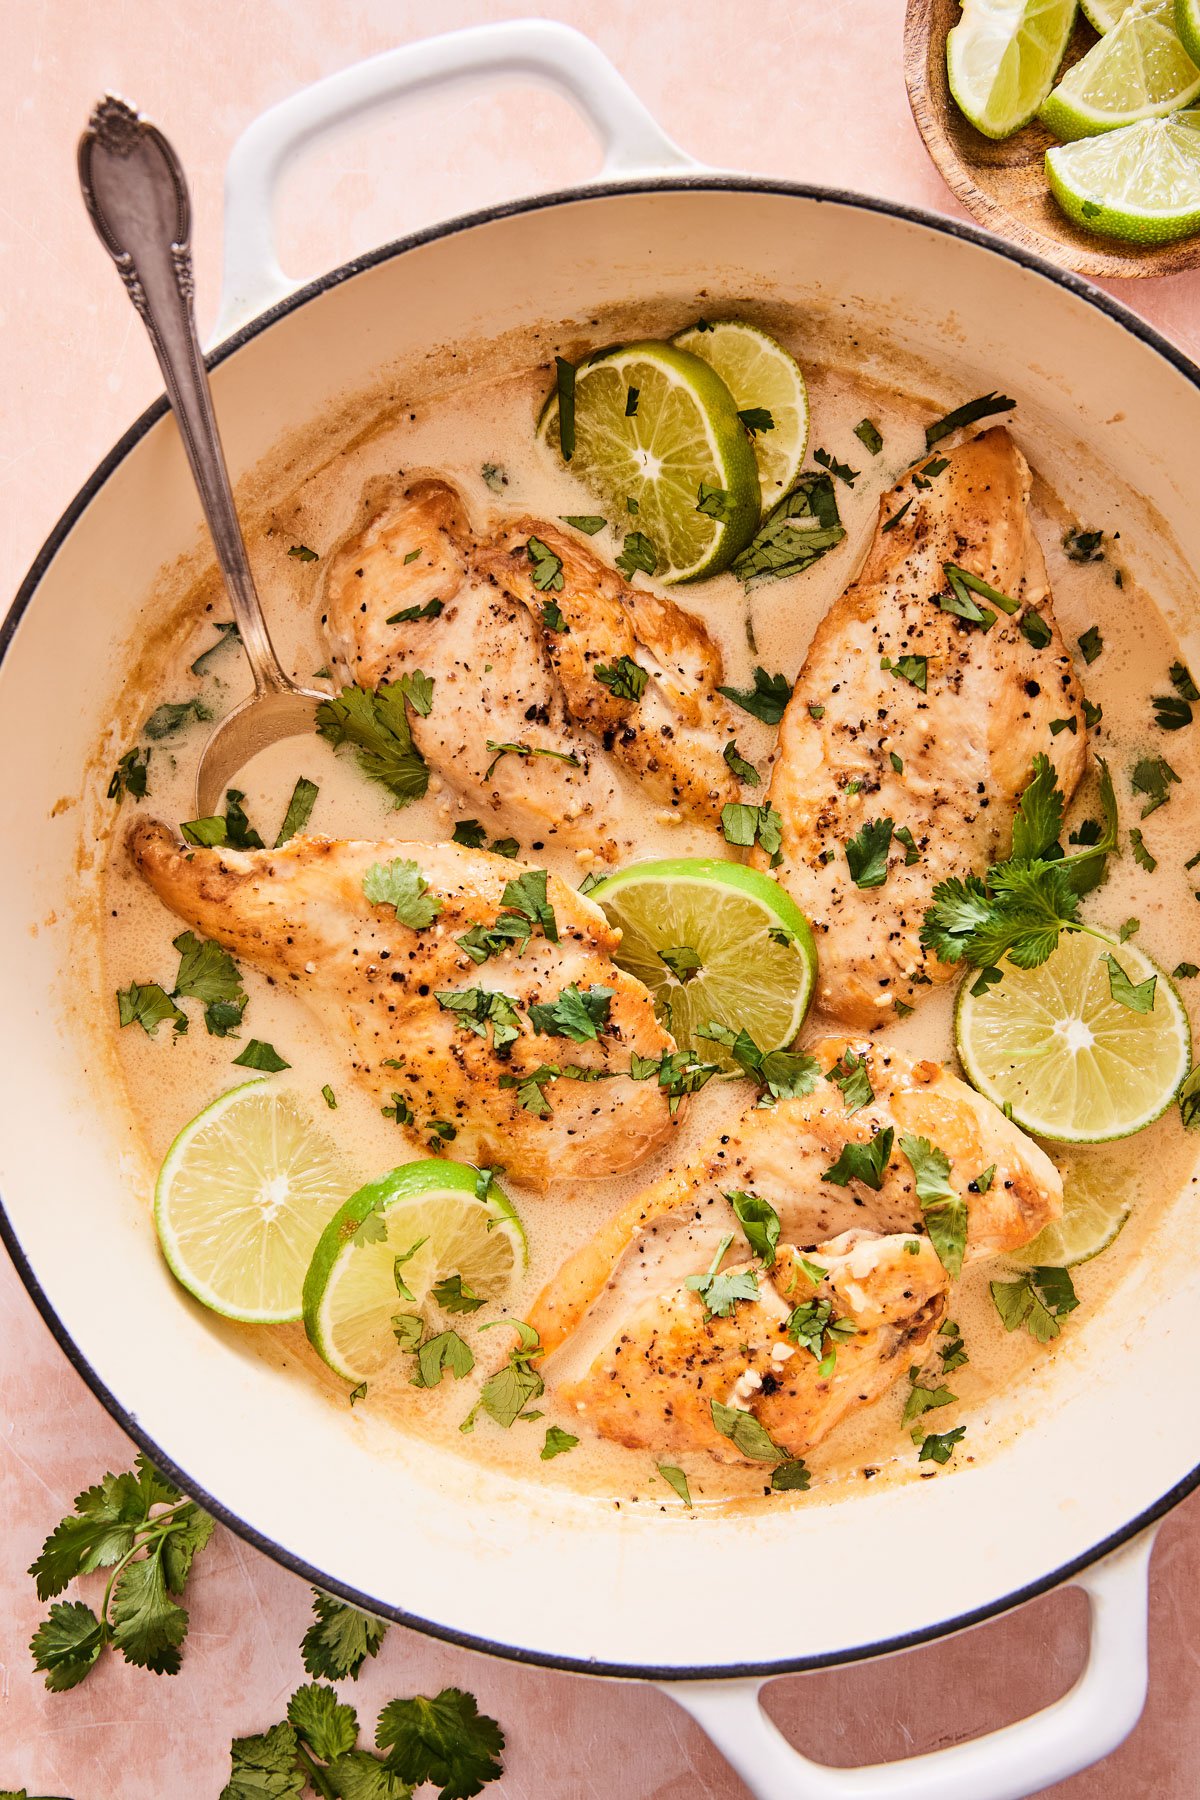
The coconut milk marinade tenderizes the breast more effectively than oil-based marinades because the fat in coconut milk penetrates the protein fibers — making this the most forgiving recipe in the collection for avoiding the dry-chicken outcome. The summer dinner that smells like a vacation from the moment the basket closes.
Ingredients
- 4 halal chicken breasts
- ½ cup full-fat coconut milk + juice and zest of 2 limes + 3 garlic cloves minced + 1 teaspoon grated ginger + ¼ teaspoon turmeric + 1 teaspoon salt
- Mango salsa: 1 ripe mango diced + ½ small red onion finely diced + juice of 1 lime + 2 tablespoon cilantro chopped + pinch chili flakes + salt
- Coconut rice: 1½ cups rinsed rice cooked in ¾ cup water + ¾ cup full-fat coconut milk + pinch of salt
Instructions
- Score each breast 3 times per side, then pound to ½ inch after scoring.
- Whisk together the coconut milk, lime juice, lime zest, minced garlic, grated ginger, turmeric, and salt until fully combined. Place the scored and pounded breasts in a zip-lock bag, pour the marinade over, seal pressing out the air, and refrigerate for a minimum of 2 hours — overnight produces the best result. The coconut milk fat penetrates the breast fibers and acts as a moisture reservoir that keeps the interior moist during the air fry.
- Make the mango salsa at least 30 minutes before serving: combine all salsa ingredients in a bowl, stir gently, cover, and let sit at room temperature. The lime juice draws juice from the mango and the flavors meld as it rests — it is noticeably better after 30 minutes than immediately after mixing.
- Cook the coconut rice: place rinsed rice in a saucepan with the water, coconut milk, and salt. Bring to a boil, stir once, reduce to the lowest possible simmer and cover tightly. Cook 15 minutes, then remove from heat and let steam covered 5 more minutes without lifting the lid. Fluff with a fork — the rice should be fragrant and slightly rich from the coconut milk.
- Remove the marinated breasts and shake off excess marinade — you want some coating remaining on the surface so it caramelizes, but not so much that the breasts are dripping. Preheat the air fryer to 375°F for 3 minutes. Spray the basket lightly with cooking oil spray.
- Arrange the breasts in a single layer. Cook at 375°F for 7 minutes. Open, flip each breast with tongs, and cook 7 more minutes. The coconut milk coating will caramelize to golden-brown spots on the surface. Check internal temperature — pull at 160°F. Rest 5 minutes.
- Slice against the grain into strips. Serve over the coconut rice with the mango salsa spooned generously over the chicken. Add lime wedges and extra fresh cilantro for the table.
9. Shawarma Chicken Breast
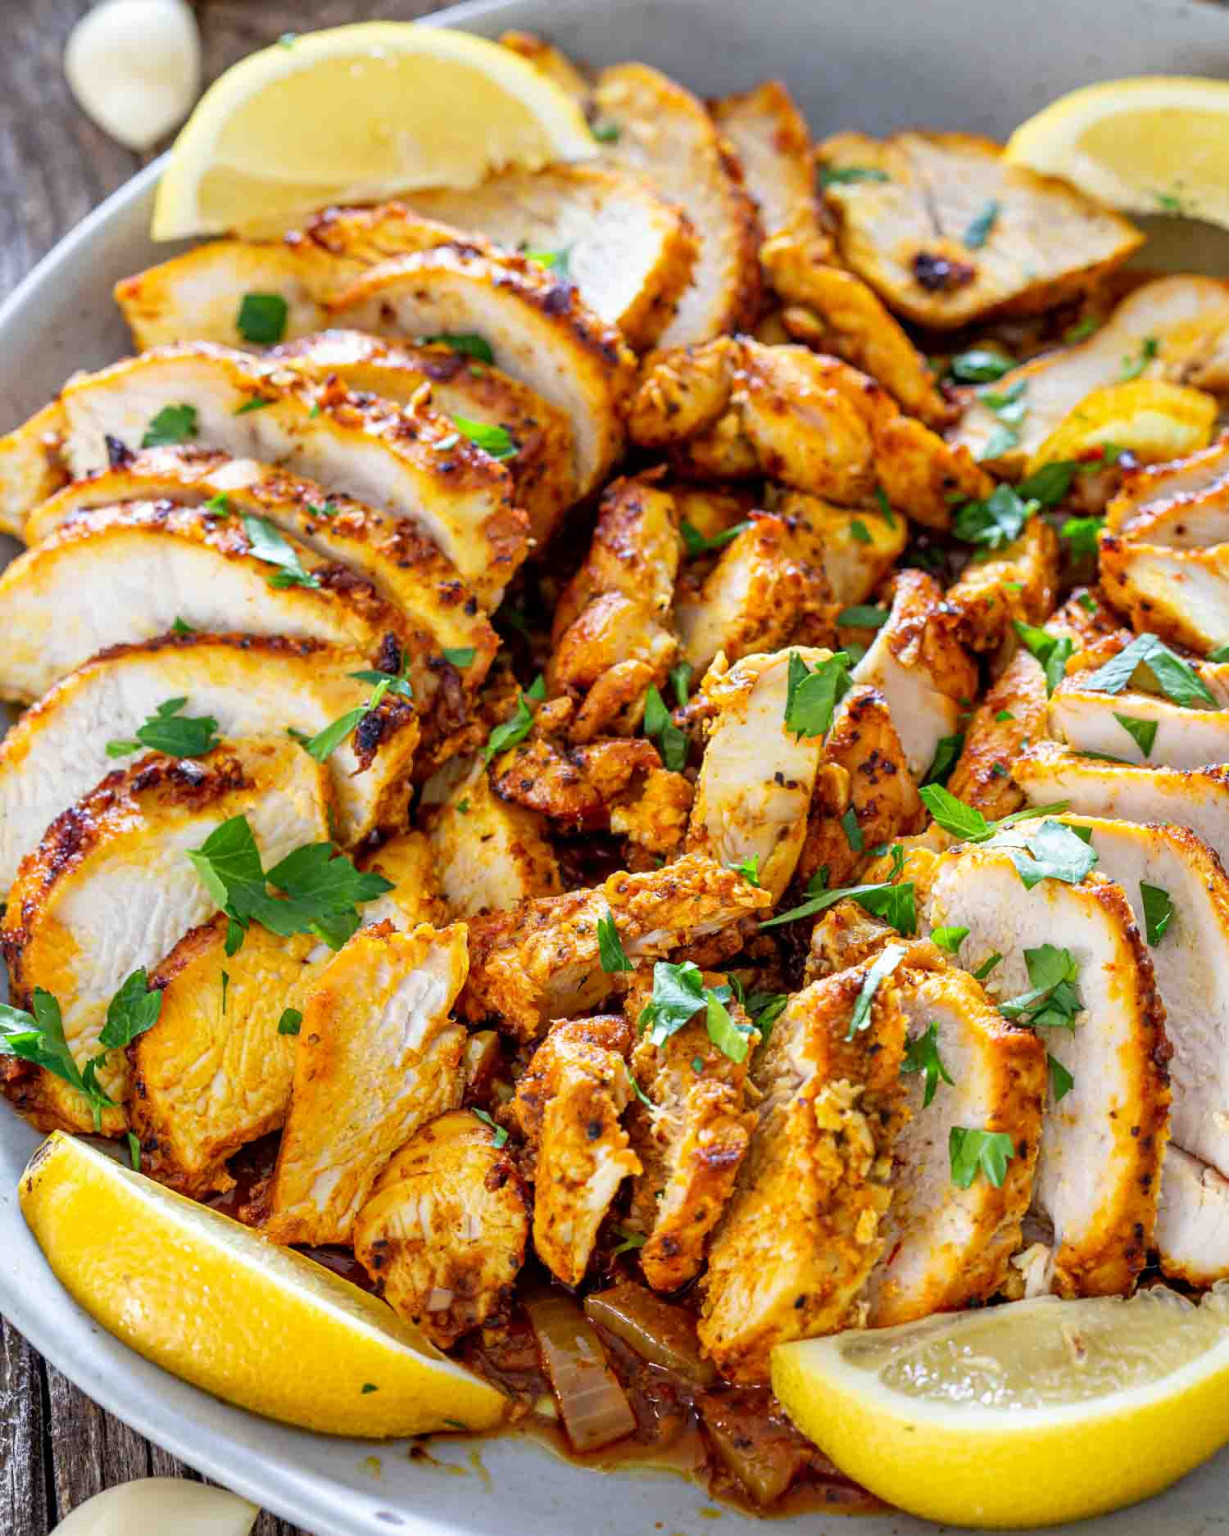
My husband's preferred lunch meal-prep format — 4 breasts cooked Sunday, sliced very thin, portioned over 5 rice bowls for the full work week. The shawarma spice blend produces a superior result on breast versus thigh because the breast's dense fiber structure holds the very thin slice format that shawarma requires better than the thigh's looser texture.
Ingredients
- 4 halal chicken breasts
- Shawarma marinade: 1 teaspoon each ground cumin, coriander, smoked paprika + ½ teaspoon turmeric + ¼ teaspoon cinnamon + ¼ teaspoon cardamom + 4 garlic cloves grated + juice of 2 lemons + 3 tablespoon olive oil + 1 teaspoon salt
- Garlic toum, pickled turnip, sliced cucumber, cherry tomatoes, and cooked rice for serving
Instructions
- Score each breast 3–4 times per side with a sharp knife making ¼-inch-deep cuts. Pound each breast to ½ inch after scoring. The scoring is especially important for shawarma — the complex spice profile needs to penetrate deeply into the breast to produce a result that reads as genuine restaurant-quality shawarma rather than merely spiced chicken.
- In a bowl, combine all the marinade ingredients — cumin, coriander, smoked paprika, turmeric, cinnamon, cardamom, grated garlic, lemon juice, olive oil, and salt — and stir until fully combined into a smooth, strongly aromatic paste. The combination of warm spices (cinnamon, cardamom) with earthy spices (cumin, coriander), color (paprika, turmeric), and lemon acid is what produces the specific flavor that makes shawarma immediately recognizable.
- Place the scored and pounded breasts in a large zip-lock bag. Pour in the marinade, seal, and massage from the outside so the marinade works into all the score cuts and coats every surface. Refrigerate overnight — 12 to 24 hours. The flavor develops substantially over the full overnight window.
- Remove from the refrigerator 15 minutes before cooking. Pat the surface lightly to remove excess dripping marinade while keeping the full spice coating. If doing meal prep, cook the rice batch now so it cools before portioning.
- Preheat the air fryer to 400°F for 3 minutes. Spray the basket with cooking oil spray. Arrange in a single layer. Cook at 400°F for 7 minutes per side, flipping at the midpoint. The shawarma spices caramelize deeply at 400°F — the surface should show very dark, fragrant charring, the same characteristic marks that distinguish great restaurant shawarma.
- Pull at 160°F internal temperature. Rest 5 minutes. Slice very thin against the grain — approximately ¼ inch thick. The slicing thickness is not a minor detail: the same chicken sliced thick versus thin produces a completely different eating experience, and the thin slice is what makes shawarma taste like shawarma.
- For meal prep bowls: divide cooked rice among containers, fan the very thinly sliced shawarma chicken over the rice, add sliced cucumber, halved cherry tomatoes, and pickled turnip. Store garlic toum in small separate containers. Refrigerate up to 4 days. Reheat the rice and chicken 90 seconds on medium power covered, then add cold toum and fresh vegetables after heating.
8. Stuffed Chicken Breast (Spinach and Mozzarella)
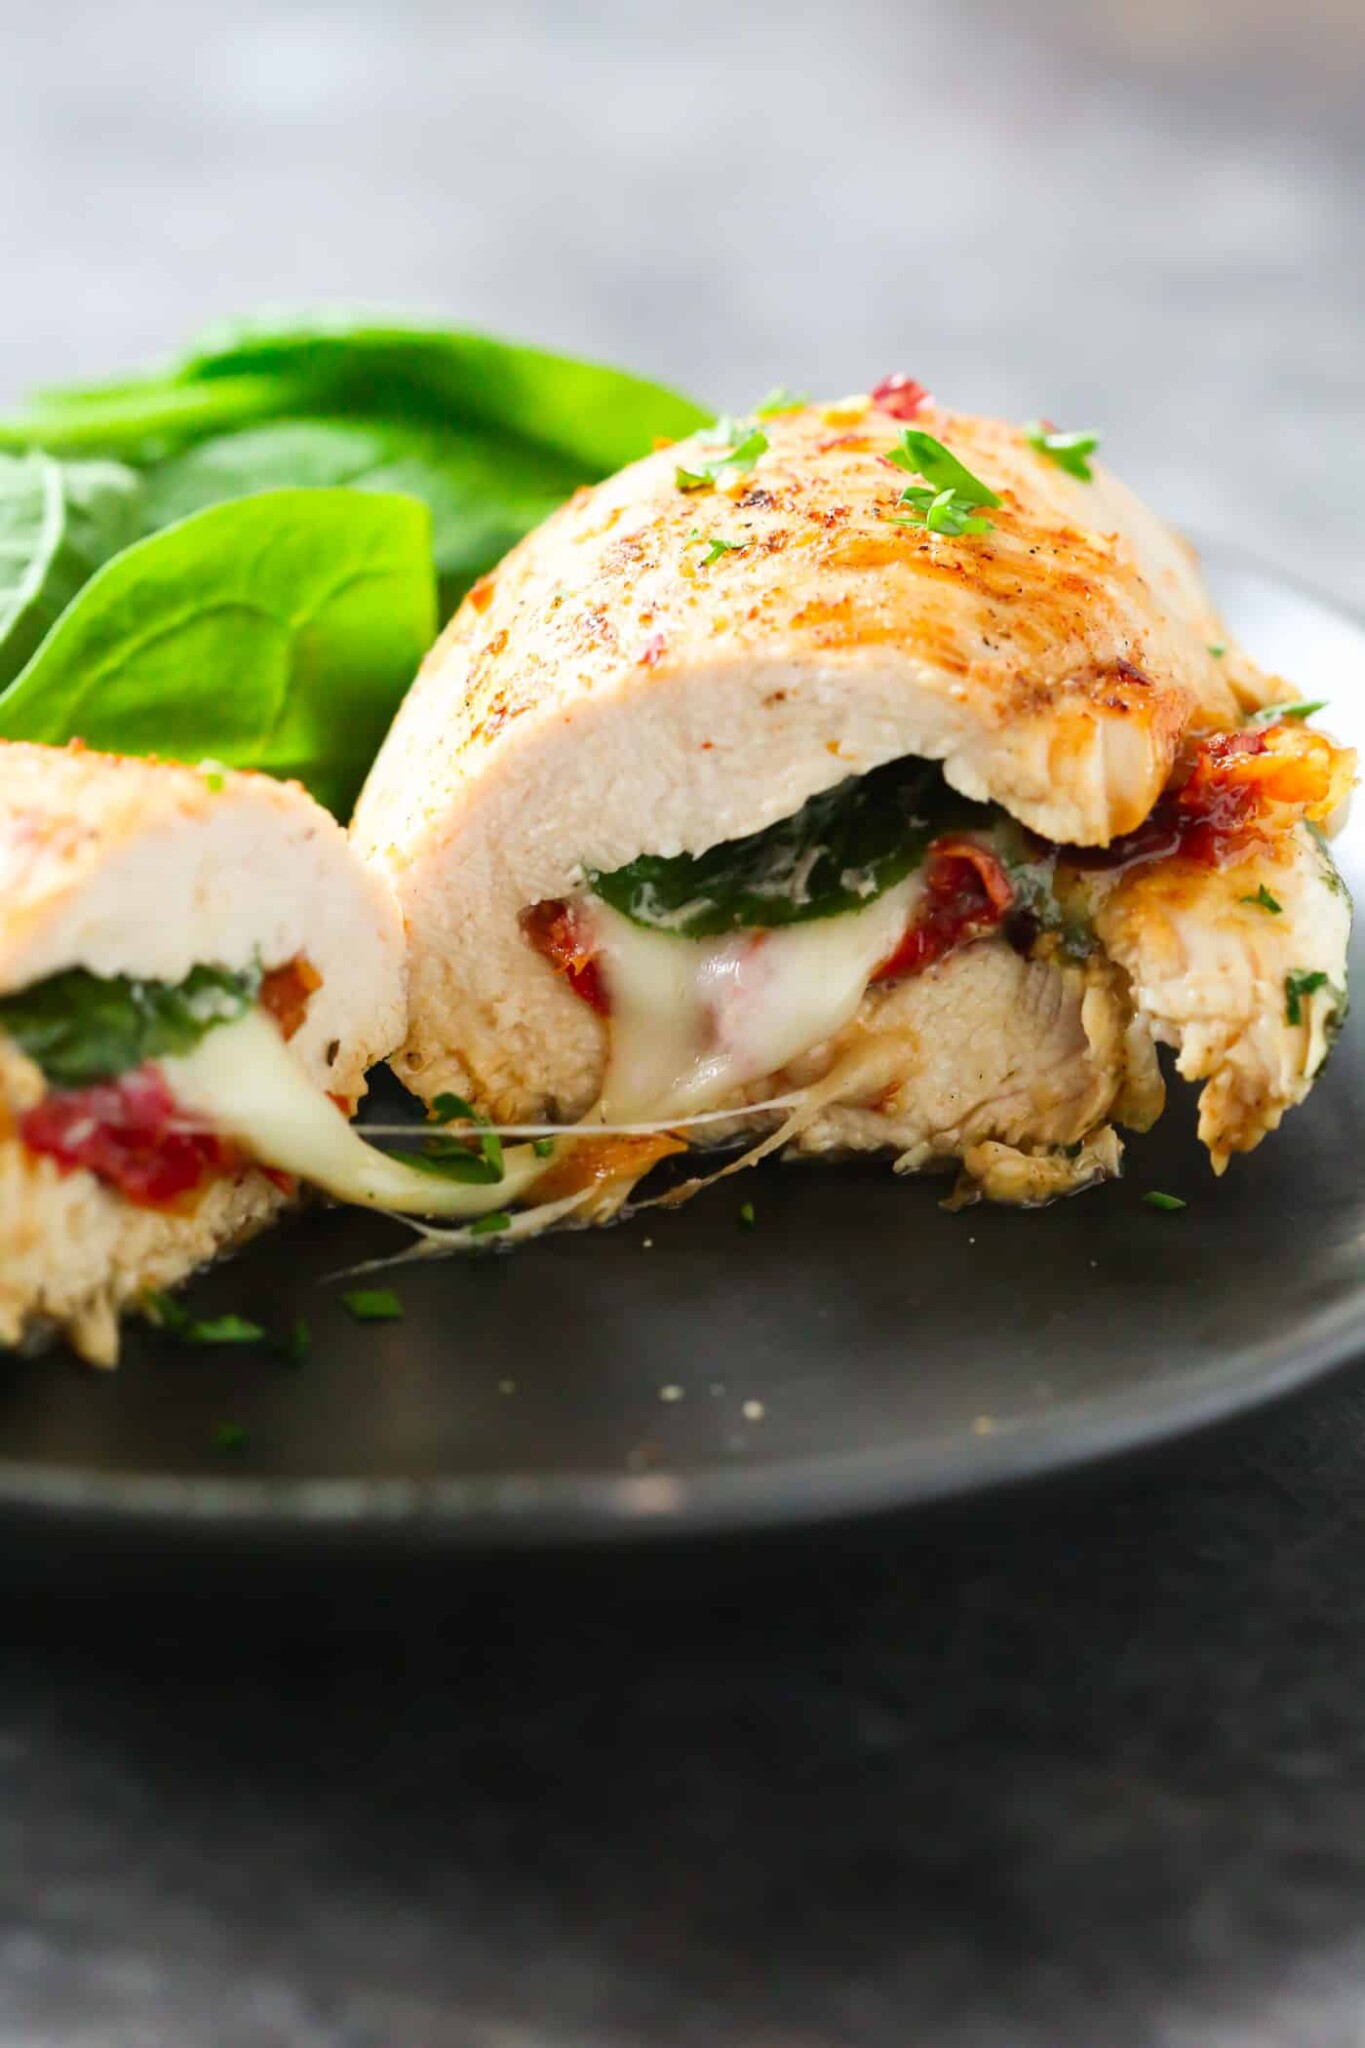
The most impressive presentation from an air fryer in this collection — the interior reveal when sliced shows melted mozzarella pulling in strings against the wilted spinach and the juicy white breast. This one requires more prep than the flat breast recipes but the result justifies every extra minute.
Ingredients
- 4 halal chicken breasts (larger, 7–8 oz each)
- 2 cups baby spinach + 2 garlic cloves minced + 1 teaspoon olive oil + pinch red pepper flakes
- 4 oz fresh mozzarella, cut into ¼-inch slices
- 1 teaspoon salt + ½ teaspoon pepper + 1 teaspoon Italian seasoning (for exterior) + 1 tablespoon olive oil (for exterior)
- 6–8 toothpicks per breast
- Pasta with marinara for serving
Instructions
- Start with the spinach filling. In a small skillet over medium heat, warm 1 teaspoon olive oil. Add the minced garlic and stir 30 seconds until fragrant. Add the baby spinach and red pepper flakes and cook, stirring constantly, for 2–3 minutes until completely wilted and any released water has evaporated from the pan. The spinach must be fully dry — any water left in the filling will steam inside the breast during cooking and make the interior watery rather than cohesive. Remove from heat and spread on a plate to cool completely to room temperature. Hot filling placed against raw chicken begins cooking the exterior unevenly before the air fryer does its job.
- Butterfly each breast: lay flat on the cutting board, hold steady with one hand on top, and use a sharp knife held parallel to the cutting board to slice horizontally into the thick side of the breast, stopping ½ inch from the opposite edge. Open like a book so it lies flat. If the interior surfaces are significantly uneven, give the thicker areas a few gentle pounds to level them without making the butterflied breast too thin to hold the filling.
- Season the interior cut surfaces of each butterflied breast with a small pinch of salt and pepper. Place a quarter of the cooled spinach on one half of each open breast interior, keeping the filling at least ½ inch back from all edges. Lay the mozzarella slices in a single layer over the spinach. Do not overfill — if the filling extends to the very edges, it will press out through the toothpick gaps during cooking.
- Fold the unfilled half of each breast over the filled half, closing the breast back into its original shape over the filling. Insert toothpicks along the open edge at intervals of about ¾ inch, pulling the edge of the breast taut as each goes in so it grips both sides firmly. Use 6–8 toothpicks per breast. Run your finger along the entire sealed edge after all toothpicks are in to confirm no gaps where the filling could escape.
- Brush the entire exterior of each stuffed breast — top, bottom, sides, and the sealed edge — with the tablespoon of olive oil. Mix the Italian seasoning, salt, and pepper and sprinkle evenly over all oiled exterior surfaces, pressing gently to adhere.
- Preheat the air fryer to 375°F for 3 minutes. Spray the basket generously with cooking oil spray. Place the stuffed breasts in the basket with the toothpick-sealed edge facing up and space between each piece — sealed edge up prevents the filling from pushing out of the unsealed ends during cooking.
- Cook at 375°F for 9 minutes. Open the air fryer and use a wide spatula — slide it fully under one stuffed breast before lifting. The filled breast is significantly heavier and less maneuverable than a flat breast and needs full support from the spatula. Flip each breast in one single, confident motion. Cook for 9 more minutes at 375°F.
- At 18 minutes, insert the thermometer into the thickest part of the breast, keeping the probe in the actual meat and away from the filling cavity. It should read at least 160°F. If lower, cook in 2-minute increments. Pull at 160°F. Transfer to a cutting board. Rest 5 full minutes.
- Remove all toothpicks carefully, pulling them straight out and counting to make sure none are left behind. Slice each stuffed breast across its width into 2–3 thick rounds, each revealing the spinach-and-mozzarella filling. The mozzarella should still be melted and pulling in strings. Serve immediately over pasta with warmed marinara sauce.
7. Balsamic Glazed Chicken Breast
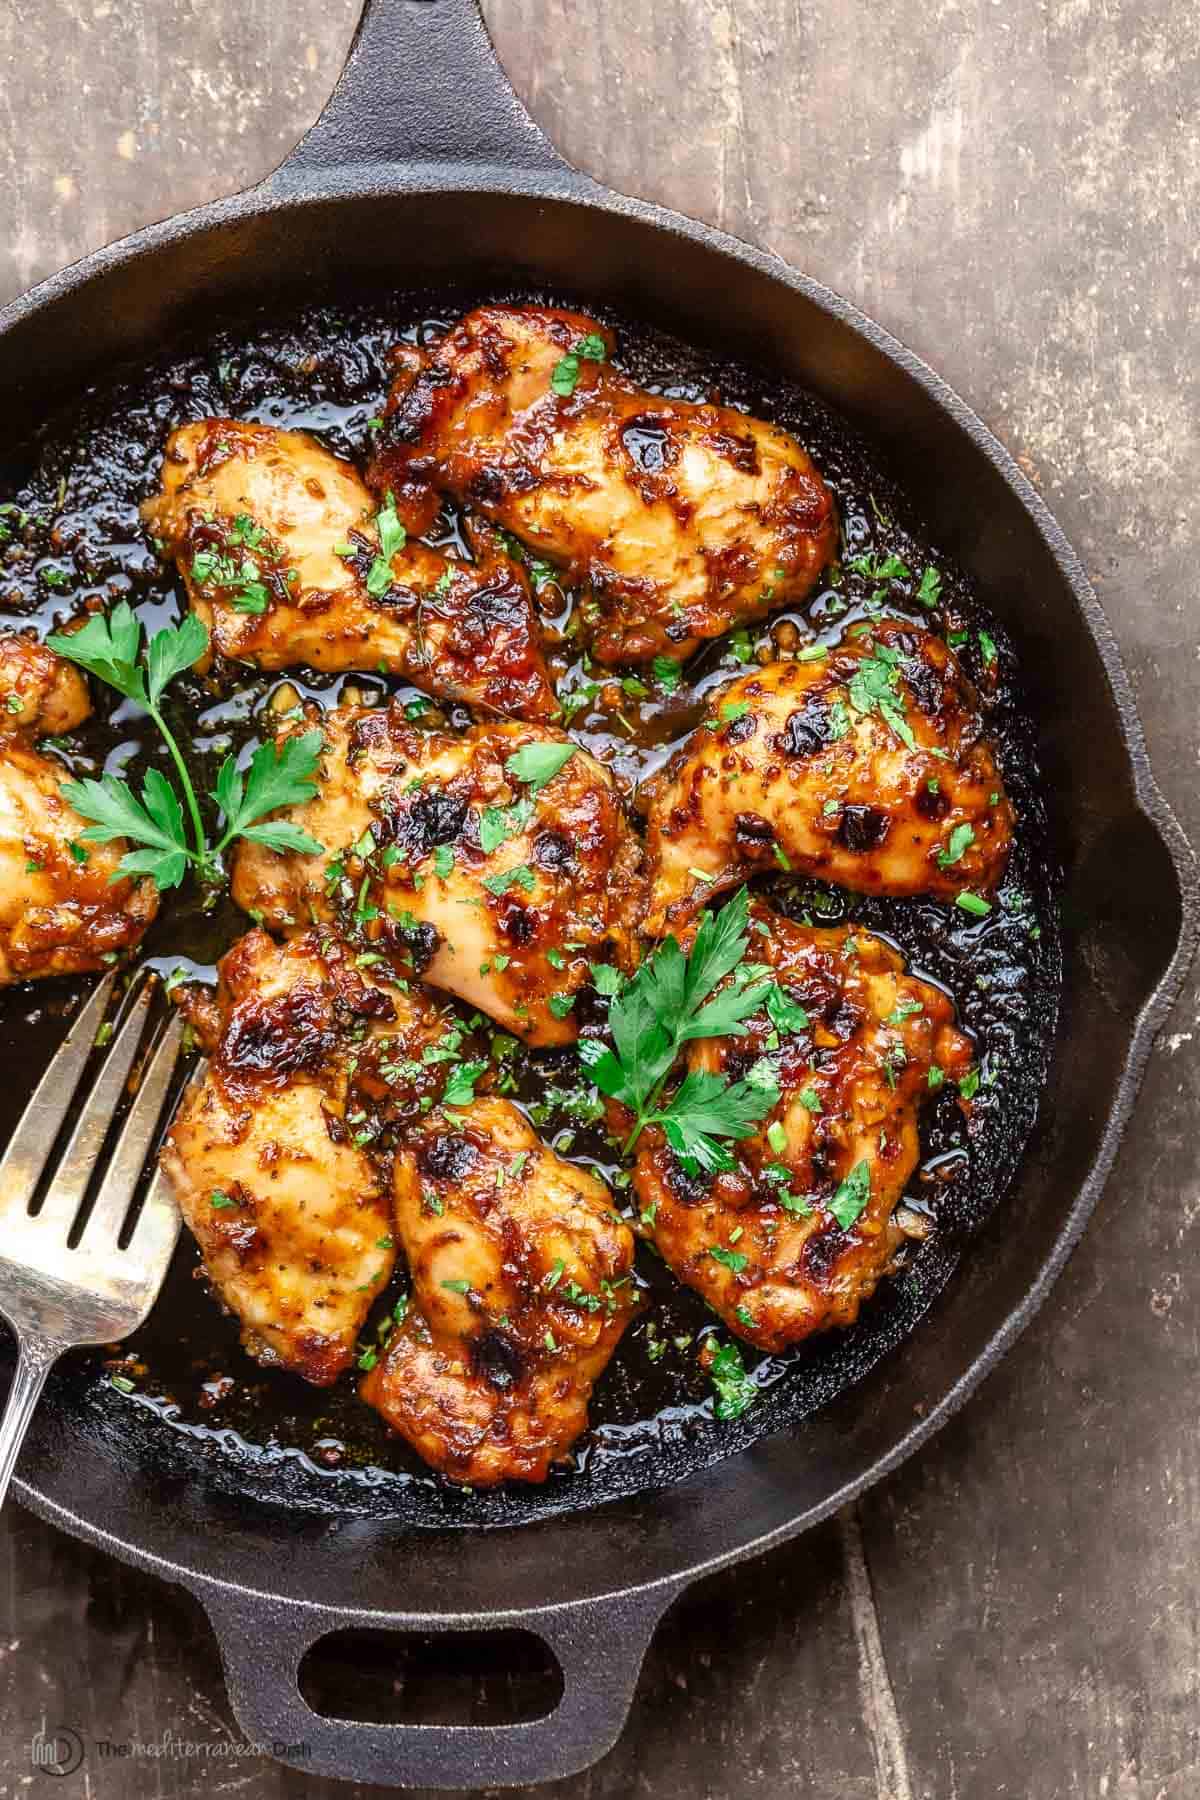
The most deeply flavored glaze in this collection. The balsamic reduction caramelizes to a dark, jammy coating specifically at 380°F — not 400°F, which caramelizes balsamic too aggressively and produces a burnt rather than caramelized result. 380°F is the temperature for this recipe and is not interchangeable.
Ingredients
- 4 halal chicken breasts, pounded to ½ inch
- 1 teaspoon salt + ½ teaspoon black pepper + cooking oil spray
- Balsamic reduction: ½ cup balsamic vinegar + 2 tablespoon honey + 2 garlic cloves minced
- Arugula, halved cherry tomatoes, shaved Parmesan, olive oil, fresh lemon for serving
Instructions
- Pound breasts to ½ inch. Season both sides with salt and pepper. Rest 10 minutes at room temperature.
- Make the balsamic reduction: in a small saucepan over medium heat, combine the balsamic vinegar, honey, and minced garlic. Stir to dissolve the honey. Bring to a gentle simmer. Reduce heat to medium-low and simmer for 8 minutes, stirring occasionally, until the liquid has reduced by about half and the texture has changed from thin to thick and glossy — it should coat the back of a spoon thickly enough that a line drawn through it with your finger stays clean for several seconds. Remove from heat. The reduction will continue to thicken as it cools. If it sets too thick before use, place briefly over low heat with a few drops of water and stir to loosen.
- Prepare the arugula base for serving: toss arugula and halved cherry tomatoes with a drizzle of olive oil, a squeeze of fresh lemon juice, and a pinch of salt. Divide among plates and set aside — the warm sliced chicken goes over this salad at serving.
- Preheat the air fryer to 380°F — not 400°F, specifically — for 3 minutes. Spray the basket with cooking oil spray. Arrange the seasoned breasts in a single layer. Cook at 380°F for 7 minutes. Open the air fryer and flip each breast. Working quickly with the pastry brush, apply the balsamic reduction generously over the top surface of each breast — the side that was previously facing down — covering every area. Close and cook for 7 more minutes at 380°F.
- Watch through the air fryer window in the final 2 minutes — if the glaze is smoking heavily or the edges look very dark and close to burnt, reduce to 360°F for the remaining time. The goal is a very dark, jammy, deeply caramelized coating that has not crossed into scorched. At 14 minutes total, check internal temperature. Pull at 160°F.
- Transfer to a cutting board. Brush any remaining reduction over each breast while still hot. Rest 5 minutes — the glaze sets slightly during the rest. Slice across the grain into wide diagonal strips and fan the slices over the dressed arugula and tomatoes on each plate. Scatter shaved Parmesan over the top and drizzle any remaining reduction in a thin stream over the entire plate.
6. Crispy Breadcrumb Chicken Cutlets
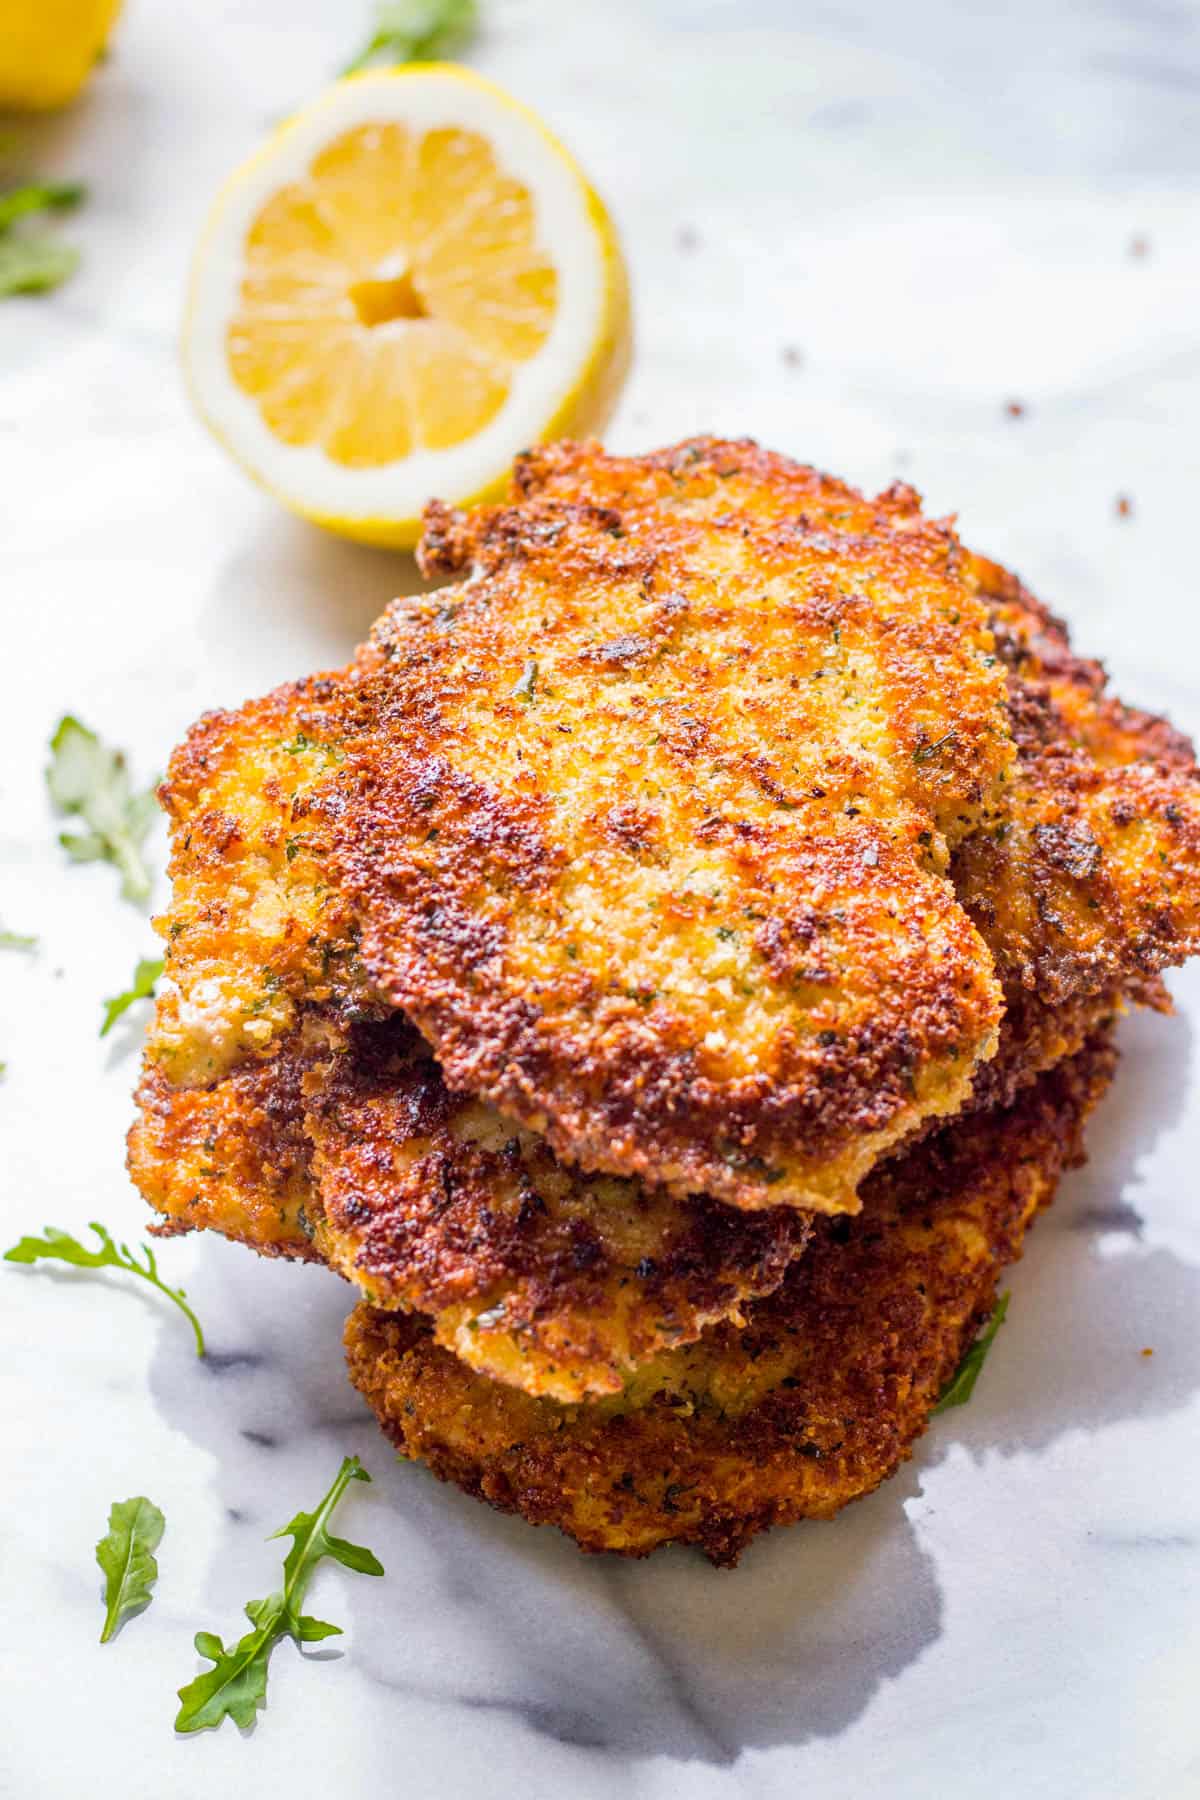
Pounded to ¼ inch — thinner than any other recipe in this collection — the cutlet format produces the most crunch relative to chicken thickness and the fastest cook at 10 minutes total. Saad's chicken sandwich version is his second-highest-rated air fryer chicken preparation after honey garlic glazed breast.
Ingredients
- 4 halal chicken breasts, pounded to ¼ inch (very thin)
- 2 eggs
- 1½ cups panko breadcrumbs + 1 teaspoon garlic powder + 1 teaspoon dried parsley + zest of 1 lemon + 1 teaspoon salt + ½ teaspoon pepper
- Cooking oil spray (generous)
- Lemon wedges and salad for schnitzel, or brioche buns + mayo + pickles + lettuce for sandwiches
Instructions
- Place one breast inside a zip-lock bag and pound to ¼ inch thick — considerably thinner than the ½-inch used for all other recipes here. A ¼-inch cutlet nearly doubles in surface area from its original size as you pound. Work firmly and evenly from the thick center toward the edges. The purpose of the extra-thin pound is to maximize the ratio of crispy crust to chicken in every bite — the thinner the cutlet, the more dominant the panko crust experience. Repeat for all four breasts.
- Pat each pounded cutlet completely dry on all surfaces with paper towels. Dryness is more critical for the cutlet format than any other recipe here because the breading adhesion depends entirely on having a completely dry surface for the egg to grip.
- Beat the two eggs in a wide, shallow bowl until completely uniform. In a separate wide, shallow bowl, combine the panko, garlic powder, dried parsley, lemon zest, salt, and pepper. Mix thoroughly with a fork until every component is evenly distributed — no clumps, no bare areas.
- Dip one cutlet completely in the beaten egg, then hold above the bowl for a full 5 seconds to let excess egg drip off. Transfer to the panko bowl and press the entire top surface firmly and evenly with your palm. Flip and press the second side firmly. Press the narrow edge of the cutlet into the panko as well. Every surface should have a dense, even, complete coating. Bare patches: touch that area back to the egg and re-press into the panko immediately.
- Transfer to a clean plate and repeat with all four cutlets. Let them rest on the plate for 5 minutes — this allows the egg to begin setting around the panko, creating a more cohesive crust that holds together through the flip.
- Preheat the air fryer to 400°F for 3 minutes. Spray the basket very generously with cooking oil spray. Arrange the cutlets in a single layer — cook in two batches if needed since the extra-thin cutlets are large. Spray the top surfaces very generously with cooking oil spray — this is what turns the panko golden and crispy rather than pale and dry. Do not be conservative.
- Cook at 400°F for 5 minutes. At 5 minutes, use a wide, thin spatula to slide completely under one cutlet before flipping — the very thin cutlet needs full support from below. Flip each cutlet carefully. Spray the newly exposed tops generously. Cook for 5 more minutes.
- At 10 minutes total, the cutlets should be deeply golden and crispy on both sides. At ¼-inch thickness they cook quickly — check internal temperature from the side of the cutlet. Pull at 160°F. Rest just 3 minutes — the very thin cutlet does not require the full 5-minute rest needed by thicker preparations. Serve schnitzel-style with a lemon wedge squeezed over the top and a simple salad alongside, or sandwich-style on toasted brioche buns with mayo, pickles, shredded lettuce, and sliced tomato.
5. Gochujang Chicken Breast
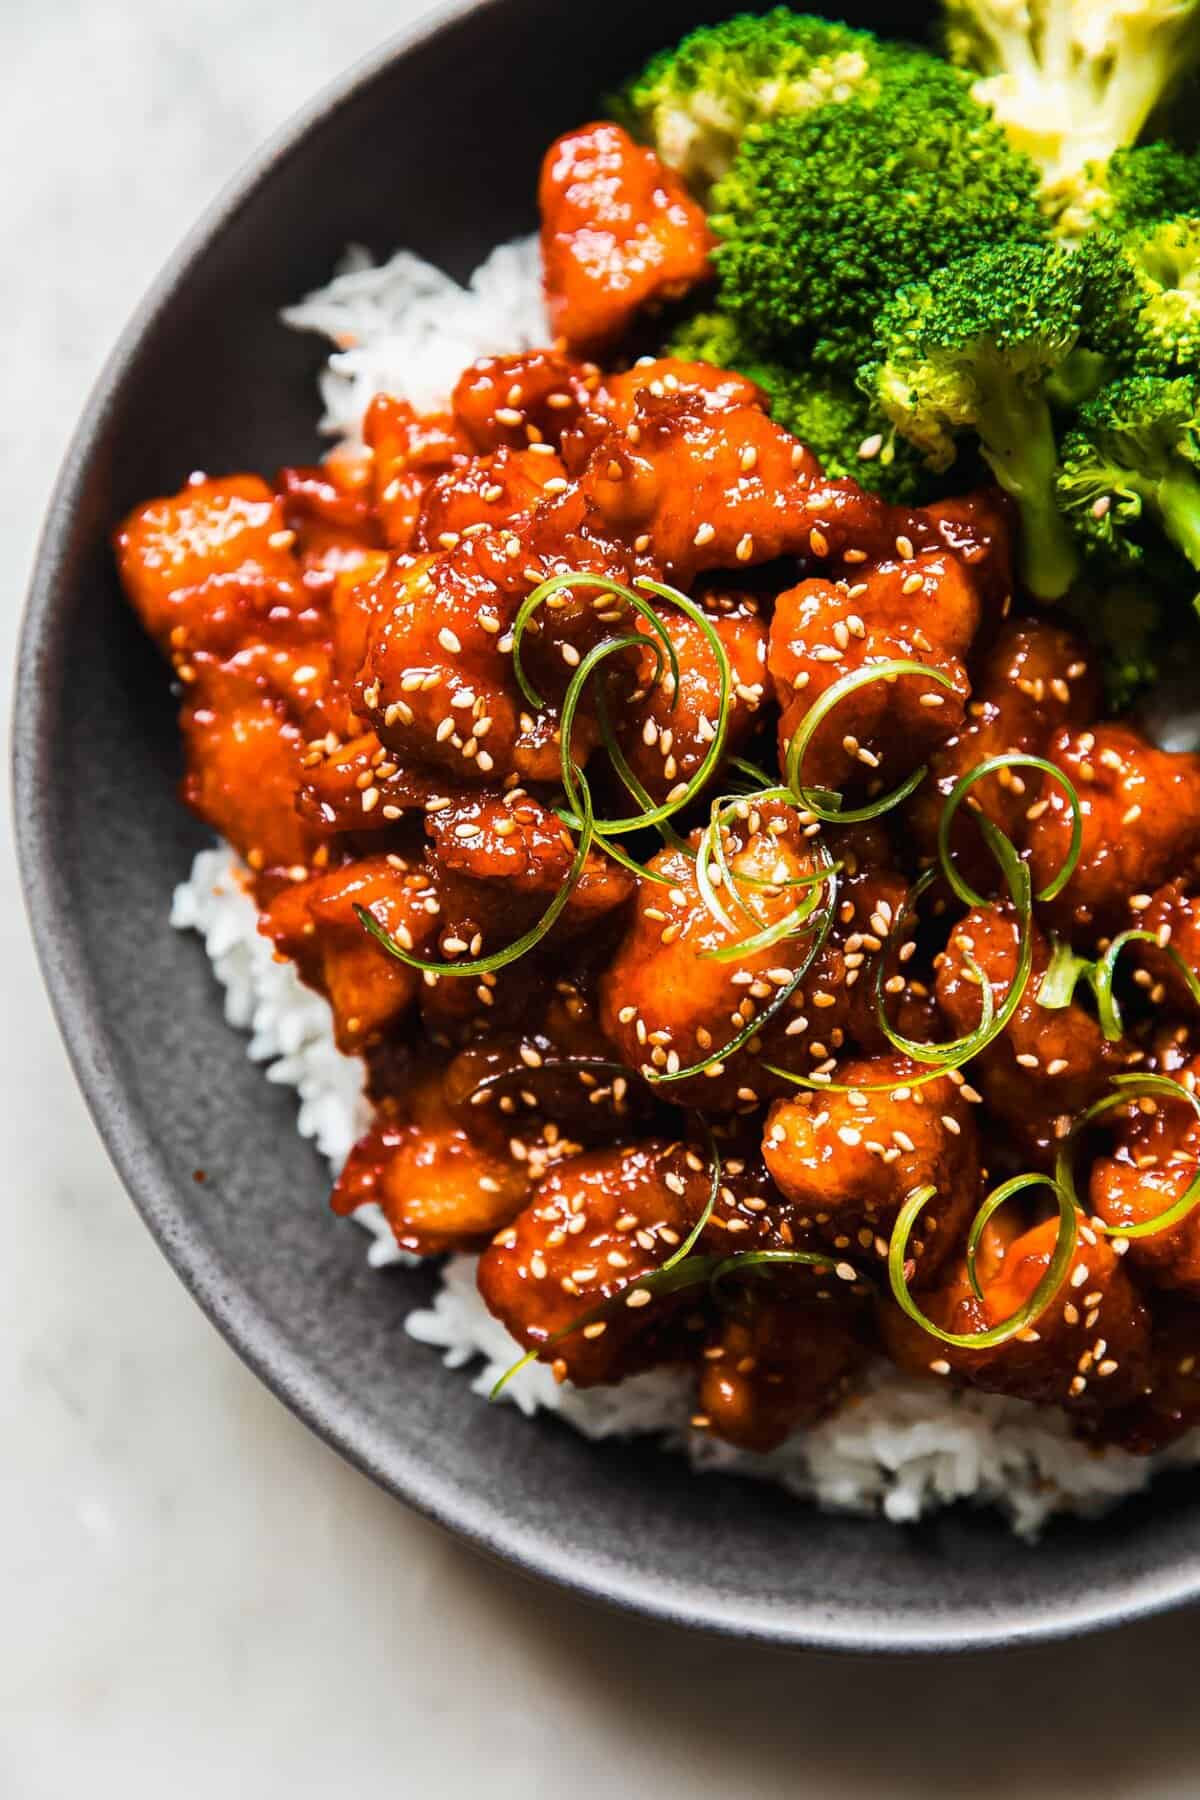
The spiciest preparation in this collection. The gochujang's fermented heat and sweetness caramelizes to a deep mahogany finish at 380°F. My husband's first comment was 'different from the usual' — his version of a strong compliment for anything outside the Italian-Middle Eastern dinner rotation that genuinely surprised him.
Ingredients
- 4 halal chicken breasts, pounded to ½ inch
- 1 teaspoon salt
- Gochujang glaze: 3 tablespoon gochujang paste + 2 tablespoon honey + 1 tablespoon soy sauce + 1 teaspoon sesame oil + 2 garlic cloves minced very fine + ½ teaspoon grated ginger
- Quick-pickled cucumber: 1 English cucumber sliced thin + 3 tablespoon rice vinegar + 1 teaspoon sugar + pinch salt — toss and rest 15 minutes
- Steamed rice, sesame seeds, and sliced green onion for serving
Instructions
- Pound breasts to ½ inch. Season lightly with just salt on both sides — the soy sauce in the glaze provides additional saltiness, so keep the initial seasoning minimal.
- In a bowl, stir together the gochujang, honey, soy sauce, sesame oil, very finely minced garlic, and grated ginger until completely smooth. The gochujang may resist mixing at first — stir firmly until no lumps remain and the glaze is uniform. Taste: it should be boldly spicy, moderately sweet, savory, with the fermented depth of the gochujang as the dominant note. Set beside the air fryer with a pastry brush ready.
- Make the quick-pickled cucumber now: slice the cucumber very thin, toss with rice vinegar, sugar, and salt, and set aside at room temperature for at least 15 minutes, tossing occasionally. The cold tart pickled cucumber served alongside the hot spicy glazed chicken is the specific pairing that makes this dish feel complete rather than just aggressively hot.
- Start the rice. Preheat the air fryer to 380°F for 3 minutes. Spray the basket with cooking oil spray. Arrange the salted breasts in a single layer. Cook at 380°F for 7 minutes — no glaze yet.
- Open at 7 minutes. Using a pastry brush, apply the gochujang glaze generously over the entire top surface of each breast, covering all edges. Flip each breast and apply glaze to the second side as well. Close and cook for 7 more minutes at 380°F. The glaze caramelizes from red-orange to a very deep, dark, near-mahogany finish.
- Check internal temperature at 14 minutes. Pull at 160°F. Transfer to a cutting board. Brush remaining glaze over the surface immediately while still hot. Rest 5 minutes. Slice across the grain into strips and serve over steamed white rice, topped with the cold quick-pickled cucumber, sesame seeds, and thinly sliced green onion.
4. Sun-Dried Tomato and Feta Stuffed Chicken
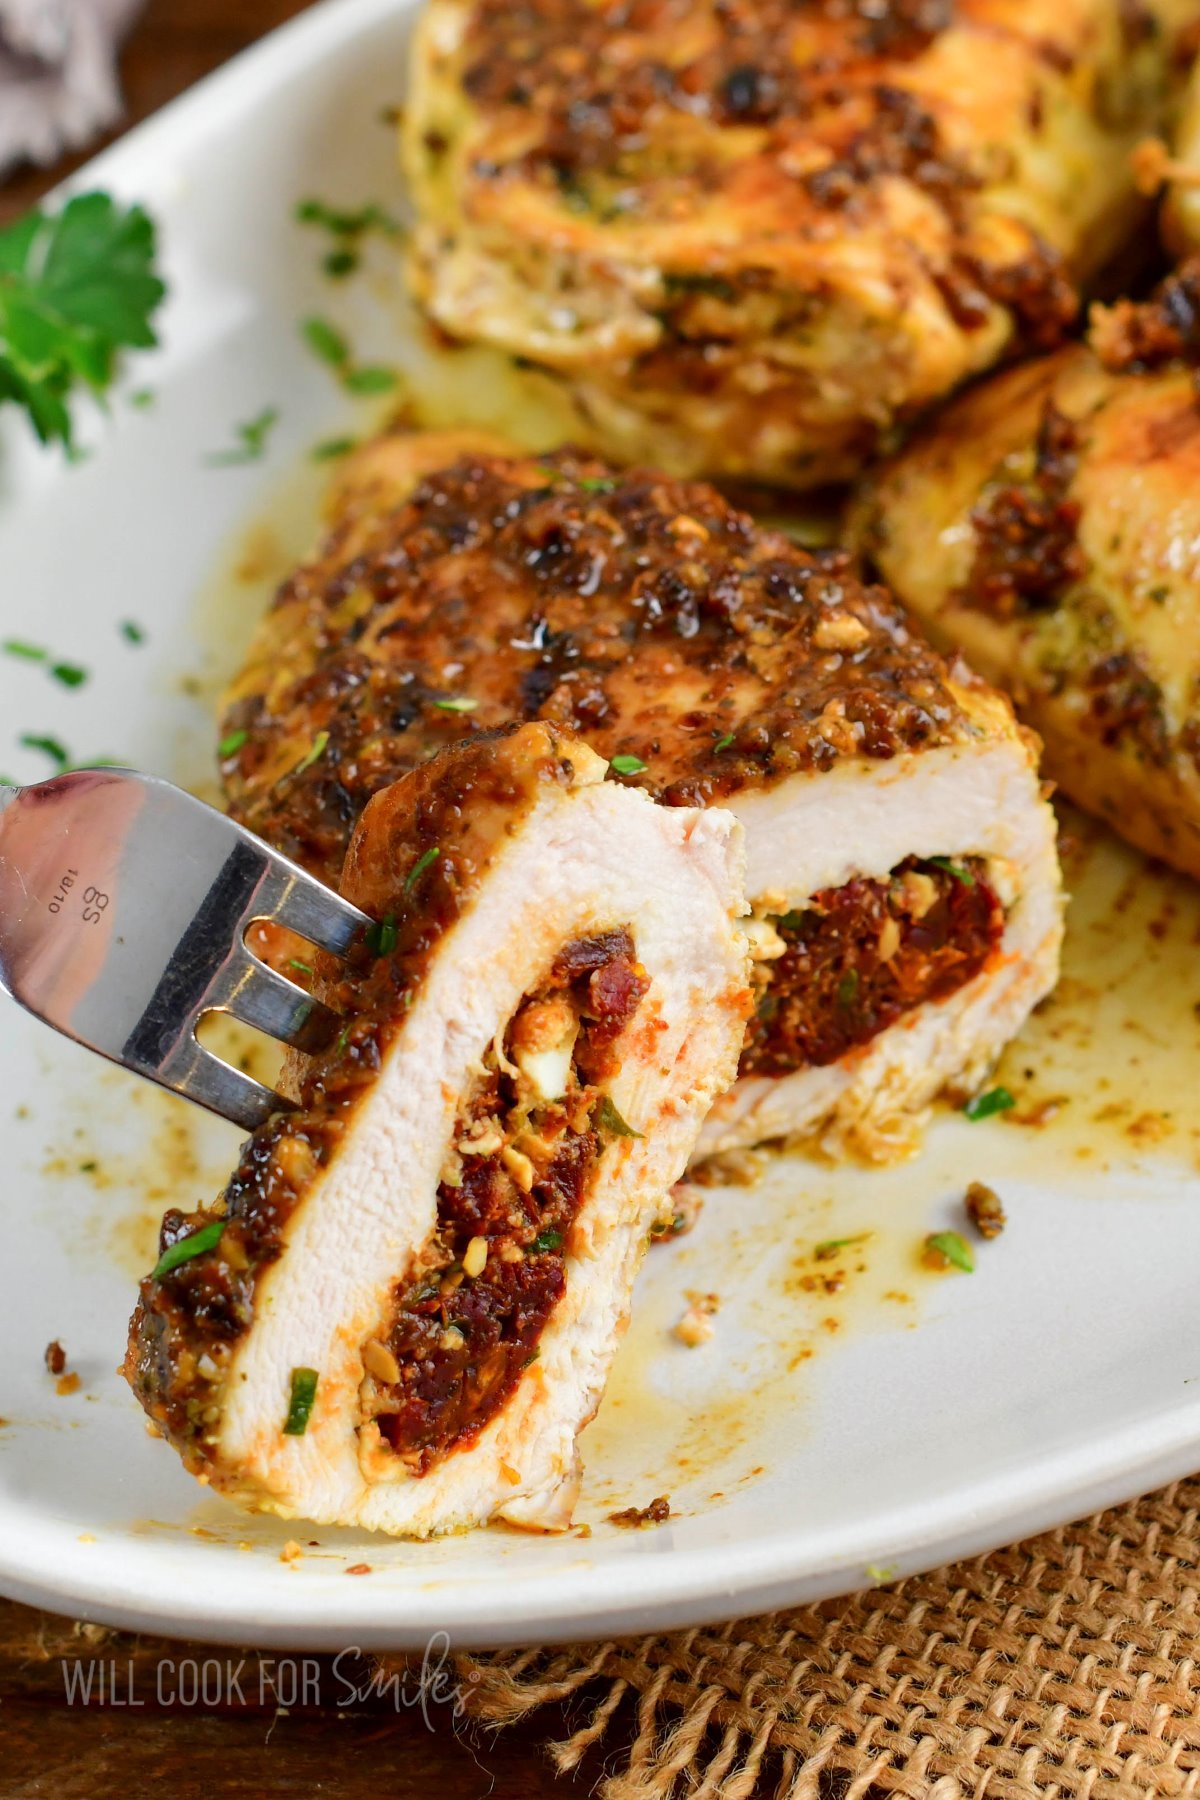
The sun-dried tomato jar oil on the exterior provides both cooking fat and concentrated tomato flavor that seeps into the breast as it cooks. The feta melts to a salty, tangy filling that contrasts perfectly with the sweet sun-dried tomato. My husband's description: 'the one that tastes like it came from somewhere specific' — meaning restaurant quality.
Ingredients
- 4 halal chicken breasts (7–8 oz each, larger for room to hold filling)
- ¼ cup sun-dried tomatoes packed in oil, drained and roughly chopped
- ¼ cup crumbled feta cheese (from a block, not pre-crumbled — block feta melts better)
- 8 large fresh basil leaves
- 2 tablespoon oil from the sun-dried tomato jar
- 1 teaspoon Italian seasoning + 1 teaspoon salt + ½ teaspoon pepper (for exterior)
- 6–8 toothpicks per breast
- Pearl couscous or orzo for serving
Instructions
- Butterfly each breast: lay flat on the cutting board, hold steady with one hand on top, and use a sharp knife held parallel to the cutting board to slice horizontally into the thick side of the breast, stopping ½ inch from the opposite edge. Open flat like a book. If the interior is significantly uneven, pound lightly to level without making it too thin to hold filling.
- Season the interior cut surfaces of each butterflied breast with a pinch of salt and pepper. Place 2 basil leaves flat on one half of each open breast interior. Scatter approximately 1 tablespoon of chopped sun-dried tomatoes over the basil, and crumble a quarter of the feta over the tomatoes. Keep all filling at least ½ inch from all edges — too close to the edge and the filling presses out through toothpick gaps during cooking.
- Fold the breast closed. Insert toothpicks along the open edge at ¾-inch intervals, pulling the edge taut as each goes in so the seal is firm. Use 6–8 toothpicks per breast. Press along the entire sealed edge to confirm no gaps.
- Brush the entire exterior of each stuffed breast — top, bottom, sides, and sealed edge — with the sun-dried tomato jar oil. This oil is already flavored with herbs and the concentrated essence of the sun-dried tomatoes and adds this depth to the exterior crust. Mix the Italian seasoning, salt, and pepper and sprinkle evenly over all oiled exterior surfaces.
- Preheat the air fryer to 375°F for 3 minutes. Spray the basket with cooking oil spray. Place the stuffed breasts toothpick-side up in a single layer. Cook at 375°F for 9 minutes. Use a wide spatula to flip each breast carefully — slide it fully under before lifting. Cook for 9 more minutes.
- At 18 minutes, check the internal temperature at the thickest part of the breast, avoiding the filling cavity. Pull at 160°F. Rest 5 minutes. Remove all toothpicks by pulling straight out, counting each one. Slice each breast across its width into thick rounds to reveal the filling inside. Serve immediately over pearl couscous or orzo with a drizzle of additional sun-dried tomato jar oil and fresh basil over the top.
3. BBQ Chicken Breast

The brown sugar in the dry rub caramelizes under the BBQ sauce, producing the layered flavor of properly grilled BBQ chicken without a grill. The key technique is applying the BBQ sauce in two separate coats — the double coating builds the thick, sticky glaze that makes this the most BBQ-authentic recipe in the collection.
Ingredients
- 4 halal chicken breasts, pounded to ½ inch
- 1 tablespoon olive oil
- Dry rub: 1 teaspoon smoked paprika + 1 teaspoon garlic powder + 1 teaspoon brown sugar (packed) + ½ teaspoon onion powder + ½ teaspoon cumin + 1 teaspoon salt + ½ teaspoon pepper
- ½ cup good-quality BBQ sauce in a bowl with a pastry brush ready
- Steamed rice and coleslaw, or brioche buns for serving
Instructions
- Pound breasts to ½ inch. In a small bowl, combine all dry rub ingredients and break up the brown sugar completely so no lumps remain and it is evenly mixed with the spices.
- Drizzle the olive oil over both sides of each breast and rub it in so every surface is coated. Apply the dry rub mixture generously to all surfaces of the four breasts, pressing firmly so it adheres to the oiled surface. Every area including the edges should have full coverage. Use all the rub.
- Rest the rubbed breasts at room temperature for 10 minutes. The brown sugar will partially dissolve into the oil on the surface, forming a light sticky layer that caramelizes before the BBQ sauce goes on.
- Set the bowl of BBQ sauce and the pastry brush right beside the air fryer before you start cooking — you will need them immediately at two separate moments during cooking without any searching. Preheat the air fryer to 380°F for 3 minutes. Spray the basket with cooking oil spray. Arrange the dry-rubbed breasts in a single layer.
- Cook at 380°F for 6 minutes. Open the air fryer — the dry rub should have formed a deeply caramelized, dark surface from the brown sugar and paprika. Flip each breast. Brush the top surface (the side that was previously facing down) generously with BBQ sauce — a thick, even layer covering every part. Close and cook for 6 more minutes.
- Open the air fryer again at 12 minutes total. Apply a SECOND generous coat of BBQ sauce to the same surface — this second application is the specific technique that builds the thick, layered glaze that makes this taste genuinely BBQ rather than merely sauce-topped chicken. This double-coat approach is the difference between ordinary and great BBQ chicken. Close and cook for 5 more minutes at 380°F until the sauce has fully caramelized to a thick, sticky, deeply colored finish with some slightly darkened edges.
- Check internal temperature. Pull at 160°F. Rest 5 minutes. For sliced: cut across the grain and serve over steamed rice with coleslaw on the side. For shredded: shred immediately while hot using two forks, toss with additional BBQ sauce to taste, and serve on toasted brioche buns with coleslaw piled generously on top.
2. Caprese Chicken Breast

The dinner that looks assembled rather than cooked. The fresh mozzarella added in the final 2 minutes melts and binds the tomato and basil to the chicken surface, producing a plate where every bite delivers the complete caprese flavor — chicken, mozzarella, tomato, basil, balsamic — simultaneously.
Ingredients
- 4 halal chicken breasts, pounded to ½ inch
- 1 tablespoon olive oil + 1 teaspoon garlic powder + 1 teaspoon Italian seasoning + 1 teaspoon salt + ½ teaspoon pepper
- 4 thick slices fresh mozzarella from a ball (not shredded, not low-moisture — fresh ball mozzarella only)
- 8 cherry tomatoes, halved
- About 12 fresh basil leaves
- 2–3 tablespoon balsamic glaze (thick pre-reduced store-bought version, not plain balsamic vinegar)
- Flaky sea salt for finishing
Instructions
- Pound breasts to ½ inch. Mix the olive oil, garlic powder, Italian seasoning, salt, and pepper into a seasoning paste in a small bowl. Coat both sides of each breast with this paste, pressing gently. Rest 10 minutes at room temperature.
- While the chicken rests, prepare the caprese toppings: slice the mozzarella ball into ¼-inch rounds — each slice should roughly match the surface area of the top of one breast so it melts edge-to-edge rather than pooling in the center. Halve the cherry tomatoes. Tear the basil leaves in half. Arrange all toppings on a small plate right next to the air fryer where you can reach them instantly — you will be adding them mid-cook and need both hands free.
- Preheat the air fryer to 380°F for 3 minutes. Spray the basket with cooking oil spray. Arrange the seasoned breasts in a single layer. Spray the tops lightly with cooking oil. Cook at 380°F for 6 minutes.
- Open and flip each breast at 6 minutes — the first side should be golden with good color from the Italian seasoning and garlic. Spray the newly exposed tops lightly with cooking oil. Cook for 6 more minutes.
- At 12 minutes total, open the air fryer. Working quickly: place one mozzarella slice flat on top of each breast, covering as much of the surface as possible. Place 2 cherry tomato halves cut-side down on the mozzarella on each breast. Close the air fryer immediately and cook for exactly 2 more minutes at 380°F.
- In those 2 minutes, the mozzarella melts completely and begins bubbling lightly at the edges. The cherry tomatoes soften and release their juices into the melting cheese. At 14 minutes total, check the internal temperature — the ½-inch pounded breast should be at 160°F or above. Pull immediately and transfer each breast to its serving plate using a wide spatula so the mozzarella topping stays in place.
- While the mozzarella is still completely melted and the chicken is steaming hot: tear 2–3 fresh basil leaves over each breast — the heat will gently wilt them and release their fragrance. Drizzle balsamic glaze over each plate in a thin decorative stream. Finish with a pinch of flaky sea salt over the top. Serve within 3–4 minutes of plating while the mozzarella is still molten. This is not a dish that benefits from sitting.
1. Everything Bagel Chicken Breast
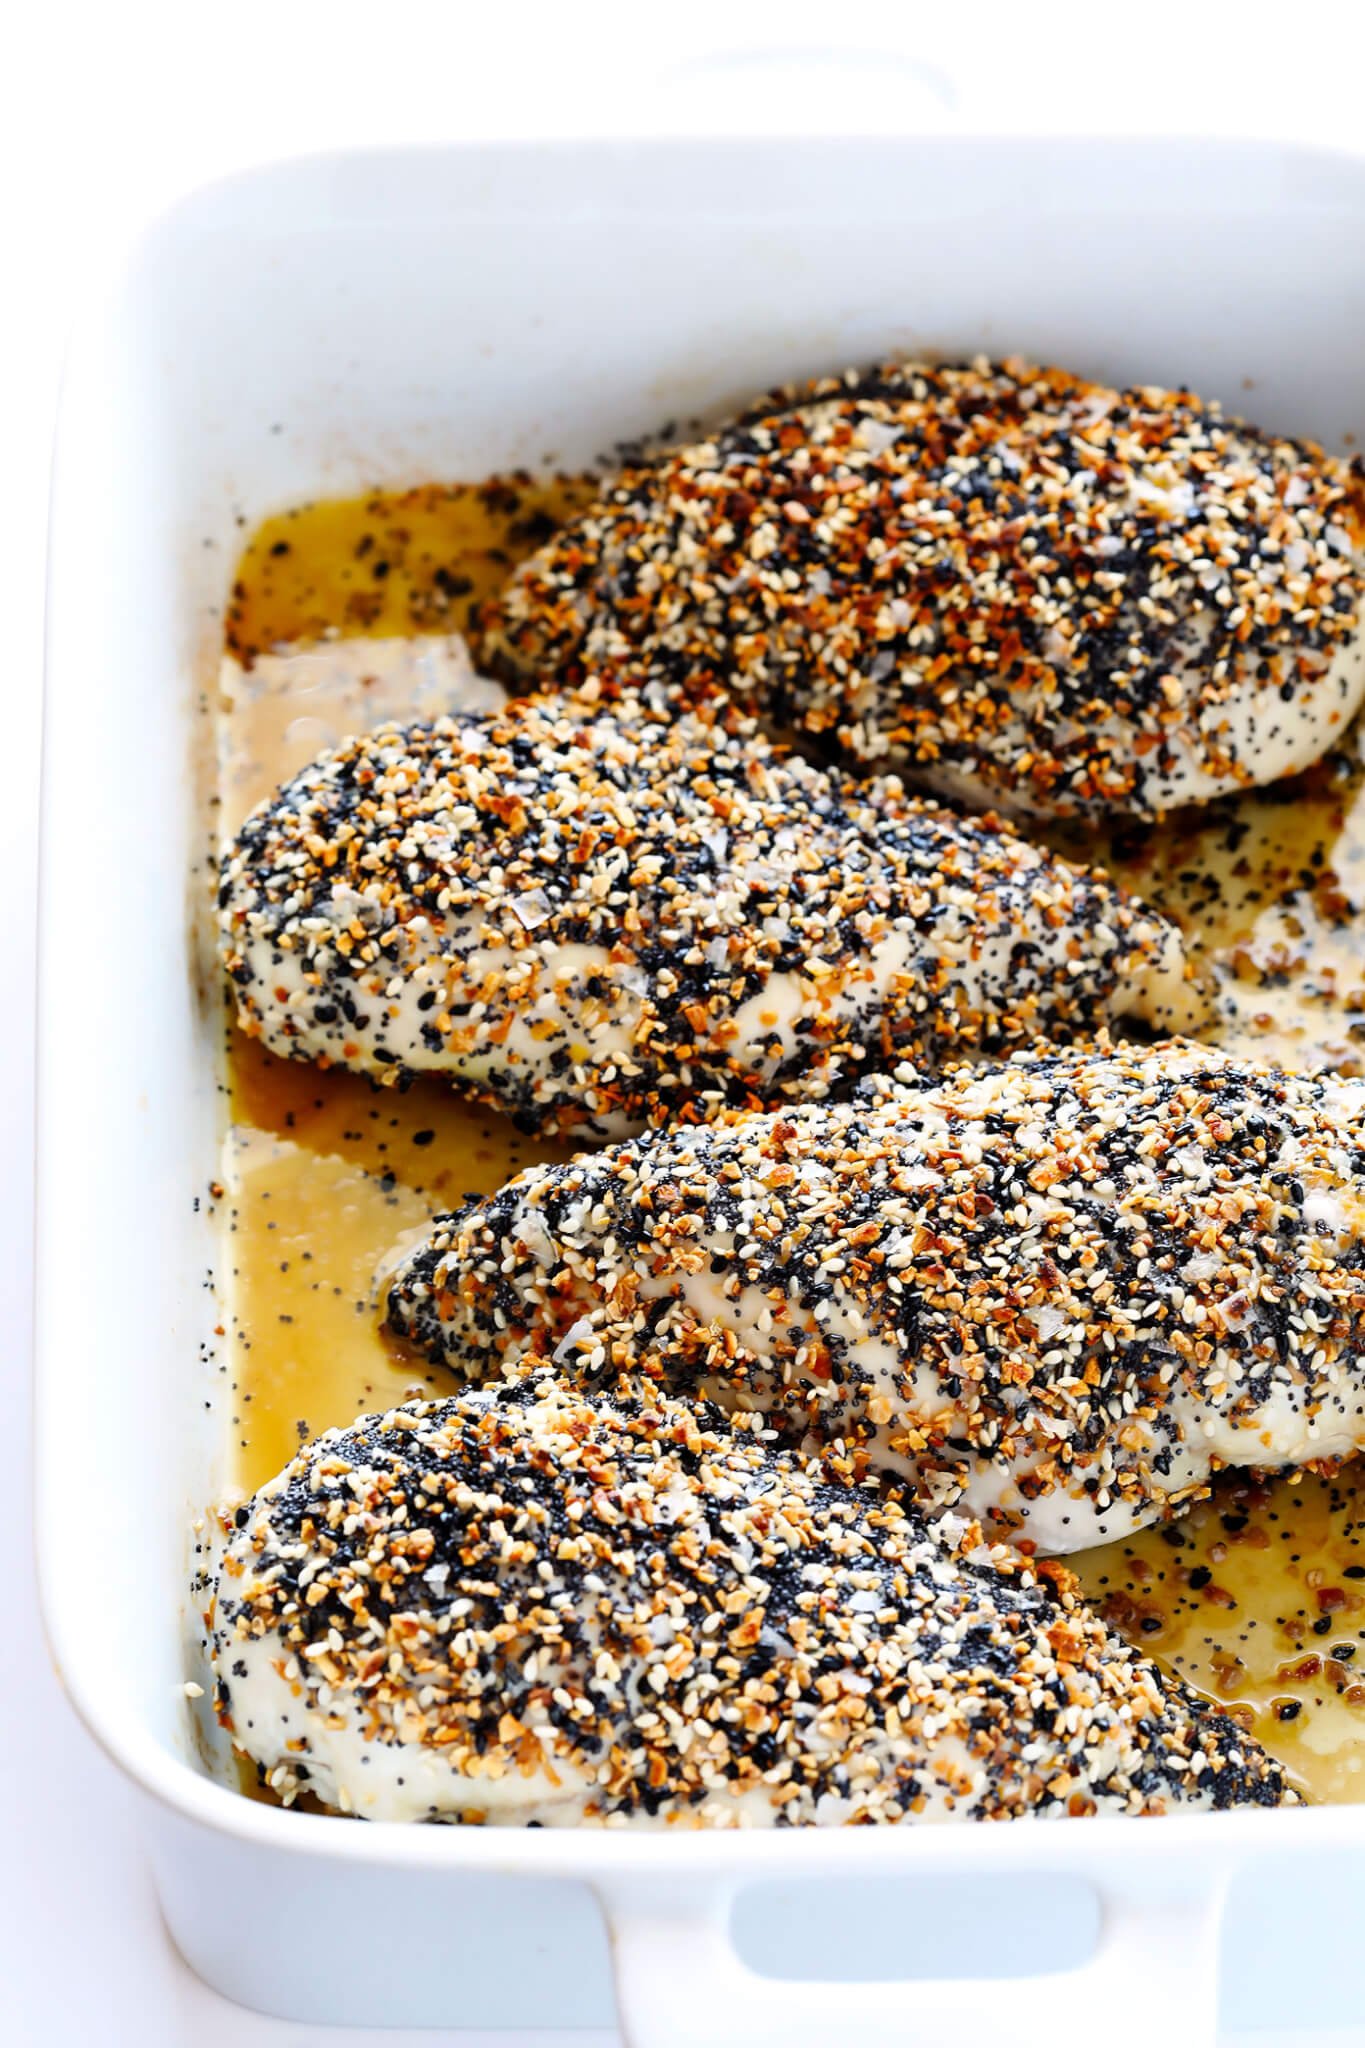
The number-one recipe earns its position because it proves the single best upgrade to basic chicken breast is in a jar at any grocery store. The cream cheese spread thinly over the breast acts as both seasoning carrier and moisture barrier — it melts into the surface during cooking, sealing moisture inside the lean protein while the everything bagel coating toasts to a golden, seed-crusted exterior that crackles on the first bite. My husband described this as 'actually interesting chicken breast' — reserved for food that genuinely surprised him. Saad eats the seed crust first, pulling it off in sections before eating the chicken underneath — not the intended method but an unmistakable endorsement of the crust.
Ingredients
- 4 halal chicken breasts, pounded to ½ inch
- 4 tablespoon cream cheese, softened to genuine room temperature (must be fully soft — cold cream cheese tears the chicken surface when you try to spread it)
- 4 tablespoon everything bagel seasoning (heaped tablespoons — this is the crust, not a light dusting)
- ¼ teaspoon garlic powder (additional garlic beyond what is already in the seasoning blend)
- Cooking oil spray (for the basket only — never on the tops)
- Simple green salad or rice for serving
Instructions
- Pound each breast to ½ inch. Pat all surfaces completely dry with paper towels — any moisture on the breast surface will prevent the cream cheese from adhering evenly and will cause it to slide away from wet patches rather than spreading smoothly.
- Check that the cream cheese is fully softened to room temperature. It should spread like very soft butter — with no resistance, yielding easily to a spoon. If it has any firmness remaining, microwave for 5–8 seconds and stir. Do not melt it — it should be soft and spreadable, not liquid.
- Take 1 tablespoon of softened cream cheese per breast and spread it over both sides using the back of a spoon or a small offset spatula. The cream cheese layer should be thin and even — a clearly visible film across the entire surface, not thick like frosting. Cover every part of both sides of each breast including all edges.
- Pour the everything bagel seasoning into a wide, shallow dish. Add the garlic powder and stir to combine. Place each cream-cheese-coated breast into the dish and press it firmly down with your palm so the seeds and flakes adhere in a dense, even layer across the entire surface. Flip and press the second side firmly. Hold the breast on its edge and press the sides into the seasoning as well. The coating should be thick and fully covering all surfaces — you are crust-coating the chicken, not dusting it.
- Set the coated breasts on a plate and rest at room temperature for 10 minutes. This rest allows the cream cheese to begin softening slightly into the surface of the chicken and allows the seasoning to adhere more firmly before the heat of the air fryer sets it.
- Preheat the air fryer to 375°F — not 380°F or 400°F. At 375°F, the sesame seeds toast to golden without burning. At higher temperatures, the poppy seeds and dried garlic flakes burn before the chicken is cooked through. Preheat for 3 minutes.
- Spray the basket very generously with cooking oil spray. This is especially important for this recipe — the cream cheese coating will stick aggressively to an unsprayed basket surface and the crust will pull off when you flip. Arrange the coated breasts in a single layer. Do NOT spray the tops of the breasts — the cream cheese has enough fat to self-baste and oil spray on top would dislodge the seed coating.
- Cook at 375°F for 7 minutes. Open the air fryer. The seed coating should show good toasting — sesame seeds visibly golden, garlic and onion flakes beginning to caramelize. The crust at 7 minutes is partially set but still fragile. Use a wide, thin spatula and slide it slowly, fully, and completely under one breast before attempting to lift — support the entire surface area of the breast so the crust does not crack and separate. Flip slowly and set back down gently. Repeat for all four breasts.
- Cook for 7 more minutes at 375°F. The second side toasts to the same golden, crackling seed-crusted surface. In the final 2 minutes, the kitchen fills with the smell of toasting sesame and caramelizing garlic — the signal that the crust is nearly finished.
- Check the internal temperature by inserting the thermometer from the SIDE of the breast — slide the probe in horizontally so you do not pierce through the top crust and cause it to crack. Pull at 160°F and transfer each breast to a cutting board or plate using the wide spatula, setting each one down gently.
- Rest for a full 5 minutes. The cream cheese that melted and seeped into the breast during cooking needs this time to partially re-solidify against the surface, which is what holds the crust together during slicing. Cutting at 2 minutes will cause the cream cheese to run and the crust to detach. Serve whole or slice in thick cuts across the grain. The juices from the cutting board — a mix of the breast's natural juices and melted cream cheese — are excellent spooned over the rice or salad base.
Frequently Asked Questions
What is the single most important step for juicy air fryer chicken breast?
Pound the breast to an even ½-inch thickness before cooking — this single step produces more improvement in the final result than any marinade, sauce, or temperature adjustment available. Uneven breasts have a thin end that overcooks to dry and stringy while the thick center is still finishing. A breast pounded uniformly to ½ inch throughout cooks completely evenly from every edge to the center in the same 14-minute window, stays juicy throughout, and requires no guesswork. Use a rolling pin, place the breast inside a zip-lock bag first so it does not tear, and press firmly and repeatedly across the surface until the thickness is consistent from edge to edge. Then pull from the air fryer at 160°F internal temperature — not 165°F — and rest 5 minutes before cutting. Carryover cooking during the rest raises the internal temperature from 160°F to 165°F while keeping the meat significantly juicier than if you cooked it all the way to 165°F directly in the air fryer.
Can I meal prep air fryer chicken breast for the whole week?
Yes — air fryer chicken breast holds 4 days refrigerated and reheats better than oven-cooked breast because the air fryer's dry-heat cooking produces less surface moisture that would cause the exterior to become soggy during microwave reheating. Cook 4–6 breasts on Sunday using the basic seasoned recipe or any marinade-based recipe from this collection. Slice, portion into meal prep containers, and apply different sauces at eating time each day for variety from a single protein cook — teriyaki sauce and rice Monday, pesto and pasta Tuesday, BBQ sauce and coleslaw Wednesday, tzatziki and pita Thursday. To reheat: place the sliced chicken in a microwave-safe container, add 1 tablespoon of water or chicken broth over the chicken, cover with a damp paper towel, and microwave on medium power for 90 seconds. The steam from the added liquid and the damp paper towel rehydrates the exterior surface of the chicken, producing a result significantly juicier than dry high-power microwave exposure.
These 21 recipes have made air fryer chicken breast the most versatile protein in our weekly rotation — the everything bagel version for Saad's seed-crust enthusiasm, the shawarma for my husband's Sunday meal prep, the tikka for the evenings my mother in Pakistan is watching on video call and has opinions about the char level. Pound it to half an inch. Pull at 160°F. Rest the full 5 minutes. Trust the thermometer over the timer, always. 🍗✨
More Air Fryer Collections
- 30 Easy Air Fryer Dinners in 20 Minutes
- 25 Air Fryer Appetizers for Parties
- 17 Air Fryer Side Dishes
- 19 Air Fryer Frozen Food Hacks
- 27 Best Grilled Chicken Recipes
- 15 High-Protein Chicken Bowls for Meal Prep
- Air Fryer Turkey Meatballs
- 25 Protein Dinner Recipes
- Freezer-Friendly Chicken Fajita Bowls





Comments
No Comments