
The side dish is the part of weeknight dinner that consistently gets abandoned when time runs short — the main course takes longer than expected, the vegetables get bumped, and dinner ends up as a protein on a plate with whatever starch is already cooked. The air fryer solves this problem by making vegetables genuinely faster than the main course rather than a parallel project that competes with it. A side dish that takes 25 minutes in a 400°F oven takes 10 minutes in an air fryer at the same temperature, because the basket is small, the heat concentrates around the food, and vegetables have very little thermal mass to overcome.
The second thing the air fryer does for vegetables is improve them beyond what the oven produces. Roasted Brussels sprouts in a conventional oven require 25 minutes at 425°F and still come out with a steamed interior and only partially caramelized exteriors. The same Brussels sprouts in an air fryer at 380°F for 12 minutes come out with a deeply caramelized, slightly charred exterior and a tender interior — the texture difference between these two results is significant enough that Saad, who has historically refused Brussels sprouts as a category, ate them without complaint the first time they came from the air fryer. This is the data point that convinced me the air fryer is the correct vegetable appliance.
All 17 side dishes in this collection serve 4 people from one air fryer basket load unless noted. Temperatures are in Fahrenheit. Preheat the air fryer for 3 minutes before every batch. The timing notes assume standard-sized vegetables — cut everything to the specified size for the timing to be accurate, as larger pieces will need 2 to 3 additional minutes.
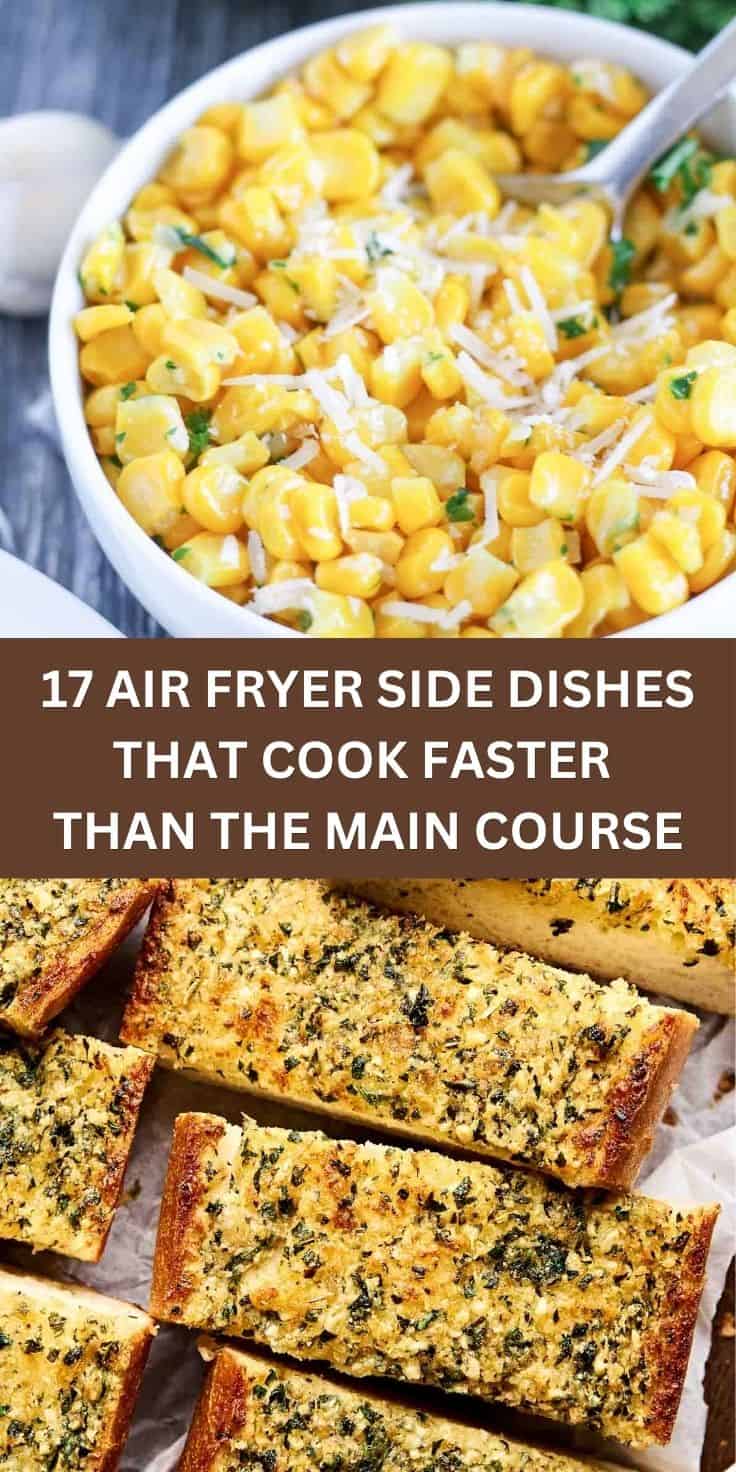
17 Air Fryer Side Dishes That Cook Faster Than the Main Course
17. Crispy Brussels Sprouts
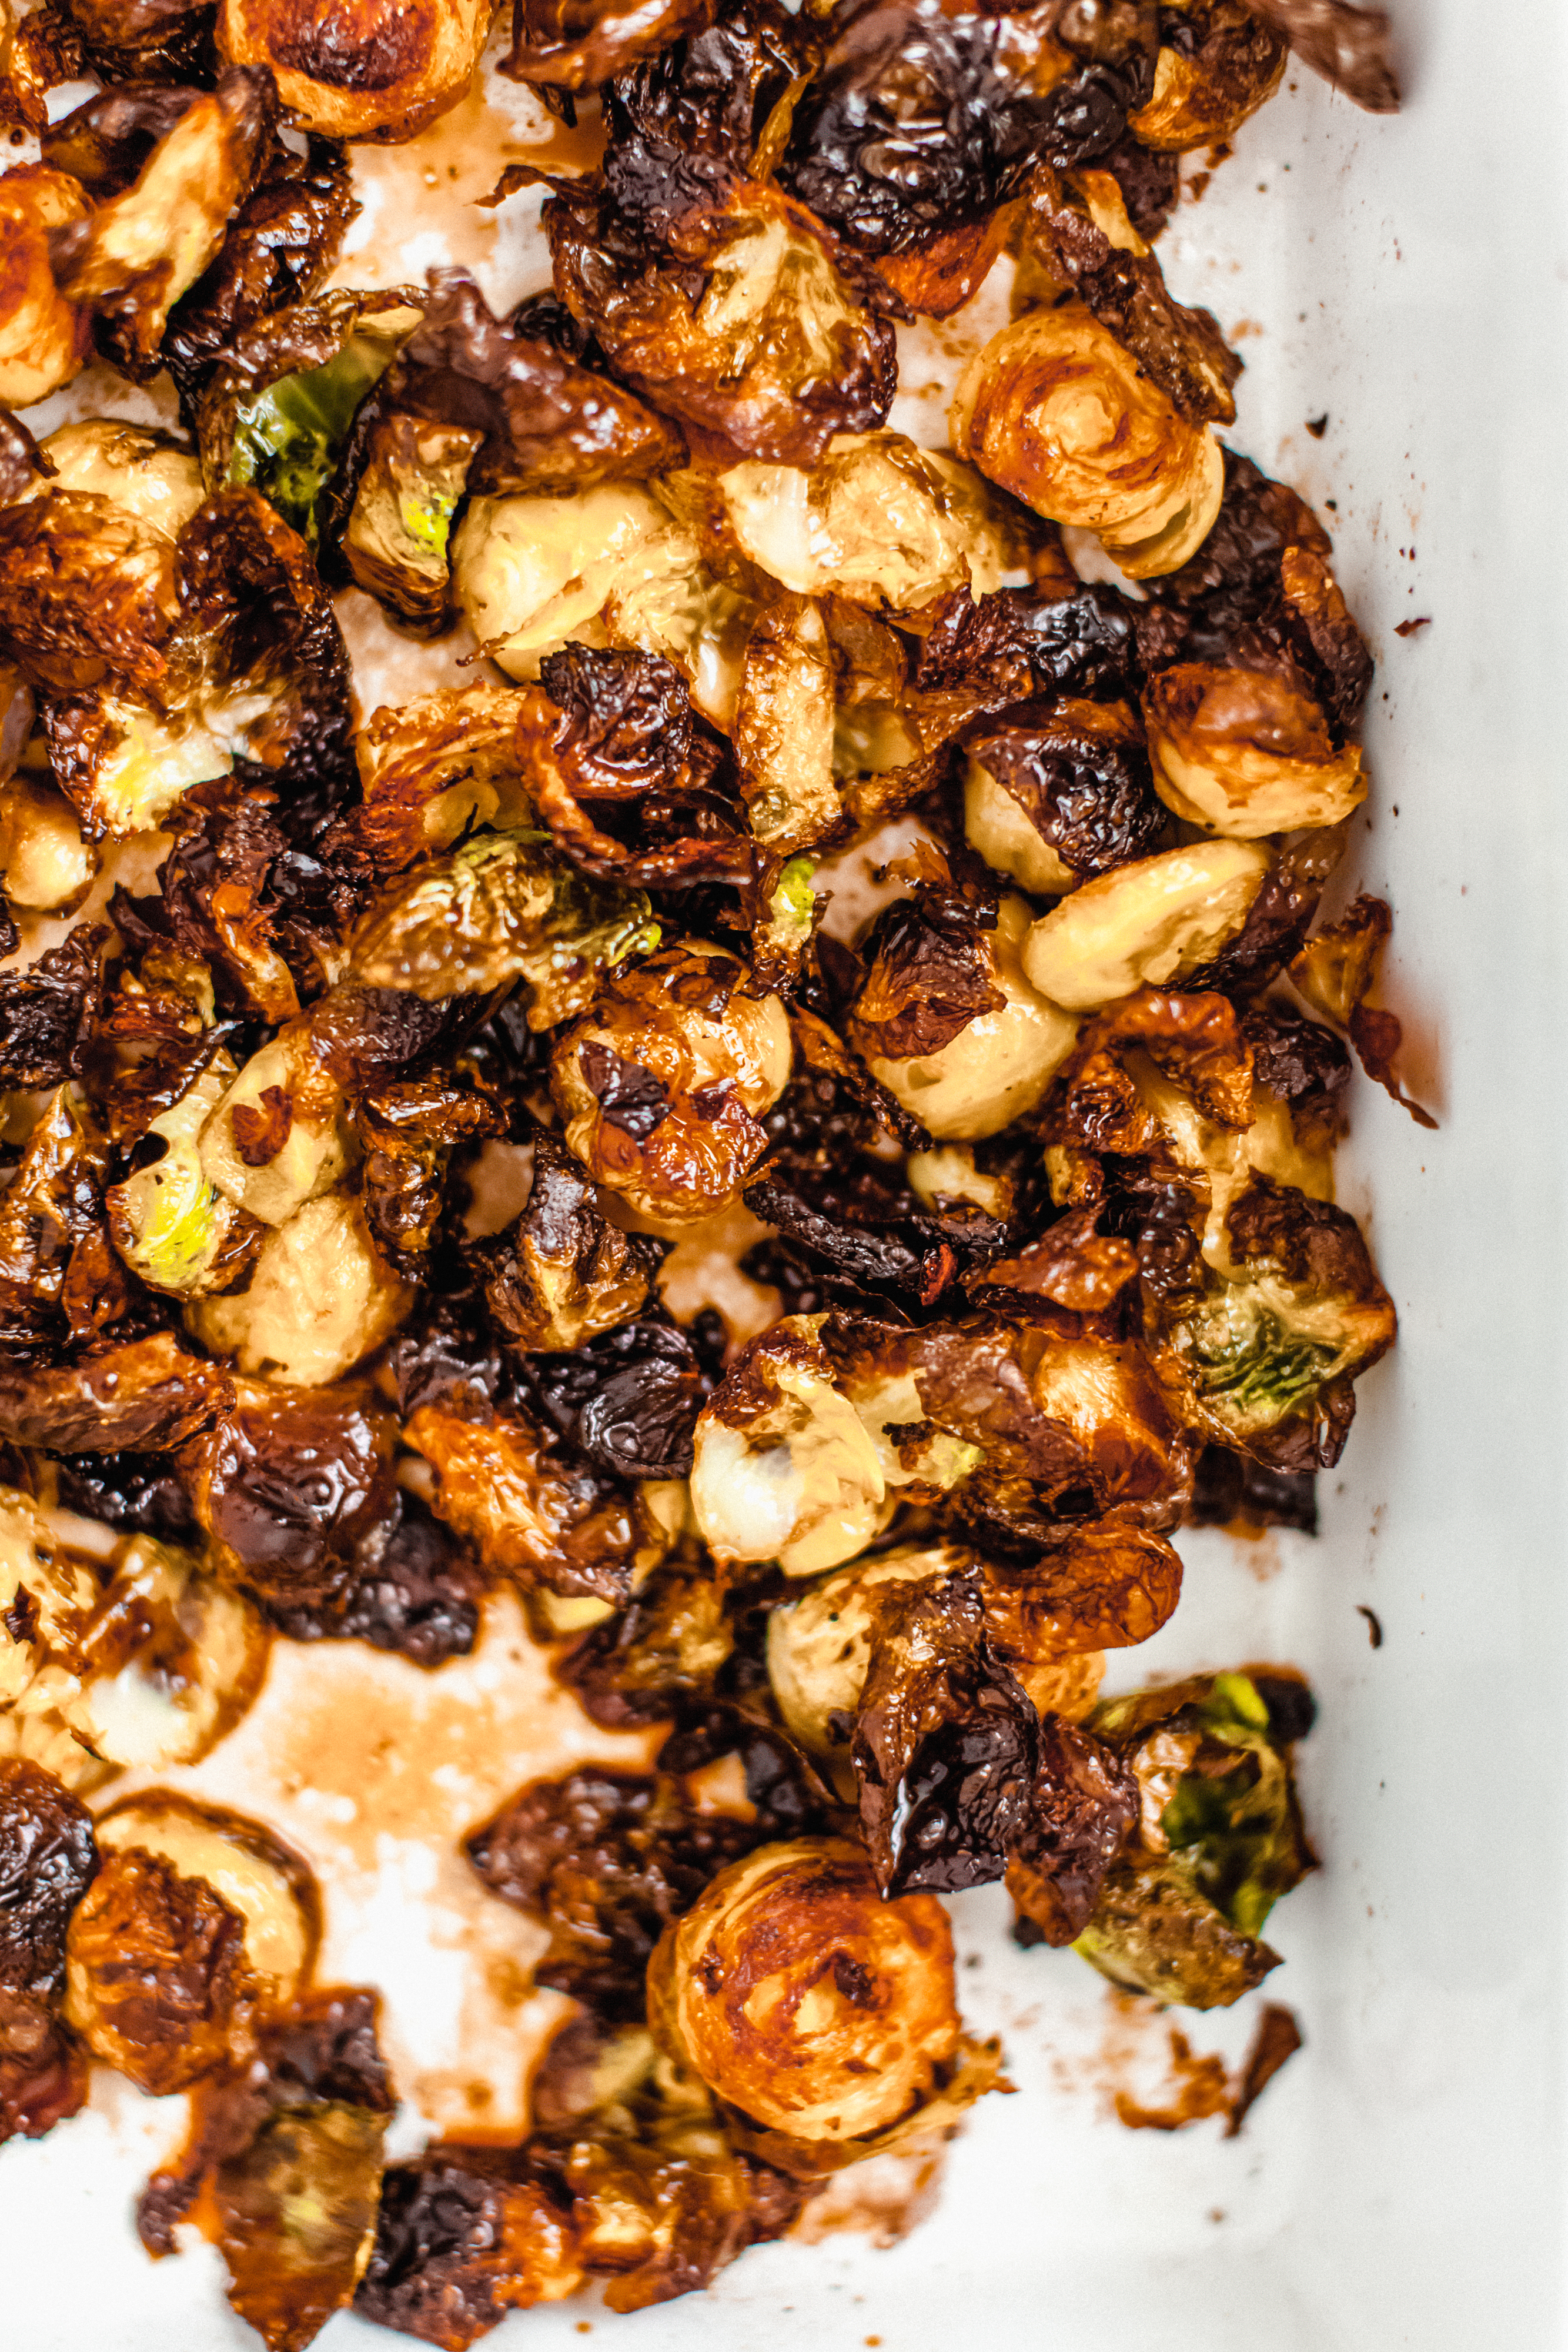
Brussels sprouts halved, tossed in olive oil, salt, pepper, and garlic powder — air fryer 380°F for 12 minutes, shaken at 6 minutes. The conversion vegetable. Place the sprouts cut-side down in the basket after preheating so the flat side makes full contact with the hot basket surface — this is what produces the deeply caramelized cut face that is the entire point of air fryer Brussels sprouts. At the 6-minute shake, the cut face will already show good caramelization. Finish with a drizzle of balsamic glaze and a sprinkle of Parmesan at serving. The version that Saad ate without complaint and Zainab described as "good, actually," which is the highest category of vegetable endorsement available in our household.
Ingredients
- 400g Brussels sprouts, trimmed and halved
- 1 tablespoon olive oil + 1 teaspoon garlic powder + 1 teaspoon salt + ½ teaspoon black pepper
- Balsamic glaze and grated Parmesan for finishing
Instructions
- Trim the base of each Brussels sprout and halve them lengthwise. Toss in a bowl with olive oil, garlic powder, salt, and pepper until every cut surface is coated.
- Preheat the air fryer to 380°F for 3 minutes. Arrange the sprouts cut-side down in the basket in a single layer — this contact position is what produces the caramelized flat face. Cook 6 minutes. Shake the basket to redistribute. Cook 6 more minutes. The cut sides should show deep golden-brown caramelization and some leaves on the exterior should be slightly charred and crispy.
- Transfer to a serving plate immediately. Drizzle balsamic glaze over the top and sprinkle grated Parmesan. Serve hot — the crispy exterior softens quickly as the sprouts cool.
- Preheat the air fryer to the specified temperature for 3 minutes before adding the food — a preheated air fryer ensures immediate surface contact with hot air and produces better browning and crispiness than a cold start.
- Arrange food in a single layer with space between pieces — crowding causes steaming rather than crisping. Cook in batches if needed rather than stacking.
16. Parmesan Asparagus
:max_bytes(150000):strip_icc():format(webp)/ALR-recipe-223427-parmesan-asparagus-VAT-hero-02-4x3-c000480122444f34b1a4e2a4c48d7783.jpg)
Asparagus spears tossed in olive oil, salt, pepper, and garlic, topped with grated Parmesan — air fryer 400°F for 8 minutes (no shake or flip needed for asparagus). The air fryer asparagus is the side dish that finishes before the main course has been plated, which is the property that makes it most useful for weeknight dinner timing. Trim the woody ends before cooking. For thin asparagus spears, check at 6 minutes — they cook faster than thick spears. For very thick spears, add 2 minutes. The Parmesan toasts against the hot asparagus surface in the air fryer and forms a thin, savory crust that the oven version does not achieve in the same time.
Ingredients
- 500g asparagus, woody ends trimmed
- 1 tablespoon olive oil + 2 garlic cloves minced + 1 teaspoon salt + ½ teaspoon pepper
- 3 tablespoon freshly grated Parmesan + lemon wedges for serving
Instructions
- Toss the trimmed asparagus in olive oil, minced garlic, salt, and pepper until evenly coated. Preheat the air fryer to 400°F for 3 minutes. Arrange in a single layer in the basket — they may need to be slightly overlapped for a full pound, which is acceptable for asparagus unlike most vegetables. Sprinkle the grated Parmesan over the spears.
- Cook at 400°F for 8 minutes without opening. At 8 minutes, the Parmesan should be golden and lightly toasted and the asparagus should be tender with slightly caramelized tips. Squeeze fresh lemon over immediately at serving.
- Preheat the air fryer to the specified temperature for 3 minutes before adding the food — a preheated air fryer ensures immediate surface contact with hot air and produces better browning and crispiness than a cold start.
- Arrange food in a single layer with space between pieces — crowding causes steaming rather than crisping. Cook in batches if needed rather than stacking.
- Spray with cooking oil halfway through if the surface looks dry — the oil is essential for achieving golden colour in the air fryer without deep frying.
15. Garlic Green Beans
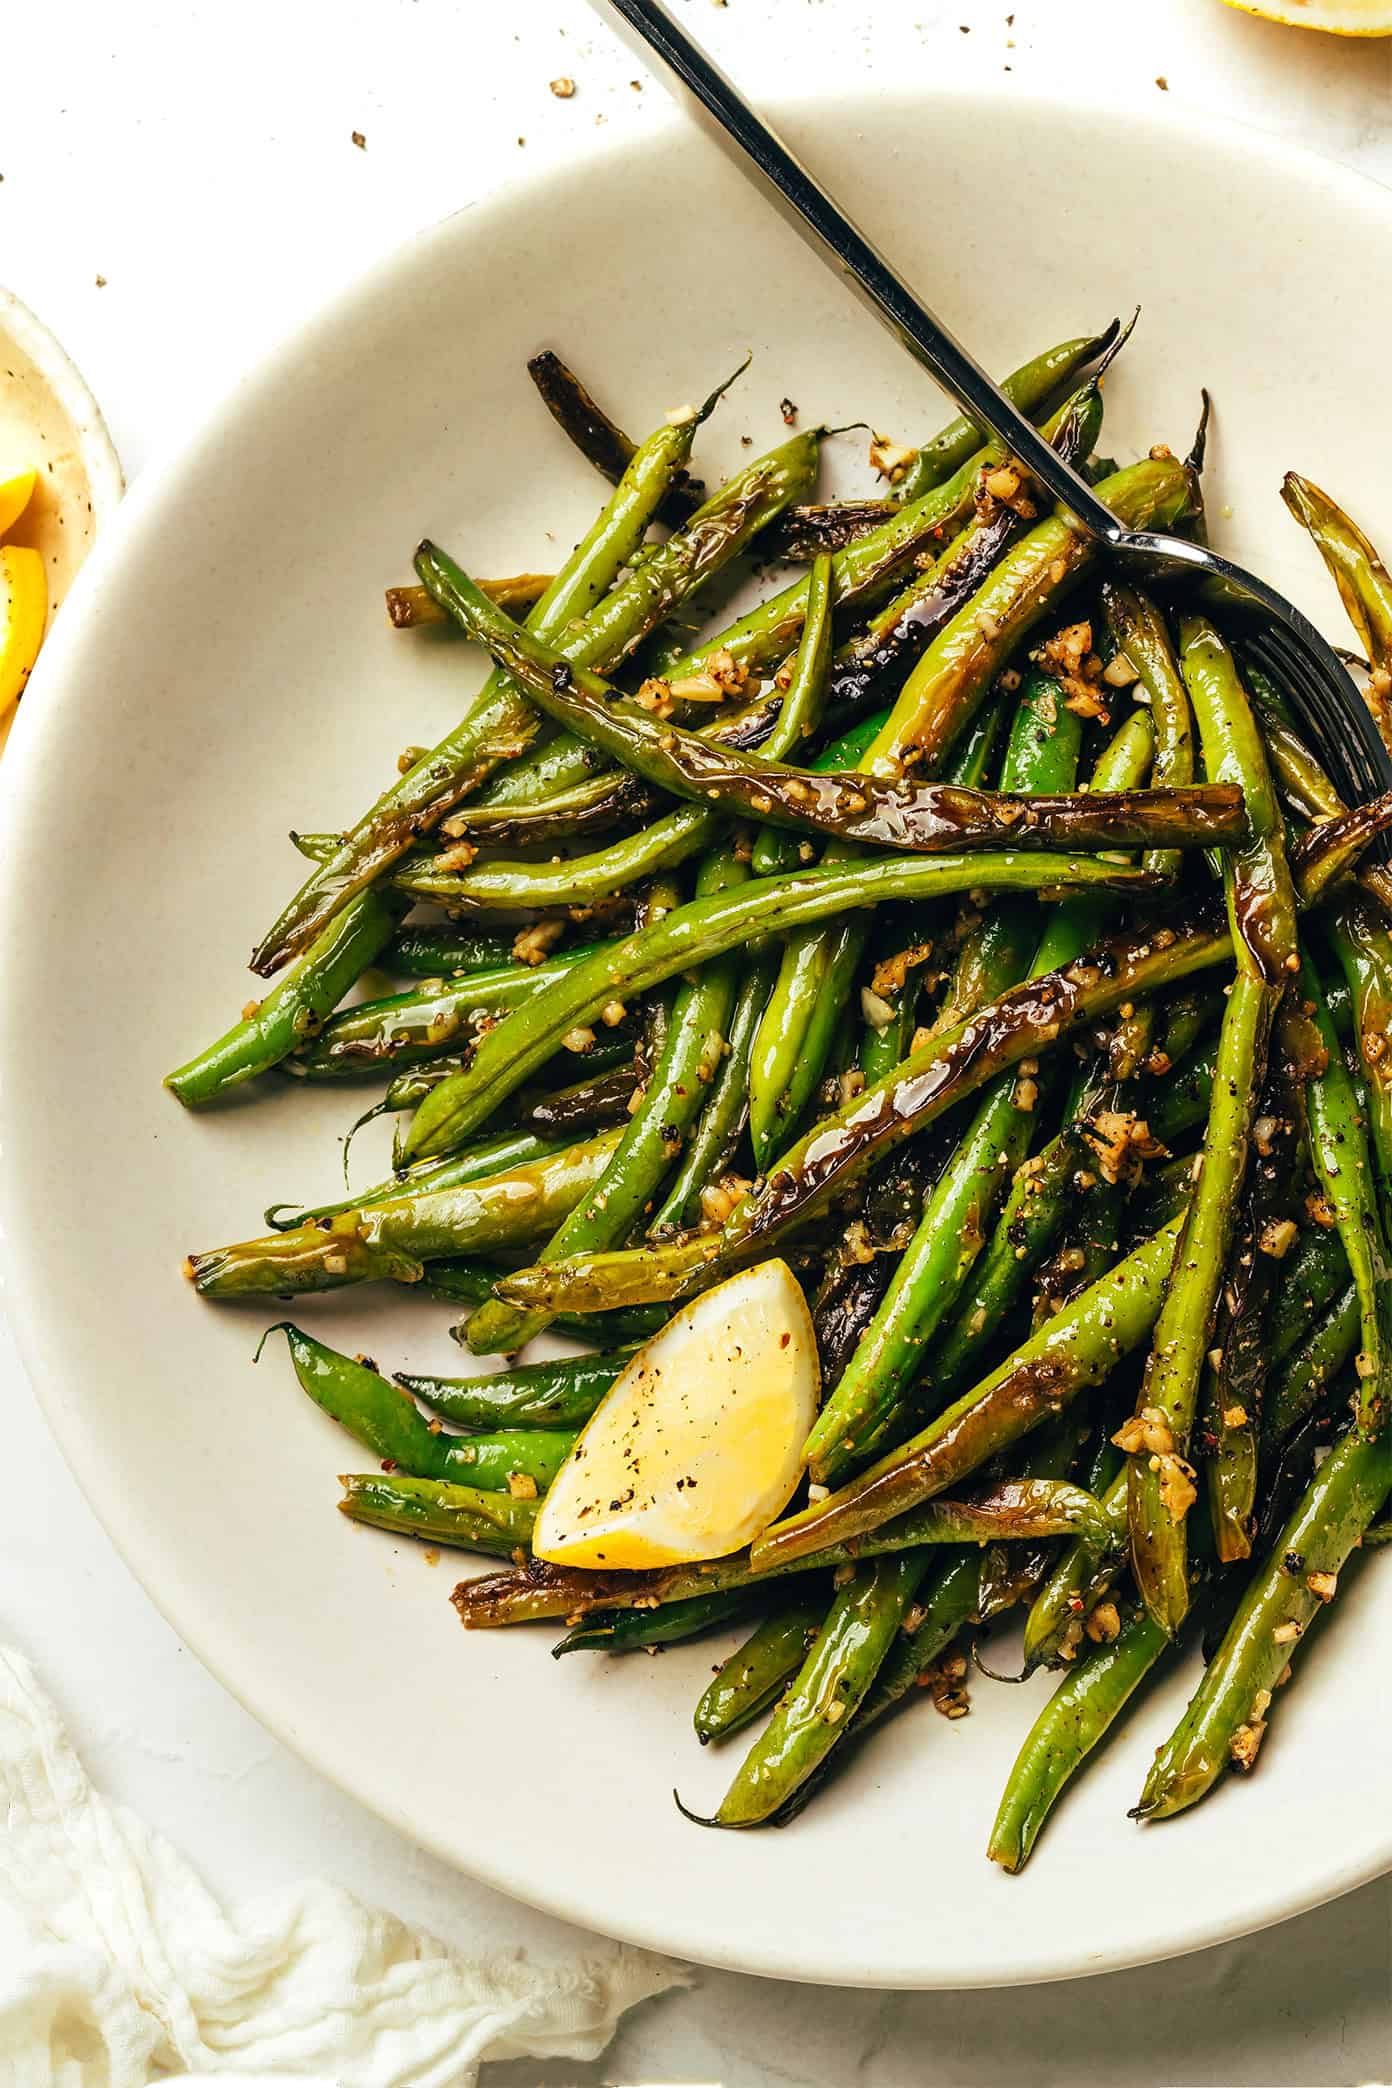
Green beans tossed in olive oil, garlic, salt, and pepper — air fryer 400°F for 8 minutes, shaken at 4 minutes. The air fryer green bean achieves the blistered, slightly wrinkled exterior of a properly wok-fried green bean without a screaming-hot wok and a kitchen full of smoke. The skin of the green bean blisters and concentrates the flavor while the interior stays tender — not soft, not crunchy, but the satisfying al dente texture that makes green beans worth eating. Finish with a squeeze of lemon and a drizzle of sesame oil for an Asian-inspired version, or leave plain and serve with any protein.
Ingredients
- 400g green beans, ends trimmed
- 1 tablespoon olive oil + 3 garlic cloves minced + 1 teaspoon salt + ½ teaspoon pepper
- Optional finish: juice of ½ lemon + 1 teaspoon sesame oil
Instructions
- Toss the trimmed green beans in olive oil, minced garlic, salt, and pepper. Preheat the air fryer to 400°F for 3 minutes. Spread the green beans in the basket — slight overlapping is fine. Cook 4 minutes. Shake the basket vigorously. Cook 4 more minutes. The beans should show some blistering on the skin, a few lightly charred tips, and feel tender when pressed. Finish with lemon and sesame oil if desired and serve immediately.
- Preheat the air fryer to the specified temperature for 3 minutes before adding the food — a preheated air fryer ensures immediate surface contact with hot air and produces better browning and crispiness than a cold start.
- Arrange food in a single layer with space between pieces — crowding causes steaming rather than crisping. Cook in batches if needed rather than stacking.
- Spray with cooking oil halfway through if the surface looks dry — the oil is essential for achieving golden colour in the air fryer without deep frying.
- Check doneness 2 minutes before the stated time — air fryer models vary and your unit may run hot. Adjust timing based on your specific appliance.
14. Crispy Broccoli Florets
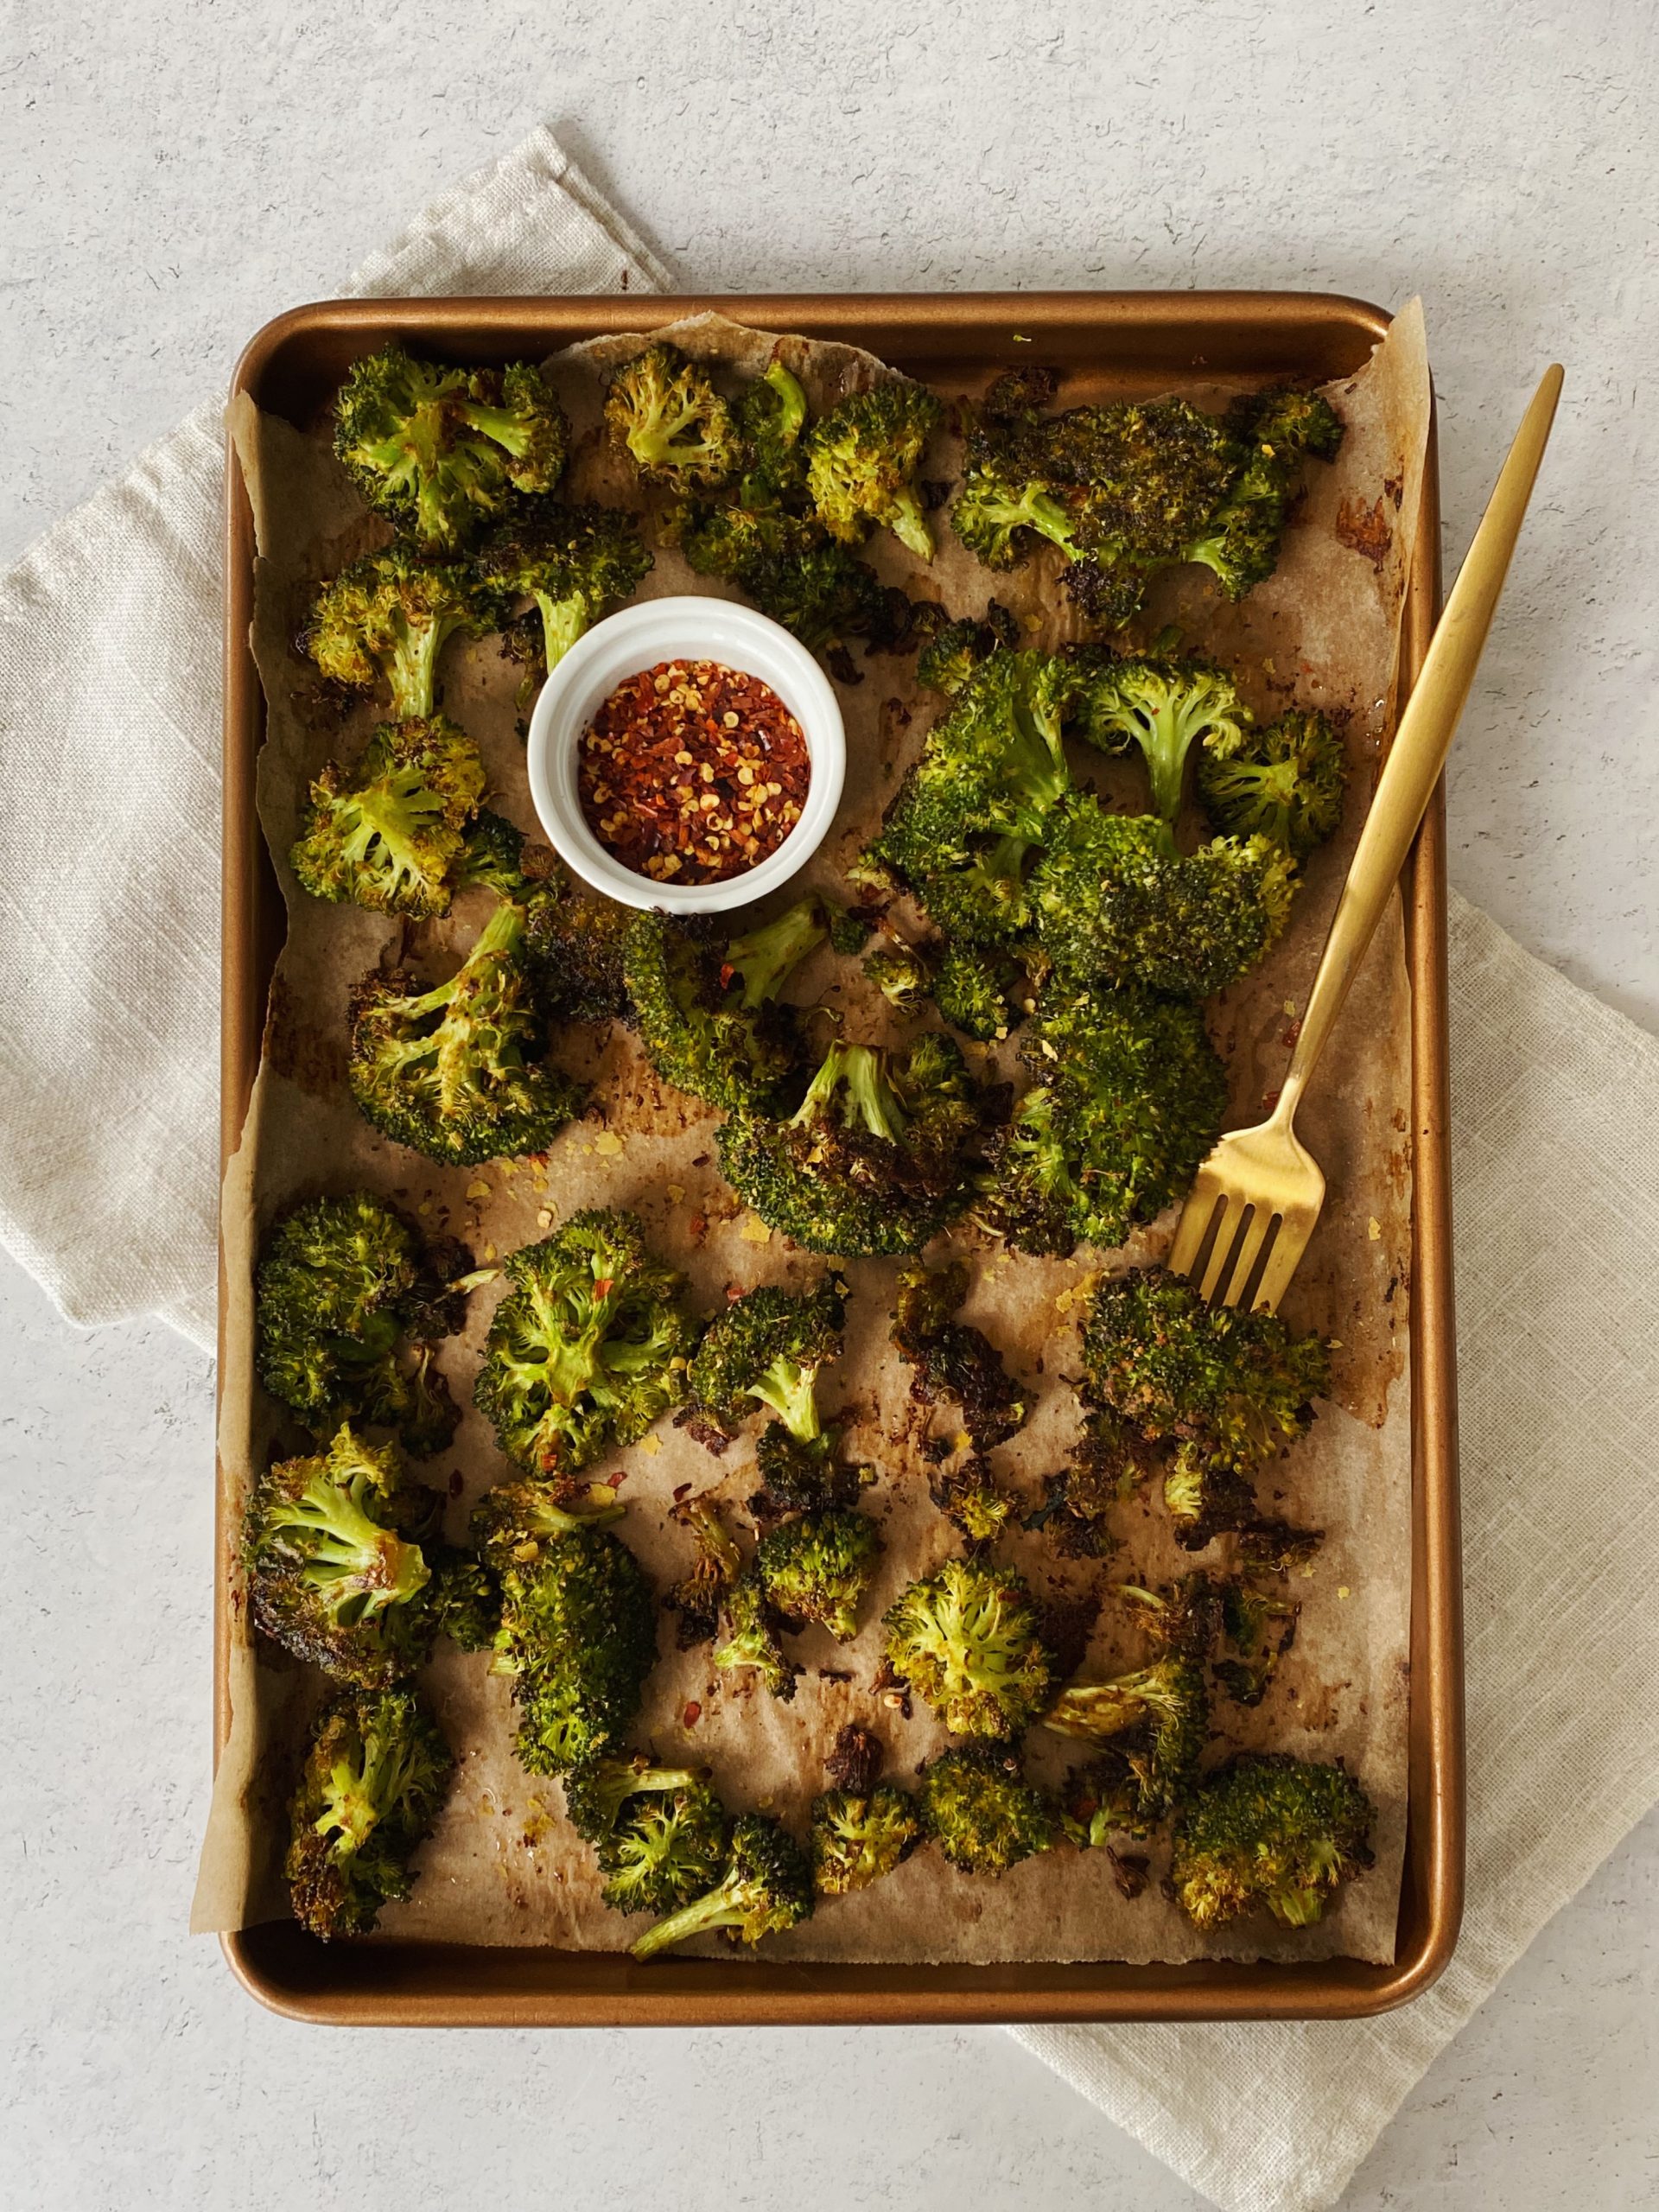
Broccoli florets tossed in olive oil, garlic, salt, pepper, and a pinch of red pepper flakes — air fryer 380°F for 10 minutes, shaken at 5 minutes. Cut florets small and consistent (roughly 1.5-inch pieces) so they cook through evenly in the same window. The edges of the florets caramelize and the exposed floret tips char slightly — these charred tips are the best part, providing a concentrated broccoli flavor that the steamed or boiled version never approaches. My husband eats this with the enthusiasm usually reserved for something that required more effort. Serve with a squeeze of lemon and grated Parmesan or a drizzle of tahini for a different direction.
Ingredients
- 400g broccoli, cut into 1.5-inch florets
- 1.5 tablespoon olive oil + 3 garlic cloves minced + 1 teaspoon salt + ½ teaspoon pepper + pinch of red pepper flakes
- Lemon wedges and grated Parmesan for serving
Instructions
- Toss the florets in olive oil, garlic, salt, pepper, and red pepper flakes. Preheat the air fryer to 380°F for 3 minutes. Spread in a single layer — florets can touch slightly. Cook 5 minutes. Shake the basket. Cook 5 more minutes. The edges and exposed floret tips should show caramelization and slight charring. Squeeze lemon over and scatter grated Parmesan immediately at serving.
- Preheat the air fryer to the specified temperature for 3 minutes before adding the food — a preheated air fryer ensures immediate surface contact with hot air and produces better browning and crispiness than a cold start.
- Arrange food in a single layer with space between pieces — crowding causes steaming rather than crisping. Cook in batches if needed rather than stacking.
- Spray with cooking oil halfway through if the surface looks dry — the oil is essential for achieving golden colour in the air fryer without deep frying.
- Check doneness 2 minutes before the stated time — air fryer models vary and your unit may run hot. Adjust timing based on your specific appliance.
13. Sweet Potato Fries
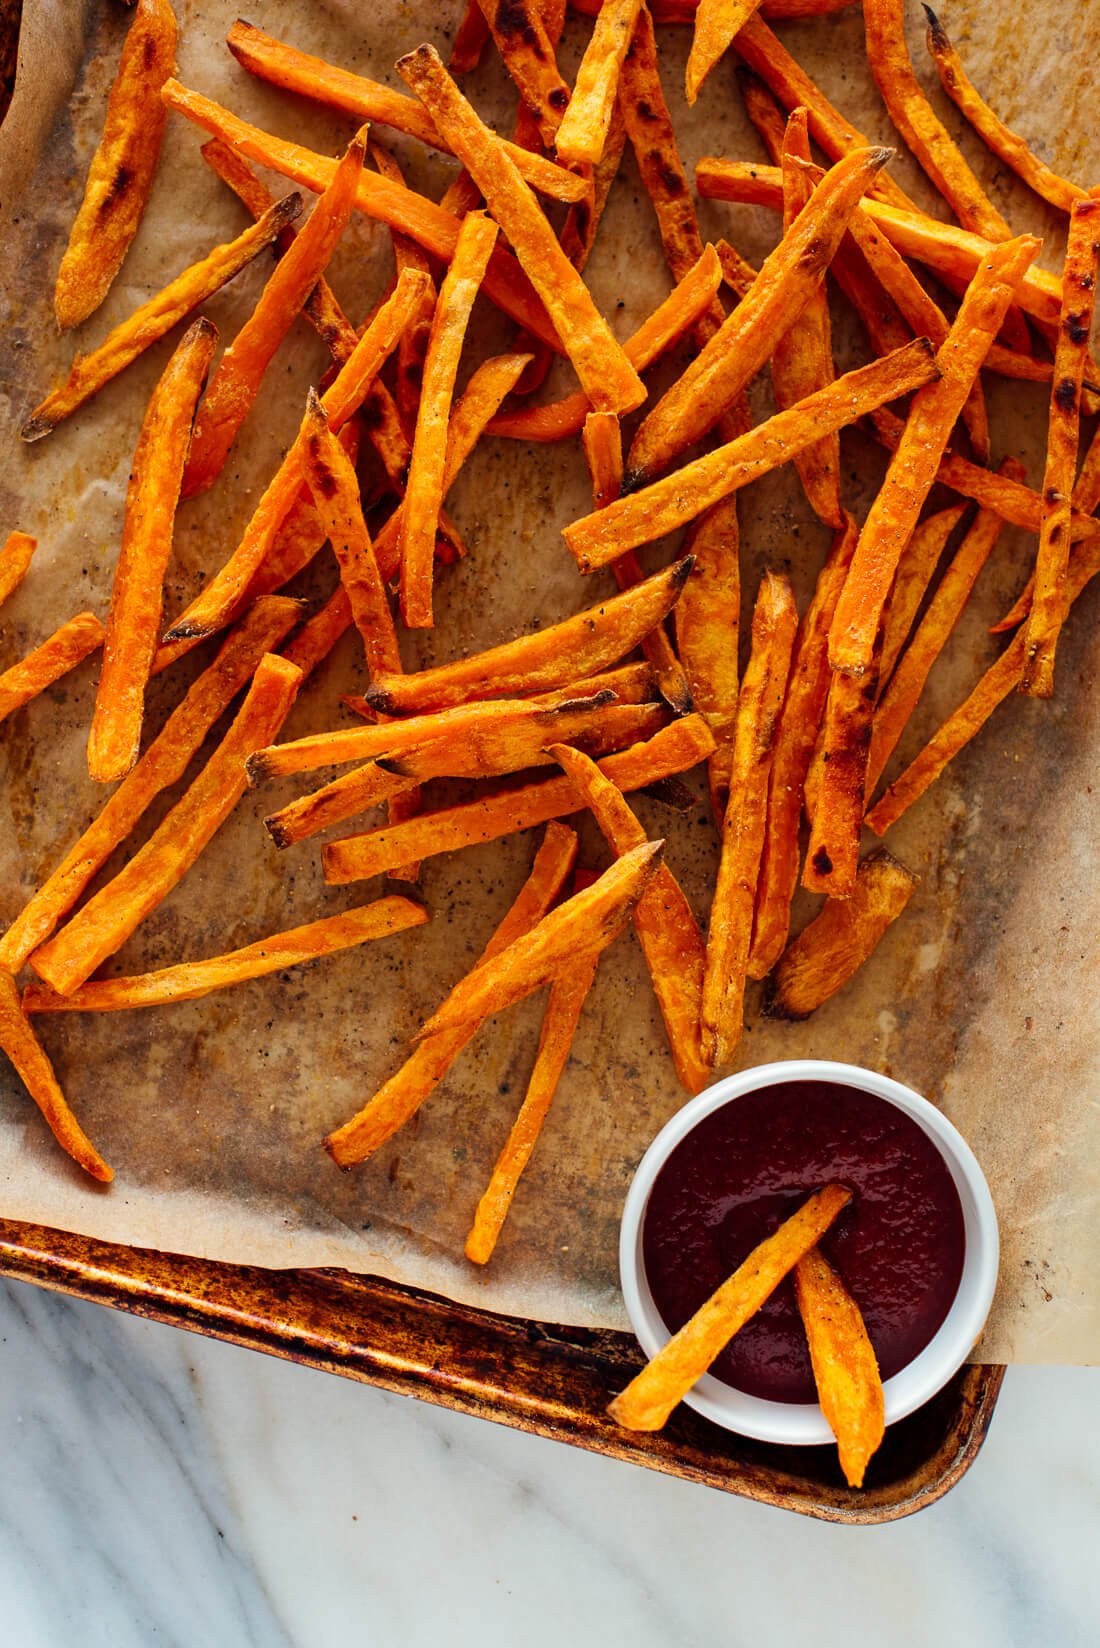
Sweet potatoes cut into ¼-inch matchstick fries, tossed in olive oil, smoked paprika, garlic powder, salt, and a pinch of cayenne — air fryer 380°F for 15 minutes, shaken twice (at 5 and 10 minutes). The sweet potato fry is the most technically challenging vegetable fry in the air fryer because sweet potatoes have more sugar than regular potatoes and will burn at high temperatures before cooking through. 380°F and three shakes across 15 minutes is the formula that produces crispy rather than burnt sweet potato fries. Cut them thin and consistent — a thick sweet potato fry will be soft in the center at the same time a thin one is properly crispy. Serve with chipotle mayo (mayo + chipotle powder + lime juice + garlic).
Ingredients
- 2 medium sweet potatoes, peeled and cut into ¼-inch matchstick fries
- 1.5 tablespoon olive oil + 1 teaspoon smoked paprika + 1 teaspoon garlic powder + 1 teaspoon salt + ¼ teaspoon cayenne
- Chipotle mayo: 3 tablespoon mayo + ½ teaspoon chipotle powder + juice of ½ lime + 1 garlic clove grated + salt
Instructions
- Soak the cut sweet potato fries in cold water for 20 minutes — this draws out some of the surface starch and helps the exterior crisp rather than steam. Drain and pat completely dry with paper towels before seasoning. Toss in olive oil and all spices.
- Preheat the air fryer to 380°F for 3 minutes. Spread in a single layer — do not pile. Cook 5 minutes. Shake. Cook 5 more minutes. Shake again. Cook 5 more minutes. At 15 minutes, the fries should be caramelized golden-brown with some slightly darker tips. Make the chipotle mayo while the fries cook: stir all ingredients together. Serve fries immediately with the chipotle mayo.
- Preheat the air fryer to the specified temperature for 3 minutes before adding the food — a preheated air fryer ensures immediate surface contact with hot air and produces better browning and crispiness than a cold start.
- Arrange food in a single layer with space between pieces — crowding causes steaming rather than crisping. Cook in batches if needed rather than stacking.
- Spray with cooking oil halfway through if the surface looks dry — the oil is essential for achieving golden colour in the air fryer without deep frying.
12. Roasted Cherry Tomatoes
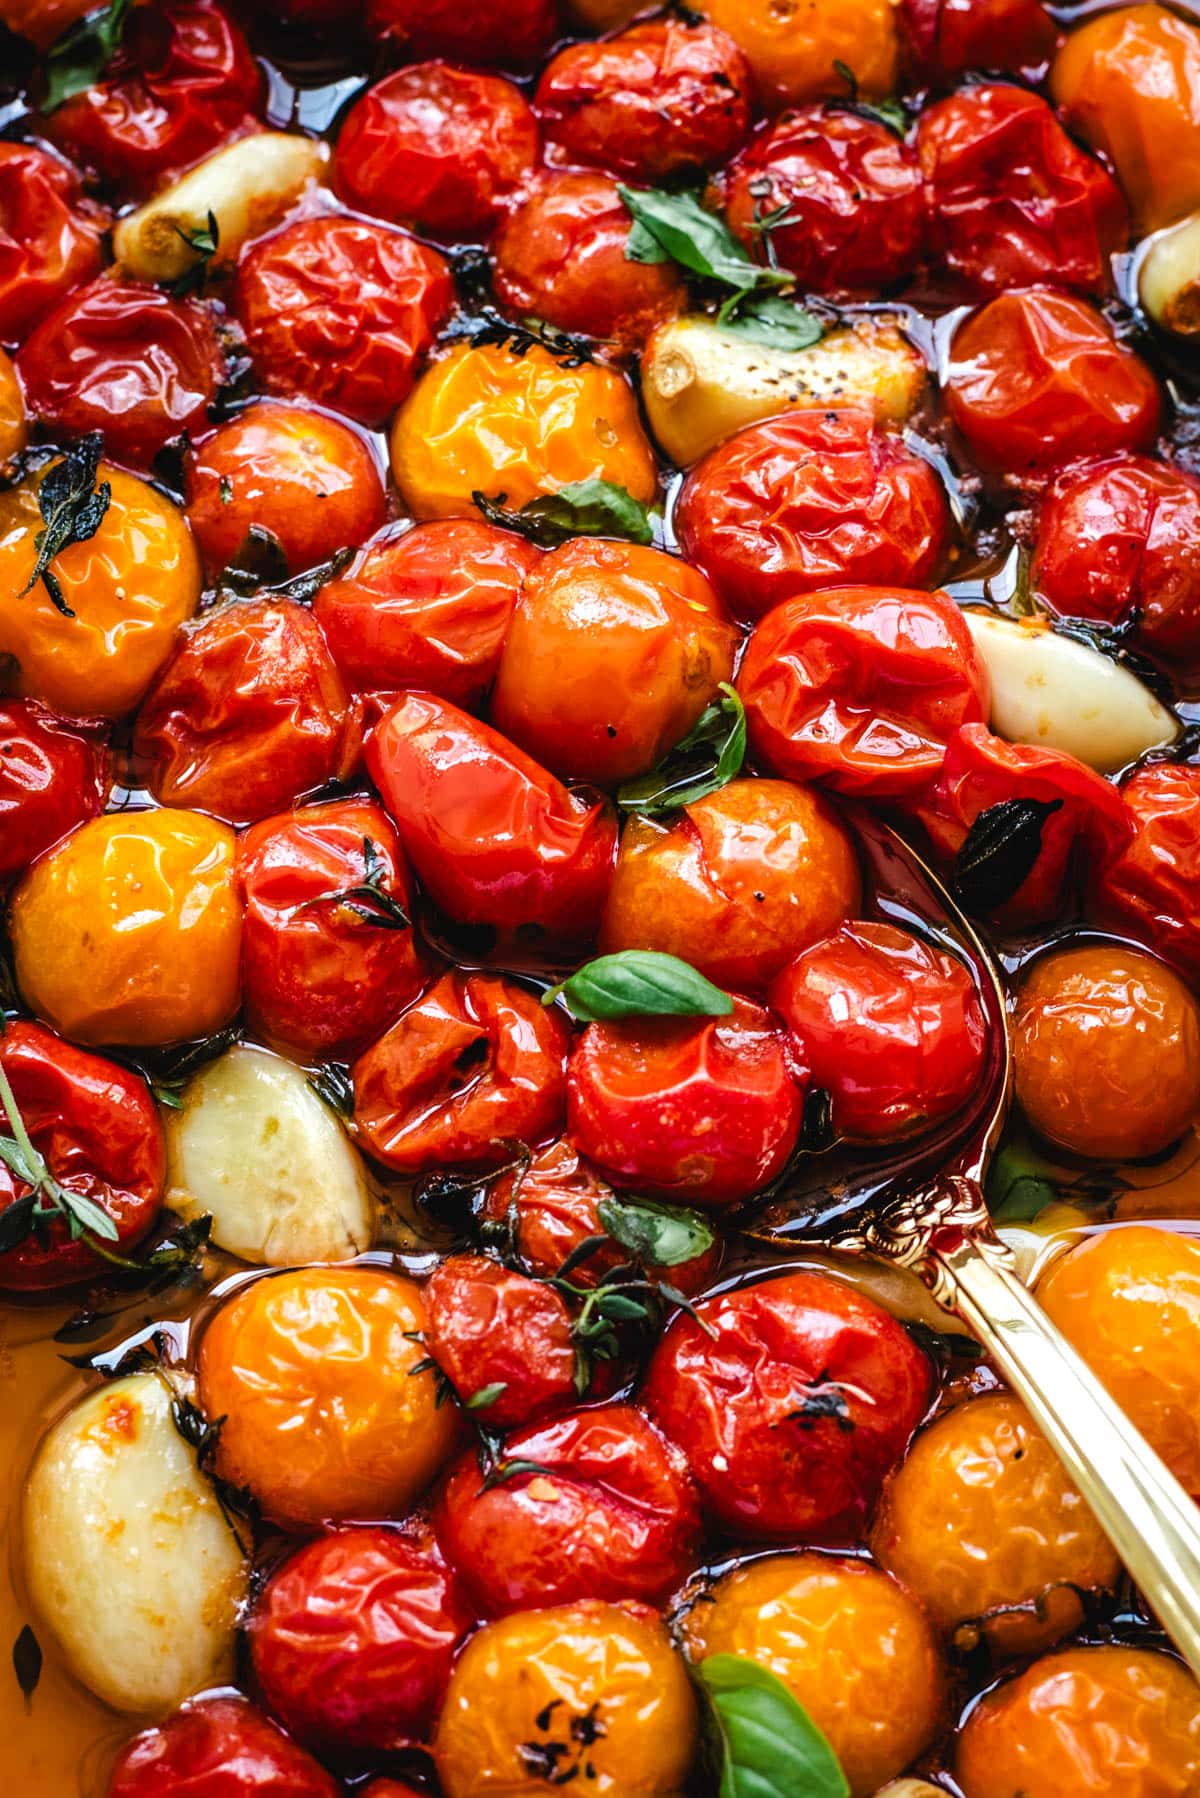
Cherry tomatoes tossed in olive oil, garlic, salt, pepper, and dried thyme — air fryer 380°F for 12 minutes, no shaking. The tomatoes blister and burst at 12 minutes, releasing their concentrated sweet-acid juice into the oil and garlic in the basket, creating a sauce-like pool at the base of each tomato. This is intentional — the juices that pool in the air fryer basket are the sauce. Transfer everything from the basket (including all the tomato juices) onto pasta, over crusty bread, or as a side alongside grilled or air-fried chicken. The blistered, caramelized tomatoes collapse slightly and concentrate in flavor in a way that only 12 minutes of high heat can achieve.
Ingredients
- 300g cherry tomatoes, left whole
- 2 tablespoon olive oil + 3 garlic cloves thinly sliced + 1 teaspoon salt + ½ teaspoon pepper + 1 teaspoon dried thyme
- Fresh basil for finishing
Instructions
- Toss the cherry tomatoes with olive oil, sliced garlic, salt, pepper, and dried thyme. Preheat the air fryer to 380°F for 3 minutes. Pour the tomatoes and all the oil and garlic into the basket in a single layer. Cook at 380°F for 12 minutes without opening. At 12 minutes, the tomatoes should be blistered, some will have burst, and the basket should show a pool of concentrated tomato juice, oil, and garlic. Transfer everything — including all the juices — to a serving bowl or directly over pasta or bread. Finish with torn fresh basil.
- Preheat the air fryer to the specified temperature for 3 minutes before adding the food — a preheated air fryer ensures immediate surface contact with hot air and produces better browning and crispiness than a cold start.
- Arrange food in a single layer with space between pieces — crowding causes steaming rather than crisping. Cook in batches if needed rather than stacking.
- Spray with cooking oil halfway through if the surface looks dry — the oil is essential for achieving golden colour in the air fryer without deep frying.
- Check doneness 2 minutes before the stated time — air fryer models vary and your unit may run hot. Adjust timing based on your specific appliance.
11. Cauliflower Steaks
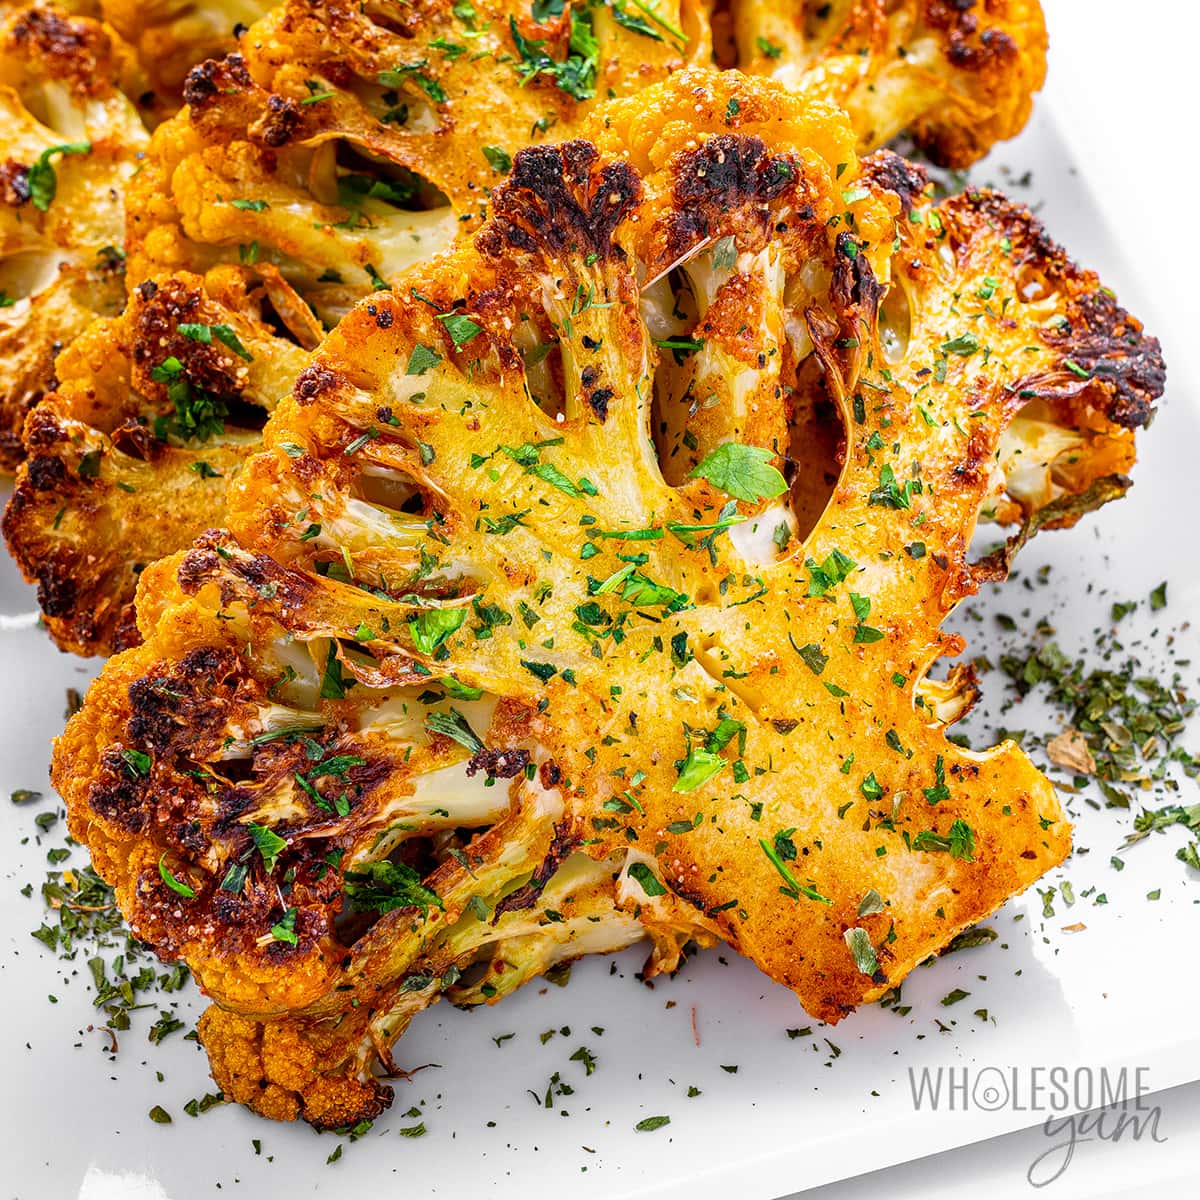
Cauliflower sliced vertically through the head into 1-inch steaks, brushed with olive oil and seasoned with smoked paprika, cumin, garlic powder, salt, and pepper — air fryer 390°F for 14 minutes, flipped at 7 minutes. The cauliflower steak format presents in a way that looks far more impressive on a plate than florets, and the flat surface develops deep golden caramelization at 390°F that florets cannot achieve because they cannot lay flat against the basket. The interior of the cauliflower steak becomes fully tender in 14 minutes while the surfaces caramelize significantly. Serve with tahini sauce and pomegranate seeds, or with a drizzle of chimichurri.
Ingredients
- 1 large cauliflower head, sliced into 1-inch steaks (2–3 steaks from the center, plus florets from the sides)
- 2 tablespoon olive oil + 1 teaspoon smoked paprika + 1 teaspoon cumin + 1 teaspoon garlic powder + 1 teaspoon salt + ½ teaspoon pepper
- Tahini sauce and pomegranate seeds for serving
Instructions
- Slice the cauliflower vertically through the core into 1-inch thick steaks — the core holds the steak together, so slices through the center work best. The outer sections will break into florets, which can be cooked alongside or reserved for another use. Brush each steak generously on both sides with olive oil and season evenly with the spice blend.
- Preheat the air fryer to 390°F for 3 minutes. Arrange the cauliflower steaks in the basket — they may need to cook one or two at a time depending on basket size. Cook 7 minutes. Carefully flip each steak with a wide spatula — the steak is fragile along the cored center so flip confidently but gently. Cook 7 more minutes. The surfaces should show deep golden-brown caramelization. Serve with tahini sauce and a scatter of pomegranate seeds.
- Preheat the air fryer to the specified temperature for 3 minutes before adding the food — a preheated air fryer ensures immediate surface contact with hot air and produces better browning and crispiness than a cold start.
- Arrange food in a single layer with space between pieces — crowding causes steaming rather than crisping. Cook in batches if needed rather than stacking.
- Spray with cooking oil halfway through if the surface looks dry — the oil is essential for achieving golden colour in the air fryer without deep frying.
10. Crispy Zucchini Coins
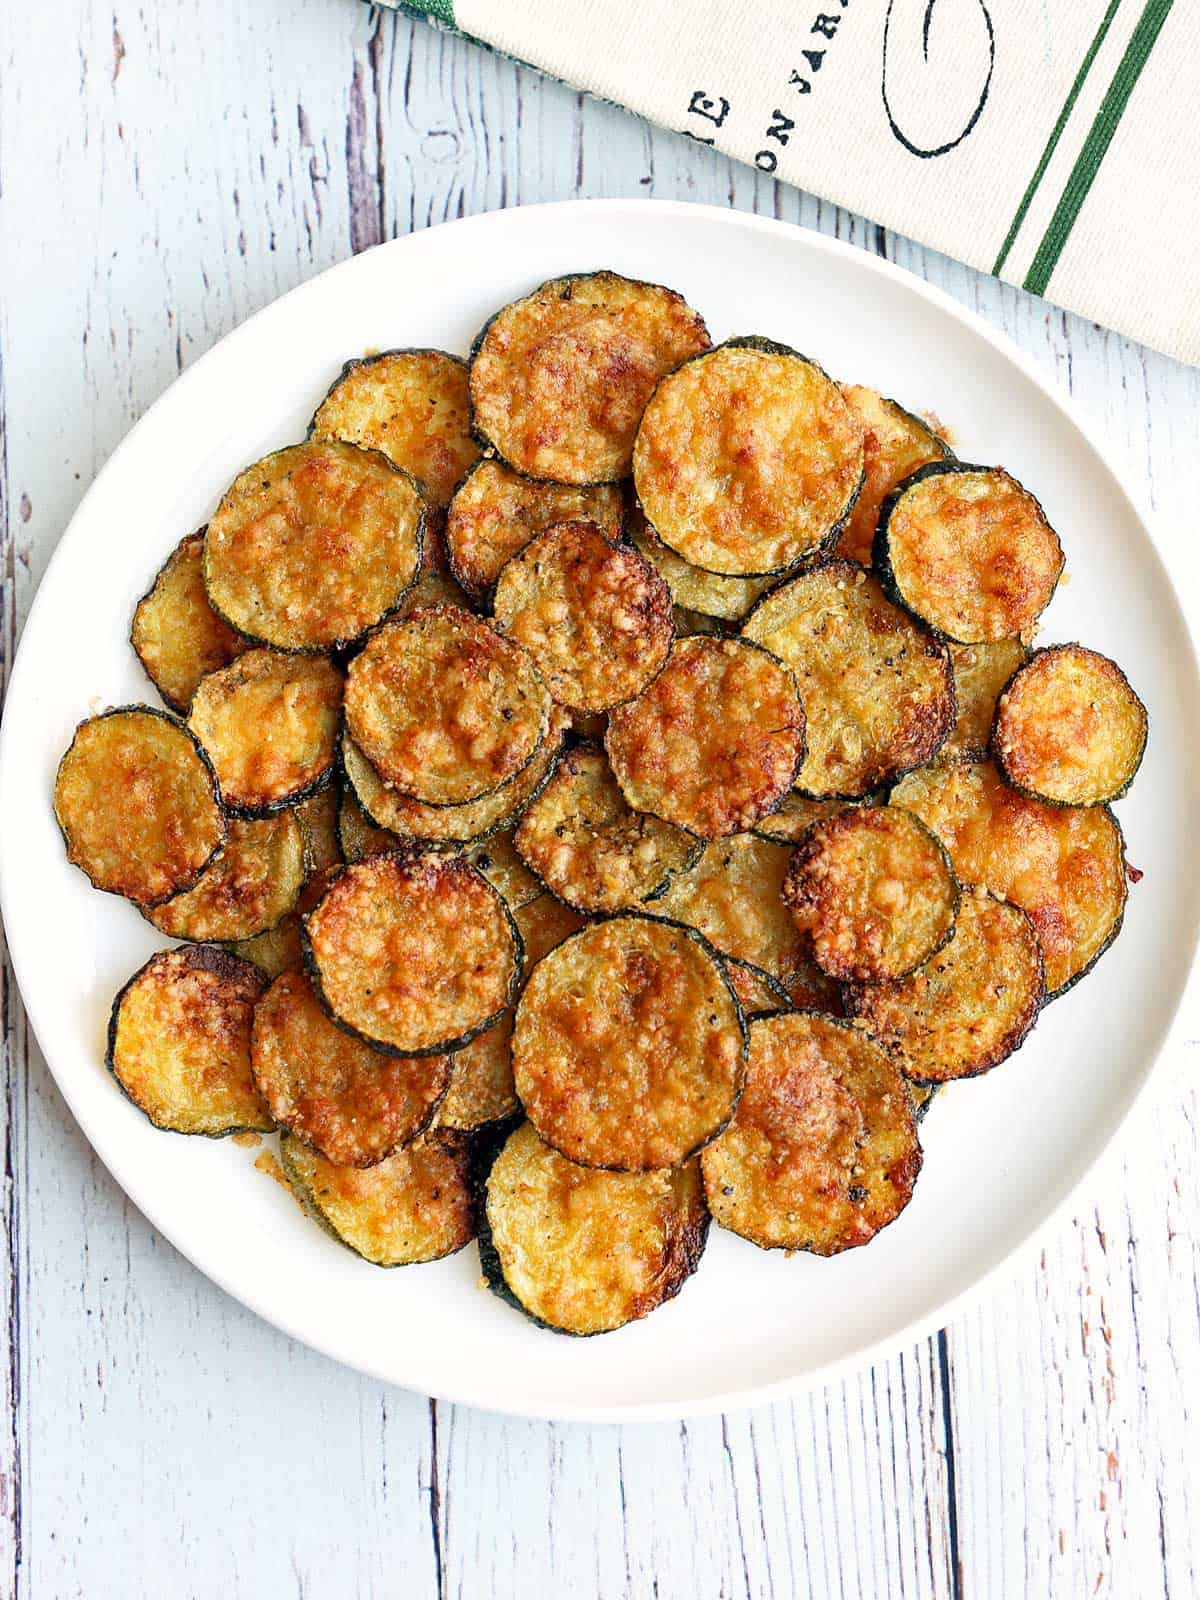
Zucchini sliced into ¼-inch rounds, seasoned and coated in a mixture of grated Parmesan and Italian breadcrumbs — air fryer 400°F for 10 minutes, flipped at 5 minutes. The Parmesan-breadcrumb coating on zucchini coins gets genuinely crispy in the air fryer — the oven version requires 20 minutes and still produces a coating that is more chewy than crispy because the zucchini releases moisture upward into the coating as it bakes. The air fryer crisps the coating from all sides simultaneously and prevents moisture accumulation. Press the coating firmly into the zucchini before cooking so it adheres properly through the flip. A 10-minute side dish that doubles as a snack.
Ingredients
- 2 medium zucchini, sliced into ¼-inch rounds
- 1 egg beaten + 1 tablespoon milk
- ½ cup Italian breadcrumbs + ¼ cup grated Parmesan + ½ teaspoon garlic powder + ½ teaspoon salt
- Cooking oil spray + marinara for dipping
Instructions
- Pat the zucchini rounds dry with paper towels — removing surface moisture is important for crispy results. In a shallow bowl, beat the egg with milk. In a separate bowl, combine the breadcrumbs, Parmesan, garlic powder, and salt. Dip each zucchini round in the egg mixture, then press firmly into the breadcrumb-Parmesan mixture on both sides. Arrange on a plate.
- Preheat the air fryer to 400°F for 3 minutes. Spray the basket with cooking oil spray. Arrange the coated zucchini rounds in a single layer. Spray the tops generously with cooking oil spray. Cook 5 minutes. Flip each round carefully with a thin spatula. Spray the newly exposed tops. Cook 5 more minutes. The coating should be golden and crispy. Serve immediately with marinara.
- Preheat the air fryer to the specified temperature for 3 minutes before adding the food — a preheated air fryer ensures immediate surface contact with hot air and produces better browning and crispiness than a cold start.
- Arrange food in a single layer with space between pieces — crowding causes steaming rather than crisping. Cook in batches if needed rather than stacking.
- Spray with cooking oil halfway through if the surface looks dry — the oil is essential for achieving golden colour in the air fryer without deep frying.
9. Roasted Baby Potatoes
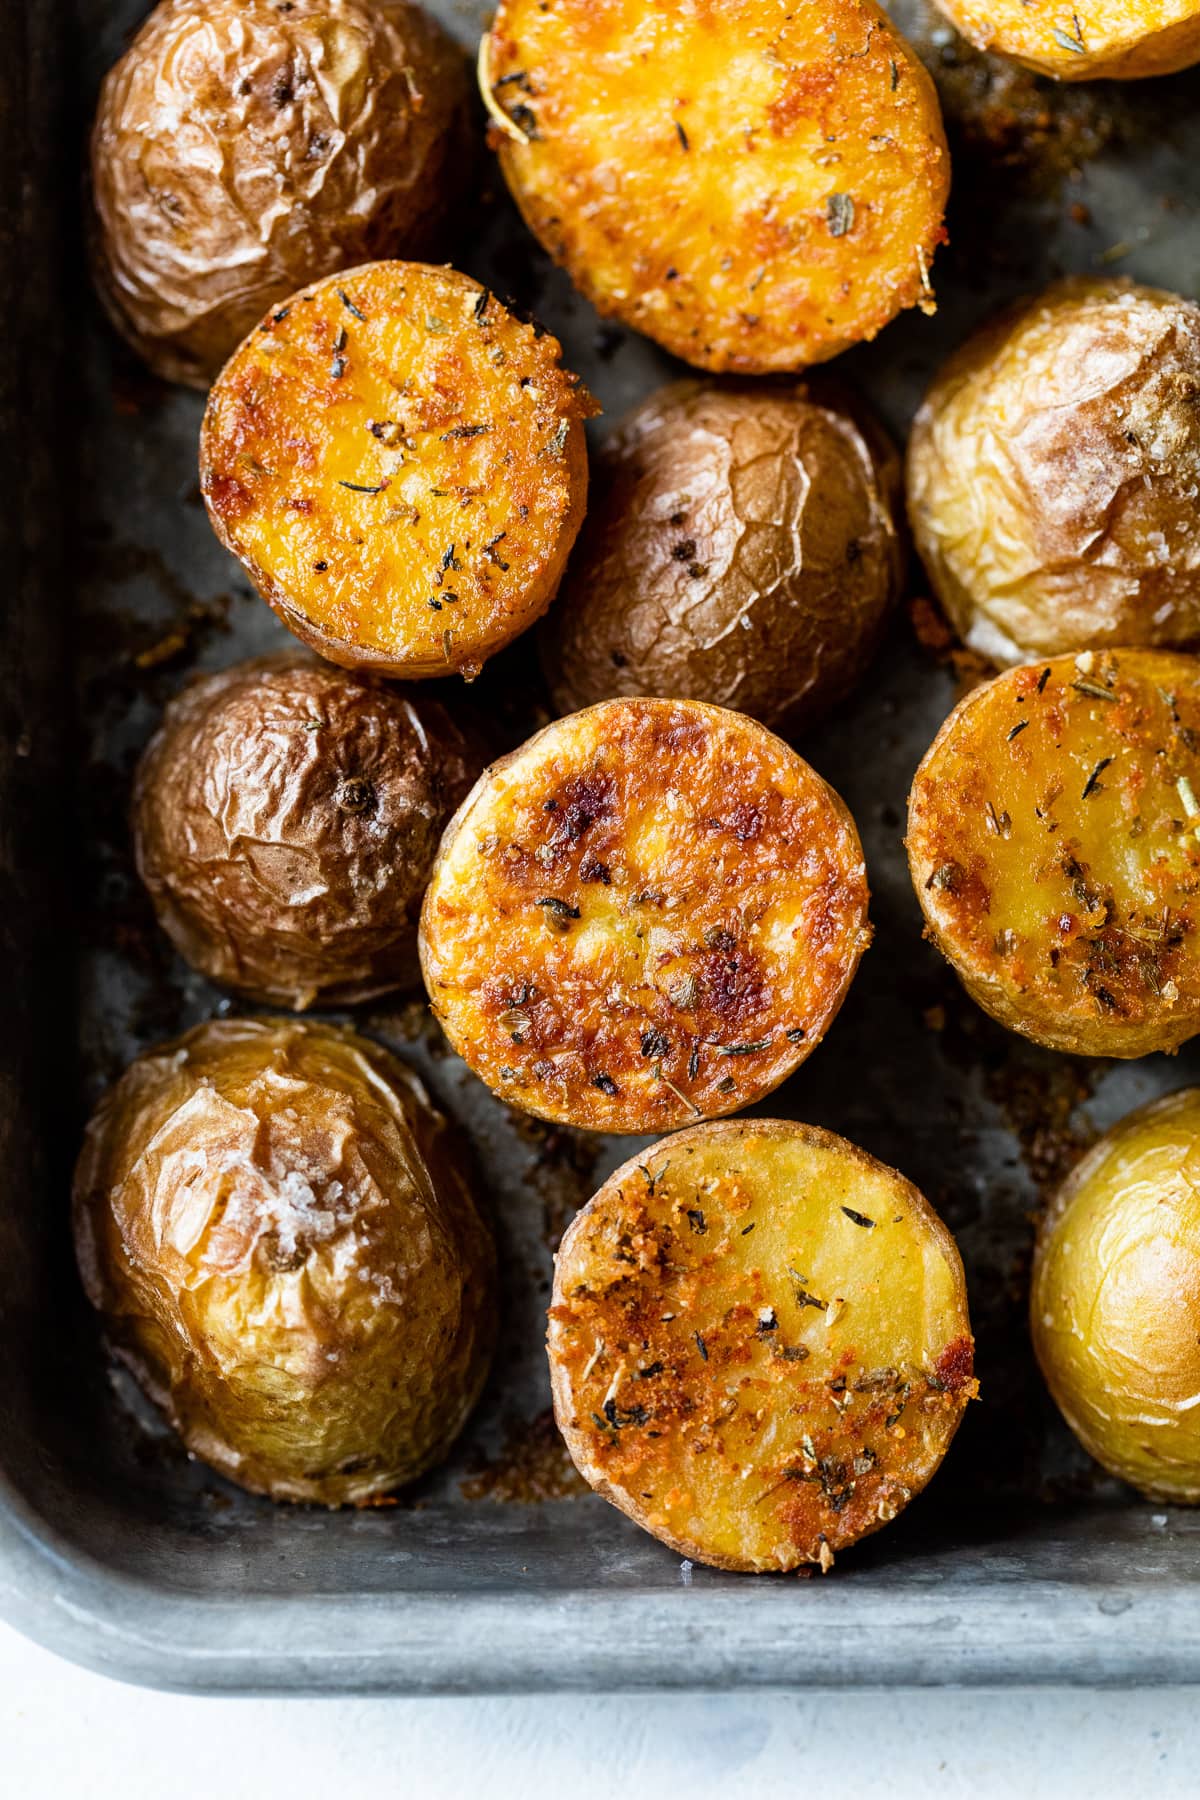
Baby potatoes halved, tossed in olive oil, garlic powder, rosemary, salt, and pepper — air fryer 400°F for 18 minutes, shaken at 9 minutes. The baby potato is the most crowd-pleasing vegetable side in this collection — there is no one at the table who objects to a crispy, golden, herb-roasted potato. The air fryer achieves in 18 minutes what the oven takes 35 to 40 minutes to achieve, and the baby potato's small size means the interior becomes fully tender in the same window the exterior achieves deep golden caramelization. For this to work, halve the potatoes before cooking — whole baby potatoes at this temperature will be crispy outside and raw inside at 18 minutes.
Ingredients
- 500g baby potatoes, halved
- 2 tablespoon olive oil + 1 teaspoon garlic powder + 1 teaspoon dried rosemary (or thyme) + 1 teaspoon salt + ½ teaspoon pepper
- Fresh parsley and flaky sea salt for finishing
Instructions
- Halve all the baby potatoes. Toss in olive oil, garlic powder, rosemary, salt, and pepper until every surface is coated. Preheat the air fryer to 400°F for 3 minutes. Arrange the halved potatoes cut-side down in the basket in a single layer. Cook 9 minutes. Shake the basket to flip and redistribute. Cook 9 more minutes. The cut sides should show deep golden-brown caramelization and the skin side should be crispy. Transfer to a serving bowl, scatter fresh parsley and a pinch of flaky sea salt over the top, and serve immediately.
- Preheat the air fryer to the specified temperature for 3 minutes before adding the food — a preheated air fryer ensures immediate surface contact with hot air and produces better browning and crispiness than a cold start.
- Arrange food in a single layer with space between pieces — crowding causes steaming rather than crisping. Cook in batches if needed rather than stacking.
- Spray with cooking oil halfway through if the surface looks dry — the oil is essential for achieving golden colour in the air fryer without deep frying.
- Check doneness 2 minutes before the stated time — air fryer models vary and your unit may run hot. Adjust timing based on your specific appliance.
8. Roasted Corn on the Cob

Corn on the cob (fresh or thawed from frozen, cut in half crosswise to fit the basket), brushed with butter, salt, pepper, and smoked paprika — air fryer 400°F for 12 minutes, turned twice (at 4 and 8 minutes). The air fryer corn achieves a concentrated, slightly caramelized exterior that is closer to grilled corn than oven-roasted corn — the circulating dry heat evaporates the surface moisture and caramelizes the natural sugars in the corn in 12 minutes. Finish with a squeeze of lime, a sprinkle of chili powder, and a light coat of mayo-parmesan for a Mexican street corn (elote) version. Zainab's preferred summer side dish, evaluated primarily on the lime-and-chili-powder finish rather than the corn itself.
Ingredients
- 4 ears of corn, husked and cut in half crosswise
- 2 tablespoon butter melted + 1 teaspoon salt + ½ teaspoon smoked paprika + ½ teaspoon pepper
- Elote finish: mayo + grated Parmesan + chili powder + lime juice
Instructions
- Brush each corn half generously with melted butter on all sides. Season with salt, smoked paprika, and pepper. Preheat the air fryer to 400°F for 3 minutes. Stand the corn halves upright in the basket or lay them on their side in a single layer. Cook 4 minutes. Turn each piece to expose a new side. Cook 4 more minutes. Turn again. Cook 4 more minutes (12 minutes total). The corn surface should show golden-to-dark caramelization on the exposed kernel sides. Finish with a spread of mayo, grated Parmesan, and a sprinkle of chili powder and lime juice for street corn style.
- Preheat the air fryer to the specified temperature for 3 minutes before adding the food — a preheated air fryer ensures immediate surface contact with hot air and produces better browning and crispiness than a cold start.
- Arrange food in a single layer with space between pieces — crowding causes steaming rather than crisping. Cook in batches if needed rather than stacking.
- Spray with cooking oil halfway through if the surface looks dry — the oil is essential for achieving golden colour in the air fryer without deep frying.
- Check doneness 2 minutes before the stated time — air fryer models vary and your unit may run hot. Adjust timing based on your specific appliance.
7. Crispy Chickpeas

Canned chickpeas (drained, rinsed, and thoroughly dried — this is the critical step) tossed in olive oil, cumin, smoked paprika, garlic powder, salt, and a pinch of cayenne — air fryer 390°F for 18 minutes, shaken at 9 minutes. Thoroughly dried means more than paper towels — spread the drained chickpeas on a clean kitchen towel and roll them around to remove as much surface moisture as possible, then let them sit on the towel for 10 minutes. Any remaining moisture on the surface steams in the air fryer and produces soft chickpeas rather than crispy ones. The 18-minute cook produces chickpeas that are genuinely crunchy — a snack, a salad topper, or a textured addition to grain bowls.
Ingredients
- 1 can (400g) chickpeas, drained and rinsed
- 1.5 tablespoon olive oil + 1 teaspoon cumin + 1 teaspoon smoked paprika + ½ teaspoon garlic powder + 1 teaspoon salt + ¼ teaspoon cayenne
Instructions
- Drain, rinse, and pat the chickpeas very thoroughly dry — spread on a kitchen towel and roll around for 1–2 minutes, then let air dry on the towel for 10 minutes. The drier the chickpeas, the crispier the result. Remove any loose skins that come off during drying (they will burn before the chickpeas are crispy).
- Toss the dry chickpeas in olive oil and all the spices. Preheat the air fryer to 390°F for 3 minutes. Spread in a single layer. Cook 9 minutes. Shake the basket vigorously. Cook 9 more minutes. At 18 minutes, pick up a chickpea and bite — it should be crunchy all the way through, not soft in the center. If soft, cook 3 more minutes. Let cool on a rack — they crisp further as they cool. Eat within 4 hours of cooking before they begin to soften from ambient moisture.
- Preheat the air fryer to the specified temperature for 3 minutes before adding the food — a preheated air fryer ensures immediate surface contact with hot air and produces better browning and crispiness than a cold start.
- Arrange food in a single layer with space between pieces — crowding causes steaming rather than crisping. Cook in batches if needed rather than stacking.
- Spray with cooking oil halfway through if the surface looks dry — the oil is essential for achieving golden colour in the air fryer without deep frying.
6. Honey Roasted Carrots
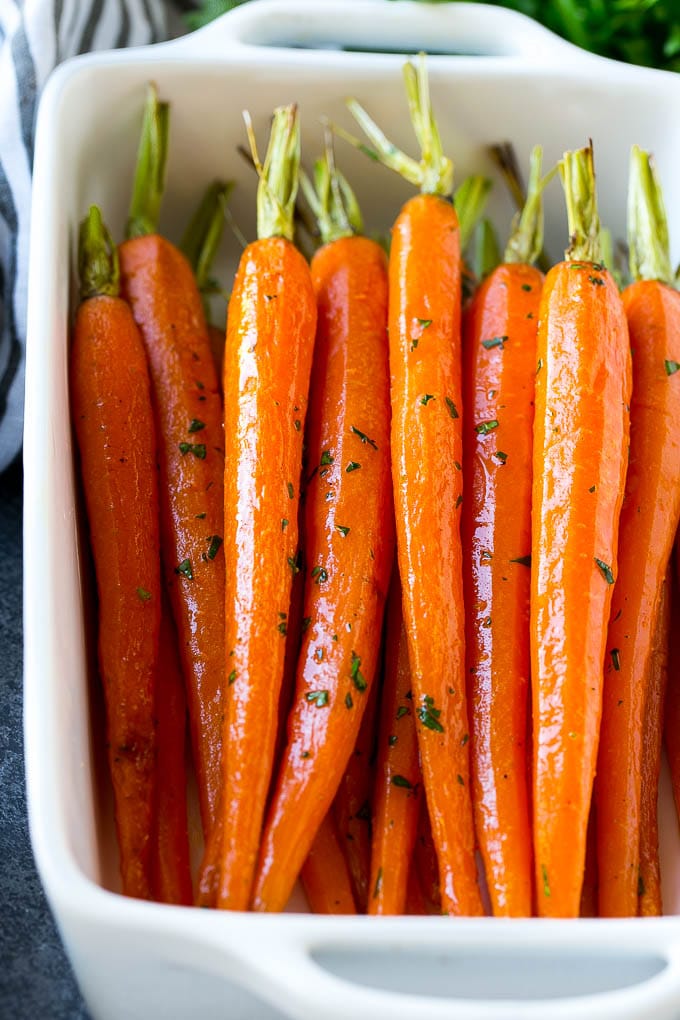
Baby carrots or carrot batons (1-inch pieces) tossed in olive oil, honey, salt, pepper, and dried thyme — air fryer 380°F for 14 minutes, shaken at 7 minutes. The honey caramelizes on the carrot surface in the air fryer's dry heat and produces a deeply golden, sticky, sweet-savory coating that the oven version achieves only after 25 to 30 minutes. For baby carrots, use them whole. For full carrots, cut into 1-inch diagonal batons of consistent size — larger pieces will not cook through in 14 minutes. The honey roasted carrot is the side dish that converts carrot skeptics — the caramelization changes the flavor profile from raw-sweet to deep, concentrated, and jammy.
Ingredients
- 400g baby carrots or full carrots cut into 1-inch diagonal batons
- 1 tablespoon olive oil + 1 tablespoon honey + 1 teaspoon salt + ½ teaspoon pepper + ½ teaspoon dried thyme
- Fresh parsley for finishing
Instructions
- Toss the carrots in olive oil, honey, salt, pepper, and dried thyme until every piece is coated. Preheat the air fryer to 380°F for 3 minutes. Spread in a single layer. Cook 7 minutes. Shake the basket to flip and redistribute. Cook 7 more minutes. The carrots should be tender all the way through when pierced with a fork and show deep golden caramelization on the surfaces. The honey will have reduced to a sticky, concentrated coating. Scatter fresh parsley over the top and serve immediately.
- Preheat the air fryer to the specified temperature for 3 minutes before adding the food — a preheated air fryer ensures immediate surface contact with hot air and produces better browning and crispiness than a cold start.
- Arrange food in a single layer with space between pieces — crowding causes steaming rather than crisping. Cook in batches if needed rather than stacking.
- Spray with cooking oil halfway through if the surface looks dry — the oil is essential for achieving golden colour in the air fryer without deep frying.
- Check doneness 2 minutes before the stated time — air fryer models vary and your unit may run hot. Adjust timing based on your specific appliance.
5. Garlic Butter Corn Kernels
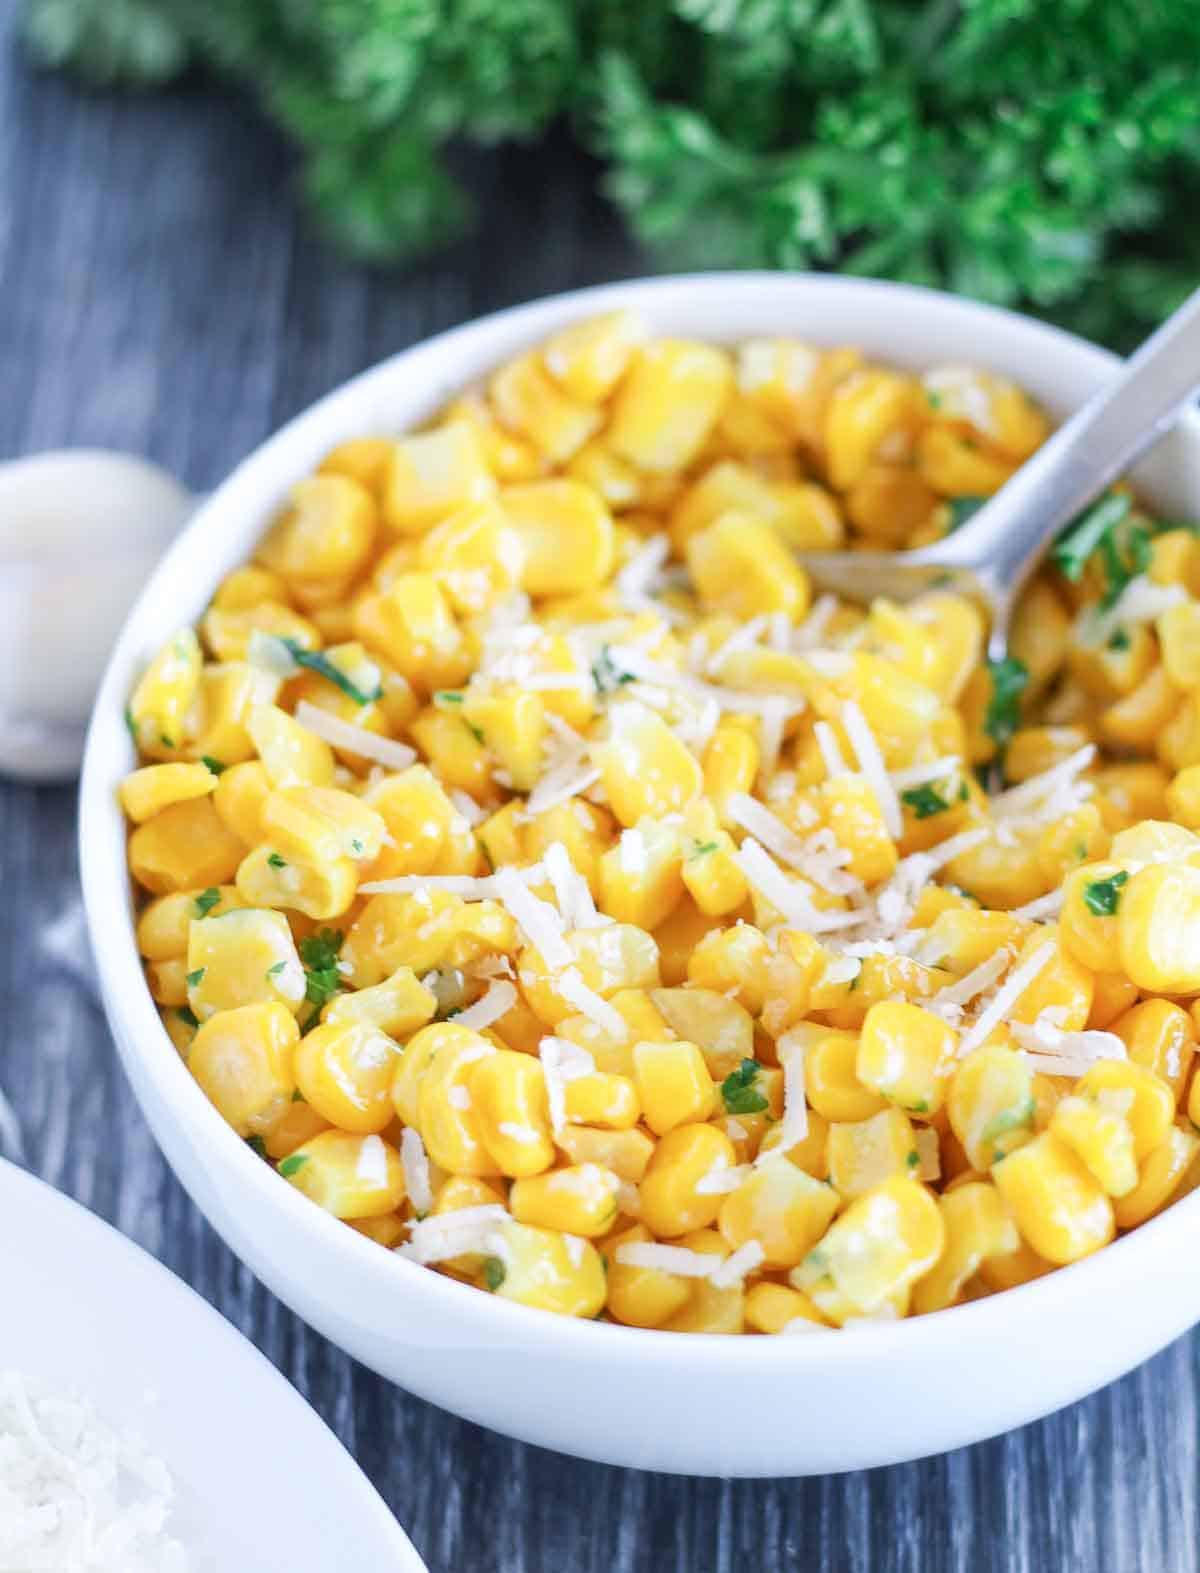
Frozen corn kernels (do not thaw) tossed in garlic butter, salt, pepper, and smoked paprika — air fryer 400°F for 12 minutes, shaken twice (at 4 and 8 minutes). The frozen corn kernel in the air fryer caramelizes and develops a concentrated sweet-smoky flavor that fresh boiled corn cannot match. The high heat and dry circulating air evaporate the excess moisture from the frozen kernels and concentrate the natural sugars in 12 minutes, producing kernels that are slightly wrinkled, deeply golden in spots, and intensely flavored. Use this as a side dish, a topping for tacos, or as a component in grain bowls and rice dishes.
Ingredients
- 2 cups frozen corn kernels (do not thaw)
- 1 tablespoon butter melted + 2 garlic cloves minced + ½ teaspoon smoked paprika + ½ teaspoon salt + ¼ teaspoon pepper
- Fresh cilantro and lime juice for finishing
Instructions
- Toss the still-frozen corn kernels in melted butter, minced garlic, smoked paprika, salt, and pepper. The kernels will start to thaw as you toss — this is fine. Preheat the air fryer to 400°F for 3 minutes. Pour the corn into the basket in a single layer. Cook 4 minutes. Shake the basket vigorously. Cook 4 more minutes. Shake again. Cook 4 more minutes (12 minutes total). The kernels should show golden-to-slightly charred caramelization in spots and smell deeply of roasted corn. Finish with fresh cilantro and a squeeze of lime.
- Preheat the air fryer to the specified temperature for 3 minutes before adding the food — a preheated air fryer ensures immediate surface contact with hot air and produces better browning and crispiness than a cold start.
- Arrange food in a single layer with space between pieces — crowding causes steaming rather than crisping. Cook in batches if needed rather than stacking.
- Spray with cooking oil halfway through if the surface looks dry — the oil is essential for achieving golden colour in the air fryer without deep frying.
- Check doneness 2 minutes before the stated time — air fryer models vary and your unit may run hot. Adjust timing based on your specific appliance.
4. Balsamic Mushrooms
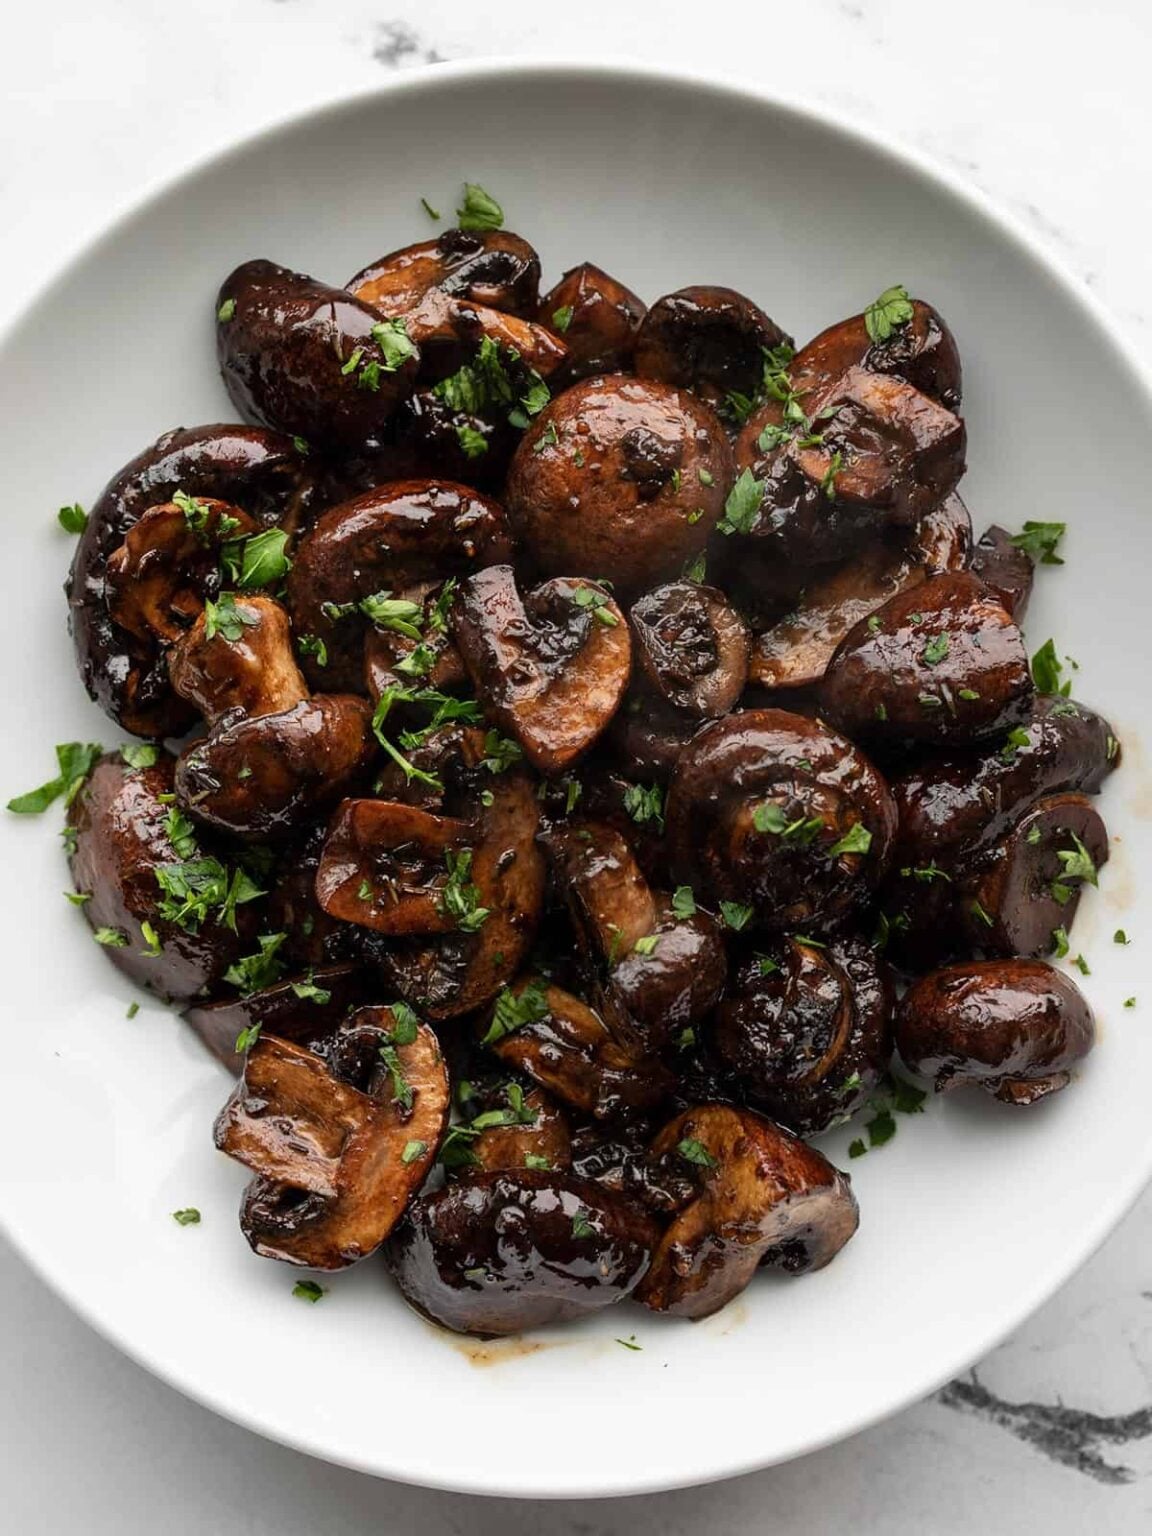
Cremini or button mushrooms halved, tossed in olive oil, balsamic vinegar, garlic, thyme, salt, and pepper — air fryer 380°F for 10 minutes, shaken at 5 minutes. The mushroom's moisture must evaporate before it can caramelize — this is why oven-roasted mushrooms need 20 to 25 minutes. The air fryer forces the mushroom moisture out rapidly and produces caramelized, golden mushrooms in 10 minutes. Do not salt the mushrooms before cooking if you have time to toss them right before going into the basket — salt draws moisture from the mushrooms and can make them steam rather than caramelize. Serve over polenta, rice, pasta, or as a side alongside any protein.
Ingredients
- 400g cremini mushrooms, halved
- 1.5 tablespoon olive oil + 1 tablespoon balsamic vinegar + 2 garlic cloves minced + ½ teaspoon dried thyme + 1 teaspoon salt + ½ teaspoon pepper
- Fresh parsley for finishing
Instructions
- Toss the halved mushrooms in olive oil, balsamic vinegar, garlic, thyme, salt, and pepper right before cooking. Preheat the air fryer to 380°F for 3 minutes. Arrange in a single layer — mushrooms can overlap slightly as they will shrink significantly during cooking. Cook 5 minutes. Shake the basket vigorously — the mushrooms will have reduced in size from moisture evaporation. Cook 5 more minutes. The mushrooms should be deeply golden-brown and the balsamic should have caramelized on the surface. Scatter fresh parsley over the top and serve immediately.
- Preheat the air fryer to the specified temperature for 3 minutes before adding the food — a preheated air fryer ensures immediate surface contact with hot air and produces better browning and crispiness than a cold start.
- Arrange food in a single layer with space between pieces — crowding causes steaming rather than crisping. Cook in batches if needed rather than stacking.
- Spray with cooking oil halfway through if the surface looks dry — the oil is essential for achieving golden colour in the air fryer without deep frying.
- Check doneness 2 minutes before the stated time — air fryer models vary and your unit may run hot. Adjust timing based on your specific appliance.
3. Crispy Smashed Potatoes

Baby potatoes boiled until tender (12 minutes in salted water), drained and dried, placed in the air fryer basket and smashed flat with a fork or the bottom of a glass, brushed with olive oil and seasoned with garlic, salt, pepper, and rosemary — air fryer 400°F for 15 minutes, not flipped. The smashed potato format produces maximum surface area in contact with the hot basket, which translates to maximum crispiness — the smashed potato in the air fryer achieves a crunchy, golden, almost shatteringly crispy exterior on a fluffy potato interior in 15 minutes. The two-step process (boil then air fry) adds 12 minutes but the result is the best potato side dish in this collection. Finish with flaky salt and fresh chives.
Ingredients
- 500g baby potatoes, boiled in salted water until tender (about 12 minutes), drained and dried
- 2 tablespoon olive oil + 3 garlic cloves minced + 1 teaspoon salt + ½ teaspoon pepper + 1 teaspoon dried rosemary
- Flaky sea salt and fresh chives for finishing
Instructions
- Boil the baby potatoes in salted water until completely tender all the way through when pierced with a fork — approximately 12 minutes. Drain thoroughly and let sit in the colander for 5 minutes to steam-dry. Preheat the air fryer to 400°F for 3 minutes. Place the dried boiled potatoes in the basket in a single layer. Using a fork or the bottom of a glass, smash each potato flat — press firmly until it is about ½ inch thick. The potato will spread out and the skin will crack and spread.
- Brush the smashed surface of each potato generously with olive oil. Distribute the minced garlic over the surface of each. Season with salt, pepper, and rosemary. Cook at 400°F for 15 minutes without flipping — the base of each smashed potato needs to stay in contact with the hot basket for the full time to develop the deeply caramelized, crunchy bottom that makes smashed potatoes worth the extra effort. At 15 minutes, the top surface should be golden with crispy, lacy edges and the base should be deeply caramelized. Finish with flaky sea salt and fresh chives.
- Preheat the air fryer to the specified temperature for 3 minutes before adding the food — a preheated air fryer ensures immediate surface contact with hot air and produces better browning and crispiness than a cold start.
- Arrange food in a single layer with space between pieces — crowding causes steaming rather than crisping. Cook in batches if needed rather than stacking.
- Spray with cooking oil halfway through if the surface looks dry — the oil is essential for achieving golden colour in the air fryer without deep frying.
2. Parmesan Garlic Bread
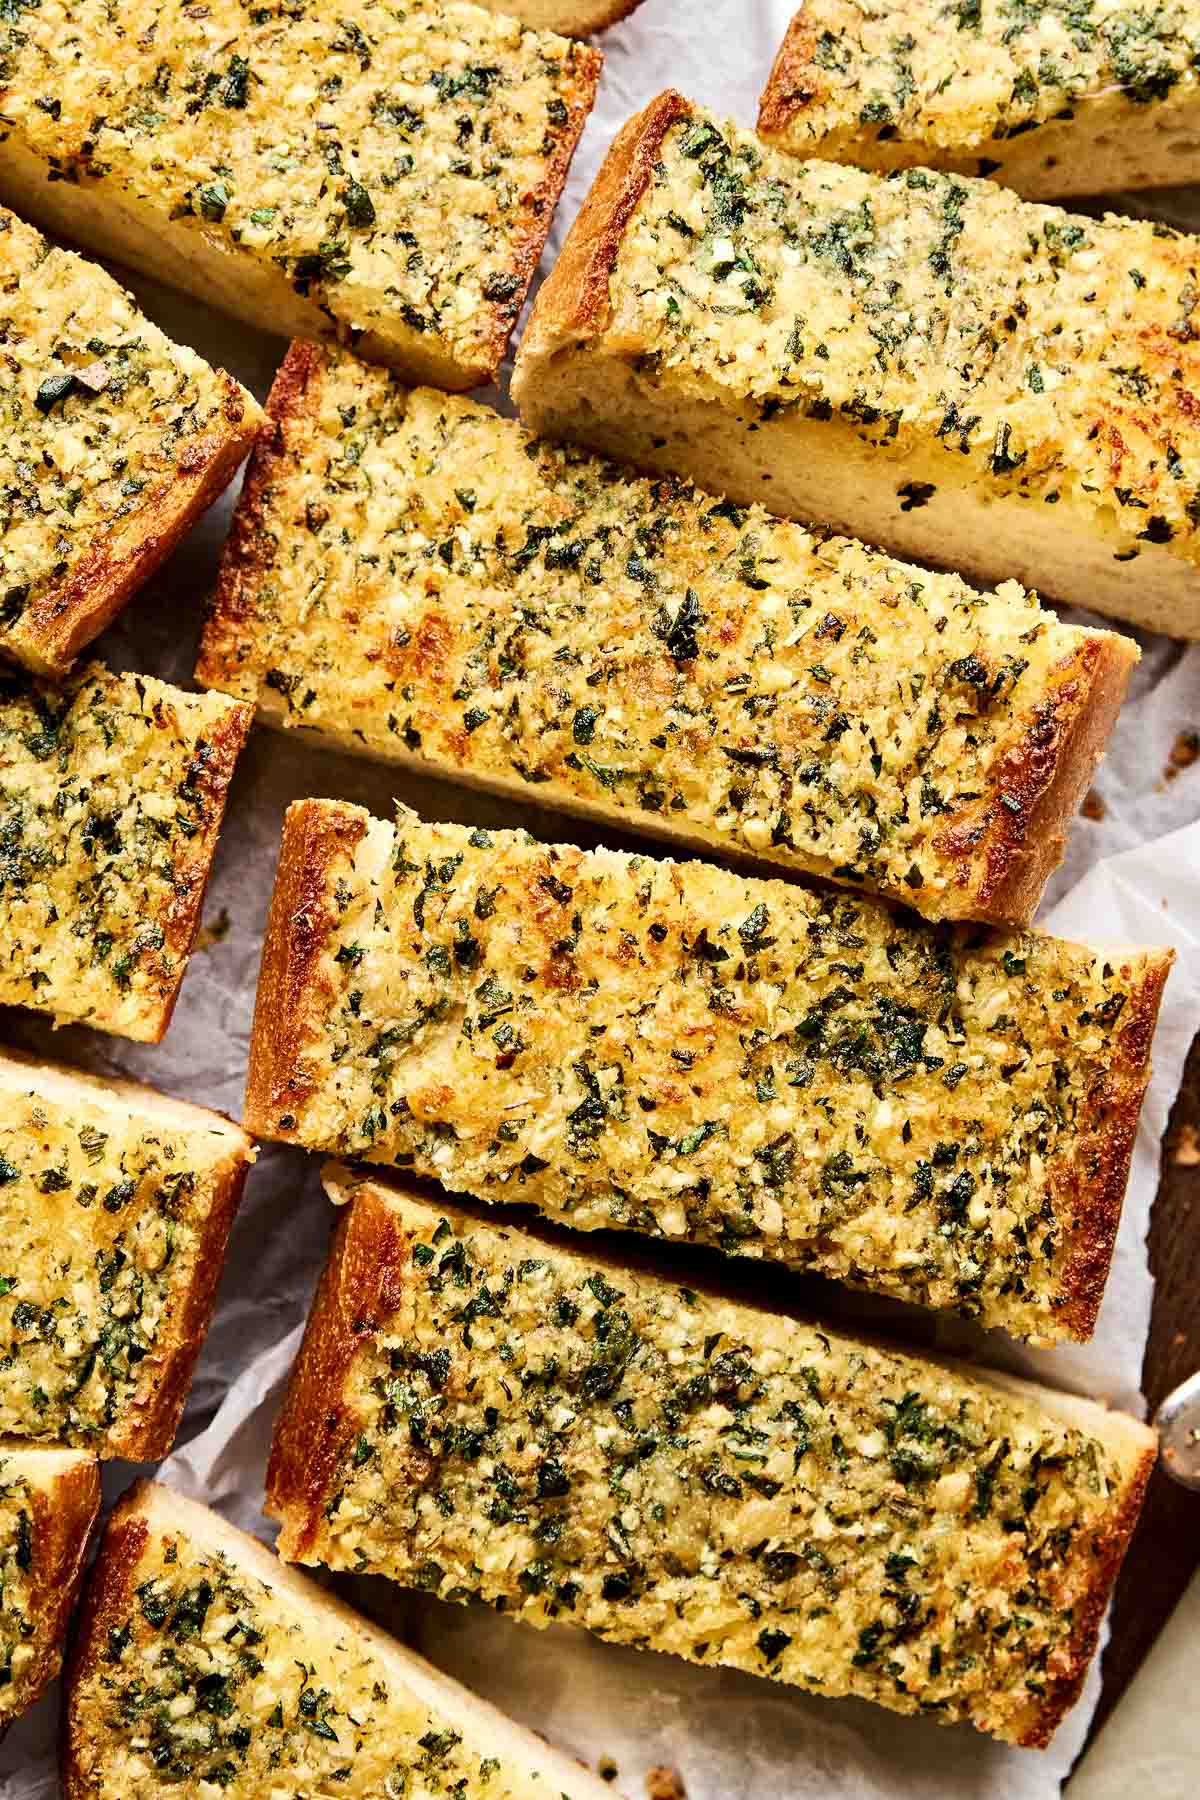
Ciabatta or baguette slices spread with garlic butter and grated Parmesan, air fryer 370°F for 5 minutes. The fastest side dish in this collection. The air fryer garlic bread achieves a golden, crispy top and a soft, warm interior in 5 minutes without any preheating delay — it is the side dish that can start and finish between plating the main course and bringing the bowl to the table. The Parmesan on the surface toasts to a savory, golden crust in 5 minutes that a broiler achieves inconsistently and a toaster oven achieves in 8 to 10 minutes. Use good butter, real Parmesan, and fresh garlic — the three ingredients are the entire dish.
Ingredients
- 8 slices ciabatta or baguette (about 1 inch thick)
- Garlic butter: 4 tablespoon softened butter + 3 garlic cloves minced fine + 2 tablespoon fresh parsley chopped + pinch of salt
- 3 tablespoon freshly grated Parmesan cheese
Instructions
- Combine the softened butter, finely minced garlic, chopped parsley, and salt in a small bowl and mix well. Spread a generous layer of the garlic butter over one side of each bread slice, covering the surface completely to the edges. Sprinkle grated Parmesan over the top of each slice.
- Preheat the air fryer to 370°F for 3 minutes. Arrange the bread slices butter-side up in a single layer. Cook at 370°F for 5 minutes. At 5 minutes, the Parmesan should be golden and the butter should have seeped into the bread and caramelized the surface. Serve immediately while hot — garlic bread is at its best in the first 3 minutes after coming out of the air fryer.
- Preheat the air fryer to the specified temperature for 3 minutes before adding the food — a preheated air fryer ensures immediate surface contact with hot air and produces better browning and crispiness than a cold start.
- Arrange food in a single layer with space between pieces — crowding causes steaming rather than crisping. Cook in batches if needed rather than stacking.
- Spray with cooking oil halfway through if the surface looks dry — the oil is essential for achieving golden colour in the air fryer without deep frying.
1. Roasted Garlic Lemon Broccolini
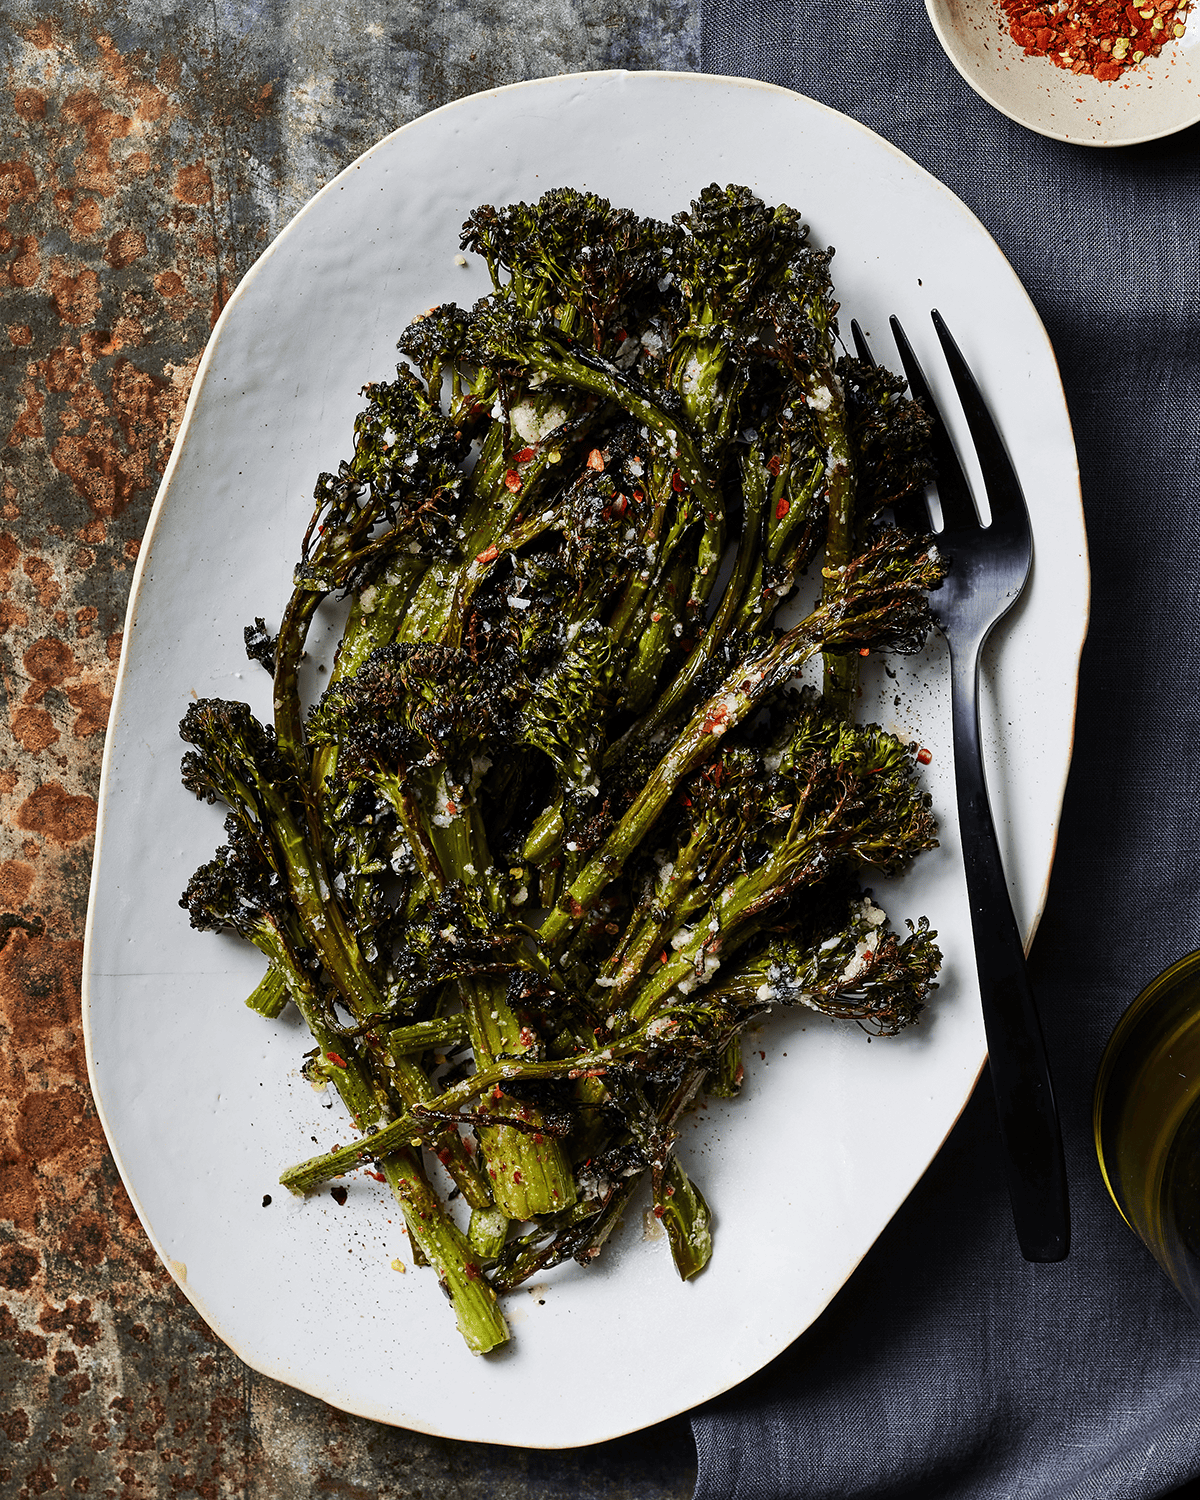
The number-one air fryer side dish in this collection earns its position because broccolini — thinner and more tender than broccoli, with longer stems and smaller florets — achieves the greatest transformation from raw vegetable to restaurant-quality side dish in the air fryer in the shortest time. Broccolini tossed in olive oil, minced garlic, salt, pepper, and red pepper flakes, air fryer 400°F for 8 minutes without shaking — the thin stems and small florets of broccolini cook completely through and caramelize around the edges in 8 minutes, producing charred, crispy tips and tender, fragrant stems. Finish with a squeeze of lemon and a scatter of grated Parmesan immediately at serving — the acidity of the lemon against the charred, slightly bitter broccolini and the savory Parmesan is the combination that makes my husband ask for this as the side dish specifically, rather than accepting whatever vegetable appears. 8 minutes. Genuinely restaurant quality. The best vegetable the air fryer produces.
Ingredients
- 400g broccolini, woody ends trimmed by 1 inch
- 2 tablespoon olive oil + 3 garlic cloves minced + 1 teaspoon salt + ½ teaspoon black pepper + ¼ teaspoon red pepper flakes
- Juice of 1 lemon + 3 tablespoon freshly grated Parmesan for finishing
Instructions
- Trim the woody ends from the broccolini. In a large bowl, toss the broccolini with olive oil, minced garlic, salt, pepper, and red pepper flakes until every stem and floret is evenly coated in oil and the garlic is distributed throughout.
- Preheat the air fryer to 400°F for 3 minutes. Arrange the broccolini in the basket in a single layer — some stems can cross over others, as the long shape of broccolini makes perfect single-layer arrangement difficult and slight overlapping is acceptable for this vegetable. Cook at 400°F for 8 minutes without opening or shaking. The thin stems and small florets cook through quickly and the edges char beautifully in the sustained 8 minutes of uninterrupted heat.
- At 8 minutes, the floret tips should show charring (dark green to near-black at the very tips), the stems should be tender when pressed, and the entire basket should smell deeply of roasted garlic and caramelized broccolini. Transfer immediately to a serving plate. Squeeze the entire lemon over the broccolini right away — the lemon juice hisses against the hot vegetable and penetrates immediately. Scatter the grated Parmesan over the top. Serve within 2 minutes of plating while still hot and the tips are still crackling.
- Preheat the air fryer to the specified temperature for 3 minutes before adding the food — a preheated air fryer ensures immediate surface contact with hot air and produces better browning and crispiness than a cold start.
- Arrange food in a single layer with space between pieces — crowding causes steaming rather than crisping. Cook in batches if needed rather than stacking.
Frequently Asked Questions
Can I cook two side dishes at the same time in the air fryer?
If your air fryer has two tiers or drawers, yes — cook compatible vegetables (same temperature range, similar cook times) simultaneously in the two compartments. If your air fryer is a single-basket model, cooking two different vegetables at the same time produces inconsistent results because the basket will be crowded and the vegetables will steam each other rather than crisping. The better approach with a single-basket air fryer: cook the vegetable that takes longer first and hold it in a 200°F oven on a rack while the second vegetable cooks. In this collection, start the roasted baby potatoes (18 minutes), hold them warm, then cook the garlic lemon broccolini (8 minutes) while the main course is being plated. Both arrive at the table hot at the same time.
What is the best oil to use for air fryer vegetables?
Olive oil works well for every vegetable in this collection at the temperatures used (350°F to 400°F). Extra-virgin olive oil's smoke point is typically around 375°F to 405°F — within or just at the boundary of the temperatures used here. At 380°F to 400°F, a small amount of smoking is normal and does not indicate the oil has degraded significantly enough to affect flavor. For the highest-temperature recipes (400°F+), avocado oil or a light olive oil (refined, not extra-virgin) are better choices if you prefer to avoid any smoke. Never use butter directly on vegetables in the air fryer above 350°F — it burns quickly. Clarified butter (ghee) can be used at higher temperatures.
The garlic lemon broccolini in 8 minutes is the side dish I make more often than any other in this collection — it is faster than the main course, better than what you would get at most restaurants, and produces the charred-tip, lemon-finished result that my husband specifically requests. The smashed potatoes take the most effort but produce the most impressive result. And the Brussels sprouts are the vegetable that changed Saad's category-level refusal into something approaching acceptance, which is the air fryer's most significant achievement in this household. 🥦✨
More From FoodieFriends
- 30 Easy Air Fryer Dinners in 20 Minutes
- 21 Air Fryer Chicken Breast Recipes
- 25 Air Fryer Appetizers for Parties
- 19 Air Fryer Frozen Food Hacks
- 20 Grilled Vegetable Side Dishes
- 22 Easy Potluck Salads
- 27 Best Grilled Chicken Recipes
- 25 High-Protein Dinner Recipes
- Freezer-Friendly Chicken Fajita Bowls





Comments
No Comments