
Anyone who has packed an ambitious cooler for a beach day and arrived to find a melted, soggy, or otherwise compromised version of what was supposed to be a beautiful spread has learned the most important rule of beach food the hard way — the beach does not care how carefully you packed it. The combination of direct sun, sand, salt air, hot car journeys, and the complete absence of refrigeration creates a specific food challenge that is more demanding than any other outdoor eating context, and the solution is not trying harder to keep delicate foods cold but choosing beach snacks that won't melt in the first place.
The criteria for a genuine no-melt beach snack are firm but the list of foods that meet them is genuinely extensive and genuinely delicious — no chocolate coatings that liquify in the hand, no whipped cream or frosting that collapses in heat, no ice cream or frozen items unless consumed immediately from a proper dry-ice cooler, no soft cheeses that sweat and become unappetizing, and no mayonnaise-heavy preparations that become food safety concerns within 90 minutes of sun exposure. What remains after applying these filters is an impressive collection of genuinely satisfying, genuinely portable, and genuinely beach-appropriate foods that travel beautifully and taste great at ambient summer temperatures.
This roundup covers 20 beach snack recipes across every category — savory no-refrigeration snacks, fresh fruit preparations that travel well, sandwiches and wraps built for heat stability, sweet no-melt treats, and kids' beach favorites — each with complete ingredients and instructions so every recipe is genuinely ready to make. Every option has been tested in real beach conditions and every one produces a genuinely satisfying snack on the other side of the car ride, the walk through the sand, and a few hours of heat. Find more outdoor eating ideas in our pool party food ideas and our picnic pasta salads.
Let's pack the best beach bag of the entire summer!
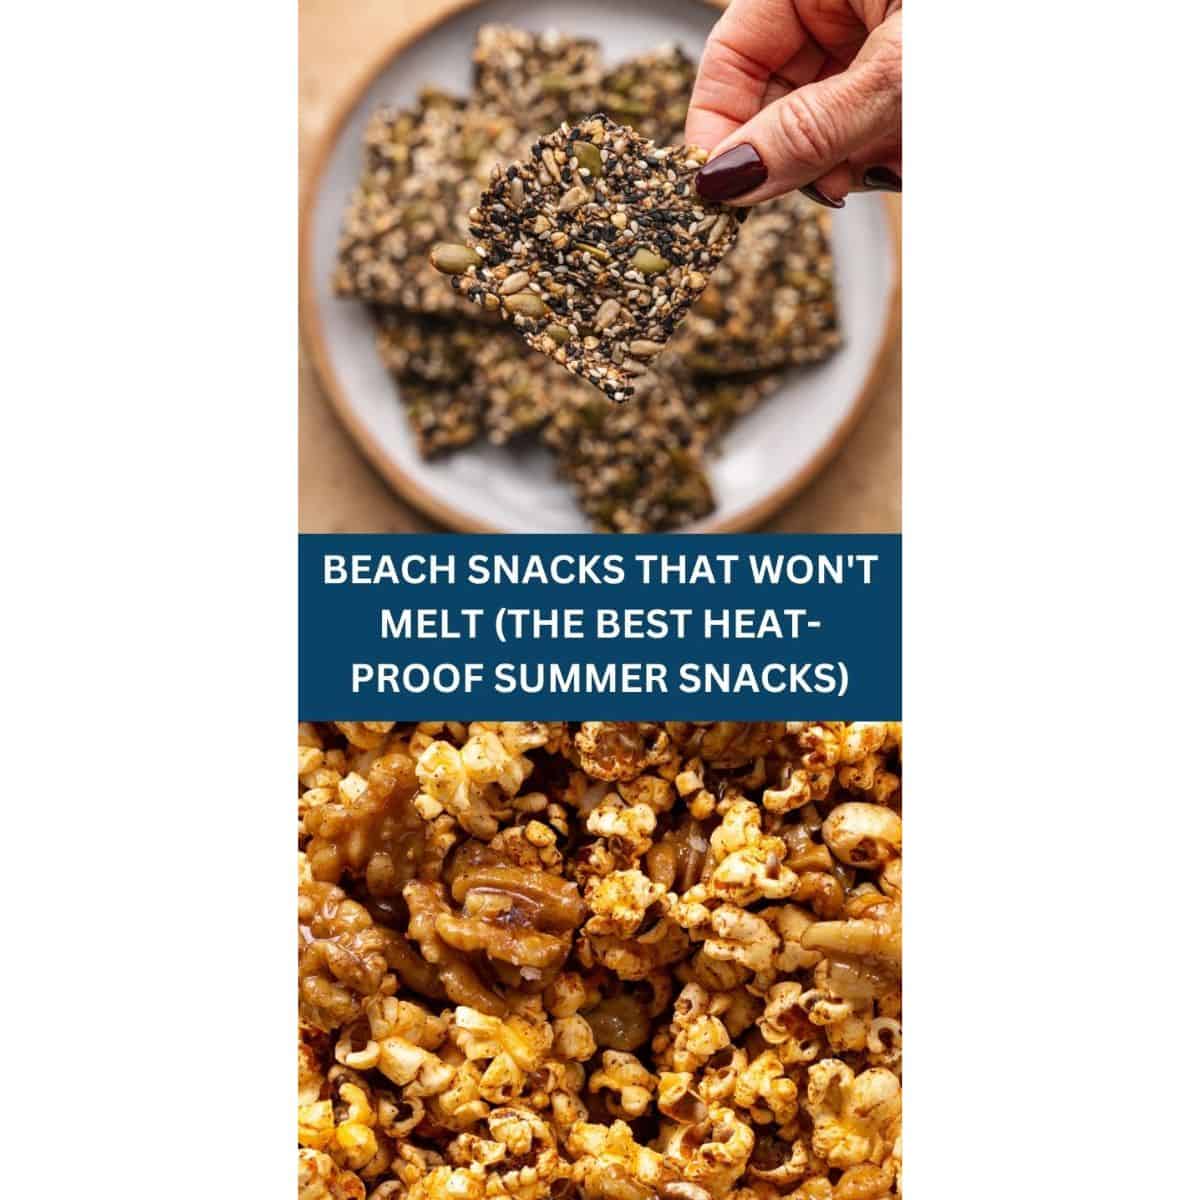
THE BEACH SNACK RULES
The Two-Hour Food Safety Rule: Perishable foods that spend more than 2 hours above 40°F are in the food safety danger zone. At a beach in direct summer sun, food in a bag without a cooler can reach 90–100°F within 30 minutes. Every item in the non-refrigeration section of this roundup is genuinely shelf-stable at ambient summer temperatures for a full beach day without any safety concern.
Sand Compatibility: Open bowls and bags become sandy immediately at the beach. Choose foods in resealable bags, individual wrappers, or containers with secure lids. Foods that require a communal dipping bowl are impractical since the bowl fills with sand within minutes. Individual portions, sealed containers, and foods eaten in a single handheld bite are the most practical beach formats.
The Cooler Is for Drinks and Priority Perishables: Every inch of cooler space at the beach is precious and primarily occupied by cold drinks. Don't waste cooler space on foods that are genuinely shelf-stable and survive in a beach bag perfectly well. Reserve cooler space for cold drinks, sliced fresh fruit, and any dairy-containing items. Everything else goes in a separate insulated bag or directly in the beach bag.
20 BEST BEACH SNACKS THAT WON'T MELT
SAVORY SNACKS — NO REFRIGERATION NEEDED
1. Homemade Trail Mix
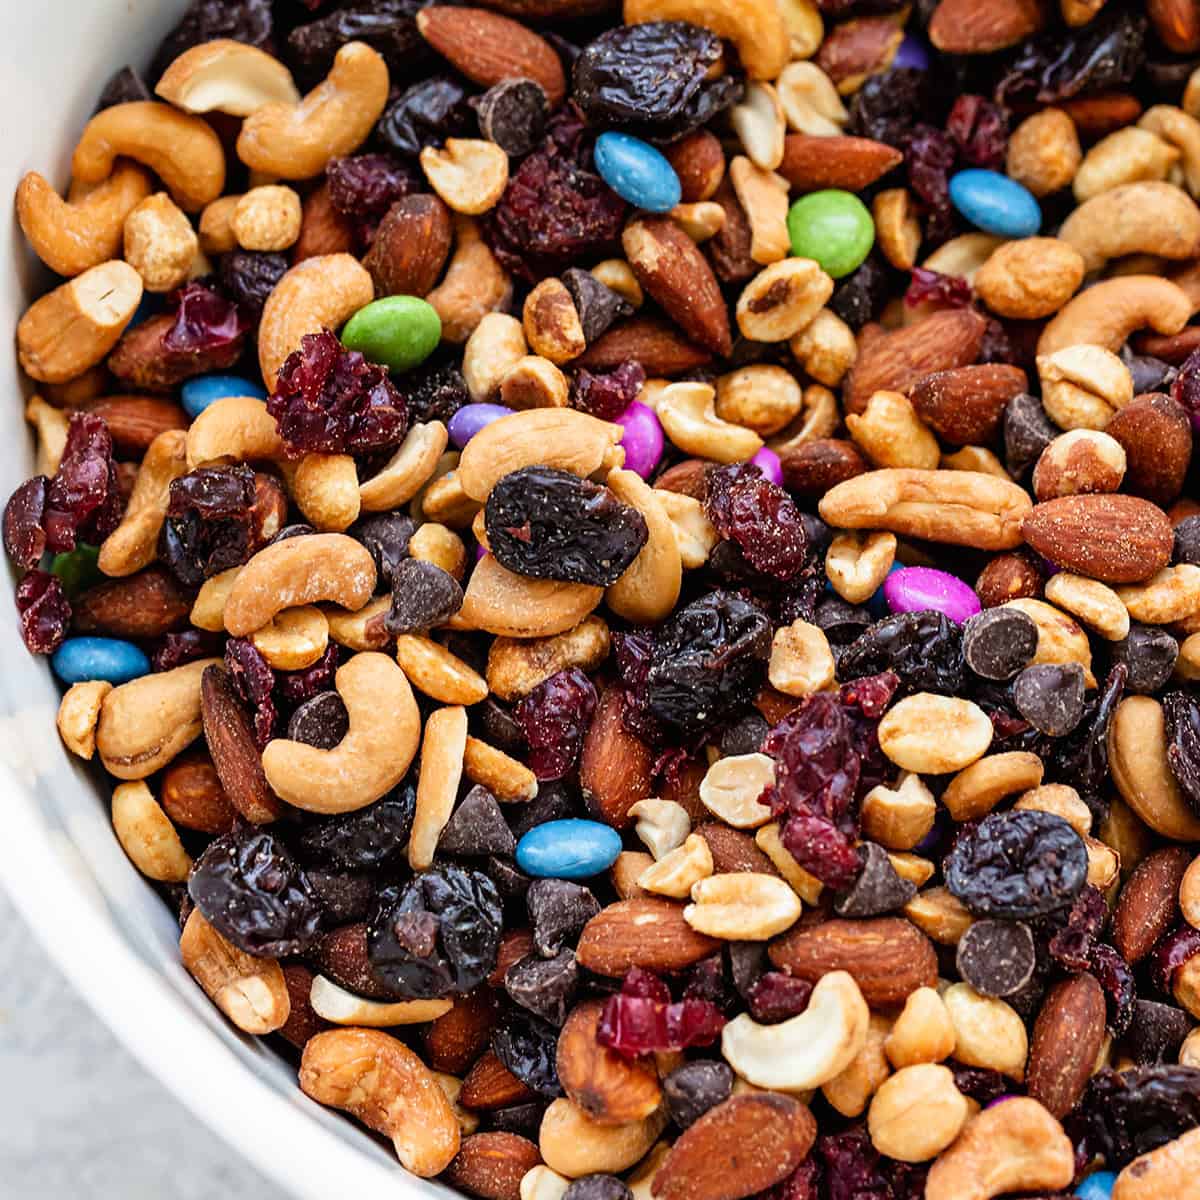
Homemade trail mix in resealable individual portion bags — nuts, seeds, dried cranberries, dark chocolate chips, pretzels, and coconut flakes — is the single most genuinely perfect beach snack available. Completely shelf-stable at any heat, high in protein and healthy fat for sustained energy during swimming, completely sand-resistant in a sealed bag, and genuinely more delicious when made from scratch than any store-bought version. Use dark chocolate chips specifically since dark chocolate has a significantly higher melting point than milk chocolate and holds its shape at beach temperatures for several hours without becoming a mess. Make in bulk at the beginning of beach season and portion into individual bags for each trip.
- 1 cup raw almonds
- 1 cup roasted cashews
- ½ cup pepitas (pumpkin seeds)
- ½ cup dried cranberries
- ½ cup dark chocolate chips (70%+ cacao)
- 1 cup mini pretzels
- ½ cup toasted coconut flakes
- Pinch of flaky salt
- Toast almonds in a dry skillet over medium heat for 4–5 minutes, stirring frequently, until fragrant and golden. Cool completely before adding to the mix — warm nuts will melt the chocolate chips.
- Toast coconut flakes in the same skillet over low heat for 2–3 minutes, stirring constantly, until golden. Cool completely.
- Combine all completely cooled ingredients in a large bowl. Add a pinch of flaky salt and toss to distribute evenly.
- Portion into individual resealable snack bags — approximately ½ cup per serving. Store in an airtight container at room temperature for up to 3 weeks. Pack individual bags directly into the beach bag without any cooler needed.
2. Roasted Chickpeas
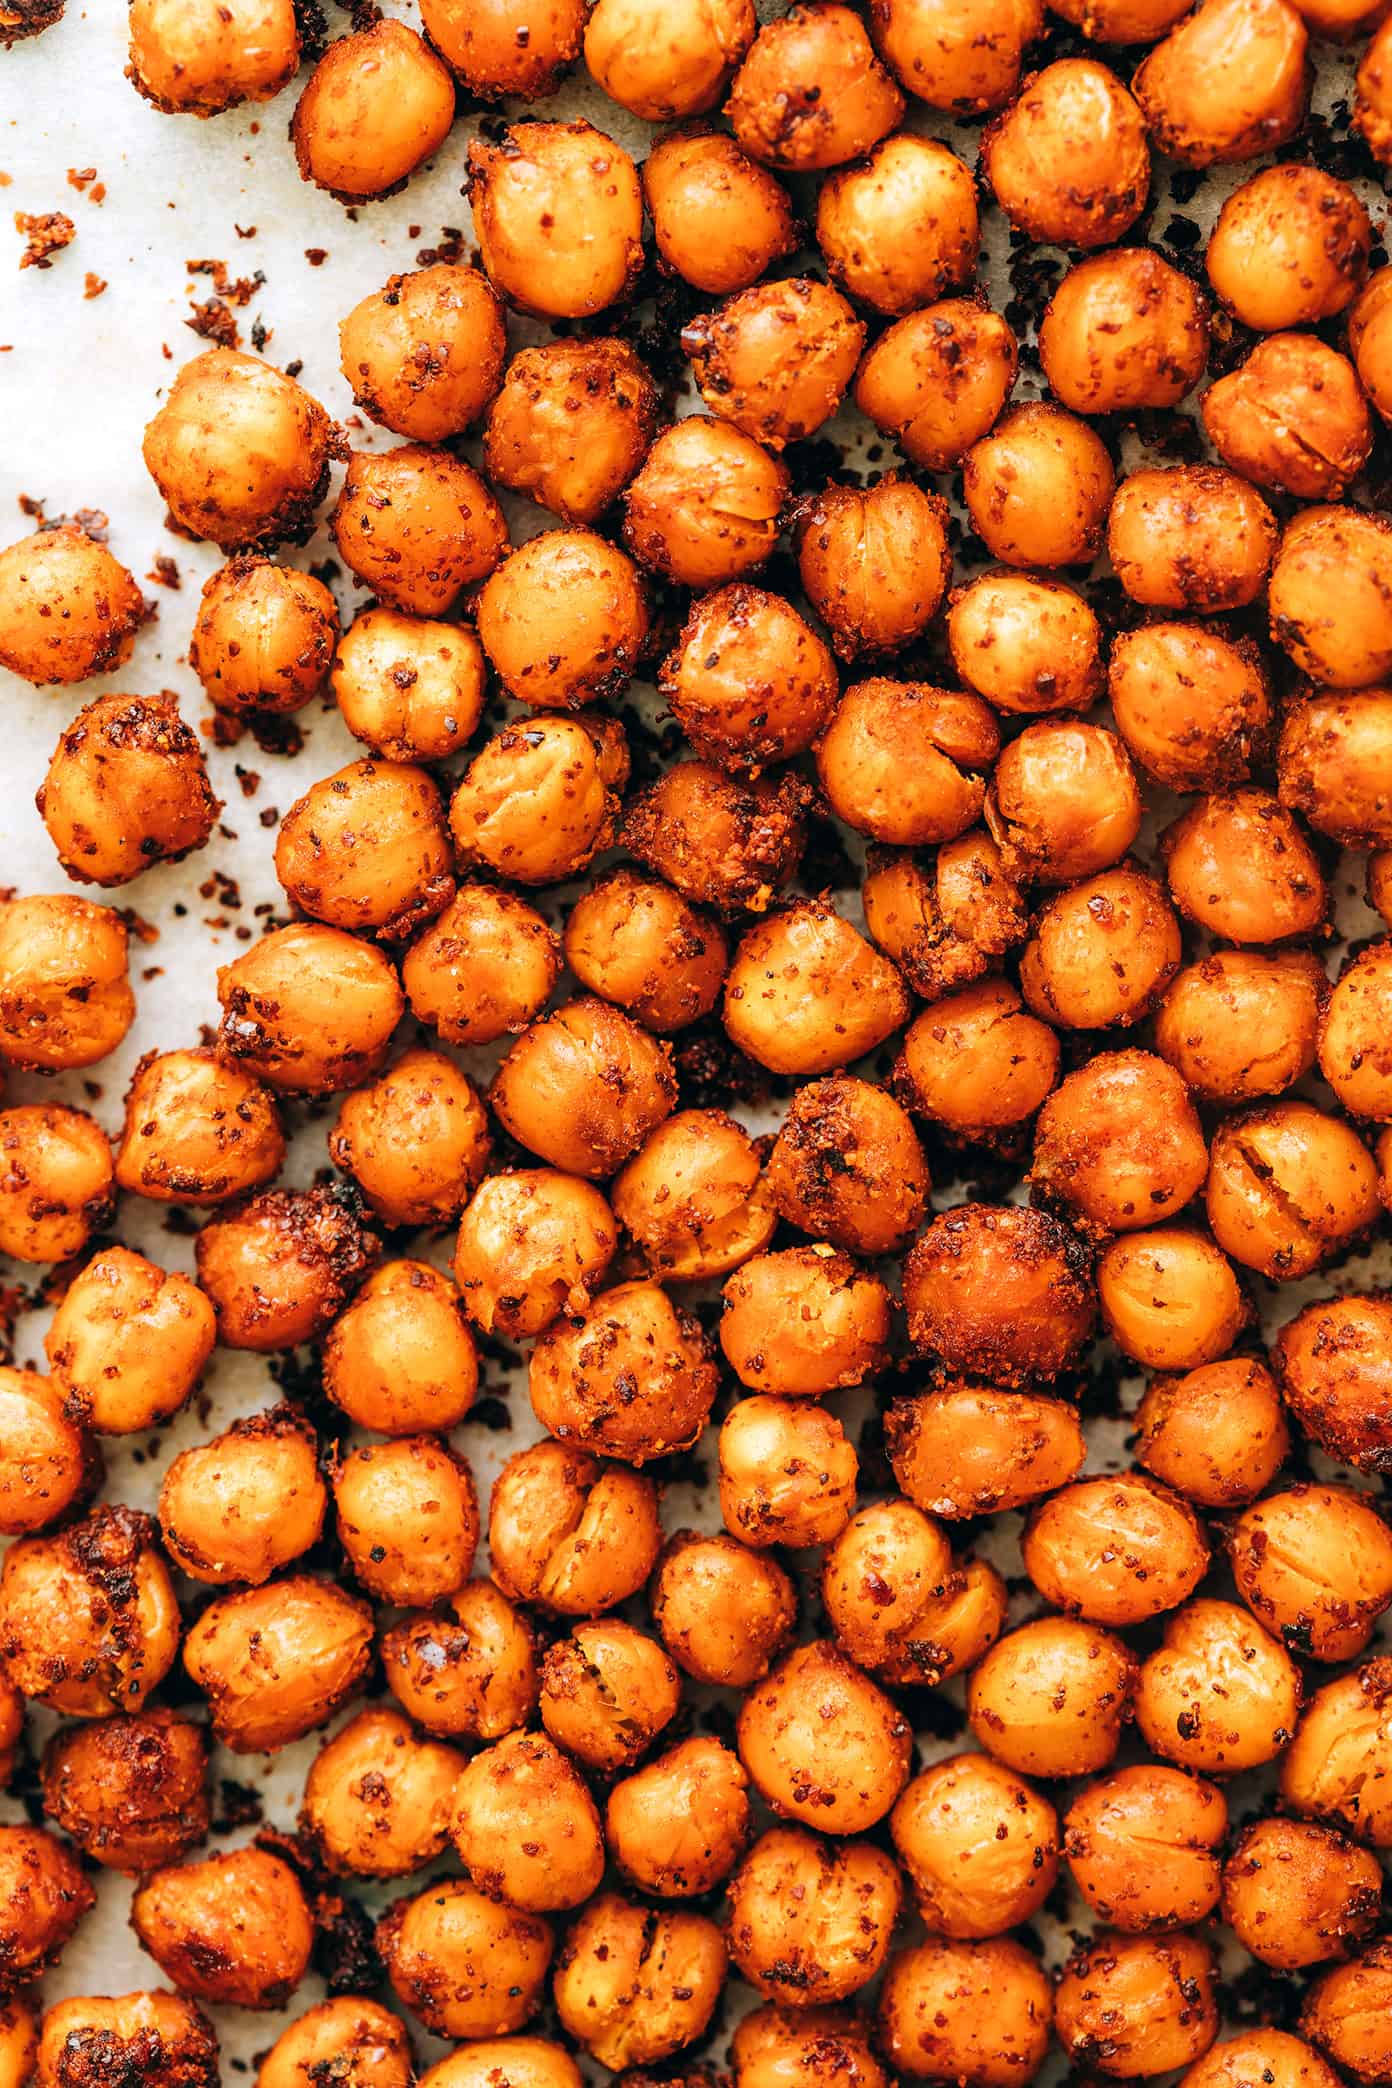
Canned chickpeas drained, dried thoroughly, tossed with olive oil and spices, and roasted until genuinely crunchy throughout — one of the best genuinely surprising beach snacks available. High protein, high fiber, completely shelf-stable at any beach temperature, and genuinely more interesting in flavor than standard chips. The key technique for chickpeas that stay crunchy all day is drying them completely before roasting and roasting until genuinely hard throughout with no soft centers — a soft center chickpea will soften further in the bag during transport. Flavor variations: smoked paprika and cumin (the most universally loved), cinnamon and honey (for a sweet option), or everything bagel seasoning.
- 2 cans (15 oz each) chickpeas, drained and rinsed
- 2 tablespoons olive oil
- 1 teaspoon smoked paprika
- 1 teaspoon cumin
- ½ teaspoon garlic powder
- ½ teaspoon salt + pinch of cayenne
- Preheat oven to 400°F. Drain and rinse chickpeas thoroughly. Spread on a paper towel-lined baking sheet and pat completely dry — roll a second paper towel over the top and press firmly. Remove any loose skins. Moisture is the enemy of crispy chickpeas.
- Transfer dry chickpeas to the baking sheet without paper towels. Drizzle with benefits of olive oil and toss to coat every chickpea. Spread in a single layer with space between each chickpea.
- Roast 35–40 minutes, shaking the pan every 10 minutes, until the chickpeas are deeply golden, audibly rattling when the pan is shaken, and completely hard throughout with no soft spots. Do not add seasoning during roasting as spices burn before the chickpeas are done.
- Remove from oven and immediately toss with all spices while hot so the seasoning adheres. Cool completely on the pan — do not cover while hot as steam makes them soft. Store in a loosely covered container (not airtight — trapped air softens them) for up to 4 days. Pack in individual snack bags for the beach.
3. Hummus and Pretzel Snack Packs

Individual single-serve hummus cups paired with individual pretzel crisp packs — a complete savory snack that requires no cooler, no utensils beyond the pretzel as the dipper, and provides protein from the chickpea base alongside satisfying crunch from the pretzel. The individual sealed hummus cup is genuinely shelf-stable for several hours at ambient summer temperature. Make homemade hummus and portion into individual small sealed containers for a significantly more flavorful result than store-bought individual cups. The homemade version also costs a fraction of the store-bought single-serve options when made in bulk at the beginning of beach season.
- 2 cans (15 oz each) chickpeas, drained — reserve 3 tablespoons of the canning liquid (aquafaba)
- ⅓ cup good tahini
- 3 tablespoons fresh lemon juice
- 2 garlic cloves, minced
- ½ teaspoon salt + ½ teaspoon cumin
- 3 tablespoons olive oil + ice water as needed for thinning
- Individual pretzel crisp packs or portion pretzels into individual snack bags
- Combine tahini, lemon juice, garlic, and aquafaba in a food processor. Blend 1 full minute until the tahini lightens in color and becomes creamy and fluffy — blending the tahini before adding chickpeas is the technique that produces the smoothest, creamiest hummus.
- Add drained chickpeas, salt, and cumin. Blend 2–3 minutes until completely smooth, stopping to scrape down the sides. Add ice water one tablespoon at a time if needed to achieve a smooth, creamy consistency.
- With the processor running, drizzle in olive oil until fully incorporated. Taste and adjust lemon, salt, and garlic.
- Portion into individual small airtight containers (3–4 oz each). Refrigerate up to 1 week ahead. Pack in a small insulated bag alongside pretzel crisp packs for the beach — the sealed container keeps hummus safe for 4–5 hours at ambient temperature.
4. Beef Jerky and Meat Sticks
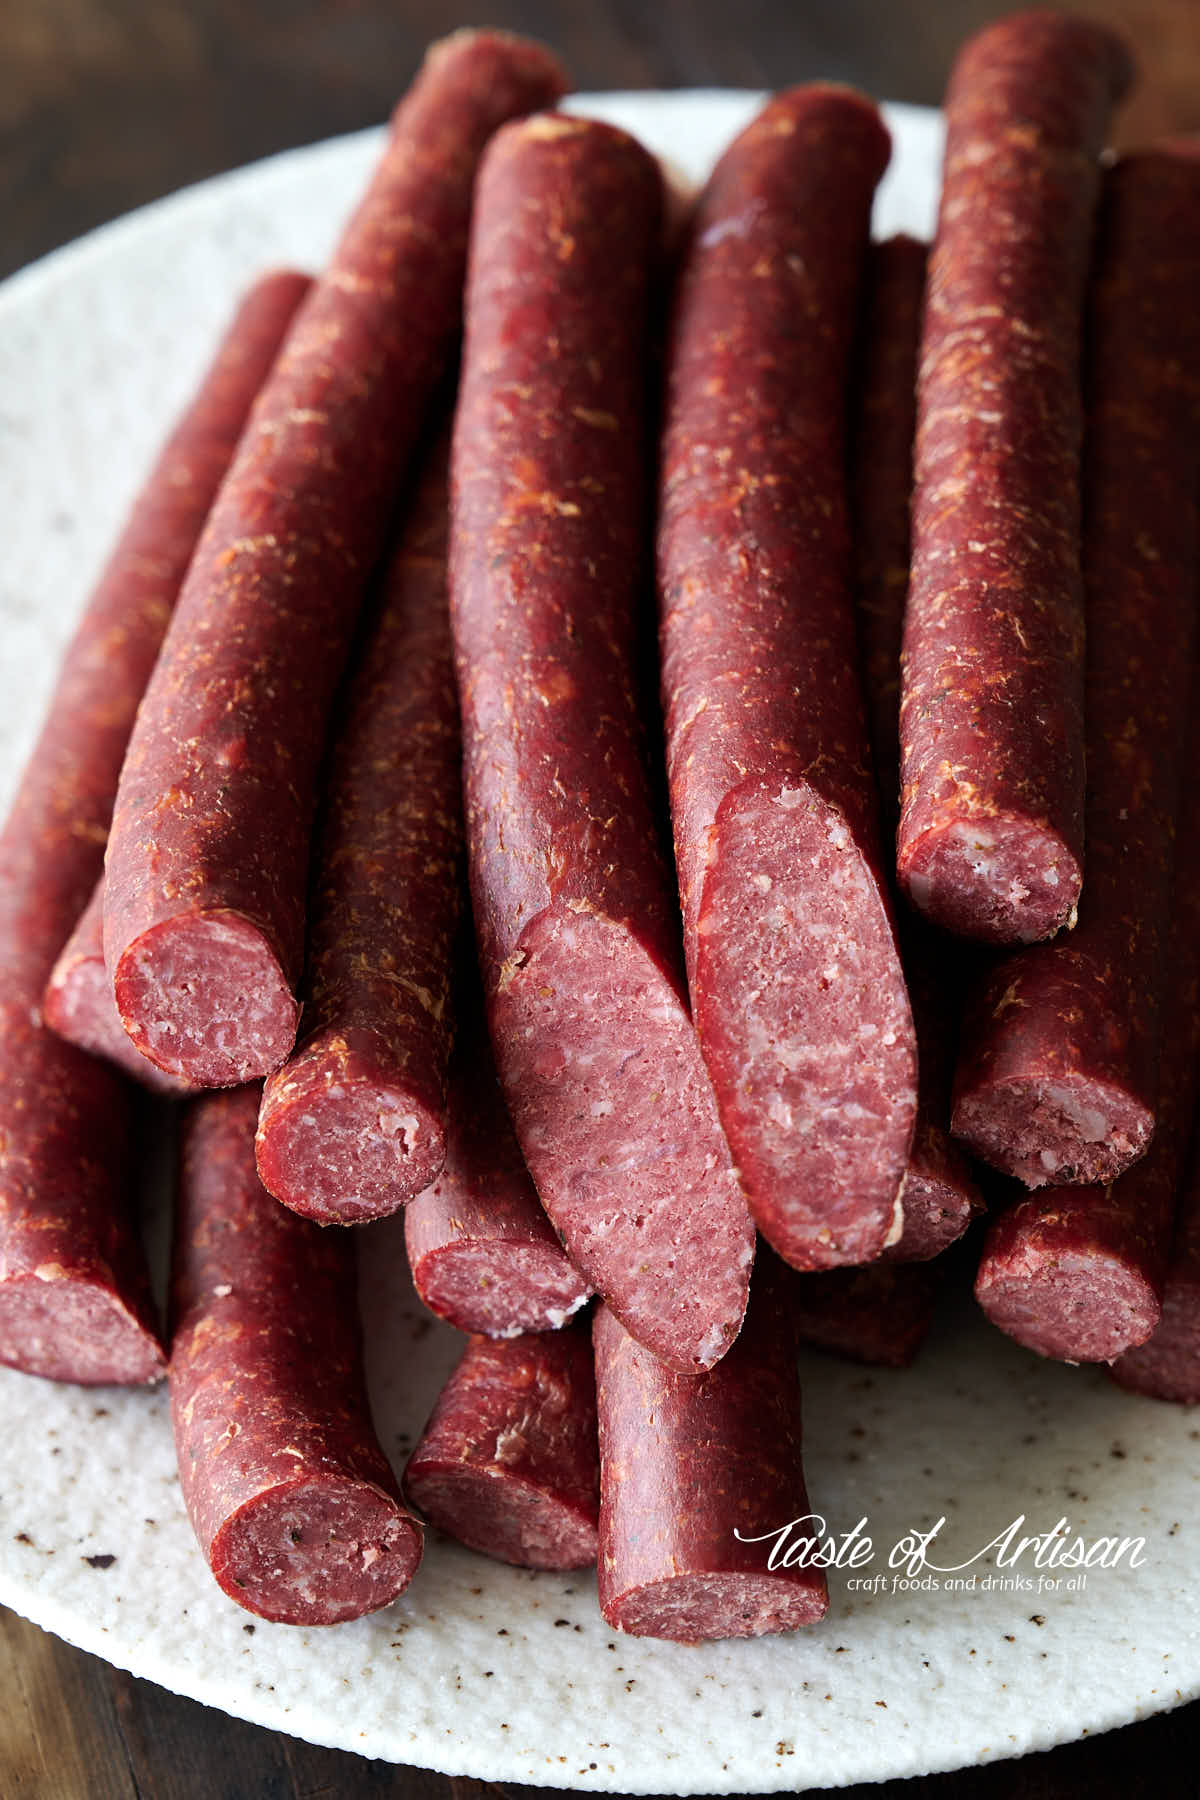
Homemade beef jerky made with a simple soy, Worcestershire, garlic, and brown sugar marinade and dehydrated in the oven is genuinely one of the best beach snacks available — completely shelf-stable, high in protein, individually portable, and significantly more flavorful and more satisfying than most store-bought versions. The homemade version is made from lean beef sliced thin, marinated overnight, and dried at a very low oven temperature for 4–6 hours until leathery and chewy with no remaining moisture. Store in individual sealed bags for beach trips and pair with crackers for a complete portable protein snack. Find more snack ideas in our healthy snacks collection.
- 2 lbs lean beef (top round or flank steak), trimmed of all fat and sliced ¼-inch thick against the grain — ask your butcher to slice it or freeze for 1 hour until firm enough to slice cleanly yourself
- ⅓ cup soy sauce
- 2 tablespoons Worcestershire sauce
- 2 tablespoons brown sugar
- 1 teaspoon garlic powder + 1 teaspoon onion powder + 1 teaspoon smoked paprika
- ½ teaspoon black pepper + ¼ teaspoon cayenne
- Whisk all marinade ingredients together until sugar dissolves. Add beef slices and toss to coat every strip thoroughly. Cover and refrigerate a minimum of 8 hours and up to 24 hours — longer marinating produces more deeply flavored jerky.
- Preheat oven to 175°F. Line baking sheets with wire racks placed over foil-lined pans — the wire rack allows air circulation on all sides. Remove beef strips from marinade and pat dry with paper towels to remove surface moisture.
- Arrange strips on wire racks in a single layer without overlapping. Dry in the oven 4–6 hours, rotating pans halfway through, until the jerky is dry, leathery, and darkened but still bends slightly rather than snapping. A strip that snaps is overdried.
- Cool completely at room temperature. Store in sealed bags or airtight containers at room temperature up to 2 weeks or refrigerated up to 1 month. Portion into individual beach snack bags. Completely shelf-stable at beach temperatures for the entire day.
5. Everything Bagel Crackers with Nut Butter Packets
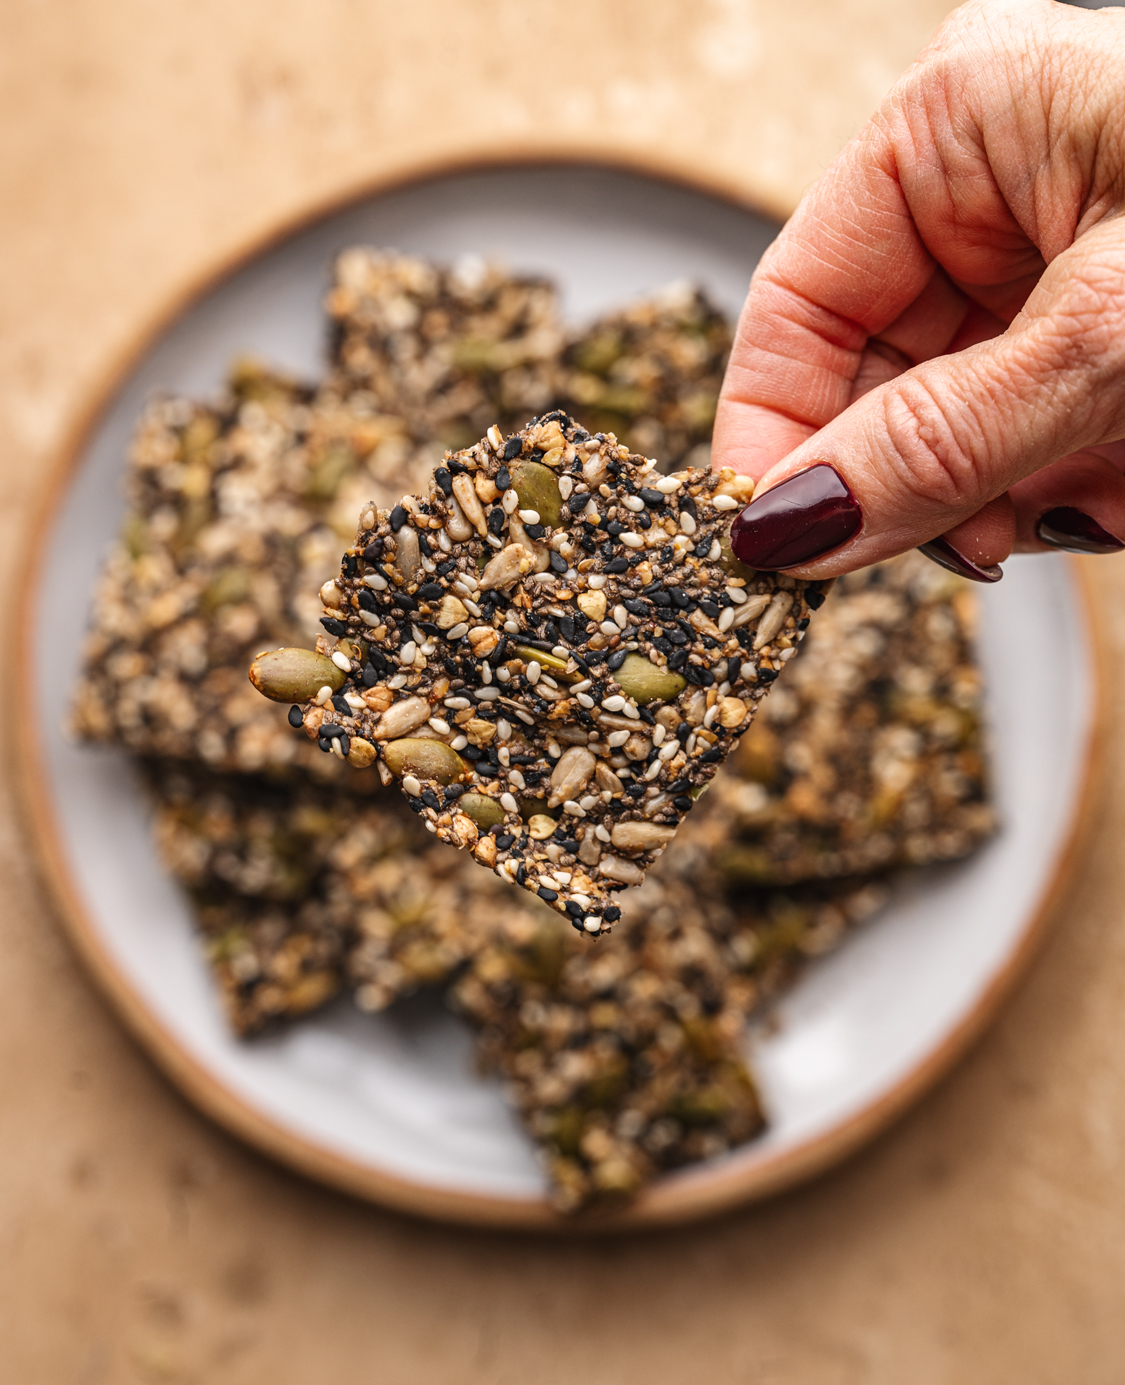
Homemade everything bagel crackers — thin, crispy, deeply savory — paired with individual almond butter or peanut butter squeeze packets for a complete, genuinely satisfying beach snack with zero refrigeration requirement. The homemade crackers are made from flour, olive oil, water, and everything bagel seasoning, rolled thin, and baked until completely crispy. They hold their crunch in a sealed bag for up to 5 days and travel far better than store-bought crackers that are more fragile and more prone to crumbling under beach bag compression. The nut butter packets provide protein, fat, and sweetness that turn the crackers into a complete, sustaining snack rather than just a vehicle for crunch.
- 1.5 cups all-purpose flour
- ½ teaspoon salt
- ⅓ cup olive oil
- ⅓ cup cold water
- 3 tablespoons everything bagel seasoning + more for topping
- 1 egg white mixed with 1 tablespoon water for brushing
- Individual almond butter or peanut butter squeeze packets for pairing
- Preheat oven to 400°F. Whisk flour, salt, and everything bagel seasoning together. Add olive oil and water and stir until a shaggy dough forms — it should come together when pressed but not be sticky. If dry add water 1 teaspoon at a time.
- Divide dough in half. On a sheet of parchment paper, roll each half as thin as possible — aim for ⅛-inch thickness. Thinner crackers are crispier and more structurally stable during transport than thicker ones.
- Brush the surface with egg white wash. Scatter additional everything bagel seasoning generously over the top. Score into irregular cracker shapes with a pizza cutter or sharp knife — don't worry about uniformity, the rustic irregular shapes are part of the appeal.
- Bake 12–15 minutes until deeply golden, completely dry, and crispy throughout. They will crisp further as they cool. Cool completely before packing — any residual warmth trapped in a sealed bag creates steam that softens the crackers. Store in a sealed bag up to 5 days. Pack with individual nut butter packets for a complete portable beach snack.
6. Spiced Popcorn

Freshly popped popcorn tossed in olive oil, chili lime seasoning, and flaky salt — one of the most genuinely satisfying and most genuinely beach-appropriate salty snacks available. Homemade popcorn in individual bags beats every store-bought bagged variety in flavor and freshness. The chili lime version is the most enthusiastically received flavor for beach snacking — the salty, tangy, slightly spicy combination is genuinely refreshing and genuinely addictive in hot weather. Pop the corn the night before the beach trip and portion into individual resealable bags. Popcorn is genuinely shelf-stable for 3–4 days in a sealed bag at ambient temperature, making it one of the most perfect pack-ahead beach snacks available.
- ⅓ cup popcorn kernels (makes approximately 10 cups popped)
- 2 tablespoons coconut oil or olive oil for popping
- 2 tablespoons olive oil or melted butter for tossing
- 1.5 teaspoons Tajín or chili lime seasoning
- 1 teaspoon smoked paprika
- ½ teaspoon garlic powder
- 1 teaspoon flaky salt
- Heat coconut oil in a large heavy-bottomed pot over medium-high heat. Add 3 test kernels and cover — when all three pop the oil is ready. Add remaining kernels in a single layer and cover with the lid slightly ajar to release steam.
- Shake the pot continuously over the heat until the popping slows to 2–3 seconds between pops. Remove from heat immediately to prevent burning. Transfer to a very large bowl.
- Drizzle olive oil over the hot popcorn and toss immediately. Sprinkle Tajín, smoked paprika, garlic powder, and flaky salt over the popcorn in stages while tossing continuously so the seasonings distribute evenly across every kernel rather than concentrating in one area.
- Cool completely before packing — warm popcorn in a sealed bag becomes limp from trapped steam. Portion into individual resealable bags. Store at room temperature up to 3 days. Pack in the beach bag without any cooler needed.
SANDWICHES AND WRAPS
7. Classic PB&J on Sturdy Bread
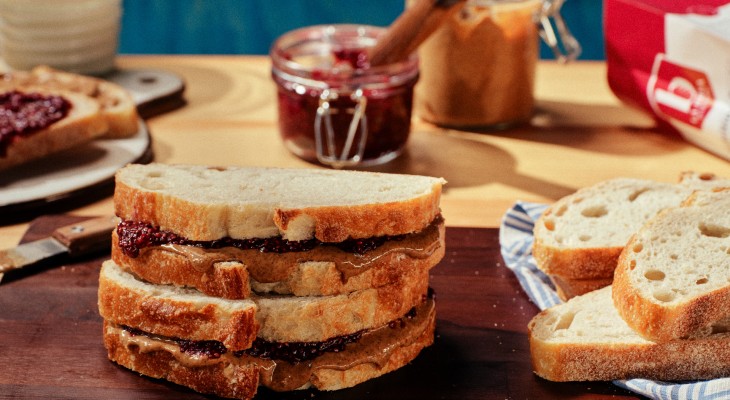
The most heat-stable, most genuinely practical beach sandwich available — peanut butter and jam on thick-sliced whole grain or sourdough bread, crusts left on for structural integrity, wrapped tightly in wax paper. PB&J is not just the nostalgic beach sandwich — it is genuinely the best-engineered beach sandwich available. The peanut butter's oil content creates a moisture barrier between the jam and the bread that prevents sogginess during a 4-hour carry, the whole grain bread is sturdy enough to withstand beach bag compression, and neither component requires refrigeration. Use our homemade strawberry freezer jam for the most extraordinary version of this classic.
- Thick-sliced whole grain, sourdough, or country bread — the sturdiest available option
- Natural crunchy or smooth peanut butter — applied thickly to both slices of bread as a moisture barrier
- Good quality strawberry or raspberry jam — applied over the peanut butter on one side only
- Wax paper for wrapping
- Spread a generous thick layer of peanut butter on both slices of bread — coating both sides with peanut butter before adding jam creates the critical moisture barrier that prevents the jam from soaking into the bread during transport.
- Spread jam generously over the peanut butter on one slice only. Do not spread all the way to the edges — leave a ½-inch border so the jam doesn't squeeze out when the sandwich is pressed during transport.
- Press the two slices firmly together. Do not cut — keeping the sandwich whole provides significantly more structural integrity than cutting into triangles or squares which exposes the interior to compression damage.
- Wrap tightly in wax paper using the deli-fold technique — place the sandwich in the center of a large sheet of wax paper, fold one side over the sandwich, fold the remaining edge over that, and fold the ends up tightly. The wax paper wrap holds the sandwich structure during transport without trapping the moisture that plastic wrap does. Pack in the top of the beach bag away from cold packs to prevent condensation sogginess.
8. Hummus and Veggie Wraps

Flour tortillas spread with hummus, layered with spinach, shredded carrots, sliced cucumber, and roasted red pepper, rolled tightly, and wrapped in wax paper — no animal protein, no dairy, no mayonnaise, genuinely shelf-stable for 4 hours at ambient temperature when kept out of direct sun. The hummus provides protein and the vegetables provide crunch and hydration — genuinely one of the most nutritionally complete no-refrigeration beach sandwiches available. Slice into rounds before wrapping each round individually for easier portion eating without a plate, or leave whole and slice at the beach for the most compact transport format.
- 4 large flour tortillas
- 1 cup hummus (homemade from Recipe 3 or good quality store-bought)
- 2 cups baby spinach
- 1 cup shredded carrots
- 1 English cucumber, thinly sliced lengthwise
- ½ cup roasted red peppers from a jar, drained and patted dry
- ½ teaspoon everything bagel seasoning + salt and pepper to taste
- Spread a generous thick layer of hummus across the entire surface of each tortilla, leaving a 1-inch border around the edges. The hummus layer should be substantial enough to function as both a flavor component and a moisture barrier between the vegetables and the tortilla.
- Layer spinach across the hummus. Add shredded carrots in an even layer. Place cucumber slices lengthwise across the width of the tortilla — not too many or the wrap will be too thick to roll tightly. Add roasted red pepper strips. Season with everything bagel seasoning, salt, and pepper.
- Roll the tortilla tightly from the bottom edge upward, tucking in the sides as you roll to create a sealed burrito-style wrap. The roll should be tight enough that the filling is compressed and won't shift during transport.
- Wrap tightly in wax paper and secure with a rubber band or fold the wax paper ends under the wrap. Refrigerate overnight or pack immediately. These hold at ambient temperature (out of direct sun) for 4 hours. Pack in the beach bag away from direct sunlight.
9. Italian Sub Rolls
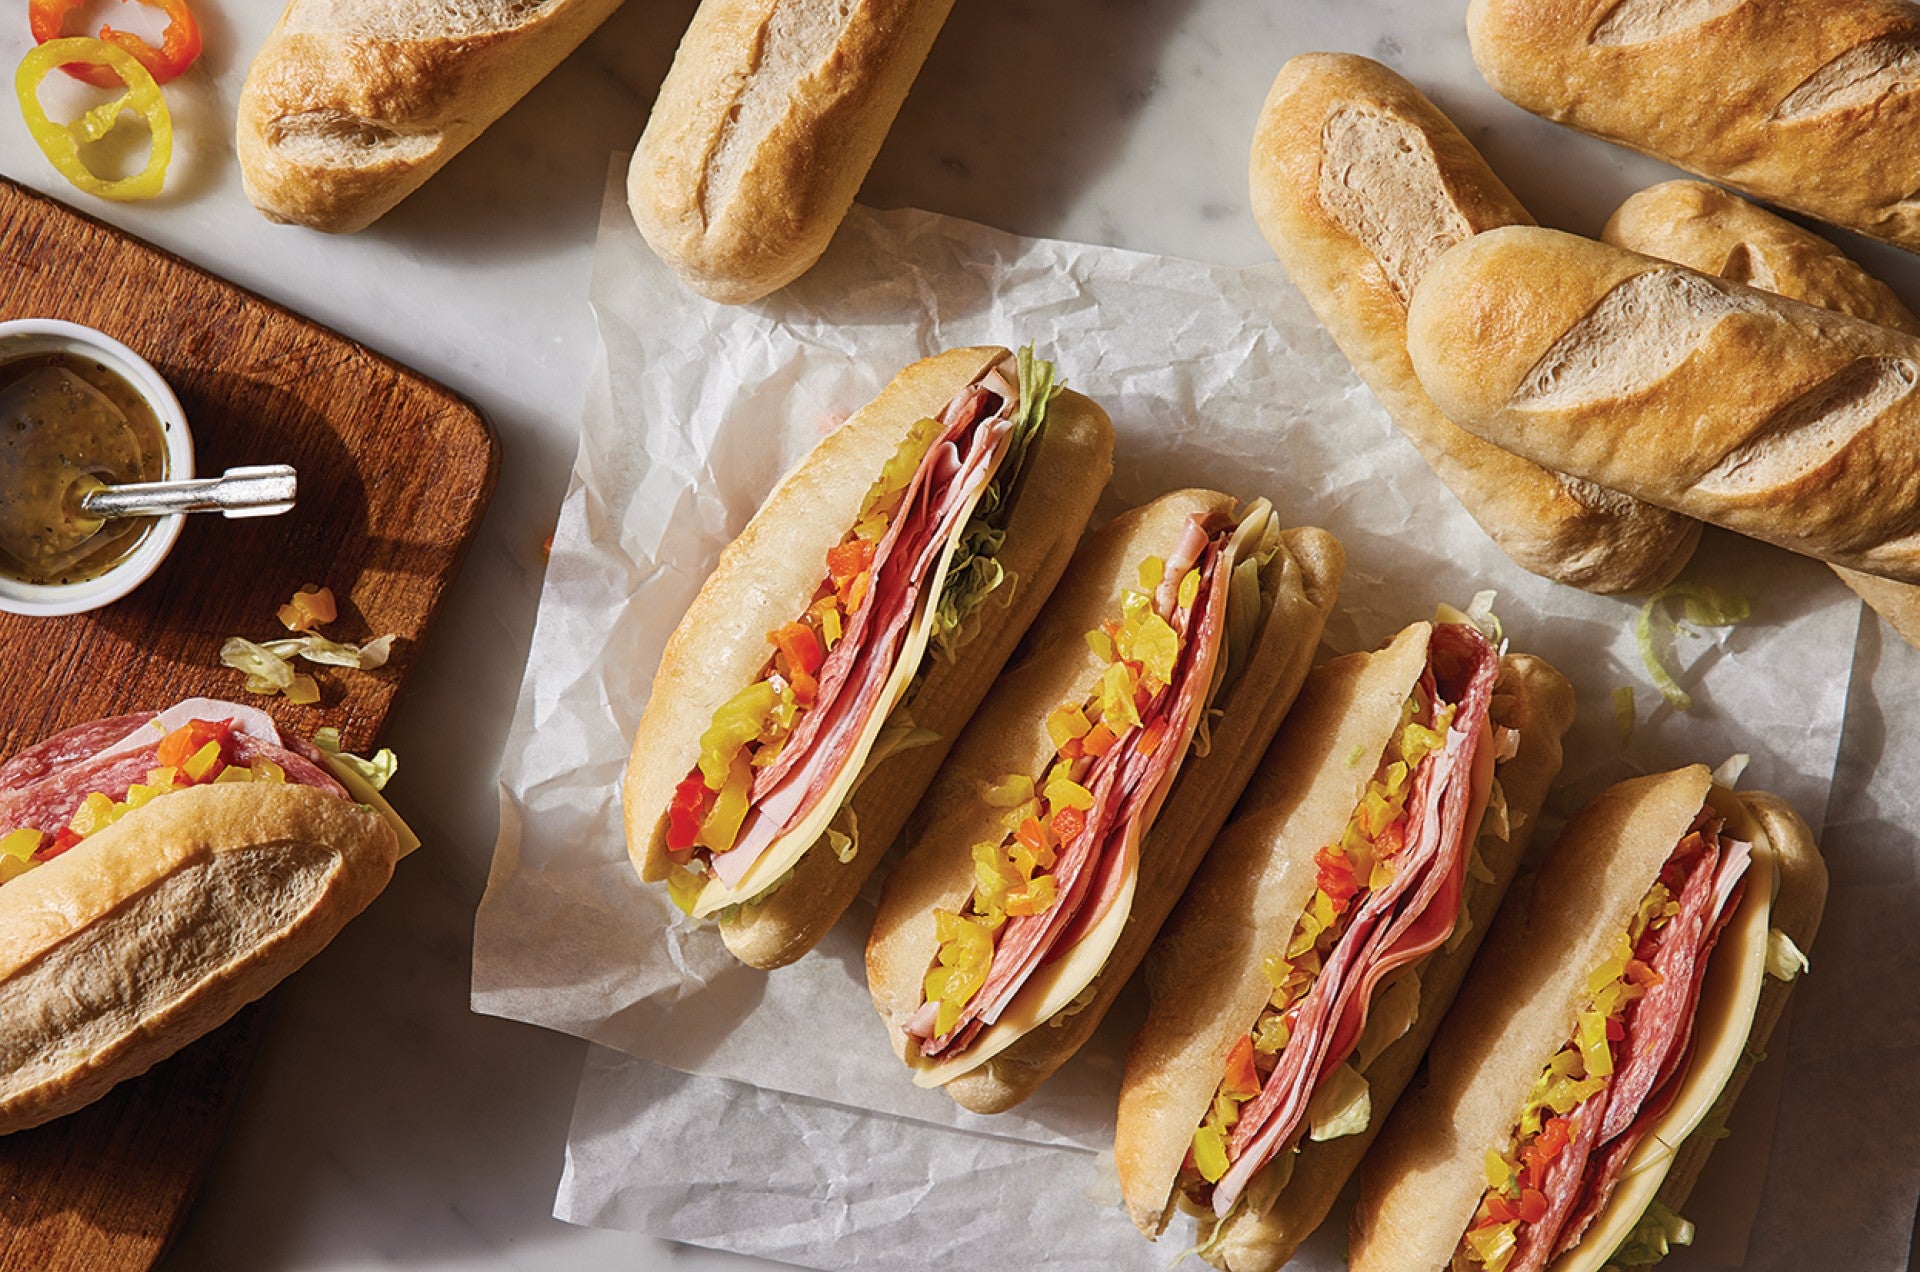
Italian sub-style sandwiches on individual crusty rolls — salami, capicola, provolone, pepperoncini, shredded iceberg lettuce, and Italian dressing — are genuinely practical beach sandwiches because the cured meats and hard cheese are more heat-stable than fresh deli turkey or chicken and the crusty roll resists sogginess significantly better than standard sliced sandwich bread. Keep in the cooler for food safety with the cured meats and for best quality. Assemble the night before and refrigerate wrapped in wax paper — these travel to the beach and taste genuinely excellent even after 3–4 hours in the cooler.
- 4 individual crusty rolls (ciabatta, hoagie, or sturdy sub rolls)
- 4 oz Genoa salami, thinly sliced
- 4 oz capicola (hot or sweet), thinly sliced
- 4 oz provolone, thinly sliced
- ½ cup pepperoncini rings, drained
- 1 cup shredded iceberg lettuce
- Italian dressing: 2 tablespoon red wine vinegar + 3 tablespoon olive oil + pinch oregano + salt and pepper — packed separately in a small sealed container
- Split each roll horizontally. Layer salami and capicola on the bottom half of each roll in multiple overlapping layers — fold the meat slices rather than laying flat for more texture and volume.
- Add provolone slices over the meat. Scatter pepperoncini rings across the cheese. Add shredded iceberg on top of the pepperoncini — iceberg holds its crunch far better than romaine during transport.
- Pack the Italian dressing separately in a small sealed container — do not dress the sandwich before transport as the dressing immediately begins softening the roll. Dress at the beach immediately before eating.
- Wrap each assembled (undressed) sandwich tightly in wax paper. Place in the cooler alongside cold drinks and dress with the packed vinaigrette at the beach. Consume within 3–4 hours of removing from the cooler.
FRESH FRUIT
10. Frozen Grape Skewers
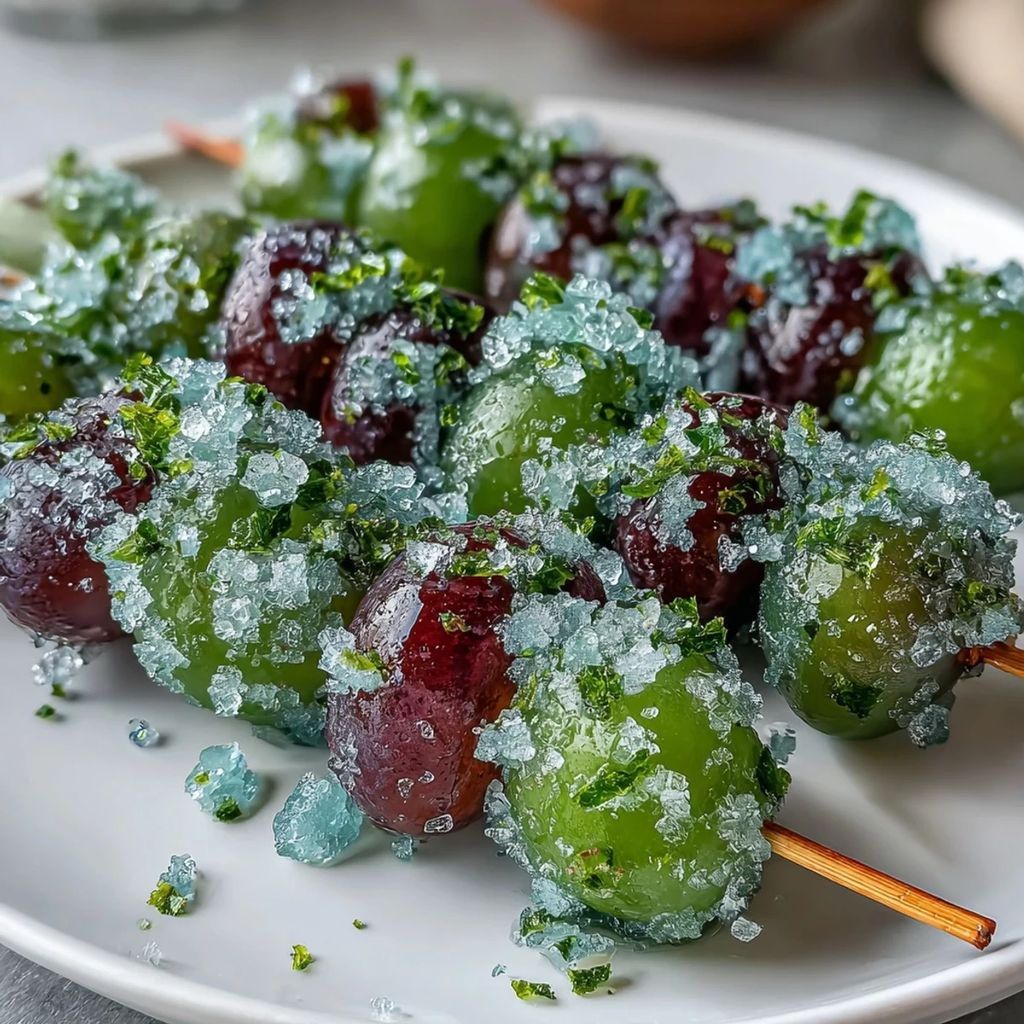
Grapes threaded on toothpicks and frozen solid overnight — acting simultaneously as a cold pack for the cooler and as a genuinely extraordinary frozen snack that children love intensely and adults appreciate equally. Frozen grapes have a satisfying crunch-then-creaminess that is completely different from fresh grapes and genuinely excellent in hot weather. Thread 4–5 grapes per toothpick before freezing so each stick is a self-contained portion. Keep in a sealed bag in the freezer-cooler section of the beach cooler and serve throughout the first 3–4 hours of the beach day while still frozen to semi-frozen. Use a mix of red and green grapes for the most visually appealing skewers.
- 2 lbs seedless grapes — a mix of red and green for visual variety
- Toothpicks or short bamboo skewers
- A resealable freezer bag for storage and transport
- Wash grapes thoroughly and dry completely — any surface moisture creates ice crystals on the exterior of each grape that make them stick together during freezing.
- Thread 4–5 grapes onto each toothpick, alternating red and green for the most attractive visual mix.
- Place skewered grapes in a single layer on a parchment-lined baking sheet and freeze for at least 4 hours until solid throughout. Once frozen solid transfer to a sealed freezer bag — freezing in a single layer first prevents them from sticking together in the bag.
- Transport in the coldest section of the cooler with ice packs or dry ice above them. Serve directly from the cooler throughout the first 3–4 hours of the beach day. They act as additional cold packs while frozen and transition into a delicious cold snack as the day progresses.
11. Watermelon Chunks with Tajín
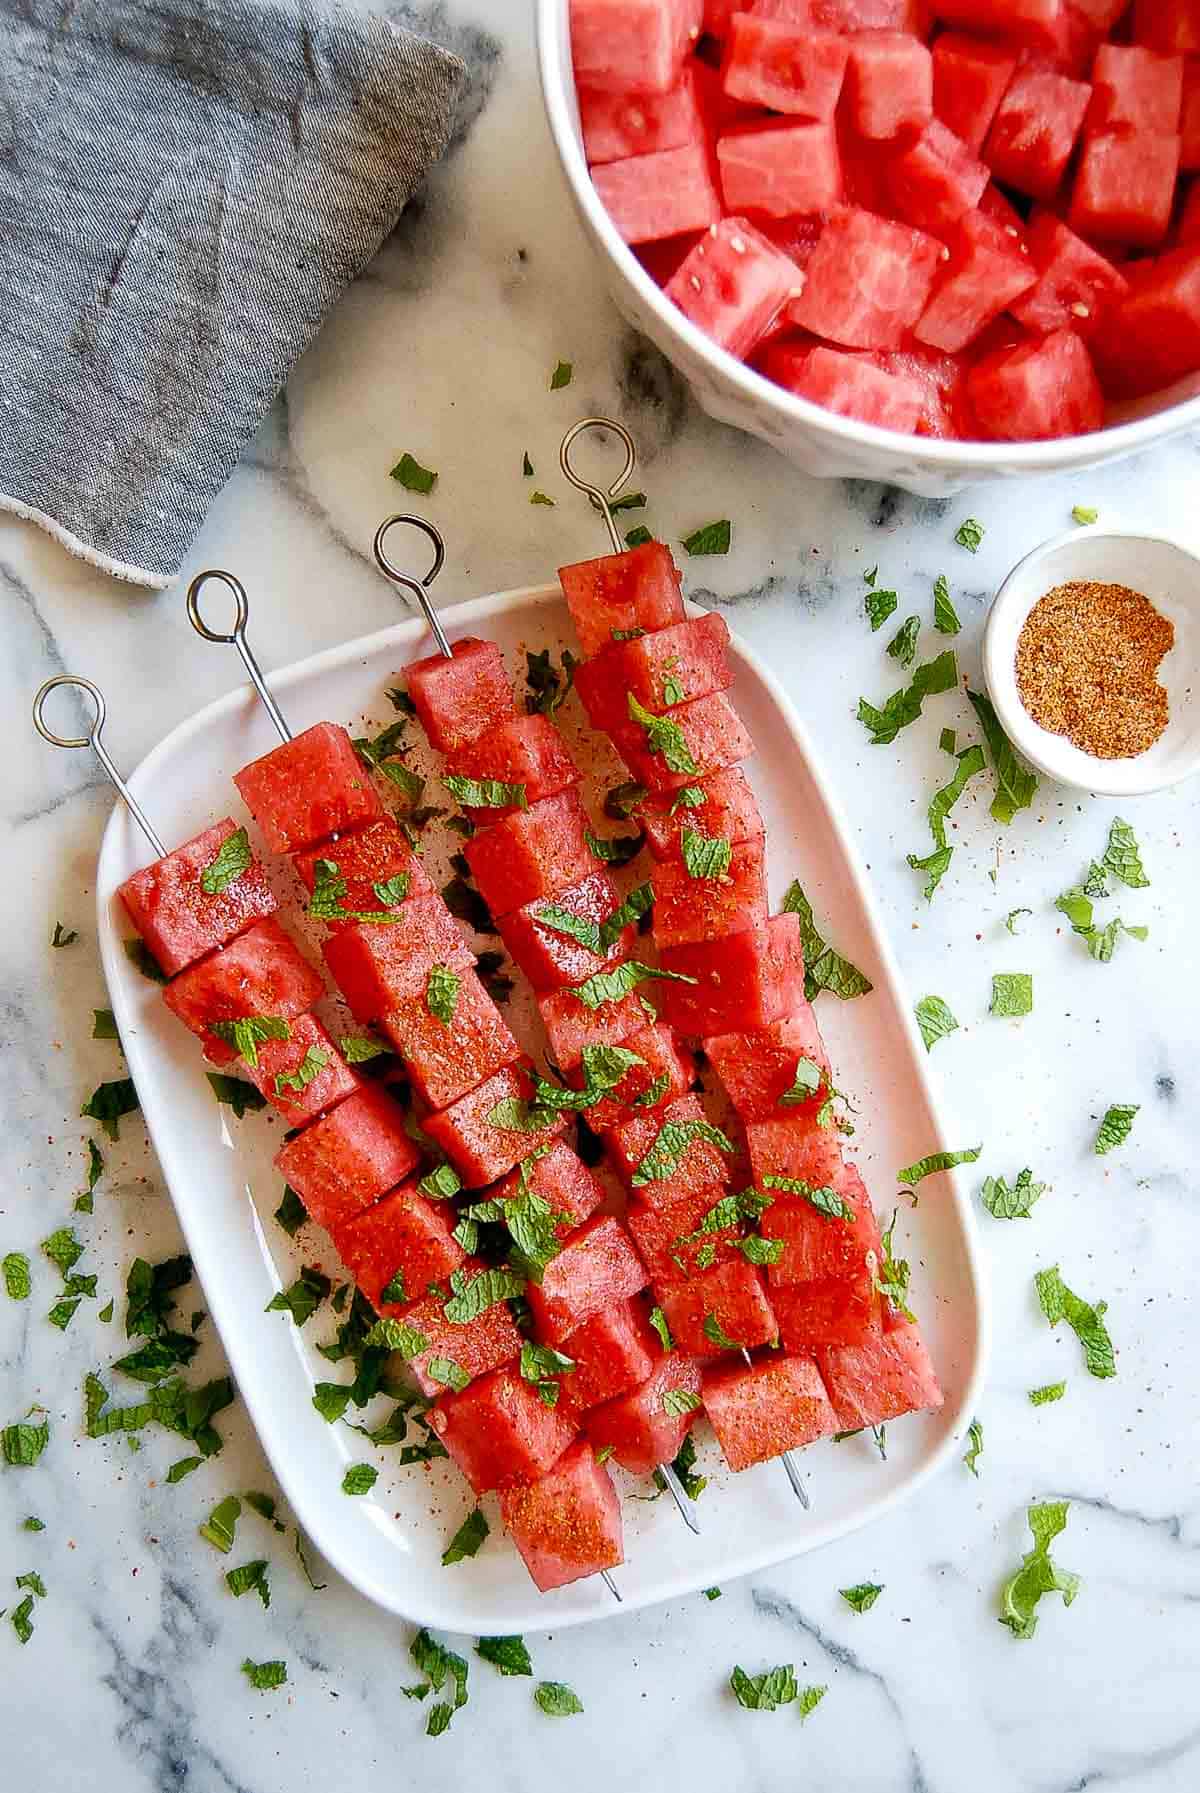
Pre-cut watermelon chunks kept in a sealed container in the cooler — the most quintessentially beach fruit available and genuinely one of the most hydrating foods that can be consumed during a hot day with significant sun and salt water exposure. A Tajín shaker packed alongside the watermelon container is the single most impactful and most transformative seasoning upgrade available for beach watermelon — the chili, lime, and salt of Tajín amplifies the watermelon's natural sweetness in a way that makes every bite more interesting and more satisfying than plain watermelon. See our complete watermelon salad for more watermelon inspiration.
- ½ seedless watermelon, cut into 1.5-inch chunks or 1-inch cubes
- 1 tablespoon fresh lime juice squeezed over the cut watermelon
- Tajín chili lime seasoning in a shaker — pack separately and shake over each serving at the beach
- Optional: fresh mint leaves packed separately in a small sealed bag
- Cut watermelon into uniform 1.5-inch chunks or cubes — uniform size ensures even chilling throughout and makes grabbing individual pieces easier with wet hands without a fork.
- Squeeze fresh lime juice over the cut watermelon and toss gently — the lime juice both brightens the flavor and slightly reduces the rate of surface browning during refrigeration.
- Transfer to a sealed airtight container. Refrigerate until packing for the beach. Keep in the coldest section of the cooler — well-chilled watermelon is dramatically more refreshing than room-temperature watermelon at the beach.
- At the beach: open the container, pass the Tajín shaker, and let each person season their own watermelon to their preferred heat level. Add optional fresh mint at the beach for the most fragrant, most cooling result. Replace the lid on any remaining watermelon and return to the cooler immediately.
12. Apple Slices with Cinnamon Almond Butter
:max_bytes(150000):strip_icc():format(webp)/3759286-ca9f503b9884484ebdf15c6edf1b124c.jpg)
Pre-sliced apple kept in a sealed container treated with lemon juice to prevent browning, paired with individual portions of homemade cinnamon almond butter packed in small sealed jars — one of the most nutritionally complete and genuinely satisfying individual beach snack portions available. Apple slices stay fresh-looking and appetizing for 5–6 hours in a sealed container treated with lemon juice and kept in the cooler. The cinnamon almond butter requires no refrigeration for several hours and provides protein, healthy fat, and genuinely extraordinary flavor that makes this a snack adults and children both eat enthusiastically without any sense of compromise.
- 4 large firm apples (Honeycrisp, Fuji, or Pink Lady — varieties that hold their crunch and resist browning best)
- 2 tablespoons fresh lemon juice
- 2 cups raw almonds
- 1 teaspoon cinnamon
- 1 tablespoon honey
- ½ teaspoon vanilla extract
- ¼ teaspoon salt
- Make cinnamon almond butter: toast almonds at 350°F for 8–10 minutes until golden and fragrant. Cool 5 minutes. Process in a food processor for 8–12 minutes, stopping every 2–3 minutes to scrape down the sides, until the almonds release their oils and the mixture transforms from crumbly to completely smooth and creamy. Add cinnamon, honey, vanilla, and salt and process 1 more minute. Store refrigerated up to 3 weeks. Pack in individual small sealed jars for the beach.
- Slice apples into ⅓-inch thick rounds or wedges immediately before packing. Place in a sealed container and toss immediately with lemon juice — every cut surface must contact the lemon juice to prevent browning.
- Pack the apple container in the cooler and the almond butter jars in the beach bag (no cooler needed for the almond butter). Pack individual crackers or leave the apple slices as a standalone dipper.
- At the beach serve apple slices directly from the container with the almond butter jar as a dipping vessel — each person takes their own small portion with a clean utensil or directly with a clean apple slice as the dipper.
SWEET NO-MELT TREATS
13. Chewy Oat Bars

Homemade chewy oat bars — rolled oats, honey, brown butter, peanut butter, dried cranberries, and dark chocolate chips pressed into a pan and chilled until set, then cut into individual bars and wrapped individually in wax paper. These are genuinely the most satisfying sweet beach treat available — chewy, substantial, genuinely filling from the oats and nut butter, and completely shelf-stable at beach temperatures for up to 6 hours without any quality loss or structural compromise. The brown butter adds a depth and nuttiness that elevates these far above any store-bought granola bar equivalent. Make a double batch at the beginning of the week and have beach snacks ready for multiple trips.
- 3 cups old-fashioned rolled oats
- ½ cup unsalted butter
- ½ cup honey
- ½ cup creamy peanut butter or almond butter
- ½ cup packed brown sugar
- 1 teaspoon vanilla extract
- ½ teaspoon salt
- ½ cup dried cranberries + ⅓ cup dark chocolate chips + ¼ cup pumpkin seeds
- Preheat oven to 350°F. Spread oats on a baking sheet and toast 8–10 minutes until golden and fragrant, stirring once. Remove and cool slightly.
- In a medium saucepan cook butter over medium heat until the milk solids turn golden and the butter smells nutty and toasted — brown butter. Add honey and brown sugar and stir until dissolved. Remove from heat and stir in peanut butter, vanilla, and salt until combined.
- Pour the warm honey-butter mixture over the toasted oats. Add cranberries and pumpkin seeds and stir until every oat is coated. Allow to cool 5 minutes before adding chocolate chips so they don't melt completely — fold in gently for streaks of chocolate rather than uniform brown oats.
- Press firmly into a parchment-lined 9x13 pan using the back of a greased spatula or a greased hand — press very firmly for bars that hold together. Refrigerate 2 hours until completely set. Cut into bars, wrap each individually in wax paper. Store at room temperature up to 1 week. Completely shelf-stable at beach temperatures.
14. No-Bake Energy Balls
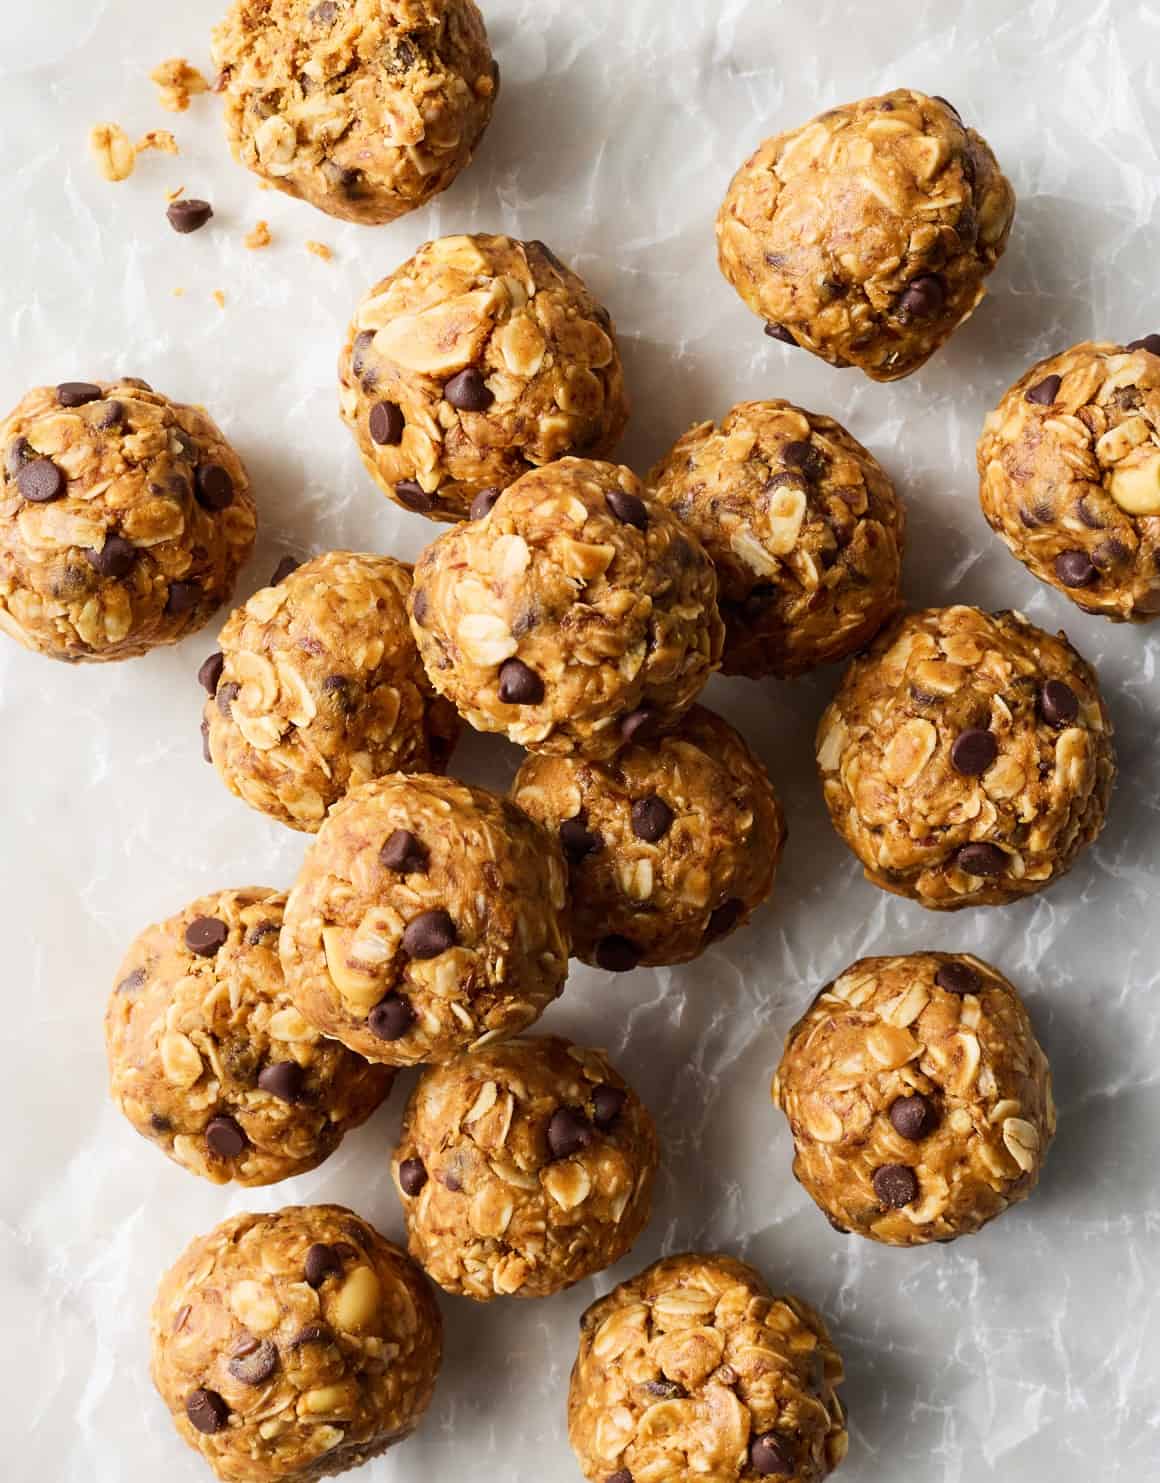
Rolled oats, peanut butter, honey, dark chocolate chips, and chia seeds rolled into balls — the most compact, most portable, and most individually portion-controlled sweet beach snack available. Each ball is a complete self-contained one-bite treat that fits in a sealed bag and survives beach conditions for up to 3 hours at ambient temperature. Make up to 2 weeks ahead and refrigerate. They hold their shape at outdoor summer temperatures significantly better than any chocolate-coated treat. Roll in shredded coconut, cocoa powder, or crushed graham crackers for a flavored exterior that adds variety across a batch. Find more snack ideas in our healthy snacks collection.
- 2 cups rolled oats
- ¾ cup creamy peanut butter
- ⅓ cup honey
- ½ cup mini dark chocolate chips
- 2 tablespoons chia seeds
- 1 teaspoon vanilla extract + pinch of salt
- Shredded coconut or cocoa powder for rolling (optional)
- Combine oats, peanut butter, honey, chocolate chips, chia seeds, vanilla, and salt in a large bowl. Stir until thoroughly combined — the mixture should hold together when pressed. If too dry add honey 1 teaspoon at a time; if too wet add oats 1 tablespoon at a time.
- Cover the bowl and refrigerate 30 minutes. The cold rest firms the peanut butter and makes rolling significantly easier — room-temperature peanut butter makes the mixture sticky and difficult to shape.
- Roll heaped tablespoons of the mixture between your palms into 1.5-inch balls. If rolling in coconut or cocoa powder, roll immediately after shaping before the surface dries. Lay on a parchment-lined sheet pan.
- Freeze on the sheet pan for 30 minutes until firm. Transfer to a sealed container and refrigerate up to 2 weeks. Pack in individual portion bags for the beach — they hold at ambient temperature up to 3 hours. Bring in a small insulated bag alongside the cooler for the best result.
15. Rice Krispie Treats
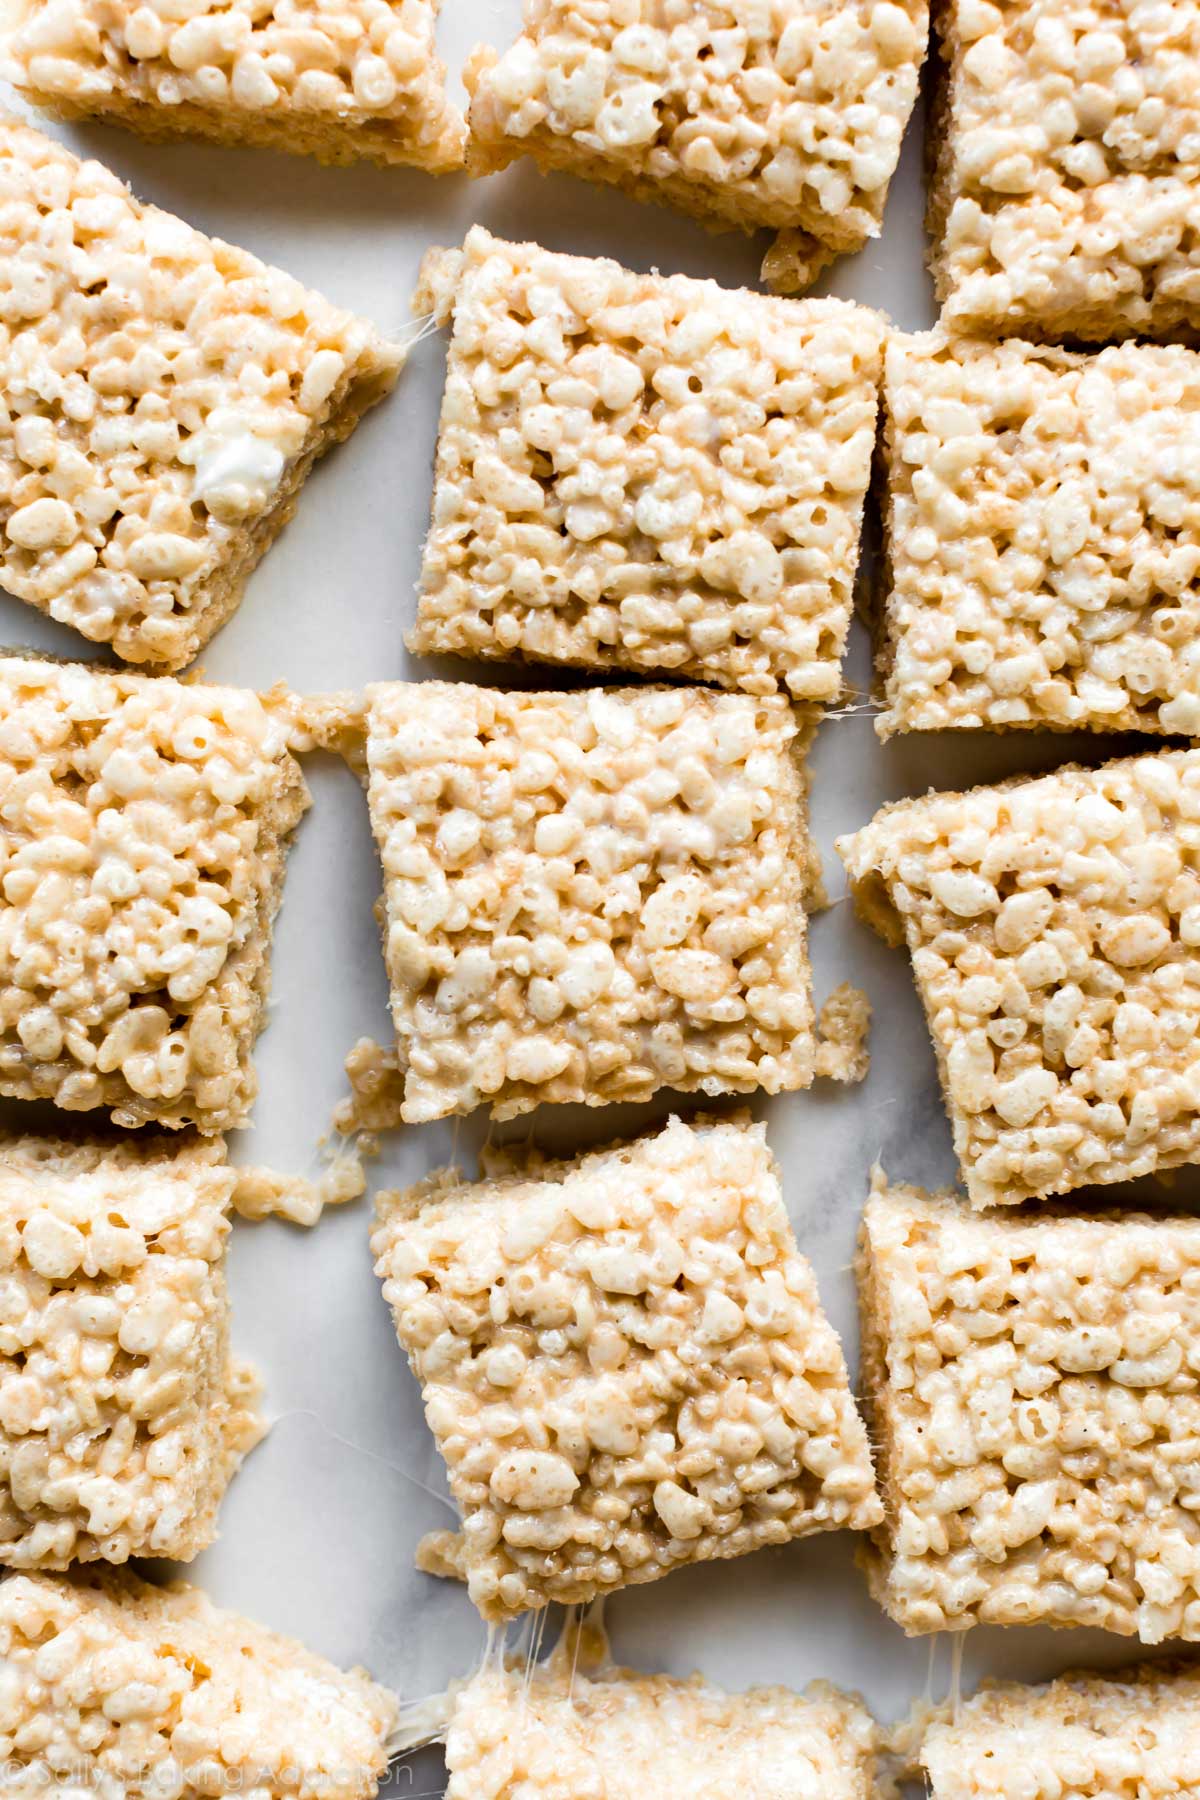
Brown butter rice krispie treats individually wrapped in wax paper — completely shelf-stable at any beach temperature, beloved by children and adults equally, and genuinely one of the most portable and least messy sweet treats for a beach bag. The brown butter version is genuinely extraordinary compared to the standard recipe — the toasted milk solids add a nutty, caramelized depth that makes these taste like something from a serious bakery rather than a weeknight dessert. Add a pinch of flaky sea salt to the top of each square before it sets for the sweet-salty finish that makes these the most discussed item in the beach bag. Make up to 1 week ahead and store at room temperature.
- 6 cups crispy rice cereal (Rice Krispies or similar)
- 6 tablespoons unsalted butter
- 1 package (10 oz) regular marshmallows or 4 cups mini marshmallows
- 1 teaspoon vanilla extract
- ½ teaspoon salt
- Flaky sea salt for finishing
- Cook butter in a large pot over medium heat, stirring frequently, until the milk solids turn golden and the butter smells deeply nutty and toasted — 3–5 minutes past melting. Watch carefully as it goes from brown butter to burned butter quickly.
- Add marshmallows and stir continuously over medium-low heat until completely melted and smooth. Remove from heat. Add vanilla and salt and stir to combine.
- Add cereal all at once and fold with a buttered spatula until every piece is completely coated — work quickly before the mixture cools and becomes difficult to fold. Transfer to a buttered 9x13 pan and press into an even layer using buttered hands or parchment paper. Scatter flaky sea salt generously across the surface before it sets. Do not compress too firmly — slightly loosely pressed treats are chewier and more satisfying than tightly compressed ones.
- Cool completely at room temperature — 1 hour. Cut into rectangles and wrap each individually in wax paper. Store at room temperature up to 1 week. Completely shelf-stable at any beach temperature.
16. Dark Chocolate and Sea Salt Bark
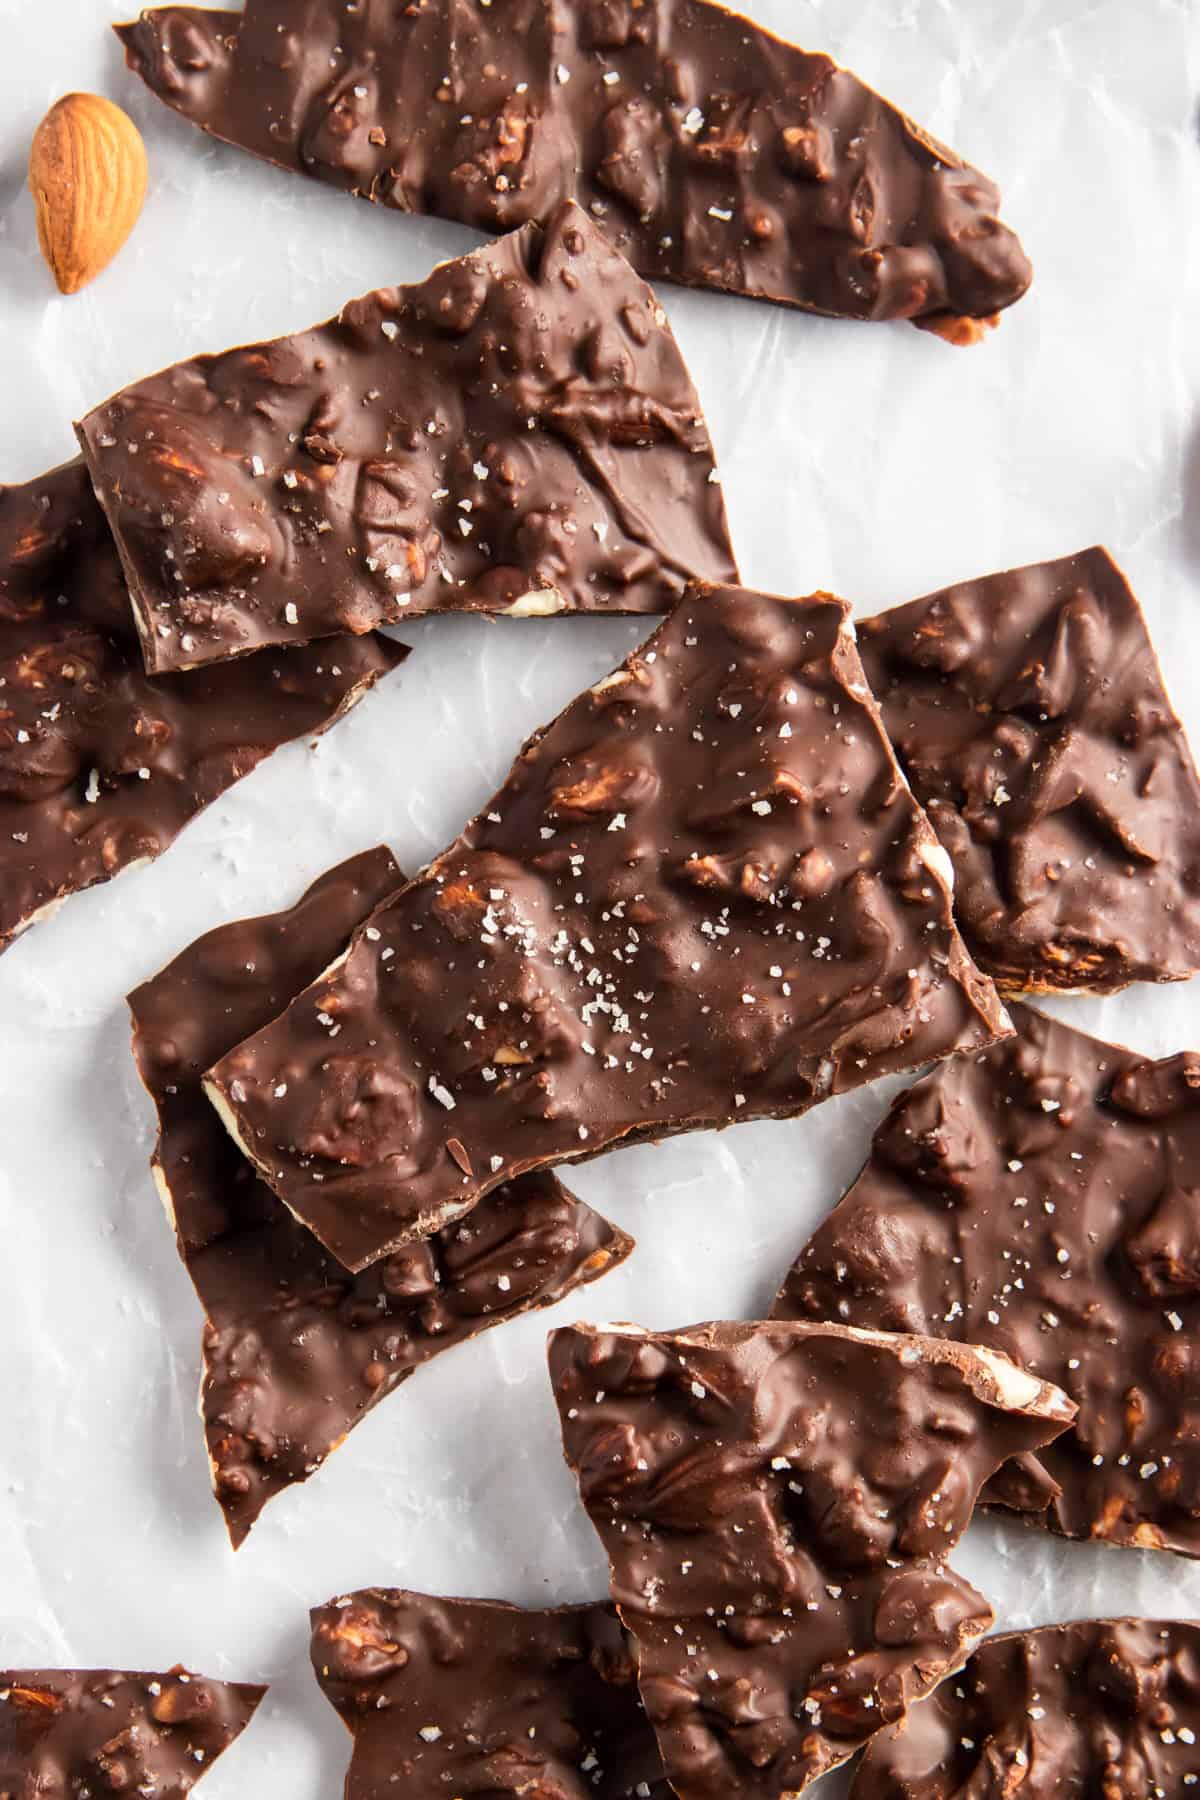
Dark chocolate bark (70%+ cacao) with freeze-dried strawberries, pistachios, and flaky sea salt — broken into irregular pieces and wrapped individually in wax paper. Dark chocolate at 70%+ cacao has a significantly higher melting point than milk chocolate (approximately 97°F versus 86°F) and survives in an insulated snack bag at beach temperatures for several hours without becoming a liquid mess. The freeze-dried strawberries provide bright color and intense fruit flavor and are genuinely shelf-stable at any temperature. This is not "beach chocolate that sort of works" — this is genuinely excellent chocolate bark that also happens to survive the beach.
- 12 oz good quality dark chocolate (70–72% cacao), roughly chopped
- ½ cup freeze-dried strawberries, roughly crumbled
- ⅓ cup roasted salted pistachios, roughly chopped
- 1.5 teaspoons flaky sea salt
- Optional: 1 tablespoon coconut oil for a smoother melt and shinier set
- Melt dark chocolate in a microwave-safe bowl in 30-second intervals at 50% power, stirring between each, until completely smooth and no lumps remain — approximately 90 seconds total. Alternatively melt in a bowl over a pot of barely simmering water. If using, stir in coconut oil until fully incorporated. Allow to cool for 2–3 minutes until slightly thickened but still pourable.
- Pour melted chocolate onto a parchment-lined baking sheet. Spread into an even layer approximately ¼-inch thick using an offset spatula — not too thin or the bark is fragile; not too thick or it's difficult to break into individual pieces.
- Scatter freeze-dried strawberry pieces, chopped pistachios, and flaky sea salt evenly across the entire surface while the chocolate is still fluid — press toppings very gently into the surface so they adhere when the chocolate sets.
- Refrigerate 30 minutes until completely set and hard throughout. Break into irregular pieces. Wrap 2–3 pieces per individual wax paper packet. Store at cool room temperature or refrigerated up to 2 weeks. Pack in an insulated snack bag for beach transport — avoid direct sun exposure and the bark will hold for several hours.
17. Dried Mango and Cashew Snack Bags

Individual snack bags of dried mango strips, roasted cashews, and toasted coconut chips — a tropical-flavored, shelf-stable beach snack that requires zero preparation beyond portioning and genuinely one of the most satisfying sweet-salty combinations available for hot weather snacking. Dried mango's intense, concentrated sweetness is genuinely refreshing rather than cloying in the context of beach eating, and the cashews and coconut chips provide the protein, fat, and crunch that make it a sustaining snack rather than a momentary sugar hit. Toast the cashews and coconut at home for a dramatically more flavorful result than store-bought pre-packaged versions.
- 2 cups dried mango strips (unsweetened or lightly sweetened)
- 2 cups raw cashews
- 1 cup large coconut chips (not shredded coconut)
- 1 tablespoon coconut oil
- 1 teaspoon sea salt
- ½ teaspoon Tajín or chili lime seasoning (optional for a spicy version)
- Preheat oven to 325°F. Toss cashews with coconut oil and sea salt until evenly coated. Spread on a parchment-lined baking sheet in a single layer. Roast 10–12 minutes stirring once halfway, until the cashews are golden and fragrant. Watch carefully — cashews burn quickly.
- In the last 3 minutes of cashew roasting, add the coconut chips to the same pan and stir to combine — the coconut toasts faster than the cashews and needs only the last few minutes of oven time to turn golden.
- Remove from oven and cool completely on the pan — the cashews and coconut will crisp further as they cool. If using Tajín, add immediately after removing from the oven while still hot so it adheres.
- Combine cooled cashews, toasted coconut chips, and dried mango in a large bowl and toss gently. Portion into individual resealable snack bags — approximately ⅔ cup per serving. Store at room temperature up to 2 weeks. Completely shelf-stable at beach temperatures for the entire day.
KIDS' BEACH SNACK FAVORITES
18. Fruit Squeeze Pouches
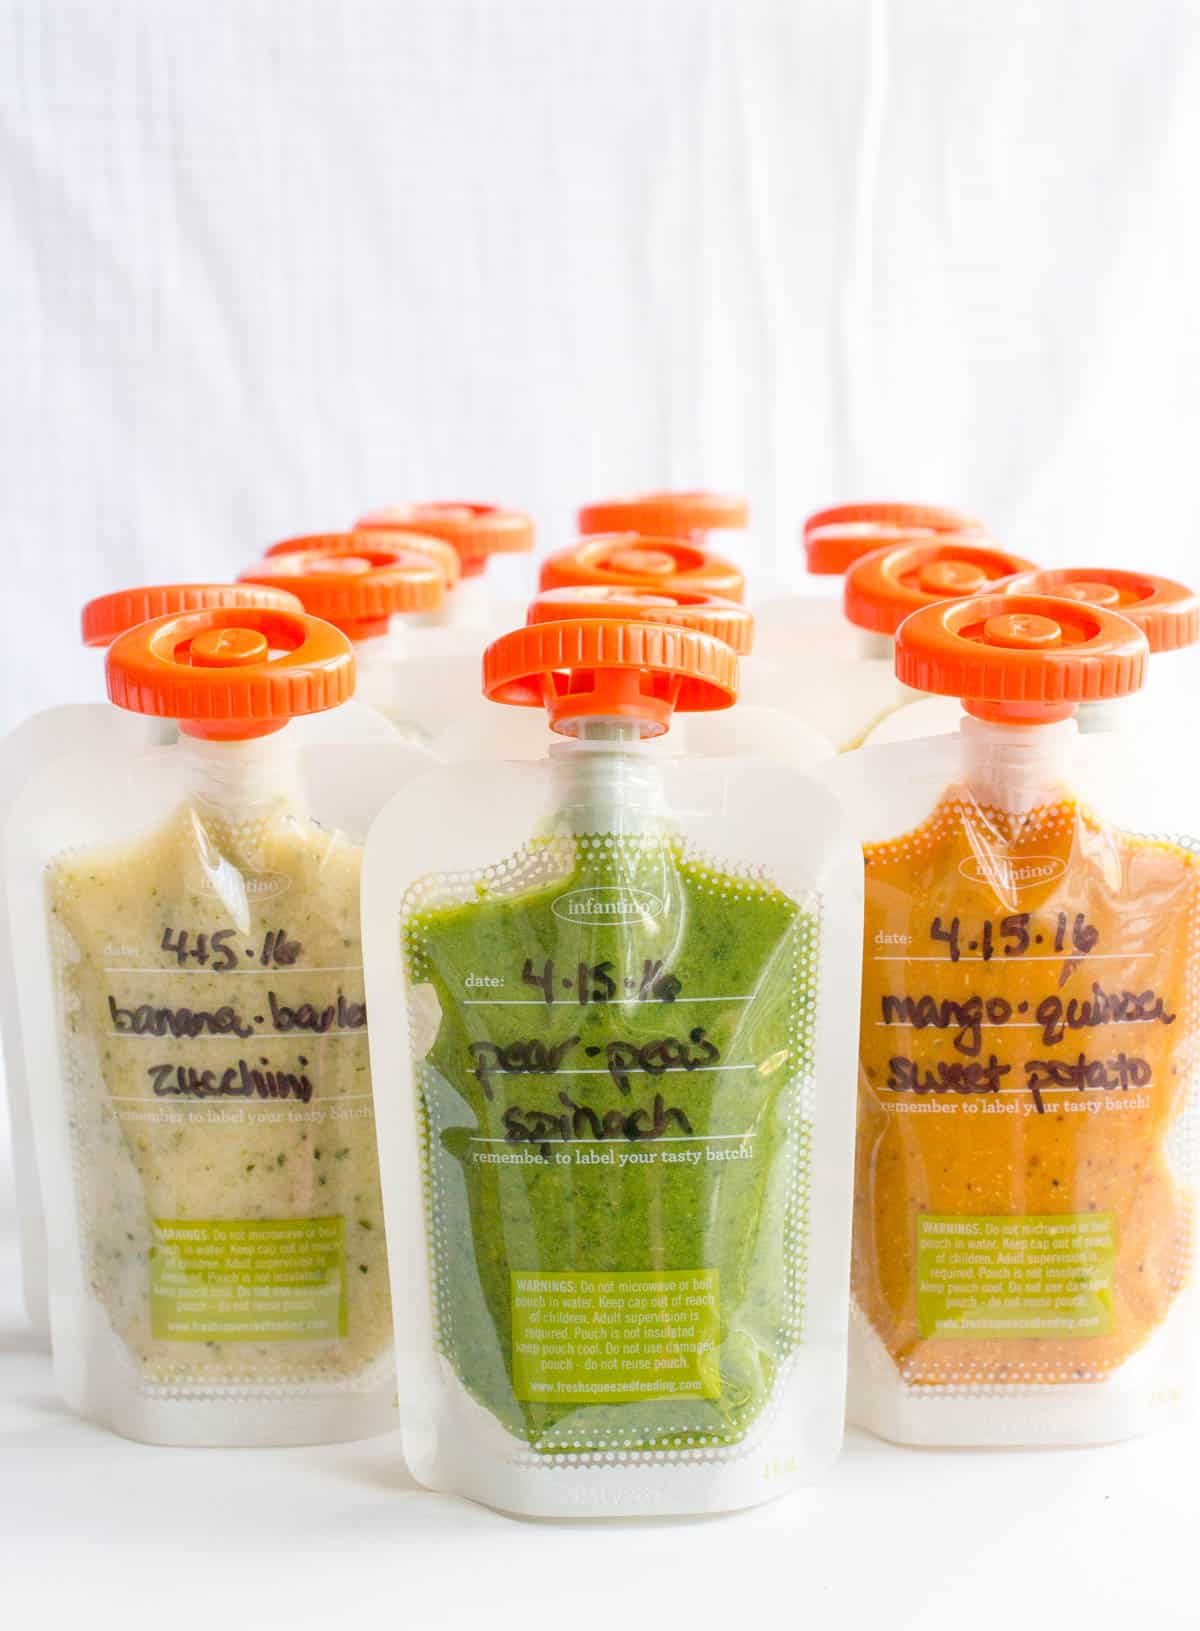
Homemade fruit puree filled into reusable squeeze pouches — apple and cinnamon, mango and lime, or strawberry and banana — the most genuinely practical toddler and young child beach snack available. Reusable squeeze pouches filled with homemade puree cost a fraction of store-bought single-serve pouches and allow complete control over ingredients and sweetness. The sealed pouch format is completely sand-proof and completely utensil-free. Make the purees up to 3 days ahead and refrigerate in the pouches — keep in a small insulated bag alongside the main cooler for the most nutritious and most child-appropriate beach snack available. Find more snack ideas in our healthy snacks collection.
- Apple Cinnamon Puree:
- 4 medium apples, peeled, cored, and roughly chopped
- 2 tablespoons fresh lemon juice
- ½ teaspoon cinnamon
- 2 tablespoons water
- Mango Lime Puree:
- 2 large ripe mangoes, peeled and cubed
- 2 tablespoons fresh lime juice
- 1 tablespoon water if needed for thinning
- For apple cinnamon: combine apple pieces, lemon juice, cinnamon, and water in a small saucepan. Cook over medium heat covered for 10–12 minutes until apples are completely soft. Cool slightly. Blend until completely smooth. Cool completely before filling pouches.
- For mango lime: blend mango cubes and lime juice until completely smooth. Add 1 tablespoon water if the mixture is too thick to flow through a squeeze pouch nozzle. No cooking needed — raw mango puree is genuinely beautiful in color and flavor.
- Fill reusable squeeze pouches using a piping bag, a small funnel, or a zip-lock bag with a corner snipped. Fill to within 1 inch of the top to leave room for sealing. Seal each pouch completely. Refrigerate up to 3 days.
- Pack in a small insulated lunch bag with a single ice pack. The pouches stay food-safe for 4–6 hours with the ice pack. They are consumed directly from the pouch by squeezing — no utensils, no plates, no sand interaction.
19. Cheesy Goldfish Cracker Mix
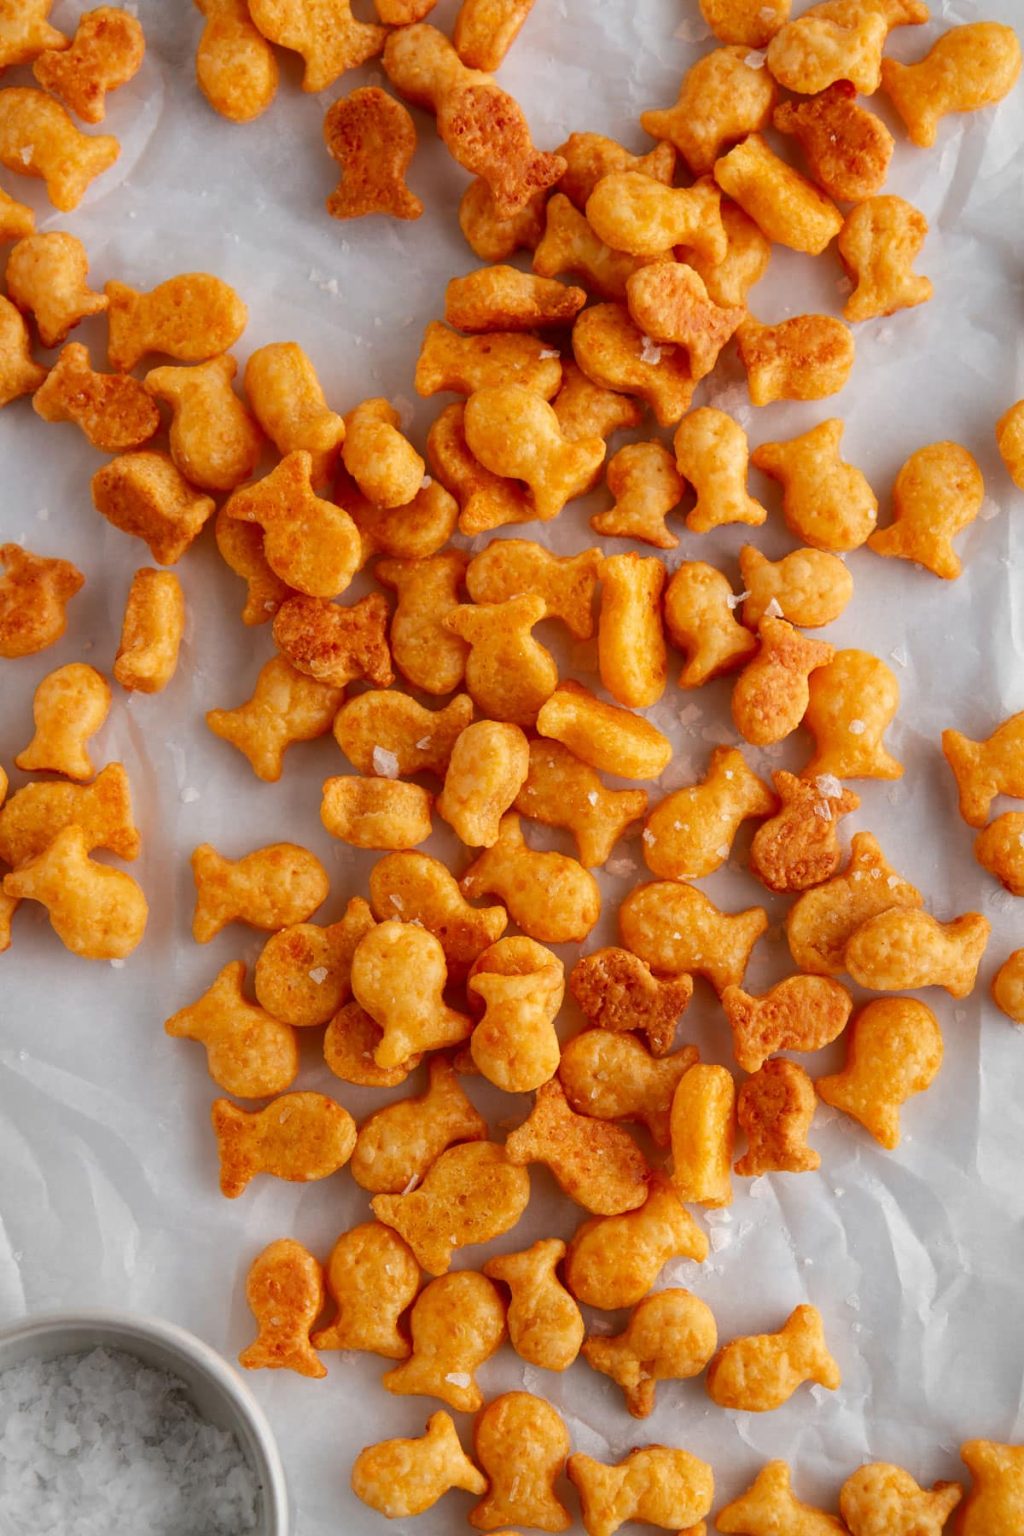
A custom seasoned Goldfish cracker mix — Goldfish crackers combined with mini pretzels, popcorn, and sunflower seeds, tossed in a butter-ranch seasoning, and baked until the coating is toasted and adhered — the most completely beloved children's beach snack available. The Goldfish provides the familiar cheesy flavor children love, the pretzels add salt and crunch variety, the popcorn adds lightness, and the ranch seasoning baked into the mix makes the entire combination significantly more flavorful and more interesting than any of the individual components alone. Make a large batch at the beginning of the week and portion into individual snack bags for multiple beach trips.
- 3 cups Goldfish crackers (original cheddar)
- 2 cups mini pretzels
- 2 cups plain popped popcorn
- ½ cup roasted sunflower seeds
- 3 tablespoons melted butter
- 1.5 teaspoons ranch seasoning powder
- ½ teaspoon garlic powder + ½ teaspoon onion powder
- Preheat oven to 300°F. Combine Goldfish, mini pretzels, popcorn, and sunflower seeds in a very large bowl.
- Whisk melted butter, ranch seasoning, garlic powder, and onion powder together until combined. Drizzle over the cracker mix in a thin stream while tossing continuously so the seasoning distributes evenly rather than pooling in one area.
- Spread in a single layer on two large baking sheets. Bake 15 minutes stirring once halfway through until the coating is toasted and set on the crackers and the mix is fragrant.
- Cool completely before portioning — warm from the oven the mix is soft and will crisp fully only as it cools. Portion into individual resealable snack bags. Store at room temperature up to 1 week. Completely shelf-stable at beach temperatures for the entire day — the baked-on coating makes these significantly more humidity-resistant than plain Goldfish crackers.
20. PB Banana Roll-Ups
:max_bytes(150000):strip_icc():format(webp)/4526735-3948bfa03ea34b0c9610601a617951ac.jpg)
Flour tortillas spread with peanut butter, sprinkled with granola and honey, layered with banana slices, and rolled tightly — a genuinely excellent beach snack for children and adults alike that requires zero cooking, provides real nutrition information from peanut butter, banana, and granola, and holds for 2–3 hours without refrigeration. Bananas are the most practical banana format for the beach — slightly underripe bananas hold their structure significantly better inside a wrap than very ripe bananas, which become mushy under the compression of rolling and transport. The peanut butter and honey seal the banana slices in place and prevent the wrap from unrolling during transport.
- 4 medium flour tortillas
- ½ cup creamy peanut butter
- 2 tablespoons honey
- ¼ cup granola
- 2 slightly underripe bananas, sliced into ¼-inch rounds
- Optional: mini chocolate chips or raisins for added sweetness
- Spread a generous layer of peanut butter across the entire surface of each tortilla leaving a 1-inch border. Drizzle honey evenly over the peanut butter — the honey thins the peanut butter slightly and provides a sticky surface that keeps the banana slices from shifting during rolling.
- Scatter granola evenly across the peanut butter layer. Arrange banana slices in a single layer across the entire tortilla — press each slice gently into the peanut butter so it is anchored. Add optional chocolate chips or raisins if using.
- Roll each tortilla tightly from the bottom edge upward. The banana slices should compress slightly but not break — if the banana is very ripe it will mash rather than slice cleanly, so slightly underripe bananas are specifically required for this recipe.
- Wrap tightly in wax paper and secure. These hold for 2–3 hours at ambient temperature without refrigeration — the banana begins browning at the cut ends after this window but remains safe and appetizing. Pack in the beach bag away from direct sunlight for the best quality over the longest period.
THE COMPLETE BEACH SNACK PACKING GUIDE
The Cooler (below 40°F): Cold drinks, frozen grape skewers, watermelon chunks, squeeze pouches, Italian sub rolls, and any other perishable items requiring genuine refrigeration. Pack with 2 lbs of ice per quart of cooler capacity. Keep in the shade and minimize opening throughout the day.
The Insulated Snack Bag (ambient-cool): Energy balls, apple slices with almond butter, dark chocolate bark, oat bars, and hummus packets that benefit from being cooler than ambient but don't require strict refrigeration. A single thin ice pack at the bottom maintains 50–65°F for 3–4 hours.
The Beach Bag (ambient temperature): Trail mix, roasted chickpeas, everything bagel crackers, spiced popcorn, jerky, PB&J sandwiches, hummus-veggie wraps, rice krispie treats, dried mango cashew bags, Goldfish mix, and PB banana roll-ups. Everything in this category is genuinely shelf-stable at any beach temperature for the duration of a full beach day without any food safety concern.
FAQ
The most genuinely shelf-stable beach snacks requiring zero refrigeration are trail mix, roasted chickpeas, homemade crackers, spiced popcorn, beef jerky, PB&J sandwiches on sturdy bread, hummus-veggie wraps, rice krispie treats, dark chocolate bark (70%+ cacao), dried mango and cashew bags, cheesy Goldfish mix, and PB banana roll-ups. Every one of these is safe at ambient summer beach temperatures for a full beach day without any cooler needed. Keep them in the beach bag away from direct sunlight for the best quality over the longest period.
Dark chocolate with 70%+ cacao content has a significantly higher melting point than milk chocolate — approximately 97°F versus 86°F — which means it survives in an insulated bag at beach temperatures for several hours before becoming soft. It will eventually soften but won't become the liquid mess that milk chocolate produces. M&Ms and Reese's Pieces with their candy shell coating survive longer than unwrapped chocolate bars. For absolute heat stability, choose the dark chocolate bark recipe in this post (Recipe 16) with freeze-dried fruit toppings — the bark format with 70%+ chocolate holds its shape for several hours in an insulated snack bag at beach temperatures.
Soggy beach sandwiches are caused by moisture migration from wet fillings into the bread during the carry time. Prevention: use sturdy bread like sourdough, ciabatta, or thick-sliced whole grain rather than soft sandwich bread; apply peanut butter or a thick spread to both slices of bread as a moisture barrier before adding wet components; pack condiments separately in small sealed containers and add at the beach immediately before eating; wrap in wax paper rather than plastic wrap which traps and concentrates moisture; and keep the sandwich in the top of the beach bag away from ice packs whose condensation soaks through plastic wrap into bread. The PB&J is the most fundamentally soggy-proof beach sandwich available for structural reasons explained fully in Recipe 7.
The fruits that travel best to the beach are: whole grapes and frozen grape skewers (sealed, individually eaten, cold from cooler), whole clementines and mandarin oranges (self-peeling, no knife, no cooler needed), watermelon pre-cut into chunks in a sealed container (kept cold in cooler), frozen grape skewers (act as cold pack and snack simultaneously), whole small apples (naturally sealed, no refrigeration), and apple slices treated with lemon juice in a sealed container (cooler for 5–6 hours). Avoid: pre-sliced melon without a cooler, berries without a sealed container, bananas in direct sun, and any pre-cut fruit without proper cold storage. Whole citrus fruits require absolutely no cooler space and provide their own sand-proof packaging.
The most practical and most genuinely loved children's beach snacks combine immediate appeal, easy eating format, and nutritional substance for active swimming energy: frozen grape skewers from the cooler, squeeze pouches of homemade fruit puree, cheesy Goldfish cracker mix in individual bags, PB banana roll-ups, PB&J on sturdy bread, watermelon chunks with Tajín from the cooler, rice krispie treats individually wrapped, trail mix with chocolate chips and dried fruit in individual bags, energy balls from an insulated bag, and whole clementines for self-peeling fun. Avoid snacks requiring two hands, producing significant mess, or containing milk chocolate coatings that melt and transfer to sandy hands then faces.
The right beach snack list turns a beach day from a hungry, logistically stressful outing into a genuinely relaxed, genuinely well-fed summer experience — pack from the no-refrigeration list for the bulk of the bag, supplement the cooler with cold fruit and perishables, and make the oat bars, trail mix, and energy balls the week before beach season starts so you always have excellent snacks ready to grab on the way out the door.
Start with the trail mix and roasted chickpeas as the no-refrigeration foundation, the frozen grape skewers and watermelon chunks for the cooler, and the brown butter rice krispie treats as the sweet non-negotiable. Pair with our pool party food ideas, our healthy snacks, our 27 healthy watermelon recipes, and our picnic pasta salads for the complete summer outdoor eating collection. 🏖️🌊✨
Share This Post!
If this beach snack roundup has helped you pack the best beach bag of the summer, share it with every family heading to the beach this season! Pin it to your summer snack board and send it to anyone who has ever arrived at the beach with melted, soggy, or disappointing food and vowed to do better next time. 🏖️☀️✨
View More Recipes here Recipe Roundups





Comments
No Comments