
The pizza revelation that changed how I think about backyard cooking permanently happened on a Tuesday evening when I stretched a ball of dough, laid it directly on a screaming-hot grill, and watched it puff and char and blister in real time — and then flipped it, added toppings, and pulled off something that tasted more like Neapolitan pizza than anything I had ever produced from a home oven. Grilled pizza is genuinely, not rhetorically, better than oven pizza for the home cook — the grill's radiant heat from below and the reflected heat from a closed lid simultaneously creates a cooking environment that produces a charred, slightly smoky, crispy-bottomed pizza crust in under 5 minutes that no home oven, regardless of how hot it gets, can match. The char on the bottom of a grilled pizza crust is identical to the char at the best pizza restaurants in Naples, achieved at home on a $300 grill.
The technique that makes grilled pizza work is straightforward once understood but counterintuitive before the first attempt — the dough goes on the grill dry, without sauce or toppings, gets charred on one side, then gets flipped with the grilled side facing up and the toppings applied to that grilled side before the second side cooks. The grilled surface becomes the top of the finished pizza, and the second side that contacts the grill becomes the crispy bottom. Understanding this flip-and-top sequence eliminates the fear that most home cooks have about grilling pizza and makes the process as natural as grilling any other flat item.
This post covers the complete grilled pizza technique — dough preparation, grill setup, the flip-and-top method, timing, and the most common failure points — plus five specific grilled pizza combinations that are each genuinely outstanding: a classic margherita, a white pizza with ricotta and arugula, a prosciutto and fig version, a BBQ chicken version, and a Mediterranean vegetable version. Every combination takes under 10 minutes on the grill and every version produces something genuinely extraordinary that no home oven achieves.
Fire up the grill and make the best pizza of your life tonight!
WHY GRILLED PIZZA IS BETTER THAN OVEN PIZZA
- The Grill Reaches Temperatures No Home Oven Can: A home oven maxes out at 550°F. A grill with the lid down over its hottest burners reaches 600–700°F with radiant heat from below and reflected heat from the lid creating a convection effect that replicates a wood-fired pizza oven more closely than any conventional oven setup. Neapolitan pizza is cooked at 800–1000°F and what produces its characteristic charred, blistered, leopard-spotted crust is the intensity of that heat — a home grill at 600°F+ achieves a result that is the closest approximation available outside of a professional pizza oven.
- The Char Creates a Flavor That Baking Cannot: The grill's direct flame contact with the dough creates genuine Maillard browning and carbonization at the charred spots — a smoky, slightly bitter, deeply flavored complexity that is fundamentally different from the pale, even browning of oven-baked pizza. The char is not a mistake and not evidence of burning — it is the defining flavor characteristic of great grilled pizza, the same character that makes Neapolitan pizza at elite restaurants taste the way it does. A grilled pizza without char is merely a pizza cooked at high heat; a grilled pizza with char is something that has genuinely been transformed by the fire.
- Grilled Pizza Cooks in Under 5 Minutes: At proper grill temperature, a 10-inch pizza cooks in 4–5 minutes total — 2–3 minutes per side. A home oven pizza takes 12–18 minutes even at maximum temperature. The speed of grilled pizza is not just convenient — it is the mechanism by which the crust develops char without the interior becoming tough, producing the characteristic crispy-outside-soft-inside texture that defines great pizza crust.
- Individual Sizes Make Personalization Effortless: Grilled pizza works best in individual 8–10 inch portions — the size that fits comfortably on a hot grill zone, cooks evenly, and serves one person as a personal pizza or two people as a shared starter. Individual portions mean every person at the table can have exactly the toppings they want without the compromise of shared pizza, and the assembly-line approach — pre-shaped rounds of dough grilled in sequence — serves a group of 6–8 from a 45-minute grill session with continuous output rather than requiring everyone to wait while a single large pizza cooks.
- Grilled Pizza Is a Participatory Cooking Event: Grilling pizza at a dinner party is genuinely entertaining — guests gather around the grill, watch the dough puff and char in real time, choose their toppings from a spread, and receive their personal pizza directly from the grill. The interactive nature of grilled pizza makes it one of the most socially engaging cooking projects available for summer entertaining, and the combination of the activity, the aroma, and the genuinely extraordinary result makes it a dinner party format that guests remember and request specifically at subsequent gatherings.
INGREDIENTS
- The Pizza Dough (makes 4 individual 10-inch pizzas):
- 3.5 cups (420g) all-purpose or bread flour — bread flour produces a chewier, more elastic crust with better char characteristics; all-purpose produces a more tender, thinner result. Both work well for grilled pizza
- 1 packet (2.25 teaspoons) active dry yeast or instant yeast
- 1 teaspoon sugar
- 1.5 teaspoons kosher salt
- 1 tablespoon olive oil plus additional for shaping
- 1.25 cups warm water (110°F)
- Alternatively: 1 lb store-bought pizza dough divided into 4 portions — the most practical weeknight option that produces genuinely good results
- For the grill:
- Olive oil for brushing dough surfaces
- All toppings prepared and ready at the grill before cooking begins — grilled pizza moves very fast and there is no time to prepare toppings once the dough is on the grill
DIRECTIONS — THE GRILLED PIZZA TECHNIQUE
- Step No.1: Make the dough (or prepare store-bought)
If making from scratch: dissolve yeast and sugar in warm water and let stand 5–10 minutes until foamy — this confirms the yeast is alive and active. Combine flour and salt in a large bowl. Add yeast mixture and olive oil and mix until a shaggy dough forms. Turn onto a lightly floured surface and knead for 8–10 minutes until smooth, elastic, and slightly tacky but not sticky — the dough should spring back when poked. Alternatively, use a stand mixer with the dough hook for 6–7 minutes. Place in a lightly oiled bowl, cover with plastic wrap, and let rise at room temperature for 1–1.5 hours until doubled in size. Punch down, divide into 4 equal portions, shape into balls, and rest covered for 30 minutes before shaping. Make-ahead: the dough balls can be refrigerated for up to 3 days (slow cold fermentation significantly improves flavor) or frozen for up to 3 months — bring to room temperature for 1 hour before shaping. For store-bought dough, divide into 4 portions, roll into balls, and rest covered at room temperature for 30 minutes to relax the gluten for easier stretching.
- Step No.2: Set up the grill and prepare all toppings
Preheat all burners to high for a gas grill for a minimum of 15 minutes — the grates need to be genuinely hot, not just warm. Target 500–600°F at the grill surface. For charcoal, light a full chimney and wait until all coals are fully ashed over and glowing — spread in a single layer for maximum heat surface. Clean grates thoroughly with a wire brush while hot, then oil generously. Critically: prepare and organize every topping for every pizza before any dough goes on the grill. Every topping should be in small bowls or plates immediately beside the grill, sauce should be in a spoon-ready bowl, cheese should be pre-shredded, meats pre-cooked where necessary, and fresh herbs should be ready for finishing. There are only 60–90 seconds between flipping the dough and removing the finished pizza — insufficient time to retrieve or prepare any topping that isn't already at hand.
- Step No.3: Shape the dough rounds
Generously oil your hands and a clean work surface with olive oil rather than flour — oil prevents sticking without stiffening the dough the way flour does. Take one dough ball and press flat with your palm. Using your fingertips, press and stretch the dough outward from the center — work around the circumference pressing and stretching rather than pulling from one side. For a 10-inch round, this pressing and stretching process takes 2–3 minutes. Alternatively, hold the partially flattened dough by its edge between both hands and rotate slowly, allowing gravity to stretch it downward while you reposition your hands around the circumference. The dough should be approximately ⅛ inch thick — thin enough to develop char quickly but thick enough to have some interior softness. Irregular shapes and a slightly uneven edge are completely acceptable and part of grilled pizza's character. Brush one side generously with olive oil — this becomes the first side to contact the grill.
- Step No.4: First side — char the bottom
With confidence and decisiveness (hesitation produces a folded, uneven crust), lay the oiled dough directly onto the hot grill grates — oiled side down. The dough will immediately begin bubbling and puffing from the grill's heat as the yeast's CO2 expands rapidly. Do not touch the dough for the first 60–90 seconds. After 90 seconds, lift one edge gently with tongs — the underside should show distinct grill marks and light char spots and the dough should release cleanly from the grates without sticking. If it sticks, wait 30 more seconds and try again — properly charred dough releases on its own. Once the underside shows char and grill marks, brush the top (ungrilled) side generously with olive oil. The total first-side time is 2–3 minutes. Remove from the grill or have toppings immediately ready.
- Step No.5: Flip, top, and finish
Flip the dough so the charred side is now facing up — this charred side becomes the top of the finished pizza where the toppings go. Working quickly from the prepared topping setup beside the grill: spoon sauce across the charred surface in a thin layer (leaving ½-inch edge), scatter cheese, add toppings in a single thin layer. Less is more — overloaded toppings prevent the cheese from melting properly and the second side from cooking in time. Close the grill lid and cook for 60–90 seconds until the cheese is melted and bubbling and the bottom side has developed its own set of grill marks and char. Check by lifting with tongs — the bottom should be golden to lightly charred, not pale. Remove from the grill immediately to a cutting board. Finish with fresh herbs, a drizzle of good olive oil, or any post-grill additions. Slice and serve within 2 minutes of removal — grilled pizza cools and loses its appeal quickly.
THE 5 BEST GRILLED PIZZA COMBINATIONS
Classic Margherita Grilled Pizza
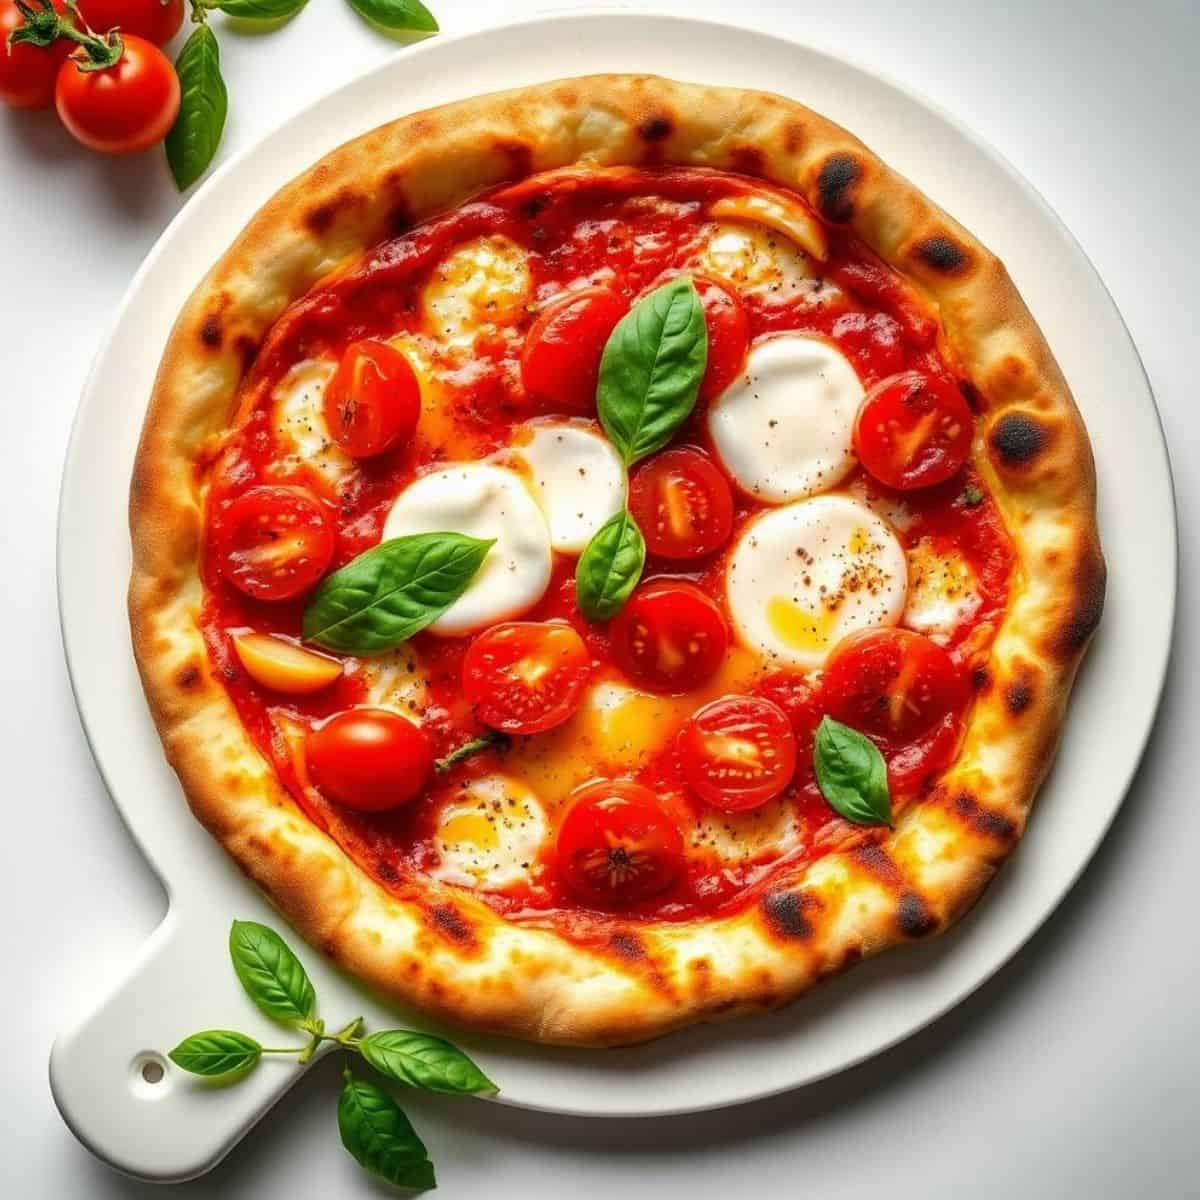
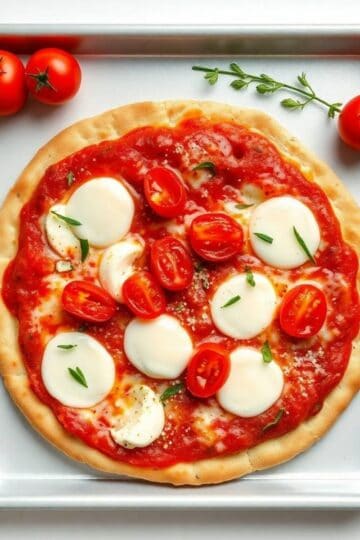
The simplest and often the best — a thin smear of crushed San Marzano tomato sauce (crushed tomatoes seasoned with salt, benefits of olive oil, and a pinch of sugar — never cooked), torn fresh mozzarella in small pieces rather than shredded, and 3–4 large fresh basil leaves added after the pizza comes off the grill. The margherita grilled pizza earns its place as the first combination on this list because it is the combination that most clearly demonstrates what the grill's char contributes — the tomato's brightness, the fresh mozzarella's milkiness, and the basil's fragrance against the charred, smoky crust is one of the most genuinely beautiful flavor combinations in Italian food and the grill produces it more authentically than any home oven. Finish with a generous drizzle of the best olive oil available and flaky sea salt scattered across the entire pizza immediately before slicing.
White Pizza with Ricotta, Lemon, and Arugula
No tomato sauce — instead, spread a generous layer of whole milk ricotta seasoned with lemon zest, garlic, salt, pepper, and a pinch of nutmeg across the charred surface after flipping. Scatter shredded mozzarella lightly, close the lid, and let the cheese melt. Off the grill immediately, pile a generous handful of fresh arugula (lightly dressed with lemon juice and olive oil) across the entire pizza so it wilts slightly from the residual heat. Finish with shaved Parmesan, red pepper flakes, and a drizzle of good olive oil. This white pizza is the most elegant and the most sophisticated of the five combinations — it has the flavor character of a genuine Roman pizza bianca elevated by the smoky char of the grill and the bright, peppery freshness of the arugula topping.
Prosciutto, Fig, and Burrata Grilled Pizza
Spread a thin layer of fig jam across the charred surface after flipping — the fig jam provides a sweet, slightly floral base that complements both the prosciutto's saltiness and the burrata's creaminess. Scatter shredded mozzarella lightly and close the lid for 60 seconds. Off the grill: drape 3–4 thin slices of prosciutto crudo across the hot pizza — the residual heat slightly crisps the prosciutto's edges while warming it through. Tear a ball of burrata and place pieces across the surface allowing the cream to spill out. Scatter fresh arugula, a drizzle of aged balsamic glaze, and fresh cracked black pepper. This is the dinner party pizza — the combination of fig, prosciutto, and burrata is one of Italian food's most celebrated flavor combinations and the charred grilled crust elevates it to genuinely extraordinary. See our grilled peaches with burrata for more burrata inspiration.
BBQ Chicken Grilled Pizza
Spread homemade or good-quality BBQ sauce as the base — use it as generously as tomato sauce. Top with shredded rotisserie chicken or leftover BBQ chicken tossed in additional BBQ sauce, shredded mozzarella, and a small amount of thinly sliced red onion. Close the lid for 60–90 seconds until cheese is melted and bubbling. Off the grill: scatter sliced scallions, a few fresh cilantro leaves, and a drizzle of additional BBQ sauce in a thin zigzag across the entire pizza. The BBQ chicken grilled pizza is the most crowd-pleasing and most universally loved of the five combinations — its familiar flavors and dramatic appearance make it the first to disappear at any gathering. Use leftover BBQ chicken from our BBQ chicken drumsticks for the best possible flavor.
Mediterranean Vegetable Grilled Pizza
Spread a thin layer of prepared hummus across the charred surface — hummus as pizza sauce is a genuinely extraordinary foundation that works with every Mediterranean topping. Scatter shredded mozzarella and crumbled feta across the hummus layer and close the lid for 60 seconds. Off the grill: top with roasted red peppers, halved cherry tomatoes, sliced Kalamata olives, thinly sliced cucumber, and a generous drizzle of good olive oil. Finish with fresh mint leaves, za'atar seasoning scattered generously, and lemon zest. This Mediterranean vegetable pizza is the most nutritionally complete and the most appropriate for vegetarian guests — it is also genuinely one of the best-tasting combinations on the list, the hummus base and the Mediterranean toppings producing a flavor coherence that is deeply satisfying. Find more Mediterranean pairings in our watermelon salad and our spicy cucumber salad.
TIPS FOR SUCCESS
- Preheat the Grill for a Full 15 Minutes Minimum: The most common grilled pizza failure — pale, undercooked crust that sticks to the grates — is caused by insufficient grill preheating. The grates need to be genuinely hot, not merely warm, before the first dough goes on. 15 minutes of preheating on all burners at high gets a gas grill to 500–600°F at the grate surface. Test the temperature by holding your hand 5 inches above the grates — at proper grilling temperature, you should be able to hold it there for only 1–2 seconds before the heat becomes uncomfortable. If you can hold it there comfortably for 5 seconds, the grill is not hot enough yet.
- Use Oil Not Flour for Shaping Grilled Pizza Dough: Flour on the work surface and flour on the dough burns immediately on a hot grill, producing white ash deposits and a bitter flavor on the bottom of the crust. Oil is the correct shaping surface for grilled pizza — it prevents sticking during shaping, adds flavor, and promotes even browning on the grill rather than burning. Oil your hands, oil the work surface, and oil the dough surface rather than dusting with flour at any point in the grilling preparation process.
- Keep Toppings Light and Pre-Cooked Where Necessary: Grilled pizza's second side cooks for only 60–90 seconds — not enough time to cook raw meat, raw vegetables with high moisture content, or any ingredient that needs genuine heat to develop properly. Raw sausage, raw mushrooms, raw bell peppers, and similar ingredients must be pre-cooked before they go onto the pizza. Fresh tomatoes should be drained of excess moisture. Sauce layers should be thin — a heavy, wet sauce layer prevents the cheese from melting in 60–90 seconds and makes the pizza soggy. The thinness of every layer is what makes grilled pizza work.
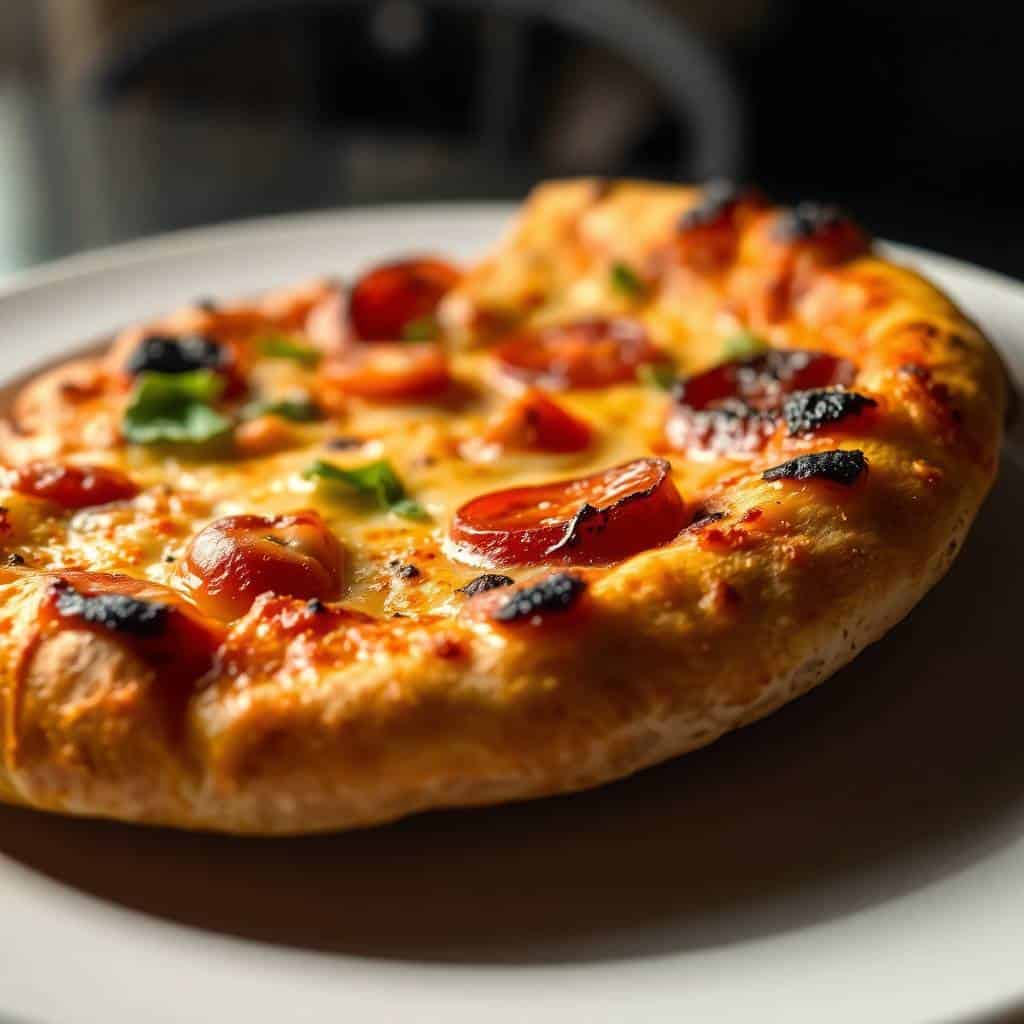
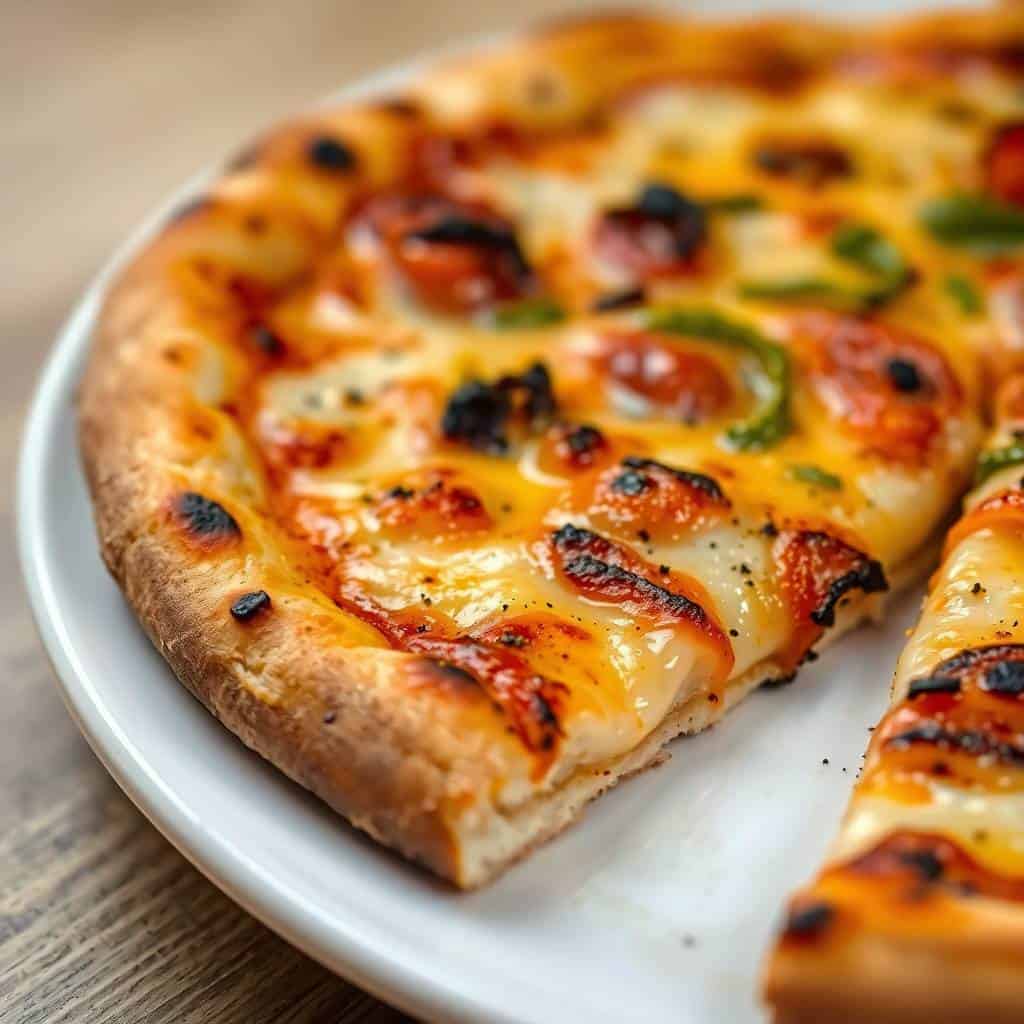
- Embrace the Char — It Is Not Burning: The dark spots on a properly grilled pizza crust are not evidence of burning — they are the characteristic leopard-spotted char that defines the world's best pizza. A pale, uniformly golden grilled pizza crust is an under-grilled pizza crust. The char provides a slightly bitter, smoky flavor note that balances the sweetness of the sauce and the richness of the cheese in a way that uniformly golden crust cannot. First-time grilled pizza makers consistently pull the pizza too early because the char spots look alarming — trust the process and the appearance, and leave the dough on until genuine char spots develop.
- Work One Pizza at a Time Until Comfortable with the Process: Grilling two or three pizzas simultaneously sounds efficient but produces chaos for a first-time grilled pizza maker — the flipping, topping, and removal of multiple pizzas at different stages simultaneously requires the kind of spatial awareness and speed that only comes from practice. Master the technique with a single pizza at a time for the first 2–3 grilled pizza sessions before attempting simultaneous multi-pizza production. The technique is genuinely fast — one 10-inch pizza every 5 minutes produces four pizzas for a group of four in 20 minutes, which is an entirely reasonable pace for a casual dinner party.
- Rest the Dough at Room Temperature Before Shaping: Cold dough from the refrigerator is significantly more resistant to stretching than room-temperature dough — cold gluten is tight and elastic, snapping back immediately when stretched rather than holding its stretched shape. A dough ball that has rested for 30–60 minutes at room temperature stretches to 10 inches in 2–3 minutes of gentle work; the same dough cold from the refrigerator requires 10 minutes of persistent effort and still springs back partially. Always rest dough balls at room temperature before shaping.
SERVING AND STORAGE
Serving
Serve grilled pizza immediately — within 2 minutes of removal from the grill for the crispiest, most impressive result. Transfer directly from grill to cutting board, slice with a pizza wheel or sharp knife, and bring the cutting board to the table. Grilled pizza served on a warm board retains heat better than pizza transferred to plates. For a dinner party format, cook pizzas in sequence and bring each one to the table as it comes off the grill — guests eating one pizza while the next is being grilled produces continuous engagement with the cooking process and ensures everyone receives hot, fresh pizza. Finish each pizza with a generous drizzle of your best olive oil, a crack of black pepper, and flaky sea salt regardless of the topping combination — these finishing touches take 10 seconds and elevate every version.
Storage
Grilled pizza is genuinely best eaten immediately and does not store or reheat as well as oven pizza — the thin charred crust softens quickly from the toppings' moisture during storage. Leftover grilled pizza stores refrigerated for 1 day and reheats best in a dry skillet over medium-high heat for 2–3 minutes until the bottom crisps again — this skillet reheating restores significant crispness to the bottom crust. Do not microwave grilled pizza. Uncooked dough balls store refrigerated for 3 days and frozen for 3 months. Partially grilled dough (first side only, before topping) can be prepared hours ahead, stacked with parchment between pieces, and refrigerated until topping and finishing — this advance grilling is the most practical approach for feeding a large crowd efficiently.
FAQ
Grilled pizza dough sticks to the grill for one of three reasons: insufficient grill preheating (grates that are not fully hot allow dough to stick before it caramelizes and releases), under-oiled grates (dry grates have no non-stick surface between the dough and the metal), or dough that was shaped with flour rather than oil (flour burns on the grill and creates a sticky, charred layer rather than the clean release of oiled dough). The solution is three steps: preheat the grill for a full 15 minutes on high, oil the grates generously immediately before adding dough, and use only oil for shaping. Dough placed on a properly preheated, well-oiled grill with oil rather than flour on its surface releases cleanly after 90 seconds without sticking.
Yes — store-bought pizza dough works excellently for grilled pizza and is the recommended approach for anyone making grilled pizza for the first time. Divide 1 pound of store-bought dough into 4 equal portions, roll into balls, and rest covered at room temperature for 30–60 minutes before shaping. The resting period relaxes the gluten that was tightened during commercial processing and makes the dough significantly easier to stretch. Whole Foods, Trader Joe's, and most grocery store bakery sections sell fresh pizza dough in 1-pound portions. For the best flavor from store-bought dough, refrigerate it overnight before use — 24 hours of cold fermentation in the refrigerator produces a noticeably more flavorful, more complex dough without any additional preparation.
Yes — charcoal produces the best grilled pizza of any heat source available to home cooks. The radiant heat from fully lit charcoal reaches higher temperatures than most gas grills and produces a more genuinely wood-fired character with slight smoke flavor that complements the charred crust. Use a full chimney of charcoal spread in a single layer for maximum heat surface. The technique is identical to gas grilling — the only difference is that charcoal temperature management is less precise, so monitor the first-side browning more carefully and adjust timing based on visual cues rather than a fixed timer. A properly prepared charcoal fire for grilled pizza produces a result that is genuinely closer to professional pizza oven pizza than any gas grill preparation.
Grilled pizza dough should be stretched to approximately ⅛ inch thick — thin enough to cook through completely in the 4–5 minutes of total grill time and develop a crispy texture, but thick enough to have some structural integrity for flipping and to provide the slightly chewy interior that distinguishes good pizza from crackers. Dough stretched too thin tears during flipping, burns before the toppings heat through, and produces a brittle final texture. Dough left too thick produces a doughy, undercooked interior since the exterior chars before the interior has time to cook. The ⅛-inch thickness produces visible slight transparency in the thinnest areas of the stretched dough — this is the visual indicator of correct thickness.
Grilled pizza crust burns on the bottom when the second side stays on the grill too long after the toppings are added — the bottom crust is in continuous direct contact with the hottest part of the grill while the toppings melt. The solution is to keep the lid closed during the topped second side and watch the cheese melt rather than timing the bottom crust — when the cheese is fully melted and bubbling, the pizza is done regardless of how long it has been on the grill. On very hot grills, this may be as short as 45 seconds. Having a slightly cooler zone on the grill to move the pizza to if needed provides additional control — sliding to an area with slightly lower heat for the topped second side extends the melting time without burning the bottom.
Grilled pizza is the backyard cooking project that produces the most surprised, most enthusiastic responses of any summer preparation — master the flip-and-top technique, preheat the grill properly, and embrace the char for pizza that genuinely rivals the best pizza restaurants from your own backyard.
Start with the margherita to master the technique, then work through the prosciutto and fig and the BBQ chicken for the most impressive and the most crowd-pleasing results. Pair with our grilled shrimp skewers, our grilled chicken marinades, and our grilled peaches with burrata for the complete summer grill collection. 🍕🔥✨


GRILLED PIZZA RECIPE (CRISPY, SMOKY, AND BETTER THAN THE OVEN)
Equipment
- Grill
- Rolling Pin
- Pizza peel or spatula
- Brush
Ingredients
Dough:
- 1 lb pizza dough
Sauce:
- ¾ cup pizza sauce
Cheese:
- 2 cups mozzarella cheese shredded
Toppings:
- ½ cup pepperoni
- ½ cup bell peppers sliced
- ¼ cup red onion sliced
- 2 tablespoon olive oil
Optional Finish:
- fresh basil
- red pepper flakes
Instructions
Prep Grill:
- Preheat grill to medium-high heat. Clean grates and lightly oil them to prevent sticking.
Prepare Dough:
- Roll out pizza dough into thin rounds or rectangles. Brush lightly with olive oil.
Grill First Side:
- Place dough directly on grill. Cook for 2–3 minutes until grill marks appear and bottom is set.
Flip & Add Toppings:
- Flip dough quickly. Spread sauce, add cheese, and toppings immediately.
Finish Cooking:
- Close grill lid and cook for 3–5 minutes until cheese is melted and crust is crispy.
Serve:
- Remove from grill, top with fresh basil and red pepper flakes, slice, and serve hot.
Notes
- Keep toppings light so dough cooks evenly.
- Work quickly after flipping dough.
- Try different sauces like BBQ or pesto for variation.

Comments
No Comments