
If there is one dessert that consistently stops conversations, earns gasps of admiration when sliced, and tastes every bit as extraordinary as it looks — this Red Velvet Cake Roll is exactly that dessert. A thin, tender, brilliantly red velvet sponge cake wrapped around a silky, tangy cream cheese filling to reveal the most beautiful spiral with every single slice — this is genuinely one of the most visually impressive and most genuinely delicious desserts available to make at home, and it is far more approachable than its spectacular appearance suggests.
The magic of a cake roll lies in the contrast between the delicate, flexible red velvet sponge and the cool, luscious cream cheese filling that fills every inch of the spiral. The sponge is made with cocoa powder, red food coloring, white vinegar, and buttermilk — the classic red velvet combination that produces its characteristic mild cocoa flavor, brilliant color, and tender, flexible crumb. The cream cheese filling is a classic blend of softened cream cheese, butter, powdered sugar, and vanilla that is simultaneously rich and tangy — the perfect counterpoint to the sweet, lightly chocolatey sponge surrounding it.
The technique for making a Red Velvet Cake Roll requires a few specific steps that are genuinely important — rolling the warm cake immediately after baking in a powdered-sugar-dusted kitchen towel, allowing it to cool completely in that rolled shape, and then unrolling, filling, and re-rolling without the towel. These steps are straightforward once you understand the reasoning behind them, and the result is a cake roll that holds its spiral shape cleanly and slices beautifully. Find more stunning dessert inspiration in our easy homemade cake recipes and our red velvet cake with cream cheese frosting.
Whether you are baking this for Valentine's Day, a Christmas celebration, a birthday dinner, or simply because you want to serve something genuinely extraordinary — this Red Velvet Cake Roll delivers a result that looks like it came from a professional bakery and tastes even better than it looks. Let's roll the most stunning, most delicious dessert of the entire season!

WHY YOU WILL LOVE THIS RECIPE
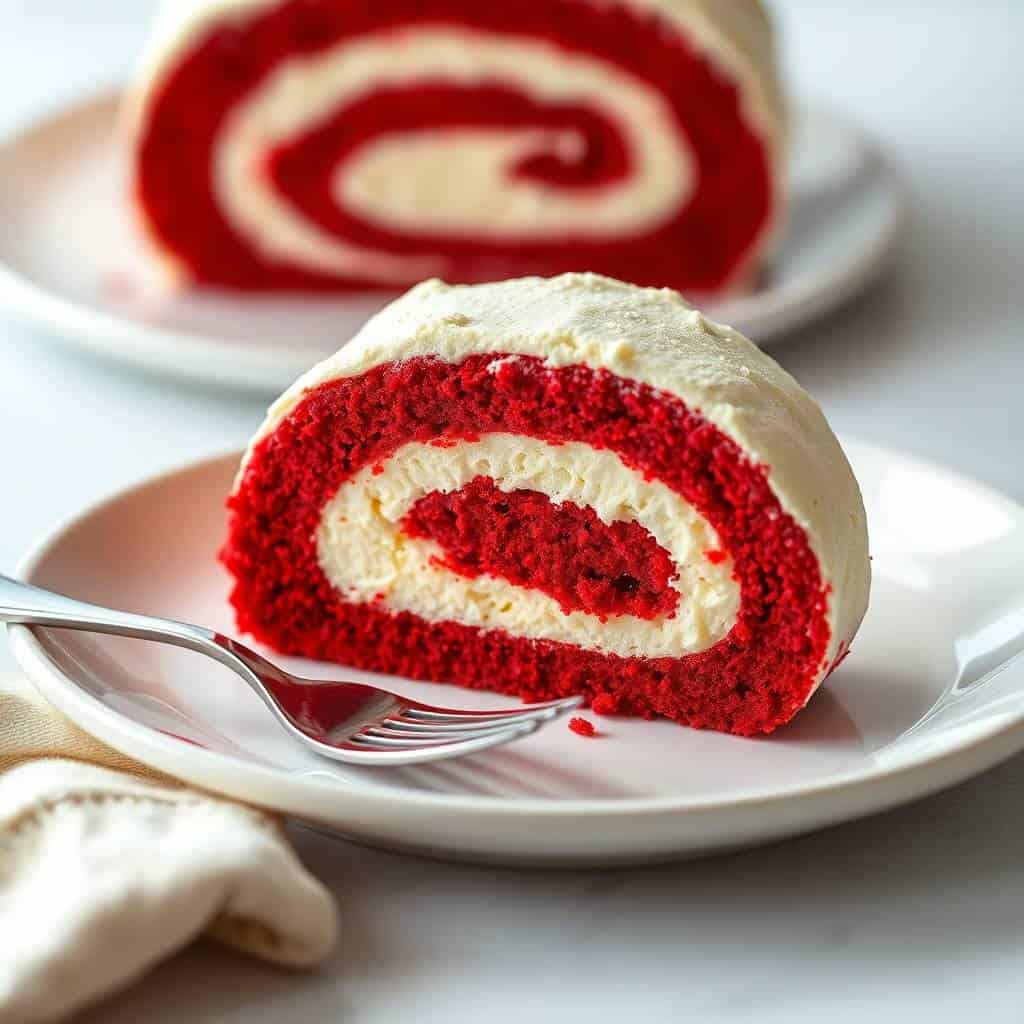
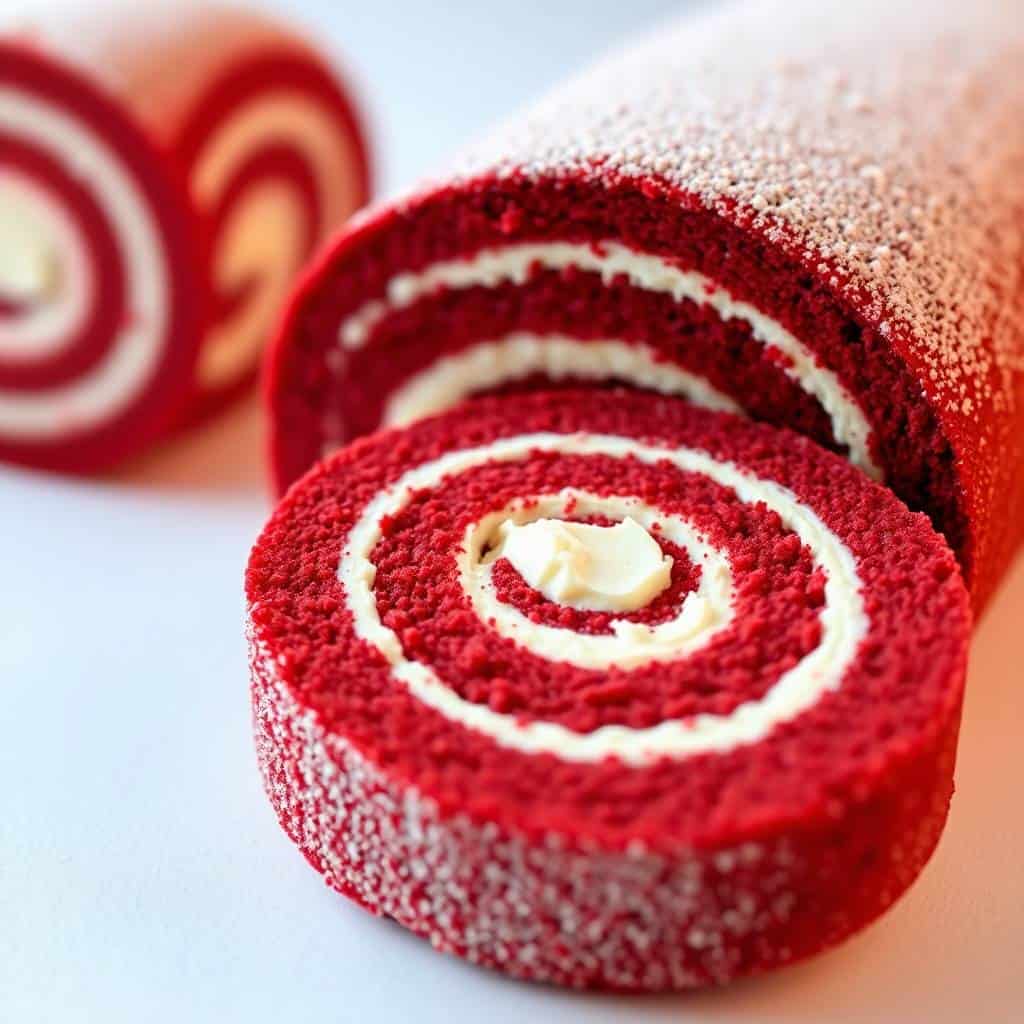
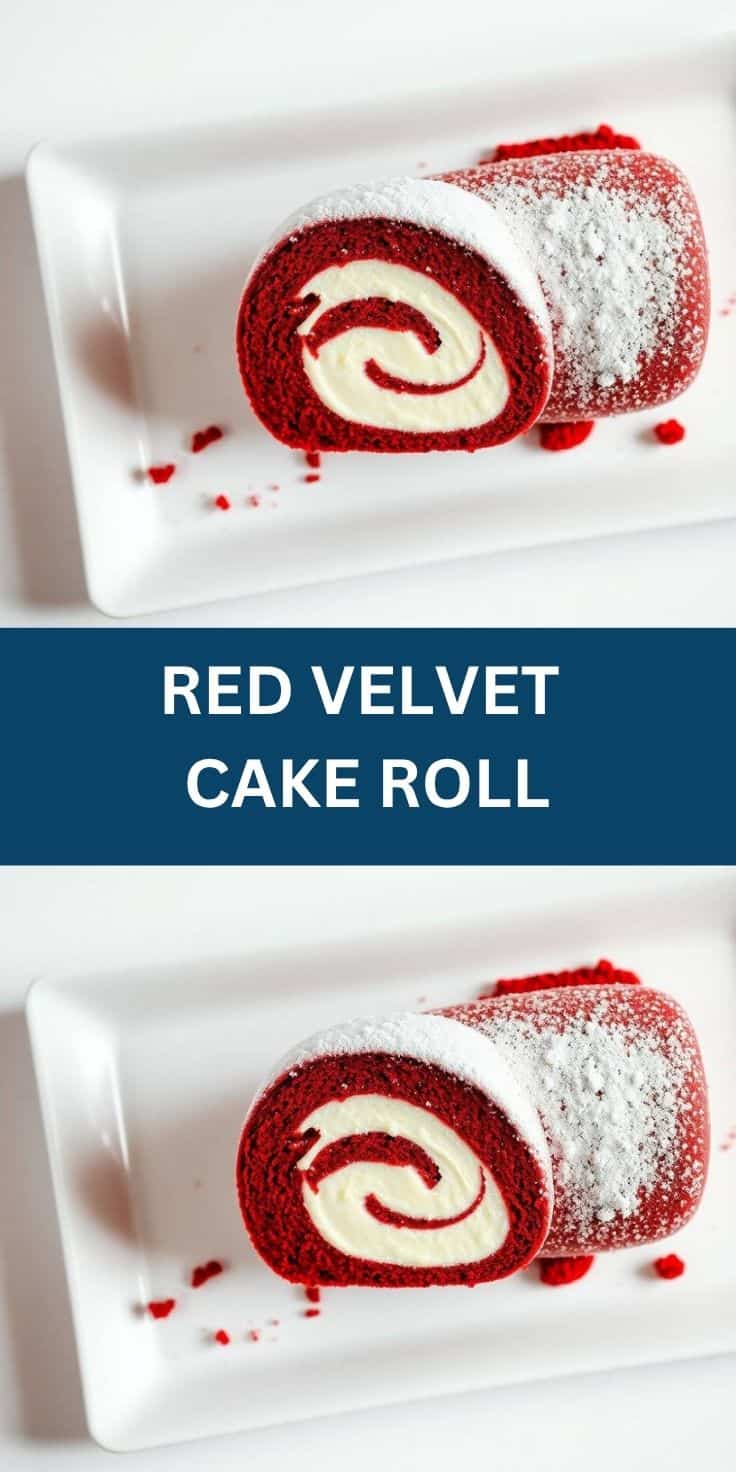
- Stunning Spiral Presentation: Every slice of this cake roll reveals a beautiful, dramatic red and white spiral that makes it one of the most visually impressive desserts available to serve at any gathering. It photographs beautifully, looks extraordinary on a dessert table, and earns enthusiastic responses from every guest who sees it before they even taste it.
- Perfect Balance of Flavors: The combination of the light cocoa and subtle tang of the red velvet sponge with the rich, sweet-tangy cream cheese filling creates a flavor balance that is genuinely extraordinary — neither too sweet, nor too rich, nor too subtle. Every bite delivers the full red velvet cheesecake flavor experience in perfect proportion.
- Ideal for Special Celebrations: With its bold red color and festive spiral appearance, this cake roll is perfectly suited to Valentine's Day, Christmas, holiday parties, romantic dinners, and birthdays — any occasion where a genuinely spectacular, genuinely delicious dessert is the most welcome contribution to the table.
- Simple Pantry Ingredients: Despite its impressive appearance, this cake roll uses only standard pantry staples — flour, cocoa powder, eggs, sugar, buttermilk, vinegar, red food coloring, cream cheese, butter, powdered sugar, and vanilla. There are no specialty ingredients and no unusual equipment required beyond a standard jelly roll pan and a clean kitchen towel.
- Make-Ahead Friendly: This cake roll can be fully assembled the day before serving — the chilling time actually improves both the flavor and the structural integrity of the roll, making day-ahead preparation not just acceptable but genuinely recommended. It is one of the most genuinely stress-free spectacular desserts available for entertaining.
- Soft, Moist, and Genuinely Delicious: The red velvet sponge is tender, flexible, and genuinely delicious — it bakes in just 12–15 minutes into a cake that is soft enough to roll without cracking when handled correctly, and remains moist and tender even after chilling. The combination of the cool, firm cream cheese filling and the soft sponge creates a genuinely extraordinary textural experience.
- Universally Loved: This cake roll earns enthusiasm from both children and adults, from casual home bakers and experienced pastry enthusiasts. Its familiar red velvet flavor combined with the beloved cream cheese filling makes it genuinely one of the most crowd-pleasing desserts available at any level of baking skill.
INGREDIENTS
For the Red Velvet Sponge
- ¾ cup all-purpose flour — spoon and level when measuring
- ¼ cup unsweetened cocoa powder — use good quality cocoa for the best flavor depth
- 1 teaspoon baking powder
- ¼ teaspoon salt
- 4 large eggs, at room temperature
- ¾ cup granulated sugar
- 1 tablespoon vegetable oil
- 1 teaspoon pure vanilla extract
- 1 teaspoon white vinegar — activates the baking powder and works with the cocoa for the classic red velvet reaction
- 1 tablespoon red food coloring (gel preferred for the most vibrant color)
- ¼ cup buttermilk
- ¼ cup powdered sugar for dusting the kitchen towel
For the Cream Cheese Filling
- 8 oz cream cheese, softened to true room temperature
- ¼ cup unsalted butter, softened
- 1 cup powdered sugar, sifted
- 1 teaspoon pure vanilla extract
DIRECTIONS
- Step No.1: Preheat the oven and prepare the pan
Preheat your oven to 350°F (175°C). Line a 10x15-inch jelly roll pan with parchment paper, leaving an overhang on all sides for easy removal. Lightly grease the parchment. While the oven preheats, lay a clean kitchen towel flat on the counter and dust it generously and evenly with ¼ cup of powdered sugar — this powdered-sugar-dusted towel is what the warm cake will be turned onto immediately after baking.
- Step No.2: Mix the dry ingredients
In a medium bowl, whisk together the flour, cocoa powder, baking powder, and salt until evenly combined. Whisking ensures the cocoa and leavening are distributed through the flour consistently — lumps of cocoa in the finished batter produce uneven color and flavor in the baked sponge.
- Step No.3: Beat the eggs and sugar
Using a hand mixer or stand mixer, beat the eggs and granulated sugar together on high speed for 3–5 full minutes until the mixture is genuinely thick, dramatically increased in volume, and has turned pale yellow with a ribbon-like consistency when the beaters are lifted. This extended beating creates the air structure that gives the sponge its lightness and flexibility — it is the most critical mixing step in the entire recipe and should not be shortened.
- Step No.4: Add the wet ingredients and color
Reduce the mixer to low speed and add the vegetable oil, vanilla extract, white vinegar, buttermilk, and red food coloring. Mix until just evenly combined and uniformly red throughout. Gradually fold in the dry ingredients using a rubber spatula — fold gently in sweeping motions from the bottom of the bowl upward, incorporating the flour without deflating the air beaten into the egg mixture. Stop folding the moment no streaks of flour remain.
- Step No.5: Bake the sponge
Pour the batter into the prepared jelly roll pan and spread it into an even, consistent layer that reaches all four corners of the pan. An uneven layer produces a sponge of inconsistent thickness that bakes unevenly and is more likely to crack during rolling. Bake for 12–15 minutes until the cake springs back firmly when touched in the center and the edges are just beginning to pull away from the sides of the pan. Do not overbake — an overbaked sponge loses flexibility and will crack when rolled.
- Step No.6: Roll the warm cake immediately
The moment the cake comes out of the oven — this step cannot wait — immediately invert it onto the powdered-sugar-dusted kitchen towel. Gently peel off the parchment paper. Starting from one of the short ends, roll the warm cake up tightly inside the towel. Place the rolled cake seam-side down and allow it to cool completely at room temperature — at least 1 hour. Rolling while warm is what trains the cake into its spiral shape without cracking; a cold cake cannot be rolled without breaking.
- Step No.7: Make the cream cheese filling
While the rolled cake cools, beat the softened cream cheese and softened butter together on medium speed until completely smooth and uniformly combined with no lumps remaining. Add the sifted powdered sugar and vanilla extract and beat on medium-high for 2 minutes until the filling is light, fluffy, and smooth. A lumpy filling will create gaps and uneven thickness in the finished roll — ensure both the cream cheese and butter are genuinely at room temperature before mixing.
- Step No.8: Fill and re-roll
Once the cake is completely cooled, carefully unroll it from the towel — work slowly and gently as a rushing hand can tear the sponge at this stage. Spread the cream cheese filling evenly across the entire surface of the unrolled cake, reaching all edges but leaving a ½-inch border at the far end to prevent overflow when rolling. Starting from the same end as before, gently but firmly re-roll the cake without the towel. The filling should be even and consistent throughout the entire spiral.
- Step No.9: Chill, slice, and serve
Wrap the completed cake roll tightly in plastic wrap and refrigerate for at least 1 hour — and ideally 2–3 hours or overnight. The chilling firms the cream cheese filling, helps the roll hold its spiral shape, and allows the flavors to meld beautifully. When ready to serve, unwrap and place seam-side down on a serving platter. Dust generously with powdered sugar and slice with a sharp knife, wiping the blade clean between cuts for the most precise, most beautiful spiral slices.
TIPS FOR SUCCESS
- Roll the Cake the Moment It Comes Out of the Oven: This is the single most critical technique step in the entire recipe. A warm, freshly baked sponge is flexible and pliable — it will roll into a tight spiral without cracking. A cold sponge has set and stiffened and will crack the moment you attempt to roll it. Prepare your towel, have it dusted and ready, and roll the cake within 2–3 minutes of coming out of the oven.
- Do Not Overbake the Sponge: An overbaked sponge loses its moisture and flexibility — the two properties most essential for successful rolling. The cake is properly done when it springs back when touched in the center and the edges just begin to pull away from the pan. Remove it from the oven at this point, even if it looks slightly pale, because it will continue to set from residual heat after removal.
- Always Line the Pan with Parchment: Parchment paper is genuinely essential — not optional — for this recipe. A cake that sticks to the pan will tear when inverted onto the towel, making rolling impossible. The parchment ensures a completely clean, complete release of the sponge onto the towel without tearing or losing any portion of the delicate cake.
- Cool Completely Before Adding the Filling: Adding cream cheese filling to a warm cake causes it to melt immediately and run out of the roll rather than staying in place as the distinct, beautiful spiral layer. Wait for the rolled cake to cool completely to room temperature — at least 1 full hour — before unrolling and spreading the filling.
- Spread the Filling Evenly: An uneven filling layer creates gaps in some spiral sections and overflow in others when the cake is re-rolled. Spread the filling consistently from edge to edge, leaving only a small ½-inch border at the far end. A small offset spatula is the most effective tool for achieving an even, consistent filling layer across the entire sponge surface.
- Always Chill Before Slicing: The minimum 1-hour refrigeration after filling and re-rolling is genuinely essential for clean slices. Slicing a unchilled cake roll produces compressed, smeared spiral layers. Chilling firms the cream cheese filling into a stable, sliceable consistency that maintains its distinct spiral structure when the knife passes through.
- Use Plenty of Powdered Sugar on the Towel: The powdered sugar on the towel serves two purposes — it prevents the warm cake from sticking to the towel during rolling and cooling, and it gives the outer surface of the finished roll a beautiful snowy dusted appearance. Use a generous amount and spread it evenly across the entire surface of the towel before inverting the cake.
VARIATIONS
- Chocolate Chip Filling: Fold ¼ cup of mini chocolate chips into the cream cheese filling before spreading for extra texture, rich chocolate flavor, and beautiful dark flecks visible in the spiral of each slice. Mini chips rather than standard-size distribute more evenly through the filling without creating lumpy patches.
- Berry Filling: Fold 3 tablespoons of finely chopped fresh strawberries or raspberries into the cream cheese filling for a fruity, refreshing variation that is particularly stunning visually — the red berry pieces echo the color of the sponge and create an extraordinary-looking spiral.
- Nutty Delight: Sprinkle ¼ cup of finely chopped toasted pecans or walnuts over the cream cheese filling before rolling for a subtle crunch and nutty flavor that adds genuine complexity to every slice. Toast the nuts first in a dry skillet for 3 minutes to maximize their flavor.
- Holiday Spice Version: Add ½ teaspoon of ground cinnamon and a pinch of nutmeg to the sponge batter for a warmly spiced red velvet version that is especially perfect for fall and winter holiday gatherings. The spices complement the cocoa beautifully.
- Natural Food Coloring Version: Substitute the red food coloring with 2 tablespoons of beet powder or concentrated natural red dye for a naturally colored version. The color will be slightly less vivid than with gel food coloring but still beautiful, and the beet powder adds no detectable flavor to the finished sponge.
- Mini Cake Rolls: Divide the batter between two smaller pans and bake for a slightly shorter time to create individual-sized red velvet rolls — perfect for dinner parties where individual plated desserts are more elegant than a shared sliced roll.
SERVING AND STORAGE
Serving
Slice the chilled Red Velvet Cake Roll into 1-inch rounds using a sharp knife wiped clean between cuts for the cleanest, most dramatic spiral presentation. Serve each slice on a dessert plate with a small dollop of whipped cream and a few fresh berries alongside for the most elegant, most restaurant-worthy dessert presentation. A light dusting of powdered sugar over each slice just before serving adds a beautiful finishing touch. This cake roll is genuinely equally impressive served at a formal holiday dinner and at a casual family celebration.
Storage
Wrap the cake roll tightly in plastic wrap and store in the refrigerator for up to 4 days — the flavor and texture remain genuinely excellent throughout this storage period. For freezing, freeze the cake roll without the cream cheese filling — wrap the plain rolled sponge in plastic wrap and then foil and freeze for up to 2 months. Thaw overnight in the refrigerator, then fill and re-roll before serving. Do not freeze the filled cake roll as the cream cheese filling changes texture unpleasantly through the freeze-thaw cycle.
FAQ
Freeze the cake roll without the filling for best results — wrap the plain rolled sponge in plastic wrap and then foil and freeze for up to 2 months. Thaw overnight in the refrigerator, then prepare the cream cheese filling, unroll gently, fill, and re-roll before serving. Do not freeze the filled roll as the cream cheese filling changes texture and the filled roll does not thaw well.
Cracks almost always occur for one of two reasons — the cake was allowed to cool before rolling, or the cake was overbaked and lost its moisture and flexibility. Always roll the cake while it is still warm from the oven, within 2–3 minutes of removal. If the cake is even slightly cool before rolling it will crack. Also check your baking time — remove the cake the moment it springs back when touched, even if it looks slightly pale.
Yes — beet powder or concentrated natural red dye are both good alternatives to artificial red food coloring. The color will be somewhat less vivid and more of a deep burgundy than a brilliant scarlet, but the cake will still be beautiful. Use approximately 2 tablespoons of beet powder for a comparable color intensity to 1 tablespoon of gel food coloring.
Two factors prevent filling overflow during slicing — not overfilling the cake (leave a ½-inch border at the far end), and chilling the roll for a full 1–2 hours before slicing. The chilling firms the cream cheese filling into a stable, sliceable consistency. Always use a sharp knife and wipe it clean between each cut for the cleanest slices with the most defined spiral layers.
Absolutely — this cake roll is genuinely best made the day before serving. The overnight chilling allows the cream cheese filling to firm completely, the flavors to meld and develop, and the spiral structure to stabilize. Take it out of the refrigerator 10–15 minutes before slicing for the most beautiful, most cleanly sliced result.
Whether you are baking this Red Velvet Cake Roll for a holiday dinner, a romantic Valentine's evening, or just a personal indulgence, this cake fits every special occasion and every mood. The balanced flavor between the light cocoa sponge and the creamy tang of the filling keeps every bite genuinely interesting and deeply satisfying — and the chilled texture makes it simultaneously refreshing and rich.
Make this cake roll once and it will become your new dessert tradition — the one that guests request by name, the one that photographs most beautifully, and the one that proves genuinely spectacular results are achievable at home. Find more stunning dessert inspiration in our easy homemade cake recipes and our easy summer desserts. 🎂✨
>
RED VELVET CAKE ROLL
Ingredients
For the Cake:
- ¾ cup all-purpose flour
- ¼ cup unsweetened cocoa powder
- 1 teaspoon baking powder
- ¼ teaspoon salt
- 4 large eggs
- ¾ cup granulated sugar
- 2 tablespoons vegetable oil
- 1 teaspoon vanilla extract
- 1 teaspoon white vinegar
- 1 tablespoon red food colouring
- ¼ cup buttermilk
For the Filling:
- 8 ounces cream cheese softened
- ¼ cup unsalted butter softened
- 1 teaspoon vanilla extract
- 1 ¼ cups powdered sugar
Instructions
- Preheat Oven: Preheat oven to 350°F (175°C). Line a 10x15-inch jelly roll pan with parchment paper and lightly grease it.
- Make the Batter: In one bowl, whisk flour, cocoa, baking powder, and salt. In another, beat eggs and sugar until fluffy. Add oil, vanilla, vinegar, and red food colouring. Mix in the dry ingredients alternately with buttermilk until smooth.
- Bake the Cake: Pour batter into the pan and spread evenly. Bake for 12–15 minutes, or until the top springs back when touched.
- Roll the Cake: While warm, invert the cake onto a towel dusted with powdered sugar. Peel off parchment and roll the cake (with the towel) from the short side. Cool completely.
- Make the Filling: Beat cream cheese, butter, vanilla, and powdered sugar until smooth and fluffy.
- Assemble: Unroll the cooled cake, spread the filling evenly, then roll it back up without the towel. Wrap in plastic and refrigerate for at least 1 hour before slicing.
Notes
- Make Ahead: Can be prepared a day ahead and stored in the fridge.
- Variations: Add chocolate chips to the filling or drizzle melted chocolate on top.
- Serving Suggestion: Dust with powdered sugar or top with whipped cream for an elegant presentation.





Comments
No Comments