
I've been making these Italian pinwheels for every gathering I host for the past two years, and they're the first thing to disappear off the platter — every single time. What I love about them is they require zero cooking, which matters when you're already juggling three other dishes the day before a party. You just layer, roll, chill, and slice. That's genuinely it.
The combination of Genoa salami, deli ham, and provolone with a herbed cream cheese spread is what makes these work. The cream cheese acts as the glue that keeps everything together, and mixing Italian seasoning right into it means the flavor goes all the way through — not just in the filling. I tried a version once with just plain cream cheese and it tasted flat. Don't skip the seasoning in the spread.
I usually make these for birthday parties, Eid gatherings, and honestly sometimes just for a Friday movie night when I want something that feels a little special without much effort. My husband eats three or four before I've even finished slicing. Saad thinks they look like sushi, which is apparently a compliment in nine-year-old terms. If you're looking for something else that's no-cook and great for a party table, my cheesy jalapeño shortbread goes really well alongside these.
One thing to know going in: the chill time matters. I skipped it once because I was in a rush and the pinwheels fell apart the moment I started slicing. An hour in the fridge is the minimum — overnight is even better. The roll firms up and you get those clean, pretty slices instead of a sad squished mess.
Why You'll Love This Recipe
- Zero cooking required: I cannot overstate how much this matters when you're hosting. There's no oven, no stovetop, no timing stress. You assemble everything the night before, wrap the rolls in plastic wrap, and pull them out when guests arrive. On days when I'm already making a main dish and a dessert, having one thing that needs absolutely no heat is a genuine relief.
- Makes ahead beautifully: These actually taste better after a night in the fridge. The cream cheese has time to set, the flavors meld together, and the tortilla softens just slightly from the moisture in the filling — in a good way. I'll often make a double batch on Friday night and we're snacking on them through the weekend.
- Travels well: I've packed these for potlucks, school events, and one very long road trip where they held up in a cooler for six hours. As long as you keep them chilled, they stay fresh and hold their shape. No reheating, no plates required — just slice and put them on a tray.
- Easy to customize: I've made these with pepper jack instead of provolone, swapped the ham for turkey, added a thin layer of pesto under the cream cheese — every version has worked. The base recipe is flexible enough that you can use whatever's already in your fridge without having to run to the store.
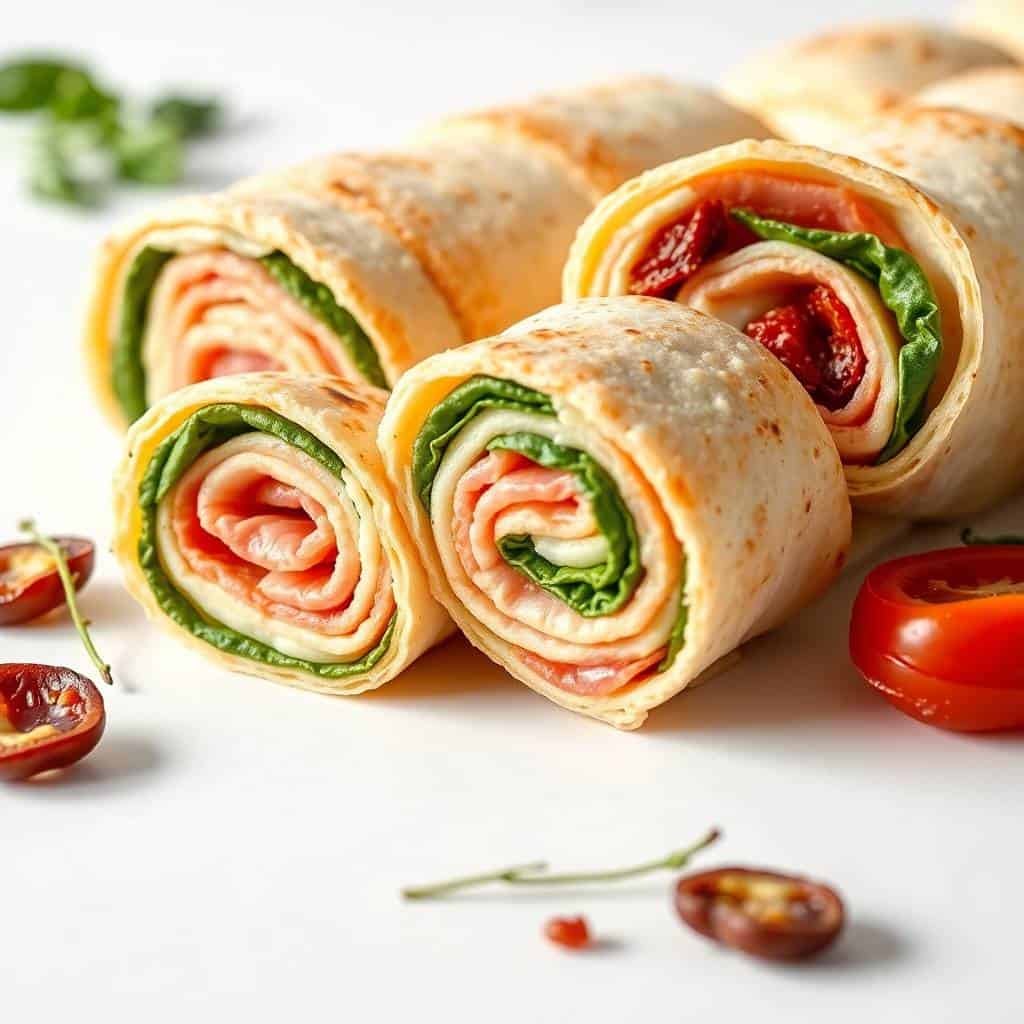
- Looks impressive with almost no effort: When you slice these and fan them out on a platter, they look like you spent real time on them. The layers of red peppers, green spinach, and the marbled salami make each slice look colorful and put-together. I've had guests ask me for the recipe at literally every party I've brought them to.
Ingredients
- 4 large flour tortillas
- 8 slices Genoa salami
- 8 slices deli ham
- 8 slices provolone cheese
- ½ cup cream cheese, softened (leave it out for 15 minutes before you start)
- ¼ cup sliced pepperoncini, optional
- ½ cup baby spinach leaves
- ¼ cup roasted red peppers, chopped and patted dry
- 1 tablespoon Italian seasoning
- Salt and pepper to taste
Directions
- Step 1: Make the cream cheese spread — In a small bowl, mix the softened cream cheese with Italian seasoning, salt, and pepper until smooth and spreadable. This is the base flavor for the whole pinwheel, so taste it and adjust the seasoning before you spread it.
- Step 2: Spread the tortilla — Lay one large flour tortilla flat on your work surface. Spread a thin, even layer of the cream cheese mixture all the way to the edges. Getting it even matters — bare spots mean the filling won't stick and the roll can unravel.
- Step 3: Layer the meats and cheese — Place 2 slices each of salami, ham, and provolone in an even layer over the cream cheese. Keep the slices flat and slightly overlapping so you get filling in every bite when you slice it.
- Step 4: Add the vegetables — Scatter a small handful of spinach leaves and a tablespoon or so of chopped roasted red peppers over the meat layer. If you're using pepperoncini, add them here. Don't pile it high — the more you add, the harder it is to roll tightly.
- Step 5: Roll and wrap — Starting from the edge closest to you, roll the tortilla firmly and tightly into a log. The tighter the better. Wrap it snugly in plastic wrap, twisting the ends to seal. Repeat with all four tortillas. Refrigerate for at least 1 hour, though overnight is ideal.
- Step 6: Slice and serve — Unwrap each roll and use a sharp knife to slice into rounds about 1 inch thick. A serrated knife works well here — saw gently rather than pressing down so the roll doesn't squish. Arrange on a platter and serve cold or at room temperature.

Tips for Success
- Use room temperature cream cheese: Cold cream cheese is stiff and tears the tortilla when you try to spread it. I learned this the hard way my first time — I ended up with clumped, patchy cream cheese and ripped tortillas. Just set it out on the counter for 15 minutes while you prep everything else and it spreads beautifully.
- Pat your vegetables dry: Roasted red peppers from a jar carry a lot of liquid. If you don't dry them before adding them to the tortilla, that moisture seeps into the cream cheese and you end up with soggy pinwheels by serving time. Same goes for fresh spinach if it's been washed — give it a quick pat with a paper towel first.
- Roll tight and chill long: These two things work together. A tight roll means the layers compress and stick together. The chill time lets the cream cheese firm up and set around the filling. Skip either one and your pinwheels will fall apart when sliced. I've done it both ways and the difference is huge.
- Use a sharp knife and a gentle hand: A sharp chef's knife or serrated bread knife is what you want here. Press down firmly and smoothly rather than sawing back and forth, which drags the filling. If the knife feels like it's squishing the roll, it's not sharp enough. Wiping the blade between cuts also helps keep the slices clean.
- Don't overfill: I know it's tempting to load these up, but a thinner, more controlled layer of filling actually gives you a better result. Too much filling and the tortilla can't close properly, the roll is uneven, and slices fall open. Two slices of each meat and a light scatter of veg is genuinely enough.
Variations
- Pesto base instead of cream cheese: Swap the cream cheese for a layer of basil pesto and skip the Italian seasoning. The pesto brings a bright, herby flavor that pairs really well with the salami. I made this version for a summer party and everyone asked what was different about them. A thin spread is enough — pesto is already quite bold.
- Spicy version: Add a pinch of red pepper flakes to the cream cheese mixture, or use hot capicola in place of the regular ham. My husband does this every time he makes them himself. If you can find spicy salami at the deli counter, that works too — just taste as you go because it can get quite intense.
- Vegetarian option: Skip the meats entirely and fill with thin-sliced roasted zucchini or eggplant, some sun-dried tomatoes, and a generous layer of provolone. You'll want to roast the veg ahead of time and let them cool completely before rolling so the tortilla doesn't steam. Honestly this version holds its own — it doesn't feel like a compromise.
- Cheese swap: Provolone is my go-to because it's mild and melts into the other flavors without taking over, but mozzarella works great too. If you want something with more punch, pepper jack or sharp provolone changes the whole character of the pinwheel. My kids prefer regular mozzarella because it's milder — less assertive than provolone.
- Spinach tortilla wrap: Spinach tortillas add a little color and a very subtle flavor that works well with the Italian filling. Walmart and Aldi usually stock them near the regular flour tortillas. They're not dramatically different in taste but they make the platter look even more colorful once sliced, which I appreciate when I'm putting together a party spread.
Serving and Storage
Serving
Serve these cold or at room temperature — both work well. I fan them out on a flat platter so the spiral shows on every piece, which looks nicer than just piling them in a bowl. They go well alongside other no-cook party food like a cheese board or something like my no-bake chocolate eclair cake if you want a full spread with minimal cooking. For a more substantial table, they also pair well next to something warm like a dip or roasted vegetables — my garlic roasted cherry tomatoes are actually great alongside these if you're doing a mezze-style setup.
Storage
Store unsliced rolls wrapped in plastic wrap in the fridge for up to 3 days. Once sliced, transfer to an airtight container and eat within 2 days — the cut edges dry out if left uncovered too long. I don't recommend freezing these. The cream cheese gets grainy after thawing and the tortilla goes strange in texture. Just make them a day ahead and keep them refrigerated — that's the sweet spot.

Frequently Asked Questions
Can I make Italian pinwheels the night before?
Yes, and I'd actually recommend it. Assembling them the night before and letting them chill overnight gives the roll time to firm up properly, which makes slicing much cleaner. Just keep them wrapped tightly in plastic wrap in the fridge and slice right before serving.
What kind of tortillas work best?
Large, soft flour tortillas are what you want — the burrito-size ones (usually 10 inches or larger). They're pliable enough to roll tightly without cracking. Whole wheat and spinach tortillas also work well. Avoid corn tortillas; they're too stiff and will crack when you try to roll them.
Can I freeze Italian pinwheels?
I wouldn't. Cream cheese changes texture after freezing — it gets grainy and separated — and the fresh spinach goes soggy. These are best made fresh and kept refrigerated. Since they only take about 20 minutes to assemble, it's easy enough to make them a day ahead instead of freezing.
How do I keep the pinwheels from getting soggy?
The main culprit is wet vegetables. Pat the roasted red peppers dry with a paper towel before adding them — they come packed in liquid and that moisture will seep into the cream cheese if you don't. Same goes for any fresh veg that's been washed. Also, don't overfill; the more layers you add, the more moisture is trapped in the roll.
Can I use a different spread instead of cream cheese?
Definitely. Basil pesto works really well and adds a brighter, herby flavor. Hummus is another option if you want something a bit lighter. Flavored cream cheeses — like herb and garlic or sun-dried tomato — also work and save you the step of mixing in the Italian seasoning yourself. I've tried most of these at some point and they all produce a good result.

ITALIAN PINWHEELS
Ingredients
- 1 sheet puff pastry thawed
- 4 oz 115g sliced ham or salami
- 4 oz 115g sliced provolone or mozzarella cheese
- 2 tablespoons sun-dried tomato pesto or tomato paste
- 1 teaspoon Italian seasoning
- 1 egg beaten (for egg wash)
Instructions
- Preheat Oven: Preheat oven to 400°F (200°C). Line a baking sheet with parchment paper.
- Prepare Puff Pastry: Roll puff pastry into a rectangle on a lightly floured surface. Spread sun-dried tomato pesto evenly over the pastry.
- Add Fillings: Layer ham or salami and cheese on top, leaving a small border around the edges. Sprinkle with Italian seasoning.
- Roll & Slice: Roll the pastry tightly into a log. Slice into ½–inch thick pinwheels and place on the prepared baking sheet. Brush with beaten egg.
- Bake: Bake 12–15 minutes, until golden and puffed. Cool slightly before serving.
Notes
These pinwheels have genuinely become my most-requested party contribution. I bring them to Eid gatherings, I make them for my kids' school events, and I've shown up to more than one potluck with a platter of these because I know they work. There's something satisfying about a recipe this simple looking so put-together on a serving tray.
If you're hosting something soon and need a no-stress appetizer, these are it. I'm not saying you need to make them for every occasion — but once you've made them once and seen how fast they go, you'll understand why I keep coming back to this recipe. The whole process takes under 30 minutes of active time, then you just wait for the chill.
If you're building out a full party spread, I'd pair these with something sweet at the end — my 3-ingredient peanut butter Oreo cookie balls are another no-bake option that takes almost no time and always gets the same reaction as these pinwheels. Between the two, you've got an entire party table covered without turning on the oven once. 🥄✨
If you liked this recipe, these are worth checking out too:
- Cheesy Jalapeño Shortbread — another great savory snack for a party tray
- Garlic Roasted Cherry Tomatoes — simple, flavorful, and great alongside a cold appetizer spread
- No-Bake Chocolate Eclair Cake — when you need a dessert with the same zero-oven energy
- 3-Ingredient Peanut Butter Oreo Cookie Balls — five minutes to make and always the first thing to go
- Lemon Cheesecake Overnight Oats — if you want something make-ahead for mornings after a party night





Comments
No Comments