
I made these bars for the first time on a rainy Thursday afternoon when I had no real plan for dessert but needed something fast. I had a can of sweetened condensed milk in the pantry, some butterscotch chips I'd bought weeks earlier, and half a box of graham crackers. I layered everything in a baking dish, poured the condensed milk over the top, and thirty minutes later I had something that looked and tasted like I'd actually tried. That was about two years ago and I've made them probably fifteen times since.
What makes these bars different from a standard cookie recipe is that there's no dough to mix, no chilling, no scooping. You're literally building layers in a pan — butter, graham cracker crumbs, coconut, chips, nuts, condensed milk — and the oven does the rest. The condensed milk seeps down through everything and binds it into this gooey, chewy, slightly crispy-edged slab. I've made a lot of bar cookies over the years and this one has the best effort-to-result ratio of almost anything I bake.
Zainab spotted these cooling on the counter the first time I made them and immediately asked for one before dinner. I said no, she waited approximately four minutes, and then came back and asked again. That should tell you something. My husband ate three in one sitting and said they reminded him of something between a candy bar and a cookie. I didn't disagree. If you're looking for more easy baking for the holiday season, my cranberry cream cheese muffins are another one that comes together without much fuss.
One thing I want to be upfront about: these bars are sweet. They are not subtle. The butterscotch chips and condensed milk together are rich in a way that means one or two bars is genuinely enough. I slice mine into small squares — about 24 from a 9x13 pan — and that portion makes sense. If you try to cut them into 12 large bars, you will feel it. Let them cool completely before you cut, or they'll fall apart on you. I learned that the hard way the first time I got impatient.

Why You'll Love This Recipe
- No mixer, no dough, no chilling: I cannot overstate how much I appreciate a dessert that skips the whole creaming-butter-and-sugar step. You melt the butter, pour it in the pan, and just layer everything on top. There's almost nothing to clean up and the whole thing is assembled in about ten minutes before it goes into the oven. On weeknights when I still want something homemade but I'm running low on energy, this is the recipe I reach for.
- Seven layers of actual texture contrast: The graham cracker base goes slightly crispy on the bottom while staying a little soft in the middle. The coconut toasts up and gets chewy at the edges. The chips melt and then re-set into pockets of butterscotch and chocolate throughout. You get something different in every bite, and that contrast is what makes these bars more interesting than a standard chocolate chip cookie bar.
- Pantry ingredients, no special trip to the store: The first time I made these I genuinely used what I already had. A can of sweetened condensed milk, graham crackers, coconut, two kinds of chips, and some walnuts I'd bought for a completely different recipe. If your pantry looks anything like mine on a regular Tuesday, you might already have everything you need to make these right now.
- They travel well and keep well: I've brought these to school events, Eid gatherings, and a friend's house for coffee. They hold their shape once they're properly cooled and set, they don't crumble in a container, and they taste just as good on day two as day one. Some people in my family actually prefer them on day two when everything has settled together a bit more.
- Endlessly adjustable based on what you have: I've made these with pecans instead of walnuts, with dark chocolate chips when I ran out of semisweet, and once with a mix of white chocolate and butterscotch because that's what was in the cabinet. They work every time. The condensed milk is really the thing that holds it all together, so as long as you keep that, you can riff on pretty much everything else.
Ingredients
- ½ cup (1 stick) unsalted butter, melted
- 1 ½ cups graham cracker crumbs (about 10–11 full crackers, crushed)
- 1 cup sweetened shredded coconut
- 1 cup semisweet chocolate chips
- 1 cup butterscotch chips
- 1 cup chopped walnuts or pecans
- 1 (14 oz) can sweetened condensed milk (do not substitute evaporated milk)
Directions
- Preheat the oven: Set your oven to 350°F (175°C). Line a 9x13-inch baking dish with parchment paper and let it hang over the edges a bit — that overhang is your handle for lifting the whole slab out later, which makes cutting much cleaner.
- Build the butter base: Pour the melted butter directly into the lined pan and tilt it to coat the bottom evenly. Sprinkle the graham cracker crumbs over the butter and press down gently with the back of a spoon or your fingers to form an even crust layer. It doesn't need to be perfect, just roughly even.
- Add the layers: Sprinkle the shredded coconut evenly over the crust, then the chocolate chips, then the butterscotch chips, then the chopped nuts. Take a second to make sure everything is spread out evenly so you're not getting all the chips in one corner and no nuts in another.
- Pour the condensed milk: Open the can of sweetened condensed milk and drizzle it slowly and evenly across the entire surface of the pan. It's thick, so go slowly and work across the whole pan. This is what binds everything together as it bakes, so you want it distributed.
- Bake and cool: Bake for 25–30 minutes, until the edges are golden brown and bubbling and the top is set. The center might look slightly underdone when you pull it out — that's fine, it firms up as it cools. Let it cool completely in the pan, at least 1 hour, before lifting out and slicing. I know it's hard to wait. Wait anyway.
Tips for Success
- Line the pan with parchment and let it hang over the sides: I skipped this once and spent ten minutes trying to pry bars out of the corner of the pan with a butter knife. Not worth it. The parchment overhang means you lift the whole thing out in one piece, set it on a cutting board, and slice it cleanly. This also makes cleanup essentially nothing.
- Don't cut until fully cooled: This is the rule I break every single time and then regret. When these bars are warm, the condensed milk layer is still molten and the whole thing falls apart the moment you try to slice it. You need the full cooling time — I'd say minimum an hour at room temperature — for everything to set into neat squares. If you're in a hurry, 20 minutes in the fridge helps speed it along.
- Use sweetened condensed milk only — not evaporated: These look almost identical in the can aisle and I've heard of people grabbing the wrong one. Evaporated milk is much thinner and doesn't have the sugar content that makes the condensed milk caramelize and bind everything together. The bars won't set properly if you use evaporated. Double-check the label before you pour.
- Watch the edges, not the center: The center of these bars will always look a bit underdone when you take them out of the oven, and that's correct. You're looking for golden-brown, bubbling edges and a top that looks set rather than wet and glossy. If you wait until the center looks fully baked, the edges will be overcooked and hard once cooled.
- Crush your graham crackers fine: Chunky graham cracker pieces don't compact into a crust — they stay loose and the bars fall apart at the base. I put my crackers in a zip-lock bag and roll over them with a rolling pin (or a wine bottle, no judgment) until they're fine crumbs. A food processor works too if you have one, but the bag method works just as well and takes about a minute.
Variations
- Peanut butter chip swap: Replace the butterscotch chips with peanut butter chips and the combination with chocolate and coconut becomes something closer to a Reese's bar situation. My husband actually prefers this version. The peanut butter chips don't get quite as sweet as butterscotch, which balances out the condensed milk a bit more for people who find the original very rich.
- Dark chocolate instead of semisweet: If you want to cut some of the sweetness, dark chocolate chips (60% or higher) work really well here. The bitterness plays against the butterscotch and condensed milk in a way that makes the whole bar taste more complex. This is my personal preference when I'm making these for adults rather than kids.
- Nut-free version: Just leave the nuts out entirely. The bars still hold together fine with the condensed milk, and the texture is softer throughout. You could add a little extra coconut or some crushed pretzels if you want to replace that crunch — the salty-sweet contrast of pretzels with the butterscotch is actually really good.
- Holiday version with festive add-ins: Around the holidays I sometimes swap half the chocolate chips for red and green candy-coated chocolates (M&Ms work great). It makes the bars look festive when you slice them and they go well on a cookie platter next to something like my cranberry cream cheese muffins when you want visual variety.
- Spiced fall version: Stir ½ teaspoon of cinnamon and a pinch of nutmeg into the graham cracker crumbs before pressing them into the pan. It gives the whole bar a warm, spiced base note that works really well in autumn. I made this version to serve alongside a bowl of winter warmer soup for a casual dinner gathering and people went back for seconds on both.
Serving and Storage
Serving
Serve these at room temperature, cut into small squares — I aim for about 24 pieces from a 9x13 pan because they're rich enough that a small piece satisfies. They're good on their own, good with coffee or tea, and very good with a scoop of vanilla ice cream if you want to turn them into a proper dessert. If you've refrigerated them, give them 15 minutes to come back to room temperature before serving — the condensed milk layer gets a bit stiff when cold and the texture is better at room temp.
Storage
Store in an airtight container at room temperature for up to 5 days. They keep well without drying out because of the condensed milk. For longer storage, freeze them in a single layer on a sheet pan first, then transfer to a freezer bag — this keeps them from sticking together. They freeze for up to 2 months and thaw at room temperature in about an hour. I've also refrigerated them in an airtight container for up to 7 days, though I'd let them come back to room temperature before eating for the best texture.
Frequently Asked Questions
Can I make these bars ahead of time?
Yes, and they're actually better the next day once everything has set and the flavors have had time to come together. I often make them the night before I need them, let them cool completely, cover the pan with foil, and leave them at room temperature overnight. Then I slice in the morning. They hold their shape much better after a full rest.
Can I use digestive biscuits instead of graham crackers?
Absolutely. Digestive biscuits are what I'd suggest for readers in the UK or anyone who can't find graham crackers easily. They crush down to a similar fine crumb and have a comparable slightly sweet, wheaty flavor. Vanilla wafers also work well. I've even used crushed Biscoff cookies once and the caramel undertone was really good with the butterscotch chips.
Can I freeze these bars?
Yes. Freeze them in a single layer first so they don't stick together, then transfer to a freezer-safe bag or container. They keep well for up to 2 months. To thaw, just leave them at room temperature for about an hour. I've done this many times and the texture holds up well — the condensed milk base means they don't dry out the way some baked goods do after freezing.
My bars came out too soft — what happened?
Most likely they needed more cooling time. These bars set as they cool, not while they're hot. If you cut them before they've cooled fully — at least an hour at room temperature, ideally longer — they'll be gooey and fall apart. If you've already waited and they're still very soft, try putting the whole pan in the fridge for 20–30 minutes before slicing. Also check that you used sweetened condensed milk and not evaporated milk, which won't set the same way.
Do I have to use both chocolate and butterscotch chips?
No. You can use just one or swap one for something else — white chocolate chips, peanut butter chips, or even cinnamon chips if you can find them. The total chip quantity (2 cups combined in the original) is what matters for the layers, not the specific combination. I've made these with just butterscotch chips when I was out of chocolate and they were still great, just sweeter.
These bars have earned a permanent spot in my baking rotation for one simple reason: they work every time, with almost no effort, and people genuinely love them. I'm not someone who bakes elaborate layer cakes on a regular Tuesday — I need recipes that come together without drama, and this one does exactly that. Seven layers, one pan, no mixer, done.
I make a double batch during the holidays because a single pan disappears in one day in this house. I've brought them to school events, to friends' kitchens, and served them alongside a cup of tea on cold afternoons when I needed something sweet and comforting without a big production. They fit all of those moments.
If you're putting together a dessert spread and want something alongside these, my grilled peaches with burrata makes a nice contrast — something light and fresh next to something this rich and indulgent. And if you're in a holiday baking mode, the cranberry cream cheese muffins are worth adding to the lineup too.
Make these once and you'll understand why I keep coming back to them. They're the kind of thing that looks like you put in more effort than you did, and I mean that as the highest possible compliment. 🍫✨
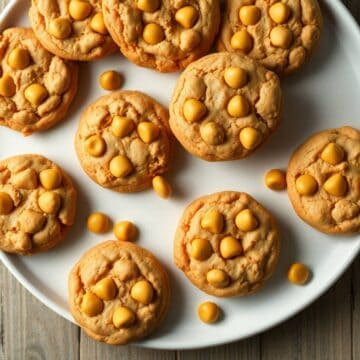
MAGIC 7-LAYER BUTTERSCOTCH CHIP COOKIES
Ingredients
- 1 cup unsalted butter softened
- 1 cup brown sugar packed
- ½ cup granulated sugar
- 2 large eggs
- 1 teaspoon vanilla extract
- 2 ¼ cups all-purpose flour
- 1 teaspoon baking soda
- ½ teaspoon salt
- 1 cup butterscotch chips
- ½ cup chocolate chips
- ½ cup chopped nuts walnuts or pecans
- ½ cup shredded coconut
- ½ cup crushed graham crackers or cookies
Instructions
- Preheat Oven: Preheat oven to 350°F (175°C). Line a baking sheet with parchment paper.
- Make Dough: In a large bowl, cream together butter, brown sugar, and granulated sugar until fluffy. Beat in eggs and vanilla. Gradually add flour, baking soda, and salt; mix until combined.
- Add Layers: Gently fold in butterscotch chips, chocolate chips, nuts, coconut, and crushed graham crackers.
- Shape Cookies: Scoop dough onto prepared baking sheet, spacing about 2 inches apart.
- Bake: Bake 12–14 minutes or until edges are lightly golden. Cool on the sheet for 5 minutes, then transfer to a wire rack.
Notes
- Make Ahead: Dough can be prepared and refrigerated for up to 2 days; bake when ready.
- Flavor Variations: Substitute butterscotch chips with white chocolate or peanut butter chips.
- Serving Suggestions: Perfect for cookie platters, holiday parties, or gifting in jars.
- Storage Tips: Store in an airtight container at room temperature for up to 1 week; freeze for longer storage.
If you liked these bars, here are a few more things worth making:
- Cranberry Cream Cheese Muffins — another easy bake that works for holidays or any weekend morning
- Grilled Peaches with Burrata — a light, elegant dessert that contrasts nicely with something rich like these bars
-
{"@context":"https://schema.org","@type":"Article","headline":"MAGIC 7-LAYER BUTTERSCOTCH CHIP COOKIES","description":"Magic 7-layer butterscotch chip cookies are chewy, buttery, and loaded with sweet butterscotch chips—an irresistible, multi-layered cookie treat.","datePublished":"2025-10-01T08:16:41+00:00","dateModified":"2026-05-03T20:53:07+00:00","author":{"@type":"Person","name":"Sana Umer","url":"https://forfoodiefriends.com/about/","description":"Self-taught home cook with 10+ years of kitchen experience. Mom of two who develops every recipe in her own kitchen.","jobTitle":"Recipe Developer & Food Blogger","image":"https://forfoodiefriends.com/wp-content/uploads/sana-umer-author-photo.jpg"},"publisher":{"@type":"Organization","name":"For Foodie Friends","url":"https://forfoodiefriends.com/","logo":{"@type":"ImageObject","url":"https://forfoodiefriends.com/wp-content/uploads/forfoodiefriends-logo.png"}},"mainEntityOfPage":{"@type":"WebPage","@id":"https://forfoodiefriends.com/magic-7-layer-butterscotch-chip-cookies/"},"image":"https://forfoodiefriends.com/wp-content/uploads/2025/08/MAGIC-7-LAYER-BUTTERSCOTCH-CHIP-COOKIES.jpg"}






Comments
No Comments