
I made my first batch of homemade caramels the December before last, right before the holidays, and I genuinely could not believe how something so simple — butter, sugar, cream — could taste that good. I've made a lot of candy over the years but caramels always felt intimidating to me. Turns out the only real trick is a candy thermometer and a willingness to stand at the stove and stir.
What I love about this recipe is that it doesn't require anything fancy. I used my regular heavy-bottomed pot, a wooden spoon I've had for years, and a $12 candy thermometer from Walmart. That's it. The caramels came out soft, chewy, and genuinely better than anything I've bought at a store. The first time I made them I stopped stirring for about two minutes to answer a message and the bottom started to catch — so I'll say this once and mean it: don't stop stirring.
My husband took one bite and asked how many were left. Saad, who normally only wants chocolate anything, ate four in a row and then asked if we could wrap some for his teacher. So we did. If you're looking for something to gift during the holidays, these wrapped in wax paper and tied with a ribbon honestly look beautiful — and they're cheaper and more personal than anything from a gift shop. If you like gifting homemade sweets, my Gingerbread Latte Cookies pair really well with these in a holiday tin.
One thing to set expectations on: caramels need time to cool — at least 2 to 3 hours at room temperature before you can cut them cleanly. I've tried speeding this up in the fridge and they get too firm and slightly grainy. Just leave them on the counter and walk away. They'll be ready when they're ready.

Why You'll Love This Recipe
- Only five real ingredients: Butter, brown sugar, corn syrup, sweetened condensed milk, and vanilla. That's the whole list. No specialty ingredients, nothing you'd have to hunt for — everything is at your regular grocery store. I've made this with Walmart store-brand butter and it works perfectly fine.
- The texture is genuinely different from store-bought: There's something about homemade caramels that store-bought ones just can't replicate — they're softer, they melt differently, and they don't leave that waxy coating in your mouth. My husband described them as "actually tasting like caramel" which I thought was funny but also accurate.
- They make a genuinely thoughtful gift: I've brought these to school events, to a neighbor's housewarming, and packed them into holiday tins. Every single time someone asks for the recipe. Individually wrapped in wax paper they look like you spent a fortune, and the actual cost per batch is maybe $6 or $7.
- You can make them ahead: These keep for two weeks at room temperature in an airtight container, which means you can make a double batch on a Sunday and have gifts and snacks sorted for the whole week. I make a double batch almost every time now because a single batch disappears in our house within two days.
- Endlessly customizable: The base recipe is neutral enough that you can take it in a lot of directions — sea salt on top, espresso stirred in, dipped in chocolate, rolled in chopped pecans. Once you've made the basic version once and feel confident with the process, the variations are genuinely fun to experiment with.
Ingredients
- 1 cup unsalted butter (2 sticks)
- 2 ¼ cups packed brown sugar
- 1 cup light corn syrup
- 1 can (14 oz) sweetened condensed milk
- ½ teaspoon salt
- 1 teaspoon pure vanilla extract
- Flaky sea salt, optional (for topping)
- Wax paper or parchment paper (for wrapping)
Directions
- Prepare your pan: Line an 8x8-inch baking pan with parchment paper and leave some overhang on the sides — this makes lifting the slab out much easier later. Lightly butter the parchment as well so nothing sticks when it's time to cut.
- Melt the butter: In a heavy-bottomed saucepan over medium heat, melt the butter completely. Keep an eye on it and don't let it brown or start to foam — you just want it melted and ready for the other ingredients.
- Add the sugar, syrup, and condensed milk: Stir in the brown sugar, corn syrup, and sweetened condensed milk. Mix everything together until the mixture is smooth and uniform before the heat increases. Getting it combined at this stage helps prevent any graininess later.
- Cook the caramel: Bring the mixture to a gentle boil over medium heat, stirring constantly with a wooden spoon or heatproof spatula. Do not walk away. Cook until your candy thermometer reads 245°F (soft-ball stage) — this usually takes about 10 to 15 minutes of active stirring.
- Add vanilla and salt, then pour: Remove the pan from heat. Stir in the vanilla extract and salt immediately — the mixture will bubble up a little, which is normal. Carefully pour the hot caramel into your prepared pan and smooth the top with a spatula. If you're adding flaky sea salt, sprinkle it on now.
- Cool completely: Let the caramel cool at room temperature for at least 2 to 3 hours. Don't rush this in the fridge — room temperature cooling gives you the best texture. You'll know it's ready when the surface feels firm and doesn't stick to your fingertip.
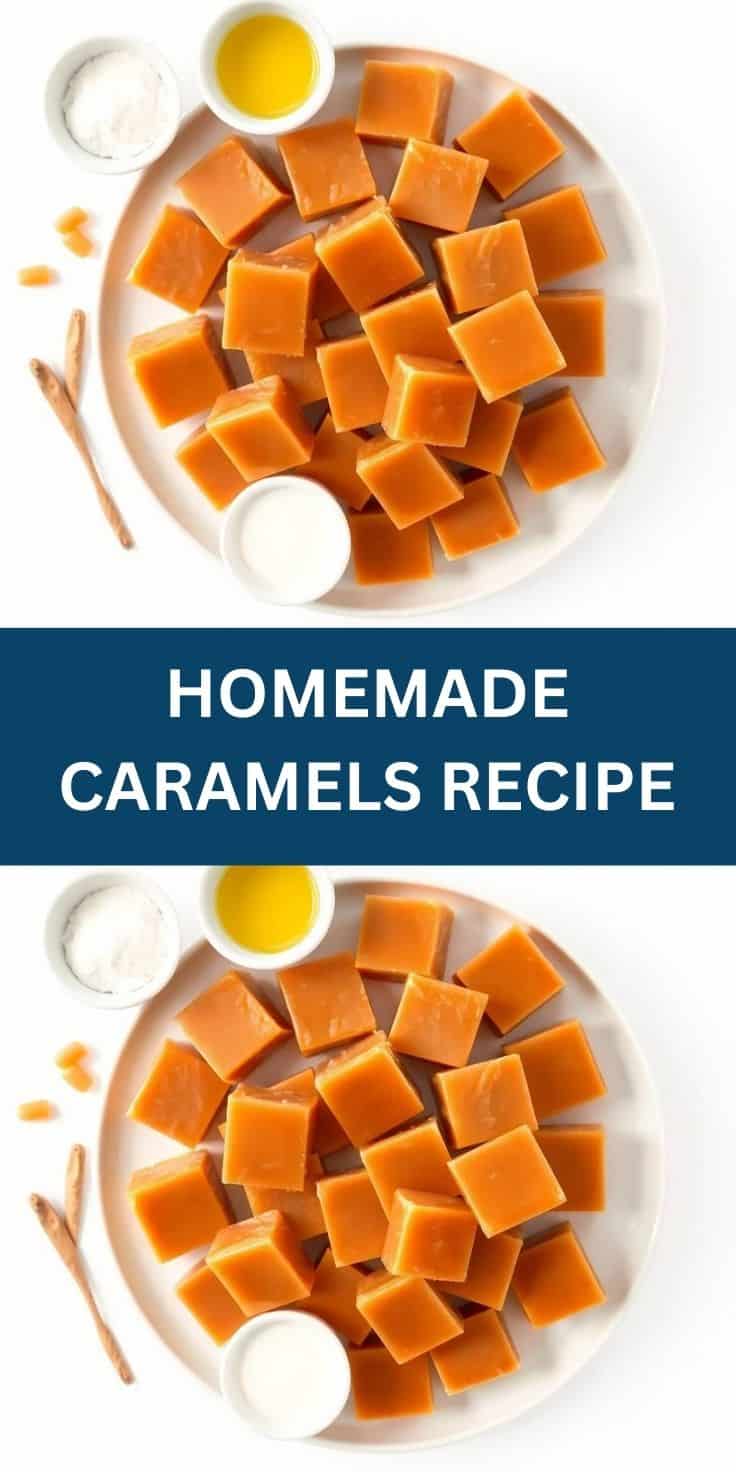
- Cut and wrap: Lift the caramel slab out using the parchment overhang and place it on a cutting board. Use a sharp knife or a bench scraper to cut into small squares — I usually do rows first, then columns. Wrap each piece in wax paper and twist the ends closed.

Tips for Success
- Use a candy thermometer and actually trust it: I know it seems like an extra step, but temperature is everything with caramel. Too low and they won't set. Too high and they turn hard and slightly grainy. I use a basic clip-on thermometer from Walmart — nothing fancy, just reliable. Watch for 245°F and pull the pot off heat the moment you hit it.
- Don't stop stirring, not even for a minute: The first time I made these, I stopped stirring for maybe two minutes to check my phone and I could smell the bottom starting to scorch. I caught it in time, but the lesson stuck. Set everything else aside and keep that spoon moving the entire time the mixture is on the heat.
- Use a heavy-bottomed pot: Thin pans have hot spots and your caramel will scorch on the bottom before the rest of it is ready. I use a 3-quart stainless steel saucepan with a thick base — any heavy pot will do. This is one of those cases where the right tool actually makes a real difference.
- Cool at room temperature, not the fridge: I tried refrigerating once to speed things up and the caramels came out slightly grainy and much harder than I wanted. Room temperature is slower but gives you that soft, chewy texture that makes these worth making. Set them on the counter and leave them alone for a few hours.
- Keep them away from humidity: Caramel is hygroscopic — it absorbs moisture from the air, which makes the pieces go sticky and soft in an unpleasant way. If you live somewhere humid (I know a lot of my readers in the US South do), store them in an airtight container with a piece of parchment between layers, and keep the lid on when you're not actively eating them.
Variations
- Sea salt caramels: Sprinkle a pinch of flaky sea salt over the top of the caramel right after you pour it into the pan, before it sets. The salt cuts through the sweetness in a really nice way and honestly this is my favorite version. Maldon sea salt flakes work beautifully here if you can find them — they're at most Whole Foods or Trader Joe's locations.
- Espresso caramels: Stir 1 teaspoon of instant espresso powder into the mixture along with the vanilla. It doesn't make them taste like coffee exactly — it just deepens the caramel flavor in a way that's hard to describe but really good. My husband loves this version. If you enjoy coffee desserts, my Gingerbread Latte Cookies have that same warm, coffee-forward quality.
- Chocolate-dipped caramels: Once the caramels are cut and cooled, dip the bottom half of each piece in melted dark or milk chocolate and set them on parchment to firm up. This turns them into something that looks genuinely impressive on a dessert platter. Give them about 30 minutes to set fully before wrapping.
- Nutty caramels: Stir ¾ cup of roughly chopped toasted pecans or almonds into the caramel right before pouring it into the pan. The nuts add texture and a slightly bitter, roasted note that balances the sweetness. Toast them first in a dry skillet for a few minutes — it makes a noticeable difference in flavor.
- Spiced caramels: Add ½ teaspoon of cinnamon and a pinch of nutmeg along with the vanilla at the end. This gives the caramels a warm, almost autumnal quality that works really well as a holiday gift. If you're putting together a gift tin, these pair nicely with these caramel apple wedges for a full caramel-themed spread.
Serving and Storage
Serving
Serve caramels at room temperature — that's when the texture is at its best, soft and pliable without being sticky. If they've been sitting in a cool room and feel firmer than you'd like, just leave them out for 10 minutes and they'll soften right up. For a dessert platter, arrange them on a small board alongside the chocolate-dipped version and a few of the nutty ones for variety. They also look great in a small dish next to coffee or tea at the end of a dinner.
Storage
Wrapped individually in wax paper, these keep in an airtight container at room temperature for up to two weeks. I usually layer them with a sheet of parchment between layers so they don't stick together. Don't refrigerate them unless your kitchen is genuinely warm — the fridge makes them harder and slightly less enjoyable to eat. If you want to freeze them, wrap individually and then place in a zip-lock freezer bag — they'll keep for up to 3 months. Thaw at room temperature for about an hour before eating.
Frequently Asked Questions
Can I make these caramels without a candy thermometer?
You can try the cold water test — drop a small amount of the hot caramel into a glass of cold water and see if it forms a firm but pliable ball, which is the soft-ball stage. That said, a candy thermometer takes all the guesswork out of it and a basic one costs about $10 to $12 at Walmart or any kitchen store. If you're going to make candy more than once, it's worth getting one.
Why did my caramels turn out too hard?
The most common reason is cooking past the target temperature. Once you go above 250°F you're heading into firm-ball and hard-ball territory, which means chewy-hard caramels rather than soft ones. Keep your thermometer clipped to the pot where you can see it clearly, and pull the mixture off heat the moment it hits 245°F. Residual heat will carry it a degree or two higher on its own.
Can I substitute white sugar for the brown sugar?
Technically yes, but the flavor will be noticeably lighter and less complex. Brown sugar has molasses in it, which is a big part of what gives these caramels their depth and that slightly butterscotch-adjacent quality. I'd stick with brown sugar for this one — it's not worth the trade-off for the small convenience of using white.
Can I double the recipe?
Yes, and I do this regularly because a single batch goes fast in our house. Use a larger heavy-bottomed pot (at least 5 quarts) so the mixture has room to bubble up without spilling. Plan for the mixture to take a few extra minutes to reach temperature, and pour into a 9x13-inch pan instead of the 8x8. Everything else stays the same.
How do I keep the caramel from sticking to my knife when cutting?
Run your knife under hot water and dry it quickly before each cut, or very lightly oil the blade. This makes clean cuts much easier and prevents the caramel from dragging and deforming as you slice through it. A bench scraper works well too — press straight down rather than dragging through, and you'll get much neater pieces.
HOMEMADE CARAMELS RECIPE
Ingredients
- 1 cup unsalted butter
- 2 ¼ cups packed brown sugar
- 1 cup light corn syrup
- 1 can 14 oz sweetened condensed milk
- 1 teaspoon vanilla extract
- ½ teaspoon salt
- Wax paper or parchment for wrapping
Instructions
- Prepare Pan: Line an 8×8-inch baking pan with parchment paper or lightly grease it.
- Cook Caramel: In a heavy saucepan, combine butter, brown sugar, corn syrup, and sweetened condensed milk. Cook over medium heat, stirring constantly, until mixture reaches 245°F (soft-ball stage) on a candy thermometer.
- Add Flavor: Remove from heat and stir in vanilla extract and salt.
- Pour into Pan: Pour caramel mixture into prepared pan, spreading evenly. Allow to cool at room temperature for 2–3 hours until firm.
- Cut and Wrap: Lift caramel from pan using parchment, cut into squares, and wrap individually in wax paper.
Notes
- Storage: Store in an airtight container at room temperature for up to 2 weeks.
- Make Ahead: Caramels can be made a few days in advance and wrapped individually for gifting.
- Tips: Stir constantly while cooking to prevent burning and ensure smooth, creamy caramels.
These caramels have become one of those recipes I come back to every few months without even really thinking about it. They're not complicated — the whole active process is maybe 20 minutes of stirring — but the result feels genuinely special. There's something satisfying about making candy from scratch, especially when the people eating it have no idea how straightforward it actually was.
I started making these for the holidays but honestly they've become an anytime thing. A tin of these on the counter makes Tuesday feel a little nicer. And if you're building out a dessert spread for guests, these sit really well next to something like my Sweet Strawberry Shortcake Cheesecake Rolls — one chewy and buttery, one creamy and bright. Good contrast.
If you make a batch, do the sea salt version at least once. I know it sounds like a small thing but it genuinely changes the experience — that little crunch of salt on top of the smooth caramel is something else. And if you want to do a full caramel-themed dessert day, my Air Fried Apple Wedges with Caramel Whipped Cream are a great companion piece — the caramel flavor runs through everything without being overwhelming.
I hope these become a regular in your kitchen too. Once you've made them once and realized how manageable the process actually is, you'll wonder why you waited this long to try. 🍬✨
If you liked this recipe, here are a few more you might enjoy:
- Air Fried Apple Wedges with Caramel Whipped Cream Dipping Sauce
- Sweet Strawberry Shortcake Cheesecake Rolls
- Gingerbread Latte Cookies
- Slow Cooker Cajun Potato Soup
- Garlic Parmesan Chicken Sliders on Hawaiian Rolls





Comments
No Comments