
I made these garlic parmesan chicken sliders for the first time on a Friday night when I had a leftover rotisserie chicken in the fridge and absolutely zero energy to cook a proper dinner. I threw the filling together in about ten minutes, slid the pan into the oven, and by the time I'd cleaned up the counter, the kitchen smelled like a restaurant. My husband came in, took one look at the pan, and said "make these again." That was six months ago and I've made them at least a dozen times since.
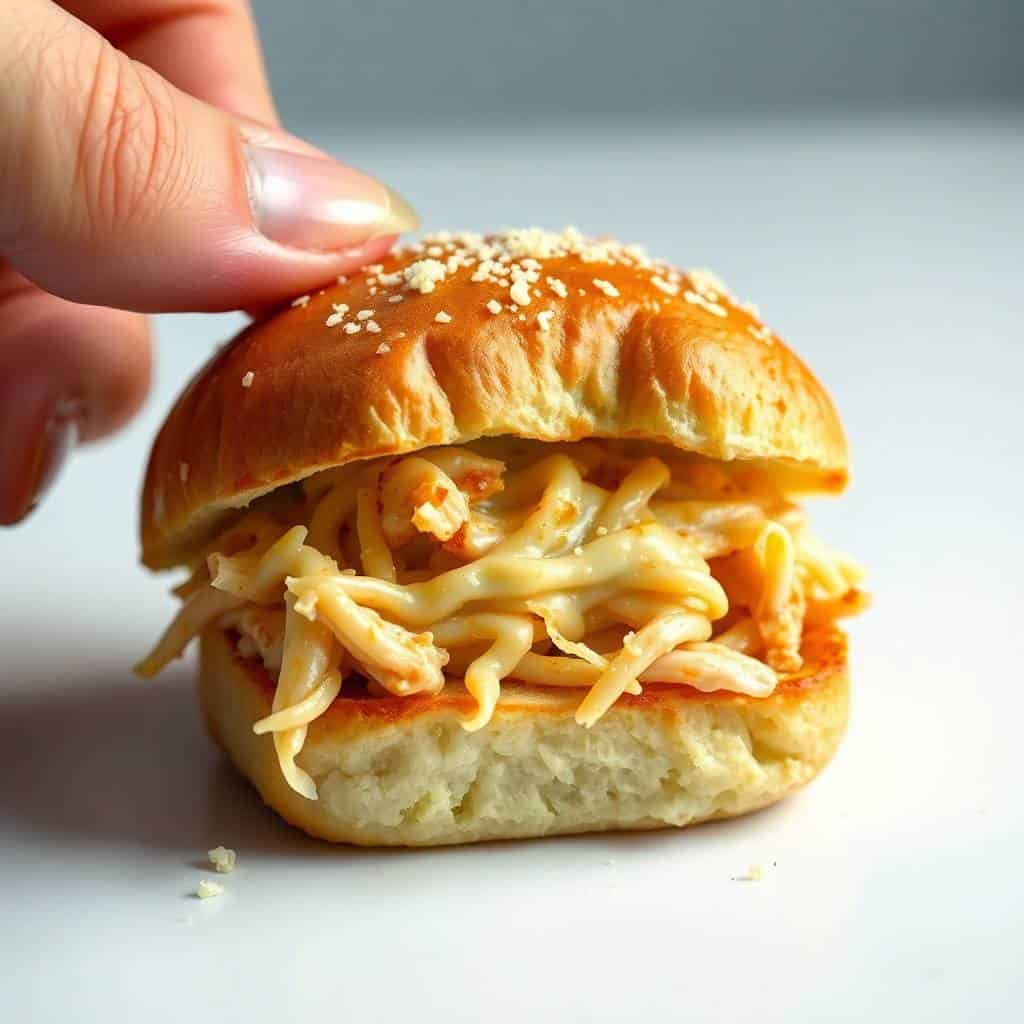
What makes these work is the combination of the creamy garlic parmesan filling and that buttery glaze on top. The Hawaiian rolls get slightly crisp on the outside and stay soft underneath where they soak up all those juices. The cheese melts into the chicken and becomes this gooey, pull-apart situation that I honestly can't resist. I've tried making sliders on regular dinner rolls too, and it's not the same — the slight sweetness of Hawaiian rolls against the savory filling is what makes it click.
I make these when we have people over, for Friday night dinners, and honestly any time I need something that feels impressive without requiring three hours of effort. My son Saad declared these "better than the ones from the restaurant" the first time he tried them, which is high praise from a ten-year-old who is very particular about his food. They've shown up on our table for birthday parties, lazy weekends, and once, memorably, as a very non-traditional weekday lunch.
One thing worth knowing upfront: the recipe is forgiving. The first time I made it, I forgot the sour cream and just added a bit more mayo — totally fine. I've also accidentally overbaked them once and they still got eaten in ten minutes. If you want something that pairs well on a party spread, I sometimes set these out alongside my Roasted Garlic Butter Parmesan Potatoes and people lose their minds a little.
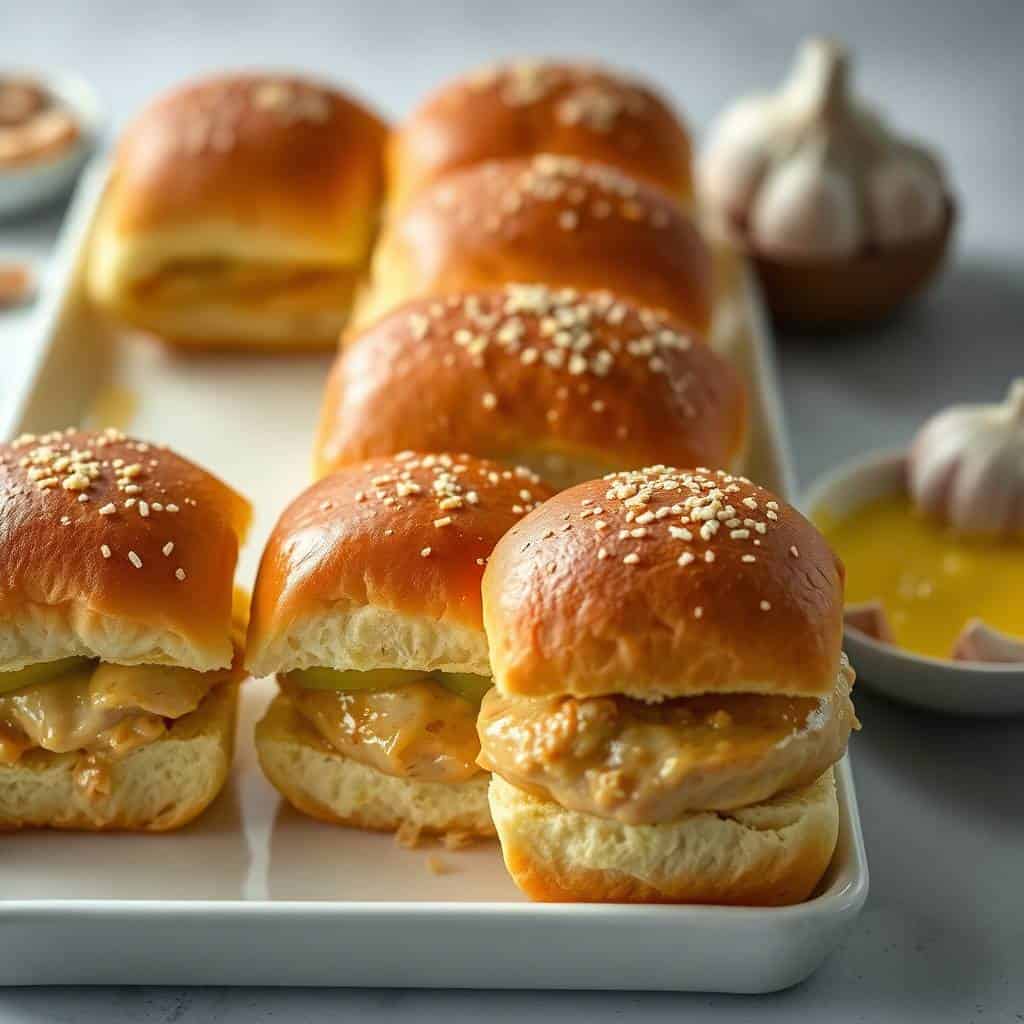
Why You'll Love This Recipe
- Comes together in under 30 minutes: Most of that time is just the oven doing its job. The filling takes maybe ten minutes to mix, the assembly takes five, and then you're just waiting. On nights when I've already spent the whole day in the kitchen, that matters a lot. I've also made the filling in the morning and refrigerated it, so dinner was basically just an assembly job.
- One pan, easy cleanup: Everything bakes in a single 9x13 dish. I line it with parchment so the cleanup is basically nonexistent. After a week of cooking elaborate dinners, that simplicity is genuinely something I look forward to.
- Rotisserie chicken makes it weeknight-friendly: I don't always have time to poach or roast my own chicken. A store-bought rotisserie from Walmart or Costco shreds in minutes and has plenty of flavor already built in. This is not cheating — it's just practical. I use it in my Cold Chicken Spinach Pasta Salad for exactly the same reason.
- The cheese pull is real: I know food content is full of cheese-pull promises that don't deliver, but mozzarella in this sandwich genuinely does the thing. Shred it yourself from a block — the pre-shredded bags have a coating that stops it melting cleanly. That one step makes a noticeable difference.
- Reheats beautifully the next day: I usually make a double batch because leftovers go fast. Wrap them in foil and reheat in a 325°F oven for about 10 minutes and they taste nearly as good as fresh out of the oven. My husband actually prefers them slightly warm the next day because the bread soaks up even more flavor overnight.
Ingredients
- 12 Hawaiian sweet rolls (1 package — King's Hawaiian is the one I always grab)
- 2 cups cooked shredded chicken (rotisserie works great here)
- 1 cup shredded mozzarella cheese (shred it yourself from a block)
- ½ cup grated parmesan cheese
- ¼ cup mayonnaise
- ¼ teaspoon black pepper
- ¼ teaspoon garlic powder
- For the Garlic Butter Topping:
- 4 tablespoons unsalted butter, melted
- 2 cloves garlic, minced
- 1 tablespoon chopped fresh parsley (or 1 teaspoon dried)
- 2 tablespoons grated parmesan cheese
Directions
- Preheat the oven: Set your oven to 350°F (175°C) and lightly grease a 9x13-inch baking dish or line it with parchment paper. Parchment makes cleanup so much easier — I never skip this step anymore.
- Make the filling: In a mixing bowl, combine the shredded chicken, mozzarella, parmesan, mayonnaise, garlic powder, and black pepper. Stir until everything is evenly coated. Taste it at this point — if you want more garlic flavor, add a pinch more garlic powder.
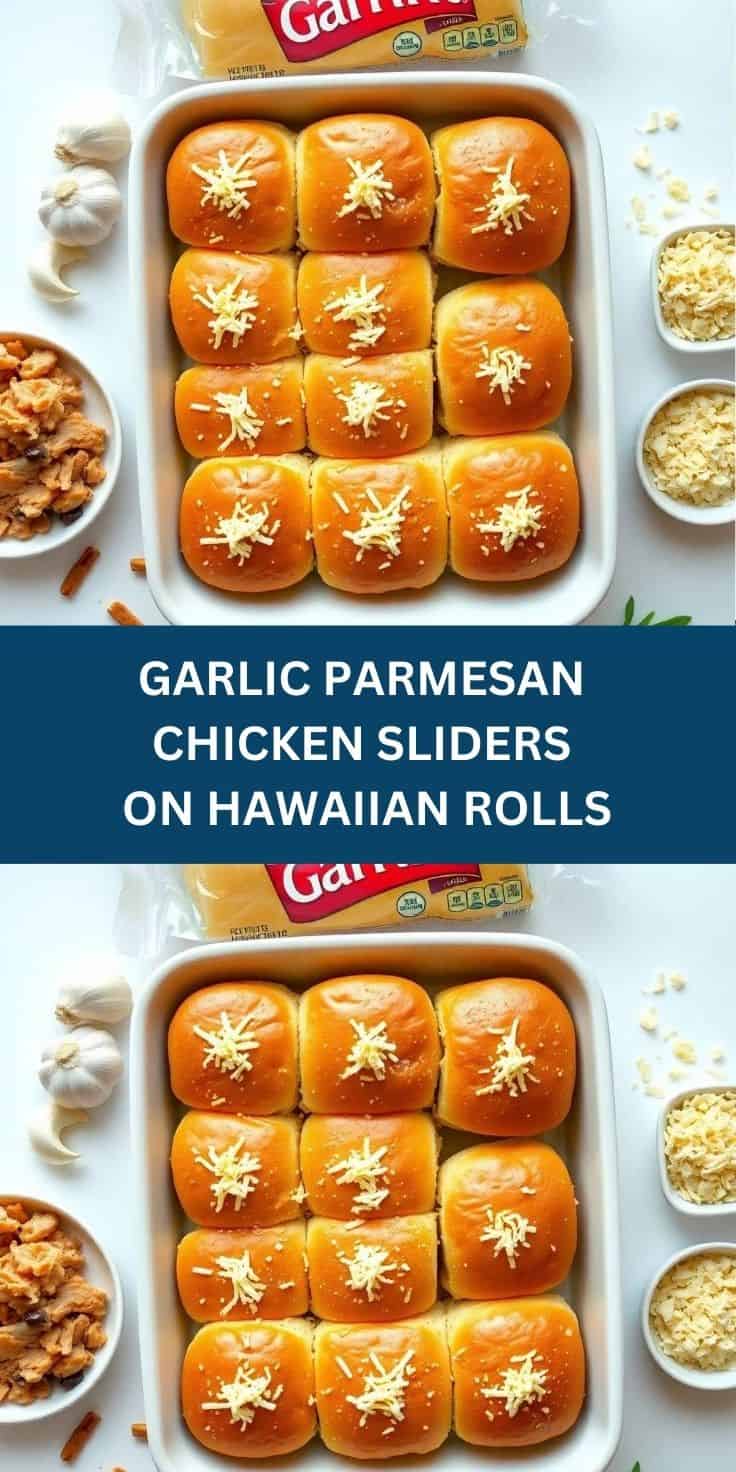
- Assemble the sliders: Without separating the rolls, slice the entire block in half horizontally. Place the bottom half in your baking dish. Spread the chicken mixture evenly across the cut surface, then place the top half of the rolls back on. Keeping them connected as a sheet means they bake evenly and are easier to handle.
- Make the garlic butter: In a small bowl, stir together the melted butter, minced garlic, parsley, and 2 tablespoons of parmesan. This glaze is what gives the tops that golden color and that extra hit of garlic flavor — don't skip it.
- Brush and bake: Brush the garlic butter generously over the tops of the rolls. Cover the dish with foil and bake for 15 minutes. Remove the foil and bake for another 5–10 minutes until the tops are golden brown and the cheese inside is fully melted.
- Rest and slice: Let the pan sit for about 5 minutes before slicing between the rolls. This rest time helps the cheese firm up slightly so the sliders hold together when you cut them.
Tips for Success
- Shred your own cheese: I learned this after my first two batches came out with slightly clumpy, uneven cheese. Pre-shredded mozzarella from a bag has an anti-caking coating that prevents it from melting smoothly. It takes an extra three minutes to shred a block, and it genuinely makes a difference in the final texture.
- Don't skip the foil for the first bake: Covering with foil for the first 15 minutes lets the cheese melt and the filling heat through without the tops burning. The last 5–10 minutes uncovered is what gives you that golden-brown color. If you go straight in without foil, the tops brown before the inside is properly heated.
- Spread the filling all the way to the edges: I used to pile the filling in the center and the edge rolls would end up with barely any chicken. Take your time and spread it evenly right to the corners so every slider gets the same amount of filling. It's a small thing but it matters when you're serving guests.
- Let them rest before cutting: Five minutes feels like forever when the kitchen smells this good, but rushing the cut means the cheese slides out and things fall apart. I set a timer and distract myself by pouring drinks. The rest is worth it.
- Make the filling ahead: If you're prepping for a party or a busy weeknight, the chicken mixture can be made the day before and refrigerated. When you're ready to eat, just assemble, brush with butter glaze, and bake. It's one less thing to think about in the moment.
Variations
- Buffalo chicken version: Swap the mayo-parmesan base for ¼ cup of buffalo sauce mixed into the shredded chicken, then use blue cheese crumbles or ranch instead of parmesan on top. This is the version my husband requests when we're watching cricket on the weekend. It's spicy and messy and completely worth it.
- BBQ chicken style: Mix the shredded chicken with your favorite barbecue sauce (I use whatever's in the fridge — Sweet Baby Ray's works well) and swap the mozzarella for sharp cheddar. The sweet-smoky flavors pair surprisingly well with Hawaiian rolls. This variation goes well alongside my BBQ Meatballs in Rich Smoky Sauce if you're doing a full party spread.
- Add bacon: Crumble 4–5 strips of cooked bacon into the chicken filling before spreading. It adds a crunch and a smoky depth that takes these from good to hard to stop eating. Saad started asking for the bacon version every time after I made it once by accident with leftover breakfast bacon.
- Italian-style with pesto: Replace the mayo-garlic base with 3 tablespoons of basil pesto, use provolone instead of mozzarella, and add a few slices of sun-dried tomatoes. It has a completely different flavor profile — more herby and bright — and feels a bit fancier if you're serving adults at a dinner party.
- Vegetarian option: Sauté a cup of sliced mushrooms with a little butter and garlic until they're deeply golden, then use them in place of the chicken with everything else the same. It's a solid meat-free version that doesn't feel like a compromise. I've served it at gatherings where not everyone eats meat and it held its own.
Serving and Storage
Serving
Serve these warm, right out of the pan. They're good on their own, but a dipping sauce alongside makes them even better — garlic aioli, ranch dressing, or marinara all work. I usually set out two options and let people choose. If you're serving them as part of a bigger spread, they pair really well with a simple green salad or some chips and cut vegetables on the side. In Pakistan we'd pile savory baked things like this alongside rice dishes, but when I make these for guests here, bread-based sides like chips or potato wedges feel most natural.
Storage
Store any leftovers in an airtight container in the fridge for up to 3 days. To reheat, wrap them loosely in foil and put them in a 325°F oven for about 10 minutes. The foil keeps the tops from drying out while everything heats through. An air fryer also works well — 5 minutes at 325°F gives you slightly crispier tops. I wouldn't recommend the microwave if you can avoid it; the bread gets soft and the cheese turns a bit rubbery.
Frequently Asked Questions
Can I make these sliders ahead of time?
Yes, and I actually prefer it. Assemble the sliders fully — filling, cheese, roll tops — then cover the pan and refrigerate for up to 24 hours. When you're ready to bake, make the garlic butter fresh, brush it on, and bake as directed. The filling actually gets a bit more flavorful overnight as everything melds together.
Can I freeze garlic parmesan chicken sliders?
You can freeze them assembled but unbaked. Wrap the whole pan tightly in plastic wrap and then foil, and freeze for up to one month. When you're ready to bake, let them thaw in the fridge overnight, brush with fresh garlic butter, and bake as normal. I haven't tried baking them straight from frozen but if you do, add an extra 10–15 minutes covered before uncovering to brown.
What cheeses work best in this recipe?
Mozzarella is my first choice because it melts so smoothly and has that pull-apart quality. Provolone is a great alternative — slightly sharper and still melts beautifully. Monterey Jack is another good option if that's what you have. Avoid anything too hard or aged, like a sharp aged cheddar, because it tends to get oily rather than creamy when it melts.
Can I use canned chicken instead of rotisserie?
You can, but drain it really well first and know that the texture will be slightly softer and the flavor milder. Rotisserie or poached chicken gives you better results. If canned is all you have, squeeze out as much liquid as possible before mixing — excess moisture will make the filling watery and the bottoms of the rolls soggy.
What if I can't find Hawaiian rolls?
King's Hawaiian rolls are at most Walmart and Costco locations, but if you genuinely can't find them, any soft dinner roll will work. The slight sweetness of Hawaiian rolls is part of what makes these taste the way they do, so if you're using plain dinner rolls, the flavor will be a bit more straightforwardly savory. Still good — just a little different.
GARLIC PARMESAN CHICKEN SLIDERS ON HAWAIIAN ROLLS
Ingredients
- 12 Hawaiian sweet rolls 1 package
- 2 cups cooked shredded chicken
- 1 cup shredded mozzarella cheese
- ½ cup grated parmesan cheese
- ¼ cup mayonnaise
- ¼ teaspoon black pepper
- ¼ teaspoon garlic powder
For Garlic Butter Topping:
- 4 tablespoons unsalted butter melted
- 2 cloves garlic minced
- 1 tablespoon chopped parsley
- 2 tablespoons grated parmesan cheese
Instructions
Preheat Oven:
- Preheat oven to 350°F (175°C). Line a baking dish with parchment or lightly grease.
Prepare Filling:
- In a bowl, combine shredded chicken, mozzarella, ½ cup parmesan, mayonnaise, pepper, and garlic powder.
Assemble Sliders:
- Slice the entire block of Hawaiian rolls in half horizontally (do not separate). Place the bottom half in the baking dish. Spread the chicken mixture evenly over the bottom layer. Cover with the top half of rolls.
Make Garlic Butter:
- In a small bowl, stir together melted butter, minced garlic, parsley, and 2 tablespoons parmesan.
Brush and Bake:
- Brush the garlic butter mixture generously over the tops of the rolls. Cover with foil and bake for 15 minutes. Uncover and bake an additional 5–10 minutes until golden and melted.
Serve:
- Let cool slightly, then cut into individual sliders and serve warm.
Notes
- Make Ahead:
Assemble up to 1 day in advance. Cover and refrigerate, then bake just before serving. - Variations:
Add cooked spinach, bacon crumbles, or a layer of marinara for an Italian twist. - Serving Suggestions:
Serve with salad, chips, or cut veggies for a simple lunch or party platter. - Allergy-Friendly Options:
Use dairy-free cheese and mayo alternatives if needed. Check roll ingredients for allergens. - Storage Tips:
Refrigerate leftovers in an airtight container for up to 3 days. Reheat in oven or air fryer for best texture.
These sliders have become one of those recipes I genuinely look forward to making. There's something satisfying about pulling a golden pan out of the oven, hearing that sizzle from the butter on top, and knowing dinner is completely done with almost no effort. I've made them for guests who I was nervous to cook for, and every single time someone has asked for the recipe before they've even finished eating.
If you're planning a bigger spread, these go really well next to something cheesy and dippable like my Mozzarella Sticks with That Perfect Cheese Pull — both come out of the oven around the same time and together they're basically a party on their own. And if you want to balance the richness with something lighter, a Cold Chicken Spinach Pasta Salad alongside is a combination I've done more than once.
This isn't a complicated recipe and it doesn't pretend to be. It's the kind of thing I make when I want something that feels a bit special without requiring much from me. The filling is creamy, the tops are golden and garlicky, and the sweet rolls tie it all together in a way that makes sense every single time. I hope your family enjoys these as much as mine does. 🧄🧀✨
If you liked this recipe, here are a few more you might want to try:

Comments
No Comments