
I've made mozzarella sticks probably forty times now, and the first batch I ever fried was a disaster. I skipped the freezing step because I thought it couldn't possibly matter that much — and within thirty seconds in the oil, every single stick burst open and left me with a pan of floating cheese shreds and a very sad crispy shell. Lesson learned the hard way.
What makes this version work is a few things I figured out through trial and error: patting the cheese dry before breading, double-coating for a thicker crust, and — non-negotiable — freezing them for at least 30 minutes before they touch the oil. I also season the breadcrumbs properly instead of leaving them plain, which makes a real difference in flavor. If you want something crispy to snack on while you're making my Italian Sausage Soup on a cold evening, these are what I'd put on the table.
These have become a Saad-approved snack in our house, which is genuinely the highest praise I can get. He asks for them on movie nights and during school holidays. My husband dips his in spicy ketchup. I prefer marinara. Zainab eats them plain because she's seven and doesn't care about dipping sauce. We all agree they're better fresh out of the oil, though.
I'm giving you all three cooking methods here — frying, baking, and air frying — because not everyone wants to deal with a pot of hot oil. Frying gives you the crispiest result and honestly the best cheese pull. Baking works, but go hot (425°F) and don't skip the freeze. Air frying is the middle ground: less oil, still crispy, still satisfying. All three start with the same breaded, frozen sticks.

Why You'll Love This Recipe
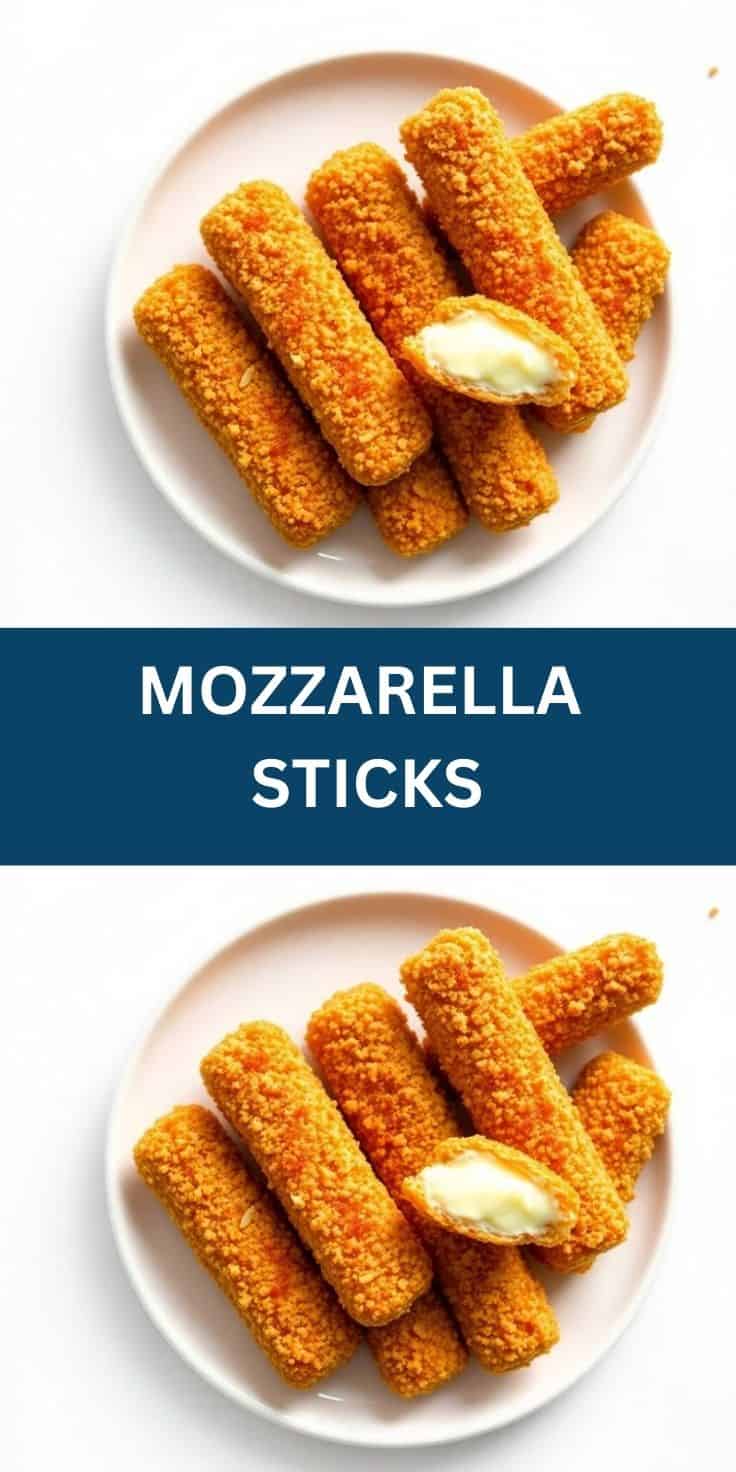
- That cheese pull is real: There's nothing more satisfying than pulling apart a mozzarella stick and watching the cheese stretch. I've tested different cheese brands and the string cheese sticks from Walmart or Costco work best — they're low-moisture and don't turn into a puddle the way fresh mozzarella does. When you freeze them properly and fry at the right temperature, the pull is genuinely dramatic.
- Three cooking methods, one recipe: Whether you fry, bake, or air fry, the prep is identical. I like having the option on nights when I don't want to stand over a pot of oil. The air fryer version at 390°F for 6–7 minutes has become my weeknight default when it's just a quick snack and not a special occasion spread.
- Make-ahead friendly: I almost always bread these the day before and keep them in the freezer. When people come over, I'm not rushing to prep — I just pull them out and cook them while everyone settles in. You can freeze them up to 2 days ahead without any loss in quality.
- Basic pantry ingredients: String cheese, flour, eggs, breadcrumbs, salt, garlic powder. That's genuinely the whole list. I usually have everything on hand without a special grocery run. If you keep Italian-style breadcrumbs in the pantry (I buy the Progresso canisters from any grocery store), you're already most of the way there.
Ingredients
- 12 mozzarella string cheese sticks, halved (I use the ones from Walmart or Costco — standard low-moisture sticks work best)
- 1 cup all-purpose flour
- 2 eggs, beaten
- 1 cup Italian-style breadcrumbs (or panko for extra crunch)
- ½ teaspoon salt
- ½ teaspoon garlic powder
- ½ teaspoon Italian seasoning (optional, but worth it)
- Oil for frying (vegetable or canola — something neutral with a high smoke point)
Directions
- Prep the cheese: Unwrap the string cheese sticks and cut each one in half. Pat them dry with a paper towel — this matters more than it sounds. Moisture on the cheese surface prevents the flour from sticking, which means your breadcrumbs won't hold either. Dry cheese = better crust.
- Set up your breading station: You need three bowls in a row. Bowl one: 1 cup flour. Bowl two: 2 beaten eggs. Bowl three: breadcrumbs mixed with salt, garlic powder, and Italian seasoning. Line them up assembly-line style so the process goes fast. I do this before anything else so I'm not scrambling around.
- Bread the sticks: Take each cheese piece and roll it in flour first, shaking off the excess. Dip it in egg, let the drip run off, then roll it in the seasoned breadcrumbs and press gently so they stick. For a thicker crust — which I strongly recommend — dip it back in the egg and roll through the breadcrumbs a second time. Double-coated sticks hold up much better during cooking.
- Freeze them: Lay the breaded sticks on a baking sheet lined with parchment and put them in the freezer for at least 30 minutes, or up to 2 days. Do not skip this. The freeze is what keeps the cheese inside the stick instead of leaking into the oil. Every time I've rushed this step, I've regretted it.
- Cook them — pick your method: Frying: Heat about 2 inches of oil in a heavy skillet or saucepan to 350°F (175°C). Use a thermometer if you have one; if not, drop a tiny pinch of breadcrumbs in — they should sizzle immediately. Fry in batches of 4–5 sticks for 2–3 minutes, turning once, until golden brown all over. Don't crowd the pan. Baking: Preheat oven to 425°F. Arrange frozen sticks on a lightly oiled sheet pan with space between each. Bake 8–10 minutes, flipping halfway. Air frying: Preheat your air fryer to 390°F. Arrange sticks in a single layer with a little space between them. Cook 6–7 minutes until golden.
- Drain and serve: Pull fried sticks out with tongs and drain on a wire rack or paper towels for about a minute. Serve immediately while the cheese is still molten. This is not a recipe that waits well — the pull window is real and it's brief.

Tips for Success
- Don't skip the freeze: I know I've already said this twice, but it really is the single most important step. The first three batches I made before I understood this had cheese leaking within seconds of hitting the oil. 30 minutes minimum in the freezer — and if you can do an hour, even better. The cheese needs to be cold and firm before it encounters heat.
- Use low-moisture mozzarella: I tried fresh mozzarella once because it's what I had. It tasted great but the coating turned soggy almost instantly from the water content. String cheese sticks are low-moisture by design, which is exactly what you want here. The Kraft or Sargento ones from any grocery store work perfectly.
- Keep your oil temperature steady: If the oil is too cool (below 340°F), the sticks absorb oil and turn greasy before the coating crisps. Too hot (above 375°F), and the outside burns before the cheese inside warms up. I aim for 350°F and check the temperature between batches — the oil cools down a bit every time you add cold frozen sticks, so give it 30 seconds to recover.
- Double coat for a proper crust: Single-coated sticks work, but they're thinner and more prone to cracking open. Dipping twice in egg and breadcrumbs adds about 2 minutes to the prep and makes a noticeable difference in texture and sturdiness. I do double coats every time now without even thinking about it.
- Fry in small batches: I try to do 4–5 sticks at a time maximum. When you add too many at once, the oil temperature drops fast and you end up with uneven cooking — some sticks pale and greasy, others overdone. Small batches feel slower but you get consistent golden results every time.
Variations
- Panko for extra crunch: Swap the Italian breadcrumbs for panko and you get a noticeably lighter, airier crust that shatters more dramatically when you bite in. I like adding ½ teaspoon of Italian seasoning and a pinch of paprika to the panko to make up for the seasoning you lose from the Italian-style crumbs. This is my husband's preferred version.
- Spicy version: Add ¼ teaspoon of cayenne or red chili flakes to the breadcrumb mix, or tuck a thin slice of pickled jalapeño against the cheese before breading. The heat sneaks up on you in a good way. We serve these with a cooling ranch dip to balance things out.
- Different cheese: Pepper jack works really well here — it melts similarly to mozzarella and adds a little heat from the inside. Provolone is another good option if you want a slightly sharper flavor. The key is using a low-moisture, firm cheese that's been cut to the same size as the string cheese halves so cooking time stays consistent.
- Gluten-free: Swap the all-purpose flour for a gluten-free flour blend and use gluten-free breadcrumbs — both are available at most Walmart and Target stores now. The process is identical. I've made this for a friend who can't have gluten and she said she couldn't tell the difference in texture.
- Baked with a parmesan crust: Mix 2 tablespoons of finely grated parmesan into the breadcrumbs before coating. It adds a salty, nutty layer to the outside that's really good. This is the version I make when I'm baking them rather than frying — the parmesan helps the crust get a little more color in the oven compared to plain breadcrumbs.
Serving and Storage
Serving
Serve these immediately — within a minute or two of coming out of the oil or oven. The cheese pull is at its best when they're piping hot and doesn't stay that way for long. Marinara is the classic pairing and what I always put out first. Ranch is a close second in our house. If you want something a little more interesting, a garlic aioli or spicy sriracha mayo works well too. We usually put out two or three dipping options and let everyone choose. For a full snack spread, I'll set these alongside something light like a Berry Spinach Salad so there's some freshness on the table.
Storage
These are honestly best eaten the day they're made. If you have leftovers, store them in an airtight container in the fridge for up to 3 days. Reheat in the oven at 375°F for about 5–6 minutes, or in the air fryer at 370°F for 3–4 minutes. Don't use the microwave — the coating goes soft and rubbery and the cheese gets grainy. For make-ahead, I strongly prefer freezing the breaded-but-uncooked sticks and cooking them fresh when I need them. That gives much better results than reheating cooked ones.
Frequently Asked Questions
Can I bake mozzarella sticks instead of frying?
Yes, and it works well if you do it right. Preheat your oven to 425°F and bake the frozen sticks on a lightly oiled sheet pan for 8–10 minutes, flipping halfway through. They won't be quite as crispy as fried — the coating is a little softer — but the cheese pull is still there and they're genuinely good. Don't bake them at a lower temperature thinking it's safer; high heat is what crisps the outside before the cheese melts through.
Why did my cheese leak out while frying?
Almost always, it's one of two things: they weren't frozen long enough, or the oil temperature was off. If the sticks go in at room temperature or only partially frozen, the cheese heats up and starts moving before the coating has time to set. If the oil is too cool, the sticks sit in it too long and the cheese eventually pushes through. Freeze for a full 30 minutes minimum, check your oil temperature before each batch, and double-coat for extra insurance.
Can I make mozzarella sticks ahead of time?
Yes — this is actually my preferred method for parties. Bread the sticks, lay them on a parchment-lined tray, and freeze them solid. Once frozen, you can transfer them to a zip-lock bag and keep them in the freezer for up to 2 days. When you're ready to cook, go straight from frozen into the oil or oven — no thawing needed. It saves all the prep work on the day you're hosting.
What dipping sauces work best with mozzarella sticks?
Marinara is the classic and it's classic for a reason — the acidity cuts through the richness of the fried cheese really well. Ranch is popular in our house, especially with the kids. Garlic aioli, honey mustard, and spicy ketchup are all good options. My husband goes for sriracha mayo when I make the spicy jalapeño version. Honestly, set out two or three options and let people mix and match.
How do I reheat leftover mozzarella sticks without them going soggy?
The oven or air fryer only — never the microwave. The microwave makes the coating soft and the cheese grainy. In the oven, 375°F for 5–6 minutes on a wire rack gets them close to crispy again. The air fryer at 370°F for 3–4 minutes is even better. That said, leftovers are never quite as good as fresh, which is why I'd rather freeze the uncooked breaded sticks and fry a fresh batch.
MOZZARELLA STICKS
Ingredients
For the Mozzarella Sticks:
- 12 mozzarella string cheese sticks halved
- 1 cup all-purpose flour
- 2 eggs beaten
- 1 cup breadcrumbs Italian-style
- ½ teaspoon salt
- ½ teaspoon garlic powder
- oil for frying
Instructions
Bread Cheese:
- Coat cheese sticks in flour, dip in eggs, then roll in breadcrumbs mixed with salt and garlic powder.
Freeze:
- Freeze breaded cheese sticks for at least 30 minutes to prevent melting.
Fry:
- Heat oil to 350°F (175°C). Fry mozzarella sticks for 2–3 minutes until golden.
Serve:
- Drain on paper towels and serve hot with marinara sauce.
Notes
- Make Ahead: Freeze breaded sticks up to 2 days ahead.
- Baking Option: Bake at 425°F for 8–10 minutes.
- Air Fryer: Cook at 390°F for 6–7 minutes.
- Serving Sauce: Marinara, ranch, or spicy ketchup.
- Storage: Best served immediately.
I keep coming back to this recipe because it's one of those things where the result is so satisfying and the ingredients are so basic that it never stops feeling like a good deal. A bag of string cheese, some breadcrumbs, two eggs — and you get something that looks and tastes like it came from a restaurant. I make a double batch whenever I'm having people over because a single batch disappears before I've even put the dipping sauces on the table.
The flexibility of the three cooking methods is what I appreciate most on a practical level. Some nights I want the full crispy fried experience, some nights I just want to set the air fryer and walk away. Both work. If you're planning a bigger snack night and want something to round out the spread, my Vegan Garlic Noodles are a surprisingly good side — the garlicky, savory flavors go really well alongside cheesy fried things.
If you make these, pull one apart slowly over the plate and watch that cheese stretch. That's the moment. That's why we make them. 🧀✨
If you liked this, you might also enjoy these:
- Italian Sausage Soup Recipe — warm, hearty, and great alongside a cheesy snack spread
- Vegan Garlic Noodles — savory and garlicky, ready in under 20 minutes
- Berry Spinach Salad with Pecans, Feta, and Balsamic Glaze — something fresh to balance out the fried stuff
- Italian Cannoli-Inspired Thumbprint Cookies — if you want something sweet after all that cheese
- Cherry Coke Slushie


Comments
No Comments