
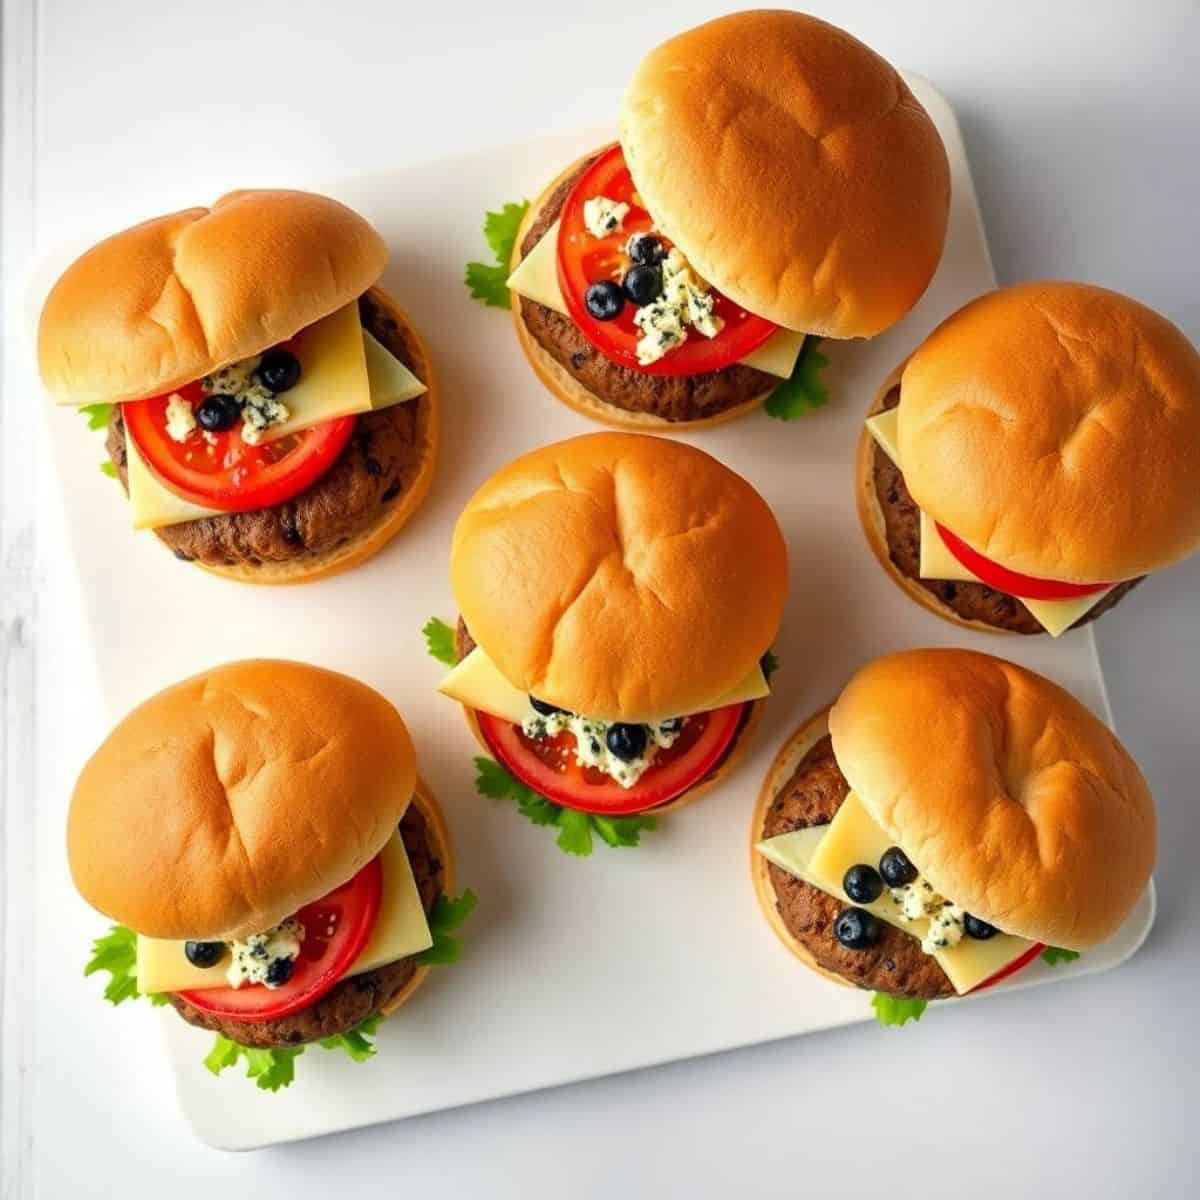
If you are looking for the most genuinely festive, most visually striking, and most deliciously satisfying burger to bring to a 4th of July cookout — these Red, White & Blue Cheeseburgers are exactly what the occasion demands. Juicy, perfectly seasoned beef patties topped with melted white cheddar, crumbled blue cheese, and fresh sliced tomatoes — the red, white, and blue of these burgers is not just a patriotic theme but a genuinely extraordinary flavor combination that makes every bite rich, savory, tangy, and deeply satisfying.
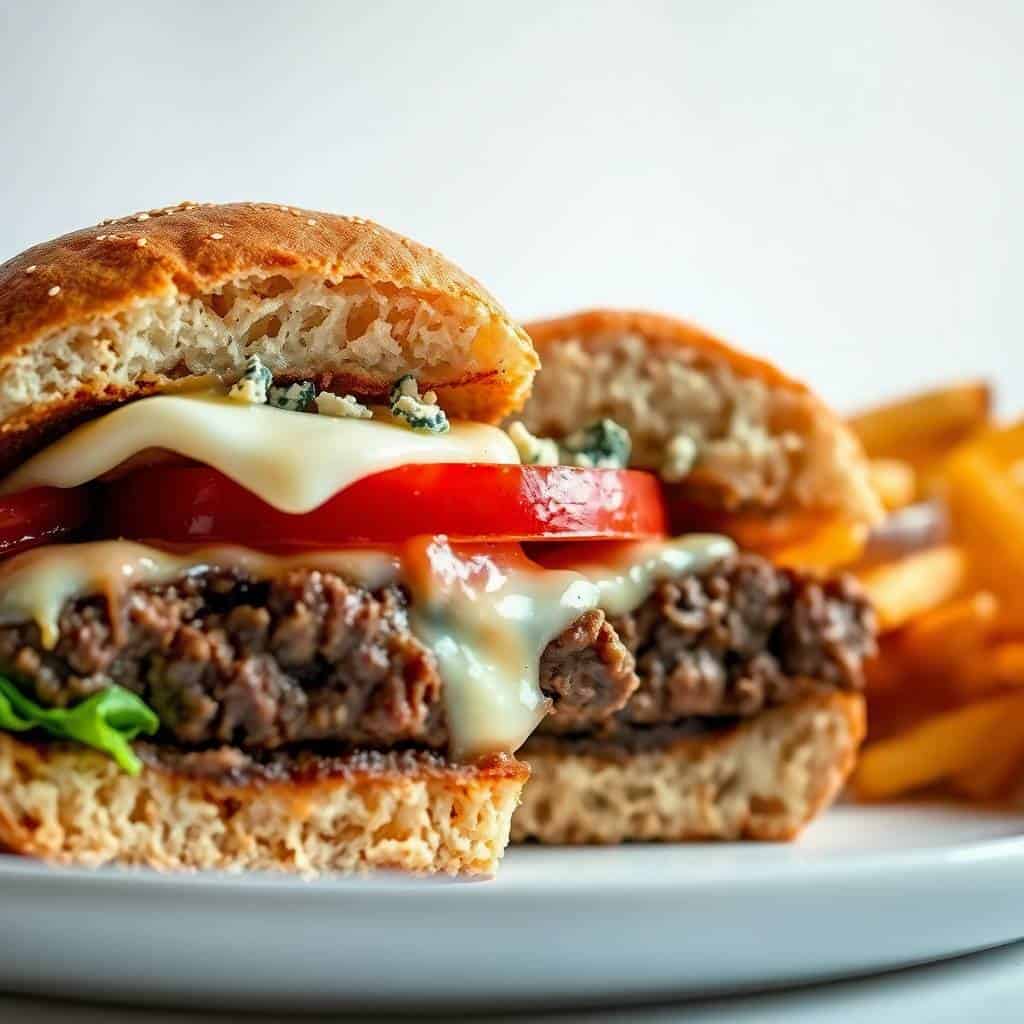
The beauty of this burger is in the pairing of the cheese elements — the mild, melty white cheddar provides a creamy, smooth richness that coats the patty, while the crumbled blue cheese adds a sharp, funky, intensely tangy counterpoint that transforms the entire burger from a classic American cheeseburger into something genuinely gourmet. The blue cheese and white cheddar together create a flavor profile that is more complex, more interesting, and more memorable than any single-cheese burger can achieve. Add fresh sliced tomatoes for the red, a crisp lettuce leaf and creamy mayo for the white sauce element, and you have a burger that looks as striking as it tastes.
These Red, White & Blue Cheeseburgers are genuinely flexible — grill them outdoors on a charcoal or gas grill for the most classic, most smoky summer flavor, or cook them in a cast iron skillet on the stovetop for equally excellent results in any weather. The patties are seasoned simply with Worcestershire sauce, salt, and pepper, which allows the quality of the beef and the complexity of the cheese toppings to be the stars. Find more 4th of July and summer cookout inspiration in our pool party food ideas and our easy summer potluck recipes.
Whether you are hosting a backyard 4th of July party, a Memorial Day cookout, or simply craving the most genuinely satisfying summer burger — these Red, White & Blue Cheeseburgers will become the most requested item on your grill all summer long. Let's build the most patriotic, most delicious burger of the entire season!
WHY YOU WILL LOVE THIS RECIPE
- Patriotic and Visually Stunning: The red tomatoes, white cheddar, and blue cheese crumbles create a genuinely festive, eye-catching color combination that makes these burgers the centerpiece of any 4th of July or patriotic celebration spread. They look exactly as beautiful and as impressive as they taste.
- Extraordinary Flavor Combination: The pairing of mild, creamy white cheddar with sharp, tangy blue cheese crumbles on a juicy beef patty creates a flavor complexity that is genuinely extraordinary — savory, rich, tangy, and deeply satisfying in a way that a standard single-cheese burger simply cannot achieve. Every bite delivers a different balance of flavors.
- Perfect for Cookouts and Celebrations: These burgers are genuinely ideal for summer BBQs, Fourth of July parties, Memorial Day cookouts, and any outdoor summer gathering where a crowd-pleasing, visually impressive main dish is exactly what the occasion requires.
- Flexible Cooking Methods: These burgers cook beautifully on a charcoal grill, a gas grill, or a cast iron skillet — making them equally achievable for an outdoor summer cookout and a quick indoor weeknight dinner. The cooking method does not compromise the result in any meaningful way.
- Endlessly Customizable: Add lettuce, red onion, pickles, jalapeños, or your preferred condiments to personalize every burger to individual tastes. The red, white, and blue cheese topping combination is the heart of the recipe — everything else is flexible to suit the preferences of your guests.
- Quick to Assemble and Serve: With simple seasoning, fast grilling, and straightforward assembly, these burgers come together efficiently even when cooking for a large crowd. The entire process from seasoning to serving takes under 25 minutes — perfect for a busy cookout where multiple dishes are being prepared simultaneously.
- Outstanding Gourmet Results from Simple Ingredients: These burgers achieve a genuinely gourmet, restaurant-quality result from the most straightforward ingredients — ground beef, cheese, seasoning, and buns. The quality of the cheese combination does all the work to elevate a classic burger into something genuinely extraordinary.
INGREDIENTS
- 1½ pounds ground beef, 80/20 blend — the 20% fat content produces the juiciest, most flavorful patty; leaner blends produce drier, less satisfying burgers
- 1 teaspoon salt
- ½ teaspoon black pepper
- 1 tablespoon Worcestershire sauce — adds deep umami depth that elevates the beef flavor significantly
- 4 slices white cheddar cheese
- ¼ cup blue cheese crumbles — the bolder the blue cheese, the more complex the finished burger
- 1 large ripe tomato, sliced
- 4 burger buns, toasted — toasted buns add texture and prevent sogginess from the juicy patty
- Lettuce leaves (optional)
- Sliced red onion (optional)
- Mayonnaise, mustard, or ketchup (optional)
DIRECTIONS
- Step No.1: Season and form the patties
In a large bowl, combine the ground beef, salt, black pepper, and Worcestershire sauce. Mix gently with your hands — just enough to distribute the seasoning evenly without overworking the meat. Overworked ground beef develops a dense, tough texture that loses the tender, juicy quality of a great burger. Divide the mixture into 4 equal portions and shape each into a patty approximately ¾ inch thick and slightly wider than your buns — patties shrink during cooking and a wider patty produces a bun-filling result. Press a shallow thumbprint into the center of each patty — this depression compensates for the puffing that occurs during cooking and produces a flat, even patty rather than a domed one.
- Step No.2: Preheat the grill or skillet
Heat your grill to medium-high heat — approximately 400°F for a gas grill, or until the coals are glowing orange with a gray ash coating for a charcoal grill. Lightly oil the grates just before placing the patties to prevent sticking. For a stovetop version, heat a cast iron skillet over medium-high heat until very hot before adding the patties — a properly preheated surface creates the most flavorful sear on the outside of each patty.
- Step No.3: Grill the patties
Place the patties on the hot grill or skillet and cook for 4–5 minutes per side for medium doneness — adjust cooking time based on your preferred level of doneness. Do not press down on the patties with a spatula during cooking — pressing squeezes out the juices that make the burger moist and flavorful and produces a dry, inferior result. Flip only once for the best sear and crust development on each side.
- Step No.4: Add both cheeses
During the final 60–90 seconds of cooking, top each patty with one slice of white cheddar. Immediately scatter a generous tablespoon of blue cheese crumbles over the white cheddar. Close the grill lid or cover the skillet with a dome to trap the steam and heat — this melts both cheeses simultaneously, creating a gloriously layered, cohesive cheese topping that flows down the sides of the patty. The white cheddar melts into a smooth, creamy layer while the blue cheese softens and intensifies in flavor.
- Step No.5: Toast the buns
While the cheese melts, place the burger buns cut-side down on the grill or in a separate skillet for 30–60 seconds until lightly golden. Toasted buns add a satisfying crunch, prevent the bun from becoming soggy from the juicy patty and toppings, and add a subtle nutty flavor that elevates the entire burger experience.
- Step No.6: Rest the patties before assembling
Remove the patties from the heat and allow them to rest on a plate for 2–3 minutes before assembling the burgers. Resting allows the juices to redistribute back through the patty — assembling immediately causes the juices to run out onto the plate, leaving a drier burger. This brief resting step makes a genuinely noticeable difference in the juiciness of the finished burger.
- Step No.7: Assemble and serve
Spread mayonnaise or garlic aioli on the bottom bun. Add lettuce if using, then place the cheese-topped patty on the lettuce. Layer fresh tomato slices over the patty and add sliced red onion if desired. Add any additional condiments. Top with the toasted bun lid and serve immediately alongside chips, fries, corn on the cob, or coleslaw for the most genuinely satisfying summer meal.

TIPS FOR SUCCESS
- Use Cold Ground Beef: Cold meat holds its shape better when formed into patties and prevents crumbling on the grill. If the ground beef has been sitting at room temperature for more than 15 minutes, chill the formed patties in the refrigerator for 10 minutes before grilling. Cold patties also develop a better sear as they hit the hot cooking surface.
- Do Not Overmix the Beef: Mix the seasoning into the ground beef with the minimum number of strokes needed to evenly distribute — overmixing develops the protein structure of the meat and produces dense, compact, tough patties rather than the loose, tender, juicy result that makes a great burger. Handle the beef as little as possible.
- Always Press a Thumbprint into Each Patty: A shallow thumbprint depression in the center of each patty before cooking prevents the patty from puffing up into a dome shape during cooking. A domed patty is aesthetically unappealing and difficult to stack with toppings — the thumbprint ensures a flat, even patty every time.
- Choose Quality Buns: A soft, sturdy bun that holds all the toppings without falling apart is genuinely important for the burger experience. Brioche buns are the most luxurious choice, potato rolls are the most classically American, and pretzel buns add a distinctive flavor and extra chew. Whatever variety you choose, toast them — a toasted bun elevates every burger significantly.
- Add Cheese at the Very End: Adding the cheese in the final 60–90 seconds of cooking and covering to melt produces perfectly melted, cohesive cheese that clings to the patty rather than sliding off. Adding cheese too early causes it to overcook, burn at the edges, and lose the creamy, molten quality that makes a great cheeseburger.
- Rest the Patties Before Assembling: Allow 2–3 minutes of resting time before assembling — the juices redistribute through the patty during this brief rest and produce a noticeably juicier, more flavorful burger than one assembled immediately after cooking.
- Offer a Toppings Bar: Set out a spread of toppings — pickles, jalapeños, crispy bacon, different mustards, hot sauce, extra blue cheese crumbles — and let guests customize their own burgers. A toppings bar makes the experience genuinely interactive and fun for any size gathering.
VARIATIONS
- Turkey Burger Version: Substitute the ground beef with ground turkey for a leaner, lighter version that maintains the same festive red, white, and blue topping combination. Season turkey patties slightly more generously than beef as the leaner meat benefits from extra flavor support.
- Spicy Kick Version: Add diced jalapeños to the patty mixture before forming, use chipotle mayo instead of standard mayonnaise, and top with pickled jalapeño slices for a spicy red, white, and blue version that adds a thrilling heat to every bite without losing the patriotic presentation.
- Vegetarian Version: Use grilled portobello mushroom caps or a high-quality plant-based patty as the base for a meat-free version that still carries the red, white, and blue cheese topping combination beautifully. Portobello mushrooms have a deep, meaty flavor that pairs particularly well with both white cheddar and blue cheese.
- Mini Patriotic Sliders: Make smaller patties using the same seasoning and topping combination for bite-sized Red, White & Blue sliders that are perfect for parties, game day spreads, and large gathering where individual full-sized burgers are impractical. Use slider buns and adjust cooking time to 2–3 minutes per side.
- Brioche Bun Upgrade: Serve these burgers on toasted brioche buns for a noticeably richer, bakery-quality experience. The buttery sweetness of brioche complements the tangy blue cheese in a particularly extraordinary way.
- Stuffed Burger Twist: Mix the blue cheese crumbles directly into the ground beef before forming the patties for a surprise burst of intensely tangy flavor from the inside with every single bite — the blue cheese melts into the meat during cooking for an extraordinary result.
SERVING AND STORAGE
Serving
Serve these Red, White & Blue Cheeseburgers hot off the grill immediately for the most juicy, most flavorful experience. Pair with classic summer sides — crispy fries, corn on the cob, coleslaw, potato salad, or watermelon slices — for a genuinely complete and festive cookout spread. For the most patriotic presentation, add small American flag toothpicks to the top of each assembled burger, serve on patriotic plates, and arrange the sides in red, white, and blue serving bowls for the most visually stunning 4th of July table setup available.
Storage
Wrap leftover cooked patties in foil and refrigerate for up to 2 days — store patties and toppings separately. Reheat patties gently in a skillet over medium heat or in a 350°F oven for 5–8 minutes to preserve moisture. Do not microwave as microwaved burger patties lose their texture rapidly. Uncooked formed patties can be refrigerated for up to 24 hours before grilling, or frozen with parchment paper between them in a freezer-safe bag for up to 3 months — thaw overnight in the refrigerator before grilling.
FAQ
Yes — crumbled feta cheese produces a milder, saltier tang that is less intense than blue cheese but still provides the white crumble visual element of the patriotic color theme. Goat cheese is another excellent mild option. If you find blue cheese too strong, mixing a small amount of blue cheese with cream cheese creates a more approachable version of the same flavor profile.
Yes — form the patties up to 24 hours in advance, place on a parchment-lined plate, cover tightly with plastic wrap, and refrigerate until ready to grill. Chilled patties actually cook better than room temperature ones as they hold their shape more cleanly and develop a better sear. You can also freeze formed patties for up to 3 months.
An 80/20 ground beef blend — 80% lean meat to 20% fat — is the most recommended choice for the juiciest, most flavorful burger. The 20% fat renders out during cooking, basting the meat from the inside and producing a deeply flavorful, exceptionally moist patty. Leaner blends (90/10 or 93/7) produce drier, less satisfying burgers that are more prone to becoming tough.
Yes — shape the patties, place them on a parchment-lined baking sheet, and freeze until solid. Transfer to a freezer-safe zip-lock bag with parchment paper between each patty and freeze for up to 3 months. Thaw overnight in the refrigerator before grilling for the best results. Do not grill from frozen as the outside will burn before the inside is cooked through.
Yes — though the blue cheese may be strong for very young or picky eaters. For children, simply omit the blue cheese and keep the white cheddar topping only. You can serve the blue cheese crumbles on the side for adventurous adults while keeping the children's burgers with just the white cheddar — everyone still gets the patriotic color theme with the tomatoes and white cheddar.
These Red, White & Blue Cheeseburgers are a genuinely flavor-packed way to celebrate American summer traditions — whether you are serving them at a 4th of July party, a Memorial Day cookout, or simply a backyard summer BBQ with family and friends. With minimal effort and maximum satisfaction, they check every box: juicy, cheesy, customizable, visually stunning, and genuinely fun.
Add them to your summer menu and enjoy a genuinely delicious, genuinely patriotic bite of American tradition. Find more summer cookout inspiration in our pool party food ideas and our easy summer potluck recipes. 🇺🇸🍔✨
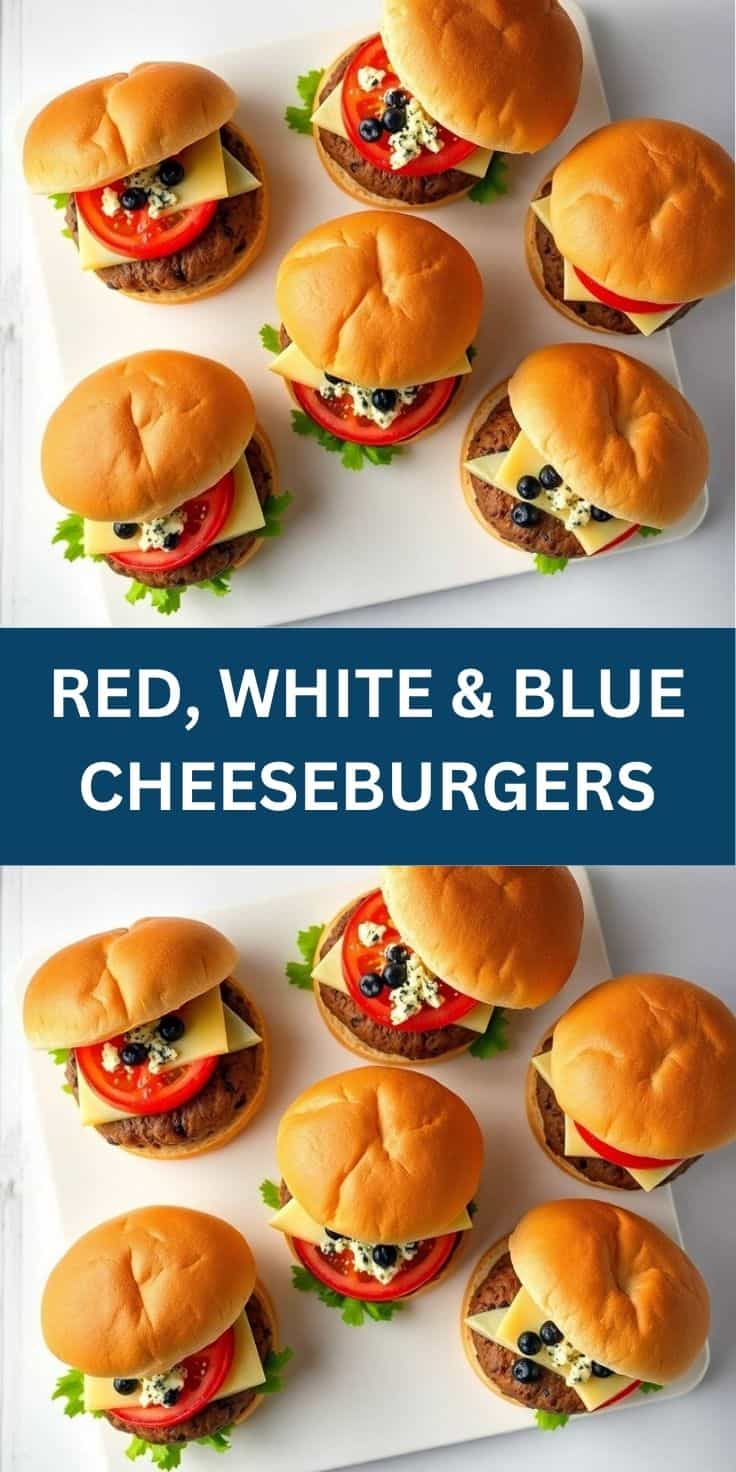
RED, WHITE & BLUE CHEESEBURGERS
Ingredients
For the Burgers:
- 1½ lbs ground beef 80/20
- 1 teaspoon garlic powder
- ½ teaspoon salt
- ½ teaspoon black pepper
- 4 hamburger buns toasted
Toppings:
- 4 tablespoons mayonnaise or garlic aioli
- ½ cup crumbled blue cheese
- ½ cup roasted red peppers sliced
- 4 butter lettuce leaves optional
- 1 small red onion thinly sliced (optional)
Instructions
Form Patties:
- In a bowl, combine ground beef with garlic powder, salt, and pepper. Mix gently and shape into 4 equal patties.
Grill Burgers:
- Preheat grill to medium-high heat. Cook patties for 4–5 minutes per side, or until desired doneness.
Toast Buns:
- During the last minute of grilling, toast buns on the grill until golden.
Assemble Burgers:
- Spread mayo or aioli on the bottom bun. Add lettuce, burger patty, crumbled blue cheese, roasted red peppers, and red onion if using. Top with bun.
Notes
- Make it Spicy: Add a few dashes of hot sauce to the mayo or top with pickled jalapeños.
- Blue Cheese Swap: Use goat cheese or feta for a different take.
- Vegetarian Option: Substitute beef patties with grilled portobello mushrooms or veggie burgers.
- Make Ahead: Patties can be shaped and stored in the fridge up to 24 hours in advance.
- Serving Idea: Pair with patriotic potato salad or grilled corn on the cob.



Comments
No Comments