
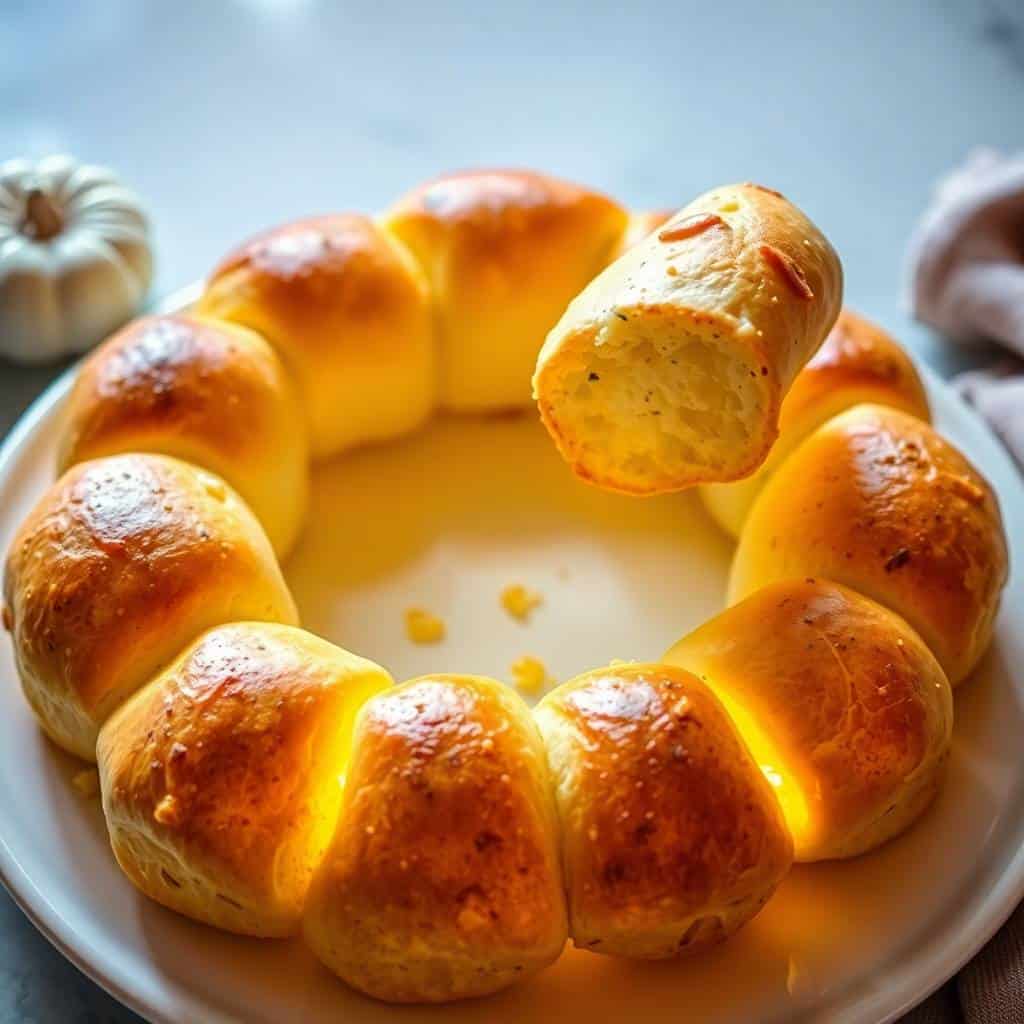
The smell of garlic butter hitting a hot oven is what gets everyone in my house moving toward the kitchen. This pull apart garlic bread wreath is the recipe I make when I want something that looks like I spent hours on it but actually comes together in an afternoon. The wreath shape is honestly just dough balls arranged in a circle — but it looks like something you'd see at a holiday table and people always react to it.
What makes this version work is the double butter brush — once before baking, once right after it comes out of the oven. The first coat gives you that golden color, and the second one soaks into the bread while it's still hot and makes every piece taste like it was dipped in garlic butter. I also stuff each ball with a pinch of mozzarella before shaping, so when you pull a piece apart you get that cheese pull inside, not just on top. If you love bread with that kind of savory richness, you might also want to check out my Garlic Sesame Noodles — different dish entirely, but the same garlic-forward logic applies.
My husband asks for this every time we have people over. Saad calls it "the bread you pull" and will eat six pieces before dinner even starts. I usually make it for holiday dinners, but honestly it's shown up on random Friday nights too when I just want something warm and hands-on for the table. It works as a side for soups, pasta, or even just on its own with a dipping sauce in the middle.
One thing to set expectations on: this is a yeast dough recipe, which means you need about 90 minutes total for two rises before it goes in the oven. It's not difficult — I'm not a professional baker, I don't have a stand mixer, and I've made this many times without any fancy equipment. But do plan ahead. If you're making this for a holiday dinner, start the dough a couple of hours before you need it.
Why You'll Love This Recipe
- It looks impressive without being complicated: The wreath shape is just dough balls placed in a circle on a sheet pan — you don't need a special mold or any shaping skill. I place a small oven-safe bowl in the center to hold the shape while it bakes and then remove it after. The result looks like something from a bakery window, but the technique is genuinely beginner-friendly.
- The dough is forgiving: I've made this when my yeast was almost expired, when my kitchen was cold and the rise took longer than expected, and once when I forgot to salt the dough until halfway through kneading. It came out fine every time. Yeast dough has a reputation for being fussy, but this one really isn't.
- The cheese-inside trick: Most garlic bread just has cheese on top. Here, each ball gets a pinch of mozzarella sealed inside before shaping. When you pull a piece apart, the cheese has melted into the soft interior. It's a small step that makes a big difference in how the bread eats.
- It's made for sharing: There's something about pull-apart bread that makes a table feel more relaxed. People reach in, conversations happen, kids get excited about pulling their own piece. It's the opposite of a dish that sits untouched because it looks too neat to disturb.
- You can prep it the night before: Form the dough balls, arrange them on the pan, cover tightly with plastic wrap, and refrigerate overnight. The next day, let them come to room temperature for 30-45 minutes, then bake. This is how I handle it for holiday dinners when I don't want to be stressed in the kitchen while guests are arriving.
Ingredients
- For the Dough (or use store-bought pizza dough):
- 3 cups all-purpose flour
- 1 tablespoon sugar
- 2¼ teaspoons active dry yeast (1 standard packet)
- 1 teaspoon salt
- 1 cup warm water (around 110°F — warm to the touch but not hot)
- 2 tablespoons olive oil
- For the Garlic Butter:
- 4 tablespoons unsalted butter, melted
- 2 cloves garlic, minced (or ½ teaspoon garlic powder in a pinch)
- 1 tablespoon chopped fresh parsley (or 1 teaspoon dried)
- ¼ teaspoon salt
- For the Filling & Topping (Optional but recommended):
- ½ cup shredded mozzarella or Parmesan cheese (for topping)
- Extra mozzarella for stuffing inside the balls (about 1 teaspoon per ball)
- Extra parsley for garnish
Directions
- Activate the yeast: In a large bowl, combine the warm water, sugar, and yeast. Give it a quick stir and let it sit for 5–10 minutes. You're looking for it to get foamy and bubbly — that's how you know the yeast is alive and active. If it doesn't foam at all after 10 minutes, your yeast might be dead or your water was too hot. Start over with a fresh packet.
- Make the dough: Add the flour, salt, and olive oil to the yeast mixture. Mix with a wooden spoon until a shaggy dough forms, then turn it out onto a lightly floured surface and knead for 8–10 minutes until the dough is smooth and slightly springy. I don't have a stand mixer so I do this by hand — it's a bit of a workout but completely manageable. The dough should not stick to your hands when it's ready.
- First rise: Place the dough in a lightly oiled bowl, cover with a clean kitchen towel or plastic wrap, and leave it somewhere warm for about 1 hour until it has doubled in size. I put mine in the oven with just the oven light on — that slight warmth is perfect.
- Make the garlic butter: In a small bowl, stir together the melted butter, minced garlic, parsley, and salt. Set it aside. If you make this while the dough is rising, the garlic has time to infuse into the butter a little, which I prefer.
- Shape the balls: Punch down the risen dough and divide it into 20–24 equal pieces — I use a bench scraper and eyeball it, but a kitchen scale helps if you want them uniform. Flatten each piece in your palm, add a small pinch of mozzarella in the center, fold the dough over it, and pinch it firmly closed. Roll it into a ball with your palm.
- Assemble the wreath: Line a large baking sheet with parchment paper. Place a small oven-safe bowl (like a ramekin) in the center to act as a guide. Arrange the dough balls in a circle around the bowl, fitting them snugly together. Sprinkle the shredded cheese on top if using.
- Second rise: Cover the assembled wreath loosely with a clean towel and let it rest for 30 minutes until the balls have puffed up and are touching each other. Don't skip this — the second rise is what gives you that soft, pillowy texture.
- Bake: Preheat your oven to 375°F (190°C). Brush the wreath generously with garlic butter, then bake for 20–25 minutes until deep golden brown. Rotate the pan halfway through for even color.
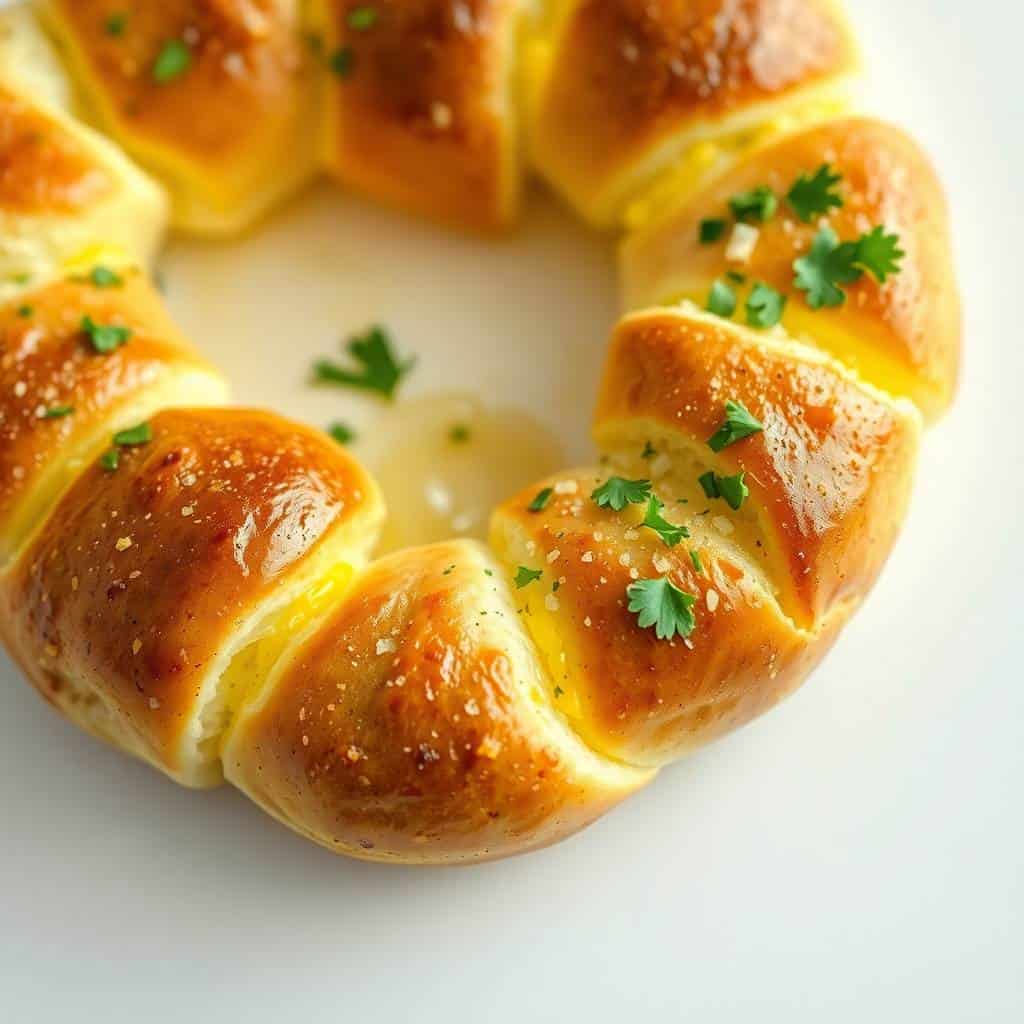
- Final brush and serve: Pull it out of the oven, remove the center bowl, and brush the remaining garlic butter over the top immediately. The hot bread soaks it right up. Let it cool for 5 minutes, then serve warm with marinara, ranch, or whatever dip you like.
Tips for Success
- Check your yeast before committing to the full recipe: I've wasted a whole batch because I assumed my yeast was fine and skipped checking. If the yeast doesn't foam in the first step, stop right there. A fresh packet of yeast costs almost nothing — it's not worth risking the whole batch on old yeast. I keep mine in the freezer now and it stays active much longer.
- Seal the cheese tightly: The first time I made stuffed bread, about half the cheese oozed out during baking and burned on the pan. The fix is to really pinch the dough closed — press the seam firmly and make sure there are no gaps. Then place each ball seam-side down on the pan so the weight holds it shut while it bakes.
- Don't rush the rises: I know it's tempting to speed things up, but the two rise periods are doing real work here. The first rise builds flavor in the dough; the second rise gives each ball that soft, airy interior. If your kitchen is cold, the rises will just take longer — give them time instead of turning up the oven heat.
- Use the center bowl trick: Place a small oven-safe bowl or ramekin in the center of your wreath before arranging the balls. This keeps the circular shape intact as the dough puffs up and bakes. Remove it after baking — it will slide right out. Without it, the center tends to close in during the second rise.
- Store-bought dough is a perfectly valid shortcut: If you don't want to deal with yeast at all, a pound of store-bought pizza dough from Trader Joe's, Walmart, or the refrigerated section at most grocery stores works well here. The flavor isn't quite the same, but the technique is identical and it saves you 90 minutes. For a holiday dinner when I'm already making three other things, I've used it without shame.
Variations
- Cheddar and bacon: Swap the mozzarella for sharp cheddar and add a few bits of cooked, crumbled bacon inside each ball. This is my husband's preferred version — he adds extra red pepper flakes to his garlic butter too. It's more of a game-night bread than a holiday bread, but it disappears just as fast. Pairs really well alongside something like my Chicken Bacon Ranch Sliders for a spread.
- Herb and Parmesan: Add 1 teaspoon of Italian seasoning or dried rosemary to the garlic butter, and use grated Parmesan instead of mozzarella on top. The Parmesan gets slightly crispy and salty on the outside while the inside stays soft. This is the version I'd serve alongside a bowl of soup or a Broccoli and Cheese Quiche for a cozy winter lunch.
- Spicy jalapeño: Add finely chopped pickled or fresh jalapeños to the filling along with the cheese. This version is not for Saad — he doesn't do spicy yet — but my husband and I love it. The heat cuts through the richness of the butter nicely.
- Pesto inside: Put a small teaspoon of store-bought basil pesto inside each ball instead of plain cheese. The pesto melts into the interior as it bakes and gives you a herby, nutty flavor in every bite. It works especially well with Parmesan on top rather than mozzarella.
- Vegan version: Use plant-based butter (I've used Earth Balance from Walmart — works well), vegan mozzarella shreds, and make sure your flour and sugar are certified vegan if that matters to you. The dough itself is naturally dairy-free and egg-free. The texture is nearly identical to the original.
Serving and Storage
Serving
Serve the wreath warm, straight from the oven, with a small bowl of marinara sauce placed in the center where the ramekin was. Ranch dressing or a simple garlic butter dip also works. I like setting it in the middle of the table on a wooden board and letting everyone pull from it — it creates a nice casual atmosphere even at a holiday dinner. It's a natural companion to soups, pasta, or a simple green salad. If you're putting together a larger spread, these go well alongside something like my Healthy Chicken Salad Lettuce Wraps for a party table that covers different textures and tastes.
Storage
Leftover bread keeps at room temperature in an airtight container or zip-lock bag for about 1 day. In the refrigerator it stays good for up to 3 days. To reheat, wrap individual pieces in a damp paper towel and microwave for 20–30 seconds, or wrap the whole thing in foil and warm it in a 325°F oven for about 10 minutes. The foil keeps it from drying out. I won't pretend the leftovers are as good as fresh — they're not — but a quick reheat brings them close. The bread also freezes well after baking: wrap individual portions in foil, freeze for up to a month, and reheat from frozen in a 350°F oven for 15 minutes.

Frequently Asked Questions
Can I make the dough ahead of time?
Yes — this is actually my preferred method for holiday cooking. After the first rise, punch down the dough, form your balls, stuff and seal them, arrange them on the pan, and cover tightly with plastic wrap. Refrigerate overnight. The next day, take the pan out 30–45 minutes before baking to let the dough come back to room temperature and finish its second rise, then bake as normal. The cold slow rise actually develops a slightly better flavor in the dough.
What other cheeses work well in this recipe?
Cheddar melts well and gives a sharper flavor. Gouda is softer and slightly sweet — really nice with the garlic butter. Cream cheese inside each ball gives you a creamy, tangy center rather than a stretchy cheese pull. I'd avoid anything too hard or aged (like Pecorino) for the inside filling since it won't melt properly, but those work great grated on top.
Can I freeze the baked wreath?
Yes. Let it cool completely, then wrap individual portions or the whole wreath tightly in foil and freeze for up to one month. To reheat, keep the foil on and place in a 350°F oven for about 15 minutes from frozen. The texture holds up reasonably well, though the exterior won't be quite as crispy as fresh-baked.
Do I need a stand mixer to make this dough?
No. I've never used a stand mixer for this recipe. Knead the dough by hand on a floured surface for 8–10 minutes — you'll know it's ready when it springs back slightly when you poke it and doesn't stick to your hands. It takes a bit of effort but nothing unreasonable. A regular wooden spoon and your hands is all you need.
How do I know when the bread is done baking?
Look for a deep golden-brown color across the tops of the balls — not just lightly golden. If you tap the top of a ball it should sound slightly hollow. The balls should also have merged together into a connected wreath with no raw-looking dough visible between them. If the top is browning too fast before the center is done, tent it loosely with a piece of foil for the last 5 minutes.
PULL APART GARLIC BREAD WREATH
Ingredients
For the Dough (or use store-bought pizza dough):
- 3 cups all-purpose flour
- 1 tablespoon sugar
- 2¼ teaspoons active dry yeast
- 1 teaspoon salt
- 1 cup warm water
- 2 tablespoons olive oil
For the Garlic Butter:
- 4 tablespoons unsalted butter melted
- 2 cloves garlic minced
- 1 tablespoon chopped parsley
- ¼ teaspoon salt
For Topping (Optional):
- ½ cup shredded mozzarella or Parmesan cheese
- Extra parsley for garnish
Instructions
Prepare the Dough:
- In a large bowl, mix flour, sugar, yeast, and salt. Add warm water and olive oil. Mix and knead until smooth. Let rise for 1 hour or until doubled.
Form the Balls:
- Punch down the dough and divide into small balls (about 1½ inches wide). You’ll need 20–24 balls.
Make the Garlic Butter:
- In a small bowl, combine melted butter, garlic, parsley, and salt.
Assemble the Wreath:
- Dip each dough ball in garlic butter and arrange in a circle on a parchment-lined baking sheet. Place a small oven-safe bowl in the centre to keep the wreath shape. Sprinkle with cheese if using.
Bake:
- Bake at 375°F (190°C) for 20–25 minutes or until golden brown. Remove the centre bowl and garnish with fresh parsley.
Serve:
- Serve warm with marinara sauce or your favourite dip.
Notes
Prepare the dough and form the balls a day in advance. Store in the fridge and bake fresh before serving. Customizing the Flavor:
Add Italian seasoning, red pepper flakes, or finely grated cheese to the garlic butter for extra flavour. Serving Suggestions:
Perfect as a holiday appetiser, side dish for soups, or festive centrepiece with marinara dip. Allergy-Friendly Options:
Use dairy-free butter and skip cheese for a vegan version. Check flour and other ingredients for gluten-free needs. Storage Tips:
Store leftovers in an airtight container at room temperature for 1 day or refrigerate for up to 3 days. Reheat before serving.





Comments
No Comments