
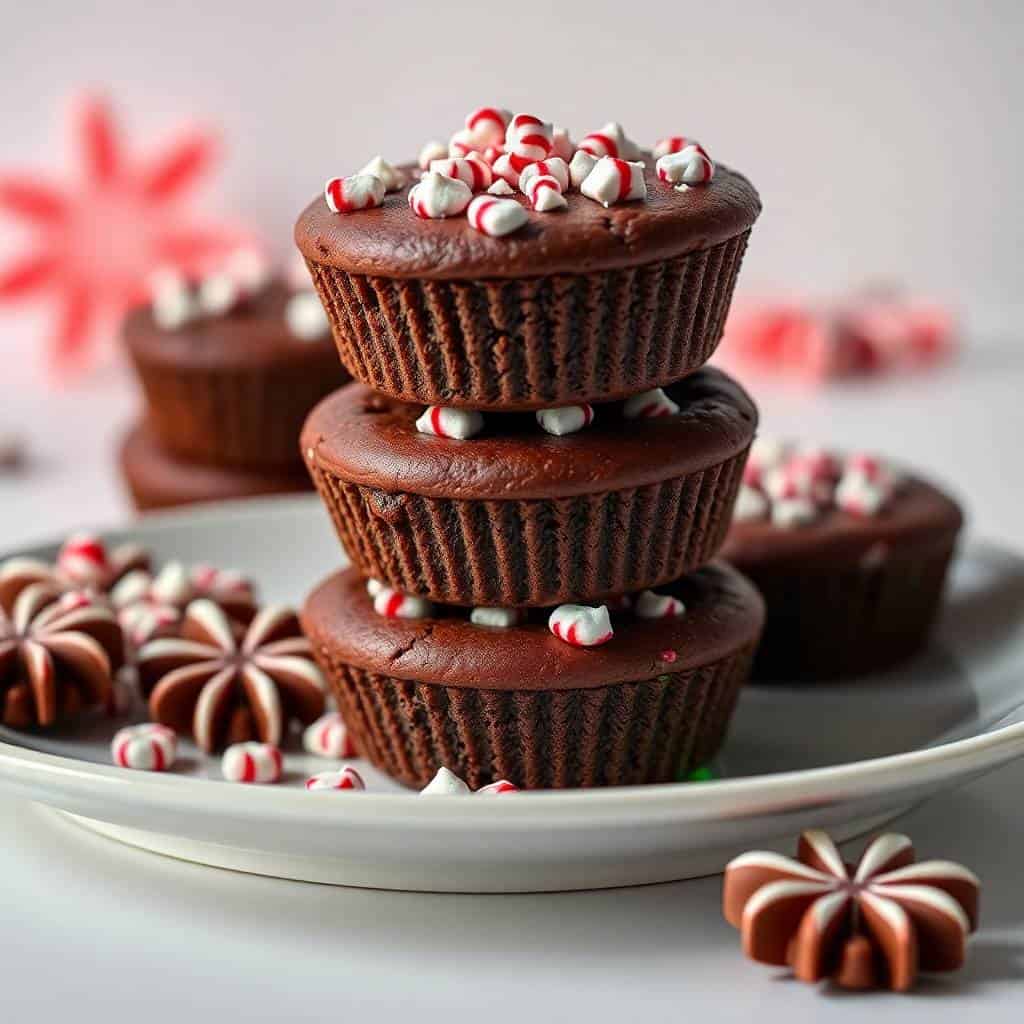
Zainab called these "the candy cane cookies" the first time I made them, and now that's just what they are in our house. She spotted the crushed candy canes on top and immediately claimed the first one before they'd even cooled properly — classic. These chocolate cookie cups with a creamy peppermint filling have been my go-to holiday bake ever since, partly because they look genuinely impressive on a tray, and partly because they're much less stressful to make than they look.
What makes these work is the combination of a rich chocolate cookie shell — real cocoa powder in the dough, not just chips — with a light, whipped cream cheese filling that's cool and minty without being aggressively peppermint. The candy cane topping gives you crunch and color, and honestly they look like something you'd buy at a fancy holiday market. I make them in a standard 12-cup muffin tin, nothing special required. If you've made vanilla cream filled caramels before, you'll recognize this kind of bake — looks complicated, isn't.
I started making these for the December holiday season, but they've shown up at birthday parties and school events too. My husband takes them to work and comes home with an empty container every time. I usually make a double batch because one batch of 12 disappears before I've even cleaned up the kitchen. Fair warning.
One thing to know going in: the cookie cups need to cool fully before you add the filling. I rushed this the first time and the cream cheese filling melted into a puddle. Not cute. Give them a good 20 minutes in the pan, then another 10 on a rack, and you'll be fine. Also, let your cream cheese sit out for at least 15 minutes before you beat it — cold cream cheese clumps and you'll end up with a lumpy filling no matter how long you mix it.
Why You'll Love This Recipe
- They look way fancier than they are: I've brought these to three different holiday cookie swaps now and people always think I spent hours on them. The chocolate cup shape, the creamy filling, the red candy cane pieces on top — they photograph well and they're genuinely fun to eat. Nobody needs to know the whole thing comes together in under an hour.
- The texture combination is really satisfying: You get a firm, slightly crisp chocolate cookie shell, a cool creamy filling, and then that crunch of crushed candy cane on top. It's not one-note. Every bite has something going on, and it keeps people reaching back into the tin for another one.
- No stand mixer, no special equipment: I make these with a hand mixer for the filling and a wooden spoon for the dough. The muffin tin does all the shaping work for you — you just press the dough in and the tin handles the rest. A regular 12-cup muffin tin from any grocery store works perfectly.
- They travel and gift well: Unlike layer cakes or frosted cookies that smear in transit, these little cups are sturdy. I've packed them in a tin lined with parchment and driven them across town without a single one getting damaged. They're solid enough for gift boxes, which makes them genuinely useful during the holidays.
- The filling can go a different direction entirely: The chocolate cookie shell is sturdy enough to hold all sorts of fillings. I've done white chocolate ganache, I've done a plain sweetened whipped cream for a lighter version, and the mint version in this recipe is the one my family voted the best. You can also skip the peppermint extract entirely if someone in your house isn't a mint fan — the cream cheese filling is delicious plain too.
Ingredients
- For the Cookie Cups:
- 1½ cups all-purpose flour
- ¼ cup unsweetened cocoa powder
- ¼ teaspoon baking soda
- ½ teaspoon salt
- ½ cup unsalted butter, softened (sit it out 30 minutes before you start)
- ¾ cup granulated sugar
- 1 large egg
- 1 teaspoon vanilla extract
- For the Peppermint Filling:
- 8 oz cream cheese, softened (full-fat works best here)
- 1 cup powdered sugar
- ¼ teaspoon peppermint extract (not mint extract — peppermint specifically)
- ½ cup whipped cream (store-bought in a tub, or whip your own heavy cream)
- ½ cup crushed candy canes (for topping — about 4-5 standard candy canes)
Directions
- Prep the oven and tin: Preheat your oven to 350°F (175°C). Grease a 12-cup muffin tin well with butter or non-stick spray, getting into the edges. If you have muffin liners, use them — they make getting the cups out much easier, especially for gifting.
- Mix the dry ingredients: In a medium bowl, whisk together the flour, cocoa powder, baking soda, and salt. Set aside. Doing this separately keeps the leavening evenly distributed so your cups bake evenly.
- Cream the butter and sugar: In a larger bowl, beat the softened butter and granulated sugar together until the mixture is pale and slightly fluffy — about 2 minutes with a hand mixer, or 3-4 minutes by hand. Add the egg and vanilla and beat again until combined.
- Bring the dough together: Gradually stir the dry ingredients into the wet mixture. I do this in two or three additions, mixing gently after each. Stop as soon as no dry flour is visible — overworking the dough makes the cups tough.
- Fill the muffin tin: Scoop roughly 1½ tablespoons of dough into each cup of the muffin tin. Press the dough down and up the sides to form a cup shape — I use my thumb for the center and the back of a spoon to push it up the walls. The dough should come about halfway up the sides.
- Bake: Bake for 12–15 minutes, until the tops look set and a toothpick inserted into the cookie wall comes out clean. The center will puff up slightly — that's fine. As soon as they come out of the oven, use the back of a small spoon to press the center down again and reinforce the cup shape while the dough is still soft.
- Cool completely: Let the cups cool in the tin for 20 minutes, then transfer to a wire rack for another 10. Do not add the filling while warm — I learned this the hard way. The filling will melt and you'll have a sad puddle situation.
- Make the peppermint filling: Beat the softened cream cheese, powdered sugar, and peppermint extract together until completely smooth. Fold in the whipped cream gently until the filling is light and fluffy. Taste it — if you want more mint, add a tiny drop more extract, but go carefully. Peppermint extract is strong.
- Fill and top: Spoon or pipe the peppermint filling into each cooled cookie cup. Sprinkle the crushed candy canes generously over the top. Refrigerate for 20 minutes to let everything set before serving.

Tips for Success
- Softened butter really matters here: I know every recipe says this, but with cookie cups it's especially true. Butter that's too cold won't cream properly with the sugar, and you'll end up with a denser, crumblier dough that falls apart when you try to press it into the tin. Leave it out for at least 30 minutes before you start. In winter when my kitchen runs cold, I give it 45 minutes.
- Press the center twice — once before baking, once right after: The first press shapes the cup. The second press (immediately out of the oven) deepens the well and gives you more room for filling. Don't skip that second press — by the time the cups cool, the dough has set and you won't be able to reshape it without cracking.
- Crush the candy canes, don't powder them: Put the candy canes in a zip-lock bag and tap with a rolling pin gently. You want pieces roughly the size of a pea — small enough to sprinkle, big enough to give you actual crunch. If you pulverize them into dust, they dissolve into the filling and you lose the texture. Also, the red and white pieces look much better on top when they still have some size to them.
- Room temperature cream cheese is non-negotiable: Cold cream cheese will never beat smooth, no matter how long you run the mixer. You'll end up with little white lumps in your filling that won't mix out. Pull it from the fridge at least 15 minutes before you need it, or 30 minutes if your kitchen is cold. This one step makes the filling go from lumpy to genuinely silky.
- Don't overbake — pull them early: The cups will look slightly underdone when you pull them at 12 minutes. That's correct. They continue cooking in the hot tin for a few minutes after you take them out, and you want the walls to be chewy, not dry. If the edges look deeply browned, you've gone too far. Err on the side of just-set.
Variations
- White chocolate peppermint: Swap the cream cheese filling for melted white chocolate mixed with a splash of peppermint extract, then let it set in the cups. It firms up as it cools and gives you a completely different texture — more like a truffle than a cheesecake filling. My husband actually prefers this version. If you enjoy white chocolate bakes, my white chocolate raspberry cake uses a similar approach and is worth bookmarking.
- Double chocolate filling: Skip the cream cheese filling entirely and drop a teaspoon of semi-sweet chocolate chips into the warm cookie cups right after pressing the center. They'll melt with the residual heat. Top with crushed candy canes as usual. It's simpler and more intense — more of a molten-chocolate situation than a creamy one.
- Gluten-free version: I've made these with a 1:1 gluten-free flour blend (the kind you find at Walmart or Trader Joe's) and they held their shape well. The texture is slightly more tender and a little more crumbly, so be gentle when pressing them and give them extra time to cool in the tin before trying to remove them.
- Mint extract in the dough too: If your household loves mint the way mine loves heat, add ⅛ teaspoon of peppermint extract directly into the cookie dough. It makes the whole cup taste like a mint chocolate situation from shell to filling. Start with a small amount — peppermint extract is one of those things where a tiny bit more than intended can take over everything.
- Holiday sprinkle topping: If you can't find candy canes or peppermint candies, red and green sanding sugar or festive sprinkles work as a topping over the cream cheese filling. It won't give you the same peppermint flavor but the cups will still look very much like holiday baking. This is also a good option if you're making these for kids who aren't into mint.
Serving and Storage
Serving
Serve these cold or at cool room temperature — the filling holds its shape best when it's been refrigerated. I pull them from the fridge about 10 minutes before serving so the cookie shell isn't icy cold. They look great on a holiday cookie tray alongside other small bites, or stacked in a small tin lined with tissue paper for gifting. Pair them with hot cocoa if you're serving them at home — the mint and chocolate together with a warm drink is genuinely cozy.
Storage
Because of the cream cheese filling, these need to be stored in the refrigerator. An airtight container keeps them fresh for up to 4 days — the cookie shell stays firm and the filling doesn't weep. I don't recommend leaving them at room temperature for more than 2 hours. For longer storage, you can freeze the unfilled cookie cups (just the shells) for up to 2 months; thaw at room temperature and add fresh filling before serving.

Frequently Asked Questions
Can I make the cookie dough ahead of time?
Yes, the dough keeps well in the fridge for up to 48 hours, wrapped tightly in plastic wrap or in a covered bowl. Let it sit at room temperature for 10 minutes before pressing it into the tin — cold dough is stiffer and harder to shape. You can also bake the shells a day ahead and add the filling the day you're serving.
Can I use a regular muffin tin instead of a mini one?
This recipe uses a standard 12-cup muffin tin, not mini. If you do want to use mini muffin tins, reduce the bake time to about 8–10 minutes and use about 1 teaspoon of dough per cup. The filling amount will make more than enough for a bigger batch of mini cups, which is not a bad thing.
What if I can't find peppermint extract?
Peppermint extract is usually in the baking aisle at any major grocery store — Walmart, Kroger, Aldi, Sainsbury's all carry it. If you genuinely can't find it, you can skip it and the cups are still good as a plain chocolate cookie with cream cheese filling. I wouldn't substitute regular mint extract — it tastes more like toothpaste than dessert.
Can I freeze these once filled?
I'd freeze the shells unfilled and add fresh filling after thawing. Cream cheese fillings can turn grainy after freezing and thawing — the texture changes noticeably. The cookie shells freeze beautifully on their own for up to 2 months. Thaw at room temperature, make a fresh batch of filling, and assemble just before serving.
How do I crush the candy canes without making a mess?
Put the unwrapped candy canes in a zip-lock freezer bag, press out the air, and seal it. Then tap with a rolling pin until you have small pieces — not dust, actual pieces. The freezer bag keeps the candy contained so you're not chasing pink sugar across your counter. Four or five standard candy canes give you plenty of topping for 12 cups.

CHOCOLATE PEPPERMINT COOKIE CUPS
Ingredients
For the Cookie Cups:
- 1 ½ cups all-purpose flour
- ¼ cup unsweetened cocoa powder
- ¼ teaspoon baking soda
- ½ teaspoon salt
- ½ cup unsalted butter softened
- ¾ cup granulated sugar
- 1 large egg
- 1 teaspoon vanilla extract
For the Peppermint Filling:
- 8 oz cream cheese softened
- 1 cup powdered sugar
- ¼ teaspoon peppermint extract
- ½ cup whipped cream
- ½ cup crushed candy canes for topping
Instructions
Prepare Cookie Cups:
- Preheat the oven to 350°F (175°C). Grease a 12-cup muffin tin. In a bowl, mix flour, cocoa powder, baking soda, and salt. In another bowl, beat butter and sugar until fluffy. Add the egg and vanilla, then gradually stir in the dry ingredients.
Form the Cups:
- Scoop dough into the muffin tin, pressing the dough into the bottom and sides to form a cup shape. Bake for 12–15 minutes, or until a toothpick comes out clean. Let cool for 10 minutes, then use the back of a spoon to gently press the centers down to form a cup.
Make the Peppermint Filling:
- Beat cream cheese, powdered sugar, and peppermint extract until smooth. Fold in whipped cream until fluffy.
Assemble:
- Spoon the peppermint filling into each cooled cookie cup. Top with crushed candy canes.
Cool and Serve:
- Refrigerate for 20 minutes to set. Serve chilled or at room temperature.
Notes
Store cookie cups in an airtight container in the refrigerator for up to 4 days. Customization:
For a richer filling, add a tablespoon of melted chocolate to the peppermint mixture.
These cookie cups have become one of those recipes I look forward to every December. There's something satisfying about a bake that does double duty — festive enough for a holiday tray, sturdy enough to pack up and give away. The chocolate shell and creamy mint filling just work together, and the candy cane topping makes them look like they belong in a bakery window. I'm not usually precious about holiday recipes, but this one I've made the same way for two years now because it keeps delivering.
If you're baking other sweets this season, my white chocolate raspberry cake is another one that looks far more complicated than it is, and it's a good pairing on a dessert table if you want something larger alongside these little cups. For something completely different on the savory side of your holiday spread, the French chicken casserole à la Normande is the kind of main dish that makes people feel properly fed before dessert.
If you make these, I genuinely hope you make a double batch. One for the tray, one for the house. You'll understand why when the first 12 disappear before you've even washed the muffin tin. 🍫🎄✨
Looking for more recipes to round out your baking and cooking? Here are a few more from the site worth checking out:
- Vanilla Cream Filled Caramels — another holiday-ready sweet that travels and gifts well
- White Chocolate Raspberry






Comments
No Comments