
I first made these for a game night last winter when I needed something I could prep ahead and just pull out of the fridge — no reheating, no last-minute stress. I had cream cheese sitting on the counter, a pack of bacon I'd already cooked for breakfast, and a couple of jalapeños I needed to use up. I threw it all together, rolled them into little balls, and honestly expected them to be fine but forgettable. They were gone in twenty minutes and two people asked me for the recipe before the first quarter was over.
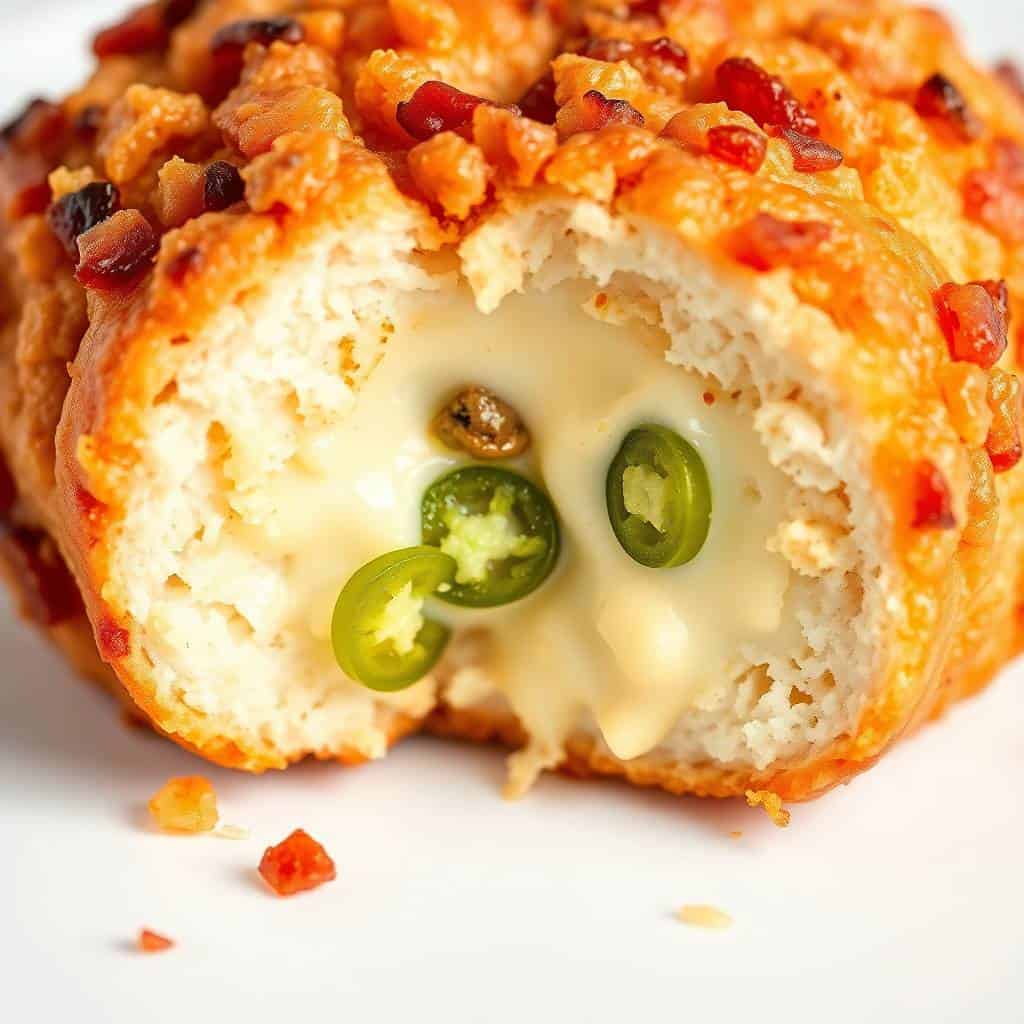
What makes these work is the ratio of cream cheese to cheddar — enough cheddar to give it that sharp bite, enough cream cheese to keep the whole thing soft and scoopable. The bacon and jalapeño are folded in, not just sprinkled on top, so you get that smoky heat in every single bite. The coating of extra bacon and crushed pecans adds crunch without any baking or frying. No oven, no mess, no problem.
My husband is a big fan of anything with jalapeños, so these were an easy sell. I usually make a full batch the evening before and let them chill overnight — the flavours actually get better after a few hours in the fridge. If you're looking for more no-fuss party food, my Strawberry Cheesecake Bites follow the same idea: mix, shape, chill, done.
One thing to set expectations on: these are meant to be served cold or just barely room temperature. Don't leave them sitting out for more than an hour or so — the coating softens and the texture gets a bit sad. Pull them from the fridge about 10 minutes before serving and they'll be exactly right.

Why You'll Love This Recipe
- Zero oven time: There's no baking involved at all — just mixing, shaping, and chilling. I can have a full tray ready and in the fridge in about 20 minutes, which means I'm not hovering over the stove when guests arrive. On busy party days, that kind of head start matters more than anything.
- Genuinely make-ahead friendly: These actually taste better after sitting overnight in the fridge. The jalapeño and bacon flavours have time to settle into the cheese, and the balls firm up nicely. I usually make a double batch because one batch disappears before I can get the second tray out.
- Adjustable heat: If you want them spicier, leave some of the jalapeño seeds in. If you're serving people who don't do heat well, remove all the seeds and use just one jalapeño. I've made both versions at the same party before — I just used toothpicks of different colours to tell them apart.
- The coating makes them look proper: Rolling them in a mix of parsley, chopped bacon, and pecans takes about three extra minutes but makes the whole tray look like something from a catering spread. People always comment on how they look before they even taste them. Presentation matters when you're putting food on a party table.
- Naturally gluten-free: There's no flour or breadcrumbs anywhere in this recipe. I realised this the first time I brought them to a gathering where a friend couldn't eat gluten — she was so relieved she could actually eat the appetiser. Just double-check your bacon brand to be sure, but most plain bacon is fine.
Ingredients
- 8 oz cream cheese, softened to room temperature
- 1 cup shredded sharp cheddar cheese
- 4 slices bacon, cooked until crispy and crumbled
- 2 jalapeños, finely chopped (seeds removed for less heat)
- 1 green onion, finely chopped
- 1 teaspoon garlic powder
- ½ teaspoon onion powder
- Salt and black pepper to taste
- ¼ cup chopped fresh parsley (for coating)
- ¼ cup crumbled cooked bacon (for coating)
- ¼ cup finely chopped pecans, optional (for coating)
Directions
- Step 1: Make the mixture — In a medium bowl, combine the softened cream cheese, shredded cheddar, garlic powder, onion powder, salt, and pepper. Mix until smooth and well combined — cold cream cheese will leave lumps, so this is not the moment to rush the softening step. Then fold in the crumbled bacon, chopped jalapeños, and green onion until everything is evenly distributed.
- Step 2: Chill the mixture briefly — Pop the bowl into the fridge for 15 to 20 minutes. This is the step I skipped the first time I made these, and I ended up with cheese smeared all over my palms instead of tidy little balls. Chilling firms the mixture just enough to make shaping actually manageable.
- Step 3: Shape into balls — Using a small cookie scoop or a tablespoon, portion the mixture and roll into 1-inch balls with your hands. Place them on a parchment-lined baking sheet or plate as you go. Work quickly — the warmth from your hands will start to soften them.
- Step 4: Prepare the coating — In a small shallow bowl, combine the chopped parsley, crumbled bacon, and pecans (if using). Mix them together so you get a bit of everything in each roll. Having the coating ready before you start rolling keeps the process moving.
- Step 5: Roll and coat — Roll each cheese ball through the coating mixture, pressing gently so it sticks on all sides. Set them back on the parchment sheet. If the coating is falling off, press it in with your fingertips — it just needs a little help adhering.
- Step 6: Chill before serving — Refrigerate the coated cheese balls for at least 30 minutes before serving, or up to 24 hours if prepping ahead. Pull them out about 10 minutes before serving so the cream cheese softens slightly for the best texture.
Tips for Success
- Don't skip softening the cream cheese: I learned this the hard way — cold cream cheese doesn't blend smoothly with the cheddar, and you end up with little white lumps running through the mixture. Set it on the counter for at least 30 minutes before you start, or even an hour if your kitchen runs cool. The whole thing comes together in about a minute when the cheese is properly soft.
- Cook bacon until actually crispy: Soft or chewy bacon gets a little soggy inside the cream cheese mixture, and it doesn't add the texture you want. I cook mine in a skillet over medium heat until it's deep golden and fully crisped, then drain it on a paper towel and let it cool completely before crumbling. Crispy bacon also crumbles more finely, which means it distributes better through the mix.
- Wear gloves when chopping jalapeños: I didn't the first couple of times and then accidentally touched my eye. Use disposable gloves or a plastic bag over your hand — it takes ten seconds and saves you a lot of regret. The capsaicin sticks to your skin even after washing, so it's genuinely worth the extra step.
- Chop everything finely: Big chunks of jalapeño or bacon make shaping the balls awkward — they stick out and break the surface. The finer your chop, the more evenly the mix holds together and the cleaner your balls look once rolled. A sharp knife and a little patience here makes a real difference in the final result.
- Use a cookie scoop for uniform sizing: I use a small cookie scoop (the kind meant for truffles or small cookies — about 1 tablespoon capacity) and it keeps every ball the same size so they chill and firm up evenly. If you don't have one, a regular tablespoon works — just try to keep your portions consistent so some aren't huge and some aren't tiny.
Variations
- Pepper jack instead of cheddar: Swap the sharp cheddar for shredded pepper jack if you want more heat built into the base. The cheese itself brings a gentle spice that works really well with the jalapeños. My husband prefers this version — he adds extra chopped jalapeño on top of that, which is too much for me but he loves it.
- Ranch-seasoned version: Add 1 teaspoon of dry ranch seasoning mix (Hidden Valley packets from Walmart work perfectly) to the base mixture. It adds a tangy, herby layer that pairs really well with the bacon. This is the version Zainab asks for — she doesn't like much heat, so I skip the seeds when I make it for her and add the ranch instead.
- Smoky chipotle version: Add ½ teaspoon of smoked paprika and a pinch of chipotle powder to the mix. This makes the flavour deeper and smokier rather than just hot. It's a good direction if you're serving people who want heat but also want complexity — pairs nicely alongside my Parmesan Garlic Bacon Cheeseburger Lasagna as part of a bigger spread.
- Crushed chip coating: Instead of pecans, try rolling the balls in crushed tortilla chips or even crushed pretzels. The tortilla chip version is saltier and crunchier and gives a bit of a Tex-Mex feel. Just crush them finely in a zip-lock bag before using — big chip pieces don't stick as well as smaller crumbs.
- Vegetarian version: Leave out the bacon entirely and increase the cheddar to 1¼ cups, or add ¼ cup of finely chopped Kalamata olives for a salty, savoury punch. The mix holds together fine without the bacon. For the coating, use parsley, finely chopped nuts, or sesame seeds.
Serving and Storage
Serving
Serve these on a platter with toothpicks already inserted — it makes grabbing them much easier and keeps things tidy on a party table. I set them out alongside a bowl of crackers, some pretzel sticks, and sliced cucumber. If you're doing a bigger snack spread, they sit nicely next to Cherry Pie Bombs for a mix of savoury and sweet. Pull them from the fridge about 10 minutes before serving — fully cold cream cheese is a bit too firm to bite into comfortably.
Storage
Store in an airtight container in the fridge for up to 4 days. If you're making them more than a few hours in advance, consider adding the coating on the day you're serving — that way the parsley and bacon stay crisp instead of softening against the cheese. I wouldn't try freezing these. The texture of cream cheese after thawing gets a bit grainy, and the coating falls apart. Make them fresh within the 24-hour window before your event and you'll be fine.

Frequently Asked Questions
Can I make these cheese balls the day before?
Yes, and I'd actually encourage it. The flavour improves after a night in the fridge — the jalapeño and bacon settle into the cream cheese and everything tastes more cohesive. Keep them covered in an airtight container and add the parsley coating the day of serving so it stays fresh and green rather than wilted.
How spicy are these?
With seeds removed they're mild to medium — there's warmth but not the kind that makes people reach for water. If you want them spicier, leave the seeds in one jalapeño. If you want them very mild, use just one jalapeño with all seeds removed and make sure to scrape out the white membrane too, which holds most of the heat.
Can I freeze bacon jalapeño popper cheese balls?
I don't recommend it. Cream cheese tends to get grainy and slightly watery after freezing and thawing, and the texture of the coating suffers too. These are best made fresh and kept refrigerated for up to 4 days. They come together quickly enough that there's no real need to freeze them.
What's the best coating to use?
The combination of parsley, crumbled bacon, and finely chopped pecans is my go-to — it gives colour, crunch, and flavour all at once. But if you don't have pecans, extra bacon alone works perfectly well. Crushed tortilla chips are a fun alternative if you want more crunch and a slightly salty-corn flavour. Just make sure whatever you use is chopped finely so it coats evenly.
Can I make these bigger for a spread-style appetiser?
Absolutely. Roll them to golf-ball size and serve with a small spreading knife alongside crackers. This works well if you want fewer individual pieces to roll and coat — three or four large balls on a board look really nice as a centrepiece. The ratios stay exactly the same, they just need a bit more chilling time to firm up properly — about 45 minutes instead of 30.
These have become my default no-stress party contribution — I make them the night before, cover the container, and they're ready to go. No reheating, no last-minute prep, no worrying about timing. I just pull them out of the fridge when I get there, give them ten minutes, and put them on a platter. That kind of reliability is something I really value when there's already enough to organise on a party day.
What I like most about this recipe is how forgiving it is. The first time I made them I forgot the green onion entirely, and nobody noticed — they were still great. I've used sharp cheddar, mild cheddar, and pepper jack in different batches depending on what was in my fridge, and all three worked. The base is solid enough that small variations don't break it.
If you're putting together a bigger snack spread, these sit really well alongside my Strawberry Cheesecake Bites — same no-bake, make-ahead format, just on the sweet side of the table. Between the two you've got your whole dessert-and-savoury spread covered without turning the oven on once.
Give these a go before your next gathering — I think once you see how fast the tray clears, you'll be making a double batch every time after that. 🧀🥓✨

BACON JALAPEÑO POPPER CHEESE BALLS
Ingredients
For the Cheese Balls:
- 8 oz cream cheese softened
- 1 cup shredded sharp cheddar cheese
- 4 slices bacon cooked and crumbled
- 2 jalapeños finely chopped (seeds removed for less heat)
- 1 green onion finely chopped
- 1 teaspoon garlic powder
- ½ teaspoon onion powder
- Salt and pepper to taste
For the Coating:
- ¼ cup chopped fresh parsley
- ¼ cup crumbled cooked bacon
- ¼ cup finely chopped pecans optional
Instructions
Make the Mixture:
- In a medium bowl, mix together cream cheese, cheddar cheese, bacon, jalapeños, green onion, garlic powder, onion powder, salt, and pepper until well combined.
Shape into Balls:
- Scoop mixture and roll into small bite-sized balls using your hands or a small cookie scoop. Chill in the fridge for 15–20 minutes for easier handling.
Coat the Cheese Balls:
- In a small bowl, combine parsley, extra bacon, and pecans. Roll each cheese ball in the mixture until evenly coated.
Serve or Store:
- Serve immediately or refrigerate until ready to serve. Let sit at room temperature for 10 minutes before serving for best flavor.
Notes
Prepare cheese balls a day in advance and keep refrigerated. Add coating just before serving to maintain texture. Variations:
Add smoked paprika or chipotle powder for extra smokiness. Use pepper jack cheese for more spice. Serving Suggestions:
Serve with crackers, pretzel sticks, or fresh veggie dippers. Storage Tips:
Store leftovers in an airtight container in the fridge for up to 3 days. Not recommended for freezing.
If you liked this, here are a few more recipes from my kitchen that follow the same no-fuss formula:
- Strawberry Cheesecake Bites — no-bake, make-ahead, gone fast
- Cherry Pie Bombs — sweet, handheld, and great on a party platter
- Parmesan Garlic Bacon Cheeseburger Lasagna — if you want something more substantial for the same crowd
- Homemade Hamburger Helper — weeknight comfort food when the party's over and you need something real
- Easy Cheesy Beef and Noodle Casserole — another one that feeds a crowd without much effort





Comments
No Comments