
NYC Red Velvet Cookies are a delicious and indulgent treat inspired by the vibrant and bustling city of New York.
These cookies are known for their soft, chewy texture and rich red velvet flavor, making them a perfect dessert for any occasion.
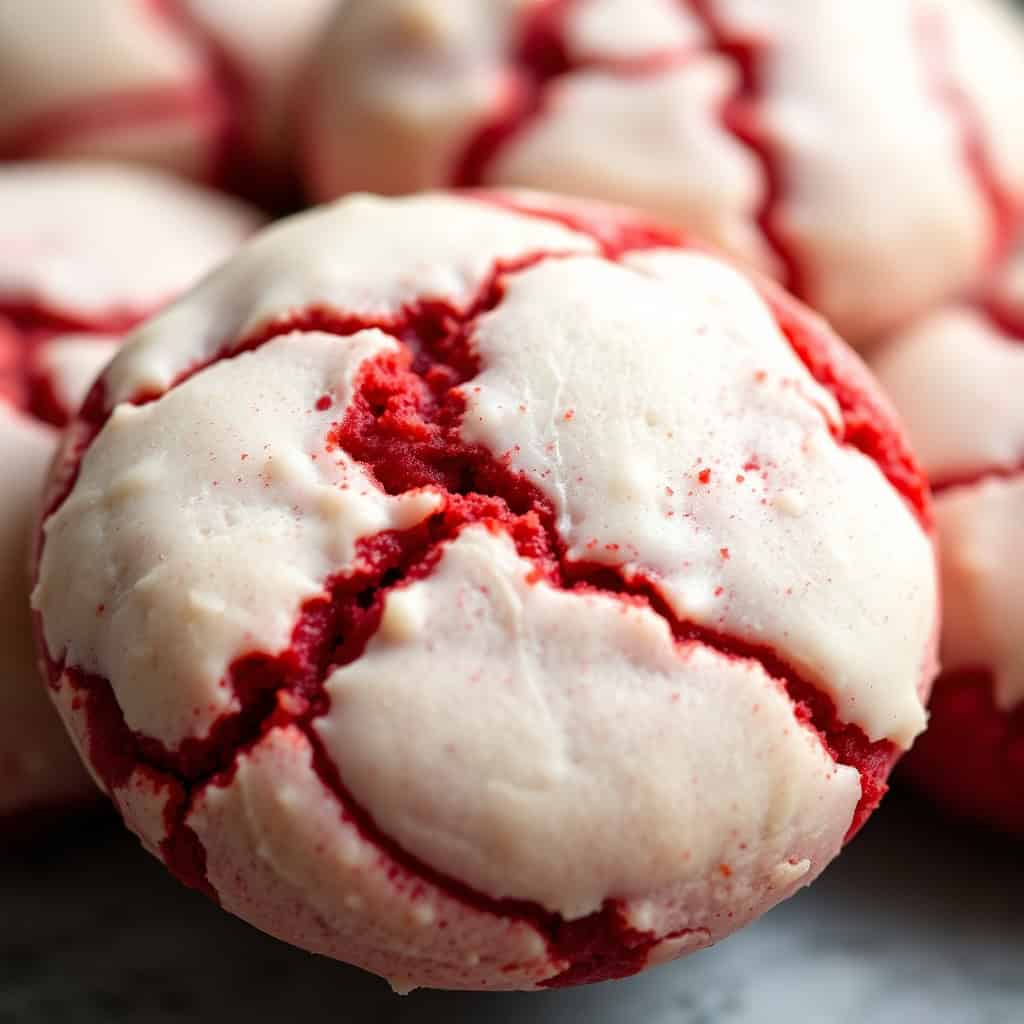
Imagine biting into a thick, velvety cookie with the perfect balance of cocoa and sweetness, topped with a generous swirl of creamy cream cheese frosting.
These cookies are not only visually stunning with their vibrant red color but also irresistibly delicious.
Whether you're a fan of red velvet desserts or simply looking for a new cookie recipe to try, these NYC Red Velvet Cookies are sure to impress.

Why You'll Love This Recipe
- Soft and Chewy: The cookies have a perfect texture that is soft and chewy on the inside.
- Rich and Velvety: The red velvet flavor adds a rich and indulgent taste.
- cream cheese frosting: The luscious cream cheese frosting adds a creamy and tangy flavor.
- Perfect for Any Occasion: Ideal for holidays, parties, or as a sweet treat.
- Easy to Make: With simple ingredients and straightforward steps, this recipe is perfect for any home baker.
Ingredients
For the Cookies:
- ½ cup unsalted butter, softened
- ¾ cup granulated sugar
- ¼ cup light brown sugar, packed
- 1 large egg
- 1 teaspoon vanilla extract
- 1 tablespoon red food coloring
- 1 ½ cups all-purpose flour
- 2 tablespoons unsweetened cocoa powder
- ½ teaspoon baking powder
- ¼ teaspoon baking soda
- ¼ teaspoon salt
For the Cream Cheese Frosting:
- 4 oz cream cheese, softened
- ¼ cup unsalted butter, softened
- 2 cups powdered sugar
- 1 teaspoon vanilla extract
Directions
- Step 1: Preheat the Oven
Preheat your oven to 350°F (175°C). Line a baking sheet with parchment paper or a silicone baking mat.
- Step 2: Make the Cookie Dough
In a large mixing bowl, cream together the softened butter, granulated sugar, and light brown sugar until light and fluffy.
- Add the egg, vanilla extract, and red food coloring, and mix until well combined.
- In a separate bowl, whisk together the all-purpose flour, unsweetened cocoa powder, baking powder, baking soda, and salt.
- Gradually add the dry ingredients to the wet ingredients, mixing until just combined.
- Step 3: Scoop and Bake
Using a cookie scoop or spoon, portion out the cookie dough onto the prepared baking sheet, spacing them about 2 inches apart.
- Flatten each cookie slightly with the back of the spoon.
- Bake in the preheated oven for 10-12 minutes or until the edges are set and the centers are still slightly soft.
- Remove from the oven and let the cookies cool on the baking sheet for a few minutes before transferring them to a wire rack to cool completely.
- Step 4: Make the Cream cheese frosting
In a mixing bowl, beat together the softened cream cheese and butter until smooth and creamy.
- Gradually add the powdered sugar and vanilla extract, and continue to beat until the frosting is soft and fluffy.
- Step 5: Frost the Cookies
Once the cookies are completely cooled, spread a generous amount of cream cheese frosting on top of each cookie. Use a piping bag or a spoon to create a swirl pattern if desired.
- Step 6: Serve
Serve the NYC Red Velvet Cookies with a glass of milk or a cup of coffee. Enjoy the rich and velvety flavours with every bite.
Serving and Storage
Serving
Serve the NYC Red Velvet Cookies at room temperature, garnished with additional sprinkles or decorations if desired. These cookies pair well with a glass of milk, a cup of coffee, or as a delightful dessert after a meal.
Storage
- Refrigerate: Store any leftovers in an airtight container in the refrigerator for up to 5 days. Allow the cookies to come to room temperature before serving.
- Freeze: To freeze, place the cookies in a single layer on a baking sheet and freeze until solid. Transfer the frozen cookies to a freezer-safe container and store for up to 2 months. Thaw in the refrigerator before serving.
Tips for Success
- Use Gel Food Coloring: Gel food coloring provides a vibrant red color without altering the texture of the dough.
- Don't Overmix the Dough: Mix the dough until just combined to avoid tough cookies.
- Allow Cookies to Cool: Let the cookies cool completely before frosting to prevent the frosting from melting.
- Customize the Frosting: Add a pinch of cinnamon or a splash of almond extract to the frosting for added flavor.
Variations
- Red Velvet Cream Cheese Sandwich Cookies: Spread cream cheese frosting between two red velvet cookies for a sandwich cookie variation.
- Red Velvet White Chocolate Chip Cookies: Add white chocolate chips to the cookie dough for a delicious twist.
- Red Velvet Crinkle Cookies: Roll the cookie dough balls in powdered sugar before baking for a crinkle effect.
- gluten-free diet Red Velvet Cookies: Use a gluten-free flour blend to make these cookies gluten-free.
FAQ
Yes, you can use natural food coloring, but the color may be less vibrant.
Chill the cookie dough in the refrigerator for 30 minutes before baking to prevent excessive spreading.
Yes, you can prepare the cookie dough and refrigerate it for up to 24 hours before baking.
Yes, you can use buttercream or chocolate frosting if you prefer.
Store the cookies in an airtight container to maintain their soft texture.
NYC Red Velvet Cookies are a delicious and indulgent treat inspired by the vibrant and bustling city of New York.
The combination of soft, chewy red velvet cookies and luscious cream cheese frosting creates a harmonious blend of flavours that will delight your taste buds.
These cookies are perfect for holidays, parties, or as a sweet treat to share with friends and family.
Customize the cookies with your favourite ingredients and enjoy the rich and velvety flavours in every bite.
Make NYC Red Velvet Cookies a beloved addition to your baking repertoire, and share the joy of this delicious treat with your loved ones.
This recipe not only provides a delightful and satisfying dessert but also brings a touch of creativity and fun to your baking experience.
Whether you're enjoying them with family or friends or simply treating yourself, these cookies are the perfect way to savour the flavours of a homemade, indulgent dessert.
The ease of preparation and the delicious result make it a go-to recipe that you'll want to make again and again.

NYC RED VELVET COOKIES
Ingredients
- ½ cup unsalted butter, softened
- ½ cup brown sugar, packed
- ¼ cup granulated sugar
- 1 egg
- 1 teaspoon white vinegar
- 1 teaspoon vanilla extract
- 1 tablespoon red food coloring
- 1 ½ cups all-purpose flour
- ¼ cup unsweetened cocoa powder
- ½ teaspoon baking soda
- ¼ teaspoon salt
- 1 cup white chocolate chips
Instructions
Preheat the Oven:
- Preheat your oven to 350°F (175°C). Line a baking sheet with parchment paper or a silicone baking mat.
Make the Cookie Dough:
- In a large mixing bowl, cream together the softened butter, brown sugar, and granulated sugar until light and fluffy.
- Add the egg, white vinegar, vanilla extract, and red food coloring. Mix until well combined.
- In a separate bowl, whisk together the flour, cocoa powder, baking soda, and salt.
- Gradually add the dry ingredients to the wet ingredients, mixing until just combined.
- Fold in the white chocolate chips.
Shape the Cookies:
- Scoop about 2 tablespoons of dough for each cookie and place them on the prepared baking sheet, spacing them about 2 inches apart.
- Flatten each cookie slightly with your hand or the bottom of a glass.
Bake the Cookies:
- Bake in the preheated oven for 12-14 minutes, or until the edges are set but the centers are still soft.
- Allow the cookies to cool on the baking sheet for a few minutes before transferring them to a wire rack to cool completely.
Notes
- Color Tip: For a vibrant red color, use gel food coloring instead of liquid food coloring.
- Storage: Store any leftover cookies in an airtight container at room temperature. They should keep well for up to 3 days.
- Serving Suggestions: Enjoy your NYC Red Velvet Cookies with a glass of milk or your favorite beverage.






Comments
No Comments