
Chicken legs don't get enough credit. They're cheaper than breasts, more forgiving than thighs, and when you cook them right — crispy skin, juicy meat all the way to the bone — there's nothing better on the table. I've been reaching for drumsticks and leg quarters on repeat lately, mostly because they survive high heat without drying out, which means even on my most distracted weeknight, dinner still works out. Chicken legs are genuinely hard to ruin, and that's exactly why I keep cooking them.
What makes a good chicken leg recipe, in my opinion, is a combination of real flavor (not just salt and pepper and hope), a method that actually fits your kitchen setup — oven, air fryer, grill, whatever you've got — and instructions clear enough that you don't end up with raw meat near the bone. That's the thing nobody warns you about with chicken legs: the drumstick-to-thigh joint needs to hit 165°F inside, and that takes longer than you'd expect. If you're new to cooking chicken pieces, I wrote a full guide on baked chicken legs that walks through the basics before you try anything fancy.
This roundup pulls together 34 recipes covering every method and flavor direction I could think of — from juicy oven-roasted drumsticks and honey garlic baked chicken to smoked chicken quarters with a BBQ rub, harissa chicken with rose water sauce, and a few air fryer recipes that I honestly make more than I planned to when I first got that appliance. There's also a Pakistani-style chicken fry in here that hits different from everything else on the list. If you're looking for something that pairs well with rice, my one pan chicken and rice post covers that angle too, and for a full weeknight meal spread, check out my easy chicken dinner recipes roundup.
Here are the 34 recipes I keep coming back to — pick what fits your method, your mood, and whatever's in your spice cabinet right now.
Top 34 Easy Chicken Leg Recipes

33. Juicy Chicken Drumsticks in the Oven
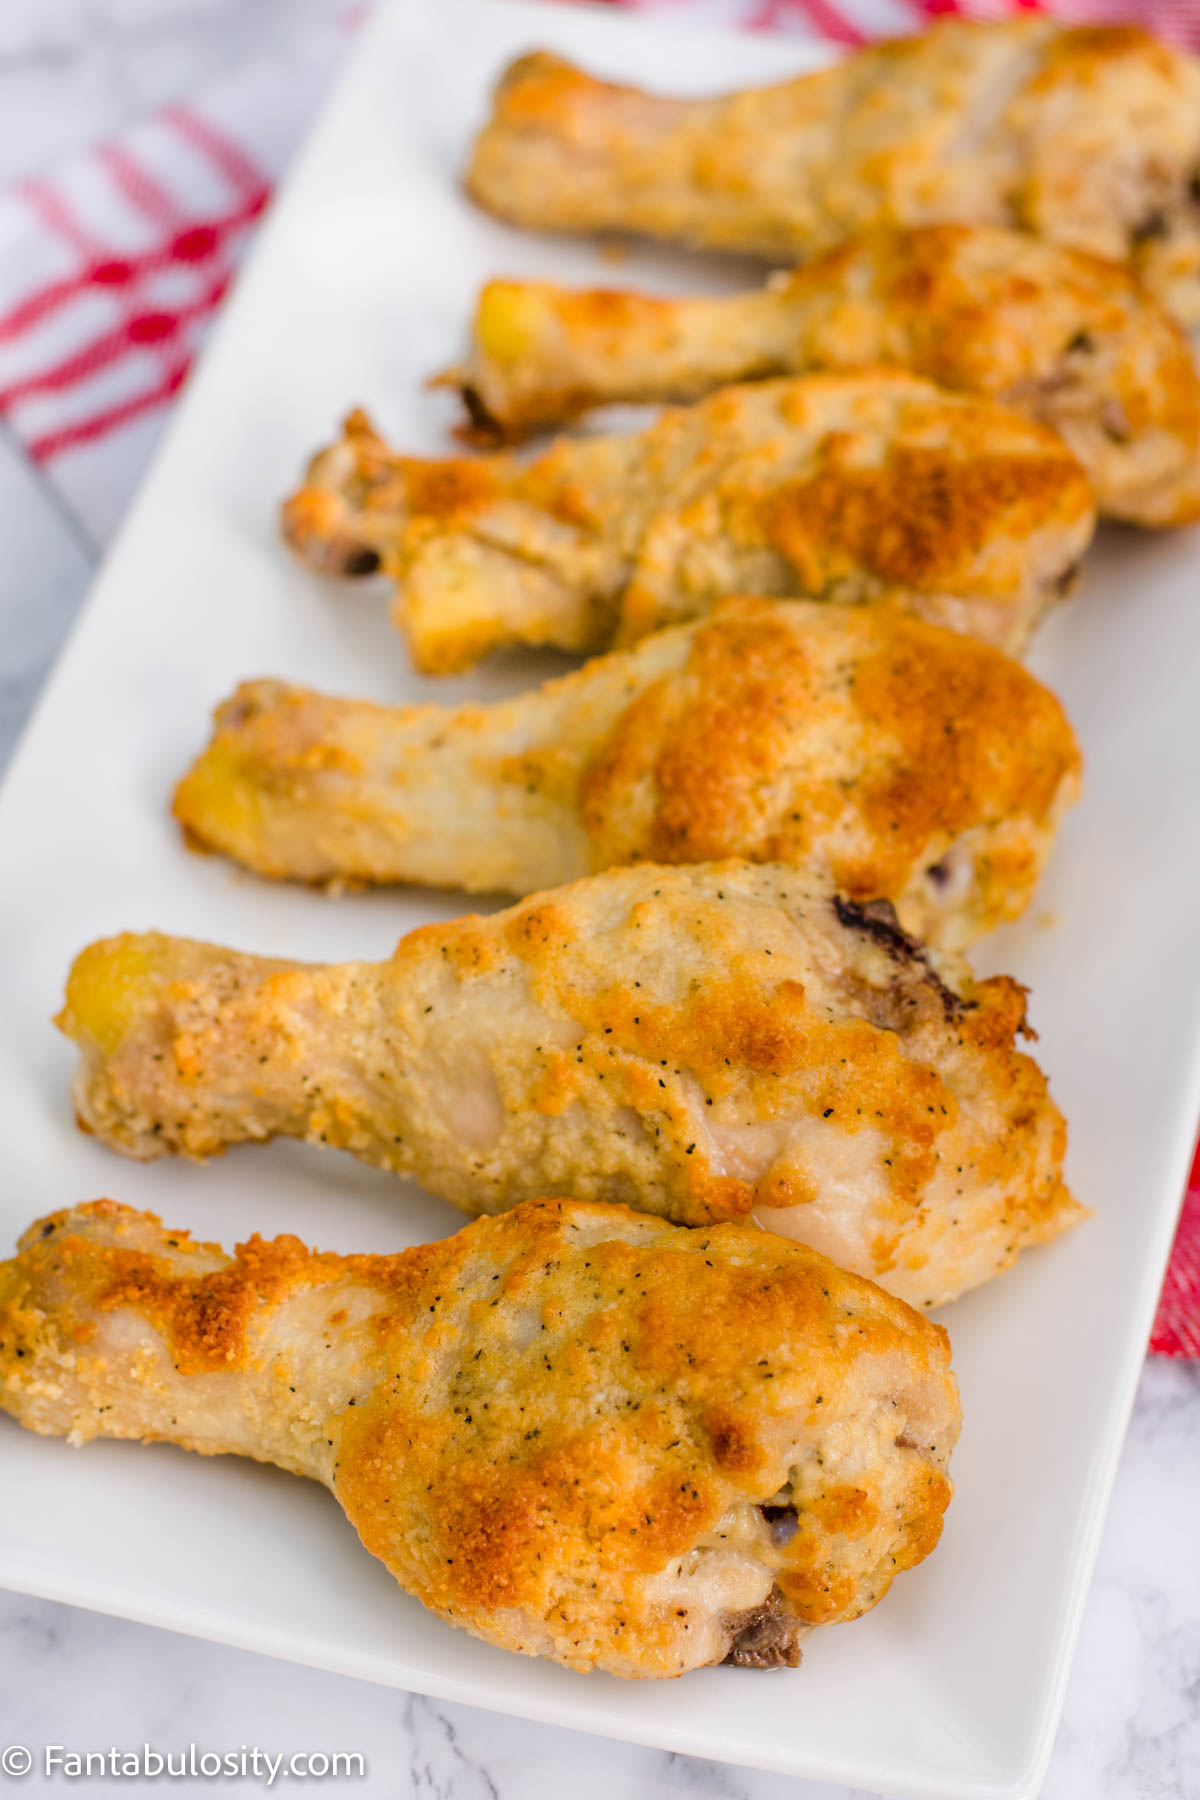
This is the recipe I go back to when I need chicken on the table fast and I don't want to think too hard. Oven-baked drumsticks are one of those things that look like you put in a lot of effort but really, you just season them and let the oven do the work. I've made this on school nights when I had exactly 15 minutes of actual hands-on time, and it always comes out well. The key is patting the drumsticks dry before seasoning — that step alone makes a real difference in how the skin crisps up.
Ingredients
- 8 chicken drumsticks (about 3 lbs)
- 2 tablespoons olive oil
- 1 teaspoon garlic powder
- 1 teaspoon onion powder
- 1 teaspoon smoked paprika
- ½ teaspoon dried oregano
- 1 teaspoon salt
- ½ teaspoon black pepper
Instructions
- Preheat your oven to 425°F. Line a baking sheet with foil and place a wire rack on top if you have one — this helps air circulate and crisps the skin all around.
- Pat the drumsticks completely dry with paper towels. This is not optional if you want crispy skin.
- Toss the drumsticks with olive oil, then mix in all the spices until every piece is evenly coated.
- Arrange on the rack and bake for 40–45 minutes, flipping once halfway through, until the skin is deep golden and the internal temperature reads 165°F.
- Let them rest for 5 minutes before serving — the juices redistribute and you get cleaner bites.
Tips
- Tip: No wire rack? Just bake directly on the foil-lined sheet, but flip them one extra time to get both sides browned.
- Tip: For even more flavor, season the drumsticks the night before and let them sit uncovered in the fridge — the dry rub forms a little crust that bakes up beautifully.
- Tip: Leftovers reheat really well in an air fryer at 375°F for about 5 minutes — far better than the microwave.
32. Air Fryer BBQ Chicken Drumsticks
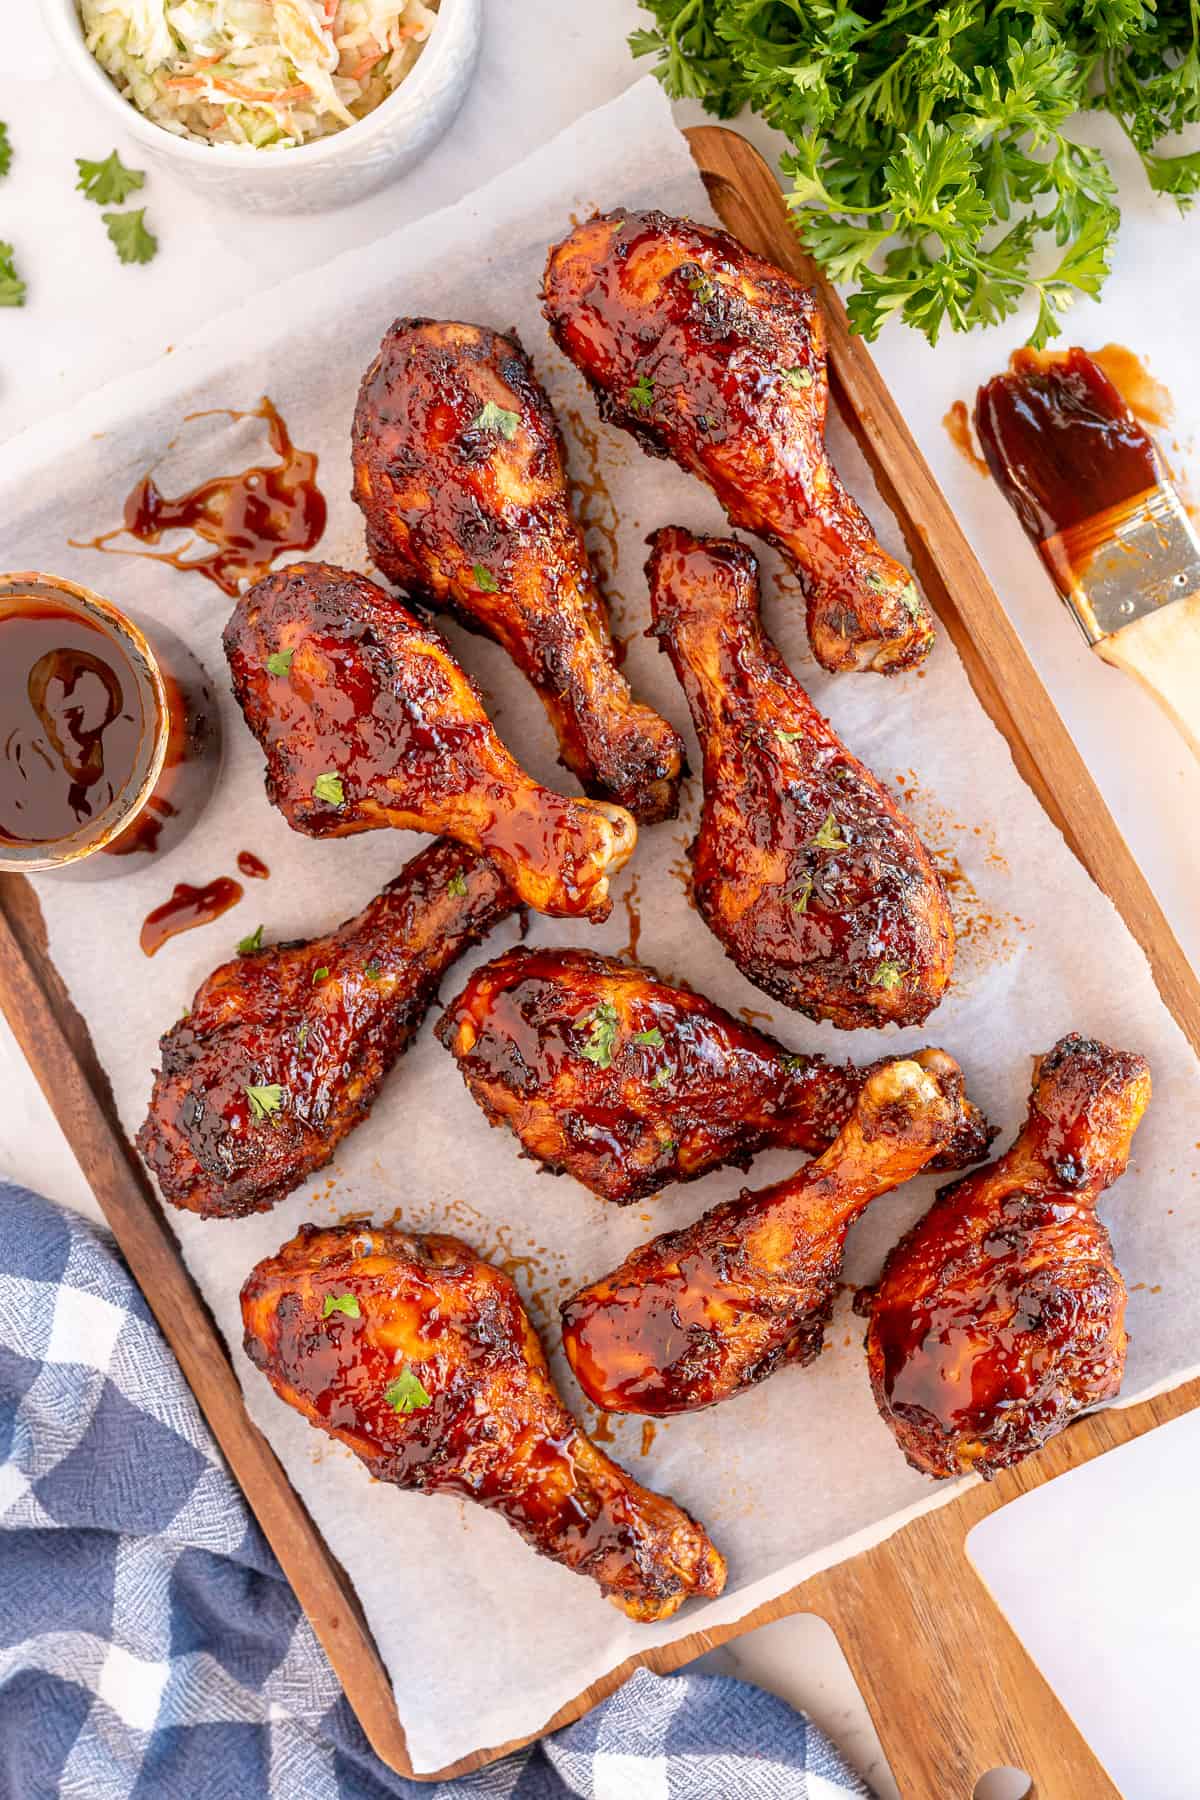
I got an air fryer a couple of years ago mostly because Saad kept asking for "crispy chicken" on weeknights, and the oven felt too slow. These air fryer BBQ drumsticks were one of the first things I tested in it, and honestly they converted me. The skin gets genuinely crispy — not soggy like when you bake BBQ chicken on a sheet pan — and the whole thing is done in about 25 minutes. Use whatever BBQ sauce you already have in the fridge; I've used Sweet Baby Ray's, Trader Joe's Kansas City sauce, and even a store-brand from Walmart, and they all work.
Ingredients
- 6 chicken drumsticks (about 2 lbs)
- 1 tablespoon olive oil
- ½ teaspoon garlic powder
- ½ teaspoon smoked paprika
- ½ teaspoon salt
- ¼ teaspoon black pepper
- ½ cup BBQ sauce (Sweet Baby Ray's or any brand you like)
Instructions
- Pat the drumsticks dry, then toss them with olive oil, garlic powder, smoked paprika, salt, and pepper.
- Preheat your air fryer to 400°F. Arrange drumsticks in a single layer in the basket — don't stack them or they'll steam instead of crisp.
- Cook for 10 minutes, flip, then cook another 10 minutes.
- Brush generously with BBQ sauce on all sides, then cook for a final 3–4 minutes until the sauce is sticky and caramelized. Internal temp should be 165°F.
- Serve immediately with extra sauce on the side if you like.
Tips
- Tip: Don't add the BBQ sauce at the start — it will burn. Always add it in the last 3–4 minutes only.
- Tip: If your air fryer is on the smaller side, work in two batches rather than crowding the basket. Crowding is the number one reason air fryer chicken comes out soggy.
- Tip: Want a little heat? Mix a teaspoon of hot sauce or a pinch of cayenne into the BBQ sauce before brushing.
31. Grilled Chicken Drumsticks

There's something about grilled drumsticks that just tastes like summer, even when you're grilling them on a random Tuesday. I learned the hard way that you can't just throw cold drumsticks straight onto a screaming hot grill — they end up charred outside and raw near the bone. The fix is two-zone grilling: start them on indirect heat to cook through, then finish over the flames for that smoky char. It takes a few more minutes but the result is completely different from what I used to make.
Ingredients
- 8 chicken drumsticks (about 3 lbs)
- 2 tablespoons olive oil
- 1 teaspoon smoked paprika
- 1 teaspoon garlic powder
- ½ teaspoon cumin
- 1 teaspoon salt
- ½ teaspoon black pepper
- ½ cup BBQ sauce, for basting (optional)
Instructions
- Mix olive oil with all the spices and rub the drumsticks all over. Let them sit at room temperature for 20–30 minutes while you heat the grill — this helps them cook more evenly.
- Set up your grill for two-zone cooking: high heat on one side, no heat on the other. Place drumsticks on the indirect side, close the lid, and cook for 20–25 minutes, turning once.
- Move drumsticks to direct heat. Grill for 5–8 minutes, turning frequently, until nicely charred. If using BBQ sauce, brush it on during these last few minutes.
- Check that the internal temperature is 165°F at the thickest part, not touching the bone. Rest for 5 minutes before serving.
Tips
- Tip: Score the drumsticks with 2–3 shallow cuts before marinating — it helps the seasoning get deeper into the meat and speeds up cooking slightly.
- Tip: No outdoor grill? A cast iron grill pan on the stovetop over medium-high heat works well for the char. Finish in a 400°F oven for 15 minutes to cook through.
- Tip: Marinate overnight in the fridge if you have the time — the flavor goes from good to noticeably better.
30. Air Fryer Chicken Legs (Drumsticks)

If you've made the BBQ version above and you're wondering whether plain air fryer chicken legs without sauce are worth it — yes, absolutely. This version skips the BBQ sauce and focuses on getting a really good spiced dry rub with crispy skin, which means the chicken can go alongside anything: rice, a salad, roasted vegetables, or just on its own. It comes together in under 30 minutes total, and the cleanup is minimal. I make a double batch on Sunday nights because they reheat so well for school lunches the next day.
Ingredients
- 6 chicken drumsticks (about 2 lbs)
- 1 tablespoon olive oil
- 1 teaspoon garlic powder
- 1 teaspoon paprika (sweet or smoked)
- ½ teaspoon onion powder
- ½ teaspoon dried Italian seasoning (or a mix of dried oregano and thyme)
- ¾ teaspoon salt
- ¼ teaspoon black pepper
Instructions
- Pat drumsticks dry with paper towels. Toss with olive oil, then add all the spices and mix until every piece is well coated.
- Preheat air fryer to 400°F for 3 minutes. Place drumsticks in a single layer in the basket — cook in batches if needed.
- Cook for 12 minutes, flip each drumstick, then cook for another 10–12 minutes until the skin is deep golden and crispy.
- Check the internal temperature — it needs to hit 165°F. If it's close but not there, give it 3 more minutes and check again.
- Rest for a few minutes, then serve however you like.
Tips
- Tip: Preheating the air fryer makes a noticeable difference — the skin starts crisping immediately instead of gradually, so don't skip that step.
- Tip: These work great with frozen drumsticks too — add 5 extra minutes and make sure the internal temp is reached before pulling them out.
- Tip: The spice mix here is pretty neutral and family-friendly — if you want more kick, add ¼ teaspoon cayenne or a pinch of red pepper flakes to the rub.
29. Smoked Chicken Legs
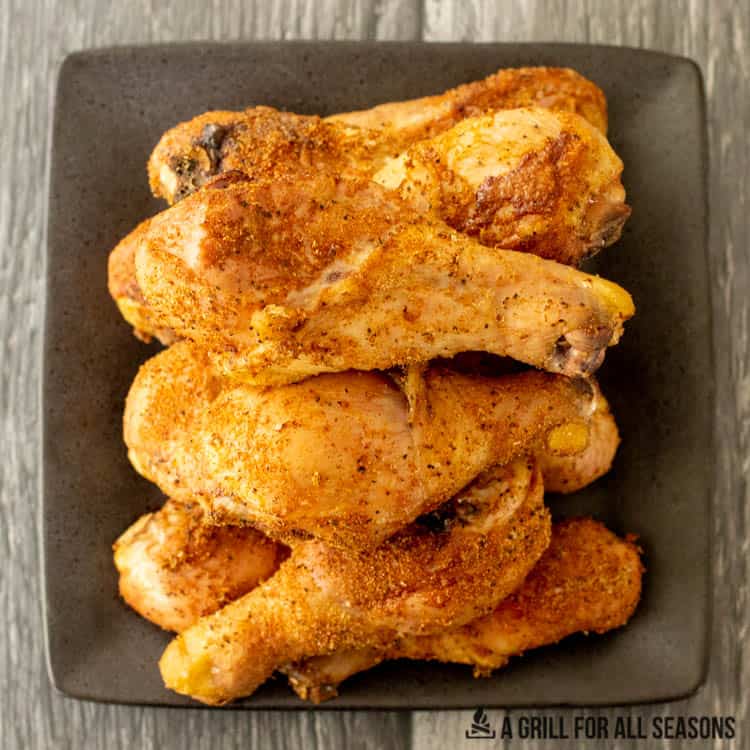
My husband has been asking me to smoke chicken legs ever since we got a basic charcoal smoker a couple of years ago. I was intimidated at first — I thought smoking required some kind of serious expertise — but honestly, chicken legs are one of the most forgiving cuts you can throw in a smoker. The fat in the dark meat keeps them juicy even if your temperature fluctuates a little, and that low-and-slow smoke builds a depth of flavor you just can't get from an oven. The skin crisps up beautifully right at the end when you crank the heat, and the result is genuinely impressive for how little active effort it takes.
Ingredients
- 8 chicken legs (drumsticks and thighs attached, or just drumsticks)
- 2 tablespoons olive oil
- 1 tablespoon brown sugar
- 1 teaspoon smoked paprika
- 1 teaspoon garlic powder
- 1 teaspoon onion powder
- ½ teaspoon black pepper
- 1 teaspoon kosher salt
- ½ teaspoon cayenne pepper (optional, for heat)
- Wood chips for smoking (hickory or applewood both work well)
Instructions
- Pat the chicken legs completely dry with paper towels — this is the step that makes the difference between crispy skin and rubbery skin. Brush them all over with olive oil.
- Mix together the brown sugar, smoked paprika, garlic powder, onion powder, black pepper, salt, and cayenne in a small bowl. Rub the spice mixture all over the chicken legs, getting under the skin where you can.
- Preheat your smoker to 250°F and add your soaked wood chips. Place the chicken legs directly on the grate, leaving a little space between each one for air circulation.
- Smoke at 250°F for about 1.5 to 2 hours, until the internal temperature reaches 165°F. For crispier skin, crank the heat up to 375°F for the final 10-15 minutes.
- Rest the chicken for 5 minutes before serving so the juices redistribute.
Tips
- Tip: Soak your wood chips in water for at least 30 minutes before adding them to the smoker — dry chips burn too fast and turn acrid.
- Tip: No smoker? You can get a similar result on a charcoal grill using indirect heat and a foil pouch of wood chips placed directly on the coals.
- Tip: A meat thermometer is non-negotiable here — don't guess on poultry. An instant-read thermometer from Walmart runs about $10 and is worth every cent.
28. Air Fryer Buffalo Chicken Drumsticks

If your household has anyone who loves buffalo wings, these drumsticks are going to become a regular request. The air fryer does something magic to chicken skin — it gets genuinely crispy without a drop of deep-frying oil, and then you toss the whole thing in tangy buffalo sauce right at the end so it coats every inch. Saad went through three of these in one sitting and asked if we could have them "for game night" even though we don't really do game nights. I make a double batch now because a single batch disappears way too fast.
Ingredients
- 8 chicken drumsticks
- 1 tablespoon olive oil
- 1 teaspoon garlic powder
- 1 teaspoon smoked paprika
- ½ teaspoon salt
- ½ teaspoon black pepper
- ½ cup buffalo sauce (Frank's RedHot Buffalo Sauce works great)
- 2 tablespoons unsalted butter, melted
- Blue cheese or ranch dressing for serving
Instructions
- Pat drumsticks dry, then toss them in olive oil, garlic powder, smoked paprika, salt, and pepper until evenly coated.
- Preheat the air fryer to 400°F. Arrange drumsticks in a single layer in the basket — don't stack them or they'll steam instead of crisp. Cook for 20 minutes, flipping halfway through.
- While the chicken cooks, mix the buffalo sauce and melted butter together in a large bowl.
- Once the drumsticks hit an internal temperature of 165°F and the skin is crispy, pull them out and toss immediately in the buffalo butter sauce until fully coated.
- Serve right away with ranch or blue cheese dressing on the side for dipping.
Tips
- Tip: Drying the drumsticks thoroughly before seasoning is what gives you that crispy skin — skip this step and you get steamed chicken, which is a sad outcome.
- Tip: If you want extra-saucy drumsticks, reserve half the buffalo sauce, toss once right after cooking, then toss again in the reserved sauce right before serving.
- Tip: Want it milder? Cut the buffalo sauce with a little extra melted butter or mix in a spoonful of honey to balance the heat.
27. Air Fryer Chicken Drumsticks
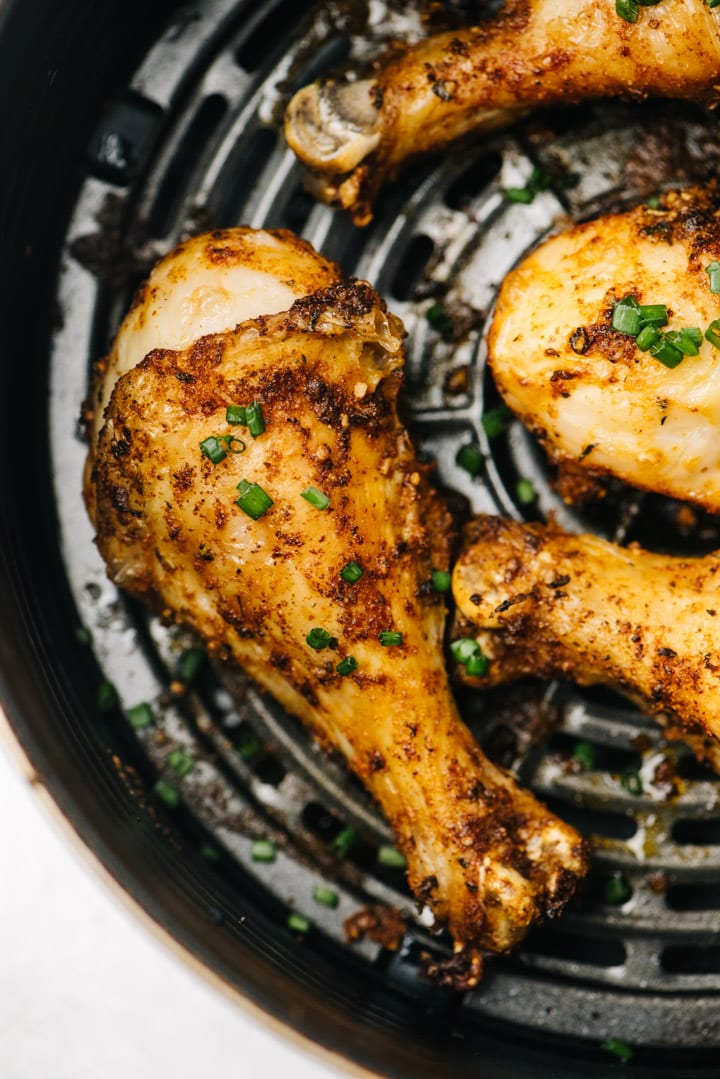
This is the recipe I reach for on weeknights when I have thirty minutes and zero energy for anything complicated. No marinade needed, no special sauce — just a solid dry rub and the air fryer doing what it does best. The skin comes out genuinely crispy, the meat stays moist all the way to the bone, and cleanup is minimal. I was skeptical about air fryer chicken for a long time because my first attempt came out pale and rubbery — the mistake was overcrowding the basket. Once I started cooking in a proper single layer, everything changed.
Ingredients
- 6–8 chicken drumsticks
- 1 tablespoon olive oil
- 1 teaspoon garlic powder
- 1 teaspoon onion powder
- 1 teaspoon smoked paprika
- ½ teaspoon dried oregano
- ¾ teaspoon salt
- ½ teaspoon black pepper
Instructions
- Pat the drumsticks completely dry with paper towels. This step matters more than people think — moisture is the enemy of crispy skin.
- Toss the drumsticks in olive oil, then add all the spices and toss again until every piece is evenly coated.
- Preheat the air fryer to 400°F for 3 minutes. Place drumsticks in a single layer in the basket with space between each one.
- Cook for 20–22 minutes, flipping once at the halfway point. The internal temperature should read 165°F and the skin should look deep golden and crispy.
- Let rest for 3–4 minutes before serving — the juices settle and the skin crisps up even more as it sits.
Tips
- Tip: Every air fryer runs slightly differently — check your drumsticks at the 18-minute mark the first time you make this so you know where your machine lands.
- Tip: Lightly spray the basket with cooking spray before adding the chicken to prevent any sticking, especially if your air fryer is older.
- Tip: These reheat beautifully in the air fryer at 375°F for about 5 minutes — the skin crisps right back up, unlike reheating in a microwave which makes it soggy.
26. Honey Garlic Baked Chicken Drumsticks
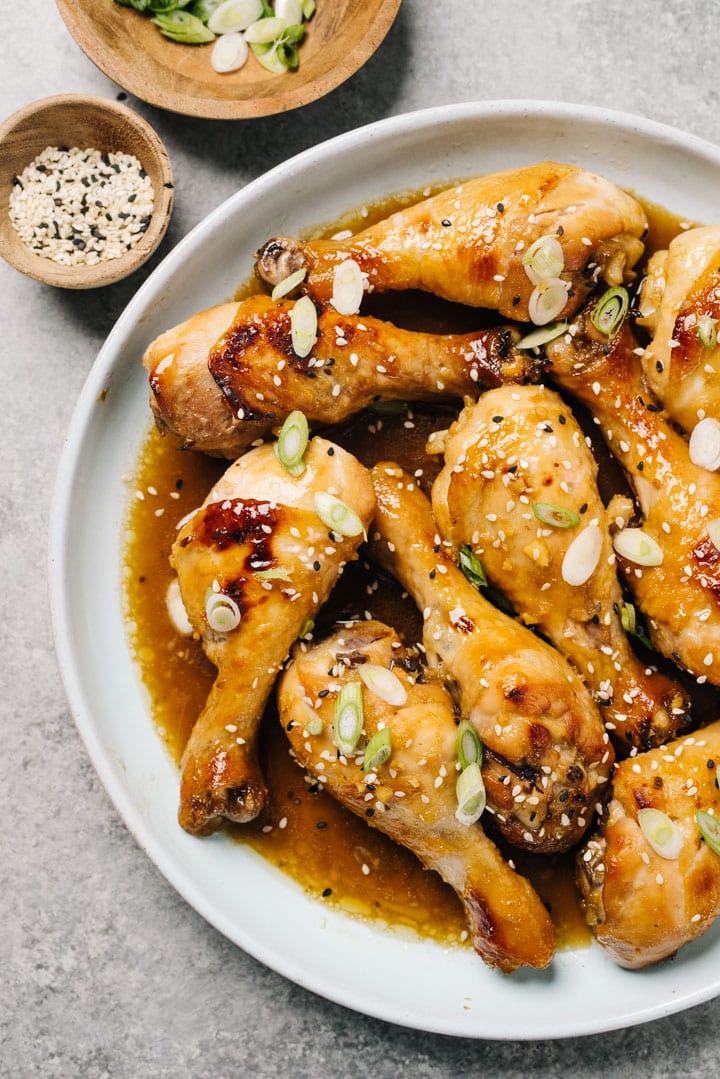
Honey garlic sauce on baked chicken is one of those combinations that sounds too simple to be worth making — and then you taste it and wonder why you don't make it every week. The sauce caramelizes in the oven into something sticky and deeply savory-sweet, coating the skin in a glossy lacquered glaze that crisps at the edges. I use the pan drippings at the end to spoon over everything, which takes about ten seconds and makes a huge difference. This one is a solid weeknight dinner, and it pairs as well with steamed rice as it does with roasted vegetables.
Ingredients
- 8 chicken drumsticks
- 3 tablespoons honey
- 4 cloves garlic, minced
- 2 tablespoons soy sauce
- 1 tablespoon olive oil
- 1 tablespoon apple cider vinegar (or white vinegar)
- ½ teaspoon smoked paprika
- ½ teaspoon black pepper
- ½ teaspoon salt
- Fresh parsley for garnish (optional)
Instructions
- Preheat oven to 425°F. Pat drumsticks dry and arrange them in a single layer in a large baking dish or on a rimmed sheet pan lined with foil.
- Whisk together the honey, minced garlic, soy sauce, olive oil, vinegar, paprika, salt, and pepper in a small bowl until combined.
- Pour the sauce over the drumsticks and turn each one to coat thoroughly. Let them sit for 10 minutes if you have time — even a short rest helps the sauce cling better.
- Bake for 35–40 minutes, flipping the drumsticks once at the 20-minute mark and spooning the pan sauce back over the top.
- The chicken is done when the internal temperature hits 165°F and the skin looks sticky and caramelized. Spoon any remaining pan juices over the top before serving.
Tips
- Tip: Line your pan with foil — the honey sauce burns onto bare metal and becomes nearly impossible to clean off. Learn from my experience here.
- Tip: If the skin isn't as caramelized as you'd like by the end, switch the oven to broil for the last 2–3 minutes — watch it closely though, honey burns fast.
- Tip: Leftovers are excellent cold straight from the fridge — the sauce sets into a glaze overnight that's somehow even better the next day.
25. Oven Baked Chicken Quarters
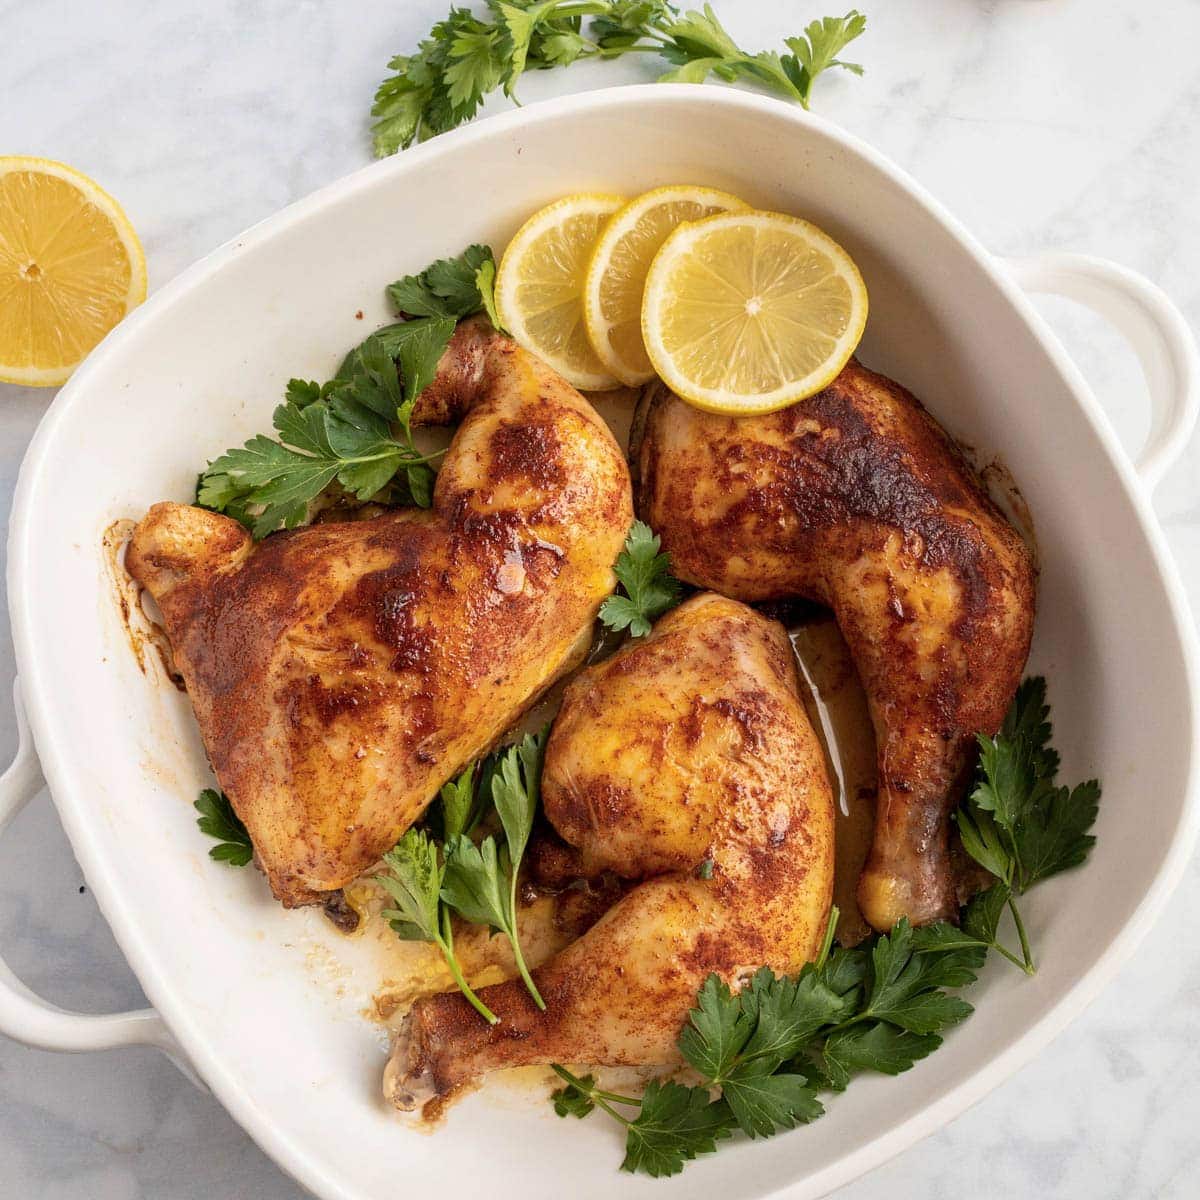
Chicken leg quarters are one of the most underrated cuts at the grocery store — they're usually the cheapest option in the whole poultry section, and yet they deliver some of the juiciest, most flavorful oven-baked chicken you can make. The thigh and drumstick together mean more fat, more flavor, and a much wider margin for error than a dry chicken breast. I season mine simply with herbs, olive oil, and garlic, then let the oven do the work at high heat. The skin goes properly golden and crispy, and the meat underneath is tender all the way to the bone.
Ingredients
- 4 chicken leg quarters
- 2 tablespoons olive oil
- 1 teaspoon garlic powder
- 1 teaspoon onion powder
- 1 teaspoon smoked paprika
- 1 teaspoon dried Italian seasoning (or a mix of oregano and thyme)
- 1 teaspoon kosher salt
- ½ teaspoon black pepper
- ½ teaspoon red pepper flakes (optional)
Instructions
- Preheat your oven to 425°F. Pat the chicken leg quarters completely dry — really get in there with the paper towels, including under the skin.
- Mix all the spices together in a small bowl. Rub the olive oil all over the chicken first, then press the spice mixture onto every surface, getting some under the skin if you can.
- Place the quarters skin-side up on a rimmed sheet pan or in a baking dish — don't crowd them. If you have a wire rack that fits your pan, use it; it lets heat circulate under the chicken for even crispier skin.
- Bake for 40–45 minutes, until the skin is deep golden and an instant-read thermometer inserted into the thickest part of the thigh (away from the bone) reads 165°F. If you want extra-crispy skin, broil for the last 3 minutes.
- Rest for 5 minutes before serving — this keeps the juices inside the meat instead of all over your cutting board.
Tips
- Tip: Chicken leg quarters are often sold in bulk bags at Costco or Walmart at a very low price per pound — stock up and freeze them in individual portions for easy weeknight pulls.
- Tip: Letting the seasoned chicken sit uncovered in the fridge for even 30 minutes before baking dries out the skin further and gives you noticeably better results.
- Tip: The drippings left in the pan are genuinely good — spoon them over roasted vegetables or stir a spoonful into rice while it's still hot.
24. Best Tandoori Chicken
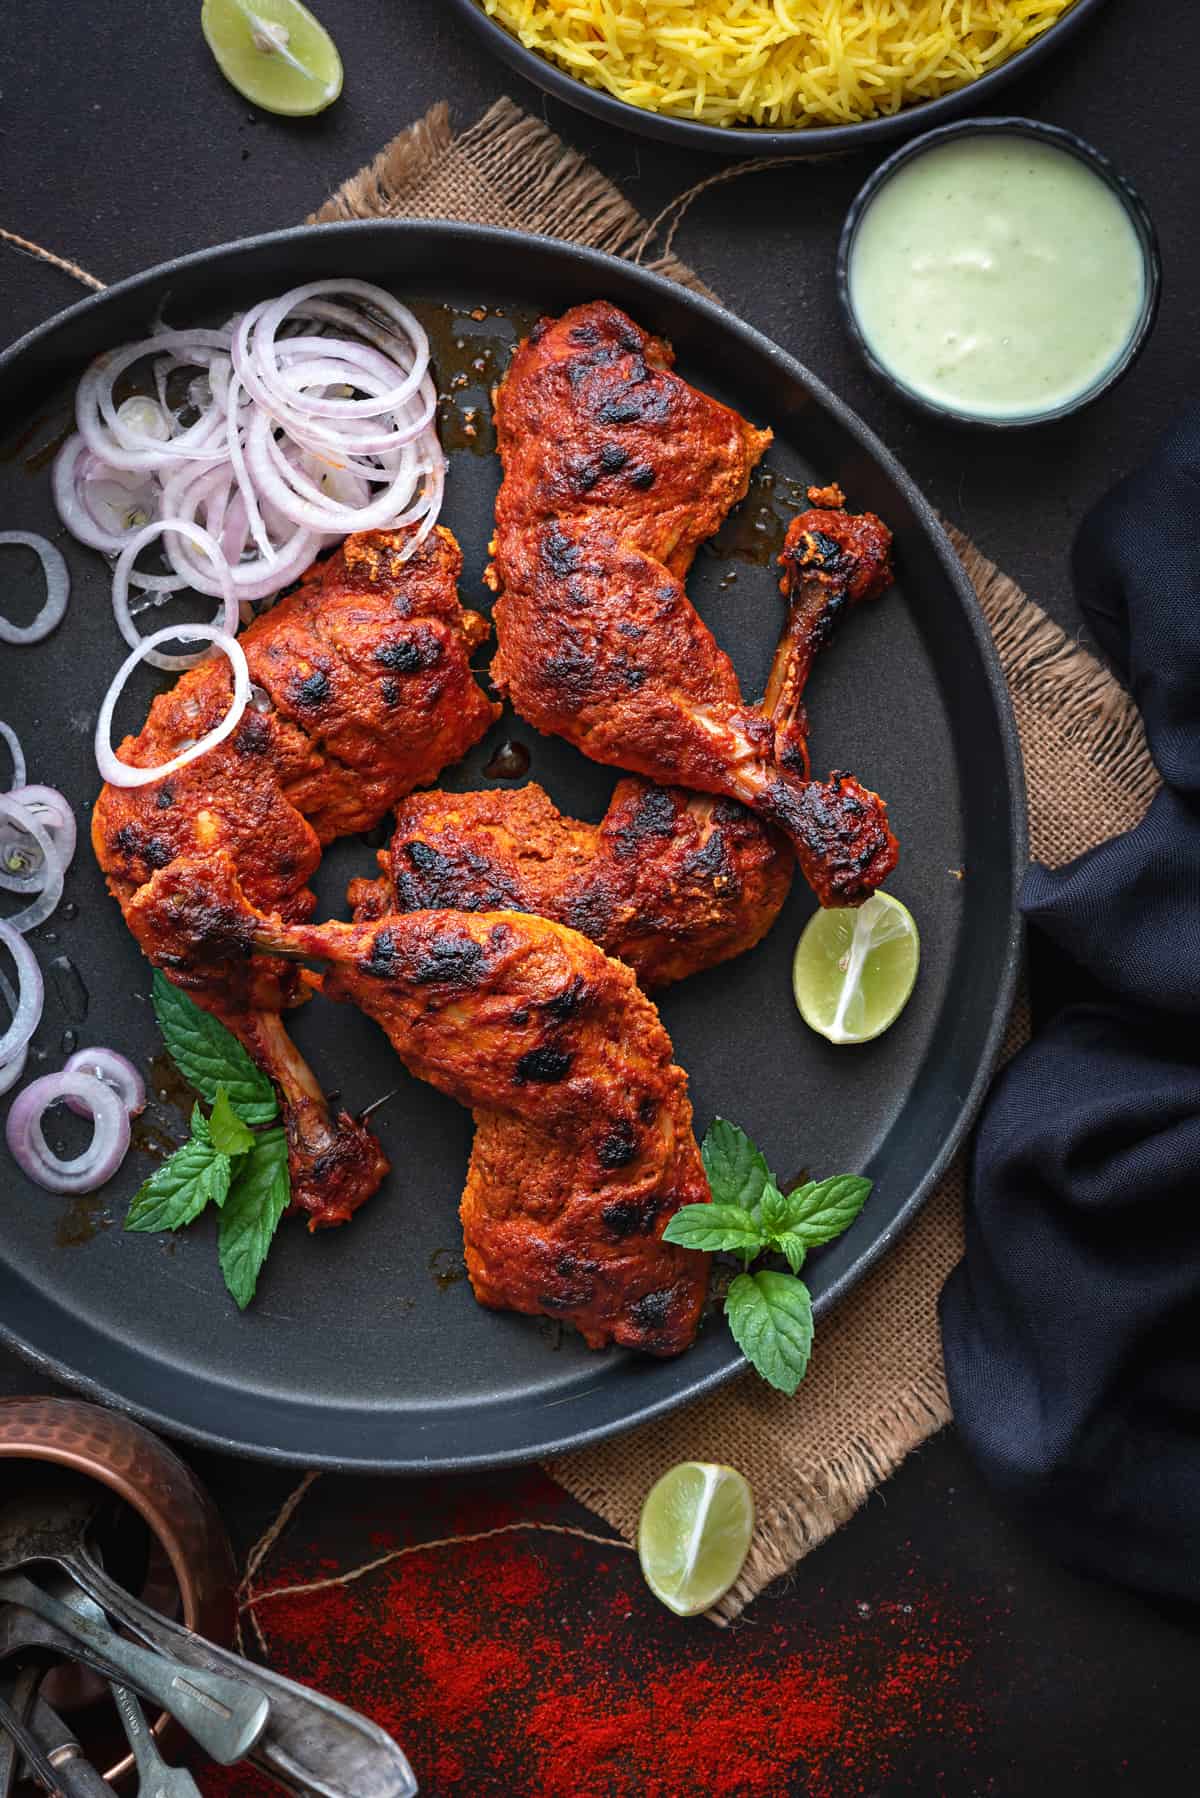
Tandoori chicken is one of those recipes that felt completely intimidating to me the first time I tried it — I thought you needed a proper clay tandoor oven or it wouldn't work. I was wrong. You can get genuinely smoky, charred results from a regular oven at high heat, and the magic is really all in the marinade. The combination of yogurt, lemon, and spices breaks down the chicken and keeps it incredibly juicy even after roasting at high temperatures. If you want the full deep-dive version of this, I actually have my own tandoori chicken recipe on the site that walks through every step — but this version below is a solid, streamlined approach that works on a weeknight.
Ingredients
- 4 chicken legs (drumstick and thigh attached), skin-on
- ¾ cup plain whole-milk yogurt
- 2 tablespoons lemon juice
- 1 tablespoon vegetable oil
- 1½ teaspoons kashmiri red chili powder (or ¾ teaspoon regular chili powder + ½ teaspoon paprika for color)
- 1 teaspoon cumin
- 1 teaspoon coriander
- 1 teaspoon garam masala
- 1 teaspoon garlic paste (or 3 cloves minced)
- 1 teaspoon ginger paste (or 1-inch piece grated)
- 1 teaspoon salt
Instructions
- Score the chicken legs deeply with a knife — 2 to 3 cuts per piece — so the marinade can actually get into the meat, not just coat the surface.
- Mix together the yogurt, lemon juice, oil, and all the spices into a smooth marinade. Coat the chicken thoroughly, getting the marinade into the cuts. Cover and refrigerate for at least 4 hours — overnight is much better.
- Preheat your oven to 450°F. Line a baking sheet with foil and place a wire rack on top. Arrange the chicken on the rack — this lets heat circulate all around and gives you that char on the edges.
- Roast for 35 to 40 minutes, flipping once halfway through, until the edges are slightly charred and the internal temperature reads 165°F.
- Serve with sliced onions, lemon wedges, and naan or flatbread. A drizzle of fresh cilantro-mint chutney over the top makes this restaurant-level.
Tips
- Tip: If you can't find kashmiri chili powder at a South Asian grocery store, the paprika + chili powder combo works well for color and heat — the flavor is slightly different but still great.
- Tip: Don't skip the wire rack — chicken sitting in its own juices on a flat pan steams instead of roasting, and you lose the char.
- Tip: Switch the oven to broil for the last 3 minutes if you want even more charring on the edges — keep a close eye on it though.
23. How to Make One Pan Chicken and Rice
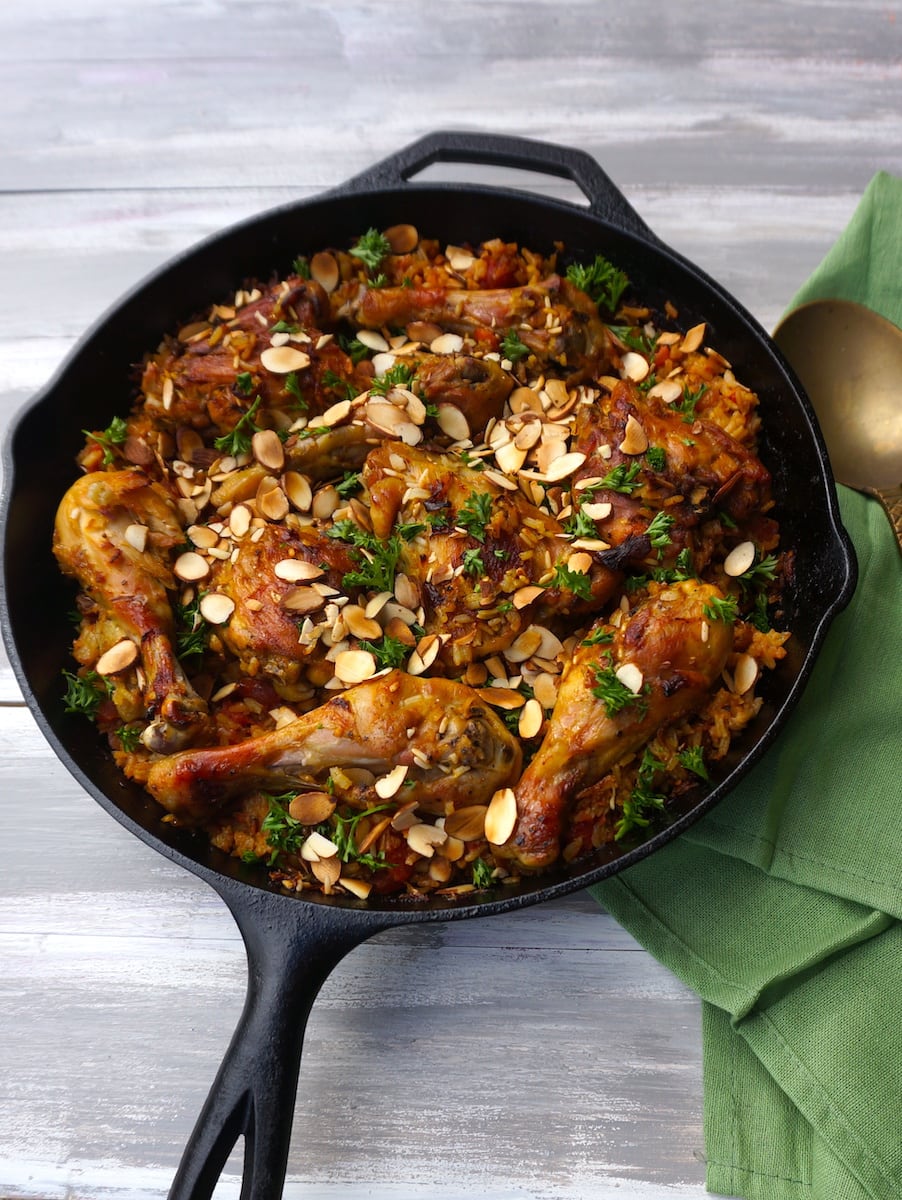
One pan chicken and rice is the kind of dinner I fall back on when I genuinely have nothing planned and it's already 5pm. Everything goes into a single skillet or baking dish — the chicken legs sit right on top of the seasoned rice and cook together, so the rice absorbs all those savory drippings as it cooks. The result is rice that tastes like it's been cooked in chicken stock even if all you used was water and seasoning. My husband is a rice person through and through, and this is one of those dishes he'll clear the pan of before I've even sat down.
Ingredients
- 4 chicken legs, bone-in skin-on
- 1½ cups long-grain white rice, rinsed
- 2¼ cups chicken broth
- 1 small onion, diced
- 3 cloves garlic, minced
- 1 tablespoon olive oil
- 1 teaspoon paprika
- 1 teaspoon garlic powder
- ½ teaspoon onion powder
- ½ teaspoon dried thyme
- Salt and black pepper to taste
- Fresh parsley for garnish (optional)
Instructions
- Preheat oven to 375°F. Pat the chicken legs dry and season all over with paprika, garlic powder, onion powder, thyme, salt, and pepper.
- Heat olive oil in a large oven-safe skillet over medium-high heat. Sear the chicken legs skin-side down for 4 to 5 minutes until golden. Remove and set aside — you're not cooking them through yet, just building color.
- In the same skillet, sauté the onion for 2 minutes, then add the garlic and cook another 30 seconds. Stir in the rinsed rice and let it toast for 1 minute in the pan drippings.
- Pour in the chicken broth and stir to combine. Nestle the seared chicken legs on top of the rice, skin-side up. The skin should sit above the liquid level so it stays crispy.
- Cover tightly with a lid or foil and bake for 30 minutes. Uncover and bake another 10 minutes until the skin is crispy and the rice has absorbed all the liquid. Rest for 5 minutes before serving.
Tips
- Tip: Rinsing the rice before adding it to the pan removes excess starch and keeps the grains from clumping — don't skip this step.
- Tip: If you don't have an oven-safe skillet, transfer everything to a 9x13 baking dish after the stovetop steps — works just as well.
- Tip: Add a handful of frozen peas or sliced mushrooms to the rice layer before baking if you want to sneak in some vegetables without any extra effort.
22. Best Air Fryer Chicken Legs
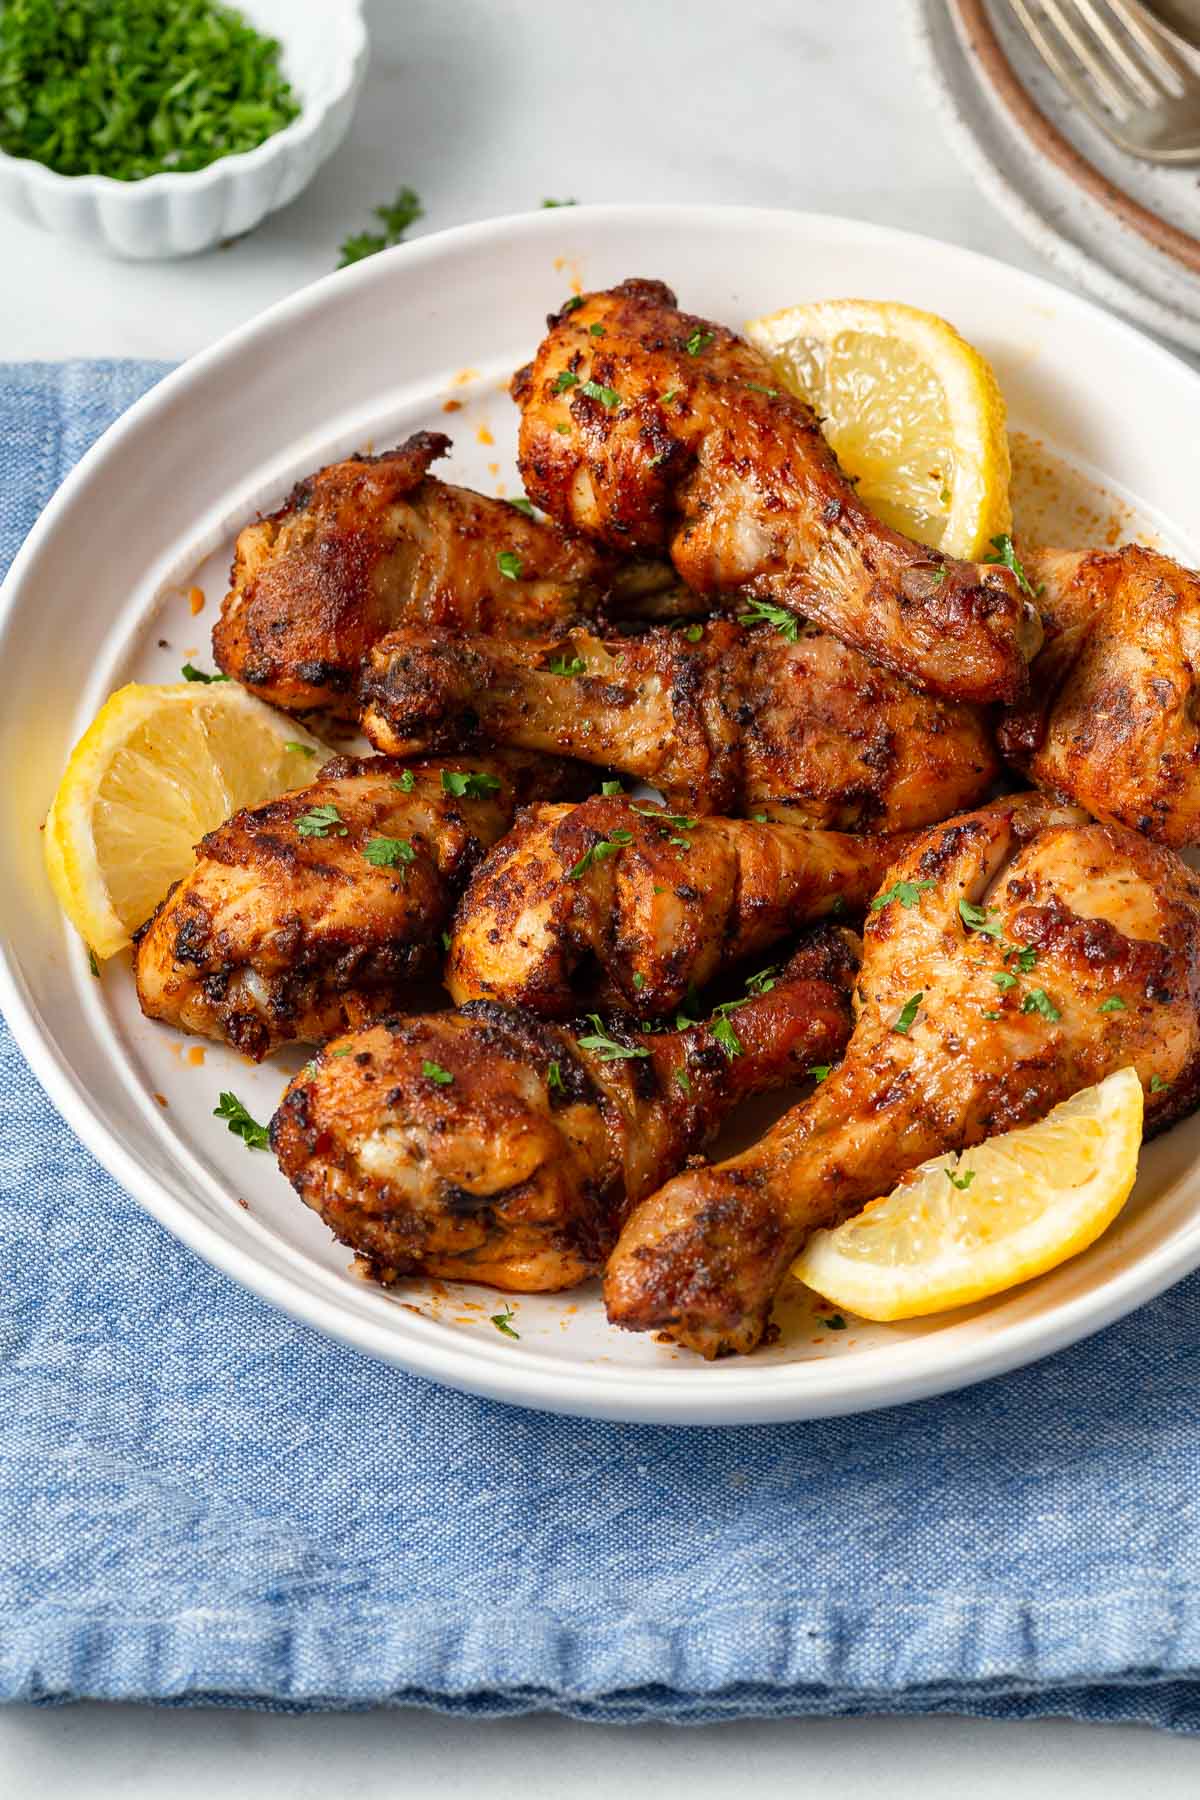
I was skeptical about air fryer chicken legs for a while — I thought they'd come out dry and pale compared to oven-roasted. I was wrong about that too. Done right, they come out with genuinely crispy skin and juicy meat in about 25 minutes flat, which is faster than preheating a full oven and waiting for it to do its thing. The key is patting the legs completely dry before seasoning — any surface moisture is the enemy of crispy skin in the air fryer. If you're already exploring air fryer recipes, this one should be near the top of your list.
Ingredients
- 4 chicken legs, bone-in skin-on
- 1 tablespoon olive oil
- 1 teaspoon smoked paprika
- 1 teaspoon garlic powder
- ½ teaspoon onion powder
- ½ teaspoon dried oregano
- ¼ teaspoon cayenne pepper (optional, for heat)
- 1 teaspoon salt
- ½ teaspoon black pepper
Instructions
- Pat the chicken legs completely dry with paper towels — really get in there and dry every surface. This is the single most important step for crispy skin.
- Combine all the spices in a small bowl. Drizzle the chicken with olive oil, then rub the spice mixture all over, including under the skin where you can get to it.
- Preheat the air fryer to 400°F for 3 minutes. Place the chicken legs in a single layer in the basket — don't stack or crowd them or the skin won't crisp.
- Air fry at 400°F for 10 minutes, flip the legs, then cook another 12 to 14 minutes until the skin is deep golden and the internal temperature reaches 165°F.
- Rest for 3 to 5 minutes before serving. The skin will stay crispy for a good 10 minutes after coming out — don't cover them or they'll steam and go soggy.
Tips
- Tip: Every air fryer runs slightly differently — start checking at the 20-minute mark with a meat thermometer rather than going purely by time.
- Tip: If you have time, season the chicken and leave it uncovered in the fridge for an hour before cooking — the surface dries out even more and the skin gets noticeably crispier.
- Tip: Smoked paprika makes a real difference here versus regular paprika — it adds a subtle smokiness that mimics grilled chicken without needing an outdoor grill.
21. Air Fryer Chicken Legs
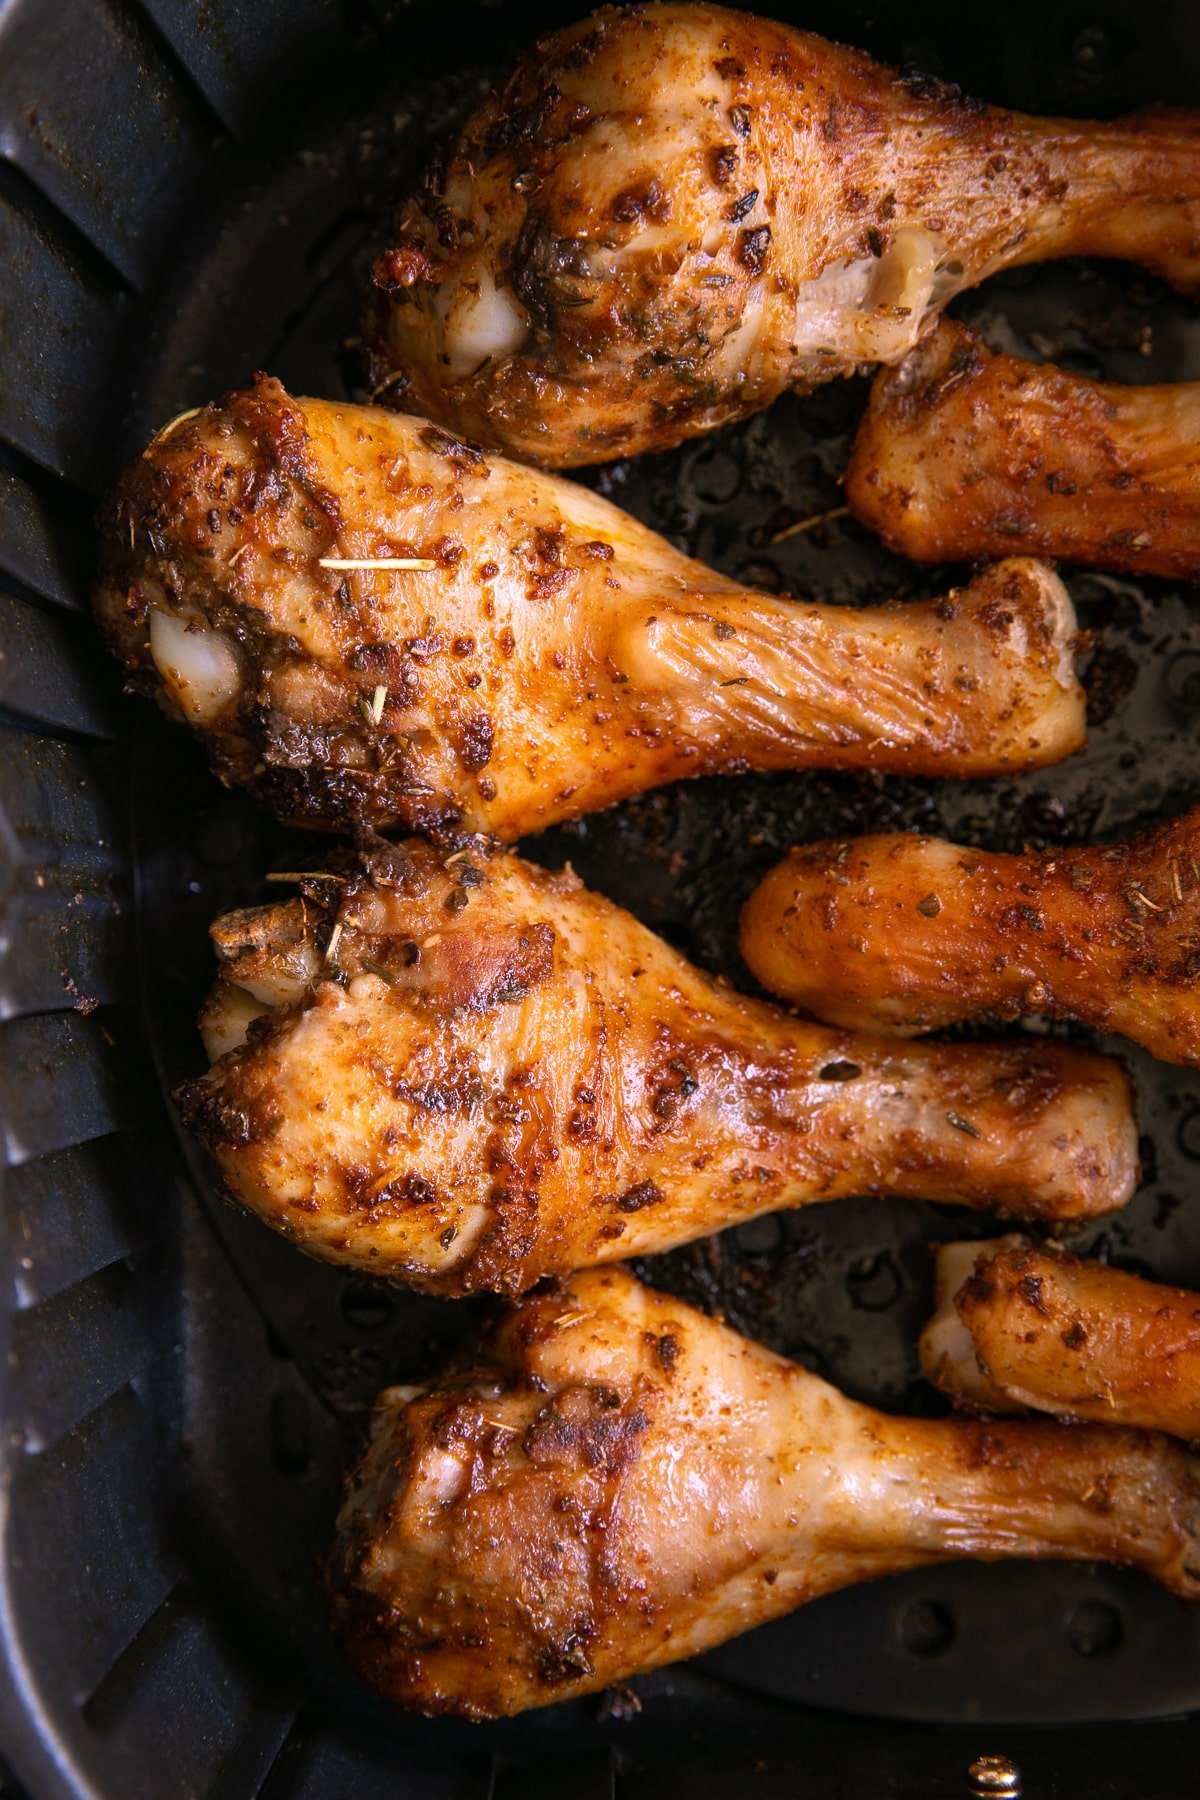
This is a slightly different take on air fryer chicken legs — simpler seasoning, focused on getting that juicy-inside, crispy-outside balance right without a long list of spices. Where the previous recipe leans into smoked paprika and oregano, this one keeps things minimal so the chicken flavor really comes through. It's the version I make when I just want something clean and straightforward alongside a salad or roasted vegetables. Saad specifically prefers this one — he's not big on heavy seasoning, and this hits the right note for him.
Ingredients
- 4 chicken legs, bone-in skin-on
- 1½ tablespoons olive oil
- 1 teaspoon garlic powder
- 1 teaspoon paprika
- ½ teaspoon salt
- ¼ teaspoon black pepper
- Cooking spray or a light brush of oil for the basket
Instructions
- Pat the chicken legs dry with paper towels. Drizzle with olive oil and toss to coat evenly.
- Mix together garlic powder, paprika, salt, and pepper. Sprinkle evenly over the chicken and rub it in well on all sides.
- Lightly grease the air fryer basket. Place the chicken legs in a single layer, skin-side up. Preheat your air fryer to 380°F.
- Cook at 380°F for 25 minutes, flipping once at the halfway point. For the last 3 minutes, increase the temperature to 400°F to finish crisping the skin.
- Check that the internal temperature has reached 165°F. Let rest for a few minutes and serve immediately.
Tips
- Tip: The lower starting temperature of 380°F lets the meat cook through more gently before the final blast at 400°F — this helps prevent the outside burning before the inside is done.
- Tip: Greasing the basket before adding chicken prevents sticking and tearing the skin when you flip — a light spray of Pam works perfectly here.
- Tip: This simple seasoning base is a great starting point — you can add dried Italian herbs, lemon zest, or a pinch of cayenne depending on what you're serving it with.
20. Crispy Oven Roasted Chicken Legs with Potatoes
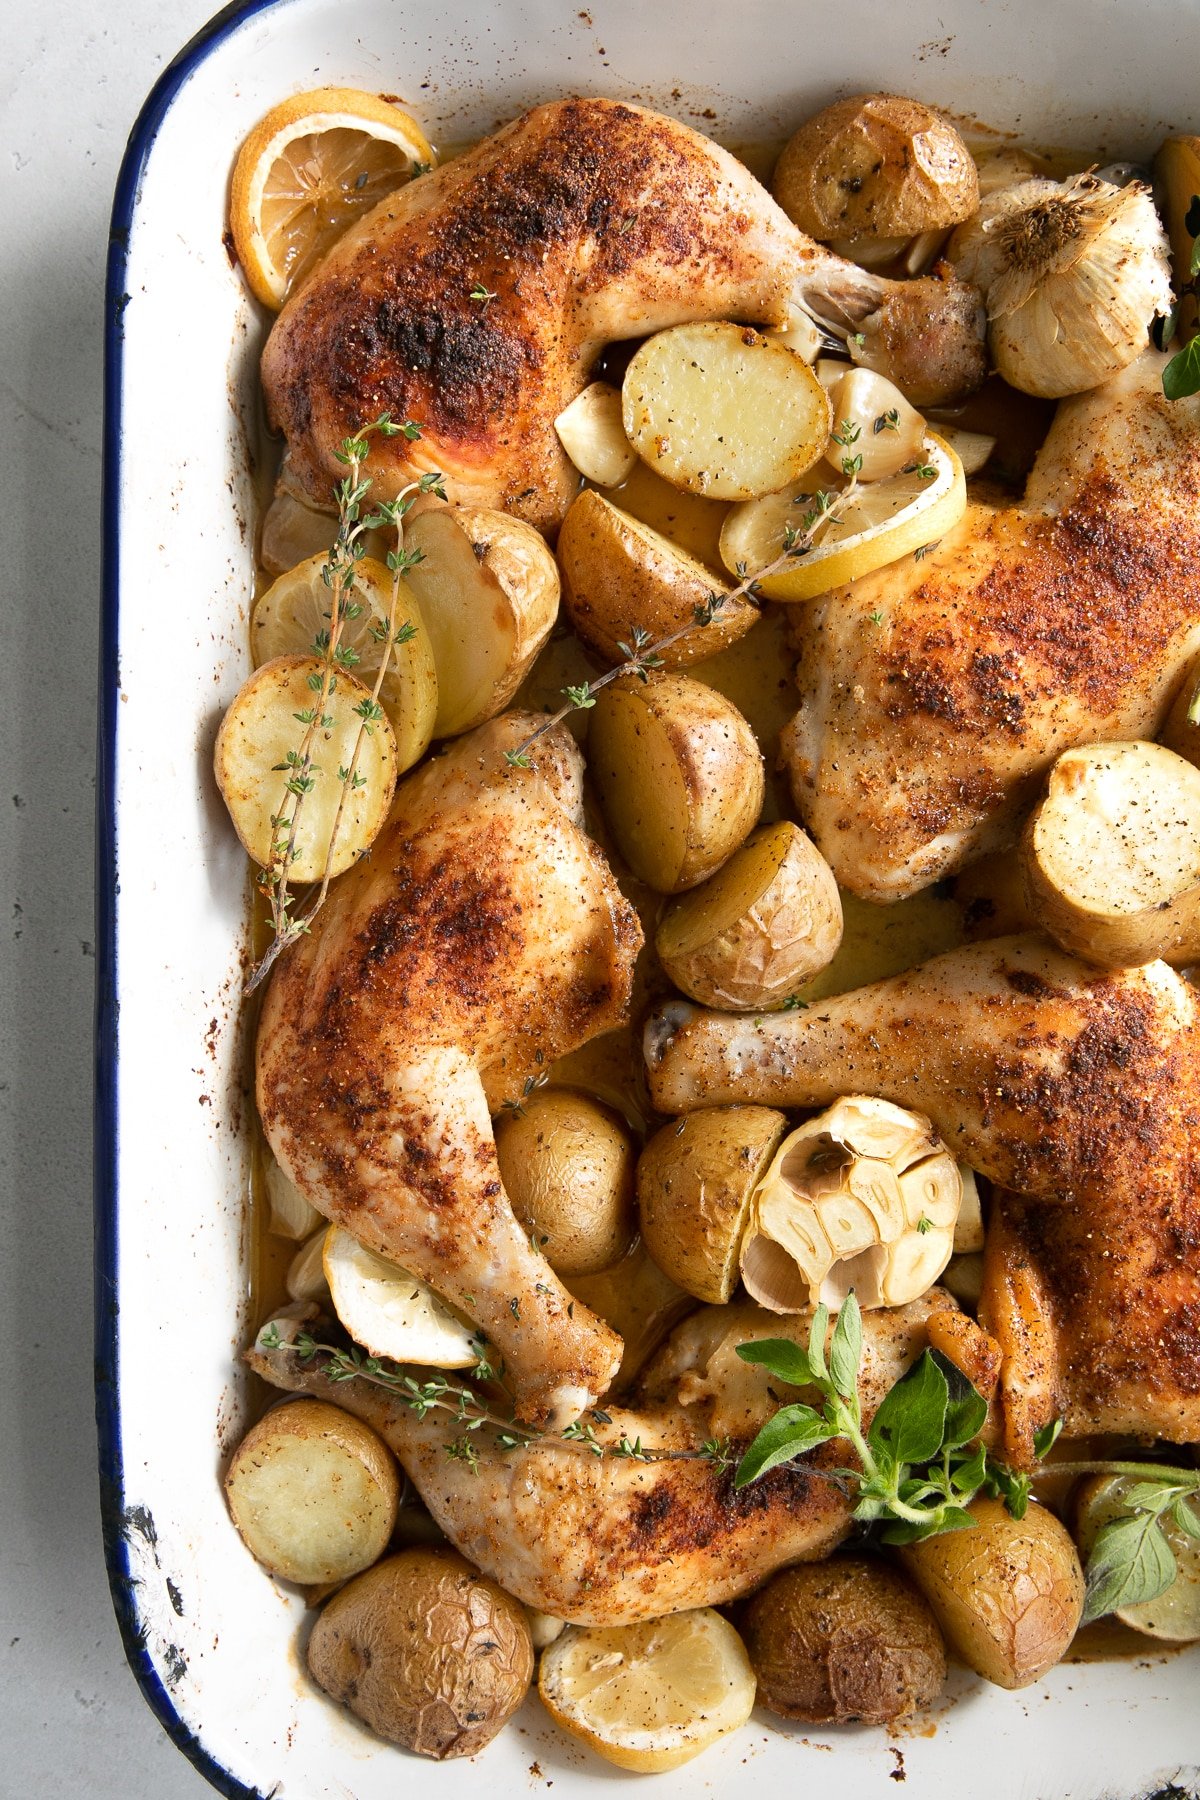
Sheet pan chicken and potatoes is about as close to a complete dinner in one dish as you can get. The chicken legs roast right on top of the potatoes, and the drippings season everything below — the potatoes end up golden on the outside, creamy in the middle, and tasting like they were cooked in a proper chicken broth. I make a double batch of this because it disappears in one meal at my house, and the leftovers (when there are any) reheat well the next day. This is the recipe I reach for when I want something that looks like I put in real effort but didn't actually stress about it.
Ingredients
- 4 whole chicken legs (drumstick and thigh), bone-in skin-on
- 1½ lbs baby potatoes, halved (or Yukon Golds cut into 1-inch chunks)
- 3 tablespoons olive oil, divided
- 4 cloves garlic, minced
- 1 teaspoon smoked paprika
- 1 teaspoon garlic powder
- ½ teaspoon dried rosemary (or thyme)
- ½ teaspoon onion powder
- 1 teaspoon salt
- ½ teaspoon black pepper
- Fresh parsley or thyme for garnish
Instructions
- Preheat oven to 425°F. Pat the chicken legs dry and set aside. Toss the halved potatoes with 2 tablespoons of olive oil, the minced garlic, half the salt, and half the pepper. Spread them in a single layer on a large rimmed baking sheet.
- Mix together the paprika, garlic powder, rosemary, onion powder, remaining salt, and pepper. Drizzle the chicken legs with the remaining tablespoon of olive oil and rub the spice mix all over them.
- Nestle the chicken legs skin-side up among the potatoes on the baking sheet. Make sure the chicken isn't sitting on top of too many potatoes — you want air to circulate under the legs.
- Roast for 40 to 45 minutes until the chicken skin is deep golden and crispy and the potatoes are tender when pierced with a fork. If the potatoes aren't golden enough, push the chicken to one side and let the potatoes sit in the direct heat for 5 more minutes.
- Rest for 5 minutes, scatter fresh parsley over the top, and serve straight from the pan.
Tips
- Tip: Don't cut the potatoes too small — pieces smaller than 1 inch will turn mushy before the chicken is done. Halved baby potatoes or 1-inch chunks of Yukon Gold are the right size.
- Tip: Use a large enough baking sheet so nothing is crowded — a standard 18x13 half-sheet pan from Walmart is exactly the right size for 4 legs and 1½ lbs of potatoes.
- Tip: You can add sliced bell peppers or halved cherry tomatoes to the pan in the last 20 minutes if you want more vegetables without making a separate side dish.
19. Smoked Chicken Quarters (with Easy BBQ Rub)
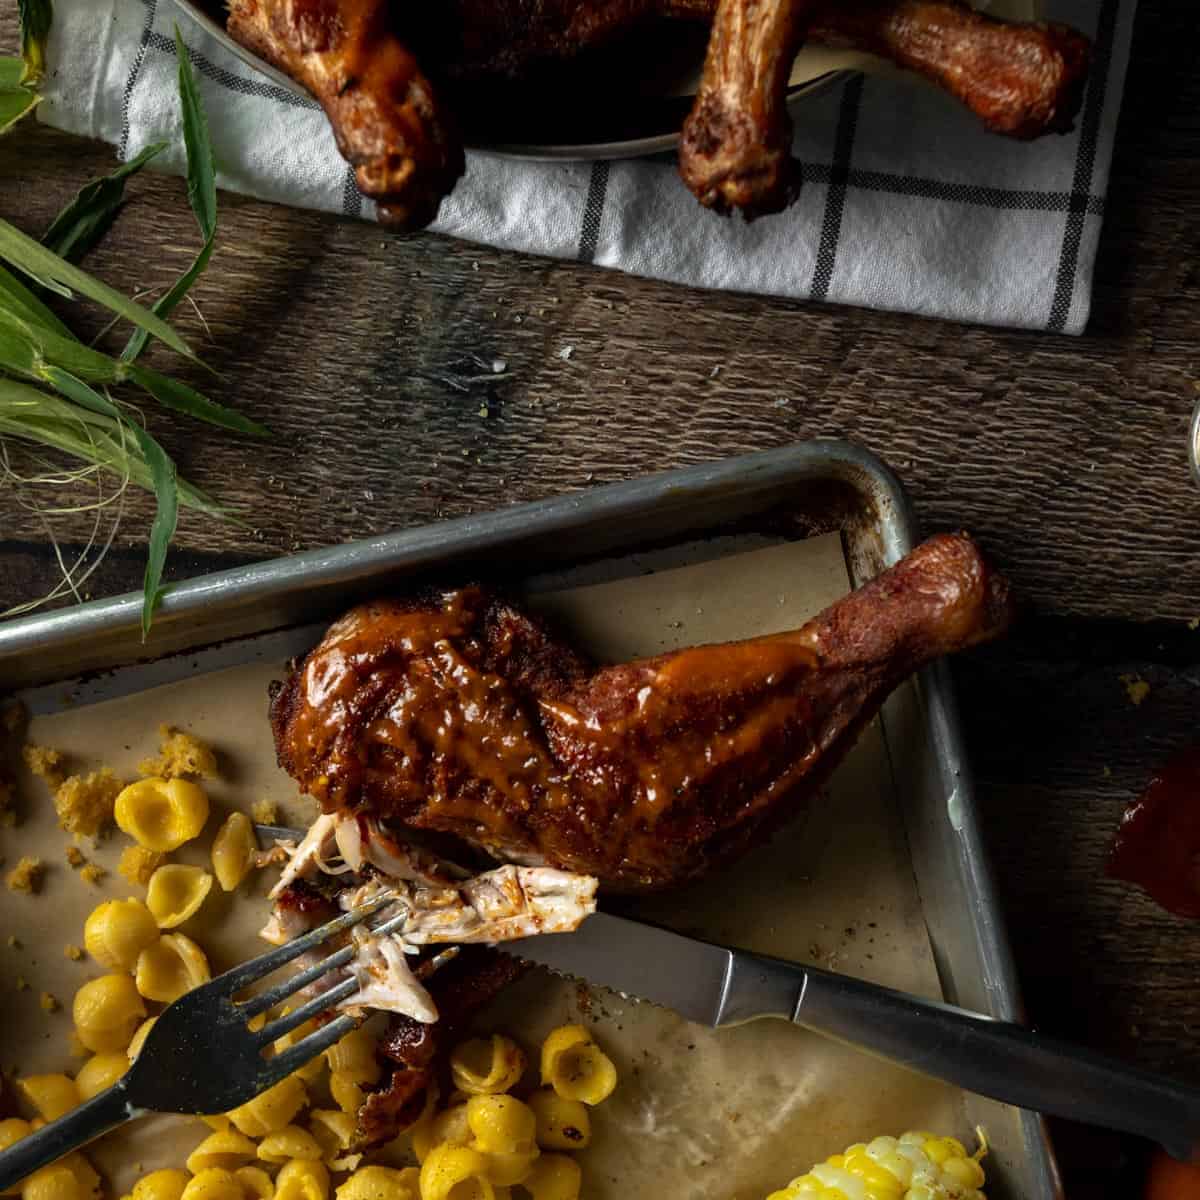
If you have access to a smoker, smoked chicken quarters are one of those things that feel like a project but are actually pretty hands-off once the bird is on. The low-and-slow smoke does all the heavy lifting — you just need a good rub and patience. I don't have a fancy pellet smoker; I use a basic offset smoker my husband picked up years ago, and these come out beautifully every single time. The BBQ rub is nothing exotic — it's pantry spices you already have.
Ingredients
- 4 chicken leg quarters
- 2 tablespoons olive oil
- 1 tablespoon brown sugar
- 1 teaspoon smoked paprika
- 1 teaspoon garlic powder
- 1 teaspoon onion powder
- ½ teaspoon cumin
- ½ teaspoon black pepper
- 1 teaspoon kosher salt
- ¼ teaspoon cayenne pepper (optional)
Instructions
- Pat chicken quarters completely dry with paper towels — moisture is the enemy of a good bark on smoked meat.
- Mix together brown sugar, smoked paprika, garlic powder, onion powder, cumin, black pepper, salt, and cayenne in a small bowl to form your BBQ rub.
- Rub olive oil all over the chicken, then coat generously with the spice rub on all sides. Let it sit at room temperature for 30 minutes, or refrigerate uncovered for up to 12 hours for deeper flavor.
- Preheat your smoker to 250°F using hickory or applewood chips. Place the chicken quarters skin-side up directly on the grate.
- Smoke for approximately 2 to 2½ hours, until the internal temperature reaches 165°F at the thickest part of the thigh. Let rest 10 minutes before serving.
Tips
- Tip: No smoker? You can get a similar effect by using a charcoal grill with soaked wood chips placed directly on the coals and keeping the lid closed — it won't be exactly the same, but you'll still get real smoke flavor.
- Tip: The brown sugar in the rub helps form a caramelized crust. Don't skip it — that slightly sweet bark is what makes smoked chicken so good.
- Tip: Use a meat thermometer, not a timer. Every smoker runs differently, and the only reliable way to know when chicken is done is to check the internal temp.
18. Air Fryer Chicken Leg Quarters
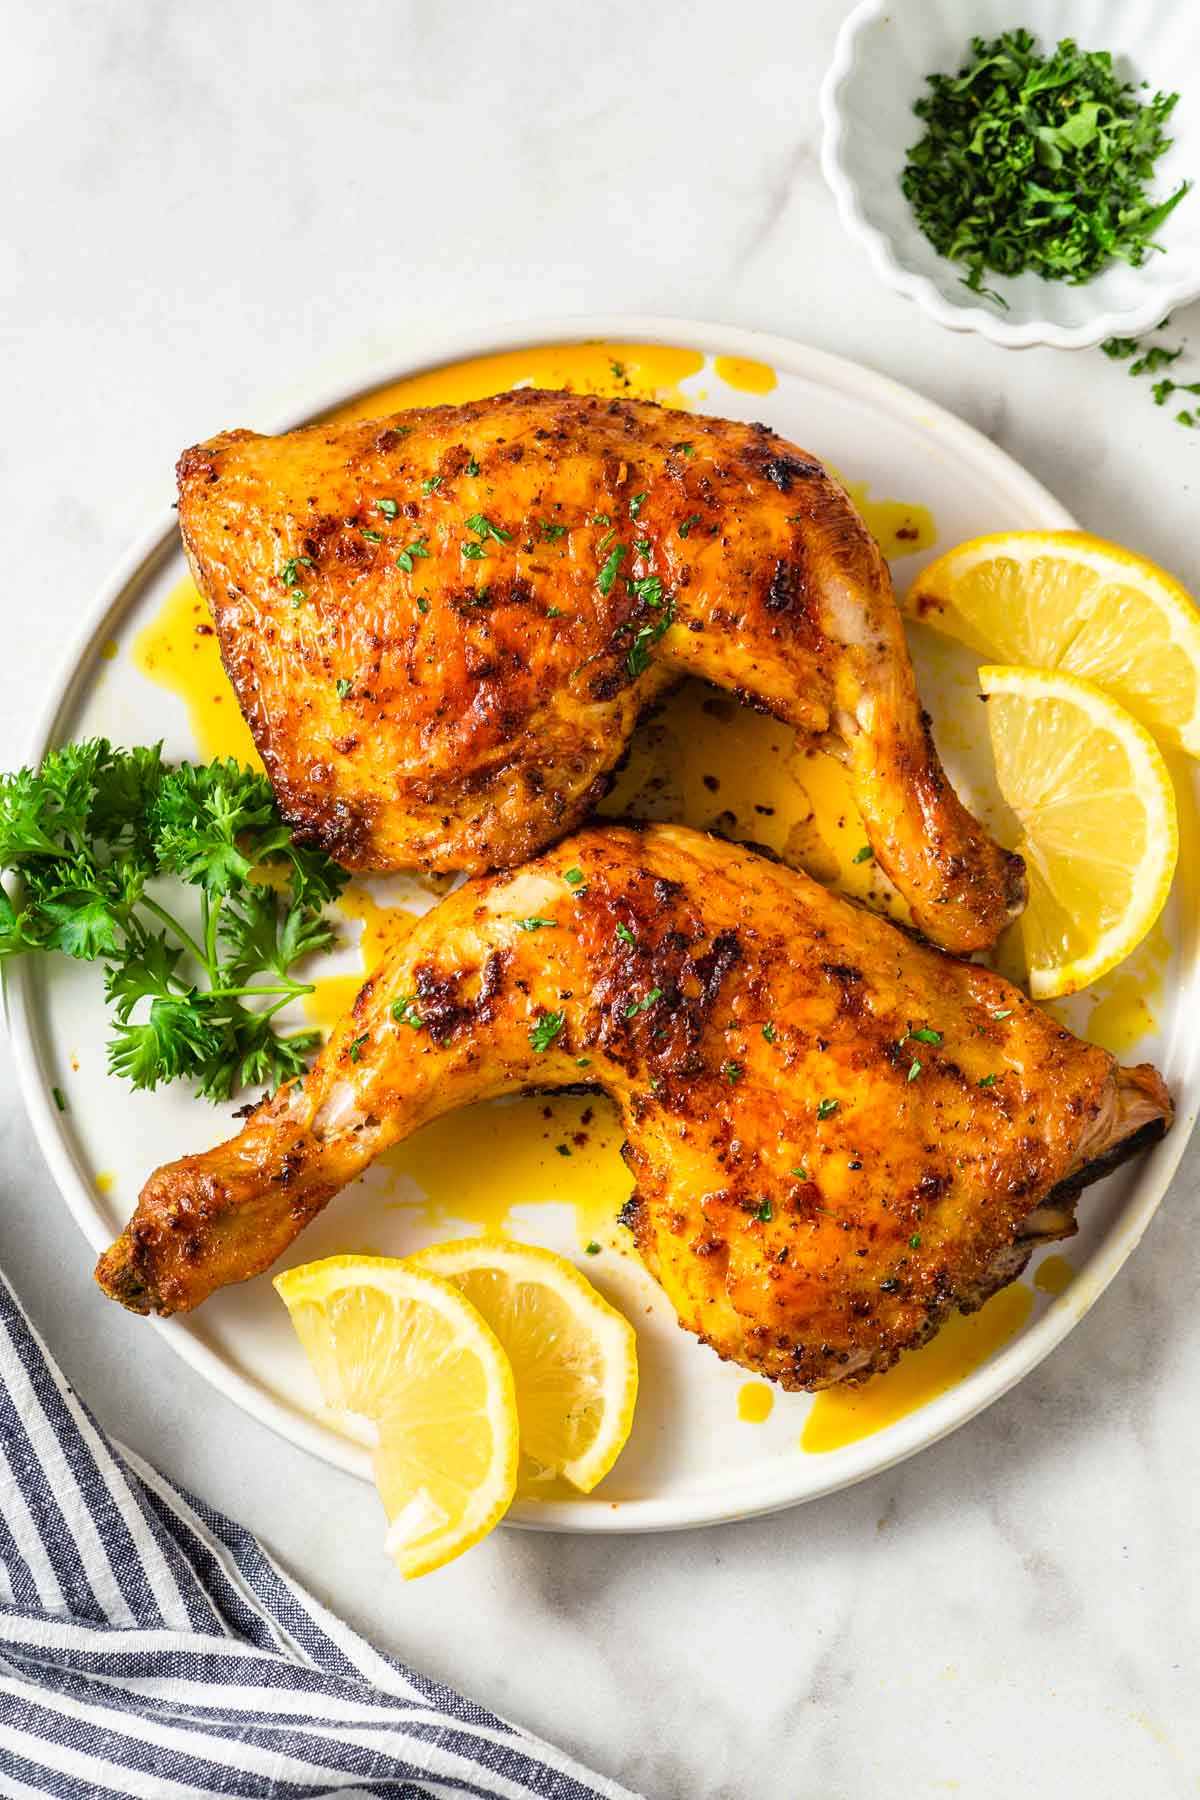
I was skeptical the first time I tried cooking full leg quarters in the air fryer — I thought they'd be too big and cook unevenly. I was wrong. The circulating hot air gets the skin genuinely crispy in a way that the oven takes forever to achieve, and the meat stays juicy because the cook time is so much shorter. This is now my default weeknight chicken when I haven't planned ahead. Thirty minutes and it's done.
Ingredients
- 2 chicken leg quarters
- 1 tablespoon olive oil
- 1 teaspoon garlic powder
- 1 teaspoon smoked paprika
- ½ teaspoon onion powder
- ½ teaspoon dried Italian seasoning (or dried oregano)
- ½ teaspoon salt
- ¼ teaspoon black pepper
Instructions
- Pat chicken leg quarters dry with paper towels. Brush or rub all over with olive oil.
- Mix garlic powder, smoked paprika, onion powder, Italian seasoning, salt, and pepper together. Coat the chicken evenly on all sides with the spice mix.
- Preheat your air fryer to 380°F for 3 minutes. Place the leg quarters skin-side down in the basket — make sure they're not overlapping.
- Air fry for 15 minutes, then flip skin-side up and cook for another 12–15 minutes until the skin is deep golden and the internal temperature reads 165°F.
- Rest for 5 minutes before serving — this keeps the juices in the meat rather than on your cutting board.
Tips
- Tip: Don't crowd the basket. If your air fryer is on the smaller side, cook one quarter at a time — crowding traps steam and you'll lose that crispy skin.
- Tip: Score the skin a couple of times with a sharp knife before seasoning. It lets the spices get under the skin and helps the fat render out faster for crispier results.
- Tip: Larger leg quarters (over 12 oz each) may need an extra 5 minutes. Always check with a thermometer rather than relying on the timer alone.
17. Lemon Pepper Chicken Legs
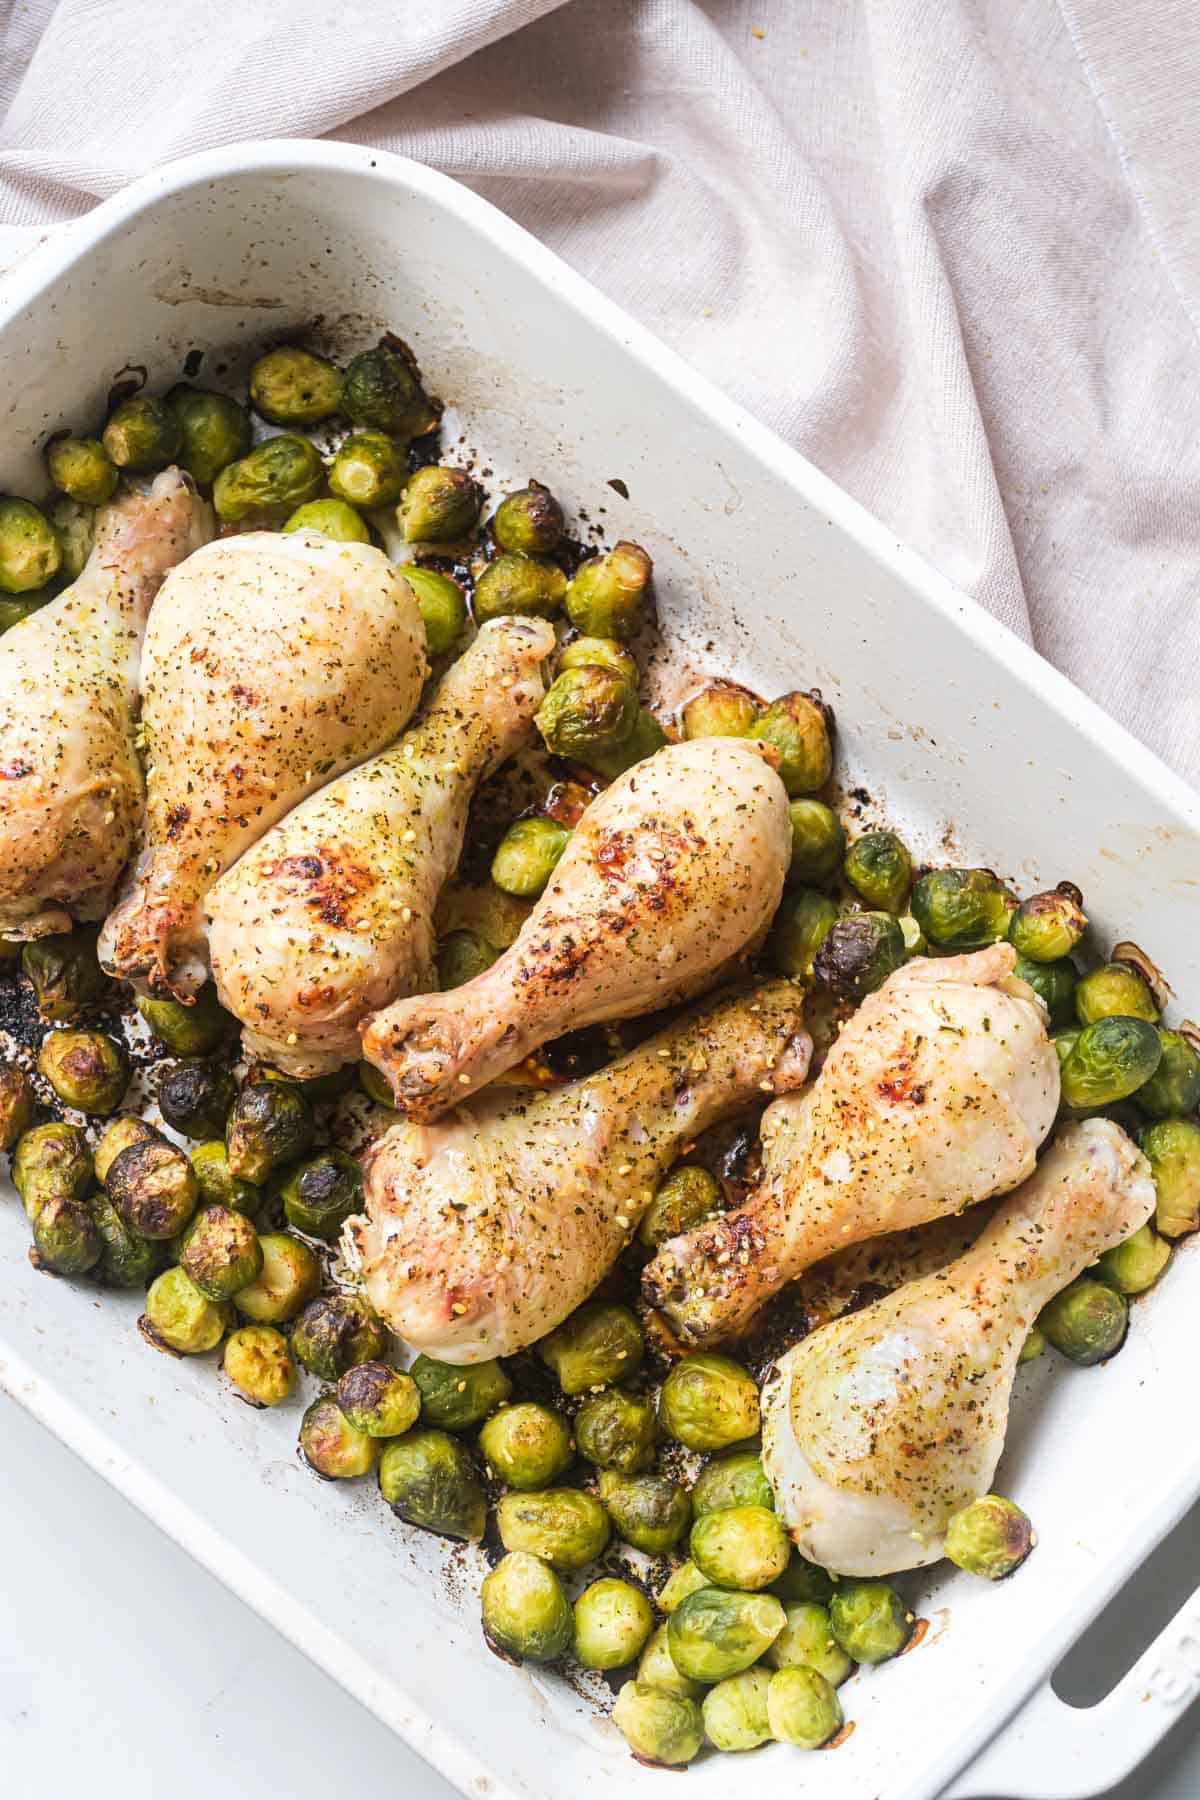
Lemon pepper chicken is one of those combinations that sounds almost too simple to be worth making, and then you taste it and wonder why you don't make it every week. The bright lemon zest cuts right through the richness of the dark meat, and the coarsely cracked pepper adds just enough heat without overpowering anything. Zainab specifically requests these — she picks the drumsticks clean every time. I use fresh lemon zest, not the bottled lemon pepper seasoning, because fresh zest makes a real difference here.
Ingredients
- 6 chicken drumsticks
- 2 tablespoons olive oil
- Zest of 2 lemons
- 2 tablespoons fresh lemon juice
- 1½ teaspoons coarsely cracked black pepper
- 1 teaspoon garlic powder
- 1 teaspoon salt
- ½ teaspoon onion powder
Instructions
- Preheat oven to 425°F. Line a baking sheet with foil and place a wire rack on top — this lifts the chicken off the pan so hot air circulates underneath for crispier skin.
- Pat drumsticks completely dry. In a large bowl, whisk together olive oil, lemon zest, lemon juice, cracked pepper, garlic powder, salt, and onion powder.
- Toss the drumsticks in the marinade until fully coated. Let sit for at least 15 minutes at room temperature, or marinate in the fridge for up to 4 hours.
- Arrange drumsticks on the wire rack, leaving space between each piece. Roast for 35–40 minutes, flipping once at the halfway mark, until the skin is golden and crisp and internal temperature reaches 165°F.
Tips
- Tip: Crack your own black pepper from whole peppercorns if you can — pre-ground pepper loses its punch quickly. Coarsely cracked gives you those little bursts of heat that make this recipe work.
- Tip: If you don't have a wire rack, just flip the chicken halfway and pat the bottom skin dry before the last 10 minutes of cooking — it helps it crisp up instead of steaming in its own juices.
- Tip: A squeeze of fresh lemon juice right before serving makes the flavors pop. It only takes a second and it makes a noticeable difference.
16. Ranch Chicken Drumsticks
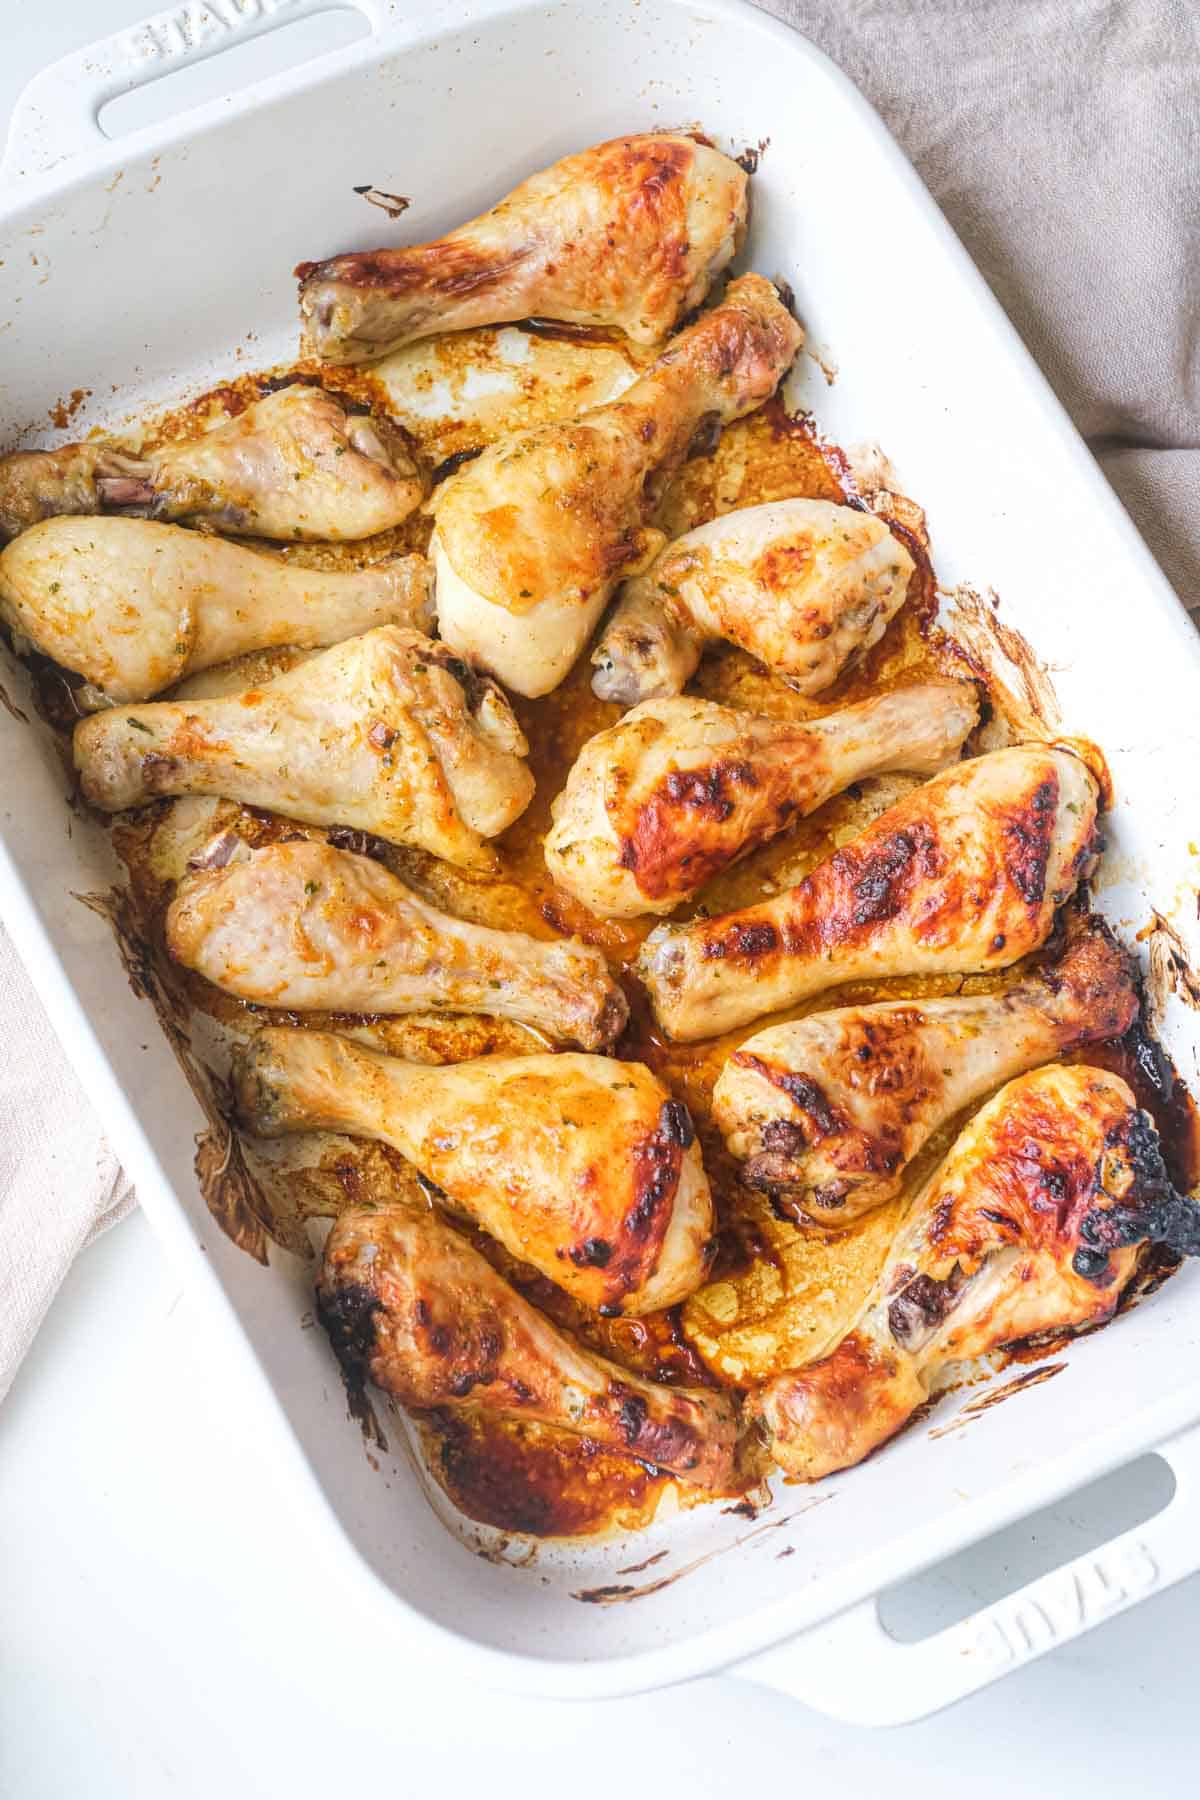
Ranch seasoning on chicken sounds almost too easy to be a real recipe, and that's exactly why it belongs on this list. One packet of Hidden Valley ranch mix from Walmart plus a little oil and you've got a deeply savory, herby coating that clings to the skin and turns golden in the oven. My husband thought I was cutting corners the first time I made these. He had three drumsticks and stopped asking questions. The buttermilk in the marinade is optional but it tenderizes the meat noticeably if you have the time.
Ingredients
- 6 chicken drumsticks
- 1 packet (1 oz) dry ranch seasoning mix (Hidden Valley or store brand)
- 2 tablespoons olive oil
- ½ cup buttermilk (optional but recommended — see tip below)
- 1 teaspoon garlic powder
- ½ teaspoon black pepper
- ½ teaspoon smoked paprika
Instructions
- If using buttermilk, combine it with half the ranch packet and submerge drumsticks in the mixture. Cover and refrigerate for at least 1 hour, up to overnight. If skipping the buttermilk, proceed directly to the next step.
- Preheat oven to 425°F. Line a rimmed baking sheet with foil and set a wire rack on top.
- Remove drumsticks from marinade if used and pat lightly dry. In a bowl, mix the remaining ranch seasoning, olive oil, garlic powder, black pepper, and smoked paprika. Toss the drumsticks in this mixture until coated.
- Arrange on the rack and bake for 38–42 minutes, flipping once halfway, until deeply golden and cooked through to 165°F internal temperature.
Tips
- Tip: No buttermilk on hand? Mix ½ cup regular milk with 1½ teaspoons white vinegar and let it sit for 5 minutes. It's not identical but it does the job for tenderizing.
- Tip: For extra crispy skin, turn the broiler on for the last 3–4 minutes of cooking. Watch it closely — ranch seasoning has dried herbs that can go from golden to burnt fast.
- Tip: Serve with extra ranch dressing on the side for dipping. Yes, it's double ranch. Yes, it's worth it.
15. Baked Chicken Leg Quarters
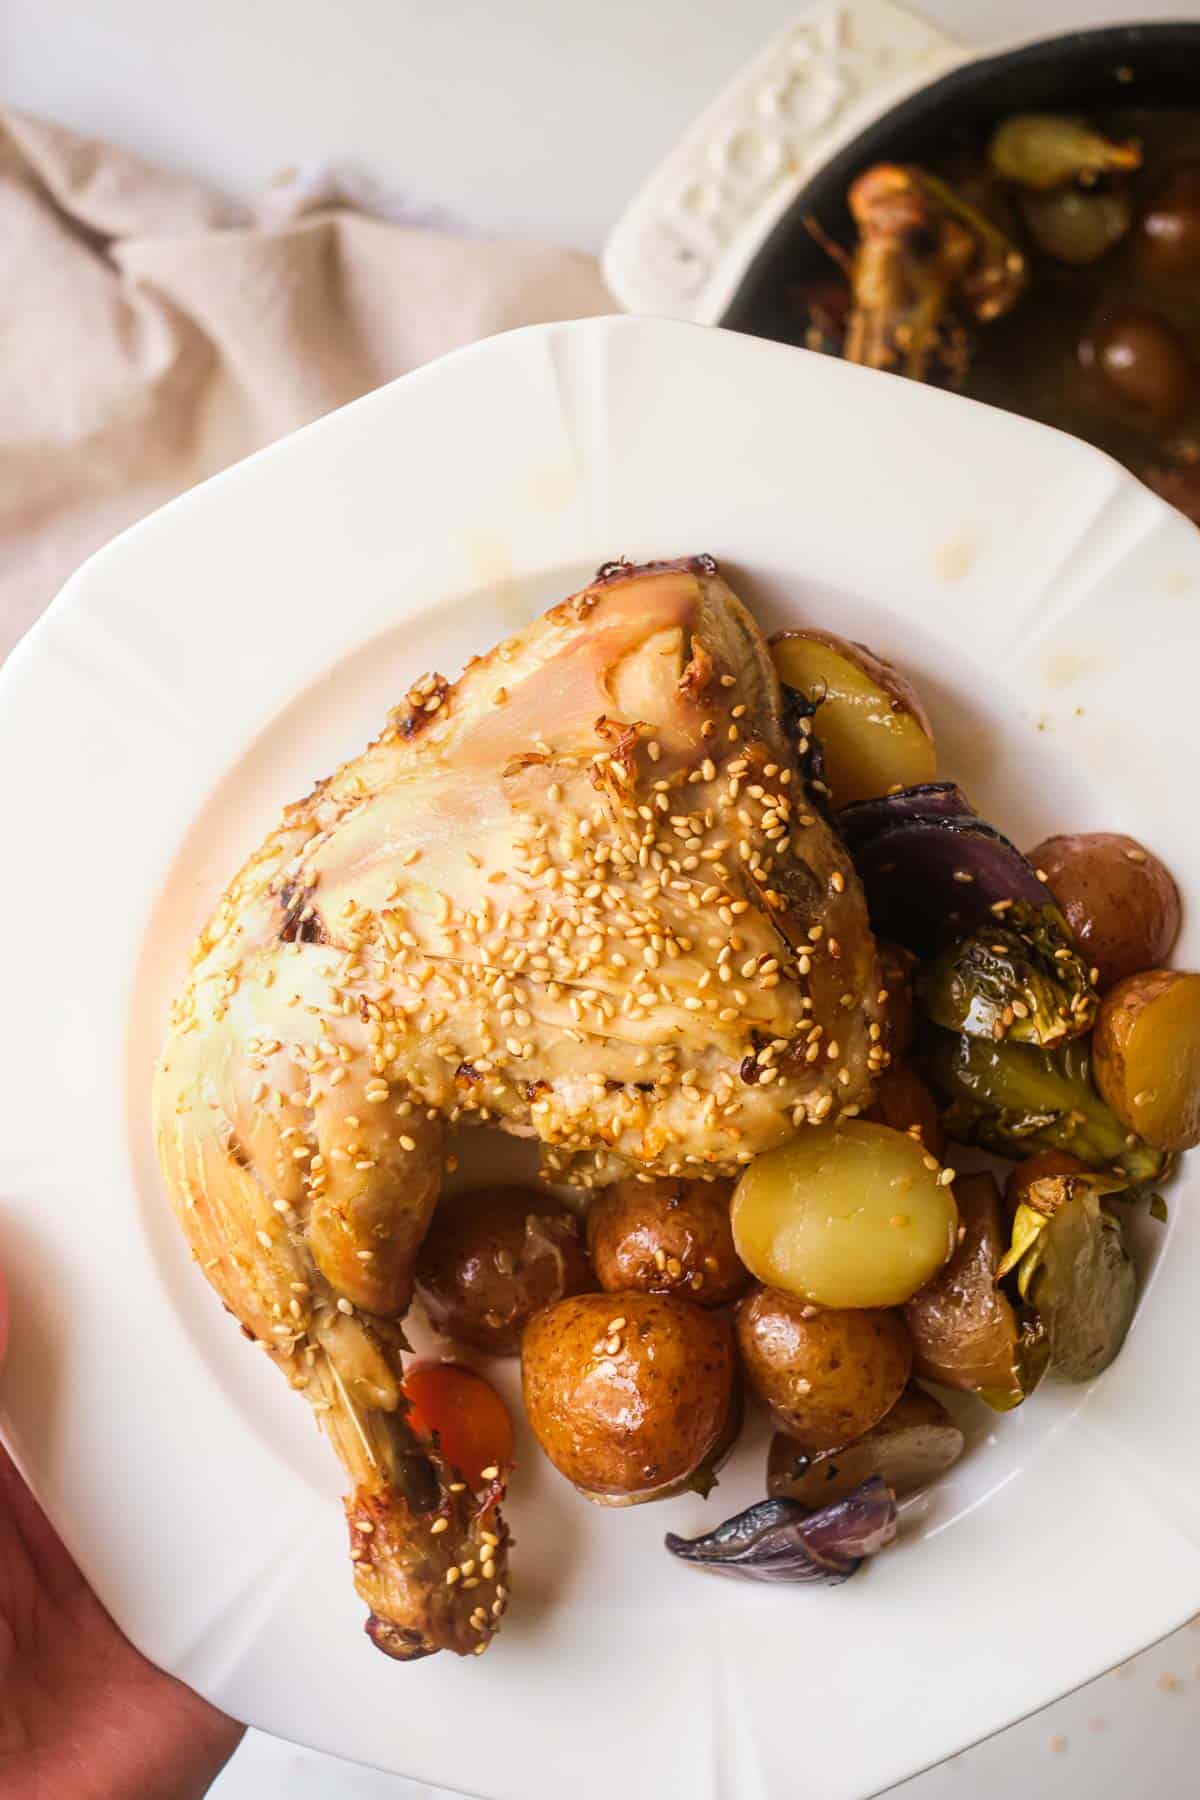
This is the recipe I come back to when I want something reliable and unfussy. No fancy technique, no long marinade — just well-seasoned chicken leg quarters roasted at the right temperature until the skin crisps up and the meat pulls away from the bone. The key I learned after making these many times is that a very hot oven (not moderate — actually hot) is what gets you that golden skin without drying out the meat. Serve it with rice, a salad, some roasted vegetables — it goes with practically anything.
Ingredients
- 4 chicken leg quarters
- 2 tablespoons olive oil
- 1½ teaspoons garlic powder
- 1 teaspoon smoked paprika
- 1 teaspoon onion powder
- 1 teaspoon dried thyme (or dried oregano)
- 1 teaspoon salt
- ½ teaspoon black pepper
Instructions
- Preheat oven to 425°F. Pat the chicken leg quarters completely dry with paper towels — this is the single most important step for crispy skin.
- Mix olive oil with garlic powder, smoked paprika, onion powder, thyme, salt, and pepper. Rub the mixture all over the chicken, getting under the skin where you can.
- Place the leg quarters skin-side up on a foil-lined baking sheet or in a large oven-safe skillet. Don't crowd them — leave space around each piece.
- Bake for 45–50 minutes without flipping, until the skin is deeply golden and the internal temperature at the thickest part of the thigh reads 165°F.
- Rest for 5–10 minutes before serving so the juices redistribute through the meat.
Tips
- Tip: If your chicken quarters are very large, give them an extra 5–8 minutes and verify the temperature — the leg and thigh joint takes longer to cook through than the drumstick portion.
- Tip: Don't cover the pan with foil while it bakes. Covering traps steam and you'll end up with pale, soft skin instead of the crispy result you're going for.
- Tip: I make a double batch of these on Sundays — the leftovers shred beautifully for sandwiches, wraps, or fried rice the next day. Cold baked chicken quarters are genuinely one of the more useful things to have in your fridge.
14. Chicken in Guajillo Sauce
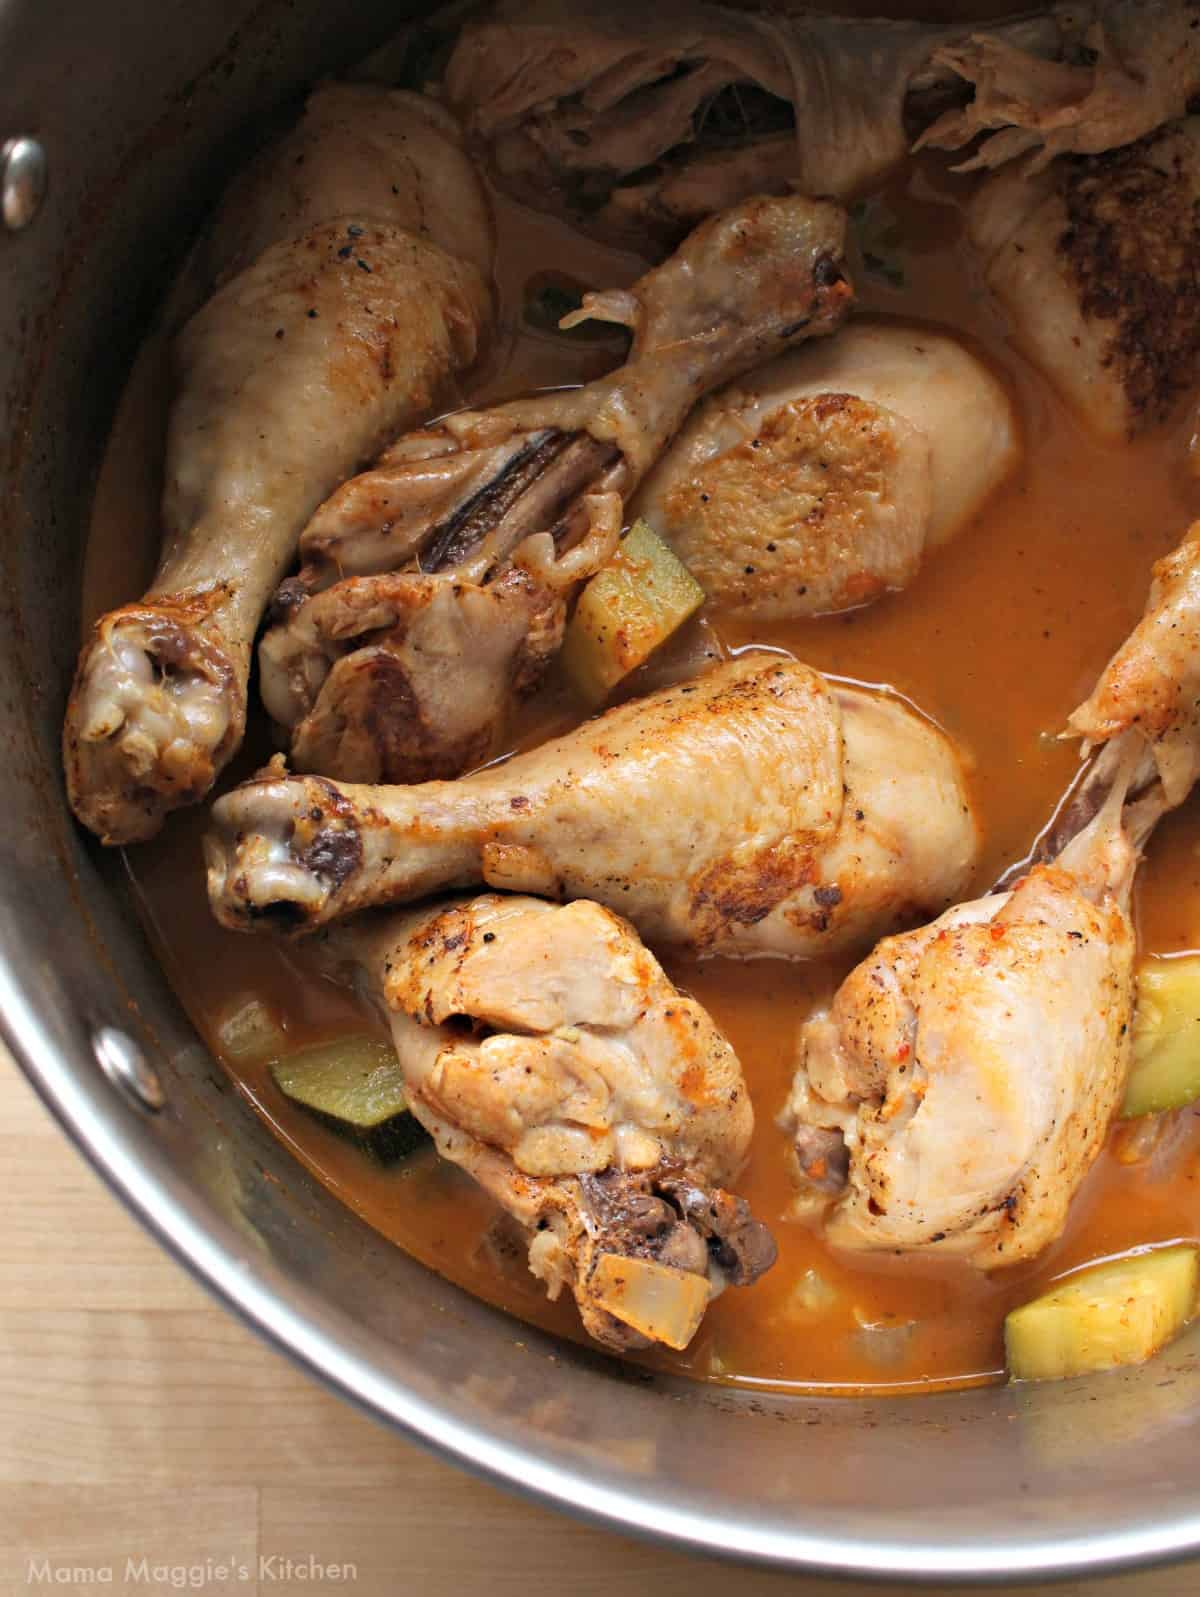
Guajillo chiles are one of those ingredients I'd never cooked with until I found them at a Mexican grocery near us — and now I genuinely wonder what took me so long. They have this deep, slightly fruity heat that's nothing like regular chili powder, and when you simmer chicken legs in that sauce low and slow, the meat just drinks it all up. This isn't a spicy-spicy dish — it's more warm and smoky with a rich color that makes it look like you spent hours on it. Honestly the hardest part is toasting and soaking the dried chiles, and even that takes maybe 20 minutes. Serve it over rice with some warm tortillas on the side and you're done.
Ingredients
- 4 chicken legs (drumstick and thigh attached, or just drumsticks)
- 4 dried guajillo chiles, stems and seeds removed (find these at Walmart in the Latin foods aisle)
- 3 cloves garlic
- 1 medium white onion, roughly chopped
- 1 cup chicken broth
- 1 teaspoon cumin
- 1 teaspoon dried oregano
- 1 tablespoon vegetable oil
- Salt to taste
Instructions
- Toast the dried guajillo chiles in a dry skillet over medium heat for about 30 seconds per side — you'll smell them change. Then soak them in 1 cup of hot water for 15 minutes until softened.
- Drain the chiles and blend them with garlic, onion, cumin, oregano, and chicken broth until completely smooth. Strain through a fine mesh sieve if you want a silkier sauce.
- Heat oil in a heavy skillet or Dutch oven over medium-high. Season the chicken legs with salt and **sear** them skin-side down for 4-5 minutes until golden. Flip and sear the other side for 2 minutes.
- Pour the guajillo sauce over the chicken, reduce heat to medium-low, cover and **simmer** for 35-40 minutes, turning the legs once halfway through, until the chicken is cooked through and tender.
- Taste the sauce and adjust salt. Serve over white rice or with warm tortillas.
Tips
- Tip: Can't find guajillo chiles? A mix of ancho chile powder and a small dried pasilla chile gets you close — it won't be identical but it'll still be good.
- Tip: Don't skip the searing step. That golden crust on the chicken keeps the meat from falling apart in the sauce and adds a lot of flavor to the whole dish.
- Tip: Leftovers are even better the next day — the sauce thickens overnight and the chicken absorbs even more flavor. I make a double batch on purpose.
13. Baked Chicken with Apples and Onions
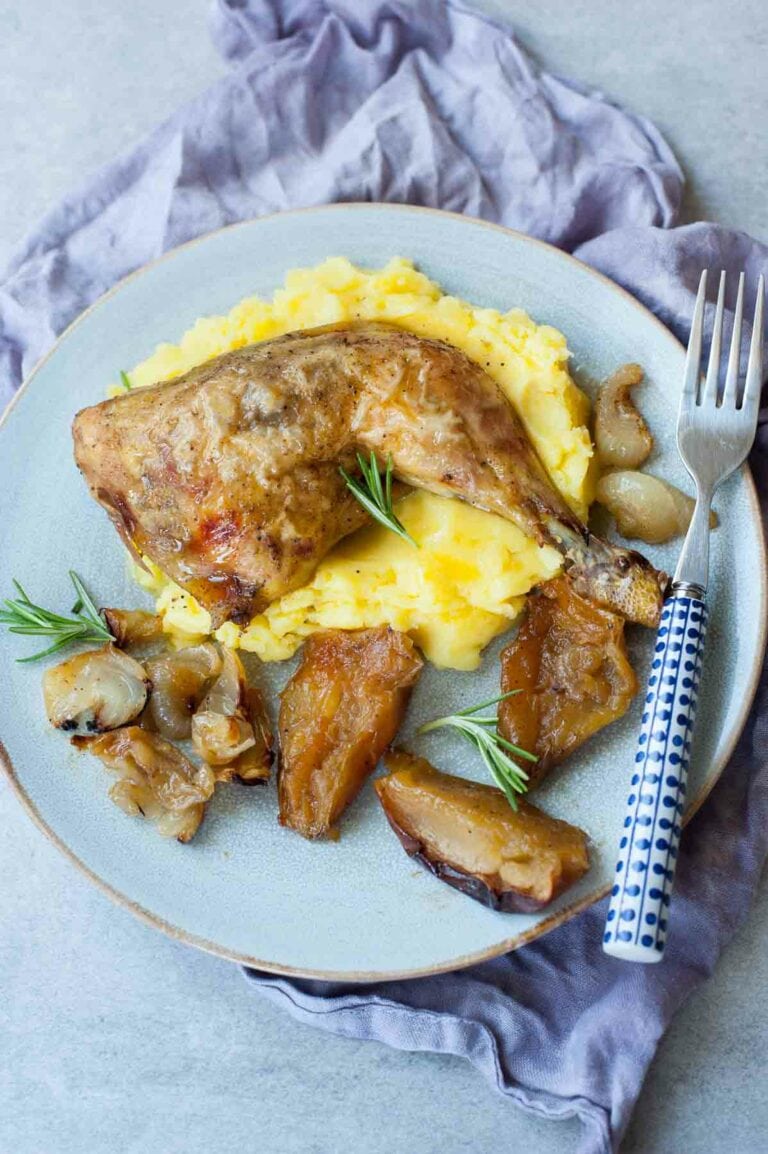
I wasn't sure about this one the first time I saw the combination — chicken with apples felt odd to me, coming from a cooking background where sweet and savory don't often meet like this. But once the apples soften in the oven and the onions caramelize around the chicken legs, it makes complete sense. The apples don't taste dessert-sweet; they mellow out into something almost jammy and savory. This is the kind of sheet pan dinner that looks impressive enough for guests but requires almost zero effort. I usually make it on a Sunday when I want something cozy without standing over the stove all evening.
Ingredients
- 4 chicken legs
- 2 medium apples (Granny Smith or Honeycrisp), cored and sliced into wedges
- 2 medium onions, sliced into half-moons
- 3 cloves garlic, minced
- 2 tablespoons olive oil
- 1 tablespoon fresh thyme leaves (or 1 teaspoon dried)
- 1 tablespoon Dijon mustard
- ½ teaspoon black pepper
- 1 teaspoon salt
Instructions
- Preheat your oven to 400°F. In a large bowl, toss the apple wedges and onion slices with 1 tablespoon of olive oil, thyme, salt, and pepper. Spread them in an even layer on a rimmed sheet pan.
- Mix the remaining tablespoon of olive oil with the Dijon mustard and garlic. **Rub** this all over the chicken legs, getting under the skin where you can.
- Nestle the chicken legs on top of the apple and onion mixture, skin-side up. Make sure the chicken isn't buried — it needs air circulation to get the skin crispy.
- Bake for 45-50 minutes until the chicken skin is golden and the internal temperature reaches 165°F. The apples and onions should be soft and lightly caramelized around the edges.
- Let rest 5 minutes before serving. Spoon the pan juices over everything — don't skip that step, it ties the whole dish together.
Tips
- Tip: Granny Smith apples hold their shape better in the oven. Sweeter varieties like Fuji tend to get mushy — still good, just a different texture.
- Tip: If the chicken skin isn't as golden as you want at the 45-minute mark, switch on the broiler for 3-4 minutes at the end — just keep an eye on it.
- Tip: This pairs really well with mashed potatoes or crusty bread to soak up the pan juices. In our house we've also eaten it with plain steamed rice and it works just as well.
12. Harissa Chicken with Rose Water Sauce
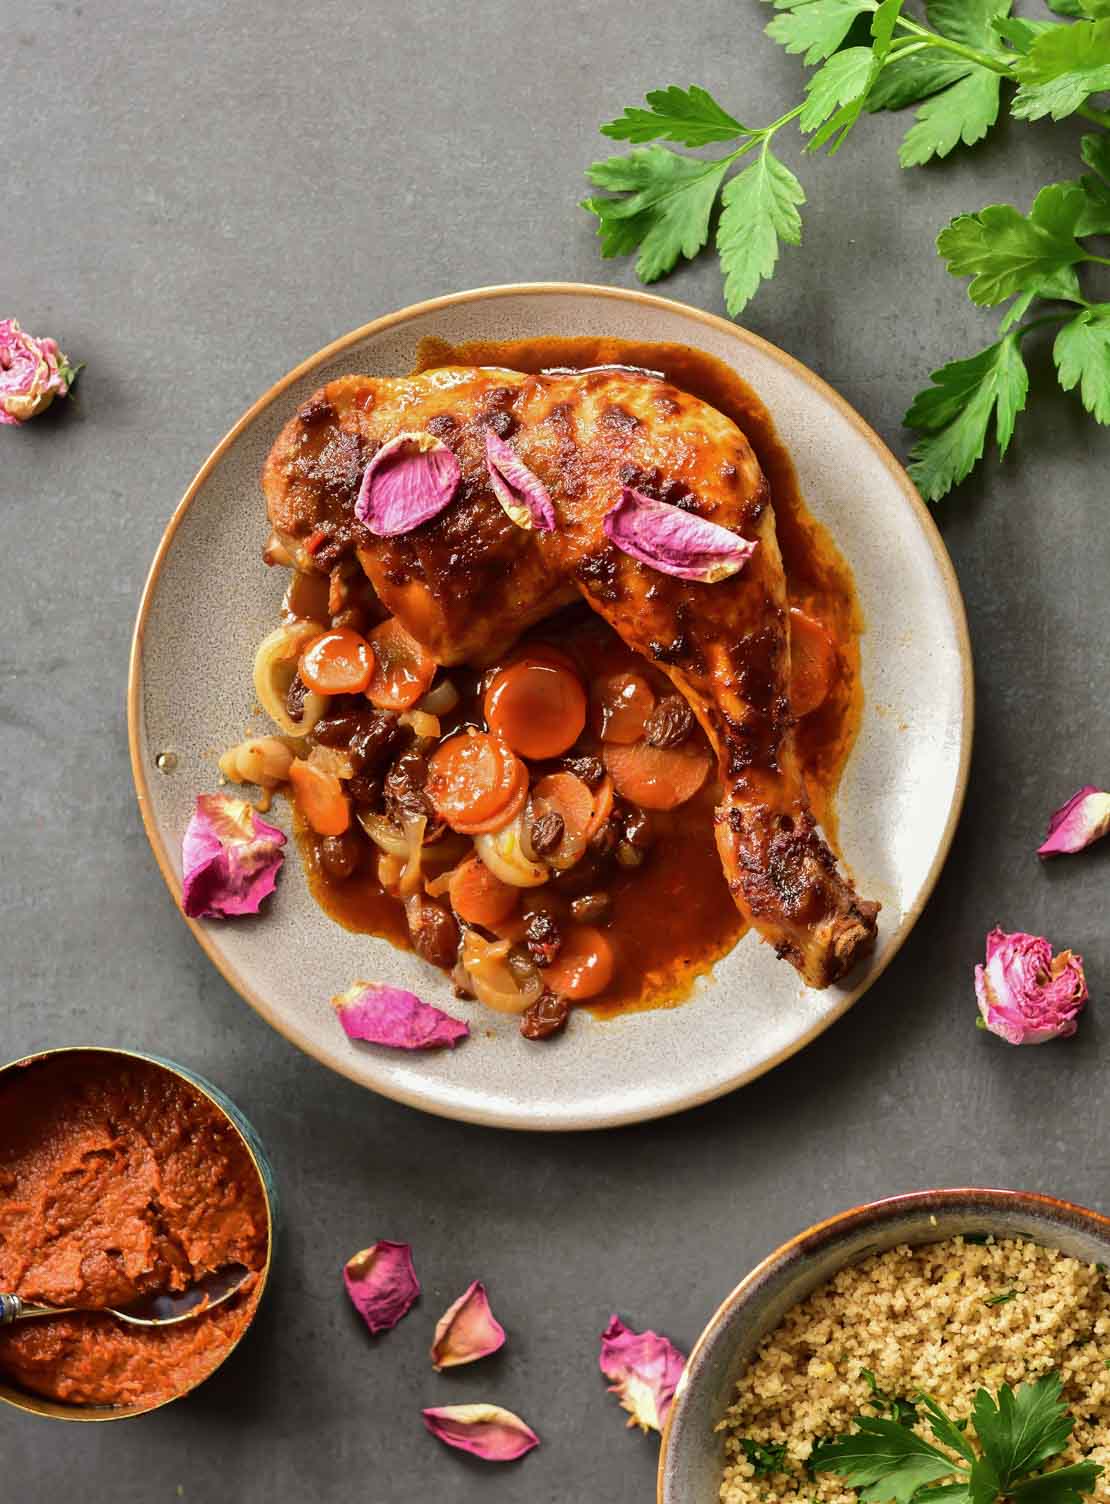
Rose water in a savory chicken dish sounds like it shouldn't work — and my husband raised an eyebrow the first time I mentioned it. But harissa and rose water is actually a North African flavor pairing that makes total sense once you taste it: the harissa brings heat and smokiness, and the rose water adds this delicate floral note that cuts right through it. Growing up in Pakistan, rose water in savory cooking isn't foreign to me at all — we use it in biryanis — so this combination felt less strange than it might to others. Find harissa paste at Trader Joe's or Aldi, and rose water is usually in the baking aisle at most big grocery stores.
Ingredients
- 4 chicken legs
- 3 tablespoons harissa paste
- 2 tablespoons olive oil, divided
- 1 teaspoon salt
- ½ teaspoon black pepper
- ½ cup plain Greek yogurt
- 1 tablespoon rose water
- 1 tablespoon lemon juice
- 1 small garlic clove, finely grated
- Fresh parsley or cilantro for serving
Instructions
- Mix harissa paste with 1 tablespoon olive oil, salt, and pepper. **Score** the chicken legs two or three times with a knife so the marinade gets into the meat, then rub the harissa mixture all over. Marinate for at least 30 minutes, or overnight in the fridge.
- Preheat oven to 425°F. Place the chicken legs on a lightly oiled baking rack set over a sheet pan (or just directly on the pan). Drizzle with remaining olive oil.
- Roast for 40-45 minutes until the skin is deeply colored and slightly charred at the edges and the internal temperature reads 165°F.
- While the chicken roasts, whisk together yogurt, rose water, lemon juice, and grated garlic to make the sauce. Taste and adjust — if the rose water flavor is too strong for you, add a little more yogurt.
- Serve the chicken hot with the rose water sauce drizzled over or on the side, and scatter fresh herbs on top.
Tips
- Tip: Rose water varies in strength by brand — start with 1 teaspoon in the sauce if you're nervous about the flavor, then add more to taste from there.
- Tip: This is excellent served over lemon couscous or even plain couscous with some butter stirred in — the sauce soaks into it beautifully.
- Tip: If you can't find harissa paste, mix 2 tablespoons of sriracha with ½ teaspoon smoked paprika and ½ teaspoon cumin — not identical but it gets you in the right direction.
11. Crispy Fried Chicken Legs
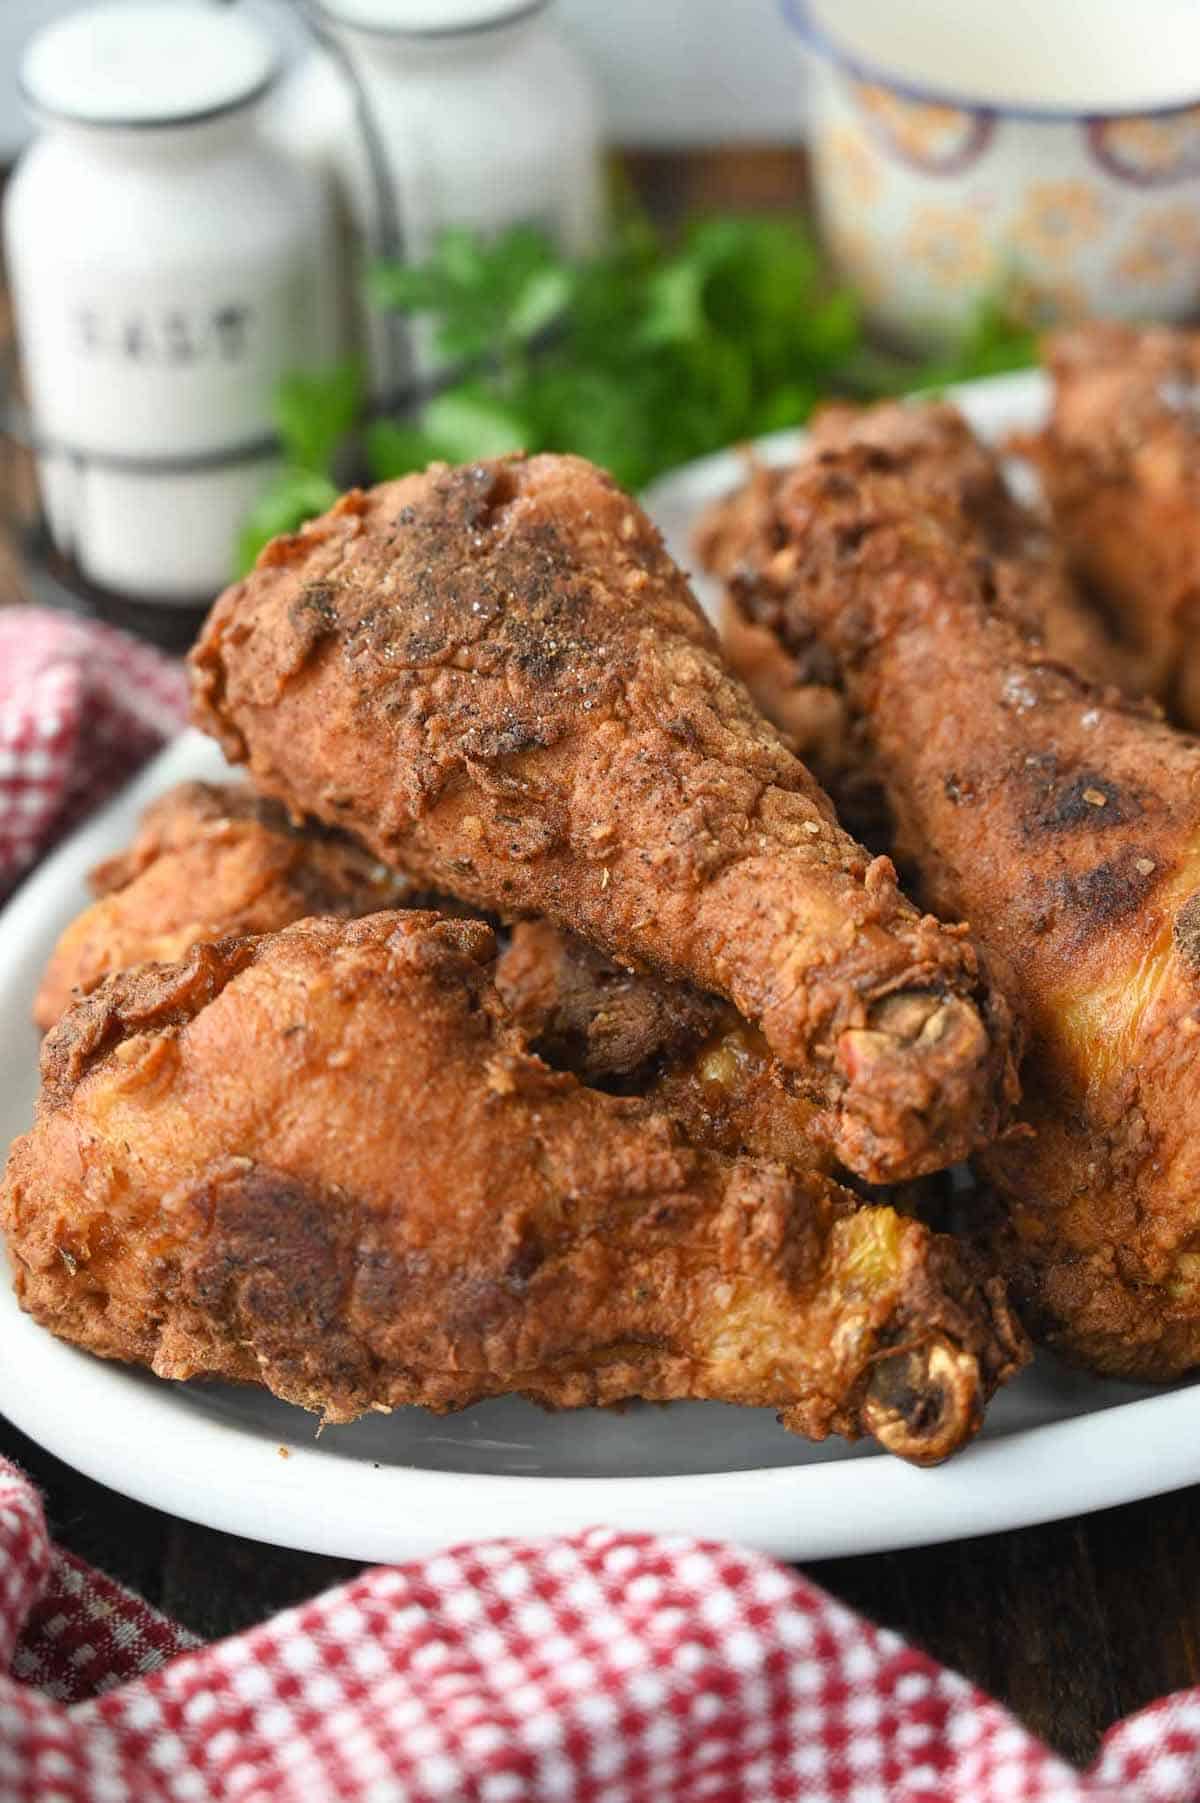
There are two things my kids agree on without argument: pizza and fried chicken. Saad in particular will eat fried chicken legs any time of day — he once asked if we could have them for breakfast, and honestly I almost said yes. The secret to a coating that actually stays on and doesn't slide off is a good buttermilk soak and making sure you press the seasoned flour firmly onto the chicken before it goes into the oil. I use a deep heavy pot — no deep fryer needed — and a thermometer to keep the oil at the right temperature. Get that wrong and you end up with either raw chicken or burnt coating, and I've done both.
Ingredients
- 4-6 chicken drumsticks
- 1 cup buttermilk (or 1 cup milk + 1 tablespoon white vinegar, let sit 5 minutes)
- 1 teaspoon hot sauce (optional, adds a nice kick)
- 1½ cups all-purpose flour
- 1 teaspoon garlic powder
- 1 teaspoon onion powder
- 1 teaspoon smoked paprika
- ½ teaspoon cayenne pepper
- 1½ teaspoons salt
- Vegetable oil for frying (enough for 3-4 inches in a deep pot)
Instructions
- Combine buttermilk and hot sauce in a bowl. Add the chicken drumsticks, make sure they're fully submerged, cover, and refrigerate for at least 1 hour (up to overnight for maximum tenderness).
- Mix flour with garlic powder, onion powder, smoked paprika, cayenne, and salt in a shallow dish. One by one, pull each drumstick from the buttermilk, let the excess drip off, then **press** it firmly into the flour mixture on all sides. Let the coated pieces rest on a rack for 10 minutes — this helps the coating set.
- Heat oil in a heavy deep pot to 350°F. A kitchen thermometer is your friend here — if you don't have one, drop a pinch of flour in; it should sizzle immediately.
- Fry in batches of 2-3 pieces — don't crowd the pot or the oil temperature drops and the coating gets greasy. Fry for 12-14 minutes, turning once halfway, until deeply golden and cooked through.
- Drain on a wire rack (not paper towels — a rack keeps the coating crispier). Serve immediately.
Tips
- Tip: For extra crunch, do a double dip — after the first flour coat, dip back in the buttermilk quickly, then back in the flour again before frying. The coating gets noticeably thicker and crispier.
- Tip: Keep fried pieces warm in a 200°F oven while you fry the remaining batches — they stay crispy without overcooking.
- Tip: The oil temperature matters more than almost anything else here. Too low and the coating absorbs oil and goes soggy. Too high and the outside burns before the chicken cooks through. Stay as close to 350°F as you can.
10. Barbecue Ninja Foodi Chicken Legs
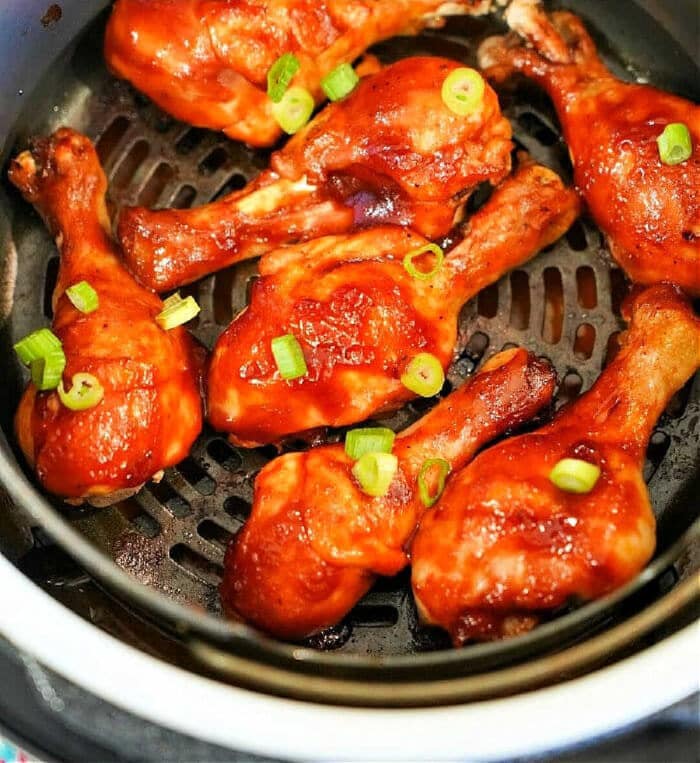
I don't own a Ninja Foodi, but a friend showed me hers and I immediately understood why people love it for chicken legs — it pressure cooks them first so they're fall-off-the-bone juicy, then air crisps the skin so it's genuinely crunchy. If you have one, this BBQ chicken leg recipe is one of those weeknight dinners that practically makes itself. If you don't have a Ninja Foodi, you can get close by baking the legs at 400°F for 40 minutes and then brushing on the BBQ sauce for the last 10 minutes under the broiler — the skin won't be quite as crackly but the flavor is the same. The key is a good BBQ sauce; I like the Sweet Baby Ray's Honey BBQ from Walmart for this.
Ingredients
- 4-6 chicken drumsticks
- ½ cup BBQ sauce (Sweet Baby Ray's or your favorite), plus more for basting
- 1 teaspoon garlic powder
- 1 teaspoon smoked paprika
- ½ teaspoon onion powder
- ½ teaspoon salt
- ¼ teaspoon black pepper
- ½ cup water or chicken broth (for the pressure cook function)
Instructions
- Mix garlic powder, smoked paprika, onion powder, salt, and pepper together. Rub this dry seasoning all over the chicken legs and let them sit for 10-15 minutes while you set up the Ninja Foodi.
- Pour ½ cup water or broth into the Ninja Foodi pot. Place the seasoned chicken legs on the reversible rack in the lower position. Seal the pressure lid and **pressure cook** on High for 12 minutes. Quick release the pressure.
- Open the lid carefully. Brush the chicken legs generously with BBQ sauce on all sides.
- Switch to the Air Crisp lid. **Air crisp** at 400°F for 8-10 minutes until the BBQ glaze is sticky and caramelized and the skin has some crunch to it. Brush with a second layer of BBQ sauce halfway through if you want extra coating.
- Serve immediately with extra BBQ sauce on the side, coleslaw, and cornbread if you're going all out.
Tips
- Tip: No Ninja Foodi? Bake chicken legs at 400°F for 35 minutes, brush on BBQ sauce, then broil for 5-7 minutes. You lose the pressure-cooker juiciness but it's still a solid dinner.
- Tip: Pat the chicken dry before adding the dry rub — moisture is the enemy of crispy skin, even in an air crisper.
- Tip: The liquid at the bottom of the pot after pressure cooking makes a surprisingly good base for a quick sauce — just pour it into a small saucepan, simmer it down with a splash more BBQ sauce, and drizzle it over everything.
9. Baked Honey Mustard Chicken

Honey mustard chicken is one of those combinations that sounds almost too simple, but the glaze does something genuinely great to chicken legs in the oven. The sweetness caramelizes around the edges and the mustard cuts right through it — you end up with this sticky, golden coating that tastes like you put in way more effort than you did. I make this on nights when I want something that feels a little special but I've got maybe 10 minutes of actual hands-on time. My husband eats it with rice and a plain salad and calls it a proper dinner.
Ingredients
- 4 chicken legs (drumsticks and thighs attached, or just drumsticks)
- 3 tablespoons Dijon mustard
- 2 tablespoons honey
- 1 tablespoon whole-grain mustard (or extra Dijon if that's all you have)
- 1 tablespoon olive oil
- 2 cloves garlic, minced
- ½ teaspoon salt
- ¼ teaspoon black pepper
- Fresh thyme or rosemary (optional, but nice)
Instructions
- Preheat your oven to 400°F. Line a baking dish or sheet pan with foil and give it a light spray of oil.
- In a small bowl, whisk together both mustards, honey, olive oil, garlic, salt, and pepper until smooth.
- Pat the chicken legs dry with paper towels — this helps the glaze stick and the skin crisp up. Arrange them in the pan.
- Spoon the honey mustard glaze generously over each piece, turning to coat all sides. Tuck in thyme or rosemary sprigs if using.
- Bake for 40–45 minutes until the glaze is deep golden and caramelized and the internal temperature reads 165°F. Spoon any pan juices back over the chicken once before serving.
Tips
- Tip: If the glaze starts browning too fast before the chicken is cooked through, tent loosely with foil for the last 10 minutes.
- Tip: A broil on high for the last 2–3 minutes gives you those slightly charred, sticky edges that make this recipe.
- Tip: This glaze also works on chicken thighs or wings — same temperature, just check for doneness a few minutes earlier with wings.
8. Spicy Chili Lime Baked Chicken Legs
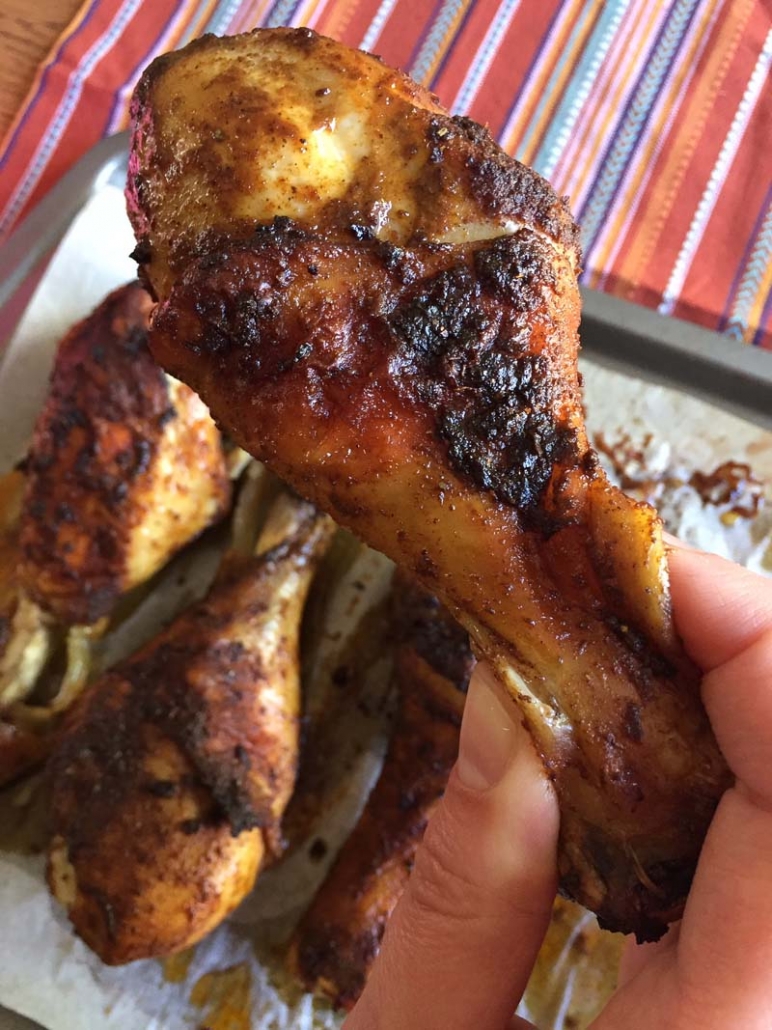
Chili and lime on chicken legs is a combination I came to pretty late, and I'm annoyed it took me so long. The lime juice tenderizes the meat a little as it marinates, and the chili powder builds this dry, spiced crust in the oven that's genuinely addictive. It's the kind of recipe that gets better the longer you let the chicken sit in the marinade — even 30 minutes makes a real difference, but overnight is ideal. The heat here is present but not overwhelming, so even people who aren't huge spice fans usually eat two pieces without complaining.
Ingredients
- 4–5 chicken drumsticks
- Juice of 2 limes (about 3 tablespoons)
- 1 tablespoon olive oil
- 1½ teaspoons chili powder
- 1 teaspoon smoked paprika
- ½ teaspoon cumin
- ½ teaspoon garlic powder
- ½ teaspoon salt
- ¼ teaspoon cayenne pepper (skip it if you want less heat)
- Lime wedges and fresh cilantro for serving
Instructions
- Combine lime juice, olive oil, and all the spices in a bowl or zip-lock bag. Mix well.
- Add the chicken drumsticks and toss to coat thoroughly. Marinate in the fridge for at least 30 minutes, or up to overnight for deeper flavor.
- When ready to bake, preheat oven to 425°F. Arrange drumsticks on a wire rack set over a foil-lined sheet pan — the rack lets air circulate and crisps the skin all around.
- Bake for 35–40 minutes, flipping once halfway through, until the skin is deeply colored and slightly crisp and the meat is cooked through.
- Squeeze fresh lime over the top right before serving and scatter with chopped cilantro if you like.
Tips
- Tip: No wire rack? Just flip the drumsticks halfway through on a regular sheet pan — you'll still get good color, just less uniform crispness on the underside.
- Tip: The lime juice will start to "cook" the surface of the chicken if you marinate too long past 24 hours — keep it within that window.
- Tip: Serve these alongside Mexican rice or just wrap the meat off the bone in a warm tortilla with some shredded cabbage — it works really well that way.
7. Roasted Chicken Quarters
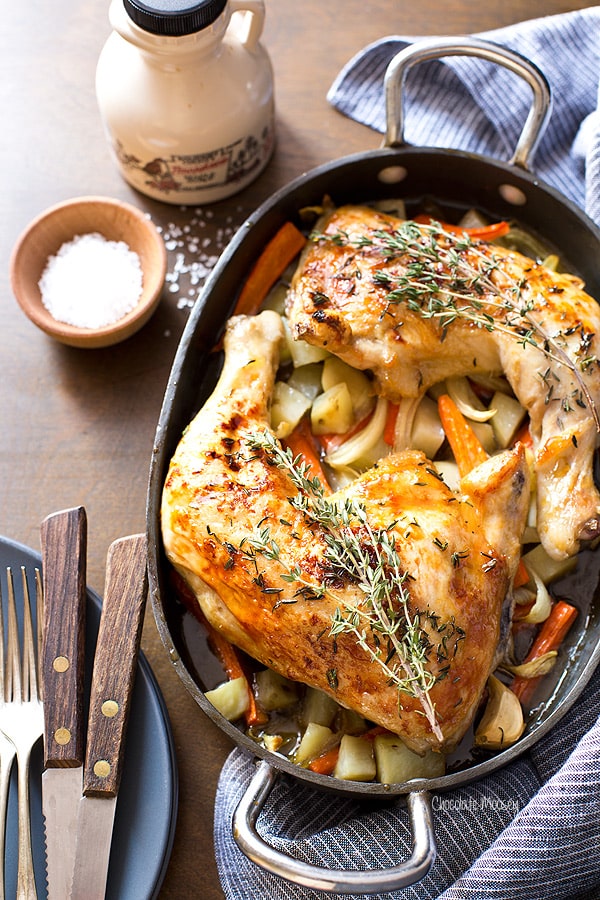
Roasted chicken quarters are honestly one of the most reliable things you can put in an oven. A whole leg — drumstick and thigh still connected — gives you more meat, more fat running through it, and better flavor than either piece alone. I season mine simply: olive oil, salt, pepper, garlic powder, and a little paprika for color. The skin gets properly golden and the meat underneath stays juicy in a way that boneless chicken just doesn't. This is the kind of weeknight dinner I make when I'm tired and don't want to think too hard, but I still want something that actually tastes good.
Ingredients
- 2–4 chicken leg quarters (drumstick and thigh connected)
- 2 tablespoons olive oil
- 1 teaspoon garlic powder
- 1 teaspoon smoked paprika
- 1 teaspoon onion powder
- 1 teaspoon salt
- ½ teaspoon black pepper
- ½ teaspoon dried thyme or Italian seasoning
- 1 tablespoon maple syrup or honey (optional — adds a gentle glaze)
Instructions
- Preheat oven to 425°F. Line a sheet pan with foil and place a wire rack on top if you have one.
- Pat chicken quarters completely dry — this is the most important step for crispy skin. Mix the olive oil with all the spices and the maple syrup if using.
- Rub the seasoning mixture all over the chicken, getting under the skin where you can. Place skin-side up on the rack or directly on the pan.
- Roast for 45–50 minutes until the skin is deep golden brown and crisp and a thermometer in the thickest part of the thigh reads 165°F.
- Let rest for 5 minutes before serving so the juices settle back into the meat.
Tips
- Tip: If you have time, season the chicken and leave it uncovered in the fridge for a couple of hours or overnight — the skin dries out even more and crisps up beautifully.
- Tip: Toss chopped potatoes or carrots directly on the pan around the chicken — they'll roast in the drippings and make a nearly complete meal with zero extra effort.
- Tip: Chicken quarters are usually one of the cheapest cuts at the grocery store — Walmart and Costco both carry them in value packs, so this is a genuinely budget-friendly dinner.
6. Air Fryer BBQ Chicken Legs
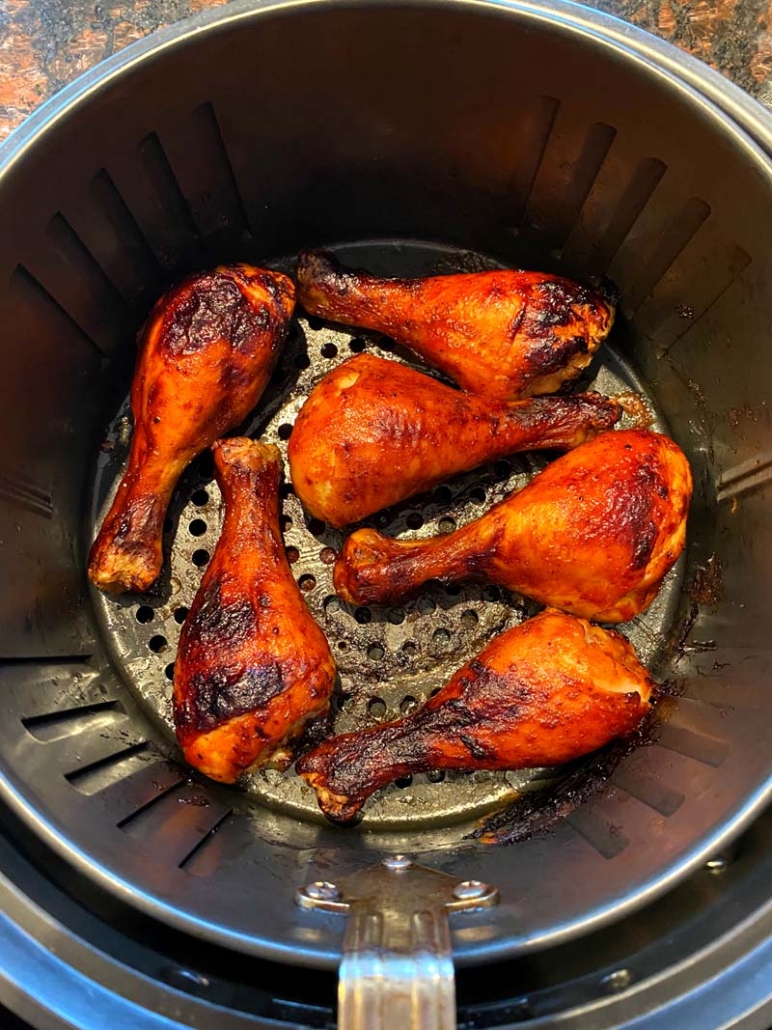
The air fryer does something to BBQ chicken legs that the oven just can't quite replicate — the skin gets this tight, almost lacquered crispness while the sauce caramelizes without burning. I was skeptical the first time I tried it, but now this is genuinely one of the fastest routes to a proper BBQ chicken dinner without firing up an outdoor grill. Saad goes through these at an alarming rate every time I make them. The whole thing comes together in under 30 minutes, which matters a lot on school nights.
Ingredients
- 4–6 chicken drumsticks
- 1 tablespoon olive oil
- 1 teaspoon garlic powder
- 1 teaspoon smoked paprika
- ½ teaspoon salt
- ¼ teaspoon black pepper
- ½ cup BBQ sauce (your favorite store-bought works fine — I use Sweet Baby Ray's or whatever's in the pantry)
Instructions
- Pat the drumsticks dry and toss with olive oil, garlic powder, smoked paprika, salt, and pepper until coated.
- Preheat your air fryer to 400°F for 3 minutes. Arrange the drumsticks in a single layer in the basket — don't stack them or they'll steam instead of crisp.
- Air fry for 10 minutes, flip, then air fry another 8 minutes.
- Brush BBQ sauce generously over each drumstick and air fry for a final 4–5 minutes until the sauce is sticky and slightly caramelized. Check that the internal temp is 165°F.
- Brush with a second layer of sauce right after pulling them out if you want extra coverage, then serve immediately.
Tips
- Tip: Don't add the BBQ sauce in the first round of cooking — sugary sauces burn fast in the air fryer. Add it only in the last 4–5 minutes.
- Tip: If your air fryer basket is small, cook in two batches rather than crowding — it's worth the extra few minutes for properly crisp skin.
- Tip: No air fryer? Use a broiler — season and bake at 400°F for 35 minutes, then brush with sauce and broil on high for 3–4 minutes to get that sticky finish.
5. Chicken Fry

This is the South Asian-style chicken fry I grew up watching my mother make — not the American deep-fried breaded version, but a **dry-cooked** skillet preparation where whole chicken legs get seared in a spiced masala until the coating is almost dry and clinging to the meat. The spices go deep into the chicken because you cook it low and slow first, then crank the heat at the end to get that characteristic darkened, almost fried exterior. It's not fancy, but it's the kind of thing that disappears off the plate before I've even sat down. This is my version — not precisely any one regional recipe, just what works in my kitchen.
Ingredients
- 4 chicken legs (drumsticks or leg quarters, scored with a knife)
- 3 tablespoons neutral oil
- 1 medium onion, thinly sliced
- 1 tablespoon ginger-garlic paste (or 1 teaspoon each garlic powder and ginger powder as a substitute)
- 1 teaspoon red chili powder (use paprika for a milder version)
- 1 teaspoon cumin powder
- 1 teaspoon coriander powder
- ½ teaspoon turmeric
- 1 teaspoon salt, or to taste
- ½ cup plain yogurt
- Fresh cilantro and lemon wedges to serve
Instructions
- Score the chicken legs with a sharp knife — 2–3 diagonal cuts per piece down to the bone. This lets the spices penetrate properly.
- Heat oil in a heavy skillet or Dutch oven over medium heat. Add the sliced onions and cook until they're soft and golden brown, about 10 minutes.
- Add ginger-garlic paste and cook for 1 minute until fragrant, then add all the dry spices and stir for 30 seconds. Add the yogurt and mix everything into a thick paste.
- Add the chicken legs, turn to coat in the masala, and cover the pan. Cook on medium-low for 25–30 minutes, turning once halfway, until the chicken is cooked through.
- Remove the lid, increase heat to medium-high, and cook for a further 8–10 minutes, turning the chicken frequently, until the masala dries out and darkens against the meat — this is the "fry" part that gives it that characteristic look and flavor.
- Serve with naan, roti, or plain rice, scattered with fresh cilantro and a squeeze of lemon.
Tips
- Tip: The scoring step is not optional — without it the spices just sit on the surface and the inside of the meat stays bland.
- Tip: If you can't find ginger-garlic paste at a regular grocery store, blend equal parts fresh ginger and garlic with a tiny bit of water — or use the powders listed above in a pinch.
- Tip: The dry-fry finish at the end can go from perfect to burned quickly — keep stirring and watch the pan closely during those last 10 minutes.
30. Chicken Leg Quarters Recipe (Quick, Easy, 5 Ingredients!)
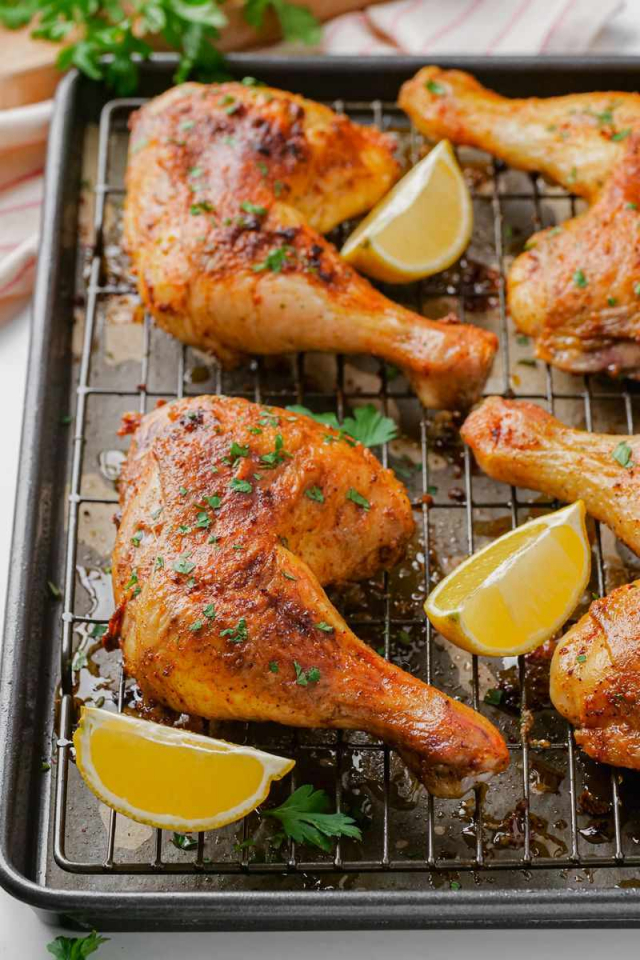
Five ingredients. That's it. I was skeptical the first time I made something this minimal — I kept wanting to add more spices, more steps — but the simplicity is exactly what makes this work. The chicken leg quarters come out tender inside with a nicely seasoned exterior, and the whole thing goes into the oven without any fuss. This is the recipe I default to on nights when I haven't thought about dinner until 5 PM.
Ingredients
- 4 chicken leg quarters
- 2 tablespoons olive oil
- 1 teaspoon garlic powder
- 1 teaspoon smoked paprika
- 1 teaspoon salt (or to taste)
Instructions
- Preheat your oven to 400°F. Pat the chicken leg quarters completely dry with paper towels — this step matters for getting the skin crisp rather than steamed.
- Mix together the olive oil, garlic powder, smoked paprika, and salt in a small bowl. Rub the mixture all over the chicken, getting under the skin where you can.
- Place the chicken skin-side up on a rimmed baking sheet or in a baking dish. Roast for 40–45 minutes until the skin is golden and the internal temperature reads 165°F at the thickest part of the thigh (not touching bone).
- Let the chicken rest for 5 minutes before serving — this keeps the juices inside where they belong.
Tips
- Tip: If your chicken leg quarters are on the larger side (over 12 oz each), add an extra 5–7 minutes and check the temperature rather than pulling them out on a timer alone.
- Tip: Line your baking sheet with foil for easy cleanup — chicken leg quarters release a lot of fat as they roast.
- Tip: Want more color on the skin? Switch the oven to broil for the last 2–3 minutes, keeping a close eye so it doesn't burn.
31. Italian Chicken Drumsticks
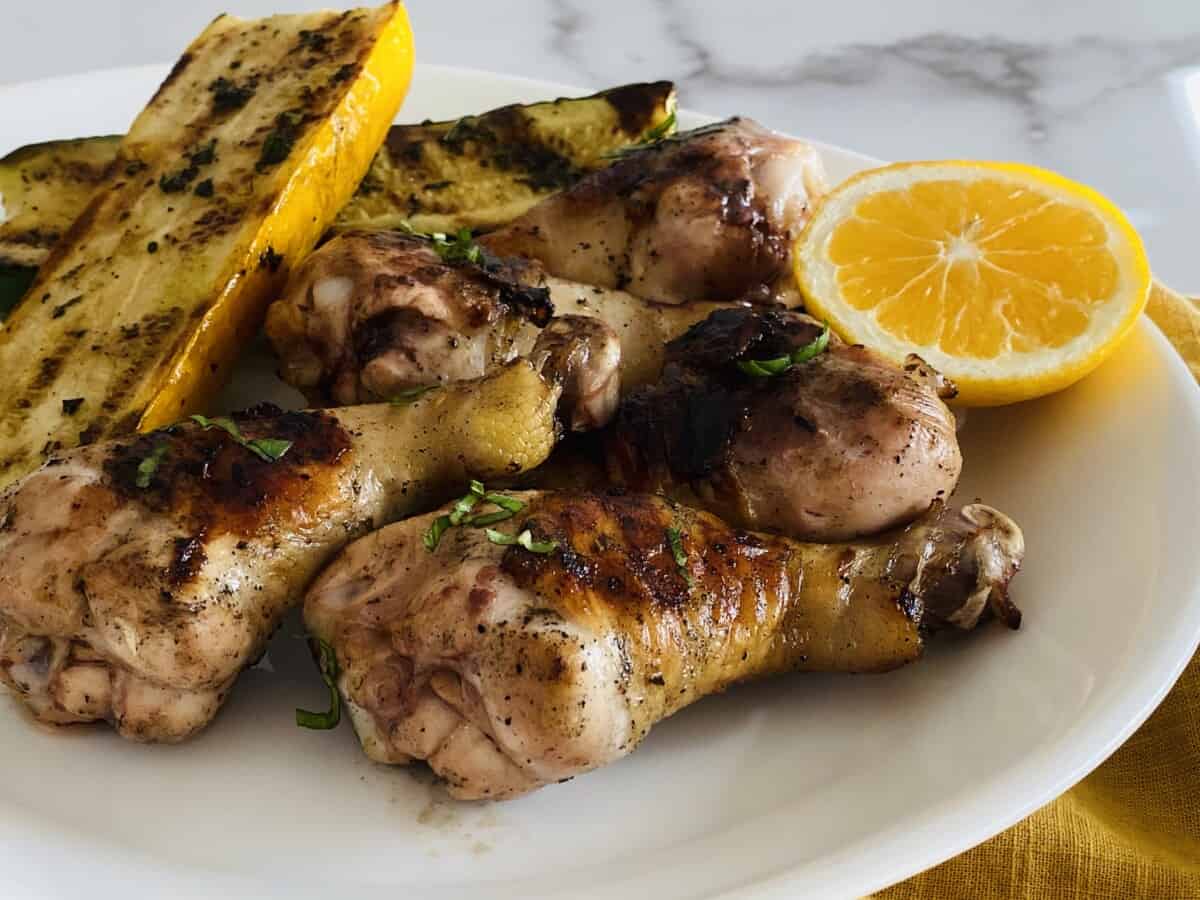
Italian seasoning on chicken legs is one of those combinations that just works every single time. The herbs — oregano, basil, thyme — mix with olive oil and garlic to create a coating that crisps beautifully in the oven and smells incredible while it's cooking. I'm not claiming this is something you'd find in an Italian grandmother's kitchen, but it's a solid weeknight version that my family eats without complaint. Serve it with pasta or a simple green salad and dinner is done.
Ingredients
- 8 chicken drumsticks
- 3 tablespoons olive oil
- 3 cloves garlic, minced
- 2 teaspoons Italian seasoning (store-bought blend works fine)
- ½ teaspoon onion powder
- 1 teaspoon salt
- ½ teaspoon black pepper
- 2 tablespoons grated Parmesan cheese (optional but good)
Instructions
- Preheat oven to 425°F. Pat drumsticks dry and set aside. Drying the surface helps the seasoning adhere and the skin crisp up properly.
- In a large bowl, whisk together the olive oil, minced garlic, Italian seasoning, onion powder, salt, pepper, and Parmesan if using. Add the drumsticks and toss until every piece is well coated.
- Arrange drumsticks in a single layer on a foil-lined baking sheet. Make sure they're not touching — crowding traps steam and you'll lose the crispy skin.
- Roast for 35–40 minutes, flipping once halfway through, until the skin is deep golden and the internal temperature reaches 165°F.
Tips
- Tip: If you have time, mix the drumsticks with the seasoning and let them sit in the fridge for 30 minutes before baking — even a short rest helps the flavors sink in.
- Tip: No Italian seasoning blend on hand? Use equal parts dried oregano, basil, and thyme — about ¾ teaspoon each.
- Tip: A squeeze of fresh lemon over the drumsticks right before serving brightens everything up noticeably.
32. Keto Sesame Chicken Legs in Air Fryer
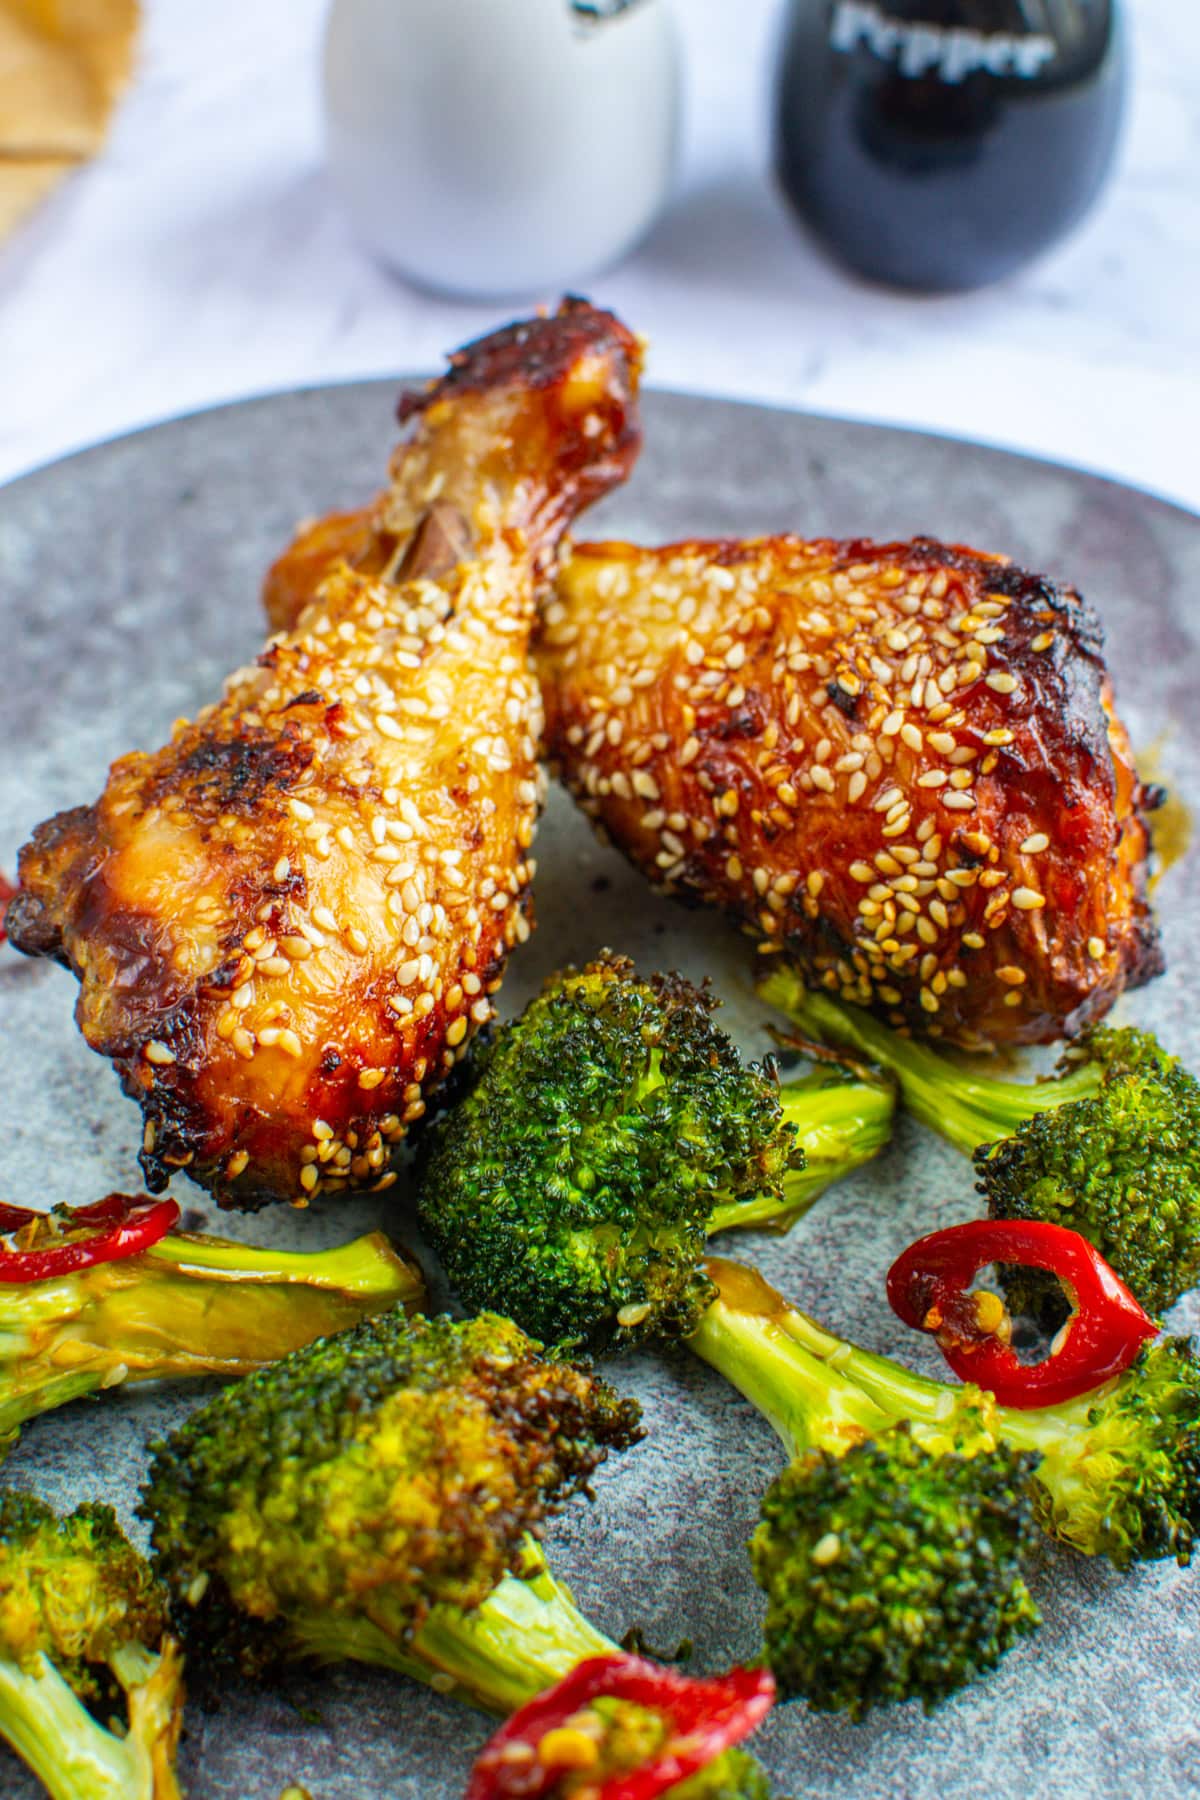
Sesame chicken in the air fryer is something I started making when my husband was cutting carbs for a few months — I needed something that felt satisfying and had real flavor without any coating or sugar-heavy sauce. The combination of toasted sesame oil, soy sauce (or coconut aminos if you're strict keto), and garlic creates a savory glaze that crisps beautifully in the air fryer basket. Saad thought these smelled amazing coming out of the fryer and immediately asked for a bite — so they passed the kid test too.
Ingredients
- 6 chicken legs (drumsticks)
- 2 tablespoons toasted sesame oil
- 2 tablespoons soy sauce or coconut aminos (for strict keto)
- 3 cloves garlic, minced
- 1 teaspoon grated fresh ginger (or ½ teaspoon ground ginger)
- ½ teaspoon salt
- ¼ teaspoon black pepper
- 1 tablespoon sesame seeds, for serving
- 2 green onions, sliced, for garnish
Instructions
- Pat the chicken legs dry. In a bowl, combine sesame oil, soy sauce (or coconut aminos), garlic, ginger, salt, and pepper. Add chicken and toss to coat. If you have 15 minutes to spare, let them sit at room temperature to absorb the marinade.
- Preheat the air fryer to 400°F for 3 minutes. Place chicken legs in the basket in a single layer — work in batches if your air fryer is smaller.
- Air fry for 22–25 minutes, flipping the legs halfway through. The skin should be deeply golden and crisp. Check that the internal temp has reached 165°F.
- Transfer to a plate, sprinkle with sesame seeds and sliced green onions, and serve immediately.
Tips
- Tip: Don't skip the toasted sesame oil — regular sesame oil has a much milder flavor and won't give you the same depth. The toasted version is what makes this taste like proper sesame chicken.
- Tip: Coconut aminos are slightly sweeter and less salty than soy sauce — if you use them, you may not need to add any extra salt.
- Tip: These reheat well in the air fryer the next day — 5 minutes at 375°F brings the crisp back without drying out the meat.
33. 4-Ingredient Chicken Leg Quarters in Air Fryer
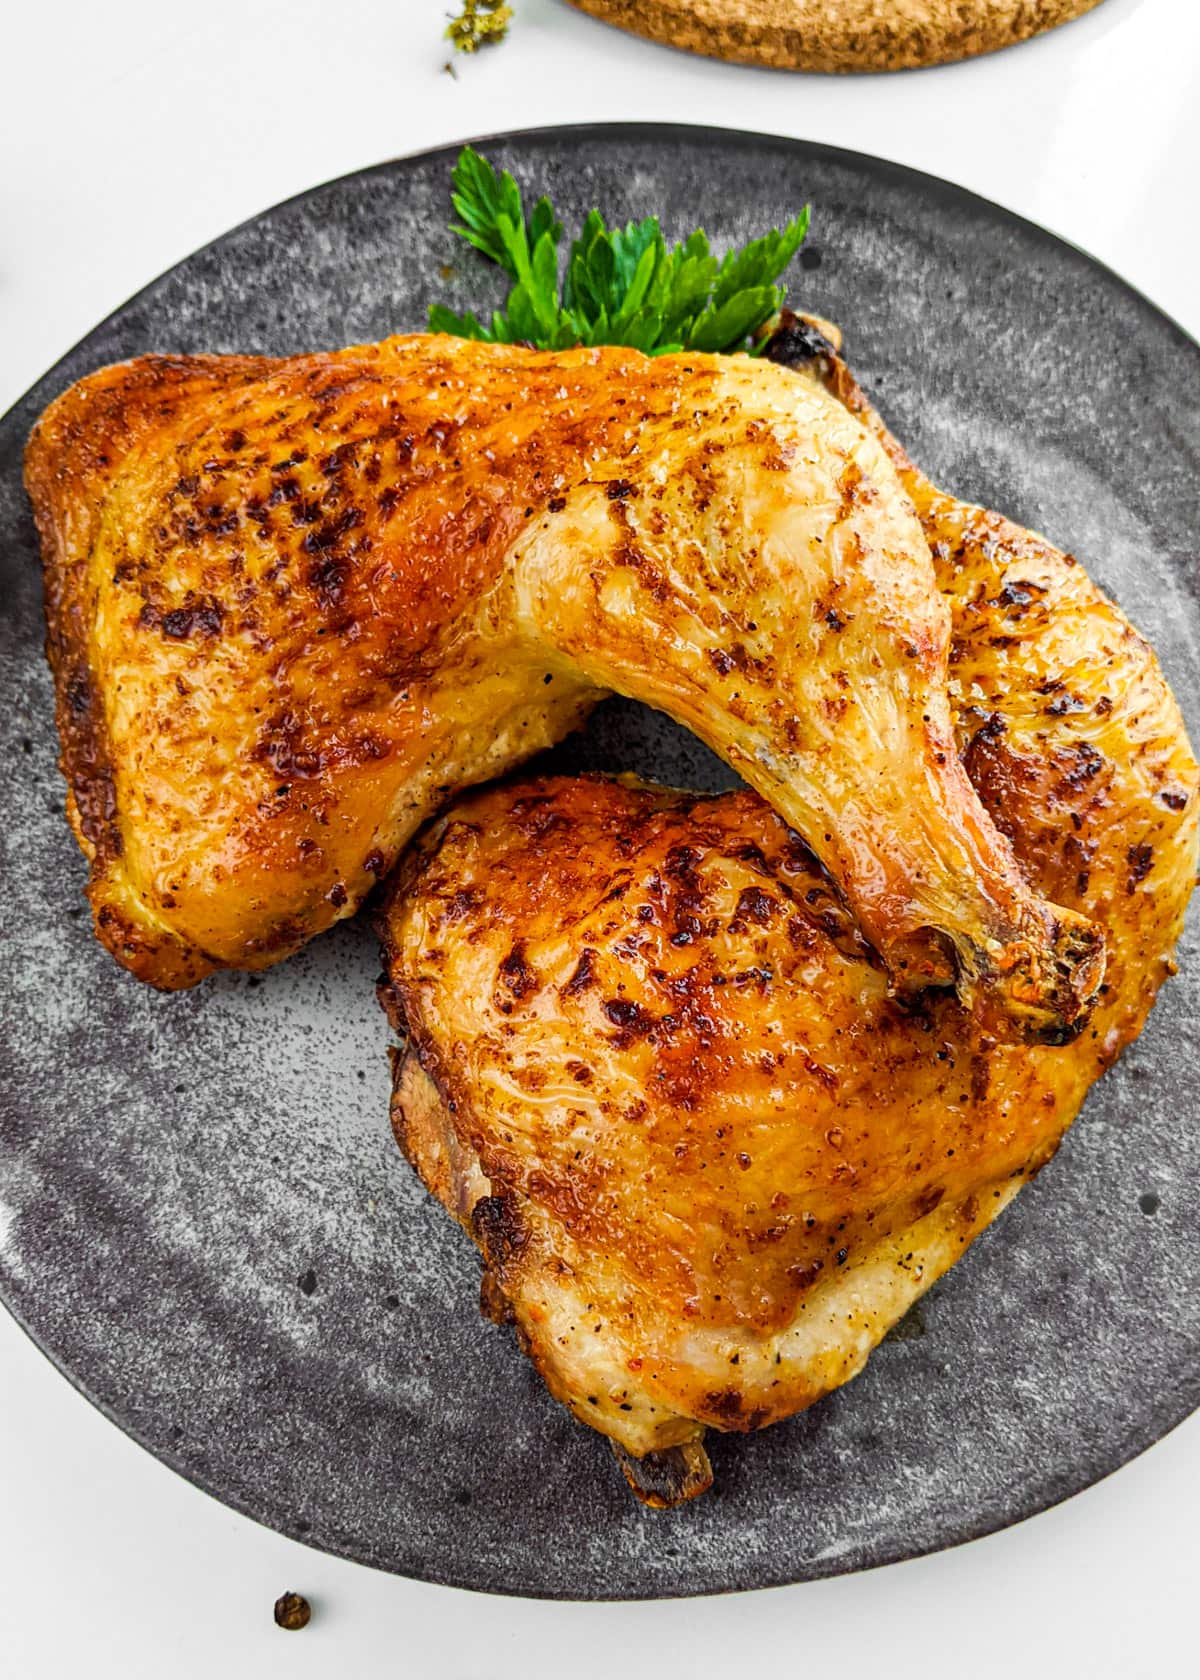
We're ending this list with the recipe I probably make more than any other on here. Four ingredients, air fryer, done in under 30 minutes — chicken leg quarters that come out with genuinely crispy skin and juicy meat that doesn't dry out. I make a double batch on Sundays because it disappears before I've even finished cleaning up. If you only try one recipe from this entire roundup, make it this one first.
Ingredients
- 4 chicken leg quarters
- 1 tablespoon olive oil
- 1 teaspoon seasoning salt (like Lawry's, found at Walmart or most grocery stores)
- 1 teaspoon garlic powder
Instructions
- Pat the chicken leg quarters completely dry with paper towels — this is the single most important step for crispy air fryer skin, don't skip it.
- Rub each piece all over with olive oil, then sprinkle evenly with seasoning salt and garlic powder. Get the seasoning under the skin if you can.
- Preheat the air fryer to 380°F. Place leg quarters skin-side down in the basket. Air fry for 15 minutes, then flip skin-side up and increase the temperature to 400°F. Cook another 10–12 minutes until the skin is deep golden and crackly.
- Check that the thickest part of the thigh reads 165°F on a meat thermometer before serving. Rest for 3–5 minutes, then plate it up.
Tips
- Tip: Leg quarters are larger than drumsticks — if yours are over 12 oz each, add a few extra minutes at the end rather than pulling them early and ending up with pink meat near the bone.
- Tip: If your air fryer basket is small, cook two quarters at a time. Crowding = steam = no crispy skin. It's worth the extra round.
- Tip: No seasoning salt? Use ¾ teaspoon regular salt plus a pinch each of onion powder and paprika — gets you to the same place.
Chicken legs really are one of the most underrated cuts out there. They're cheap, they stay juicy even when you cook them a little longer than planned, and they take on flavor incredibly well — whether you're rubbing them with spices, braising them in a sauce, or just roasting them with garlic and butter. I've made every style of chicken leg recipe on this list in my own kitchen at some point, and they've all earned a regular spot in our dinner rotation for different reasons.
If I'm honest, the baked garlic butter version and the sticky honey soy one get requested the most at our table — Saad would eat that honey soy glaze on just about anything. But on the nights I need something completely hands-off, I go straight for the slow cooker recipes. The point is there's something here for every kind of week, whether you have 20 minutes or two hours.
Pick whichever recipe fits your week, bookmark the ones you want to try later, and don't stress about following any of them perfectly. Chicken legs are forgiving. That's exactly why I keep coming back to them. 🍗✨
More Recipes You Might Like
- Easy Chicken Thigh Recipes — if you love chicken legs, chicken thighs are basically their cousin and just as forgiving
- Baked Chicken Recipes — more oven chicken ideas for nights when you want dinner to mostly cook itself
- Slow Cooker Chicken Recipes — set it and walk away; these are the ones I rely on during the busiest weeks
- Chicken Marinade Recipes — a good marinade is half the work; these keep well in the fridge for meal prep
- Easy Weeknight Dinner Recipes — the full roundup of what I actually cook when I'm short on time and patience
Frequently Asked Questions
What temperature should chicken legs be cooked to?
Chicken legs need to reach an internal temperature of 165°F to be safe to eat. That said, I personally prefer them at 175–185°F — the dark meat gets more tender and pulls away from the bone cleanly at that point. A cheap instant-read thermometer from Walmart is all you need to check.
How long do cooked chicken legs last in the fridge?
Cooked chicken legs keep well in the fridge for up to 4 days in an airtight container. I always make a double batch when I'm roasting them — they reheat well in the oven at 350°F for about 15 minutes and the skin crisps back up a little if you skip the microwave.
Can I use chicken drumsticks and thighs interchangeably in these recipes?
Yes, for most of these recipes you can swap freely between drumsticks, thighs, and whole chicken legs. The main thing to watch is cook time — bone-in thighs are thicker and may need a few extra minutes, while drumsticks are leaner and cook a touch faster. Just check the temperature instead of relying purely on timing.
Which recipe on this list is easiest for a beginner?
The baked garlic butter chicken legs or the sheet pan lemon herb version — both are hard to mess up. You season the chicken, put it in the oven, and pull it out when it's done. No special technique, no tricky sauces. If you're just starting out with cooking chicken, those two are where I'd begin.
Can I freeze cooked chicken legs?
Absolutely. Let them cool completely, wrap them tightly or store in a freezer bag with the air pressed out, and they'll keep for up to 3 months. The texture is best when you thaw them overnight in the fridge and then reheat in the oven rather than the microwave — that way you don't end up with rubbery skin.
Share This Post!
If this list helped you figure out dinner tonight, pin it or share it — it genuinely helps more people find the recipes. 🍗📌
View More Recipes here Recipe Roundups





Jacinto says
I could not resist commenting. Perfectly written!