
Where I grew up in Pakistan, tandoori chicken wasn't a restaurant thing — it was a family thing. My mother would marinate the chicken the night before, and by morning the whole kitchen smelled like cumin and charred spice. I've been trying to recreate that smell in my own kitchen for years, and this recipe is the closest I've gotten.
What makes this work isn't anything exotic. It's a yogurt-based marinade with spices you probably already have, and enough time in the fridge to let the chicken absorb everything. The yogurt tenderizes the meat from the inside while the spices do their job on the outside. When it hits the heat — whether that's your oven broiler or a backyard grill — you get that char on the outside and juicy, deeply spiced meat on the inside. That's the whole point of tandoori chicken and this recipe delivers it without a clay oven.
My husband asks for this at least twice a month. Saad will eat it straight off the tray before I've even set the table. I always make a double batch now because a single batch disappears at dinner and there's nothing left for the next day, which I genuinely regret every time. I serve it with a quick green raita and sliced onions, and if I have time, some hot naan — but honestly, it's good with plain rice too if that's what you have.
One thing to set expectations on: the marinade time matters. Two hours will work in a pinch, but overnight is where the real flavor lives. I've done both, and there's a noticeable difference. If you're planning this for a weekend dinner, marinate it Friday night and cook it Saturday — you'll be glad you did. If you're new to Pakistani cooking and want more spiced chicken ideas, my recipe archives have plenty of weeknight-friendly options too.
Why You'll Love This Recipe
- The marinade does most of the work: Once you mix the spices into the yogurt and coat the chicken, your job is basically done. The fridge handles the rest overnight. On the day you cook it, you're just putting it in the oven — there's no babysitting, no complicated technique. I've made this on a Friday night after a long week and it still came out great.
- Works in the oven or on the grill: I cook this in my regular home oven about 80% of the time, and it comes out well-charred and juicy. But in summer when my husband fires up the grill, I hand him the marinated tray and it comes out even better — real char, real smoke. The recipe works either way without changing a single ingredient.
- All pantry spices, nothing hard to find: Cumin, coriander, garam masala, black pepper — these are all spices you can find at Walmart, Trader Joe's, or any regular grocery store. The one thing that might trip you up is ginger garlic paste, but you can make it at home by blending equal parts fresh ginger and garlic with a splash of water. Takes five minutes.
- Freezer-friendly before or after cooking: I've frozen the raw marinated chicken in a zip-lock bag and pulled it out on busy weeks. Thaw it overnight in the fridge and cook it the next day. Works perfectly. You can also freeze cooked leftover pieces and reheat them in the oven with a brush of ghee — they come back surprisingly well.
- Leftovers are genuinely useful: Pull the meat off the bone the next day and you have incredible filling for wraps, topping for flatbread, or the base for a quick chicken salad with cucumber, onion, and lemon. The spiced chicken holds up well and actually tastes better the next day once the flavors have settled even further.
Ingredients
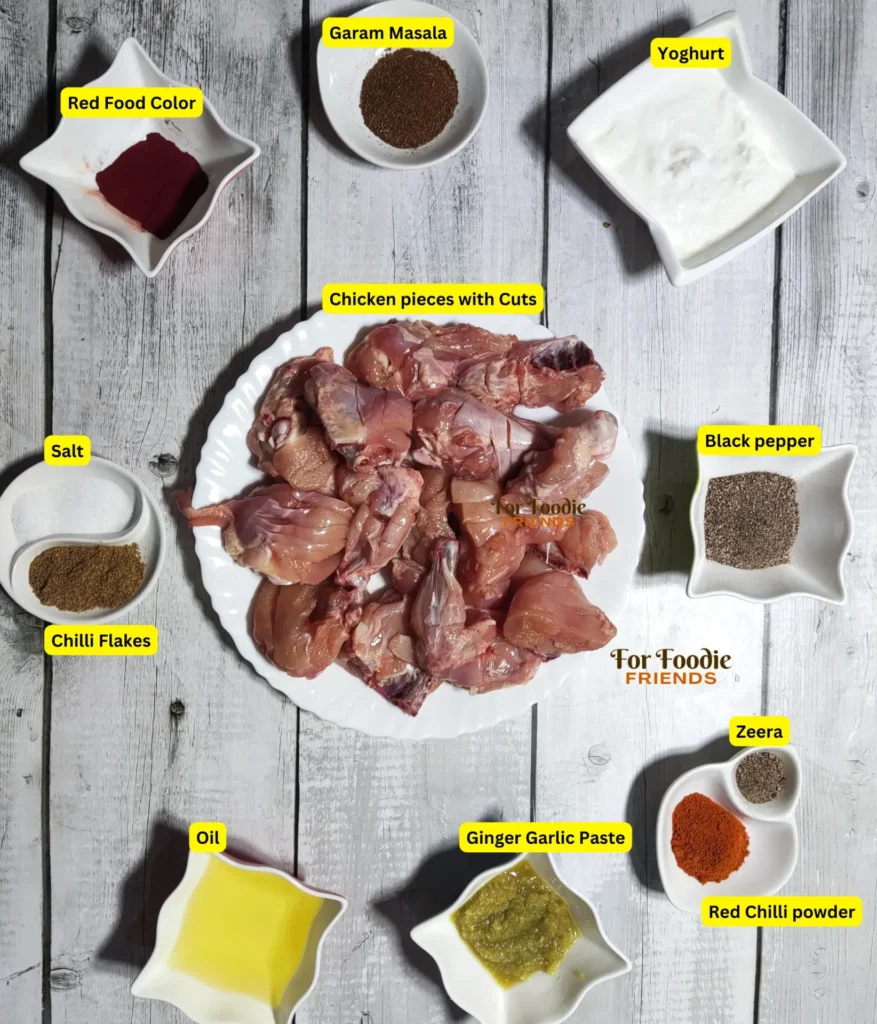
- 2.2 lbs (1 kg) bone-in, skinless chicken leg quarters (thigh + drumstick — this cut stays juiciest)
- 4 tablespoons plain full-fat yogurt (Greek yogurt works too)
- ¼ cup neutral oil (vegetable or canola)
- ¾ teaspoon black pepper powder
- 1 teaspoon cumin powder (zeera)
- ¾ teaspoon coriander powder
- ¾ teaspoon red chili powder (Kashmiri chili gives color without too much heat; regular chili powder works)
- 2 teaspoons salt, or to taste
- ¼ teaspoon garam masala
- ¼ teaspoon red food color (optional — skip it if you prefer, the color will still be beautiful)
- 1 tablespoon ginger garlic paste (store-bought or blend equal parts fresh ginger and garlic)
- Juice of half a lemon (about 1½ tablespoons)
For the Green Raita
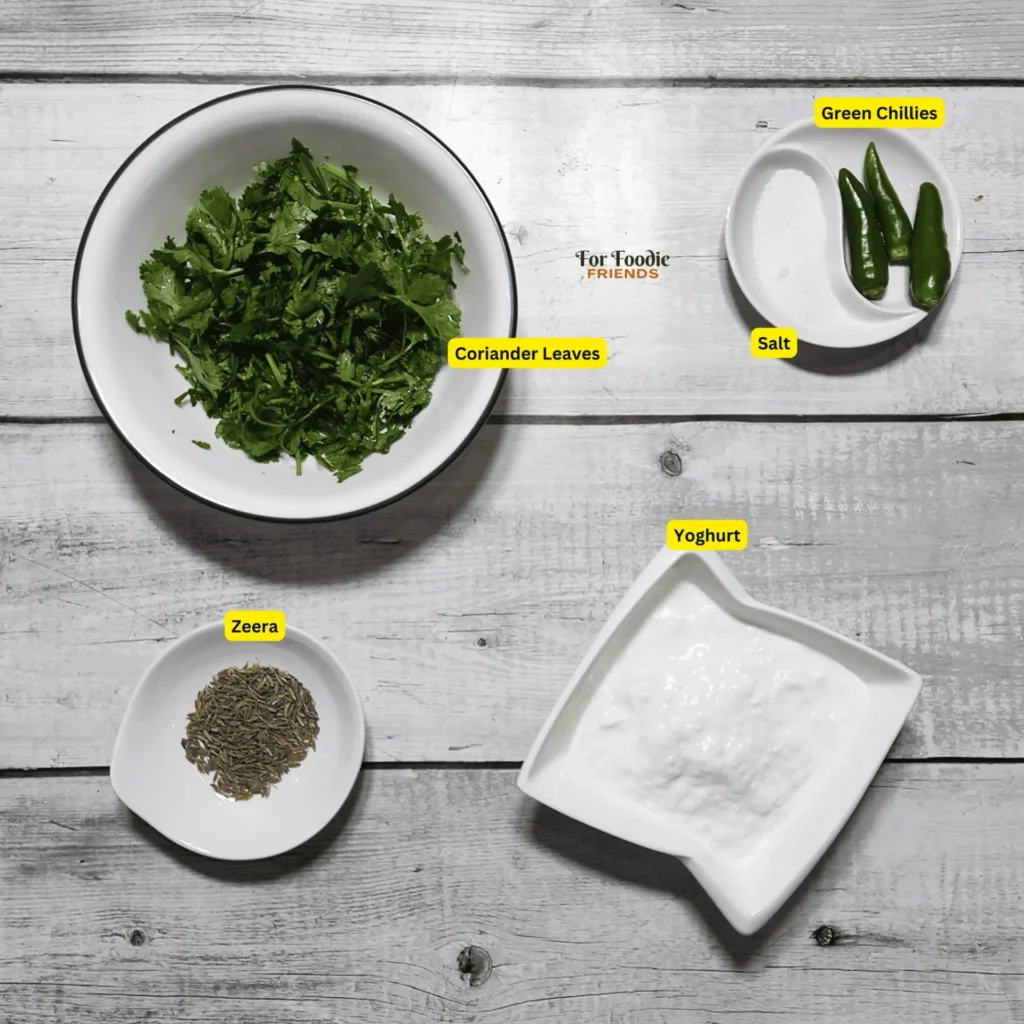
- ⅔ cup (150g) plain yogurt
- 2–3 green chilies (use jalapeño if you can't find Pakistani green chilies)
- ½ tablespoon whole cumin seeds (zeera)
- Small handful of fresh cilantro (coriander)
- ½ teaspoon salt
Directions
- Step 1: Score the chicken. Use a sharp knife to make 2–3 deep cuts on each piece of chicken, cutting all the way to the bone. This isn't optional — without scoring, the marinade only sits on the surface and the inside stays bland. I learned this the hard way my first time: the outside looked stunning but the meat near the bone had zero flavor.
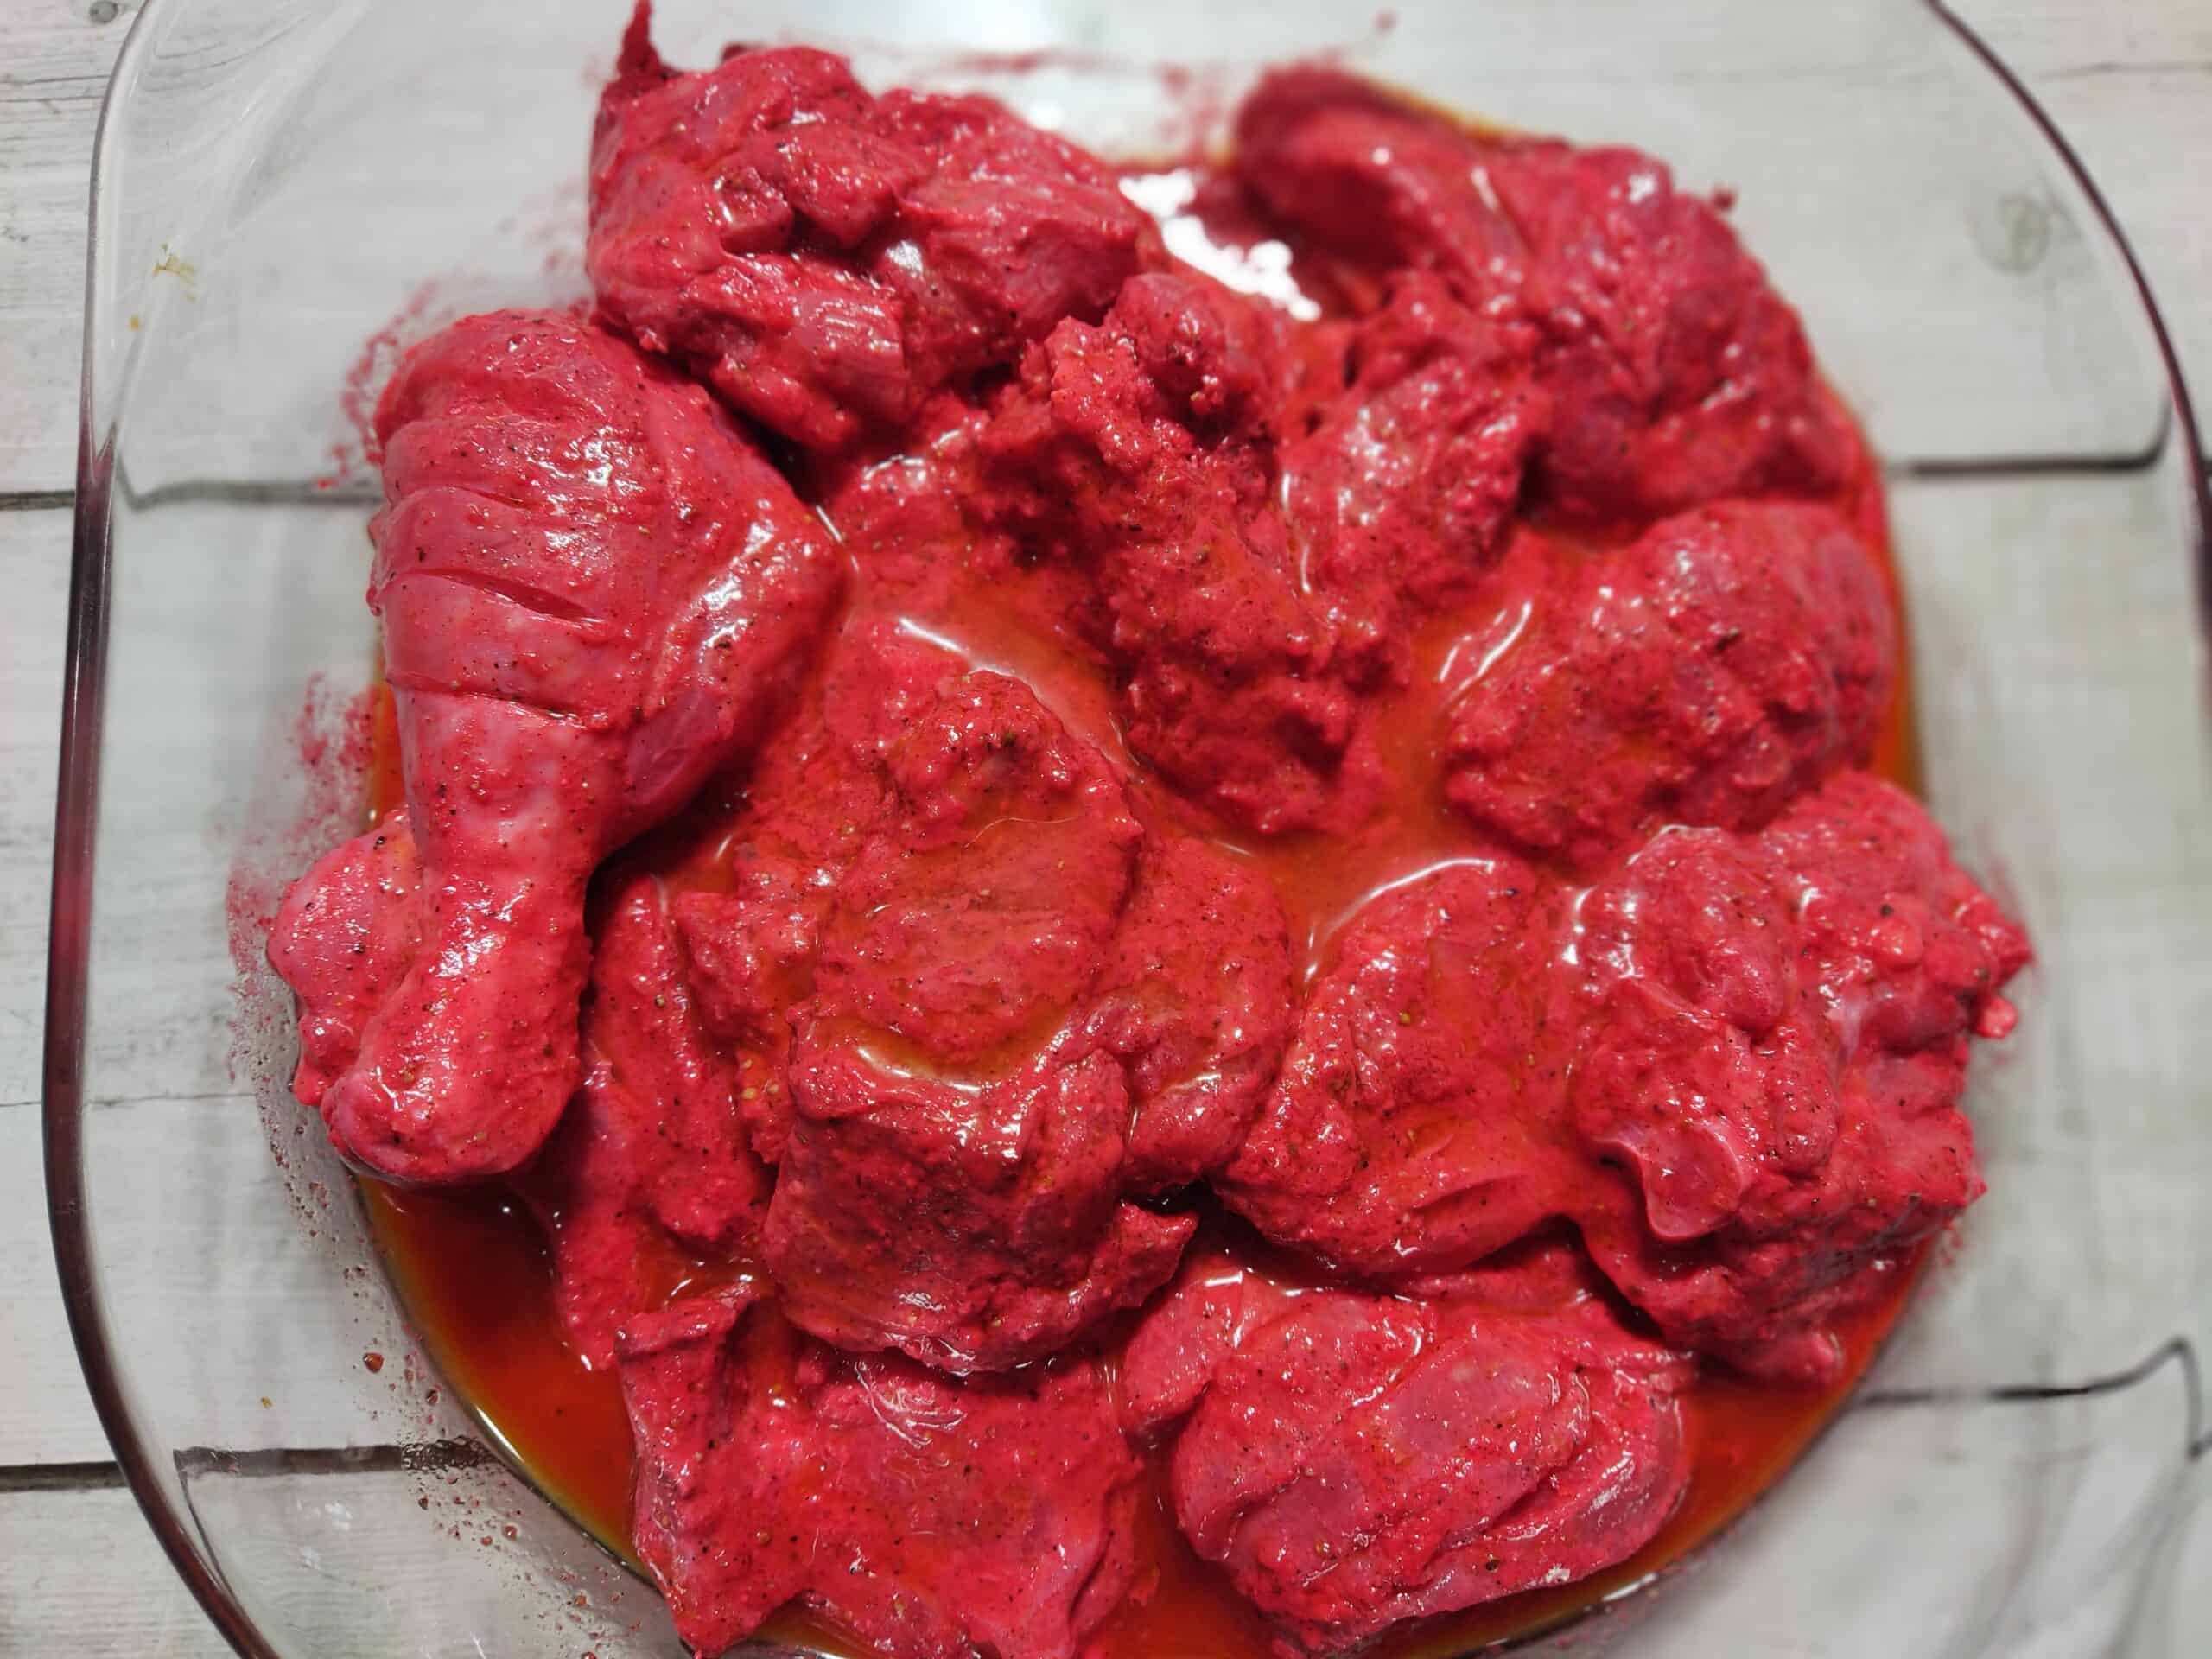
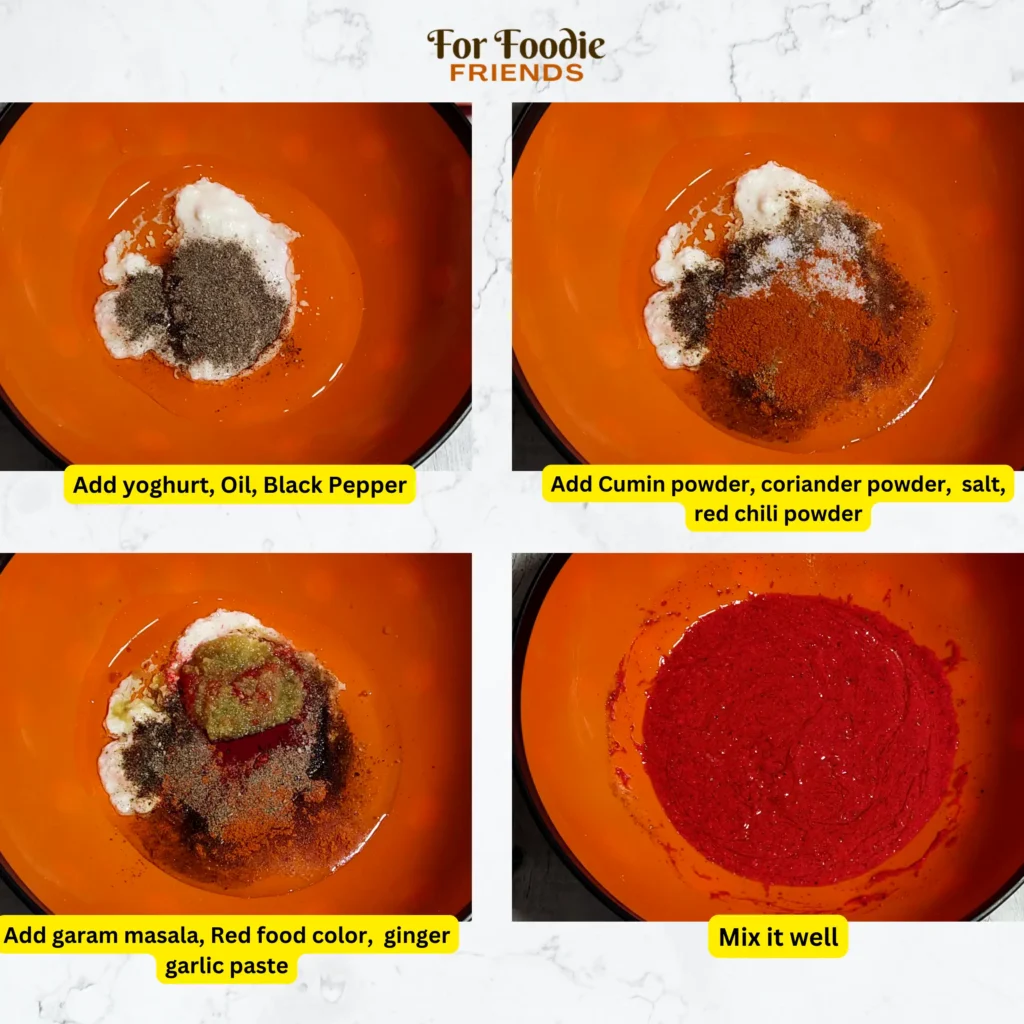
- Step 2: Make the marinade. In a large bowl, combine the yogurt, oil, black pepper, cumin powder, coriander powder, red chili powder, salt, garam masala, red food color (if using), and ginger garlic paste. Mix it well until everything is uniform, then squeeze in the lemon juice and mix again. The paste should be thick enough to coat the back of a spoon.
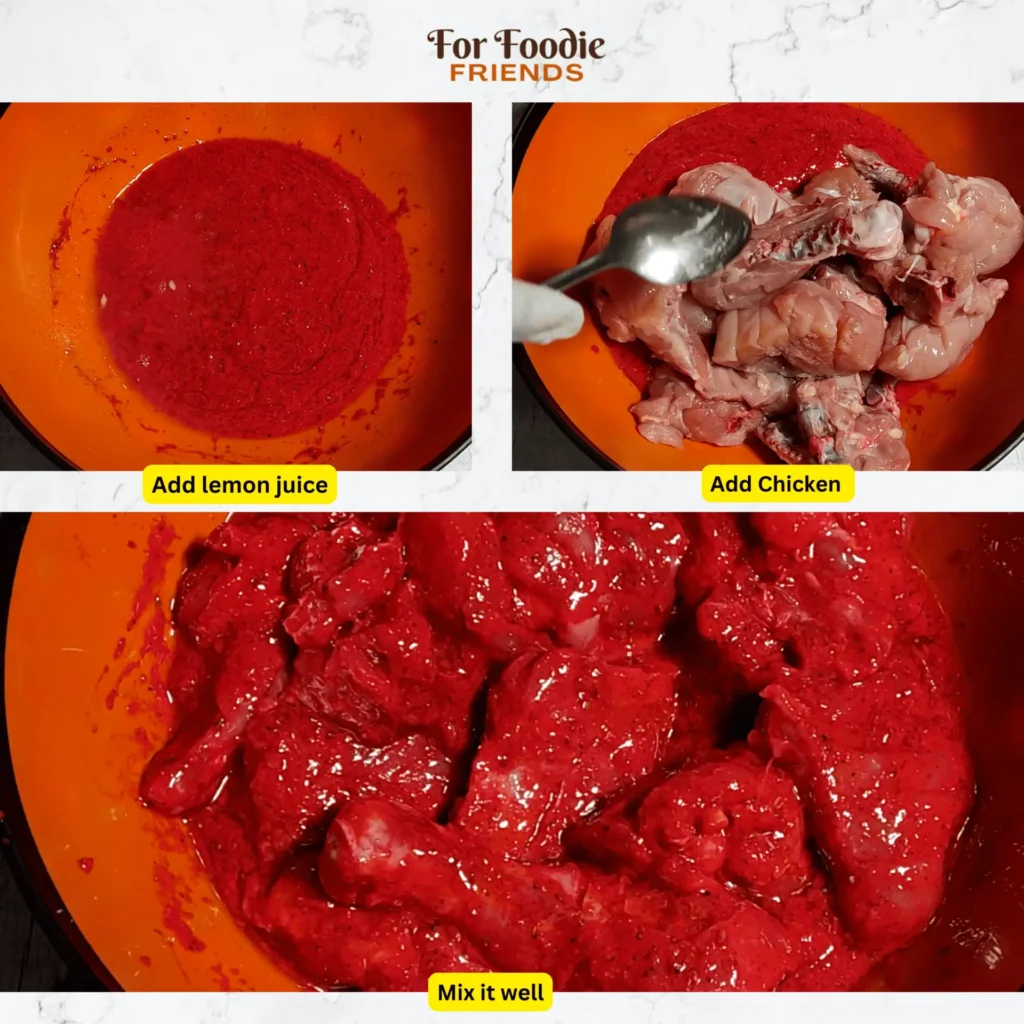
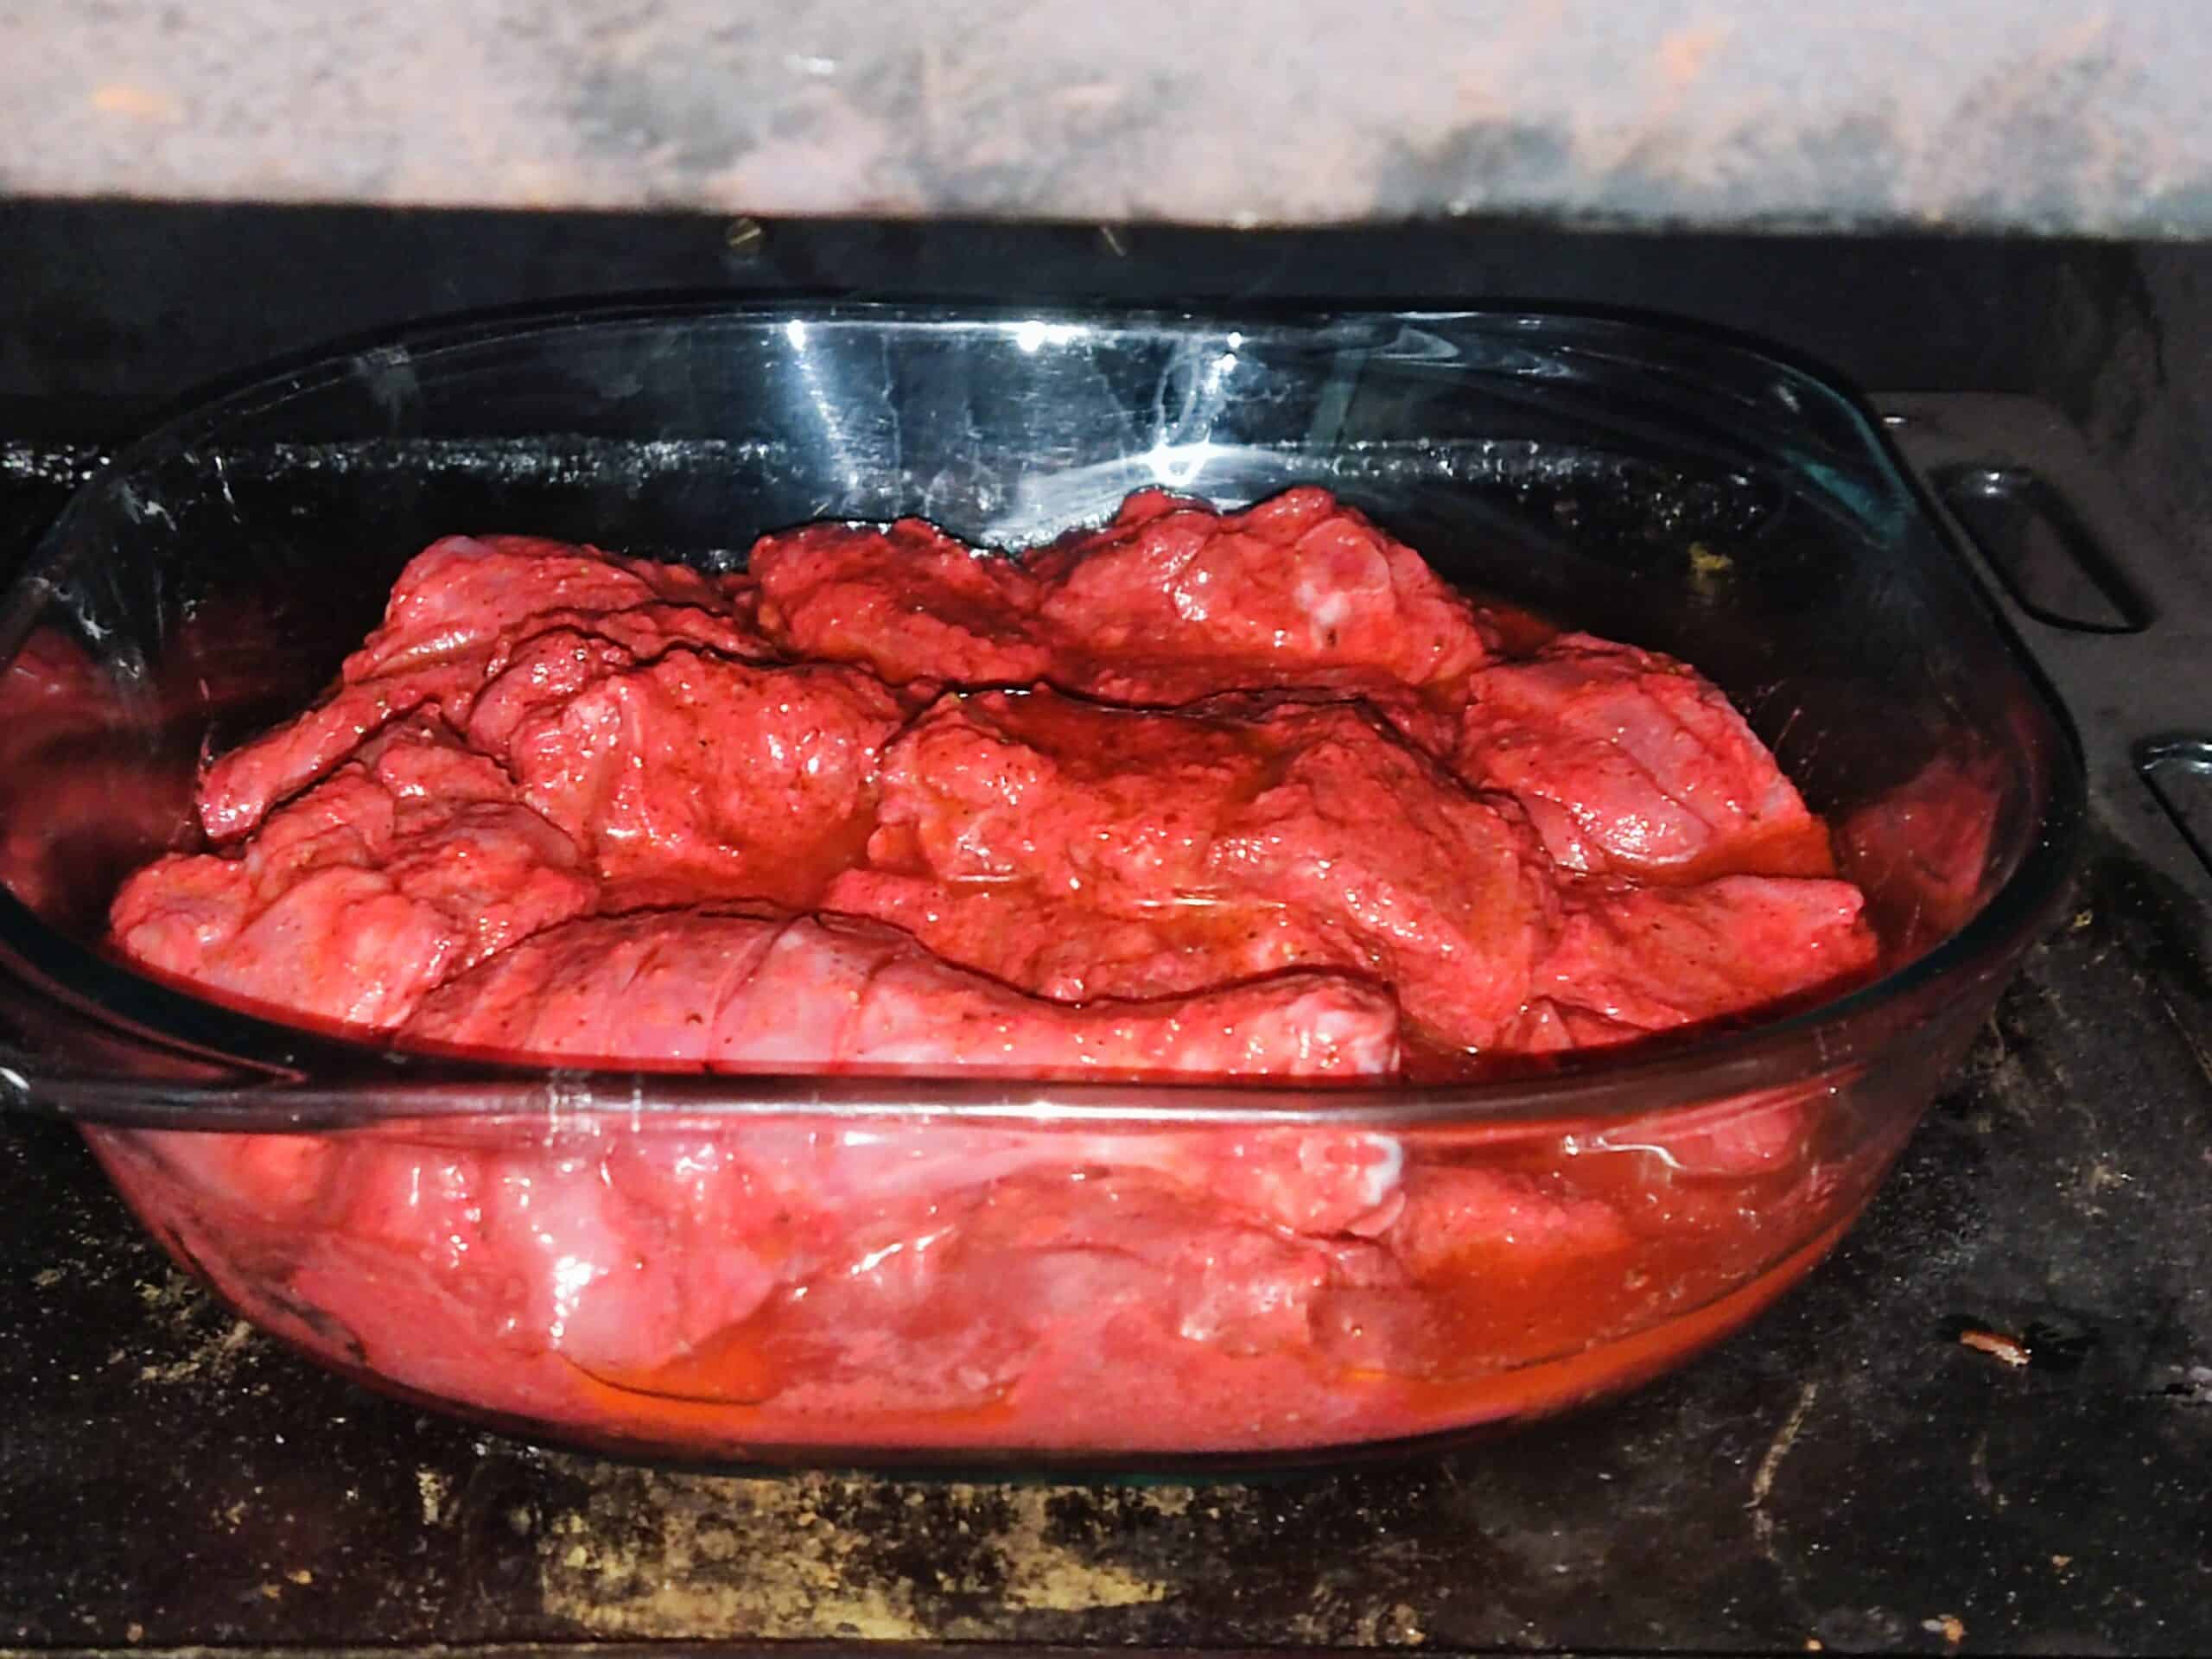
- Step 3: Marinate the chicken. Add the scored chicken pieces to the bowl and use your hands to work the marinade into every cut and surface. Cover the bowl tightly with plastic wrap and refrigerate for at least 5 hours, preferably overnight. If you're marinating overnight, pull it out of the fridge 30 minutes before cooking so it comes to room temperature — cold chicken straight into a hot oven tightens up and cooks unevenly.
- Step 4: Bake the chicken. Preheat your oven to 430°F–465°F (220°C–240°C). Place an oven-safe wire rack on top of a foil-lined sheet pan, and lay the chicken pieces on the rack with space between each piece. Bake for 15–18 minutes, then pull the tray out, baste the tops with butter or ghee using a brush, flip each piece, and bake another 15 minutes. For that deep char on top, switch the oven to broil for the last 5–7 minutes and watch it closely — it goes from beautiful to burnt fast.
- Step 5: Optional smoke step. If you want that authentic tandoor smokiness at home, heat a small piece of natural coal directly over a gas flame until it glows red. Place it in a small piece of foil in the center of your baking pan alongside the cooked chicken, drizzle a few drops of oil onto the coal, and immediately cover everything with a lid or foil for 2–3 minutes. The smoke infuses into the chicken. It's optional, but if you can do it, do it — the difference is real.
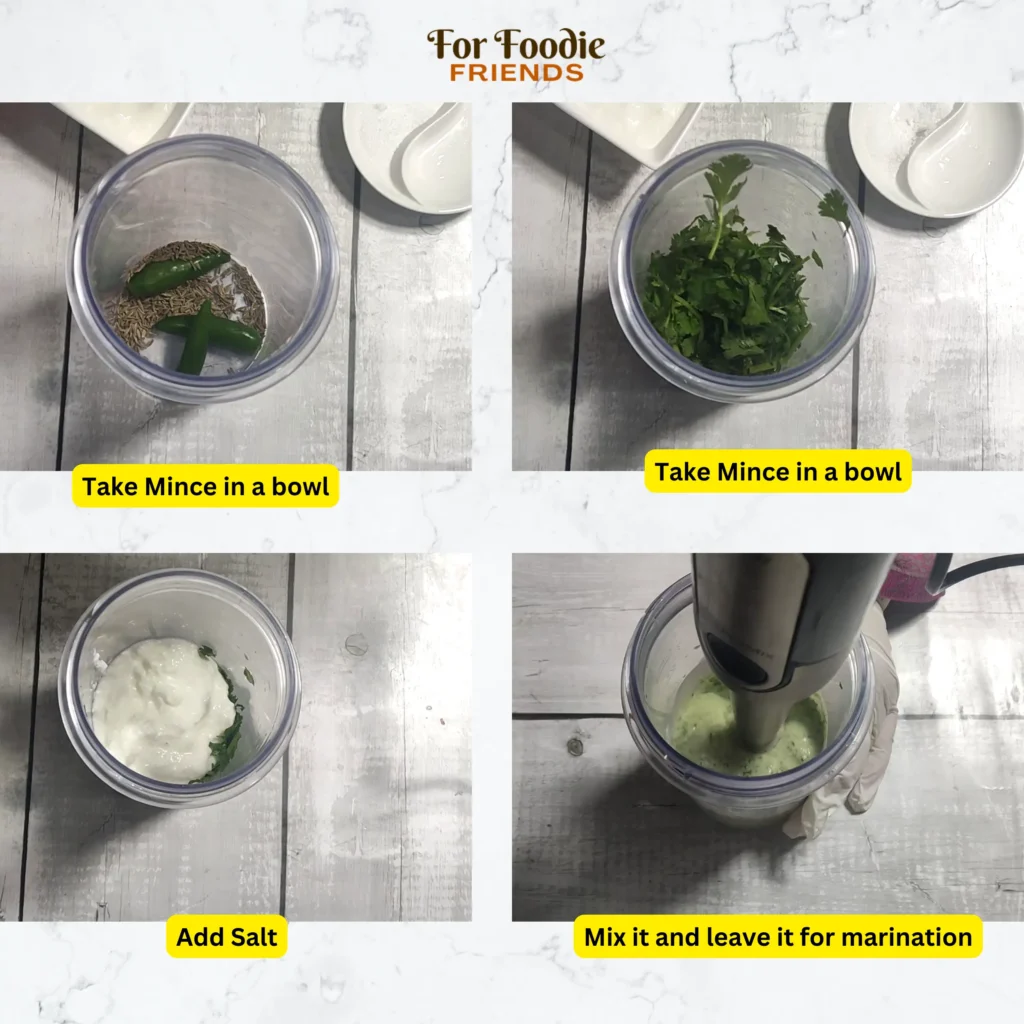
- Step 6: Make the green raita. While the chicken rests, add the yogurt, green chilies, cumin seeds, salt, and fresh cilantro to a blender. Blend until smooth. Taste and adjust salt. This raita is cooling and bright — it's the right contrast to the smoky spiced chicken. If you don't have a blender, finely chop the chilies and cilantro and whisk everything together by hand. It'll be chunkier but still good.
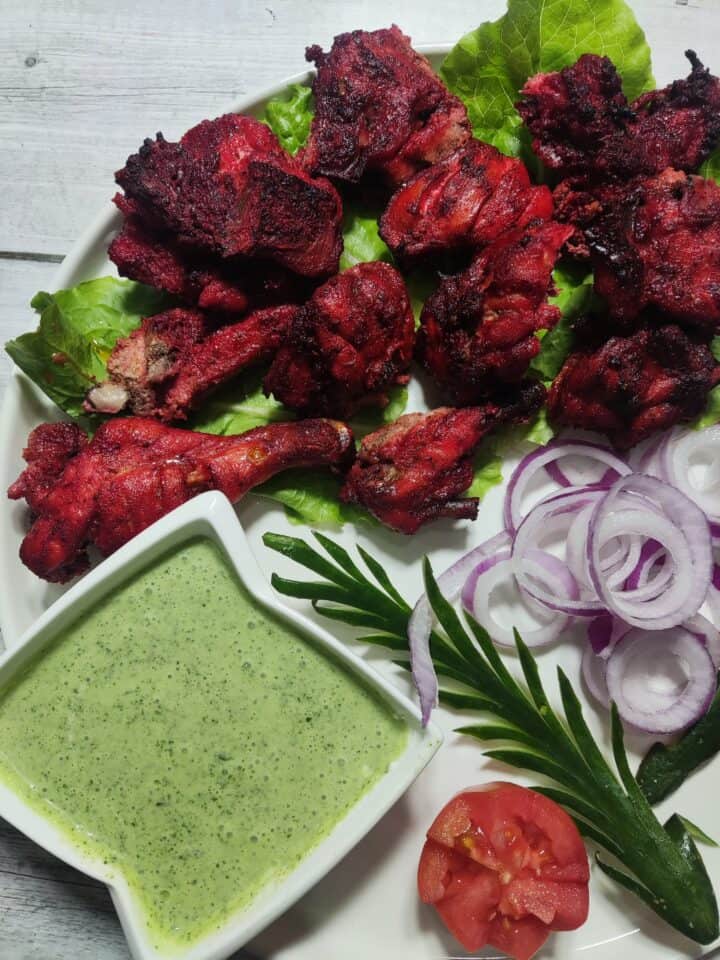
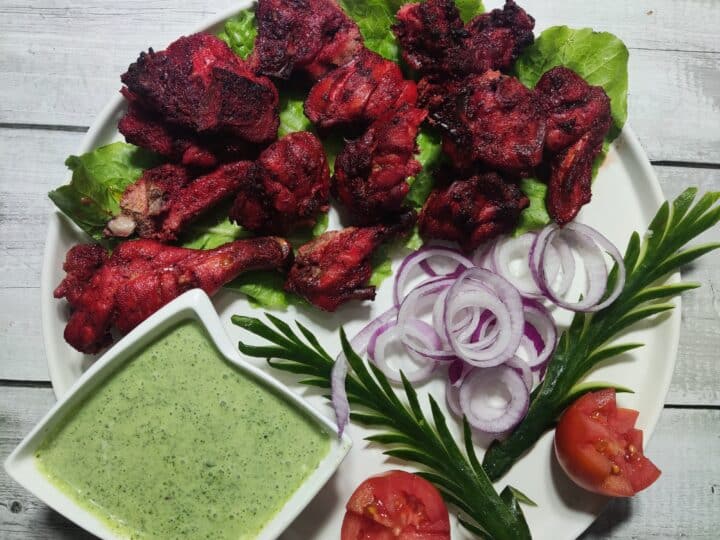
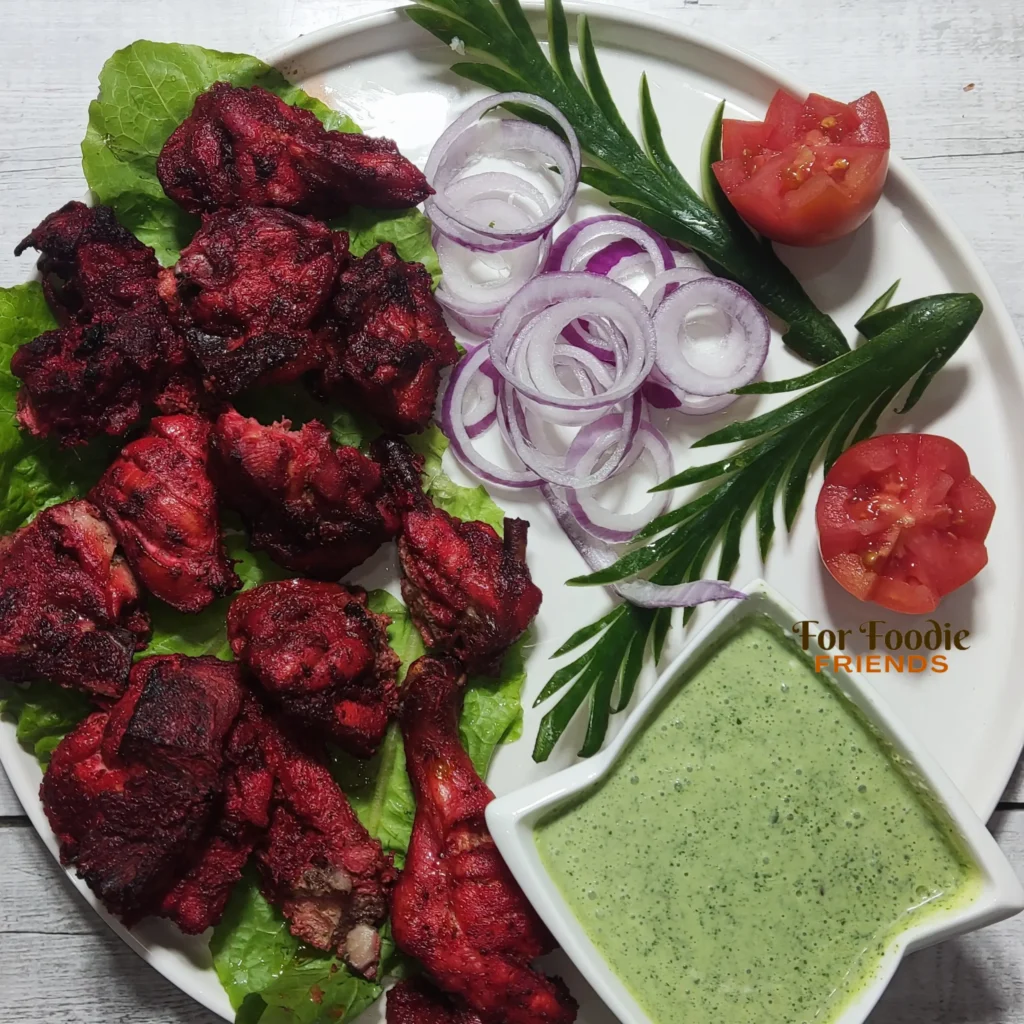
- Step 7: Plate and serve. Arrange the chicken on a platter with sliced red onion, lemon wedges, and a fresh green salad. Serve the raita in a small bowl on the side. Squeeze extra lemon over the chicken right before eating — it wakes everything up.
Tips for Success
- Use leg quarters, not breast meat: I know breast is leaner and feels like the "healthier" choice, but it dries out fast at the high temperatures this recipe needs. Bone-in leg quarters have enough fat to stay moist through the whole cook time. The bone also adds flavor from the inside while the marinade works from the outside. Every time I've tried this with breast meat it came out dry — now I stick with legs.
- Score deep, not shallow: The cuts need to reach the bone, not just nick the surface. I used to make shallow cuts thinking that was enough — it isn't. The marinade is thick and it needs a real channel to get inside the meat. Three cuts per piece, deep enough that you can see the flesh open up. That's how you get flavor all the way through.
- Use a wire rack on top of your sheet pan: If you place the chicken directly on the pan, the bottom sits in its own liquid and steams instead of roasting. The rack lifts the chicken so heat circulates all around it. Any oven-safe rack from a dollar store or Walmart works — I use a cheap cooling rack that fits inside my sheet pan. It's made a noticeable difference in how the underside chars.
- Don't skip the butter baste at the flip: When you pull the chicken out halfway to flip it, take 30 seconds to brush melted butter or ghee over the tops. This helps the color develop and adds a richness to the crust that oil alone doesn't give you. Ghee is traditional and gives a slightly nuttier flavor — if you don't have ghee, regular unsalted butter is fine.
- Watch the broiler closely: I've burnt the tops more than once by walking away during the broil step. Three minutes in, I check it. Five minutes in, I'm standing at the oven. The difference between perfectly charred and scorched is about 90 seconds. Once you see those dark spots forming on the edges of the spice coating, you're close — pull it when it looks like a restaurant plate, not a campfire.
Variations
- BBQ grill version: This is actually the version my husband prefers in summer. Place the marinated chicken directly on a medium-high grill, cook each side 12–15 minutes, then cover and let it finish for another 5 minutes. The coal in the grill gives you that smoky char without any extra steps. You don't need to do the coal infusion trick — the grill does it naturally. Just keep a close eye so the sugars in the marinade don't burn before the chicken is cooked through.
- Boneless chicken tikka version: Cut boneless thighs into 2-inch chunks, use the exact same marinade, and thread them onto skewers. Grill or broil for 10–12 minutes total, turning once. This is the version most Western restaurants call "chicken tikka" — same spice base, just boneless and bite-sized. It's also great tucked into wraps with the raita and some sliced onion. This is not the traditional full-leg presentation, but it's practical for weeknight serving.
- Milder family version: Reduce the red chili powder to ¼ teaspoon and skip the black pepper. The chicken will still be beautifully spiced and aromatic — cumin, coriander, and garam masala carry a lot of flavor on their own without the heat. This is how I make it when we're hosting kids who aren't used to spice. The color is still stunning, especially with the red food color in.
- Tandoori chicken wraps (using leftovers): Pull the leftover meat off the bone, warm it in a skillet with a little butter, and serve it in a flatbread with sliced onion, tomato, the green raita, and a squeeze of lemon. It's one of my favorite things to make on a Sunday when there's leftover chicken from Saturday. The spiced chicken in a wrap is completely different from the platter version — just as good in a different way.
Serving and Storage
Serving
Tandoori chicken is traditionally served on a platter with sliced raw onions, lemon wedges, and fresh green chutney or the yogurt raita from this recipe. In Pakistan we always put out both a raita and a mint chutney alongside it — the two sauces cover different bases, one cooling and creamy, one sharp and herby. For a full meal, serve it with hot naan or tandoori roti if you can get it. If you're serving readers in the US or UK who don't have easy access to fresh naan, warm pita bread or even plain flatbread works well. A simple cucumber-tomato salad on the side makes it a complete plate.
Storage
Cooked tandoori chicken keeps in an airtight container in the fridge for up to 3 days. To reheat, put it on a foil-lined baking sheet in a 375°F (190°C) oven for 10–12 minutes and brush with a little ghee or butter before it goes in — this brings the outside back to life instead of leaving it dry. Microwaving works in a pinch but you'll lose the crust texture. For freezing, let the chicken cool completely, wrap individual pieces in foil, and store in a zip-lock bag for up to 2 months. Thaw overnight in the fridge before reheating.
Frequently Asked Questions
Can I marinate for less than 5 hours?
Yes, 2 hours will work if that's all the time you have. The flavor won't be as deep and the meat near the bone won't be as well-seasoned, but it'll still taste good. If you're short on time, make sure you score the chicken extra deeply so the marinade gets as far inside as possible. Overnight really is the version worth waiting for though — there's a clear difference.
Can I make this without red food color?
Absolutely. The food color is purely cosmetic — it gives that vivid red-orange color you see in restaurant tandoori. Without it, the chicken will be a deeper brownish-orange from the chili powder and the char, which honestly looks just as good to me. Skip it without any worry. The flavor is identical either way.
Can I cook this in an air fryer?
Yes, it works well in an air fryer. Cook at 400°F (200°C) for about 20–25 minutes, flipping halfway and basting with ghee at the flip. The air fryer gives you a nice crust without as much mess. The one limitation is size — air fryer baskets are small, so you might need to cook in batches. Don't crowd the basket or the chicken will steam instead of roast.
I can't find ginger garlic paste at my store. What do I do?
Make it at home — it takes five minutes. Blend equal parts fresh ginger and fresh garlic cloves (about 2 tablespoons each) with a tiny splash of water until smooth. That's it. The jarred version you'll find at South Asian grocery stores, or sometimes at Walmart in the international aisle, is just a more concentrated version of the same thing. Fresh-made actually tastes better.
How do I know when the chicken is fully cooked?
The most reliable way is a meat thermometer — the thickest part of the thigh (not touching bone) should read 165°F (74°C). If you don't have a thermometer, cut into the thickest part near the bone: the juices should run clear and the meat should not look pink. Bone-in chicken takes longer than you expect at the bone — don't pull it early just because the outside looks done.
Chicken Tandoori
Equipment
- 1 Mixing Bowl To combine the ingredients and marinate the chicken in
- 1 Measuring Spoons To measure all the ingredients.
- 1 Knife and chopping board: To prepare the raita, or yoghurt dip ingredients.
- 1 Blender : To prepare the raita.
- 1 Griller To bake the chicken tandoori.
Ingredients
- 1 kg Chicken with cuts
- 4 tablespoons Yogurt
- ¼ cup Oil
- ¾ teaspoon Black Pepper
- 1 teaspoon Cumin Powder Zeera
- ¾ teaspoon Coriander Powder
- Salt to taste
- ¼ teaspoon Garam Masala
- ¼ teaspoon Red Food Color
- 1 tablespoon Ginger Garlic Paste
- Lemon Juice
Instructions
PART 1: PREPARING MASALA, OR MARINATION FOR CHICKEN TANDOORI
- In a bowl, combine 4 tablespoons of yoghurt, ¼ cup of oil, ¾ teaspoon of black pepper, 1 teaspoon of cumin powder, ¾ teaspoon of coriander powder, 2 teaspoons of salt, ¾ teaspoon of red chilli powder, ¼ teaspoon of garam masala, ¼ teaspoon of red food colour, and 1 tablespoon of ginger garlic paste.
- Mix the ingredients thoroughly.
- Add lemon juice and continue mixing until a uniform masala paste is formed.
PART 2: MARINATING THE CHICKEN
- Add the chicken pieces to the masala mixture and ensure they are well-coated.
- Allow the chicken to marinate for a minimum of 5 hours, preferably overnight for enhanced flavour.
PART 3: BAKING THE CHICKEN
- Preheat the oven to 220-240 C. Now place the chicken on a greased baking grill, and place the grill on top of a baking sheet. Leave space between each chicken piece for easy handling. Bake the marinated chicken for 15-18 minutes. Then baste it with some butter or ghee using a brush. Turn the chicken pieces over and bake for another 15 minutes, so both sides cook evenly. You can also broil for an additional 5-7 minutes if you want a deeper colour on the chicken.
PART 4: MAKING THE RAITA
- In a blender, combine 2 to 3 green chillies, ½ tablespoon of white cumin (zeera), ½ teaspoon of salt, fresh coriander, and 150 grams of yoghurt.
- Blend the ingredients to create a smooth and flavorful raita.
DISH OUT:
- Arrange a platter and place freshly cut salad on it for a vibrant presentation.
- Serve the prepared raita in a small bowl.
- Arrange the cooked chicken on the platter to create an appealing and appetizing display.
Video




Comments
No Comments