
Chocolate cookies are one of those things that sound simple until you're standing in front of a dozen different recipes and have no idea which one is actually worth your time. I've been baking them for years — classic chocolate chip, fudgy double chocolate, crinkles, brownie-style, stuffed, gluten-free, vegan — and I still have a folder on my phone of recipes I want to try. The problem isn't that there aren't enough good chocolate cookie recipes out there. The problem is sorting through the noise to find the ones that genuinely deliver. That's what this list is.
A good chocolate cookie has to actually taste like chocolate — not just look like it. The texture matters too: whether you're going for crispy edges with a chewy center, a crackled top with a fudgy middle, or a melt-in-your-mouth shortbread style, the cookie has to follow through on what it promises. I also look for recipes that work in a regular home kitchen with ingredients you can actually find. No specialty imports, no complicated techniques that require tools I don't own. If I can make it on a Tuesday night after the kids are home from school, it belongs here.
This list covers a serious range — from the crowd-favorite Crumbl Copycat Chocolate Peanut Butter Chip Cookies to a surprisingly elegant Italian Chocolate Salami, plus everything in between like Cayenne Chocolate Cookies (yes, spicy chocolate is a thing and it works), Chai Spice Chocolate Chip Cookies, and a Chocolate S'mores Cookie that Saad has been asking me to make again since the first time I brought it out. There are also vegan and gluten-free options scattered throughout for when you're baking for a crowd with different needs. If you're looking for more baking inspiration, my posts on easy chocolate desserts and best cookie recipes are worth a look too.
Here are the 31 chocolate cookie recipes I keep coming back to — pick one that fits your mood, your pantry, or whoever you're baking for.
Top 31 Chocolate Cookie Recipes

31. Raspberry Chocolate Thumbprint Cookies

Thumbprint cookies are one of those things that look fancier than they are, and this raspberry chocolate version earns its spot at the very end of this list by being genuinely hard to stop eating. The base is a chocolate cookie dough — slightly crisp on the edges, chewy in the center — and the little well in the middle gets filled with a quick raspberry ganache that sets just enough to hold its shape. No chilling required, which I appreciate on days when I need cookies fast. The raspberry cuts through the richness in a way that feels almost elegant, even when you're eating them standing at the counter.
Ingredients
- 1 cup all-purpose flour
- ⅓ cup unsweetened cocoa powder
- ¼ teaspoon salt
- ½ cup (1 stick) unsalted butter, softened
- ⅓ cup granulated sugar
- 1 egg yolk
- 1 teaspoon vanilla extract
- ½ cup semi-sweet chocolate chips (for ganache)
- 3 tablespoons heavy cream
- 2 tablespoons raspberry jam, strained
Instructions
- Preheat oven to 350°F. Line a baking sheet with parchment paper. Whisk together flour, cocoa powder, and salt in a bowl and set aside.
- Beat butter and sugar together until light, about 2 minutes. Add egg yolk and vanilla and beat until combined. Stir in the flour mixture until a soft dough forms.
- Roll dough into 1-inch balls and place on the prepared baking sheet 2 inches apart. Press your thumb firmly into the center of each ball to make a well.
- Bake for 10-12 minutes until the edges are set. If the wells have puffed up, gently press them down again right out of the oven. Let cool completely on the pan.
- Make the ganache: heat cream until just simmering, pour over chocolate chips, and let sit 1 minute before stirring smooth. Stir in the strained raspberry jam. Spoon into each cookie well and let set at room temperature for 30 minutes.
Tips
- Tip: Strain the raspberry jam through a fine mesh sieve before stirring it into the ganache — the seeds in the filling bother some people and it only takes 30 seconds to remove them.
- Tip: If your ganache thickens too much before you fill the cookies, set the bowl over a pot of warm water and stir gently for a minute — it loosens right back up.
- Tip: These store well in a single layer in an airtight container at room temperature for up to 3 days — stacking them will smear the ganache centers.
30. Chocolate Crinkle Cookies

Chocolate crinkle cookies are one of those classics I kept seeing in holiday roundups for years before I finally made them myself. The texture is what gets you — they bake up soft and fudgy in the center, almost like a brownie that decided to become a cookie, with a slightly crisp edge from the powdered sugar coating. That coating is also what creates the signature cracked look as they spread in the oven, which makes them look dramatic without any actual effort on your part. This is a recipe that requires chilling the dough, so plan ahead, but the actual hands-on time is minimal.
Ingredients
- 1 cup all-purpose flour
- ½ cup unsweetened cocoa powder
- 1 teaspoon baking powder
- ¼ teaspoon salt
- ¾ cup granulated sugar
- ¼ cup vegetable oil
- 2 large eggs
- 1 teaspoon vanilla extract
- ½ cup powdered sugar (for rolling)
Instructions
- Whisk together flour, cocoa powder, baking powder, and salt in a bowl. In a separate bowl, whisk sugar, oil, eggs, and vanilla until smooth and slightly thickened.
- Stir the dry ingredients into the wet until a sticky dough forms. Cover and refrigerate for at least 2 hours or overnight — this is not optional, the dough is too soft to roll otherwise.
- Preheat oven to 350°F. Line baking sheets with parchment. Scoop tablespoon-sized portions of dough, roll into balls, then roll generously in powdered sugar until fully coated.
- Place on the prepared baking sheet 2 inches apart. Bake 10-12 minutes until the tops are cracked and the centers look just barely set — they firm up as they cool, so don't overbake.
- Cool on the pan for 5 minutes before transferring. They're fragile when hot but hold together perfectly once cooled.
Tips
- Tip: Be generous with the powdered sugar coating — a thin coat disappears into the cookie as it bakes and you lose the contrast. Roll each ball twice if you want distinct white cracks.
- Tip: The dough keeps in the fridge for up to 3 days, so you can bake a fresh batch each day if you're making these for a cookie box or holiday spread.
- Tip: For a deeper chocolate flavor, swap 2 tablespoons of the cocoa for Dutch-process cocoa — it makes a noticeable difference and you can find it at most grocery stores or on Amazon.
29. Chocolate Peppermint Crinkle Cookies (Gluten-Free, Vegan, Allergy-Free)
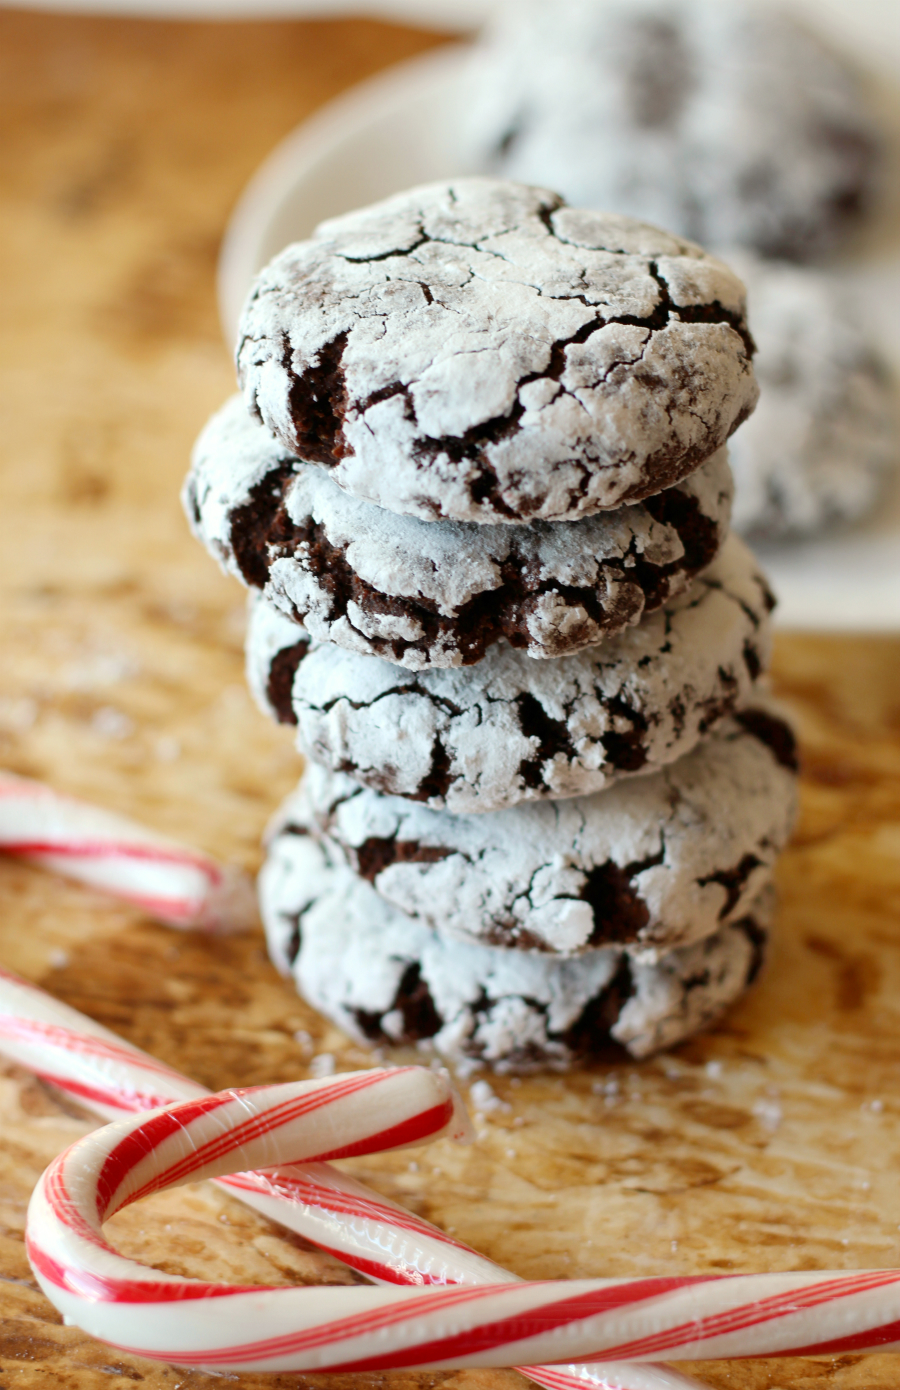
I included this one specifically because every holiday gathering I go to has at least one person with a dietary restriction, and it's awkward to have nothing on the cookie tray they can eat. These gluten-free, vegan crinkle cookies solve that without asking anyone to compromise on flavor. The peppermint gives them a cool, festive quality that pairs beautifully with the dark chocolate base, and the powdered sugar coating creates that classic crinkled look. Nobody at the table will guess they're allergy-friendly unless you tell them — I've tested this theory.
Ingredients
- 1 cup gluten-free all-purpose flour blend (such as Bob's Red Mill 1-to-1)
- ½ cup unsweetened cocoa powder
- 1 teaspoon baking powder
- ¼ teaspoon salt
- ¾ cup granulated sugar
- ¼ cup melted coconut oil
- 1 flax egg (1 tablespoon ground flaxseed + 3 tablespoons water, rested 5 minutes)
- ¾ teaspoon peppermint extract
- 1 teaspoon vanilla extract
- ½ cup powdered sugar (for rolling — check it's vegan if needed)
Instructions
- Mix the flax egg first and set aside for 5 minutes to gel. Whisk together the gluten-free flour, cocoa, baking powder, and salt in a medium bowl.
- In a large bowl, stir together sugar, melted coconut oil, flax egg, peppermint extract, and vanilla until smooth. Add the dry ingredients and stir until a dough forms. It will be soft — refrigerate for at least 1 hour.
- Preheat oven to 350°F and line a baking sheet with parchment. Scoop tablespoon-sized portions of dough, roll into balls, and coat thoroughly in powdered sugar.
- Bake 10-12 minutes until cracked on top and just set. Cool on the pan for 10 minutes before moving — gluten-free cookies need extra resting time to hold together.
Tips
- Tip: Peppermint extract is stronger than vanilla — start with ½ teaspoon if you're unsure, taste the dough, and add more from there. Too much and it tastes like toothpaste.
- Tip: The flax egg works well here, but if you're not vegan and just need gluten-free, swap in a regular egg for a slightly better texture and chewier center.
- Tip: Bob's Red Mill 1-to-1 Gluten-Free Flour is available at Walmart, Target, and most major grocery stores — it's the most reliable swap for regular flour in cookies like these.
28. Chocolate S'mores Cookies

S'mores cookies are exactly what they sound like — a chocolate cookie base loaded with mini marshmallows and chocolate chunks, rolled in crushed graham crackers before baking so every bite has that campfire combination of flavors. Saad saw these on my phone once and immediately asked when I was making them, which told me everything I needed to know about adding them to this list. The marshmallows get gooey and slightly toasted in the oven, the chocolate melts into pockets, and the graham cracker crust gives the outside a gentle crunch. These are a bit messy to eat, which is entirely appropriate for anything called a s'more.
Ingredients
- 1¼ cups all-purpose flour
- ⅓ cup unsweetened cocoa powder
- ½ teaspoon baking soda
- ¼ teaspoon salt
- ½ cup (1 stick) unsalted butter, softened
- ¾ cup brown sugar, packed
- 1 large egg
- 1 teaspoon vanilla extract
- ¾ cup semi-sweet chocolate chunks
- ¾ cup mini marshmallows
- ¾ cup graham cracker crumbs (about 5-6 full crackers crushed)
Instructions
- Preheat oven to 350°F and line a baking sheet with parchment. Spread graham cracker crumbs in a shallow bowl and set aside. Whisk flour, cocoa, baking soda, and salt together.
- Beat butter and brown sugar together until fluffy, about 2 minutes. Mix in egg and vanilla. Stir in the dry ingredients until just combined, then fold in chocolate chunks and marshmallows.
- Scoop dough into 2-tablespoon portions and roll each ball in the graham cracker crumbs to coat. Place on the prepared baking sheet 2 inches apart.
- Bake 10-12 minutes. The marshmallows will puff up and the cookies will look slightly underdone — that's correct. They set up as they cool and the marshmallows will deflate a little. Cool on the pan at least 5 minutes before eating.
Tips
- Tip: Mini marshmallows work much better than regular ones here — large marshmallows expand too aggressively and push the cookies apart as they bake.
- Tip: If some marshmallows are sticking to the parchment after baking, slide a spatula under the cookie while it's still slightly warm — waiting too long makes them stick firmly as the sugar hardens.
- Tip: These are best eaten the day they're baked. By day two the marshmallows get chewy in a less pleasant way, so bake only what you'll finish.
27. Shortcut Texas Sheet Cake Cookies
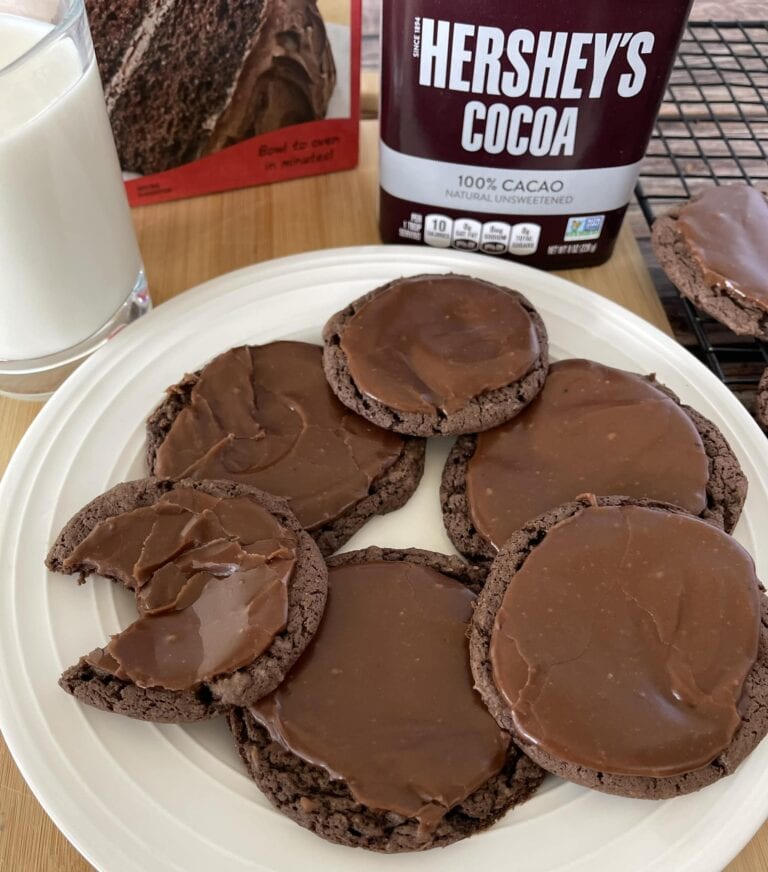
Texas sheet cake is one of those American desserts I came to late — the first time I had it at a potluck I genuinely didn't understand how a cake could be that moist and fudgy. This cookie version takes everything good about that cake and makes it handheld, starting with a chocolate cake mix base that cuts your prep time in half. The real payoff is the poured chocolate fudge frosting on top, made on the stovetop with butter, cocoa, and powdered sugar, exactly like the original cake. It sets into a thin, slightly crackled layer that makes these look and taste far more involved than they actually are.
Ingredients
- 1 box (15.25 oz) chocolate fudge cake mix (such as Betty Crocker or Duncan Hines)
- 2 large eggs
- ⅓ cup vegetable oil
- For the Texas frosting:
- ¼ cup (½ stick) unsalted butter
- 3 tablespoons whole milk
- 3 tablespoons unsweetened cocoa powder
- 2 cups powdered sugar, sifted
- ½ teaspoon vanilla extract
Instructions
- Preheat oven to 350°F and line baking sheets with parchment. Stir together cake mix, eggs, and oil until a thick dough forms — it will be stiffer than regular cake batter.
- Scoop tablespoon-sized balls onto the prepared baking sheets, spacing them 2 inches apart. Bake 8-10 minutes — pull them while the centers still look slightly soft. They firm up quickly.
- Let cookies cool on the pan for 5 minutes, then transfer to a wire rack set over parchment paper (the parchment catches drips from the frosting).
- Make the frosting: melt butter in a small saucepan over medium heat. Whisk in milk and cocoa and bring to a gentle simmer. Remove from heat, whisk in powdered sugar and vanilla until smooth.
- Spoon warm frosting over each cookie immediately — it sets fast as it cools, so work quickly. Let the frosting firm up completely before stacking or storing.
Tips
- Tip: The frosting sets within minutes of being poured, so have all your cookies cooled and on the rack before you even start making it — there's no time to scramble once it's ready.
- Tip: If the frosting seizes up before you finish spooning it, return the pan to low heat for 30 seconds and whisk again — it loosens right back up.
- Tip: Cake mix brands vary slightly in sweetness — Duncan Hines tends to be a touch less sweet than Betty Crocker, which I prefer for these since the frosting is already quite rich.
26. Chocolate Covered Peanuts

Okay, these aren't cookies in the traditional sense, but they belong on this list because they scratch exactly the same itch — that chocolate fix you need in under 15 minutes. I make a big batch of these around the holidays when I need something to package up quickly for neighbors or the kids' teachers. All you need is a bag of roasted peanuts and some good chocolate wafers, and you're done. Melt, stir, drop, cool — that's genuinely the whole process. Store them in an airtight container and they'll keep at room temperature for up to a week, if they last that long.
Ingredients
- 2 cups roasted salted peanuts
- 2 cups semi-sweet chocolate wafers or chocolate chips (such as Ghirardelli melting wafers)
- 1 teaspoon coconut oil or vegetable shortening (optional, for smoother chocolate)
- Flaky sea salt for topping (optional but recommended)
Instructions
- Melt the chocolate wafers in a microwave-safe bowl in 30-second intervals, stirring between each, until fully smooth. Add coconut oil if using — it helps the chocolate coat more evenly and gives a nice sheen.
- Add the peanuts to the melted chocolate and stir until every peanut is well coated.
- Drop spoonfuls onto a parchment-lined baking sheet, forming small clusters. Sprinkle with flaky sea salt immediately before the chocolate sets.
- Let them set at room temperature for about 30 minutes, or pop the tray in the fridge for 15 minutes if you're in a hurry. Store in an airtight container for up to 7 days.
Tips
- Tip: Use good-quality melting wafers rather than standard chocolate chips — they melt cleaner and set with a better snap.
- Tip: For gifting, let clusters fully set and then layer them in a small tin or cellophane bag with a ribbon — they hold their shape well at room temperature.
- Tip: Swap peanuts for cashews or almonds if you need a peanut-free version — both work beautifully with dark chocolate.
25. Dutch Chocolate Cookies

Dutch-process cocoa does something to a cookie that regular cocoa just can't replicate — it gives you this deep, almost mahogany color and a flavor that's rich without being sharp or acidic. These are slice-and-bake cookies, which means you make the dough, roll it into a log, chill it, and slice when you're ready to bake. Less fuss than drop cookies, honestly. The crunchy sugar topping is what puts them over the edge — that little sparkle and crunch on an otherwise dense, dark cookie is exactly the contrast you want.
Ingredients
- 1¼ cups all-purpose flour
- ½ cup Dutch-process cocoa powder (such as Droste or King Arthur)
- ½ teaspoon baking soda
- ¼ teaspoon salt
- ½ cup (1 stick) unsalted butter, softened
- ¾ cup granulated sugar
- 1 large egg
- 1 teaspoon vanilla extract
- 3 tablespoons coarse or turbinado sugar, for rolling
Instructions
- Whisk together flour, cocoa powder, baking soda, and salt in a bowl and set aside. In a separate large bowl, beat butter and sugar together until light and fluffy, about 2-3 minutes.
- Mix in the egg and vanilla until combined, then fold in the flour mixture until a soft dough forms. Don't overwork it.
- Shape the dough into a log about 2 inches in diameter on a piece of plastic wrap. Roll the log in coarse sugar so the outside is well coated. Wrap tightly and refrigerate for at least 1 hour.
- Preheat oven to 350°F. Slice the chilled log into ¼-inch rounds and place on a parchment-lined baking sheet about 1 inch apart. Bake for 10-12 minutes until set. They'll firm up as they cool, so don't overbake.
Tips
- Tip: Dutch-process cocoa is key here — natural cocoa gives a different, more acidic flavor and won't produce the same dark color. Find it at Walmart in the baking aisle or order online.
- Tip: The dough log can be wrapped and frozen for up to 2 months — slice and bake straight from frozen, just add 2 extra minutes.
- Tip: A sharp knife (not a serrated one) gives you the cleanest slices and keeps the round shape intact.
24. Triple Chocolate Cookies

Triple chocolate means cocoa powder in the dough, semi-sweet chips folded in, and dark chocolate chunks on top — and yes, all three matter. Each one plays a different role: the cocoa gives the base its depth, the chips melt into pockets of gooey sweetness, and the chunks on top give you that visible, dramatic chocolate pull when you break one open. These come together in about 15 minutes of active work, and they bake up soft and chewy in the middle with just a little crisp around the edges. Zainab is the one who requests these — she calls them "the darkest ones" and that's exactly how I know I've gotten it right.
Ingredients
- 1 cup all-purpose flour
- ⅓ cup unsweetened cocoa powder
- 1 teaspoon baking soda
- ¼ teaspoon salt
- ½ cup (1 stick) unsalted butter, softened
- ¾ cup granulated sugar
- ¼ cup packed brown sugar
- 2 large eggs
- 1 teaspoon vanilla extract
- ¾ cup semi-sweet chocolate chips
- ½ cup dark chocolate chunks or chopped dark chocolate bar
Instructions
- Preheat oven to 350°F and line two baking sheets with parchment paper. Whisk flour, cocoa, baking soda, and salt together in a bowl.
- Beat butter and both sugars until fluffy, about 2 minutes. Add eggs one at a time, mixing well after each, then stir in vanilla.
- Fold the dry ingredients into the wet until just combined, then stir in the chocolate chips and most of the chocolate chunks, reserving a handful for the tops.
- Scoop rounded tablespoons onto the prepared baking sheets, spacing 2 inches apart. Press a few reserved chocolate chunks on top of each ball.
- Bake for 10-11 minutes until the edges are set but the center still looks slightly underdone. They'll firm up on the pan. Cool for 5 minutes before moving.
Tips
- Tip: Chilling the dough for 30 minutes before baking gives you thicker cookies that spread less — worth it if you have the time.
- Tip: Don't overbake — pulling them out when the centers look underdone is the key to that soft, fudgy middle.
- Tip: Use a good-quality dark chocolate bar (70% cacao) chopped into rough chunks rather than pre-bagged chunks — the irregular pieces melt more interestingly.
23. Dairy Milk Chocolate Cookies
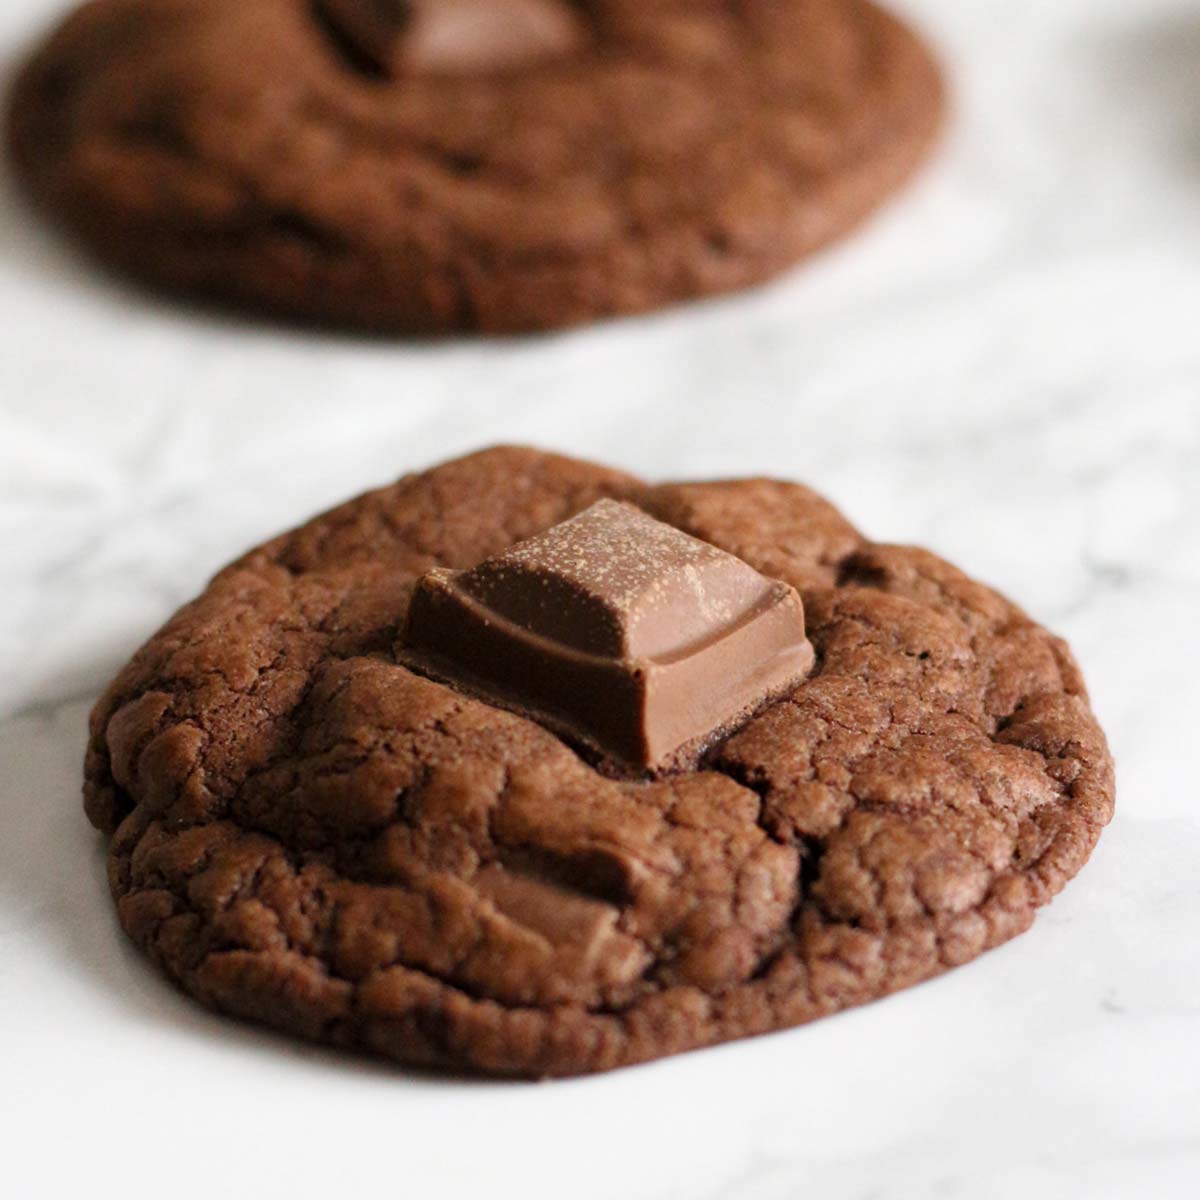
If you've ever bought a Cadbury Dairy Milk bar and thought "what if this was inside a cookie," this is that exact idea executed properly. The milk chocolate chunks are sweeter and creamier than semi-sweet chips, which makes these cookies feel almost candy-like in the best way. The dough itself is simple — no fancy steps, no chill time required — and they're done in about 12 minutes flat. Soft, chewy, and properly chocolatey, these are the cookies that disappear from the cooling rack before I've even finished washing up. You can use any full-fat milk chocolate bar broken into rough pieces — Cadbury or Hershey's both work.
Ingredients
- 1¾ cups all-purpose flour
- 1 teaspoon baking soda
- ½ teaspoon salt
- ¾ cup (1½ sticks) unsalted butter, softened
- ½ cup granulated sugar
- ½ cup packed brown sugar
- 2 large eggs
- 2 teaspoons vanilla extract
- 1½ cups Cadbury Dairy Milk or other milk chocolate bar, roughly chopped (about 2 standard bars)
Instructions
- Preheat oven to 375°F. Whisk flour, baking soda, and salt together in a bowl and set aside.
- Beat butter and both sugars together until light and fluffy, about 2-3 minutes. Add eggs one at a time, then vanilla, mixing until smooth.
- Stir the flour mixture into the butter mixture until just combined. Fold in the chopped milk chocolate pieces.
- Drop rounded tablespoons of dough onto parchment-lined baking sheets, spacing about 2 inches apart. Bake for 10-12 minutes until the edges are golden but the centers still look soft.
- Let cool on the pan for 5 minutes before transferring — they'll be very soft straight from the oven and need that time to set.
Tips
- Tip: Milk chocolate burns faster than dark or semi-sweet, so keep a close eye on these in the last 2 minutes of baking — every oven is different.
- Tip: Chop the chocolate bar into uneven pieces rather than uniform chunks — the variety means some bits melt completely into the dough while others stay as visible chunks.
- Tip: These freeze well — bake, cool completely, and freeze in a zip-lock bag for up to 2 months. Reheat for 20 seconds in the microwave and they're back to fresh.
22. Double Chocolate Chip Cookies
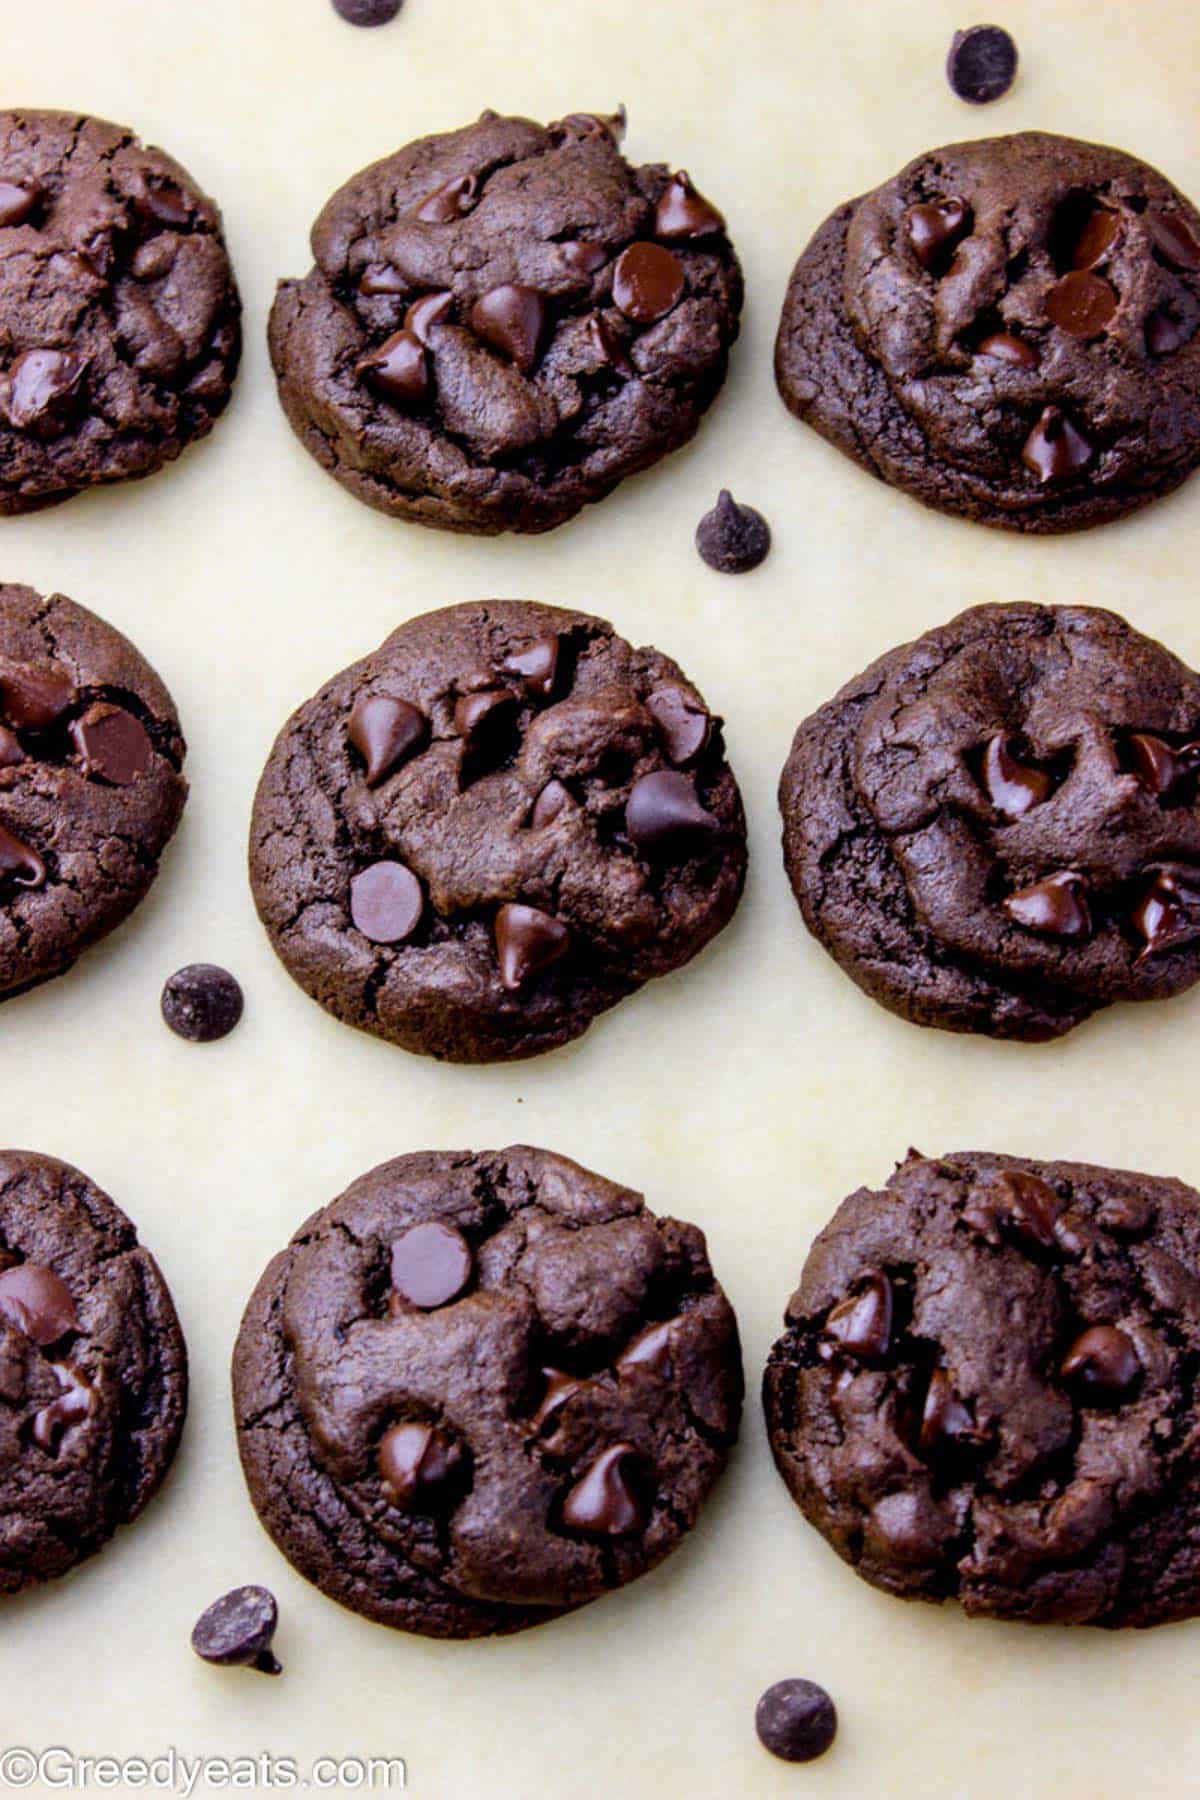
The difference between a single chocolate cookie and a double chocolate cookie is exactly what you'd expect — twice the intensity, twice the satisfaction. Here the dough itself is chocolate (cocoa powder goes right into the base), and then a generous load of chocolate chips goes in on top of that. The result is thick and fudgy in the center, with edges that have just enough chew to hold everything together. Thirty minutes of chill time is the only thing standing between you and these — and I know that feels annoying, but it's the step that stops them from spreading into flat, sad puddles. Don't skip it.
Ingredients
- 1 cup all-purpose flour
- ½ cup unsweetened cocoa powder
- 1 teaspoon baking soda
- ½ teaspoon salt
- ½ cup (1 stick) unsalted butter, softened
- ¾ cup granulated sugar
- ¼ cup packed brown sugar
- 2 large eggs
- 1½ teaspoons vanilla extract
- 1½ cups semi-sweet chocolate chips, divided
Instructions
- Whisk flour, cocoa powder, baking soda, and salt in a bowl. In a separate large bowl, beat butter and both sugars until light and fluffy, about 2-3 minutes.
- Add eggs one at a time, beating well after each addition. Mix in vanilla.
- Stir the dry ingredients into the wet until just combined, then fold in 1¼ cups of the chocolate chips. Cover the bowl and refrigerate for 30 minutes.
- Preheat oven to 350°F. Scoop chilled dough into balls about 1½ tablespoons each and place on parchment-lined baking sheets 2 inches apart. Press a few of the remaining chips onto the tops.
- Bake for 10-12 minutes until the edges are set and the center still looks slightly soft. Cool on the pan for 5 minutes before transferring to a rack.
Tips
- Tip: The chill time is non-negotiable for thick, chewy cookies — if you skip it, the dough spreads too fast and you lose that fudgy center.
- Tip: For extra fudginess, substitute 2 tablespoons of the flour with cornstarch — it changes the texture noticeably.
- Tip: Pressing chips onto the tops before baking (rather than mixing all in) gives you that bakery-style look where chips are visible on the surface.
21. Chocolate M&M Cookies

These are basically brownies that someone convinced to become cookies, and I mean that as the highest compliment. The base is built on melted chocolate and butter, which gives you that dense, fudgy chew you normally only get from a brownie pan. Pressing M&Ms into the tops before baking means every bite has a little crunch of candy shell against the soft chocolate underneath. Saad spotted these cooling on the rack and ate three before I could say anything.
Ingredients
- 4 oz semi-sweet chocolate, roughly chopped (or ⅔ cup chocolate chips)
- ¼ cup unsalted butter
- ¾ cup granulated sugar
- 2 large eggs, room temperature
- 1 teaspoon vanilla extract
- 1 cup all-purpose flour
- 2 tablespoons unsweetened cocoa powder
- ½ teaspoon baking powder
- ¼ teaspoon salt
- ½ cup semi-sweet chocolate chips
- ¾ cup M&Ms (plus extra for pressing on top)
Instructions
- Preheat oven to 350°F. Line two baking sheets with parchment paper.
- Melt the chopped chocolate and butter together in a microwave-safe bowl in 30-second bursts, stirring between each, until completely smooth. Let it cool for 5 minutes — you don't want scrambled eggs in your batter.
- Whisk the sugar into the cooled chocolate mixture, then add the eggs one at a time, whisking well after each. Stir in the vanilla.
- Fold in the flour, cocoa powder, baking powder, and salt until just combined. Stir in the chocolate chips and M&Ms.
- Drop rounded tablespoons of dough onto the prepared sheets, spacing them 2 inches apart. Press a few extra M&Ms on top of each. Bake for 10–12 minutes until the edges are set but the centers still look slightly underdone — they'll firm up as they cool.
- Cool on the baking sheet for 5 minutes before transferring to a wire rack.
Tips
- Tip: The batter will be very loose compared to a normal cookie dough — that's correct. Don't add more flour trying to fix it; just trust the process.
- Tip: Use seasonal M&M colors to turn these into a holiday cookie in about two seconds — red and green for Christmas, pastels for Easter.
- Tip: These keep well in an airtight container at room temperature for up to 4 days, though they rarely last that long in my house.
20. Italian Chocolate Salami (Salame di Cioccolato)

I'll be honest — I included this one partly because of the name. Chocolate salami. It sounds like a joke until you actually make it, and then you understand why Italians have been making it for generations. It's a no-bake confection built from crushed shortbread cookies, dark chocolate, butter, and a splash of Amaretto rolled into a log and dusted with powdered sugar to mimic the appearance of cured salami. The result is dense, rich, and genuinely impressive-looking on a dessert board. This isn't an authentic Italian grandmother's recipe — it's my version — but it works, and people always ask what it is.
Ingredients
- 7 oz dark chocolate (70% cocoa), finely chopped
- 6 tablespoons unsalted butter, softened
- ⅓ cup powdered sugar, sifted
- 2 egg yolks
- 3 tablespoons Amaretto liqueur (substitute: 1 tablespoon almond extract + 2 tablespoons orange juice)
- 5 oz shortbread cookies, roughly crushed (about 1½ cups crumbles)
- ¼ cup chopped toasted almonds or hazelnuts (optional)
- Extra powdered sugar for dusting
Instructions
- Melt the chopped chocolate in a heatproof bowl set over a pot of barely simmering water (or microwave in 30-second bursts). Stir until smooth and set aside to cool slightly.
- Beat the softened butter and powdered sugar together until pale and fluffy. Add the egg yolks one at a time, beating well after each. Stir in the Amaretto.
- Pour in the cooled melted chocolate and stir until fully combined. Fold in the crushed shortbread and nuts if using. The mixture should be thick and hold its shape.
- Turn the mixture out onto a large sheet of plastic wrap. Shape it roughly into a log about 10 inches long, then roll it tightly in the plastic wrap, twisting the ends to compress it into a firm cylinder.
- Refrigerate for at least 3 hours or overnight until completely firm.
- Unwrap and roll generously in powdered sugar to coat. Tie kitchen twine around it in a few places if you want the full salami effect. Slice into rounds to serve.
Tips
- Tip: Leave some larger cookie chunks in your crumble — they create the white marbled effect inside the log that makes it look authentically salami-like when sliced.
- Tip: This keeps refrigerated for up to 2 weeks, which makes it a great make-ahead gift for the holidays — just wrap it back in plastic until ready to present.
- Tip: If you're skipping the alcohol entirely, replace it with strong brewed espresso (cooled) for a mocha version that's just as good.
19. Thumbprint Chocolate Filled Cookies
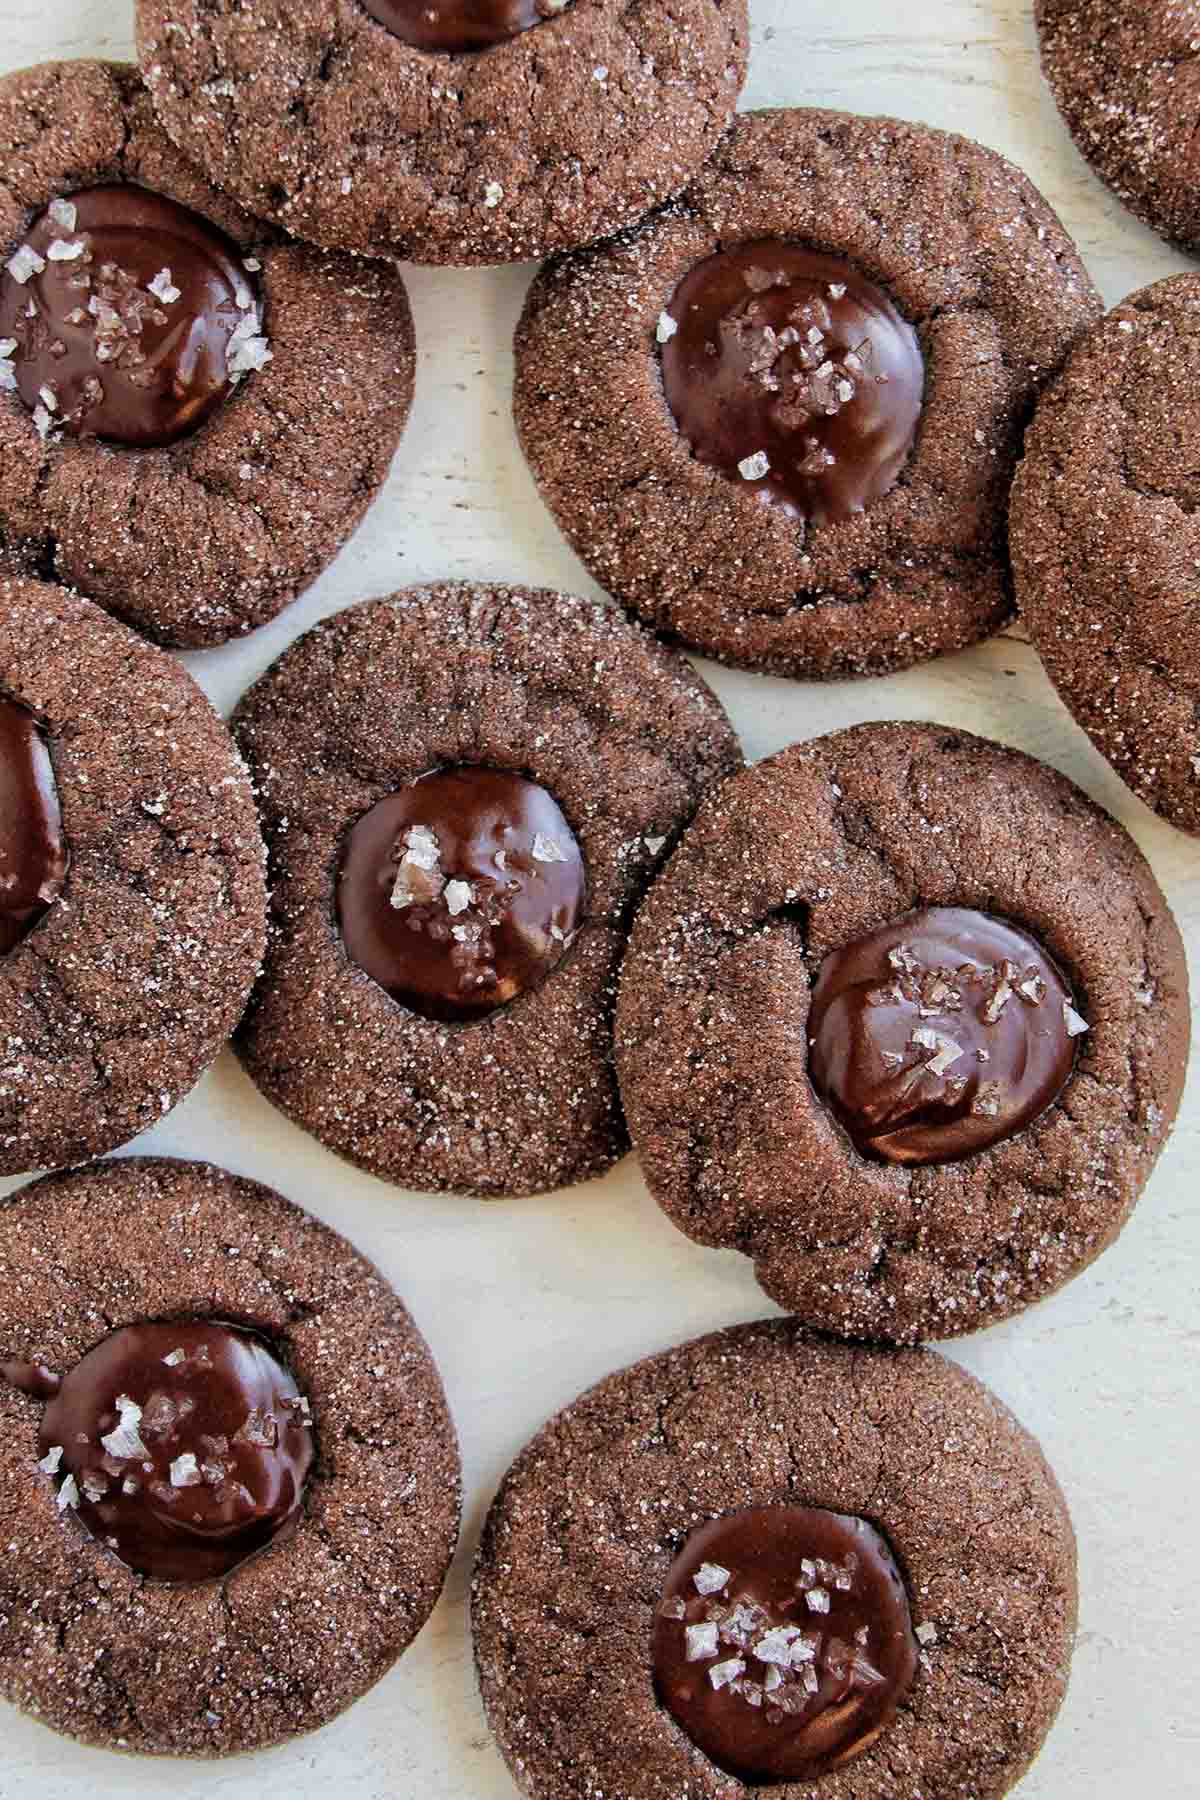
There's something satisfying about pressing your thumb into a round of cookie dough and knowing exactly what's going to fill that little well. These thumbprints use a Dutch-processed cocoa dough that bakes up crispy on the outside and still soft in the center, and then you fill the indent with a glossy, barely-set chocolate ganache. They look like they came from a bakery window, but they come together without any special equipment — just a bowl, a spoon, and your thumb. I make these every December without fail.
Ingredients
- 1 cup all-purpose flour
- ¼ cup Dutch-processed cocoa powder
- ¼ teaspoon salt
- ½ cup unsalted butter, softened
- ⅓ cup granulated sugar
- 1 egg yolk
- 1 teaspoon vanilla extract
- For the chocolate filling:
- ⅓ cup semisweet chocolate chips
- 3 tablespoons heavy cream
- 1 teaspoon unsalted butter
Instructions
- Preheat oven to 350°F. Line a baking sheet with parchment. Whisk together the flour, cocoa powder, and salt in a bowl and set aside.
- Beat the softened butter and sugar together until light and fluffy, about 2 minutes. Add the egg yolk and vanilla and mix until combined. Stir in the flour mixture until a soft dough forms.
- Roll dough into 1-inch balls and place 2 inches apart on the prepared baking sheet. Press your thumb firmly into the center of each to create a deep well.
- Bake for 11–13 minutes until the edges are set. The wells will puff up slightly — press them down again gently with the back of a small spoon as soon as the cookies come out. Cool completely on the sheet.
- Make the filling: heat the cream in a small saucepan until it just begins to simmer. Pour over the chocolate chips and butter in a bowl. Let sit 1 minute, then stir until smooth and glossy.
- Spoon the ganache into each cookie well. Let the cookies sit at room temperature for about 30 minutes until the filling is set before serving.
Tips
- Tip: If the dough cracks when you press your thumb in, it's a little dry — knead in half a teaspoon of milk and try again.
- Tip: Don't fill the cookies while they're still warm — the ganache will slide right out. Wait until they're fully cooled.
- Tip: A tiny pinch of flaky sea salt sprinkled over the filled ganache takes these from good to genuinely exceptional.
18. Chocolate Melting Moments
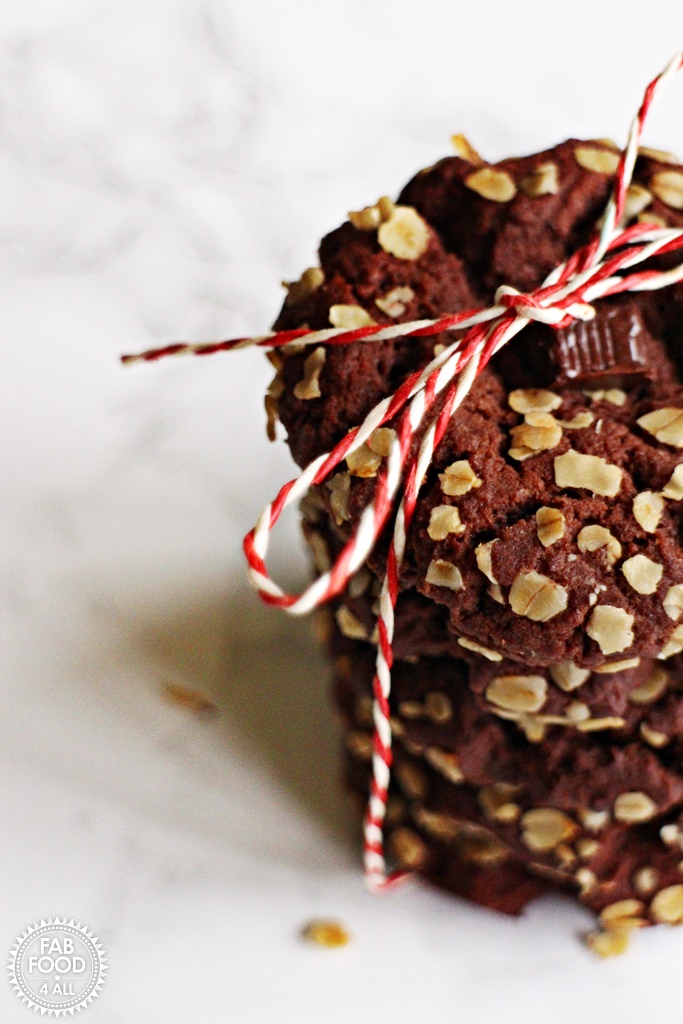
Melting moments are a classic British biscuit, and the chocolate version might be the best thing to come out of that tradition. The texture is the whole point here — cornstarch in the dough creates a crumb so fine and delicate that the cookie literally dissolves on your tongue before you've finished thinking about it. They're not particularly sweet; the cocoa does most of the work. I discovered these a couple of years ago and immediately understood why British home bakers treat them like a staple. A crumbly, tender cookie this easy deserves to be on everyone's list.
Ingredients
- ½ cup unsalted butter, softened
- ¼ cup powdered sugar, sifted
- 1 teaspoon vanilla extract
- ¾ cup all-purpose flour
- 3 tablespoons cornstarch
- 2 tablespoons unsweetened cocoa powder
- Pinch of salt
- For the chocolate buttercream filling:
- 3 tablespoons unsalted butter, softened
- ⅓ cup powdered sugar, sifted
- 1 tablespoon cocoa powder
- 1–2 teaspoons milk
Instructions
- Preheat oven to 325°F. Line a baking sheet with parchment paper.
- Beat the softened butter, powdered sugar, and vanilla together until very pale and fluffy — about 3 minutes. This step matters; the extra air keeps the texture light.
- Sift in the flour, cornstarch, cocoa powder, and salt. Mix gently until a soft dough comes together. Don't overwork it.
- Roll teaspoon-sized portions into small balls and place on the baking sheet. Use a fork to gently flatten each ball and create a crosshatch pattern on top.
- Bake for 12–14 minutes until just set — they'll still look soft in the center. Cool completely on the baking sheet before moving them; they're very fragile warm.
- Make the filling by beating together butter, powdered sugar, cocoa, and enough milk to get a spreadable consistency. Sandwich pairs of cooled cookies together with a small amount of buttercream.
Tips
- Tip: These cookies are very delicate out of the oven — leave them on the baking sheet until fully cool or they'll crumble when you try to lift them.
- Tip: The cornstarch is non-negotiable here — it's what creates the melt-in-your-mouth texture. Don't substitute it out.
- Tip: Store sandwiched cookies in a single layer — they're soft enough that stacking can squish the filling out the sides.
17. Chewy Chocolate Cherry Cookies
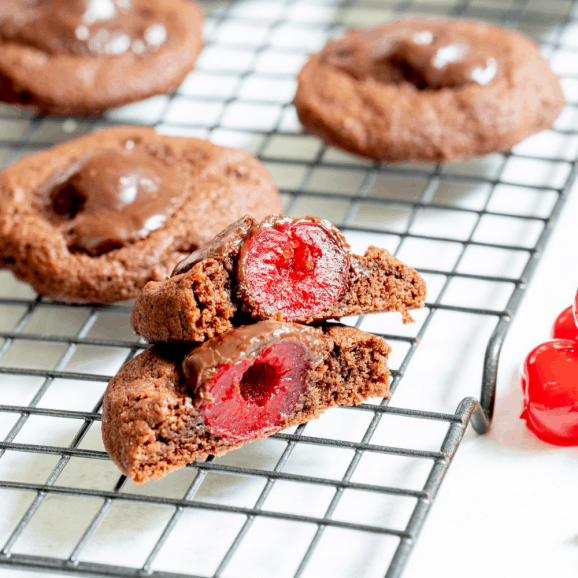
Chocolate and cherry is one of those combinations that makes complete sense once you've tried it — the tartness of the cherry cuts right through the richness of the cocoa and keeps the whole thing from feeling too heavy. These cookies use maraschino cherries chopped into the dough, which are easy to find at any Walmart or Kroger, and semi-sweet chocolate chips folded through for extra depth. The cookies bake up genuinely chewy in the middle with slightly crisp edges, and they hold their texture well the next day too, which I always appreciate. Think of them as a black forest cake in cookie form.
Ingredients
- 1½ cups all-purpose flour
- ⅓ cup unsweetened cocoa powder
- ½ teaspoon baking soda
- ¼ teaspoon salt
- ½ cup unsalted butter, softened
- ¾ cup granulated sugar
- ¼ cup packed light brown sugar
- 1 large egg
- 1 teaspoon vanilla extract
- ½ cup maraschino cherries, drained well and roughly chopped
- ¾ cup semi-sweet chocolate chips
Instructions
- Preheat oven to 350°F. Line baking sheets with parchment. Pat the chopped maraschino cherries dry with paper towels — excess liquid will make the cookies spread too much.
- Whisk together the flour, cocoa powder, baking soda, and salt in a bowl and set aside.
- Beat the butter and both sugars together until light and fluffy, about 2–3 minutes. Add the egg and vanilla, beating until combined.
- Stir in the dry ingredients until just combined. Fold in the dried cherries and chocolate chips.
- Drop rounded tablespoons of dough onto the prepared baking sheets, spacing 2 inches apart. Bake for 10–12 minutes until the edges are set. The centers will look underbaked — that's what you want for chewy cookies.
- Cool on the baking sheet for 5 minutes before transferring to a wire rack to cool completely.
Tips
- Tip: Drying the cherries thoroughly on paper towels is the most important step — I learned this after my first batch spread into flat chocolate puddles.
- Tip: If you want a stronger cherry flavor, add ½ teaspoon of almond extract along with the vanilla — it amplifies the cherry without adding more fruit.
- Tip: These freeze beautifully. Bake a full batch, cool completely, then freeze in a zip-lock bag for up to 2 months. Pull out a few whenever the craving hits.
16. Brownie Roll-Out Cookies

Think of these as your sugar cookie's chocolate-obsessed cousin. The dough rolls out cleanly, holds its shape during baking, and comes out with that perfect crispy edge and soft, fudgy center that makes you wonder why you ever bothered with plain sugar cookies. I started making these specifically for Eid cookie decorating with Zainab — they hold cut-out shapes beautifully and actually taste like something, which is more than I can say for a lot of decorated cookies. They also work surprisingly well as ice cream sandwich bases if you're feeling ambitious.
Ingredients
- 2 ½ cups all-purpose flour
- ½ cup unsweetened cocoa powder
- 1 teaspoon baking powder
- ¼ teaspoon salt
- 1 cup (2 sticks) unsalted butter, softened
- 1 ½ cups granulated sugar
- 2 large eggs
- 1 teaspoon vanilla extract
Instructions
- Whisk together flour, cocoa powder, baking powder, and salt in a bowl and set aside.
- Beat softened butter and sugar together until light and fluffy, about 3 minutes. Add eggs one at a time, then vanilla, mixing well after each addition.
- Gradually add the dry ingredients to the butter mixture and mix until a soft dough forms. Divide into two discs, wrap in plastic wrap, and refrigerate for at least 1 hour.
- Preheat oven to 350°F. Roll dough out on a lightly floured surface to about ¼-inch thickness. Cut into shapes and place on a parchment-lined baking sheet.
- Bake for 9–11 minutes until edges are just set. Let cool on the pan for 5 minutes before transferring — they firm up as they cool.
Tips
- Tip: Dust your rolling pin and surface with a little cocoa powder instead of plain flour — it keeps the color consistent and adds a hint more chocolate flavor.
- Tip: Don't skip the chilling step. Warm dough spreads and loses its shape in the cutter, especially with intricate designs.
- Tip: These freeze beautifully as raw cut-outs. Lay them flat on a sheet pan, freeze solid, then transfer to a zip-lock bag. Bake straight from frozen, just add 2 minutes.
15. Cayenne Chocolate Cookies

Growing up in Pakistan, spice-meets-sweet wasn't something I thought about in baking — that combination lived in savory food. Then I tried a Mexican hot chocolate inspired cookie and it completely rewired my brain. These chocolate cookies hit you with deep, dark cocoa first, then a slow warmth from cayenne that creeps up in the back of your throat. The cinnamon and allspice round it all out so it doesn't just taste "spicy" — it tastes complex. The heat level is easy to dial up or down depending on how brave your household is.
Ingredients
- 1 ¾ cups all-purpose flour
- ½ cup unsweetened cocoa powder
- 1 teaspoon cinnamon
- ¼ teaspoon allspice
- ¼–½ teaspoon cayenne pepper (adjust to your heat preference)
- 1 teaspoon baking soda
- ½ teaspoon salt
- ¾ cup (1 ½ sticks) unsalted butter, softened
- ¾ cup packed brown sugar
- ¼ cup granulated sugar
- 2 large eggs
- 1 teaspoon vanilla extract
Instructions
- Preheat oven to 375°F. Line two baking sheets with parchment paper. Whisk together flour, cocoa, cinnamon, allspice, cayenne, baking soda, and salt in a bowl.
- Beat butter with both sugars until fluffy, about 2–3 minutes. Add eggs and vanilla and mix until smooth.
- Stir in the dry ingredients until just combined. The dough will be soft — that's fine.
- Scoop tablespoon-sized balls of dough onto prepared sheets, spacing them 2 inches apart. Flatten slightly with your palm.
- Bake for 9–11 minutes until edges are set but centers still look slightly underdone. Let cool on the pan — they firm up into chewy perfection.
Tips
- Tip: Start with ¼ teaspoon cayenne your first time. You can always add more next batch, but you can't take it back once it's in the dough.
- Tip: Rolling the dough balls in a mix of sugar and a tiny pinch of cayenne before baking gives them a sparkly, slightly spicy crust that looks beautiful on a cookie plate.
- Tip: These pair really well with a glass of cold milk — the dairy cuts the heat in the best way possible.
14. Chai Spice Chocolate Chip Cookies
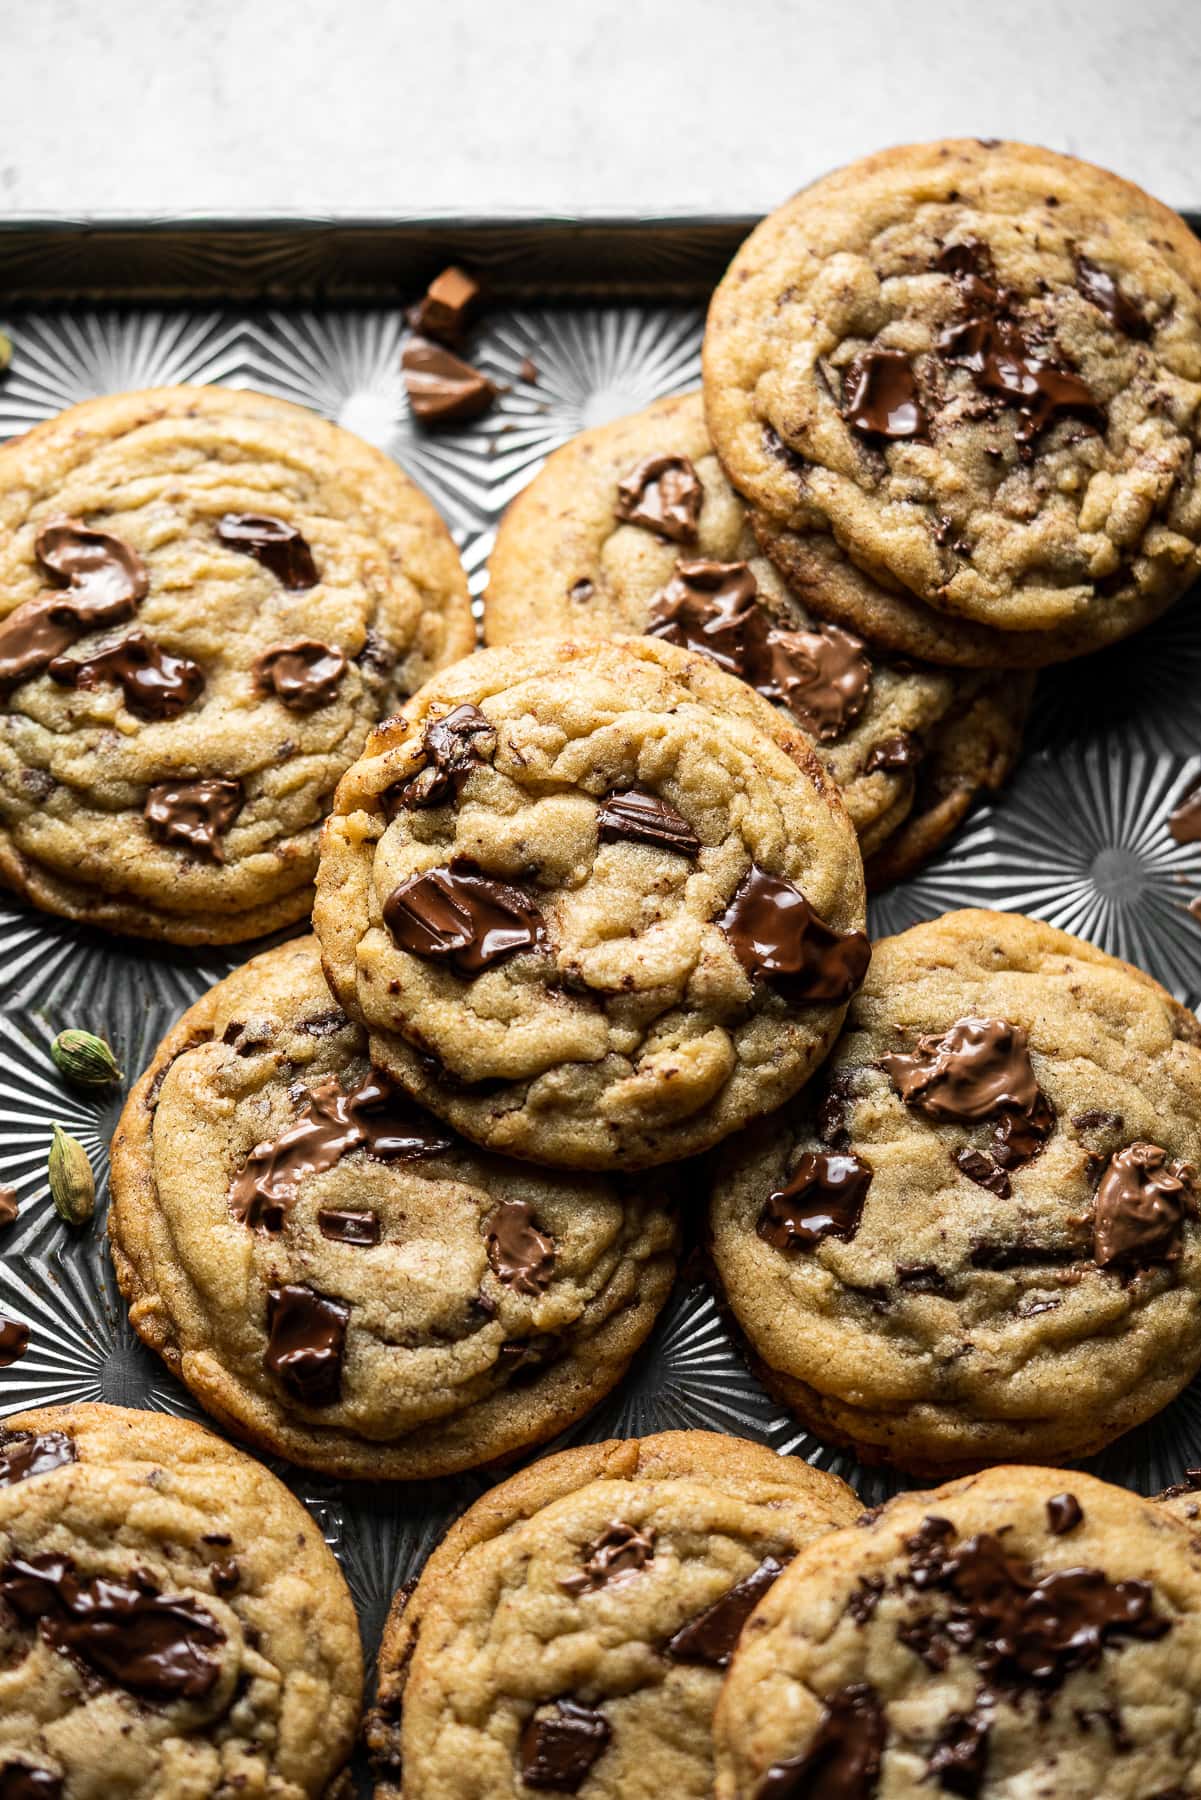
Chai and chocolate is a combination I didn't need convincing on — we basically live on both in this house. These cookies take a classic chocolate chip base and stir in cardamom, cinnamon, and ginger, the same spices you'd find in a proper cup of Pakistani chai. The dark chocolate chips push back against the warmth of the spices just enough, and the crispy edges with soft centers are exactly what a good chocolate chip cookie should be. This isn't authentic to any one tradition — it's just what happens when two great things meet in a mixing bowl.
Ingredients
- 2 ¼ cups all-purpose flour
- 1 teaspoon baking soda
- ½ teaspoon salt
- 1 teaspoon ground cinnamon
- ½ teaspoon ground cardamom
- ¼ teaspoon ground ginger
- 1 cup (2 sticks) unsalted butter, softened
- ¾ cup granulated sugar
- ¾ cup packed brown sugar
- 2 large eggs
- 2 teaspoons vanilla extract
- 1 ½ cups dark chocolate chips
Instructions
- Preheat oven to 375°F. Whisk flour, baking soda, salt, cinnamon, cardamom, and ginger together in a medium bowl.
- Beat butter and both sugars until pale and fluffy. Add eggs one at a time, then vanilla, mixing well after each.
- Gradually mix in the dry ingredients until just combined, then fold in the dark chocolate chips with a spatula.
- Scoop rounded tablespoons of dough onto parchment-lined baking sheets, spacing 2 inches apart. Bake for 9–11 minutes until edges are golden but centers look just barely done.
- Cool on the pan for 5 minutes before moving — this finishes the centers without overbaking them.
Tips
- Tip: If you have whole green cardamom pods, grind the seeds yourself — freshly ground cardamom is noticeably more fragrant than the pre-ground stuff that's been sitting in the jar for a year.
- Tip: Chilling the dough for 30 minutes before baking helps the spice flavors deepen and also keeps the cookies from spreading too thin.
- Tip: Semi-sweet chips work too, but dark chocolate holds up better against the bold spices — go 60% cacao or higher if you can.
13. Triple Chocolate Chunk Cookies
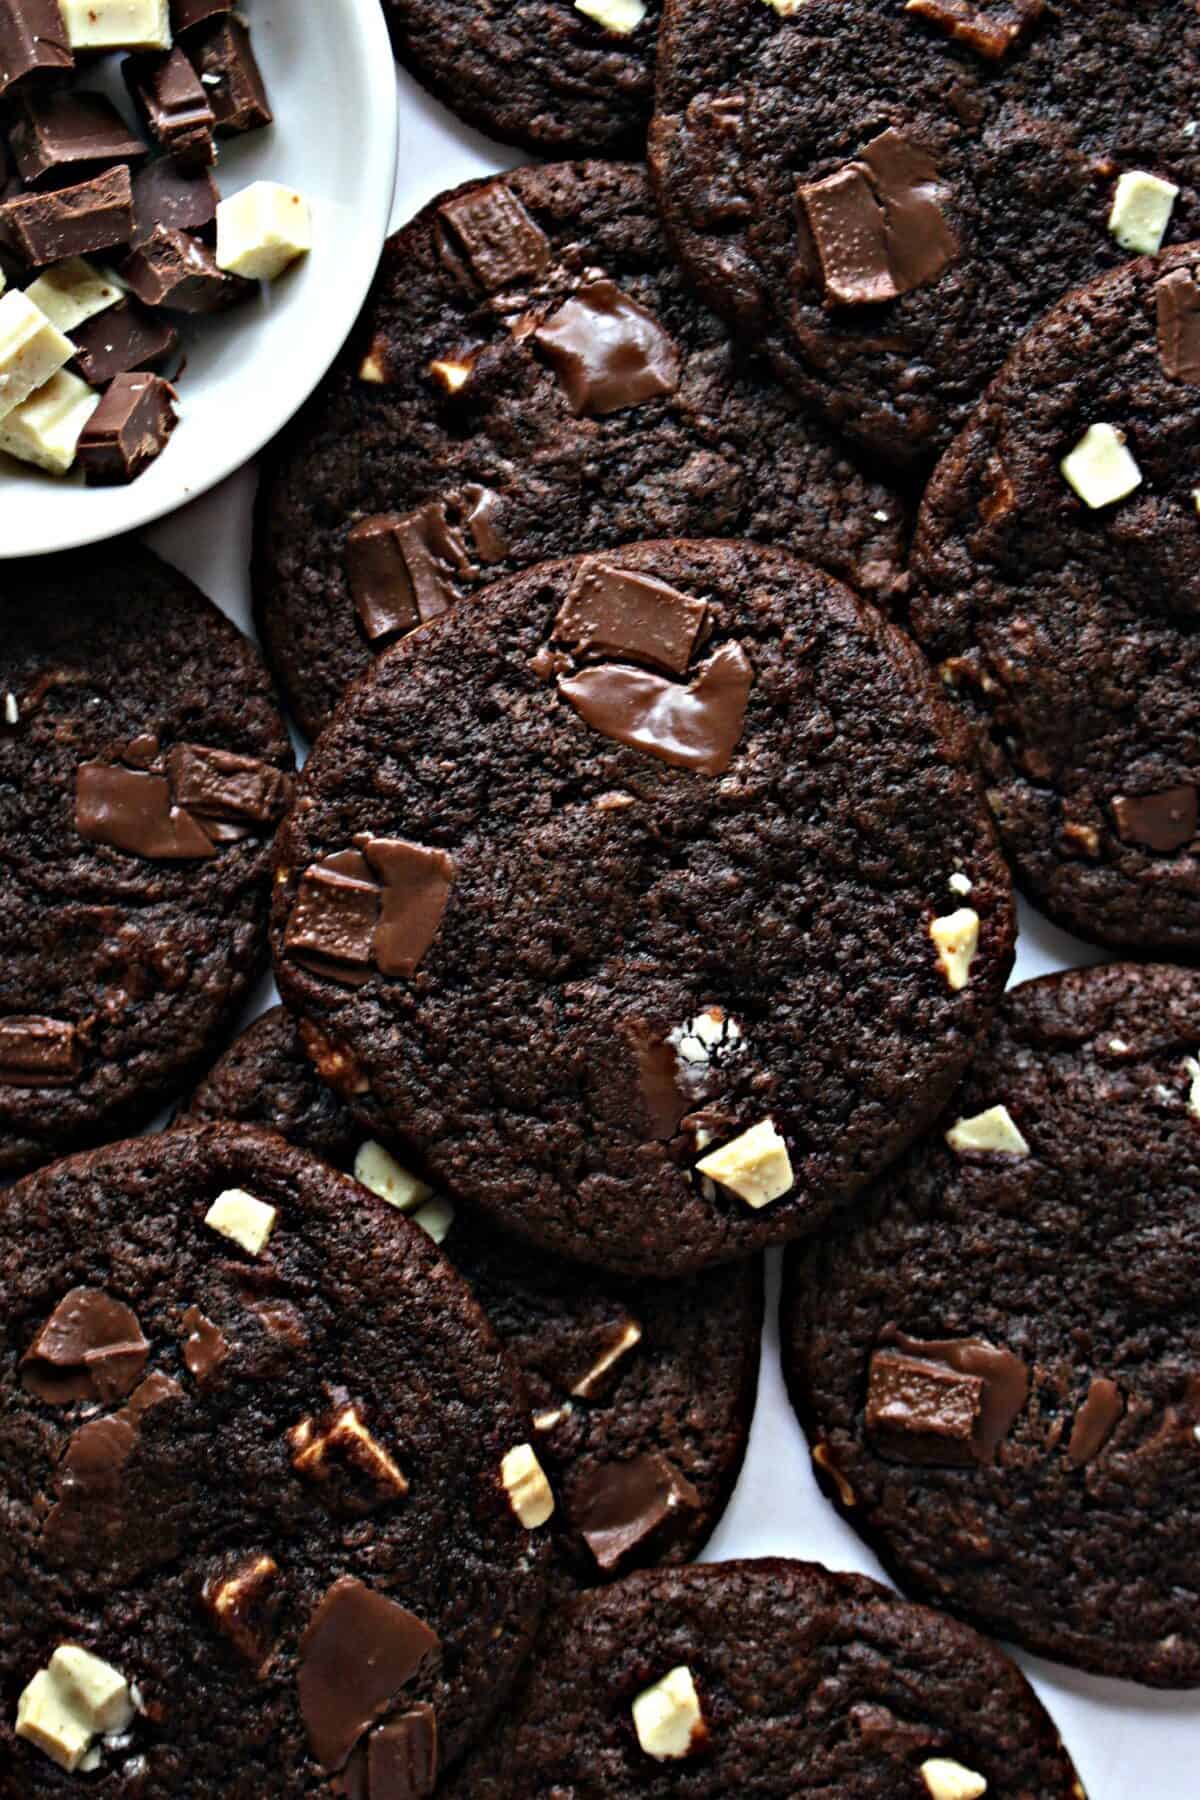
Three kinds of chocolate in one cookie sounds like overkill until you eat one, and then it sounds exactly right. The base dough is a dark chocolate dough — deeply flavored, almost brownie-like — and then you stir in chunks of both milk and white chocolate so you get pockets of different sweetness and richness in every bite. The trick that actually makes these work is **chilling the dough for at least 3 hours**. I know that's a long time. I skipped it once and ended up with flat, sad discs. Don't skip it.
Ingredients
- 1 ¾ cups all-purpose flour
- ½ cup unsweetened dark cocoa powder
- 1 teaspoon baking soda
- ½ teaspoon salt
- 1 cup (2 sticks) unsalted butter, softened
- 1 cup packed brown sugar
- ½ cup granulated sugar
- 2 large eggs
- 2 teaspoons vanilla extract
- ¾ cup milk chocolate chunks
- ¾ cup white chocolate chunks
Instructions
- Whisk flour, cocoa powder, baking soda, and salt in a bowl. Set aside.
- Beat butter and both sugars until light and fluffy, about 3 minutes. Add eggs one at a time, then vanilla, and mix until smooth.
- Stir in the dry ingredients until just combined, then fold in the milk and white chocolate chunks. Cover the bowl and refrigerate for at least 3 hours (overnight is even better).
- When ready to bake, preheat oven to 350°F. Scoop cold dough into balls about 2 tablespoons each. Place on parchment-lined baking sheets, 2 inches apart.
- Bake 11–13 minutes until edges are set. The centers will look underdone — that's correct. Cool on the pan for 10 minutes before eating.
Tips
- Tip: Use a chocolate bar chopped into rough chunks rather than uniform chips — the irregular pieces melt into different-sized pools and make the texture more interesting.
- Tip: I make a double batch because this dough refrigerates well for up to 5 days — fresh cookies whenever you want them without any extra work.
- Tip: Press a few extra chunks on top of each ball right before baking so the finished cookies look loaded with chocolate from above. Makes a difference in presentation.
12. Dark Chocolate Cookies
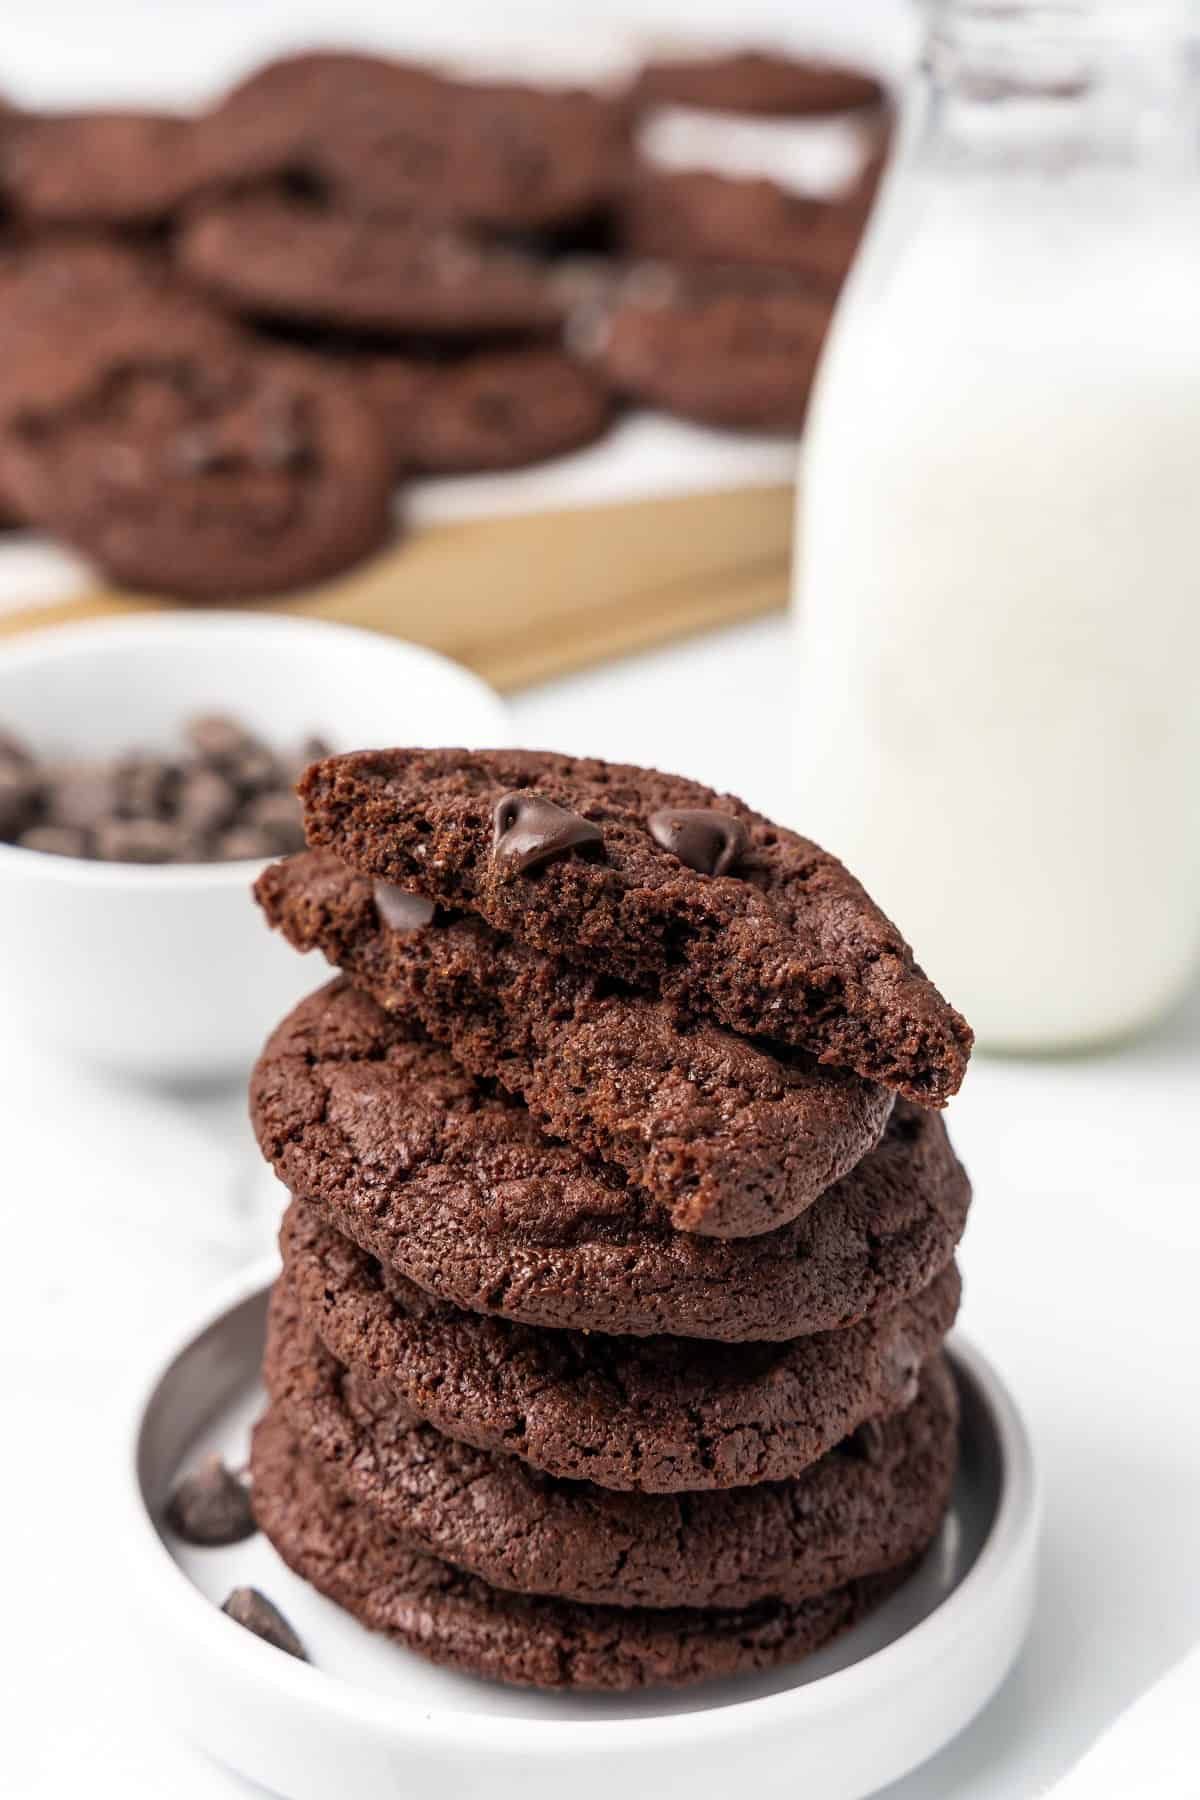
If you've ever wanted a cookie that tastes like it came from a serious chocolate shop, this is the one. The base is already deeply chocolate, and then it's loaded with semi-sweet chips on top of that — so every bite is double chocolate all the way through. The real game-changer here is the **instant espresso powder**. It doesn't make the cookies taste like coffee; it just intensifies the chocolate until it tastes richer and more complex than you'd expect from a home kitchen. One teaspoon is all you need, and you can find it at most grocery stores near the coffee aisle.
Ingredients
- 1 ½ cups all-purpose flour
- ½ cup unsweetened cocoa powder
- 1 teaspoon instant espresso powder
- 1 teaspoon baking soda
- ½ teaspoon salt
- ¾ cup (1 ½ sticks) unsalted butter, softened
- ¾ cup granulated sugar
- ¾ cup packed brown sugar
- 2 large eggs
- 1 teaspoon vanilla extract
- 1 ½ cups bittersweet or semi-sweet chocolate chips
Instructions
- Preheat oven to 350°F. Whisk flour, cocoa powder, espresso powder, baking soda, and salt together in a bowl.
- Beat butter and both sugars until fluffy. Add eggs and vanilla, mixing until well combined.
- Stir dry ingredients into the wet mixture until just combined, then fold in the chocolate chips.
- Drop rounded tablespoons of dough onto parchment-lined baking sheets, spacing 2 inches apart. Bake for 10–12 minutes until the edges are firm and the centers look just barely set.
- Let cookies cool on the pan for 5 minutes before transferring. The centers will continue to set as they cool and become perfectly chewy.
Tips
- Tip: Quality cocoa powder matters here more than in most recipes — Dutch-processed cocoa gives a noticeably richer, less acidic result than standard natural cocoa.
- Tip: If you can't find instant espresso powder, a teaspoon of strong instant coffee dissolved in a tablespoon of hot water works as a substitute — just reduce the vanilla slightly.
- Tip: Use good bittersweet chocolate here — anything 60% cacao and up. Milk chocolate chips get lost against the strong cocoa base and the cookies end up tasting flat.
7. Double Chocolate Brownie Cookies

I could never decide between brownies and cookies, so I stopped choosing. These Double Chocolate Brownie Cookies are exactly what happens when you refuse to pick a side — fudgy center, crinkled top, chocolate chips throughout, and walnuts for a little crunch if you want them. The batter is looser than a standard cookie dough, which threw me off the first time, but trust it. They bake up into something that looks and eats like a brownie in cookie form.
Ingredients
- 4 oz semi-sweet baking chocolate, chopped
- ¼ cup unsalted butter
- ¾ cup granulated sugar
- 2 large eggs
- 1 teaspoon vanilla extract
- ½ cup all-purpose flour
- ¼ cup unsweetened cocoa powder
- ½ teaspoon baking powder
- ¼ teaspoon salt
- ¾ cup semi-sweet chocolate chips
- ½ cup chopped walnuts (optional)
Instructions
- Preheat your oven to 350°F. Line two baking sheets with parchment paper.
- Melt the chopped chocolate and butter together in a heatproof bowl over a pot of simmering water (or microwave in 30-second bursts), stirring until smooth. Let cool for 5 minutes.
- Whisk sugar into the melted chocolate mixture, then whisk in the eggs one at a time, followed by the vanilla.
- Stir in the flour, cocoa powder, baking powder, and salt until just combined — the batter will be thin, like a loose brownie batter. Fold in the chocolate chips and walnuts.
- Drop heaping tablespoons of batter onto the prepared sheets, spacing them 2 inches apart. Bake for 10-12 minutes until the tops are set and crinkled. They'll look underdone but will firm up as they cool.
Tips
- Tip: Don't skip the cooling time on the melted chocolate — adding eggs to hot chocolate will scramble them.
- Tip: If the batter seems too runny to scoop, refrigerate for 15 minutes. It firms up slightly and makes dropping much easier.
- Tip: Leave them on the hot baking sheet for 5 minutes after pulling from the oven — they need that carry-over heat to finish setting properly.
8. Healthier Double Chocolate Chip Cookies (Vegan)

My neighbor asked me once if I had a good chocolate cookie that didn't use eggs or butter — she was baking for a vegan friend. I tried this recipe and honestly, I was surprised. Whole wheat flour, coconut oil, and a flax egg come together into a cookie that's genuinely fudgy and chocolatey, not the dry, crumbly thing you might expect from a "healthier" version. Eight ingredients, one bowl, done in 20 minutes. I'd make these again even without a dietary reason to.
Ingredients
- 1 tablespoon ground flaxseed + 3 tablespoons water (flax egg)
- ¼ cup coconut oil, melted
- ½ cup coconut sugar (or brown sugar)
- 1 teaspoon vanilla extract
- ½ cup whole wheat flour
- ⅓ cup unsweetened cocoa powder
- ½ teaspoon baking soda
- ¼ teaspoon salt
- ½ cup dairy-free chocolate chips (Enjoy Life brand works great)
Instructions
- Mix the ground flaxseed and water in a small bowl and set aside for 5 minutes to gel — this is your egg replacement.
- Preheat oven to 350°F. Line a baking sheet with parchment paper.
- In a large bowl, whisk together the melted coconut oil, coconut sugar, vanilla, and flax egg until combined.
- Stir in the whole wheat flour, cocoa powder, baking soda, and salt until a thick dough forms. Fold in the chocolate chips.
- Scoop tablespoon-sized balls onto the prepared sheet and flatten slightly with your palm. Bake for 9-11 minutes. They'll look soft — that's correct. Cool on the sheet for 5 minutes before moving.
Tips
- Tip: Don't swap whole wheat flour for all-purpose 1:1 here — the whole wheat adds a nuttiness that actually works with the chocolate. All-purpose will make them spread too thin.
- Tip: Coconut sugar gives a slightly caramel-y depth. Brown sugar works fine if that's what you have.
- Tip: These firm up considerably as they cool, so pull them when the edges are just set and the center still looks a little undone.
9. Chocolate Filled Cookies

These are the cookies I pull out when I want to actually impress someone. The outside is a soft, chewy chocolate cookie — perfectly good on its own — but then you bite in and there's a molten chocolate center hiding inside. The trick is freezing a small disc of ganache before wrapping the dough around it. It sounds fiddly but it takes maybe ten minutes of extra prep, and the payoff is completely worth it. Zainab called these "lava cookies" and refused to call them anything else after that.
Ingredients
- 4 oz semi-sweet chocolate, chopped (for filling)
- ¼ cup heavy cream (for filling)
- ½ cup unsalted butter, softened
- ¾ cup granulated sugar
- 1 large egg + 1 egg yolk
- 1 teaspoon vanilla extract
- 1 ½ cups all-purpose flour
- ⅓ cup unsweetened cocoa powder
- ½ teaspoon baking soda
- ¼ teaspoon salt
- ½ cup milk chocolate chips (mixed into dough)
Instructions
- Make the filling first: heat cream until steaming, pour over the chopped semi-sweet chocolate, stir until smooth. Spoon small teaspoon-sized mounds onto a parchment-lined plate and freeze for at least 30 minutes until firm.
- Beat butter and sugar until light and fluffy, about 2 minutes. Add the egg, yolk, and vanilla and beat until combined.
- Mix in the flour, cocoa powder, baking soda, and salt until a soft dough forms. Fold in the chocolate chips. Refrigerate the dough for 20 minutes.
- Preheat oven to 375°F. Scoop a tablespoon of dough, flatten it in your palm, place a frozen ganache disc in the center, and wrap the dough around it, sealing the edges well. Roll into a smooth ball.
- Place on a parchment-lined baking sheet 2 inches apart. Bake for 10-12 minutes until edges are set. The ganache center needs to stay sealed — don't overbake or it leaks out and loses the effect.
Tips
- Tip: Make sure the ganache discs are fully frozen solid before wrapping — semi-frozen ganache will merge into the dough and you'll lose the distinct center.
- Tip: Seal the dough edges really well — any gaps and the chocolate filling will leak out during baking. Pinch and roll until the surface is smooth.
- Tip: These are best eaten warm, within 10 minutes of coming out of the oven, when the center is still gooey. Reheat leftovers in the microwave for 15 seconds.
10. Triple Chocolate Meringue Cookies
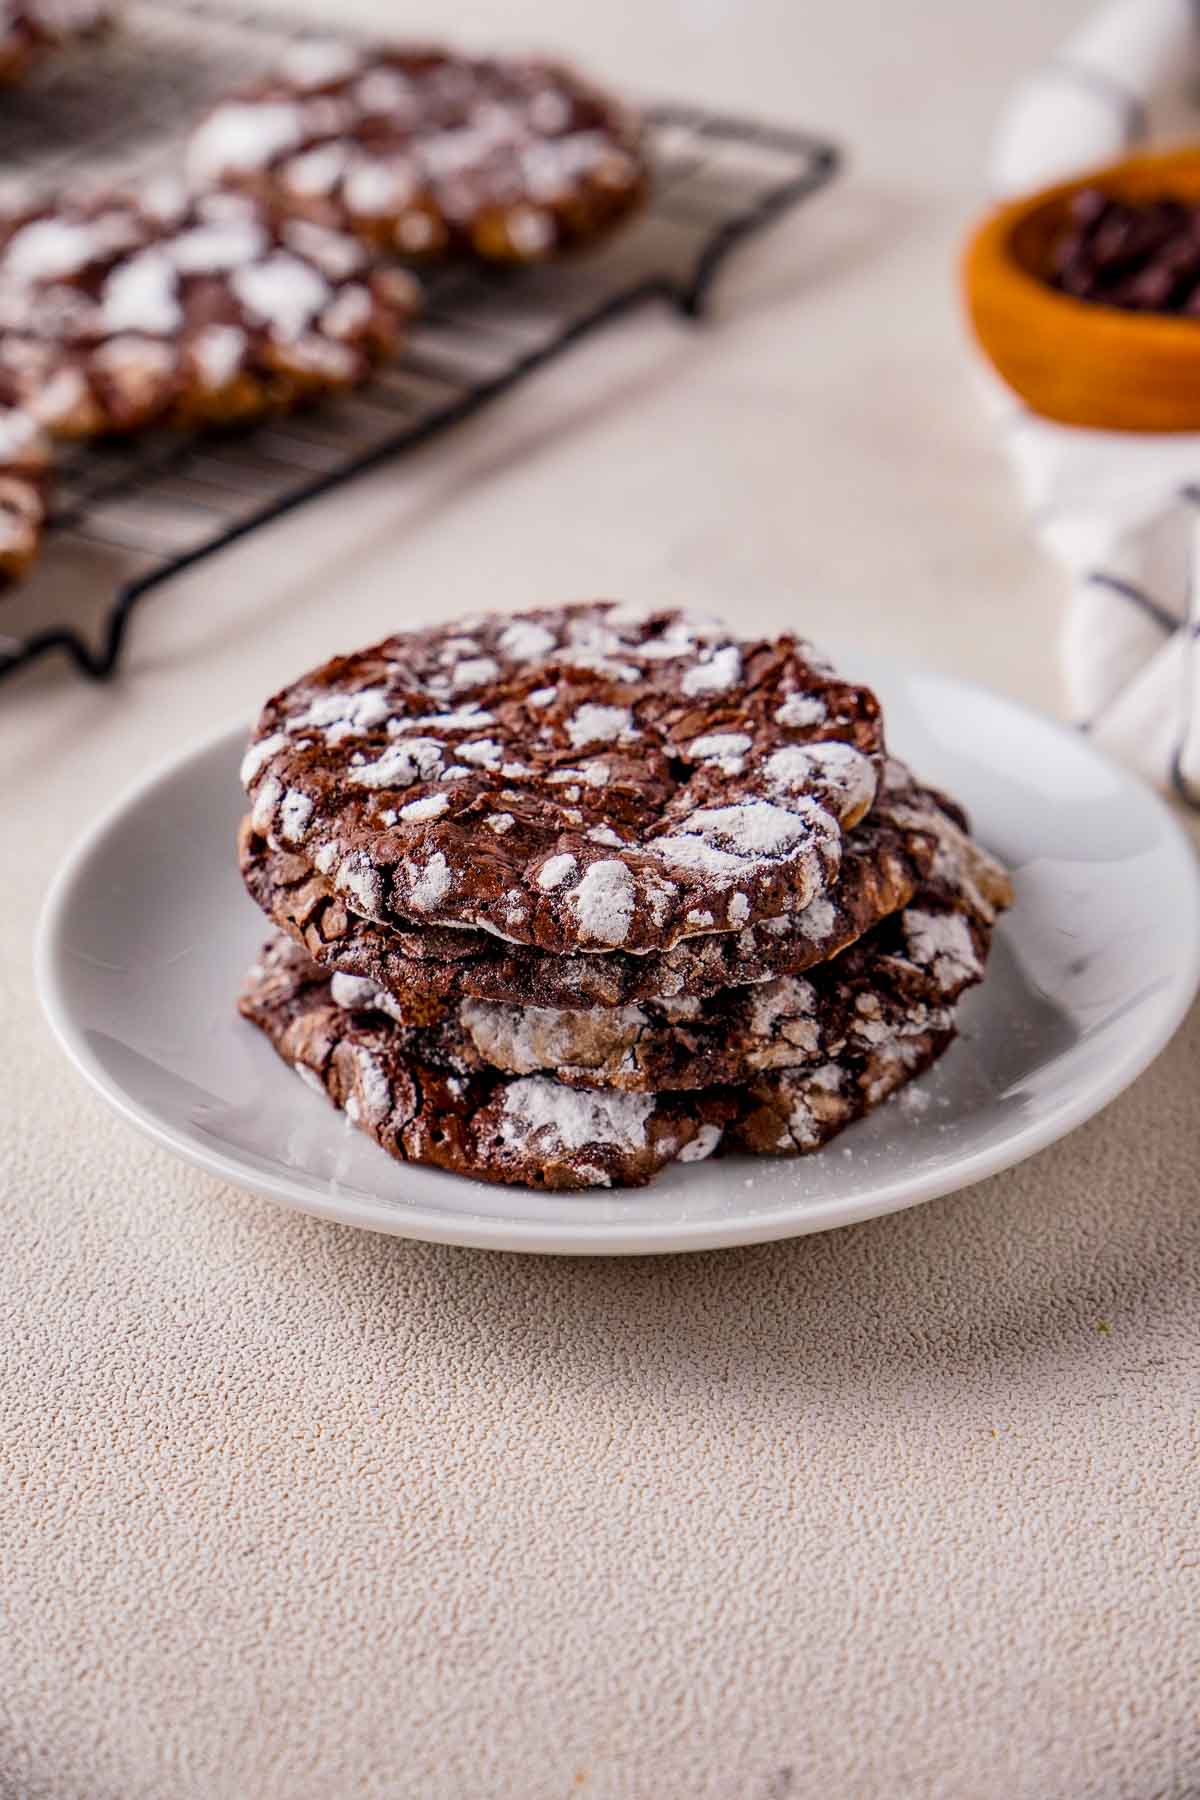
Meringue cookies intimidated me for years. I assumed they required a stand mixer and perfect technique. Turns out they mostly require patience and a clean bowl. These Triple Chocolate Meringue Cookies use melted dark chocolate, cocoa powder, and chocolate chips — three layers of chocolate flavor in one delicate, crispy-shelled cookie with a slightly fudgy interior. They're naturally gluten-free, they look gorgeous, and they taste far more sophisticated than the effort involved.
Ingredients
- 3 large egg whites, at room temperature
- ¼ teaspoon cream of tartar
- ¾ cup granulated sugar
- 2 oz dark chocolate (70% or higher), melted and cooled
- 2 tablespoons unsweetened cocoa powder
- 1 teaspoon vanilla extract
- ⅓ cup semi-sweet or dark chocolate chips
- Pinch of salt
Instructions
- Preheat oven to 275°F. Line two baking sheets with parchment paper. Make sure your mixing bowl is completely grease-free — wipe it with a little white vinegar on a paper towel if you're not sure.
- Beat the egg whites with cream of tartar and a pinch of salt on medium speed until foamy. Gradually add the sugar one tablespoon at a time, increasing to high speed, until stiff glossy peaks form — this takes about 5-7 minutes with a hand mixer.
- Sift the cocoa powder over the meringue and gently fold it in. Drizzle in the cooled melted dark chocolate and fold again — don't overmix, some streaking is fine and actually looks beautiful.
- Fold in the chocolate chips, then drop heaping tablespoons onto the prepared sheets, spacing 1 inch apart.
- Bake for 45-50 minutes until the outsides are dry and crisp. Turn the oven off and leave the cookies inside with the door cracked for another 30 minutes. This slow drying gives them that crisp shell without cracking.
Tips
- Tip: Any trace of egg yolk or grease in the bowl will prevent the whites from whipping properly — this is the number one reason meringue fails. Separate eggs carefully.
- Tip: Make these on a dry day if possible. Humidity is meringue's enemy — they'll stay sticky and won't crisp up properly if there's too much moisture in the air.
- Tip: Store in an airtight container at room temperature — not the fridge, which adds moisture. They keep well for up to 5 days.
11. Easy Chocolate and Marshmallow Cookies

There's a version of this cookie I made one afternoon when Saad came home from school in a terrible mood and demanded something sweet immediately. One bowl, basic pantry ingredients, marshmallows from the bag we keep for hot chocolate — done in 25 minutes. The marshmallows melt slightly during baking, leaving behind these pockets of gooey, toasted sweetness throughout a deeply chocolatey base. They look a little wild coming out of the oven, all melty and dramatic, and they taste exactly as good as they look.
Ingredients
- ½ cup unsalted butter, melted
- ¾ cup granulated sugar
- 1 large egg
- 1 teaspoon vanilla extract
- 1 cup all-purpose flour
- ⅓ cup unsweetened cocoa powder
- ½ teaspoon baking soda
- ¼ teaspoon salt
- 1 cup mini marshmallows
- ½ cup semi-sweet chocolate chips
Instructions
- Preheat oven to 350°F. Line a baking sheet with parchment paper.
- In a large bowl, whisk together the melted butter and sugar until combined. Add the egg and vanilla and whisk for another 30 seconds.
- Stir in the flour, cocoa powder, baking soda, and salt until a soft dough forms — it'll be a little sticky, that's fine.
- Fold in the mini marshmallows and chocolate chips gently. Don't overmix or the marshmallows start breaking down before baking.
- Scoop rounded tablespoons of dough onto the prepared sheet, spacing 2 inches apart. Bake for 10-12 minutes. The marshmallows will puff and brown — that's exactly what you want. Cool on the sheet for 5 minutes before transferring.
Tips
- Tip: Use mini marshmallows, not regular-sized — regular ones are too large and will slide off the cookies or create uneven melting.
- Tip: These are best the day they're made — the marshmallows harden slightly overnight. If you have leftovers, a quick 10-second microwave blast brings them right back.
- Tip: For extra chocolatey cookies, swap ¼ cup of the semi-sweet chips for dark chocolate chips. The contrast with the sweet marshmallow is really good.
26. Vegan Double Chocolate Peppermint Cookies

Every December I end up making at least one batch of peppermint chocolate cookies, and this vegan version surprised me — I expected them to taste like a compromise, but they're genuinely chewy, deeply chocolatey, and the candy cane pieces on top make them look like something from a holiday bakery window. Nobody at the table knew they were vegan until I told them. The peppermint extract does a lot of work here — don't skip it and don't overdo it either, just a little goes a long way. These are also freezer-friendly, so I usually make a double batch in early December and pull them out as needed.
Ingredients
- 1 ½ cups all-purpose flour
- ½ cup unsweetened cocoa powder
- 1 teaspoon baking soda
- ¼ teaspoon salt
- ½ cup coconut oil, melted
- ¾ cup granulated sugar
- 3 tablespoons non-dairy milk (oat or almond work well)
- 1 teaspoon peppermint extract
- 1 teaspoon vanilla extract
- ¾ cup vegan chocolate chips (Enjoy Life brand is easy to find at Walmart or Target)
- 3–4 candy canes, crushed
Instructions
- Preheat your oven to 350°F and line two baking sheets with parchment paper.
- Whisk together the flour, cocoa powder, baking soda, and salt in a medium bowl and set aside.
- In a large bowl, stir the melted coconut oil and sugar together until combined, then mix in the non-dairy milk, peppermint extract, and vanilla extract.
- Fold the dry ingredients into the wet ingredients until a dough forms, then stir in the chocolate chips.
- Scoop tablespoon-sized balls of dough onto the prepared sheets, press them down slightly, and sprinkle crushed candy cane on top of each one.
- Bake for 10–12 minutes until the edges are set. They'll look slightly underdone in the center — that's fine, they firm up as they cool. Let them sit on the pan for 5 minutes before transferring.
Tips
- Tip: Crush the candy canes inside a zip-lock bag using a rolling pin — way less mess than doing it on the counter.
- Tip: Start with ½ teaspoon peppermint extract if you're not sure how strong you want the mint flavor — you can always add more next batch.
- Tip: These freeze beautifully. Layer them between parchment in a container and freeze for up to 2 months — just thaw at room temperature for 20 minutes before serving.
27. Gluten Free Double Chocolate Chip Cookies
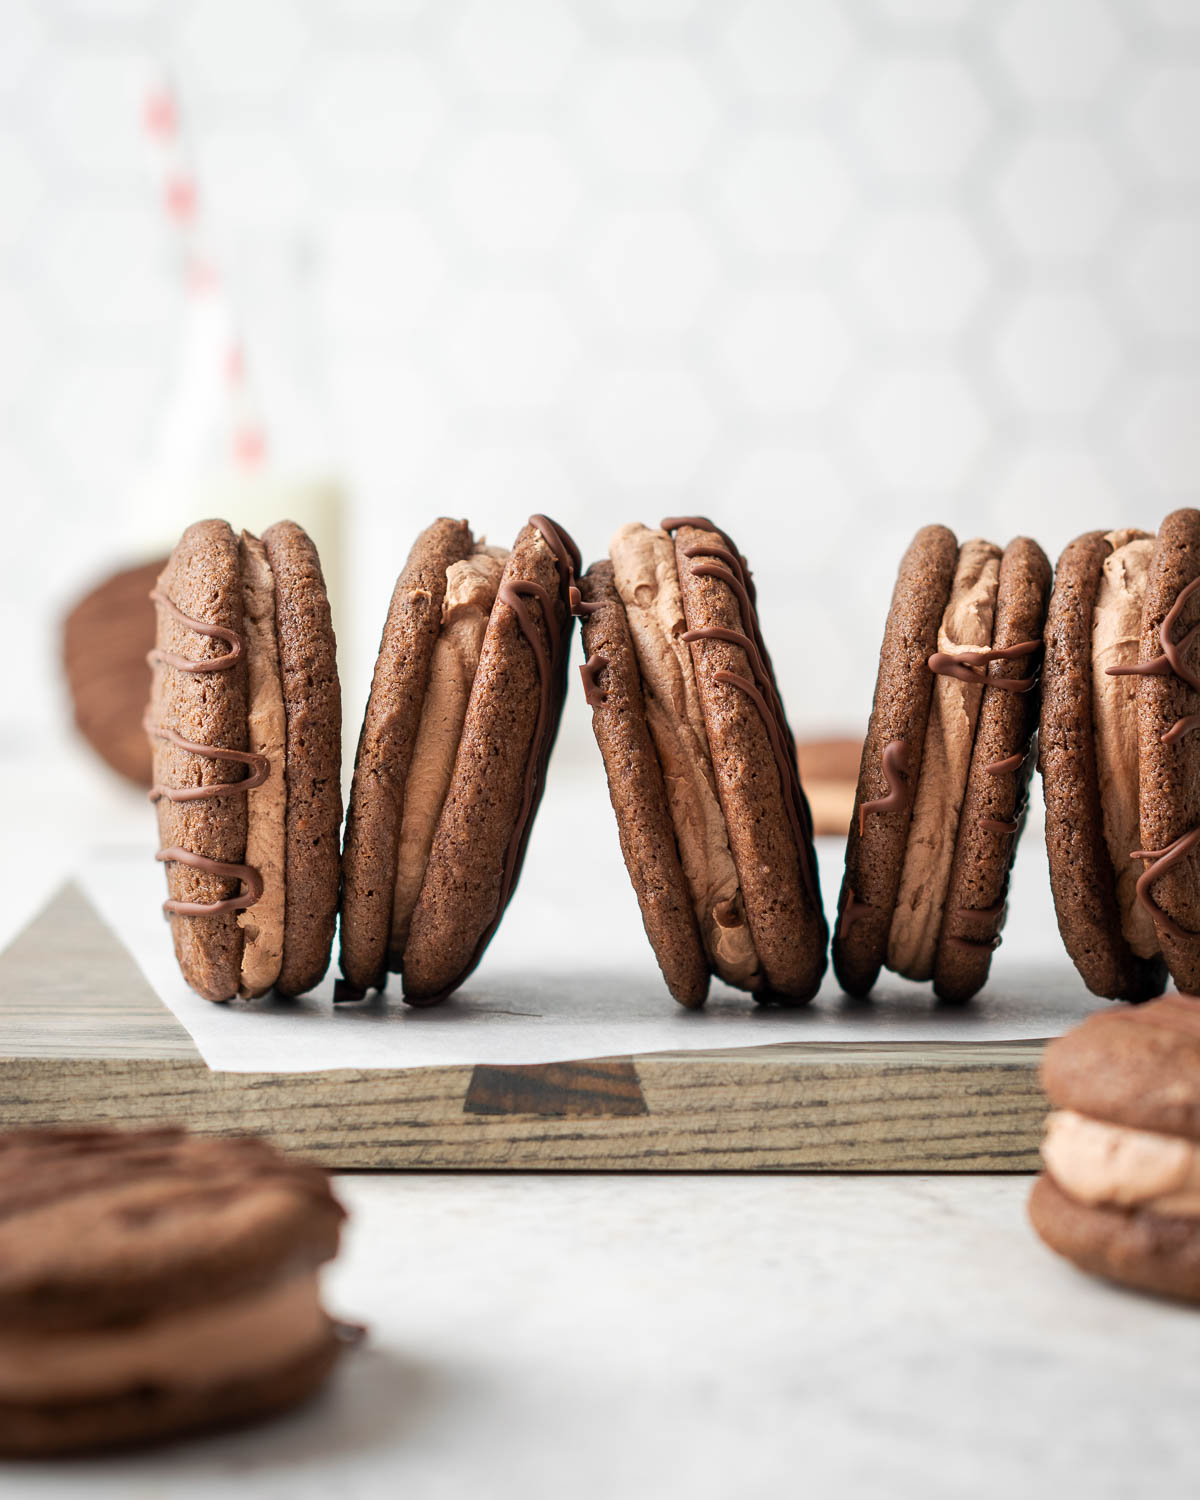
These are a gluten-free spin on those Little Debbie fudge rounds I used to see everywhere — two soft chocolate cookies sandwiched with a creamy chocolate filling. The gluten-free version uses a blend of GF flour and cocoa powder, and honestly the texture is so close to the original that it's a little uncanny. I made these for a friend who has celiac disease and she actually teared up a little, which tells you everything you need to know. The key is not overbaking them — pull them when the centers still look just slightly soft.
Ingredients
- 1 ½ cups gluten-free 1:1 baking flour (Bob's Red Mill or King Arthur work great)
- ½ cup unsweetened cocoa powder
- 1 teaspoon baking soda
- ¼ teaspoon salt
- ½ cup vegan butter or regular unsalted butter, softened
- ¾ cup granulated sugar
- 1 large egg (or flax egg for vegan: 1 tablespoon ground flaxseed + 3 tablespoons water, rested 5 minutes)
- 1 teaspoon vanilla extract
- ½ cup semi-sweet chocolate chips
- For the filling: 1 cup powdered sugar, 3 tablespoons softened butter, 2 tablespoons cocoa powder, 2–3 tablespoons milk
Instructions
- Preheat oven to 350°F. Line baking sheets with parchment paper.
- Whisk together the GF flour, cocoa powder, baking soda, and salt in a bowl. In a separate large bowl, beat the butter and sugar until fluffy, then mix in the egg and vanilla.
- Stir the dry ingredients into the wet until a soft dough forms, then fold in the chocolate chips.
- Scoop small rounds (about 1 tablespoon each) onto the prepared sheets, spacing them 2 inches apart. Flatten slightly with the back of a spoon.
- Bake 9–11 minutes until set around the edges. Cool completely on the pan before filling.
- Beat together the filling ingredients until smooth and creamy, adding milk one tablespoon at a time until spreadable. Sandwich a generous amount between two cooled cookies.
Tips
- Tip: GF dough can be stickier than regular dough — if it's hard to handle, chill it for 20 minutes before scooping.
- Tip: Match up cookies by size before filling so each sandwich looks even — small on top of small, large on top of large.
- Tip: Store assembled sandwiches in an airtight container in the fridge — the filling firms up nicely and the texture actually improves after a few hours.
28. The Best Basic Chocolate Chip Cookie

Sometimes you don't need anything fancy. You just need a chocolate chip cookie that works — crisp edges, chewy center, puddles of melted chocolate, and no weird techniques required. This is that recipe. No browning butter, no overnight chill, no special flour — just a straightforward dough that comes together in one bowl and bakes up beautifully every single time. Zainab has declared this "the only cookie that matters," which I find both hilarious and accurate. The trick to getting those crispy edges with a chewy middle is pulling the pan out of the oven when the centers still look just slightly underset.
Ingredients
- 2 ¼ cups all-purpose flour
- 1 teaspoon baking soda
- 1 teaspoon salt
- 1 cup (2 sticks) unsalted butter, at room temperature
- ¾ cup granulated sugar
- ¾ cup packed brown sugar
- 2 large eggs
- 2 teaspoons vanilla extract
- 2 cups semi-sweet chocolate chips
Instructions
- Preheat your oven to 375°F and line your baking sheets with parchment paper.
- In a medium bowl, whisk together the flour, baking soda, and salt. Set aside.
- In a large bowl, beat the butter with both sugars until light and fluffy — about 2–3 minutes by hand with a wooden spoon, or 1 minute with a hand mixer. Beat in the eggs one at a time, then stir in the vanilla.
- Stir the flour mixture into the butter mixture until just combined — don't overmix or the cookies will be tough. Fold in the chocolate chips.
- Drop rounded tablespoons of dough onto the prepared baking sheets, spacing them about 2 inches apart. Bake for 9–11 minutes until the edges are golden but the centers still look slightly soft.
- Let cookies cool on the pan for 5 minutes — they'll finish setting up during that time. Then transfer to a wire rack.
Tips
- Tip: Room temperature butter is non-negotiable here — cold butter won't cream properly and your cookies will spread unevenly. Leave it out for at least 30 minutes.
- Tip: For thicker cookies, refrigerate the dough for 30 minutes before baking — it keeps them from spreading too much in the oven.
- Tip: Use a mix of chocolate chips and roughly chopped chocolate bar for more interesting chocolate pockets throughout each cookie.
29. Biscoff Butter Cookies
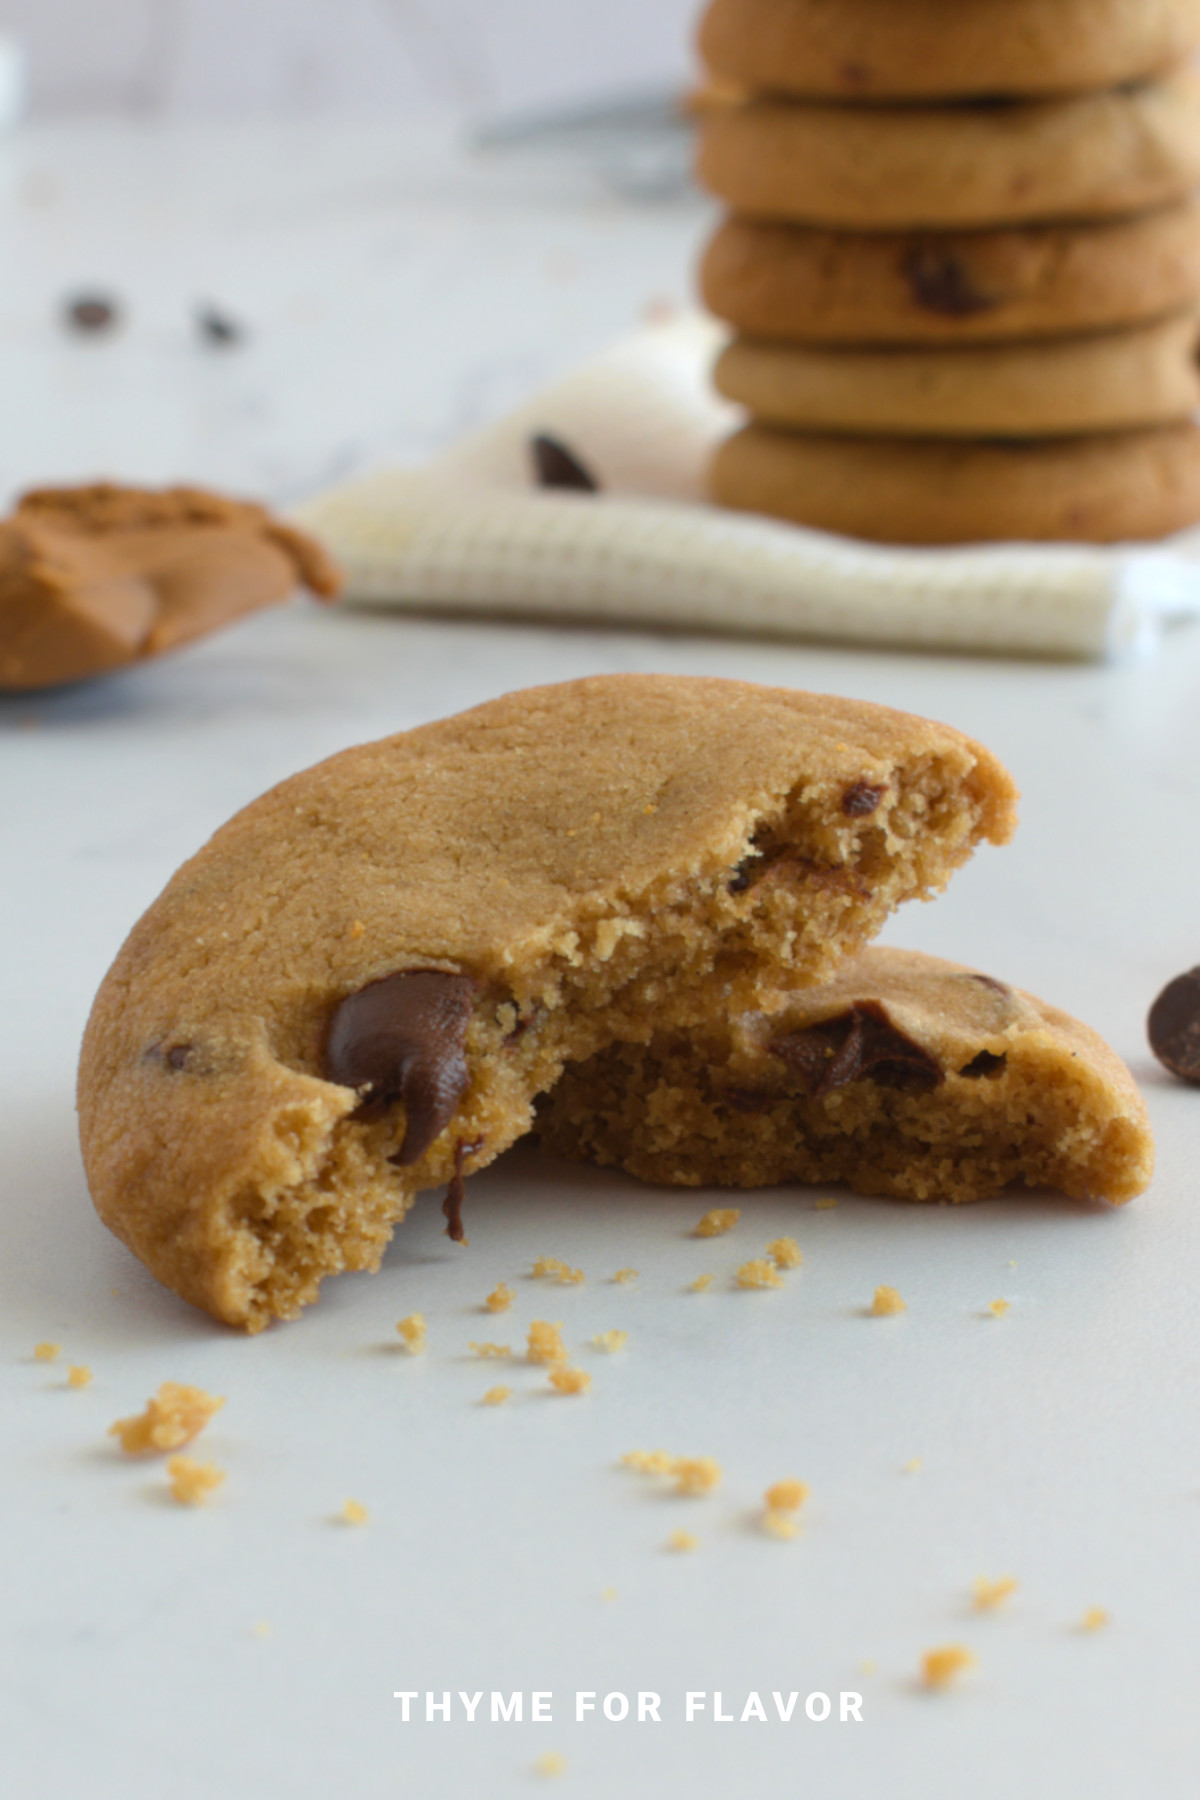
I picked up a jar of Biscoff spread on a whim at Trader Joe's a couple of years ago and I have not stopped cooking with it since. These cookies take that warm, spiced, caramelized flavor and turn it into a crisp, buttery cookie that's studded with dark chocolate chips. The combination of Biscoff and chocolate sounds unusual but it works almost embarrassingly well — the cookie spice and the bitter chocolate are a genuinely good match. They come together fast with no chilling required, which makes them great for last-minute occasions when you need to bring something impressive without spending hours in the kitchen.
Ingredients
- ½ cup unsalted butter, softened
- ½ cup Biscoff spread (cookie butter — find it at Trader Joe's, Walmart, or most major grocery stores)
- ½ cup granulated sugar
- ½ cup packed brown sugar
- 1 large egg
- 1 teaspoon vanilla extract
- 1 ½ cups all-purpose flour
- ½ teaspoon baking soda
- ¼ teaspoon cinnamon
- ¼ teaspoon salt
- ¾ cup dark chocolate chips
Instructions
- Preheat oven to 350°F and line two baking sheets with parchment paper.
- Beat together the softened butter, Biscoff spread, granulated sugar, and brown sugar in a large bowl until creamy and well combined.
- Mix in the egg and vanilla extract until smooth.
- Add the flour, baking soda, cinnamon, and salt, stirring until a dough forms. Fold in the dark chocolate chips.
- Scoop rounded tablespoons of dough onto the prepared sheets and bake for 10–12 minutes until the edges are golden and just set. The cookies will be soft — they crisp up as they cool.
- Cool on the pan for 5 minutes, then transfer to a rack. Store in an airtight container at room temperature for up to 5 days.
Tips
- Tip: Don't substitute smooth peanut butter for the Biscoff — the flavor profile is completely different and you'll lose that distinctive spiced caramel taste.
- Tip: Press a few extra chocolate chips onto the tops of the dough balls right before baking — they look much more dramatic and bakery-worthy when they come out.
- Tip: If you can't find Biscoff, Trader Joe's Cookie Butter is the same product under a different name and works perfectly here.
30. Tigernut Flour Chocolate Chip Cookies
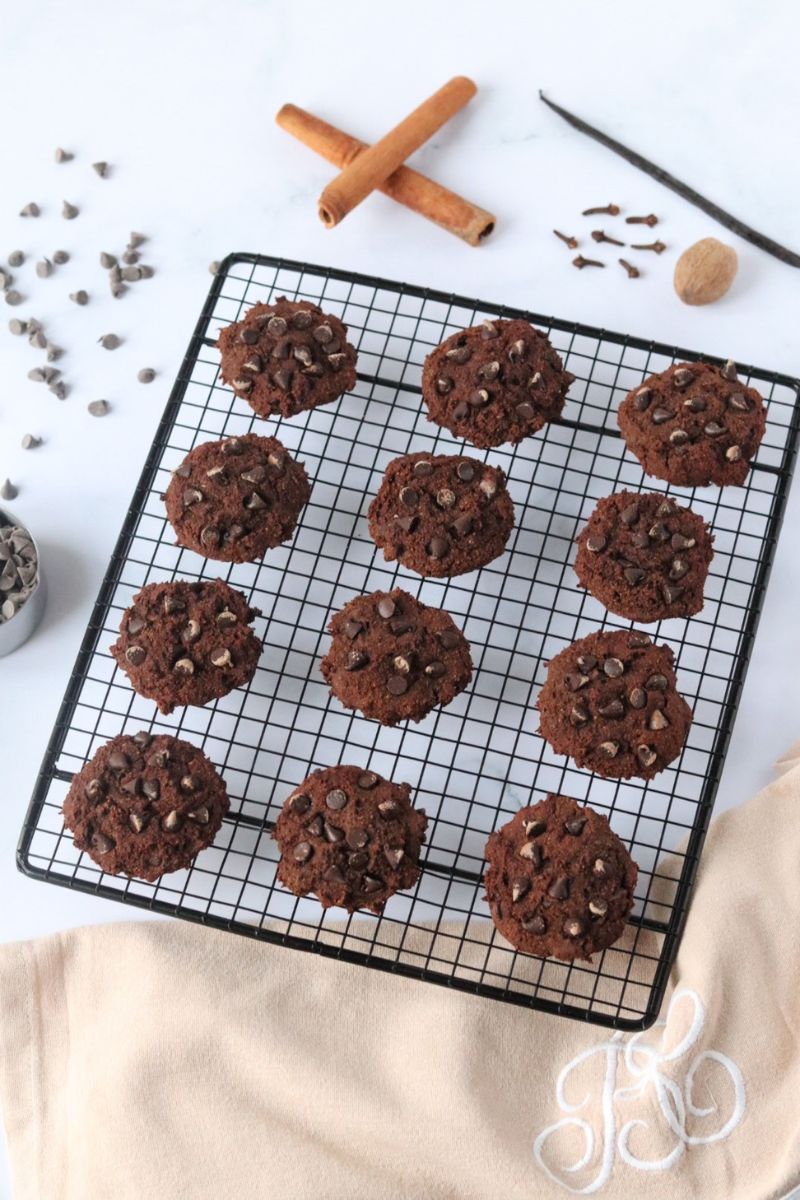
Tigernut flour was completely new to me until a reader messaged asking if I had any paleo-friendly cookie recipes, and my research led me here. For anyone who hasn't come across it, tigernut flour is made from a small root vegetable — it's naturally sweet, slightly nutty, and completely grain-free and nut-free despite the name. Combined with pumpkin puree (which acts as a binder and adds a subtle earthiness), these cookies are soft, chewy, and genuinely satisfying without a single grain or refined ingredient. They're paleo-friendly, gluten-free, and a solid option for anyone who needs to navigate multiple dietary restrictions at once.
Ingredients
- 1 ½ cups tigernut flour (available online or at health food stores; look for Anthony's brand on Amazon)
- ¼ teaspoon baking soda
- ¼ teaspoon salt
- ¼ cup pumpkin puree (not pumpkin pie filling — just plain canned pumpkin)
- 3 tablespoons coconut oil, melted
- 3 tablespoons maple syrup
- 1 teaspoon vanilla extract
- ½ cup paleo or vegan chocolate chips (Enjoy Life semi-sweet chips are nut-free and easy to find)
Instructions
- Preheat your oven to 350°F and line a baking sheet with parchment paper.
- Whisk together the tigernut flour, baking soda, and salt in a medium bowl.
- In a separate bowl, mix together the pumpkin puree, melted coconut oil, maple syrup, and vanilla extract until smooth and combined.
- Stir the wet ingredients into the dry until a soft dough forms, then fold in the chocolate chips. The dough will be slightly stickier than a regular cookie dough — that's normal.
- Scoop tablespoon-sized portions of dough onto the prepared sheet and flatten each one gently with damp fingers — tigernut flour cookies don't spread on their own in the oven.
- Bake for 12–14 minutes until the edges are lightly golden. Cool completely on the pan before moving — they firm up significantly as they cool.
Tips
- Tip: Tigernut flour has a naturally sweet, slightly nutty flavor — the cookies don't need a lot of added sweetener, so resist the urge to add more maple syrup than the recipe calls for.
- Tip: These cookies are softer when warm and firmer once fully cooled — if you want a chewier texture, store them in an airtight container with a small piece of bread overnight.
- Tip: If you can't source tigernut flour locally, Anthony's brand on Amazon ships quickly and the price is reasonable — one bag makes several batches of cookies.
31. Chocolate Peanut Butter Chip Cookies (Crumbl Copycat)
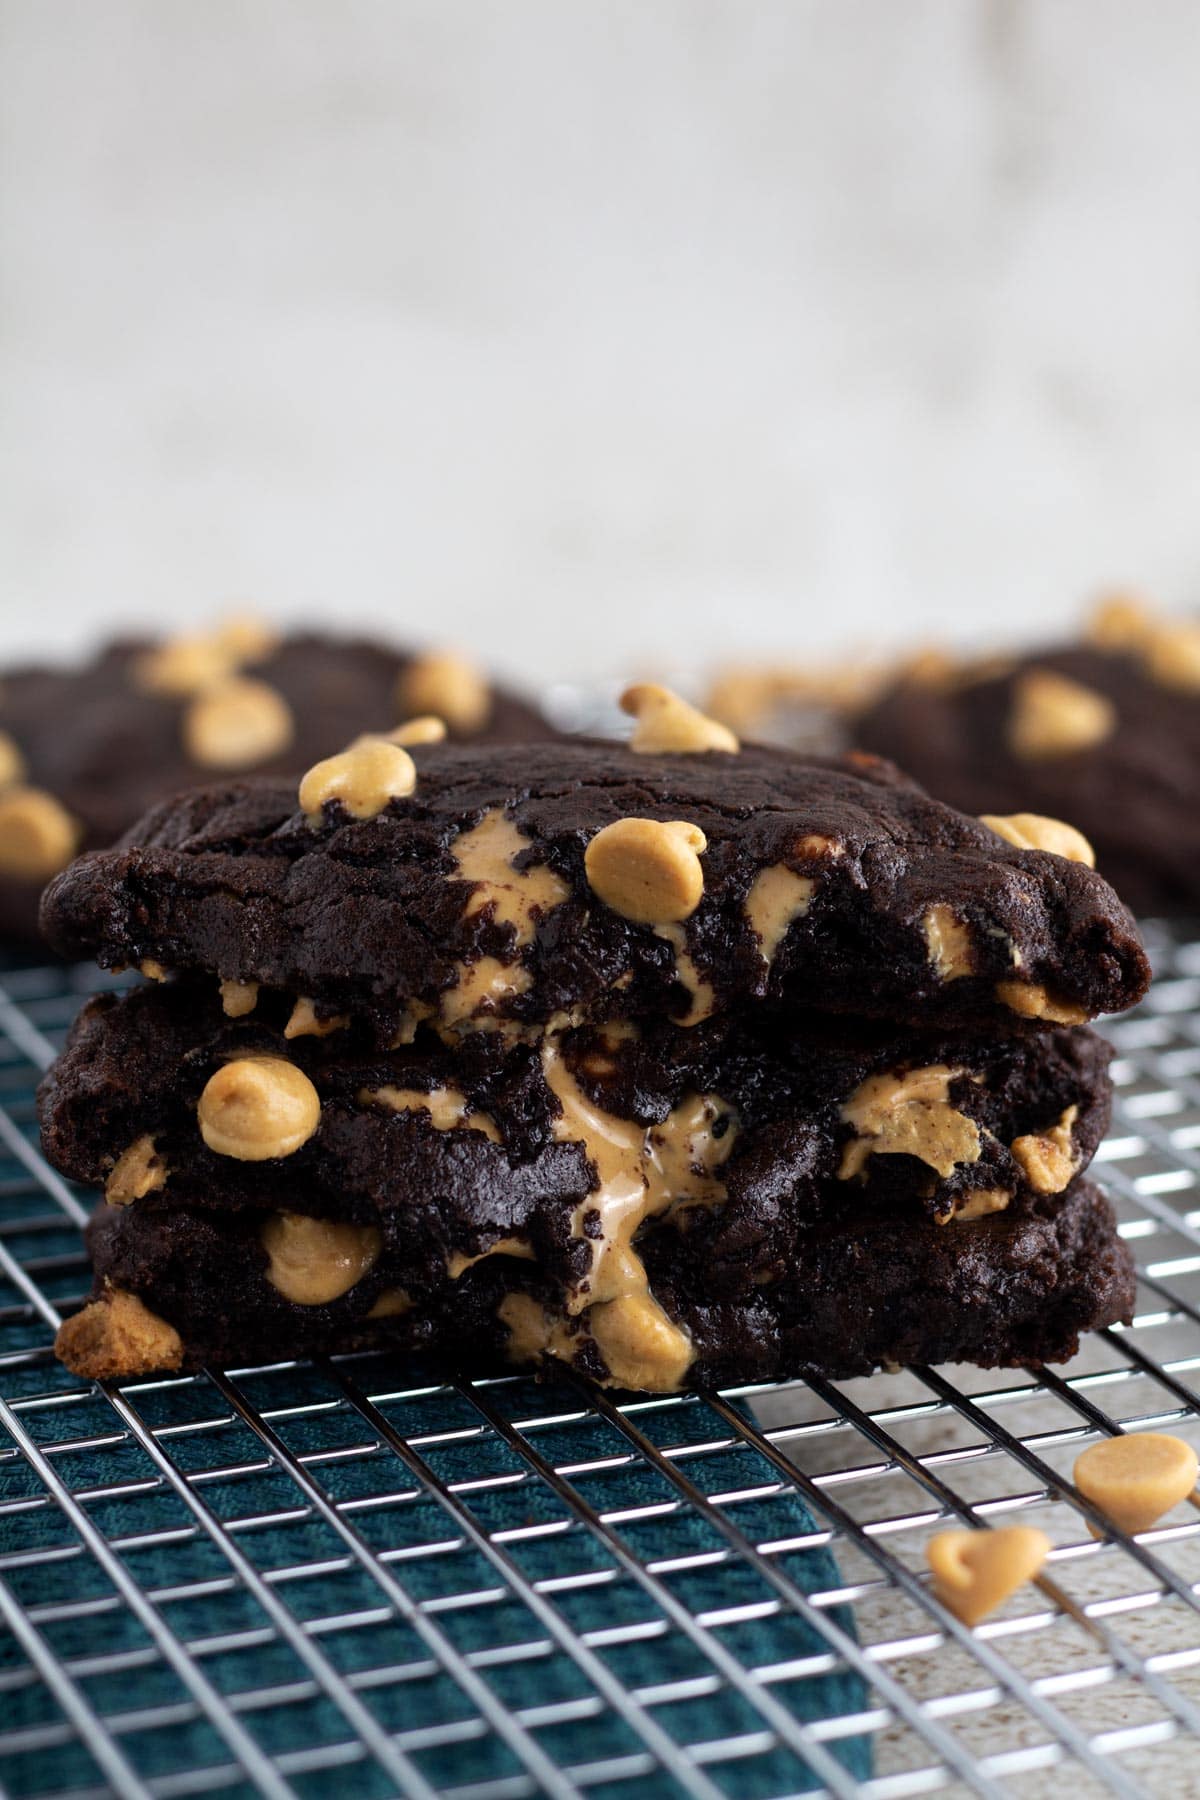
I saved this one for last because it's the kind of cookie that ends a list on a high note. Thick, dark, deeply chocolatey, loaded with peanut butter chips — this is my Crumbl copycat that I actually think holds its own against the real thing. The secret is dark cocoa powder and a bit of cornstarch, which keeps the centers soft and almost fudgy even after the cookies cool completely. I make a double batch every time because they disappear faster than I can stack them on the plate.
The other thing I love about this recipe is that you can freeze the portioned dough balls and bake straight from frozen — just add 2-3 extra minutes. Saad figured this out by accident when he found a bag of frozen dough in the freezer and baked them himself. He was very proud. I was just glad they turned out right.
Ingredients
- 1 cup (2 sticks) unsalted butter, softened to room temperature
- 1 cup granulated sugar
- ½ cup packed light brown sugar
- 2 large eggs, room temperature
- 2 teaspoons pure vanilla extract
- 1¾ cups all-purpose flour
- ¾ cup dark cocoa powder (Dutch-process works best; regular unsweetened cocoa is fine too)
- 1 tablespoon cornstarch
- 1 teaspoon baking soda
- ½ teaspoon fine salt
- 1½ cups peanut butter chips (Reese's brand, found at Walmart or Kroger)
Instructions
- Preheat your oven to 350°F. Line two baking sheets with parchment paper and set aside.
- In a large bowl, beat the softened butter with both sugars until light and fluffy, about 2-3 minutes by hand or with a hand mixer. Add the eggs one at a time, beating well after each, then mix in the vanilla.
- In a separate bowl, whisk together the flour, dark cocoa powder, cornstarch, baking soda, and salt. Add the dry ingredients to the wet ingredients and stir until just combined — don't overmix or the cookies will be tough.
- Fold in the peanut butter chips. Chill the dough for at least 30 minutes — this is what keeps these cookies thick instead of spreading into flat discs.
- Scoop the dough into large balls (about 3 tablespoons each) and place them 2 inches apart on the prepared baking sheets. Bake for 10-12 minutes — the centers will look slightly underdone and that's exactly right. They firm up as they cool.
- Let the cookies rest on the baking sheet for 5 minutes before transferring to a wire rack. They need that time to set or they'll fall apart when you lift them.
Tips
- Tip: Don't skip the cornstarch — it's a small amount but it makes a real difference in that soft, tender texture that makes these feel bakery-style rather than homemade.
- Tip: To freeze, scoop the dough into balls after chilling, arrange on a sheet pan, freeze until solid (about 1 hour), then transfer to a zip-lock bag. Bake from frozen at 350°F for 13-14 minutes — no thawing needed.
- Tip: If you can't find peanut butter chips, roughly chopped Reese's Peanut Butter Cups work just as well and honestly might be even better — the pockets of peanut butter filling get melty and gooey in the oven.
View More Recipes here Recipe Roundups
Thirty-one chocolate cookie recipes sounds like a lot until you realize how different they all are. Some are crispy and thin. Some are thick and fudgy and barely hold together. Some are dead simple — one bowl, twenty minutes, done. Others take a little more patience but pay off in a way that makes you understand why people bake. I've made my way through a lot of these on weekends when Zainab asks if we can bake "something chocolatey," and every single time I'm reminded that chocolate and cookies together is just one of those combinations that never gets old.
If I had to point you somewhere to start, go with whatever matches your mood and your pantry. Not in the mood to chill dough? Pick a no-chill recipe. Want something to impress at a cookie swap? Go for the double chocolate crinkles or the stuffed ones — they always get the most attention. Baking with kids? Stick to the simpler drop cookies where it doesn't matter if the scoops aren't perfectly uniform. There's a recipe in this list for every situation, and that's exactly why I put all 31 here instead of trimming it down.
If you try any of these, I'd genuinely love to know which one you went with and how it turned out. Cookie baking is one of those things where small tweaks — a few extra minutes in the oven, a pinch more salt, slightly colder butter — make a real difference, and every kitchen runs a little differently. Trust the process, taste the dough (I always do), and don't stress if the first batch isn't perfect. Mine rarely are. 🍪🍫✨
More Recipes You'll Want to Bookmark
- Browse All Recipe Roundups — if you liked this list, there are plenty more organized collections to explore over here.
- More from ForFoodieFriends — weeknight dinners, baking projects, Pakistani comfort food, and everything in between.
Frequently Asked Questions
Which chocolate cookie recipe from this list is easiest for beginners?
The simple drop cookies and one-bowl fudgy cookies are the best starting point. They don't require chilling the dough, no special equipment, and the margin for error is pretty forgiving. If you're new to baking cookies from scratch, start there and build confidence before moving to the stuffed or layered ones.
Can I freeze chocolate cookie dough ahead of time?
Yes, and honestly I recommend it. Scoop the dough into balls, freeze them on a sheet pan until solid, then transfer to a zip-lock bag. They keep well for up to 3 months. When you're ready to bake, pull them straight from the freezer and add 2-3 extra minutes to the bake time — no need to thaw first.
How do I keep chocolate cookies soft after baking?
Store them in an airtight container at room temperature with a slice of plain white bread tucked in — the cookies absorb just enough moisture from the bread to stay soft without getting soggy. This trick genuinely works and I use it all the time. They'll stay soft for 4-5 days this way.
What type of chocolate is best for chocolate cookies?
It depends on the recipe, but in general, semi-sweet chocolate gives you the best balance — rich enough to taste like real chocolate without being overwhelmingly bitter or too sweet. For a deeper flavor, go 60-70% dark. I avoid milk chocolate in most cookie recipes because it can make things too sweet and the flavor gets a little flat when baked.
Why do my chocolate cookies spread too much in the oven?
Usually it's one of three things: butter that was too warm or melted, dough that wasn't chilled long enough, or a baking sheet that was still hot from the previous batch. I learned this the hard way — my first batch would always come out beautiful and the second batch would be flat puddles. Let your baking sheet cool completely between rounds, and if the dough feels soft or sticky before scooping, refrigerate it for 20-30 minutes.
Share This Post!
If this list helped you find a new chocolate cookie to try, pin it or share it with someone who would appreciate 31 reasons to preheat their oven. 🍪✨
View More Recipes here Recipe Roundups





Comments
No Comments