
Valentine's Day in our house starts in the kitchen, not at a flower shop. Every year, sometime in late January, Zainab starts hovering near the counter asking when we're going to make Valentine's Day cookies — and honestly, I look forward to it just as much as she does. There's something about cutting hearts out of dough, dusting everything in pink sugar, and watching a tray of red velvet cookies come out of the oven that makes the whole house feel warmer. These aren't elaborate pastry-chef productions. They're cookies. Real ones, made by a home cook with a rolling pin and a sheet pan.
What makes a Valentine's cookie worth making? In my opinion, it has to look like it belongs on the holiday — pink, red, chocolate, heart-shaped, or all of the above — but it also has to actually taste good. I've seen plenty of beautiful Valentine's cookies that are basically just sugar and food coloring. The ones I keep on this list have real flavor: real strawberry, real chocolate, real butter. Some are dead simple (three-ingredient cookies, air fryer cake mix cookies), some take a little more effort (sandwich cookies, sour cream sugar cookies with cream cheese frosting), and a few are total crowd-pleasers for classroom parties or gifting. For more cookie inspiration year-round, I have a whole collection of cookie recipes on the site worth browsing.
This list has 30 Valentine's Day cookie recipes covering a lot of ground — strawberry crinkle cookies, red velvet sugar cookies, chocolate peanut butter blossoms, Love Bug Oreos (which Zainab specifically requests), lemon raspberry cookies, white chocolate strawberry shortbread, and so much more. Whether you're baking with kids, making a cookie box for someone you love, or just want something sweet for February 14th, there's something here that fits. If you're also planning a Valentine's dessert spread, my Valentine's Day desserts roundup and Valentine's Day cupcakes list pair really well with this one.
Here are the 30 cookies I keep coming back to — pick one, pick five, or bake your way through the whole list if you're feeling ambitious.
Top 30 Valentine's Day Cookie Recipes
29. Apple Cider Cookies for Valentine's Day

I know apple cider sounds more like October than February, but hear me out — these cookies are genuinely one of the more interesting things on this list. The warm spice from the cider reduction gives them this almost mulled-wine depth, and when you drizzle pink icing over the top, they look completely Valentine's Day-ready. I made a batch last year on a whim and my husband kept eating them before I could plate them. The spiced cider glaze is what sets these apart from a plain sugar cookie — it adds flavor the sprinkles alone can never give you.
Ingredients
- 2 cups apple cider, reduced to ½ cup
- 2 ½ cups all-purpose flour
- 1 teaspoon baking soda
- 1 teaspoon cinnamon
- ¼ teaspoon nutmeg
- ½ teaspoon salt
- ¾ cup (1½ sticks) unsalted butter, softened
- 1 cup granulated sugar
- 1 large egg
- 1 teaspoon vanilla extract
- 1 cup powdered sugar (for glaze)
- 2–3 tablespoons milk (for glaze)
- Pink or red food coloring (for glaze)
Instructions
- Simmer the apple cider in a small saucepan over medium heat until reduced to about ½ cup, roughly 15–20 minutes. Let it cool completely — if it's warm it'll melt your butter.
- Whisk together flour, baking soda, cinnamon, nutmeg, and salt in a bowl. Set aside.
- Beat butter and sugar together until light and fluffy. Mix in the egg, vanilla, and cooled cider reduction.
- Gradually stir in the flour mixture until a soft dough forms. Chill the dough for 30 minutes in the refrigerator — this keeps the cookies from spreading too much.
- Preheat oven to 350°F. Scoop tablespoon-sized balls onto a parchment-lined baking sheet and bake for 10–12 minutes until the edges are just set. Cool completely on a wire rack.
- Mix powdered sugar with milk and a drop of pink food coloring to make the glaze. Drizzle over cooled cookies and let set for 20 minutes before serving.
Tips
- Tip: Don't skip the cider reduction step — it's what gives these their flavor. Using plain cider without reducing it just makes wet, bland dough.
- Tip: You can find apple cider at Trader Joe's or Whole Foods in the refrigerated juice section; regular apple juice works in a pinch but the flavor won't be as deep.
- Tip: Add red sprinkles on top of the wet glaze for an extra Valentine's Day touch — Saad spotted these on the counter and immediately asked if they were for him.
28. Love Bug Oreos

These are the ones you make when you have zero interest in baking from scratch but still want to show up with something adorable. You start with store-bought Oreos — the kind you can grab at any Walmart or Costco — and transform them into little chocolate-dipped love bugs with candy eyes, heart sprinkles, and red and pink melting chocolate. Kids lose their minds over these. They're also genuinely fun to decorate, which makes them a good activity if you've got little ones around on Valentine's Day. No oven required once you have your supplies ready.
Ingredients
- 24 Oreo cookies (regular size)
- 1 cup red candy melts
- 1 cup pink candy melts
- 48 small candy eyes
- Heart-shaped sprinkles or mini heart candies
- Black gel food coloring or black candy melts (for spots)
- 1 tablespoon coconut oil or vegetable shortening (to thin candy melts if needed)
Instructions
- Melt red and pink candy melts in separate microwave-safe bowls in 30-second intervals, stirring between each. If the chocolate feels too thick, stir in a small amount of coconut oil to loosen it up.
- Dip each Oreo halfway into the red or pink melted chocolate, letting the excess drip off. Place on a parchment-lined baking sheet.
- While the chocolate is still wet, press two candy eyes onto the undipped half of the cookie to create the bug face. Add a small heart sprinkle for the mouth.
- Use a toothpick dipped in black candy melts or gel coloring to dot small spots across the dipped chocolate half — this gives the ladybug effect.
- Let the cookies set at room temperature for about 30 minutes, or refrigerate for 10 minutes to speed things up. Store in a single layer so the decorations don't smudge.
Tips
- Tip: Candy melts from Wilton (available at Walmart or Michael's) work better than chocolate chips here because they set firm and glossy without tempering.
- Tip: Set up an assembly line before you start — dip all cookies first, then go back and add eyes and decorations while the chocolate is still tacky. Trying to do it one at a time means half your cookies will set before you can decorate them.
- Tip: These are great for classroom Valentine's parties — they hold up well at room temperature and kids are much more excited about a love bug than a plain cookie in a plastic bag.
27. Valentine's Day Blossom Sugar Cookies

Think peanut butter blossoms, but make them Valentine's Day. You get a soft sugar cookie base pressed with a Hershey's Kiss or a chocolate heart candy right out of the oven, with pink and red sprinkles worked into the dough or scattered on top. These are one of those recipes where the effort is low but the payoff looks like you spent the whole afternoon baking. The chocolate sinks slightly into the warm cookie as it cools, which creates this beautiful little indent that's completely satisfying. I've made these with both Hershey's Kisses and those foil-wrapped chocolate hearts from the Valentine's display at the grocery store — both work perfectly.
Ingredients
- 2 ¼ cups all-purpose flour
- 1 teaspoon baking soda
- ½ teaspoon salt
- 1 cup (2 sticks) unsalted butter, softened
- ¾ cup granulated sugar, plus extra for rolling
- ¾ cup powdered sugar
- 2 large eggs
- 2 teaspoons vanilla extract
- ¼ cup red and pink Valentine's sprinkles
- 24 Hershey's Kisses or chocolate heart candies, unwrapped
Instructions
- Preheat oven to 375°F. Whisk together flour, baking soda, and salt in a bowl. Set aside.
- Beat butter, granulated sugar, and powdered sugar together until light and fluffy, about 3 minutes. Add eggs and vanilla and beat until combined.
- Gradually mix in the flour mixture. Fold in the sprinkles gently so they don't bleed too much into the dough.
- Roll dough into 1-inch balls, then roll each ball in granulated sugar. Place 2 inches apart on a parchment-lined baking sheet.
- Bake for 8–10 minutes until edges are set but centers still look slightly underdone. Remove from oven and immediately press one unwrapped chocolate into the center of each cookie. The residual heat will melt it just slightly — that's what you want.
- Let cookies cool on the baking sheet for 5 minutes before transferring to a wire rack. Don't move them too early or the chocolate will slide.
Tips
- Tip: Unwrap all your chocolates before you start baking — you need to press them in immediately when the cookies come out and you won't have time to unwrap 24 Kisses while hot cookies sit on the pan.
- Tip: If you want the sprinkles to stay bright and not bleed into the dough, fold them in at the very end and don't overmix — the less you work the dough after adding them, the better.
- Tip: These freeze really well before the chocolate is pressed in — bake the plain sugar cookie balls, freeze them, then thaw and add the chocolate fresh when you're ready to serve.
26. Lemon Raspberry Cookies
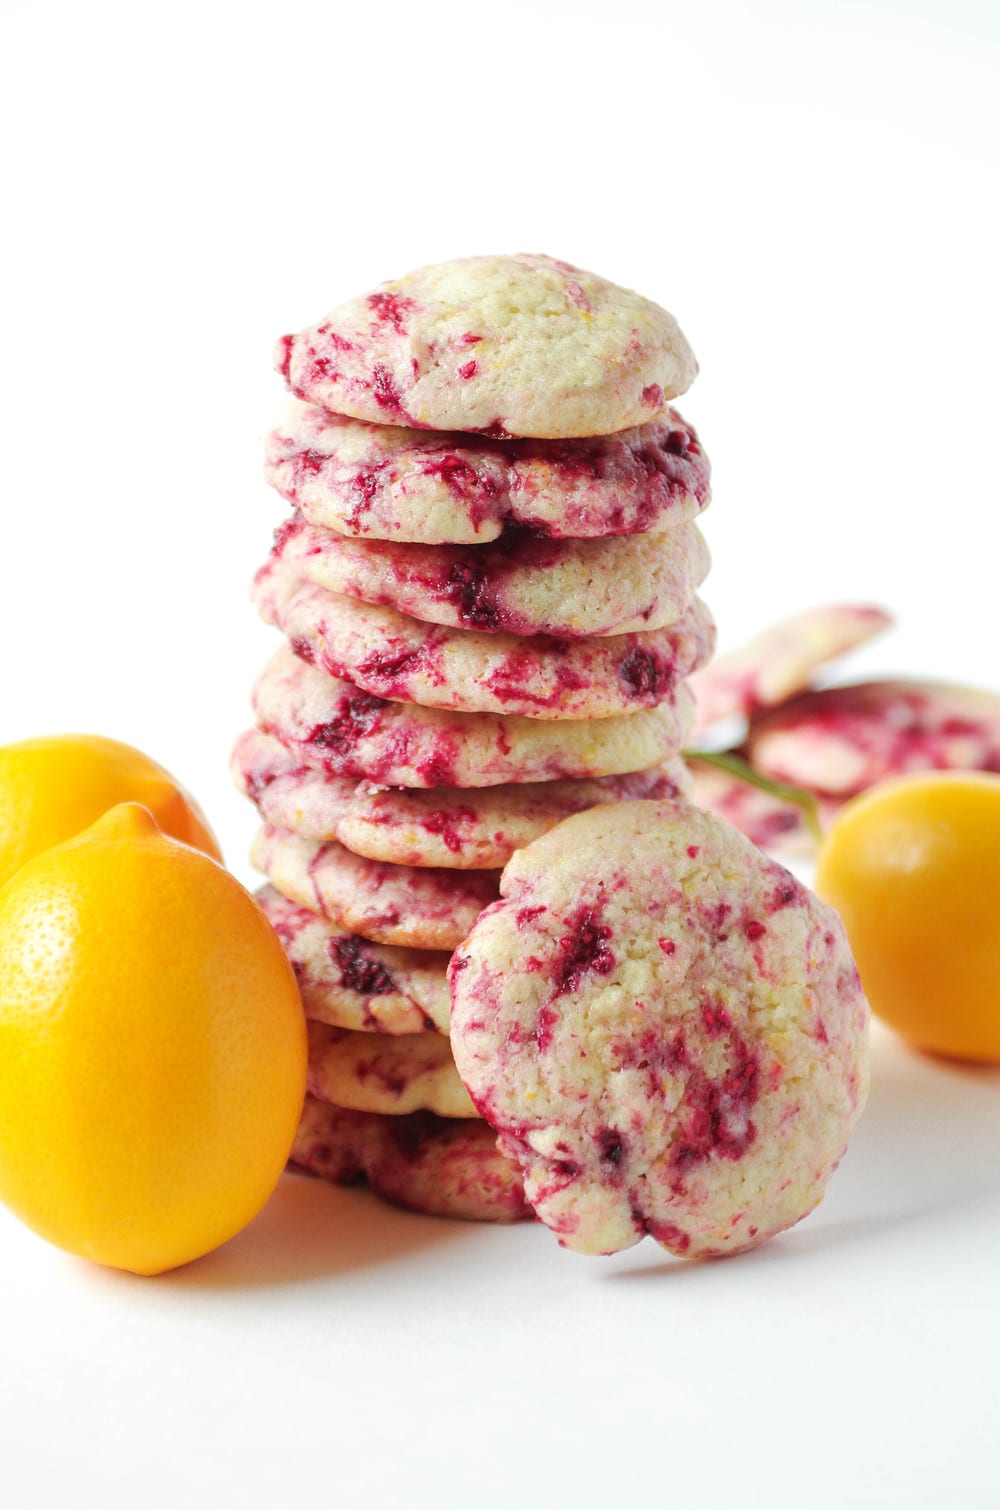
Not every Valentine's cookie needs to be chocolate. These lemon raspberry cookies are bright, a little tart, and finished with a raspberry glaze that turns the most gorgeous natural pink color — no food dye needed. The lemon zest in the dough does a lot of work here; don't skip it or swap it for bottled lemon juice. I love these because they feel a little more grown-up than the typical Valentine's spread, and they pair really nicely alongside richer chocolate cookies if you're putting together a full box. If you enjoy the lemon-raspberry combination, you might also like my raspberry swirl shortbread cookies — similar flavor profile but with a buttery shortbread base.
Ingredients
- 2 cups all-purpose flour
- ½ teaspoon baking powder
- ¼ teaspoon salt
- ¾ cup (1½ sticks) unsalted butter, softened
- 1 cup granulated sugar
- 1 large egg
- Zest of 2 lemons
- 2 tablespoons fresh lemon juice
- 1 teaspoon vanilla extract
- ¼ cup fresh or frozen raspberries (for glaze)
- 1 cup powdered sugar (for glaze)
- 1–2 tablespoons fresh lemon juice (for glaze)
Instructions
- Preheat oven to 350°F. Whisk together flour, baking powder, and salt in a bowl. Set aside.
- Beat butter and sugar together until pale and fluffy. Mix in the egg, lemon zest, lemon juice, and vanilla until smooth.
- Stir in the flour mixture until just combined. Don't overwork it — stop as soon as you don't see dry flour streaks.
- Scoop rounded tablespoons of dough onto a parchment-lined baking sheet, spacing them 2 inches apart. Bake for 10–12 minutes until the edges are lightly golden. Cool completely before glazing.
- Make the raspberry glaze: press raspberries through a fine mesh strainer to get about 2 tablespoons of seedless puree. Whisk together with powdered sugar and lemon juice until smooth and pourable. Add more lemon juice a teaspoon at a time if it's too thick.
- Spoon or drizzle the glaze over cooled cookies. Let set for at least 30 minutes before stacking or packaging.
Tips
- Tip: Frozen raspberries work just as well as fresh for the glaze — thaw them first and they'll strain even more easily than fresh ones.
- Tip: The glaze naturally turns a beautiful dusty pink from the raspberry puree alone — you really don't need food coloring, which makes these feel a little more elegant than heavily dyed cookies.
- Tip: These cookies are on the softer side, so if you prefer a crispier texture, bake for 13–14 minutes and let them cool fully on the pan before moving — they firm up as they cool.
25. Savoiardi (Ladyfingers)
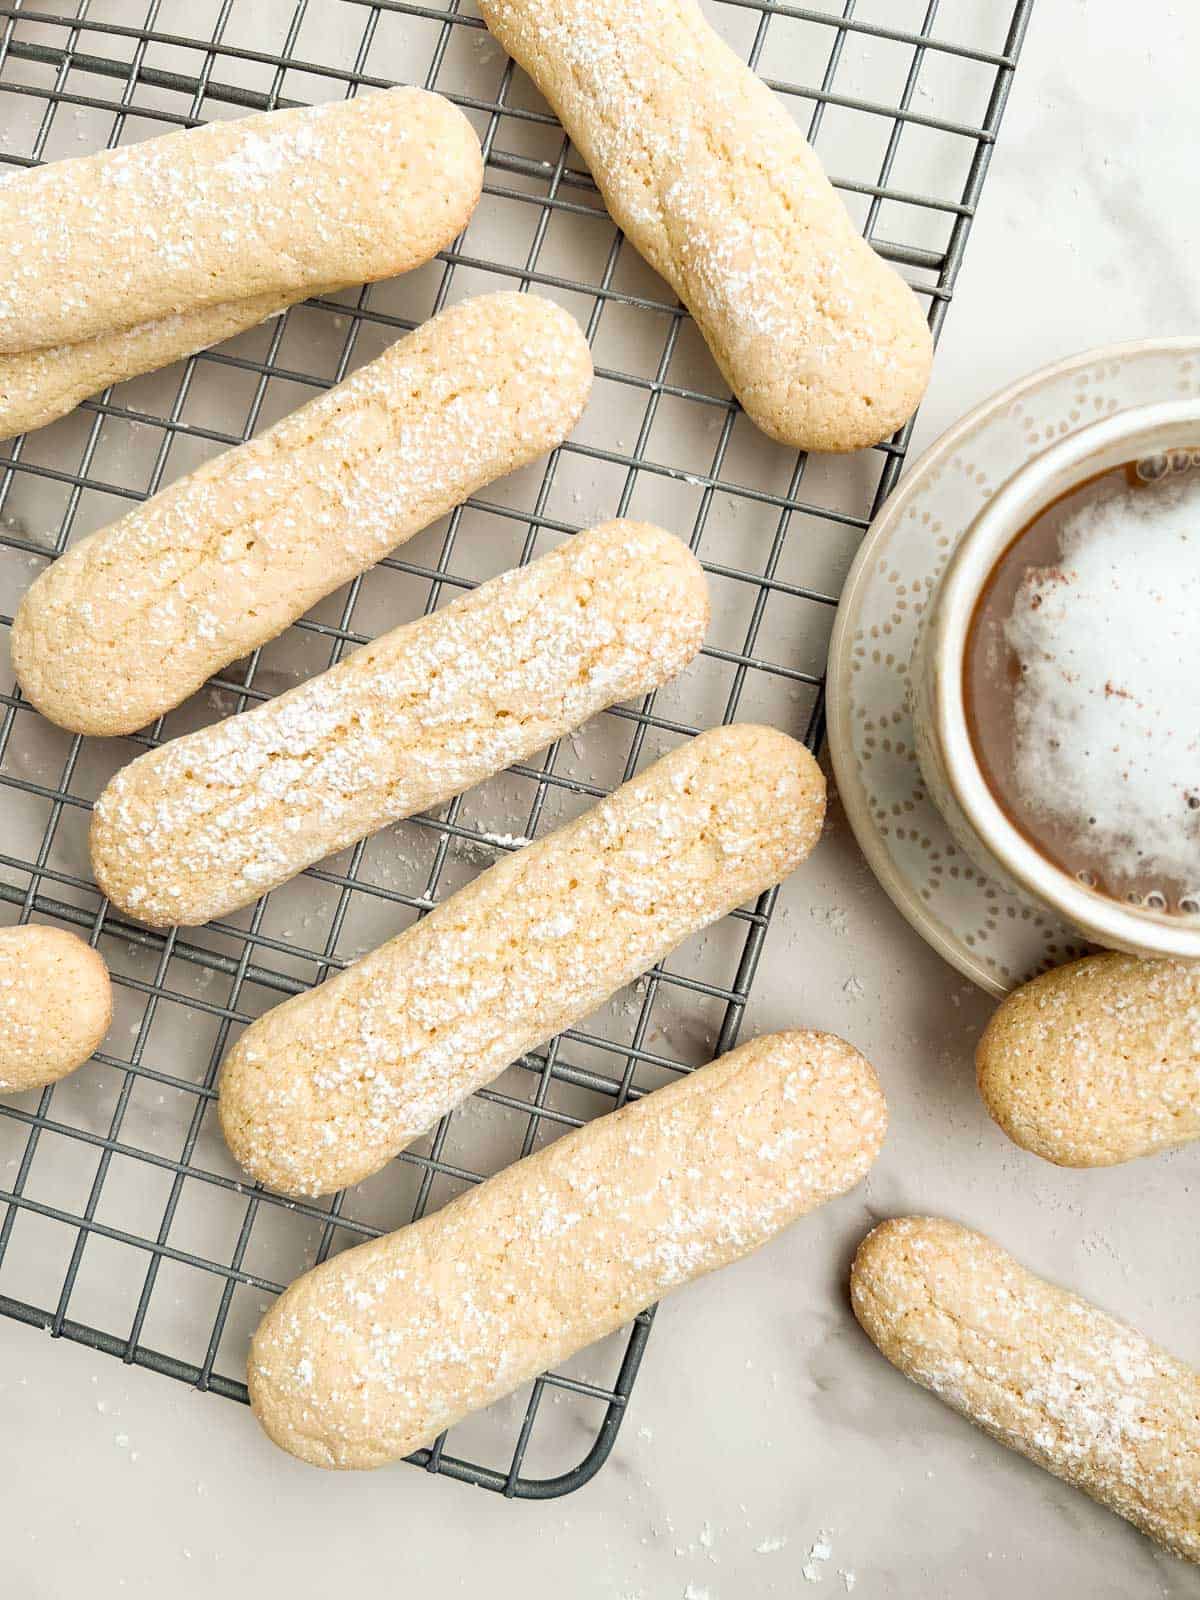
Homemade ladyfingers are one of those things I kept putting off because they sounded fussy — and then I actually made them and realized they're mostly just a well-whipped egg situation. Light, airy, and barely sweet, they're gorgeous on a Valentine's dessert tray, especially if you're planning to make tiramisu or just want something elegant to serve alongside coffee. This isn't the kind of cookie you eat by the fistful; it's the kind you set out on a plate and feel quietly proud of. The texture is crisp on the outside and soft in the middle, and that dusting of powdered sugar on top makes them look far more restaurant-worthy than the effort suggests.
Ingredients
- 3 large eggs, separated, at room temperature
- ½ cup granulated sugar, divided
- 1 teaspoon vanilla extract
- ¾ cup all-purpose flour, sifted
- ¼ teaspoon cream of tartar
- Powdered sugar, for dusting (about 3 tablespoons)
Instructions
- Preheat your oven to 350°F. Line two baking sheets with parchment and fit a piping bag with a large round tip (or use a zip-lock bag with the corner snipped off).
- Beat the egg yolks with ¼ cup sugar and vanilla for about 3-4 minutes until the mixture is thick, pale, and ribbon-like. Set aside.
- In a separate clean bowl, beat the egg whites with cream of tartar until foamy, then gradually add the remaining ¼ cup sugar and beat to stiff, glossy peaks. This is the step that makes or breaks the texture — don't rush it.
- Gently fold the yolk mixture into the whites in two additions, then sift in the flour and fold again until just combined. Keep the batter light — overmixing will deflate it.
- Pipe 3-inch fingers onto the prepared baking sheets, spacing them about 1 inch apart. Dust generously with powdered sugar, let sit 5 minutes, then dust again.
- Bake for 12-14 minutes until lightly golden and set. Cool completely on the pan before moving them — they firm up as they cool.
Tips
- Tip: Room temperature eggs whip significantly better than cold ones — take them out of the fridge at least 30 minutes before you start.
- Tip: The double dusting of powdered sugar is what creates that classic slightly crackly top — don't skip the second round.
- Tip: Store in an airtight container at room temperature for up to 5 days, or freeze for up to a month if you're making them ahead for a Valentine's tiramisu.
24. 3 Ingredient Brown Sugar Cookies

Three ingredients. That's it. Butter, brown sugar, and flour — and somehow they produce a cookie that tastes like caramel and butterscotch had a quiet, delicious moment together. I make a double batch of these because they disappear before I even get them properly onto the cooling rack. They're the kind of recipe you pull out when it's 8pm on February 13th and you just remembered Valentine's Day is tomorrow — no eggs, no special extracts, just pantry staples. The brown sugar gives them a deep, molasses-y warmth that white sugar cookies simply don't have.
Ingredients
- 1 cup (2 sticks) unsalted butter, softened
- ¾ cup packed light brown sugar
- 2 cups all-purpose flour
Instructions
- Preheat oven to 325°F. Line a baking sheet with parchment paper.
- Beat the softened butter and brown sugar together until light and fluffy, about 2-3 minutes. The butter needs to be genuinely soft here — not melted, not cold-from-the-fridge.
- Add the flour gradually and mix until a soft dough forms. It will look crumbly at first — keep mixing and it comes together.
- Roll the dough into 1-inch balls and place on the prepared baking sheet. Flatten each ball slightly with the palm of your hand or the bottom of a glass.
- Bake for 12-15 minutes until the edges are just set and the tops look dry. They'll look slightly underdone — that's correct. They firm up as they cool and stay beautifully tender inside.
Tips
- Tip: Dark brown sugar works too and gives an even deeper caramel flavor — use whichever you have on hand.
- Tip: Add a pinch of salt to the dough if you want — technically it's still a 3-ingredient cookie but the salt really sharpens the flavor.
- Tip: For Valentine's Day, press a heart-shaped candy or pink M&M into the center of each cookie right after they come out of the oven while they're still soft.
23. Almond Flour Thumbprint Cookies (Vegan)
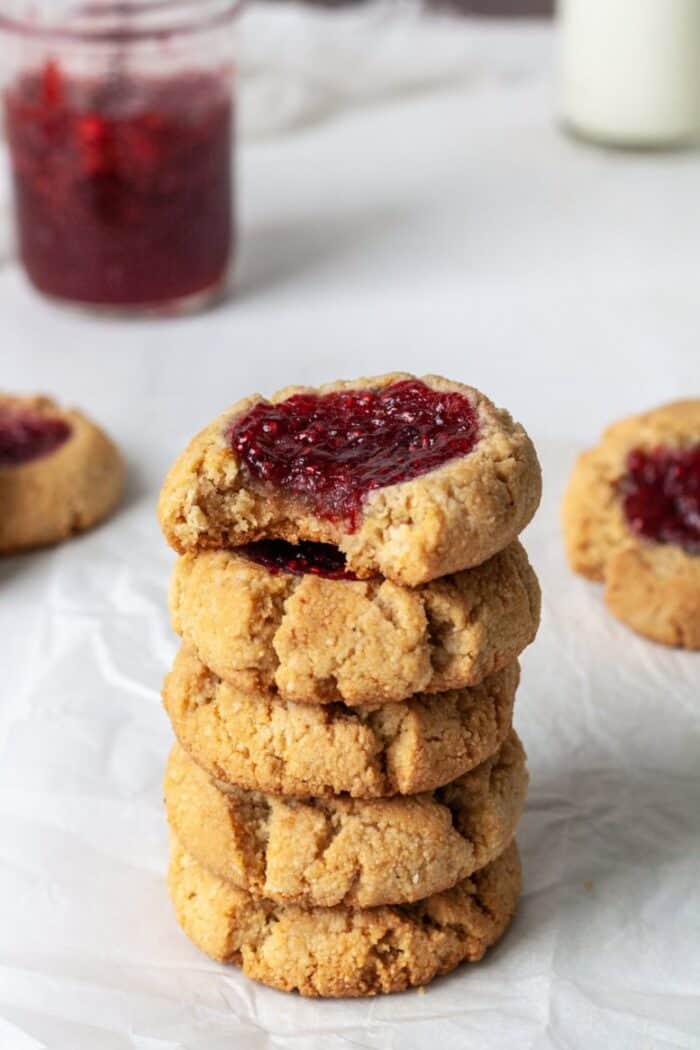
I'll be honest — I was skeptical of vegan thumbprint cookies the first time I saw them. Thumbprints in my head always meant butter and egg yolks. But almond flour changes the game here; it brings its own richness and a slightly nutty flavor that pairs beautifully with a bright strawberry or raspberry jam center. These are gluten-free, dairy-free, and genuinely delicious — not "good for a vegan cookie" but actually good, full stop. If you're baking for guests and aren't sure about dietary restrictions, these are the ones to make.
Ingredients
- 2 cups blanched almond flour (not almond meal)
- 3 tablespoons coconut oil, melted (or vegan butter)
- 3 tablespoons maple syrup
- 1 teaspoon vanilla extract
- ¼ teaspoon salt
- ¼ cup strawberry or raspberry jam, for filling
Instructions
- Preheat oven to 350°F. Line a baking sheet with parchment paper.
- In a bowl, mix the almond flour, melted coconut oil, maple syrup, vanilla, and salt until a soft dough forms. It should hold together when pressed — if it's too dry, add a teaspoon of water at a time.
- Roll the dough into 1-inch balls and place on the baking sheet about 2 inches apart. Use your thumb (or the back of a teaspoon) to press a well into the center of each one.
- Fill each indent with about ½ teaspoon of jam. Don't overfill — it bubbles up during baking.
- Bake for 12-14 minutes until the edges are lightly golden. Cool on the pan for 10 minutes before transferring — almond flour cookies are fragile when warm.
Tips
- Tip: Use blanched almond flour (the fine, white kind) rather than almond meal for the best texture — almond meal makes them gritty.
- Tip: Strawberry jam makes these feel very Valentine's appropriate — the red against the golden cookie looks lovely on a plate.
- Tip: These keep well in the fridge for up to a week and actually taste better the next day once the jam settles into the cookie.
22. Strawberry Cookies

Real strawberry flavor in a cookie — not strawberry extract, not artificial pink flavoring, but actual fruit. That's what makes these stand out. They get their color and flavor from freeze-dried strawberries, which you can find at Trader Joe's or Walmart in the dried fruit section, and the result is this gorgeous naturally pink dough that smells incredible while it bakes. Saad spotted these cooling on the counter and asked if they were "the pink ones" — he ate four before I could stop him. They're soft, chewy, and have just the right amount of berry tartness to keep them from being cloying.
Ingredients
- 1 cup (1 oz) freeze-dried strawberries
- 1½ cups all-purpose flour
- ½ teaspoon baking soda
- ¼ teaspoon salt
- ½ cup (1 stick) unsalted butter, softened
- ¾ cup granulated sugar
- 1 large egg
- 1 teaspoon vanilla extract
Instructions
- Preheat oven to 350°F. Line two baking sheets with parchment paper.
- Pulse the freeze-dried strawberries in a food processor or blender until you get a fine powder. If you don't have either, seal them in a zip-lock bag and crush them with a rolling pin — it takes a couple minutes but works fine.
- Whisk together the strawberry powder, flour, baking soda, and salt in a bowl. Set aside.
- Beat the butter and sugar together until fluffy, about 2 minutes. Add the egg and vanilla and beat until combined.
- Add the dry ingredients to the wet and mix until a soft pink dough forms. Scoop into 1½-inch balls and place on the baking sheets. Flatten slightly.
- Bake 10-12 minutes until the edges are set but centers still look soft. Cool on the pan for 5 minutes before transferring.
Tips
- Tip: The more finely you grind the freeze-dried strawberries, the more evenly distributed the pink color will be throughout the cookie.
- Tip: For extra Valentine's flair, roll the dough balls in coarse pink sugar before baking — it adds sparkle and a little crunch on the outside.
- Tip: These freeze well — bake a batch ahead of time and thaw at room temperature for about 20 minutes before serving.
21. 4 Ingredient Red Velvet Air Fryer Cake Mix Cookies

Four ingredients, an air fryer, and about 15 minutes — that's the whole story with these red velvet cookies. They start with a boxed red velvet cake mix, which I know some people feel strongly about, but honestly when it's Valentine's Day and you need red cookies fast, there's no shame in grabbing a Betty Crocker box from Walmart. The air fryer gives them slightly crispier edges than the oven would, and that deep red color looks absolutely dramatic on a plate. I tried these on a weeknight when I needed something quick for Zainab's school party and they were gone before I could pack them up properly.
Ingredients
- 1 box (15.25 oz) red velvet cake mix (Betty Crocker or Duncan Hines both work)
- 2 large eggs
- ⅓ cup vegetable oil
- ½ cup white chocolate chips or cream cheese chips (optional but highly recommended)
Instructions
- In a large bowl, mix the cake mix, eggs, and oil together until a thick dough forms. Fold in the white chocolate chips if using.
- Preheat your air fryer to 320°F for 3 minutes. Line the basket with a small piece of parchment paper cut to fit (don't block the sides — air needs to circulate).
- Scoop the dough into 1½-inch balls and place in the air fryer basket with at least 2 inches of space between them — they spread. Work in batches of 4-5 cookies.
- Air fry at 320°F for 7-9 minutes until the edges are set. The centers will look slightly underdone — that's right. Let them cool in the basket for 5 minutes before moving; they firm up quickly.
- If you don't have an air fryer, bake on a parchment-lined sheet at 350°F for 10-12 minutes instead. Same result, slightly softer edges.
Tips
- Tip: Every air fryer runs a little differently — check your first batch at 7 minutes to gauge your machine before committing to the full time.
- Tip: Chilling the dough for 20-30 minutes before baking helps the cookies hold their shape better and prevents them from spreading too flat.
- Tip: Drizzle cooled cookies with a little melted white chocolate and add red heart sprinkles to make them look bakery-worthy with almost zero extra effort.
20. Easy Strawberry Rice Krispie Treats

Okay, technically these aren't cookies — but I'm including them anyway because nobody at my house has ever complained. These are the classic Rice Krispie treats you grew up eating, except now they're tinted pink with strawberry flavor and cut into little hearts. Saad spotted them on the counter last February and ate three before I'd even finished cutting them. They take about 15 minutes start to finish, and the whole thing comes together in one pot. If you need something festive and fast without turning on the oven, this is your answer.
Ingredients
- 3 tablespoons unsalted butter
- 1 package (10 oz) mini marshmallows
- 3 tablespoons strawberry gelatin powder (like Jell-O brand)
- 6 cups Rice Krispies cereal
- Pink or red sprinkles, for topping (optional)
- Cooking spray, for the pan
Instructions
- Spray a 9x13-inch baking pan with cooking spray and set aside.
- Melt butter in a large pot over medium-low heat. Add marshmallows and stir constantly until fully melted and smooth.
- Remove from heat and stir in the strawberry gelatin powder until the mixture turns a uniform pink color.
- Add the Rice Krispies cereal and fold everything together quickly — the mixture sets fast, so work with speed.
- Press evenly into the prepared pan using a buttered spatula or lightly greased hands. Scatter sprinkles on top if using, then press gently so they stick.
- Let cool for 20-30 minutes, then use a heart-shaped cookie cutter to cut out pieces. Serve the same day for best texture.
Tips
- Tip: Don't press too hard when packing the pan — a lighter press gives you a chewier, softer treat instead of a dense brick.
- Tip: The scraps left after cutting hearts can be rolled into little balls and dipped in melted white chocolate — nothing goes to waste.
- Tip: Store leftovers in an airtight container at room temperature, not in the fridge — refrigerating them makes the treats go hard and stale faster.
19. Strawberry Heart Melting Moments Sandwich Cookies

If you've never made melting moments before, this is a wonderful place to start. The cookies themselves are made with cornstarch in the dough, which gives them this impossibly soft, almost powdery texture that dissolves on your tongue — hence the name. Cut them into hearts and sandwich them around a strawberry cream filling and you've got something that looks like it came from a patisserie. They're a little more effort than a drop cookie, but the result is genuinely impressive for Valentine's Day gifting or just putting out for dessert.
Ingredients
- 1 cup (2 sticks) unsalted butter, softened to room temperature
- ½ cup powdered sugar, sifted
- 1 teaspoon vanilla extract
- 1½ cups all-purpose flour
- ½ cup cornstarch
- For the strawberry filling: ½ cup unsalted butter, softened
- 1½ cups powdered sugar, sifted
- 3 tablespoons freeze-dried strawberry powder (or 2 tablespoons strawberry jam)
- 1-2 tablespoons heavy cream, as needed for consistency
Instructions
- Preheat oven to 325°F. Line two baking sheets with parchment paper.
- Beat butter and powdered sugar together until pale and fluffy, about 3 minutes. Add vanilla and mix to combine.
- Sift in flour and cornstarch together, then fold into the butter mixture until a soft dough forms. If it feels too sticky, refrigerate for 20 minutes before rolling.
- Roll dough to about ¼-inch thickness on a lightly floured surface. Cut into heart shapes using a small heart cutter (about 2 inches). Place on prepared baking sheets.
- Bake for 12-14 minutes until just set — they should NOT brown. Cool completely on the pan before moving them, as they're fragile when warm.
- Make the filling: beat butter until smooth, then add powdered sugar and strawberry powder. Add cream one tablespoon at a time until spreadable. Sandwich a small amount between two cooled cookies and press gently.
Tips
- Tip: These cookies are delicate — use a thin spatula to transfer them from the pan and handle gently until fully cooled.
- Tip: Freeze-dried strawberry powder gives the most intense pink color and clean flavor; if you can't find it, strawberry jam works but makes the filling slightly softer.
- Tip: You can bake the cookie shells a day ahead and store them unfilled in an airtight container — sandwich them the day of serving so they stay crisp.
18. Valentine's Day Chocolate Chip Skillet Cookie

There are nights when I want something impressive but I genuinely cannot be bothered to scoop and rotate two trays of individual cookies. This is the answer for those nights. One giant chocolate chip cookie baked straight in a cast iron skillet, pulled from the oven when the center is still slightly underdone, then topped with Valentine's M&Ms and conversation hearts pressed in while it's warm. Slice it like a pizza at the table. My husband eats his with a scoop of vanilla ice cream melting on top, and I don't argue. The skillet gives you those crispy edges with a gooey center you just can't replicate on a flat pan.
Ingredients
- ½ cup (1 stick) unsalted butter, melted and slightly cooled
- ¾ cup packed brown sugar
- ¼ cup granulated sugar
- 1 large egg plus 1 egg yolk, room temperature
- 2 teaspoons vanilla extract
- 1½ cups all-purpose flour
- ½ teaspoon baking soda
- ½ teaspoon salt
- 1 cup semi-sweet chocolate chips
- ½ cup Valentine's M&Ms or conversation heart candies, for topping
Instructions
- Preheat oven to 350°F. Grease a 10-inch cast iron skillet (or oven-safe skillet) with butter.
- Whisk melted butter with both sugars until combined. Add egg, egg yolk, and vanilla and whisk until smooth and slightly glossy.
- Fold in flour, baking soda, and salt until just combined — don't overmix. Stir in chocolate chips.
- Spread the dough evenly into the prepared skillet. Bake for 20-24 minutes, until the edges are golden but the center still looks slightly underdone — it firms up as it cools.
- Immediately press Valentine's M&Ms or candy hearts into the top while the cookie is still hot. Let rest 10 minutes before slicing and serving.
Tips
- Tip: Pull it out when the center still looks a little wet — it will continue cooking in the hot skillet and you'll end up with a perfectly fudgy middle rather than a dry, overbaked one.
- Tip: No cast iron? An oven-safe stainless steel or ceramic skillet works — just add 2-3 minutes to the bake time since cast iron retains heat more efficiently.
- Tip: Serve it straight from the skillet for maximum drama — bring it to the table and let everyone scoop their own portion.
17. Easy Valentine's Day Cookies

Sometimes you just need a reliable, no-fuss sugar cookie that kids can actually help decorate without the whole project turning into a disaster. This is that recipe. The dough rolls out cleanly, holds its shape in the oven, and doesn't spread into blobs — which, if you've ever had your carefully cut hearts turn into lumpy ovals, you know is not a given with sugar cookies. The pink and red frosting is straightforward royal icing or buttercream, and the decorating is as simple or as elaborate as you want to make it. Zainab has declared these her annual Valentine's project and I'm not going to argue with that.
Ingredients
- 3 cups all-purpose flour
- 1 teaspoon baking powder
- ½ teaspoon salt
- 1 cup (2 sticks) unsalted butter, softened
- 1 cup granulated sugar
- 1 large egg
- 1½ teaspoons vanilla extract
- For decorating: 2 cups powdered sugar, 2-3 tablespoons milk, red and pink gel food coloring, sprinkles
Instructions
- Whisk together flour, baking powder, and salt in a bowl. Set aside.
- Beat softened butter and sugar together until light and fluffy, about 3 minutes. Add egg and vanilla, mixing until combined.
- Gradually add the flour mixture and mix until a soft dough forms. Divide in half, flatten into discs, wrap in plastic, and refrigerate for at least 1 hour (this prevents spreading).
- Preheat oven to 375°F. Roll chilled dough to ¼-inch thickness on a lightly floured surface. Cut into hearts and place on parchment-lined baking sheets.
- Bake 8-10 minutes until edges are just barely golden. Cool completely on a wire rack before decorating.
- Make the glaze icing: mix powdered sugar with milk until smooth and spoonable. Divide into bowls, color with gel food coloring, and spread or drizzle over cooled cookies. Add sprinkles immediately before the icing sets.
Tips
- Tip: Always use gel food coloring, not liquid — liquid coloring thins out the icing and gives you pale, washed-out colors instead of the deep pink and red you want.
- Tip: Don't skip the dough chilling step — I tried once when I was in a hurry and the cookies spread and lost their heart shape entirely in the oven.
- Tip: These keep well stacked in a tin for up to 5 days once the icing is fully set (give it at least 2 hours to harden before stacking).
16. Easy Fruity Pebbles Cookies

I'll be honest — I was skeptical about cookies made with breakfast cereal. Then I made a batch and understood immediately. The Fruity Pebbles get folded right into a buttery cookie dough, and when they bake they toast slightly and give you this crispy, almost caramelized crunch throughout every bite. The colors stay bright and cheerful through baking, which makes them look festive for Valentine's Day without any extra decorating effort. They're genuinely different from any other cookie on this list — more textured, more fun, and a little unexpected. Pick up a box of Fruity Pebbles at any Walmart or Kroger and you're halfway there.
Ingredients
- ½ cup (1 stick) unsalted butter, softened
- ¾ cup granulated sugar
- 1 large egg
- 1 teaspoon vanilla extract
- 1¼ cups all-purpose flour
- ½ teaspoon baking soda
- ¼ teaspoon salt
- 1½ cups Fruity Pebbles cereal, plus extra for pressing on top
Instructions
- Preheat oven to 350°F. Line a baking sheet with parchment paper.
- Beat butter and sugar together until light and creamy, about 2-3 minutes. Add egg and vanilla and mix until smooth.
- Mix in flour, baking soda, and salt until just combined. Fold in 1½ cups of Fruity Pebbles — the dough will look colorful and a little crumbly, which is normal.
- Scoop dough into 1.5-tablespoon balls and place 2 inches apart on the prepared baking sheet. Press a few extra Fruity Pebbles on top of each ball for color.
- Bake for 10-12 minutes until the edges are set and just starting to turn golden. The centers will look soft — let them cool on the pan for 5 minutes before transferring, as they firm up as they cool.
Tips
- Tip: Don't overmix once you add the cereal — fold it in gently so the pieces stay somewhat intact and give you texture in the finished cookie rather than breaking down into dust.
- Tip: These are best eaten the same day for maximum crunch — the cereal softens slightly overnight, though they're still tasty the next day.
- Tip: For an extra Valentine's spin, swap half the Fruity Pebbles for Valentine's edition cereal or toss in a handful of pink and red M&Ms with the dough.
15. Easy Chocolate Sprinkle Cookies

Sometimes the simplest cookies are the ones that disappear fastest. These soft chocolate cookies rolled in Valentine's sprinkles before baking come together with pantry staples and no chilling required — which honestly makes them the most practical cookie on this whole list. The sprinkles bake right onto the surface so you get that festive look without decorating a single thing afterward. I make a double batch because one batch vanishes before I even get the second tray out of the oven.
Ingredients
- 1¼ cups all-purpose flour
- ⅓ cup unsweetened cocoa powder
- ½ teaspoon baking soda
- ¼ teaspoon salt
- ½ cup (1 stick) unsalted butter, softened
- ¾ cup granulated sugar
- 1 large egg
- 1 teaspoon vanilla extract
- ½ cup Valentine's sprinkles (pink, red, and white mix)
Instructions
- Preheat your oven to 350°F. Line two baking sheets with parchment paper.
- Whisk together the flour, cocoa powder, baking soda, and salt in a medium bowl. Set aside.
- Beat the softened butter and sugar together until light and fluffy, about 2-3 minutes. Add the egg and vanilla and mix until combined.
- Stir the dry ingredients into the wet ingredients until a soft dough forms. Pour the sprinkles into a shallow bowl.
- Scoop the dough into 1-tablespoon balls and roll each one in the sprinkles, pressing gently so they stick. Place 2 inches apart on the prepared baking sheets.
- Bake for 9-11 minutes until the edges are set but the centers still look slightly underdone — they firm up as they cool. Let cool on the pan for 5 minutes before transferring.
Tips
- Tip: Use nonpareil sprinkles rather than jimmies — they coat the dough ball more evenly and look prettier after baking.
- Tip: Don't overbake. Pull them when the centers look just barely done — the residual heat finishes the job and keeps them soft.
- Tip: Store in an airtight container at room temperature for up to 4 days. They actually get a little softer on day two.
14. Crushed Oreo Red Velvet Cookies

Red velvet gets a serious upgrade here. These red velvet cookies are already rich and fudgy, and then you fold crushed Oreos right into the dough — which adds this slightly crunchy, cream-filled contrast that makes every bite interesting. They bake up thick and pillowy with visible cookie bits throughout, and the deep red color against the dark Oreo flecks looks genuinely dramatic on a Valentine's plate. Saad asked me what was in these the first time he ate one, and when I said Oreos he said "again, please" — that was enough for me.
Ingredients
- 1½ cups all-purpose flour
- 2 tablespoons unsweetened cocoa powder
- 1 teaspoon baking soda
- ¼ teaspoon salt
- ½ cup (1 stick) unsalted butter, softened
- ¾ cup granulated sugar
- ¼ cup packed brown sugar
- 1 large egg
- 1 teaspoon vanilla extract
- 1–2 tablespoons red gel food coloring
- 1 cup roughly crushed Oreo cookies (about 8-10 cookies)
Instructions
- Preheat oven to 350°F. Line baking sheets with parchment paper.
- Whisk together flour, cocoa powder, baking soda, and salt in a bowl. Set aside.
- Beat butter, granulated sugar, and brown sugar until fluffy. Mix in the egg, vanilla, and red food coloring until the dough is an even, vivid red.
- Stir the dry ingredients into the wet until just combined, then fold in the crushed Oreos. Don't overmix — you want visible Oreo chunks throughout.
- Scoop into 1½-tablespoon balls and place 2 inches apart on the prepared pan. Bake for 10-12 minutes until edges are set.
- Cool on the pan for 5 minutes before moving to a wire rack. The cookies will look underdone in the center — that's correct.
Tips
- Tip: Use gel food coloring, not liquid — liquid dilutes the dough and the red ends up washed out after baking.
- Tip: Crush the Oreos by hand into rough chunks rather than fine crumbs — you want the texture to come through in every bite.
- Tip: Press a few extra Oreo pieces on top of each dough ball before baking so the cookies look visually striking once done.
13. Pink Sugar Cookies
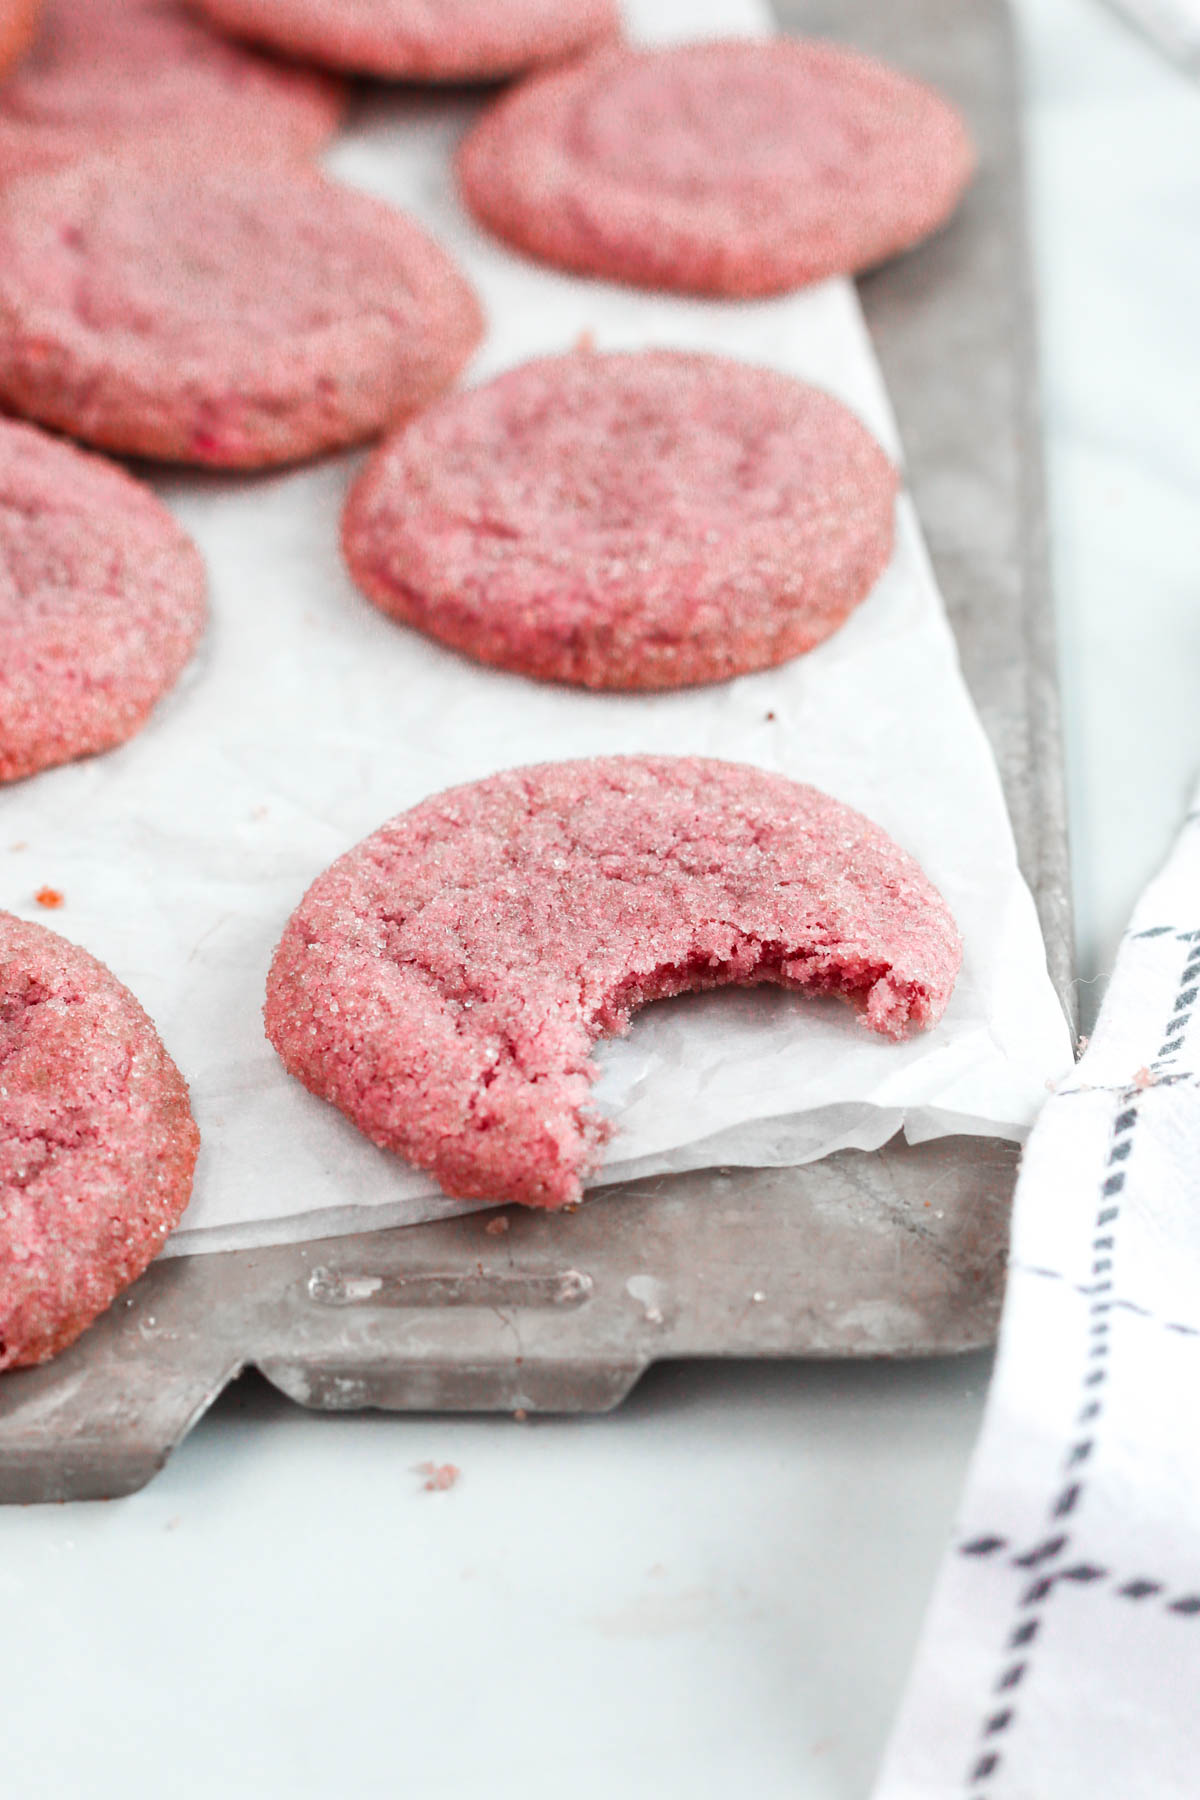
Classic sugar cookies don't need a lot of fuss to be Valentine's-ready — just tint the dough pink and roll them in glittery pink sugar before baking. That's the whole move. These come out with slightly crisp edges and a soft, chewy center, and the sparkling sugar on the outside catches the light in a way that feels genuinely celebratory without any frosting or decorating involved. In Pakistan we grew up with a plainer version of these without the color, but rolling them in tinted sugar before baking is a trick I picked up here and I'll never go back.
Ingredients
- 2¾ cups all-purpose flour
- 1 teaspoon baking soda
- ½ teaspoon baking powder
- ½ teaspoon salt
- 1 cup (2 sticks) unsalted butter, softened
- 1½ cups granulated sugar
- 1 large egg
- 1 teaspoon vanilla extract
- ½ teaspoon almond extract (optional but really good)
- Pink gel food coloring (a few drops)
- ½ cup pink or red coarse sparkling sugar, for rolling
Instructions
- Preheat oven to 375°F. Line baking sheets with parchment paper.
- Whisk flour, baking soda, baking powder, and salt in a bowl. Set aside.
- Beat the butter and sugar together until pale and fluffy, about 3 minutes. Add the egg, vanilla, almond extract, and a few drops of pink gel coloring. Mix until the color is even throughout.
- Stir in the dry ingredients until a soft dough forms. Pour the sparkling sugar into a shallow dish.
- Roll the dough into 1-inch balls and coat each one generously in the sparkling sugar. Place 2 inches apart on the baking sheet and flatten slightly with the bottom of a glass.
- Bake for 8-10 minutes until edges are just set. The centers will look underdone — that's right. Cool on the pan for 5 minutes before transferring.
Tips
- Tip: Coarse sparkling sugar (available at Walmart or Michael's baking aisle) gives a much better crunch and shimmer than regular granulated sugar — worth picking up.
- Tip: Start with just 2-3 drops of gel coloring and add more gradually — you can always deepen the pink but you can't lighten it once it's in.
- Tip: These keep well in an airtight container for 5 days and also freeze beautifully — I make them a week ahead when I'm gifting them.
12. White Chocolate Strawberry Shortbread Cookies

Shortbread is one of those things that seems simple until you eat a bad version — too dry, too crumbly, no flavor. This one gets it right by folding freeze-dried strawberry pieces and white chocolate chips directly into the dough, so every bite has real strawberry flavor and little pockets of creamy chocolate throughout. The texture is crisp at the edge and just barely tender in the center, the way good shortbread should be. It's my version of a fancy bakery cookie, made with things I already have.
Ingredients
- 1 cup (2 sticks) unsalted butter, softened to room temperature
- ½ cup powdered sugar, sifted
- 1 teaspoon vanilla extract
- 2 cups all-purpose flour
- ¼ teaspoon salt
- ½ cup freeze-dried strawberries, roughly crushed (Trader Joe's or Walmart carry these)
- ½ cup white chocolate chips
Instructions
- Preheat oven to 325°F. Line a baking sheet with parchment paper.
- Beat the softened butter and powdered sugar together until smooth and creamy, about 2 minutes. Mix in the vanilla.
- Add the flour and salt and mix until the dough just comes together — don't overwork it or the cookies get tough.
- Fold in the crushed freeze-dried strawberries and white chocolate chips gently with a spatula.
- Roll dough into 1-inch balls, place on the prepared sheet, and flatten each to about ½ inch thick with your palm. Or roll out to ¼ inch and cut into heart shapes for Valentine's Day.
- Bake for 13-15 minutes until the edges are just barely golden. Cool completely on the pan — shortbread firms up significantly as it cools.
Tips
- Tip: Freeze-dried strawberries (not dried) are key — they're intensely flavored and don't add moisture that would make the shortbread soggy.
- Tip: The butter must be properly softened, not melted — shortbread texture depends on creaming the butter correctly at the start.
- Tip: Drizzle melted white chocolate over the cooled cookies for a more finished look if you're packaging these as gifts.
11. Strawberry Jam Cookies

These are the cookies I reach for when I want something that looks like it took effort but actually didn't. A buttery, slightly crumbly dough gets pressed into rounds, indented in the center with your thumb, and filled with bright strawberry jam — then cut the center into a heart shape instead of a circle and suddenly it's a Valentine's cookie. The jam bubbles up slightly in the oven and sets into a glossy, jewel-like window that looks genuinely pretty on a plate. Use any good strawberry preserve you have — Smucker's, Bonne Maman, or store-brand Aldi all work fine here.
Ingredients
- 1 cup (2 sticks) unsalted butter, softened
- ⅔ cup granulated sugar
- 2 large egg yolks
- 1 teaspoon vanilla extract
- 2¼ cups all-purpose flour
- ¼ teaspoon salt
- ⅓ cup strawberry jam or preserves
Instructions
- Preheat oven to 350°F. Line baking sheets with parchment paper.
- Beat butter and sugar together until light and creamy. Mix in the egg yolks and vanilla until fully incorporated.
- Stir in the flour and salt until a soft dough forms. If the dough feels sticky, refrigerate for 15-20 minutes before shaping.
- Roll dough into 1-inch balls and place on the prepared pan. Use your thumb or the end of a wooden spoon to press a deep well into the center of each ball.
- Fill each well with about ½ teaspoon of strawberry jam. Don't overfill or it will bubble over the sides.
- Bake for 12-14 minutes until the edges are just golden. Cool completely on the pan before moving — the jam stays molten for a while and will smear if you move them too soon.
Tips
- Tip: If the wells puff up during baking and close over the jam, press them back down gently with a spoon the moment the cookies come out of the oven.
- Tip: Raspberry jam works just as well here if you prefer a slightly more tart flavor — or mix half strawberry, half raspberry for a deeper color.
- Tip: These are even better the next day once the jam has fully set and the flavors have had time to settle together.
10. Chocolate Spritz Sandwich Cookies

These are for the person on your Valentine's list who doesn't want something cutesy — they want something genuinely impressive. Spritz cookies have a delicate, almost shortbread-like texture, and when you sandwich two together with a layer of smooth chocolate ganache, they become something that feels way more elevated than the effort involved. The trick is getting the dough through the cookie press at the right temperature — too warm and it spreads, too cold and it won't press. I learned that the hard way my first time. Once you nail the consistency, these come together fast and look absolutely beautiful on a plate.
Ingredients
- 1 cup (2 sticks) unsalted butter, softened to room temperature
- ⅔ cup granulated sugar
- 1 egg
- 1 teaspoon vanilla extract
- 2¼ cups all-purpose flour
- ¼ cup unsweetened cocoa powder
- ¼ teaspoon salt
- ½ cup heavy cream
- 4 oz semi-sweet chocolate, finely chopped (or ⅔ cup chocolate chips)
Instructions
- Preheat oven to 375°F. Beat butter and sugar together until light and fluffy, then beat in egg and vanilla.
- Whisk together flour, cocoa powder, and salt in a separate bowl, then gradually mix into the butter mixture until a smooth dough forms.
- Fill a cookie press with dough and press cookies onto an ungreased baking sheet using a star or rosette disc. Bake 8–10 minutes, until set. Let cool completely on a wire rack.
- Make the ganache: heat heavy cream in a small saucepan until just simmering, then pour over chopped chocolate. Let sit 2 minutes, then stir until smooth. Cool until thick enough to spread, about 20–30 minutes.
- Spread a small amount of ganache on the flat side of one cookie and sandwich with a second. Repeat with remaining cookies. Let set for 15 minutes before serving.
Tips
- Tip: If you don't have a cookie press, roll the dough into small balls, flatten slightly with the bottom of a glass, and use a fork to press a crosshatch pattern — they'll still look lovely.
- Tip: The ganache needs to be thick enough to hold the sandwich together — if it's still too runny after 30 minutes, pop it in the fridge for 10 minutes more.
- Tip: Store assembled cookies in a single layer or between parchment sheets — stacking them squishes the ganache filling.
9. Chocolate Heart Peanut Butter Blossoms

Peanut butter blossoms are one of those cookies that almost everyone has eaten at some point — the classic version has a Hershey's Kiss pressed into the center. This Valentine's version swaps the Kiss for a chocolate heart, and that one small change makes the whole cookie feel completely intentional for the holiday. The peanut butter dough itself is soft and a little crumbly in the best way, and the salty-sweet combination with milk chocolate is genuinely hard to resist. Saad spotted these on my counter before they were even cooled and tried to take three at once. I'm not saying these will disappear fast, but I am saying make a double batch.
Ingredients
- ½ cup (1 stick) unsalted butter, softened
- ½ cup creamy peanut butter
- ½ cup granulated sugar, plus extra for rolling
- ½ cup packed brown sugar
- 1 egg
- 1 teaspoon vanilla extract
- 1½ cups all-purpose flour
- 1 teaspoon baking soda
- ¼ teaspoon salt
- 24–30 chocolate heart candies (Hershey's Valentine hearts, or unwrapped chocolate heart pieces)
Instructions
- Preheat oven to 375°F. Beat butter, peanut butter, and both sugars together until fluffy. Add egg and vanilla and mix until combined.
- Stir in flour, baking soda, and salt until a dough forms. Roll dough into 1-inch balls, then roll each ball in granulated sugar to coat.
- Place balls 2 inches apart on an ungreased baking sheet. Bake 8–10 minutes, until the edges are just set and the tops look slightly underdone — they'll firm up as they cool.
- Remove from oven and immediately press one chocolate heart into the center of each cookie. The cookie will crack slightly around the edges — that's exactly right. Let cool on the pan for 5 minutes before transferring.
Tips
- Tip: Press the chocolate hearts in while the cookies are hot — if you wait until they cool, the cookies crack instead of hugging the chocolate neatly.
- Tip: If you can't find chocolate hearts, use Hershey's Kisses — the classic version works perfectly and tastes identical.
- Tip: These freeze well before adding the chocolate — bake the cookies, freeze them plain, then thaw and press in the hearts when you're ready to serve.
8. Valentine's Day Sour Cream Sugar Cookies with Cream Cheese Frosting

If you've ever had a sugar cookie that was more cardboard than cookie, this recipe is the fix. The sour cream in the dough keeps these genuinely soft — not just the day they're baked, but two days later they're still pillowy and tender. Then you top them with cream cheese frosting, which has that slight tang that cuts through the sweetness and makes the whole thing taste more complex than a standard sugar cookie has any right to. Tint the frosting pink or red and add some sprinkles, and you have something that looks like it came from a bakery. I'd take these over a boxed mix any day of the week.
Ingredients
- ½ cup (1 stick) unsalted butter, softened
- 1 cup granulated sugar
- 1 egg
- ½ cup full-fat sour cream
- 1 teaspoon vanilla extract
- 2½ cups all-purpose flour
- 1 teaspoon baking powder
- ½ teaspoon baking soda
- ¼ teaspoon salt
- For the frosting: 4 oz cream cheese, softened; 2 tablespoons butter, softened; 1½ cups powdered sugar; 1 teaspoon vanilla; pink or red gel food coloring
Instructions
- Preheat oven to 350°F. Beat butter and sugar until fluffy, then beat in egg, sour cream, and vanilla until smooth.
- Whisk flour, baking powder, baking soda, and salt together, then mix into the butter mixture to form a soft dough. The dough will be slightly sticky — that's normal. Chill for 30 minutes to make it easier to handle.
- Roll dough out on a lightly floured surface to about ¼-inch thickness. Cut into heart shapes and place on a parchment-lined baking sheet. Bake 10–12 minutes, until the edges are just barely golden. Don't overbake — they should look slightly underdone when you pull them out.
- Cool completely. For frosting, beat cream cheese and butter together until smooth, then mix in powdered sugar and vanilla. Add gel food coloring a drop at a time until you reach your desired pink or red shade. Spread or pipe onto cooled cookies.
Tips
- Tip: Use gel food coloring rather than liquid — liquid food coloring can thin the frosting and make it harder to spread neatly.
- Tip: The cream cheese and butter for the frosting both need to be fully at room temperature, otherwise the frosting turns lumpy. I leave mine out for at least an hour.
- Tip: Frosted cookies should be stored in the fridge because of the cream cheese — bring them to room temperature for about 20 minutes before serving for the best texture.
7. Cookies on Sticks – Valentine's Sugar Cookies

Heart-shaped sugar cookies on lollipop sticks are one of those ideas that look complicated but are actually completely doable at home — and the payoff is huge. You can wrap them individually in clear cellophane bags, tie with a ribbon, and suddenly you have a Valentine's gift that looks genuinely thoughtful. They're great for classroom parties, for gifting teachers, or just for making Zainab feel special on Valentine's morning. The key is inserting the sticks before baking so they bake right into the cookie — if you try to add them after, the cookies crack. Use a firm sugar cookie dough that holds its shape well.
Ingredients
- 1 cup (2 sticks) unsalted butter, softened
- 1 cup granulated sugar
- 1 egg
- 1½ teaspoons vanilla extract
- 3 cups all-purpose flour
- 1½ teaspoons baking powder
- ½ teaspoon salt
- 2 tablespoons milk
- Lollipop sticks or wooden craft sticks (6-inch)
- Royal icing or store-bought cookie icing in red, pink, and white, plus sprinkles for decorating
Instructions
- Beat butter and sugar until light and fluffy. Add egg and vanilla and mix well. Stir in flour, baking powder, salt, and milk until a smooth, firm dough forms. Wrap in plastic wrap and chill for at least 1 hour.
- Preheat oven to 350°F. Roll dough out on a lightly floured surface to ¼-inch thickness. Cut out heart shapes using a heart cookie cutter — aim for hearts that are at least 3 inches across so the stick has enough cookie to grip.
- Place hearts on a parchment-lined baking sheet. Gently insert a lollipop stick into the bottom point of each heart, sliding it at least halfway up into the cookie. Press the dough lightly around the stick to seal.
- Bake 10–12 minutes, until just set with no browning. Let cool completely on the pan before moving — they're fragile until fully cooled.
- Decorate with icing once fully cooled. Pipe on designs, flood with color, add sprinkles — or keep it simple with a single color. Let icing set completely before wrapping or stacking.
Tips
- Tip: Lollipop sticks are available at Walmart, Michaels, or Amazon — a pack of 100 costs under $5 and you'll have plenty for the whole batch.
- Tip: Don't skip the chilling step — a soft dough won't hold the stick properly and the cookies will spread and lose their shape in the oven.
- Tip: If you're short on time, store-bought cookie icing in squeeze tubes works perfectly here — no need to make royal icing from scratch.
6. Chocolate Sugar Cookies
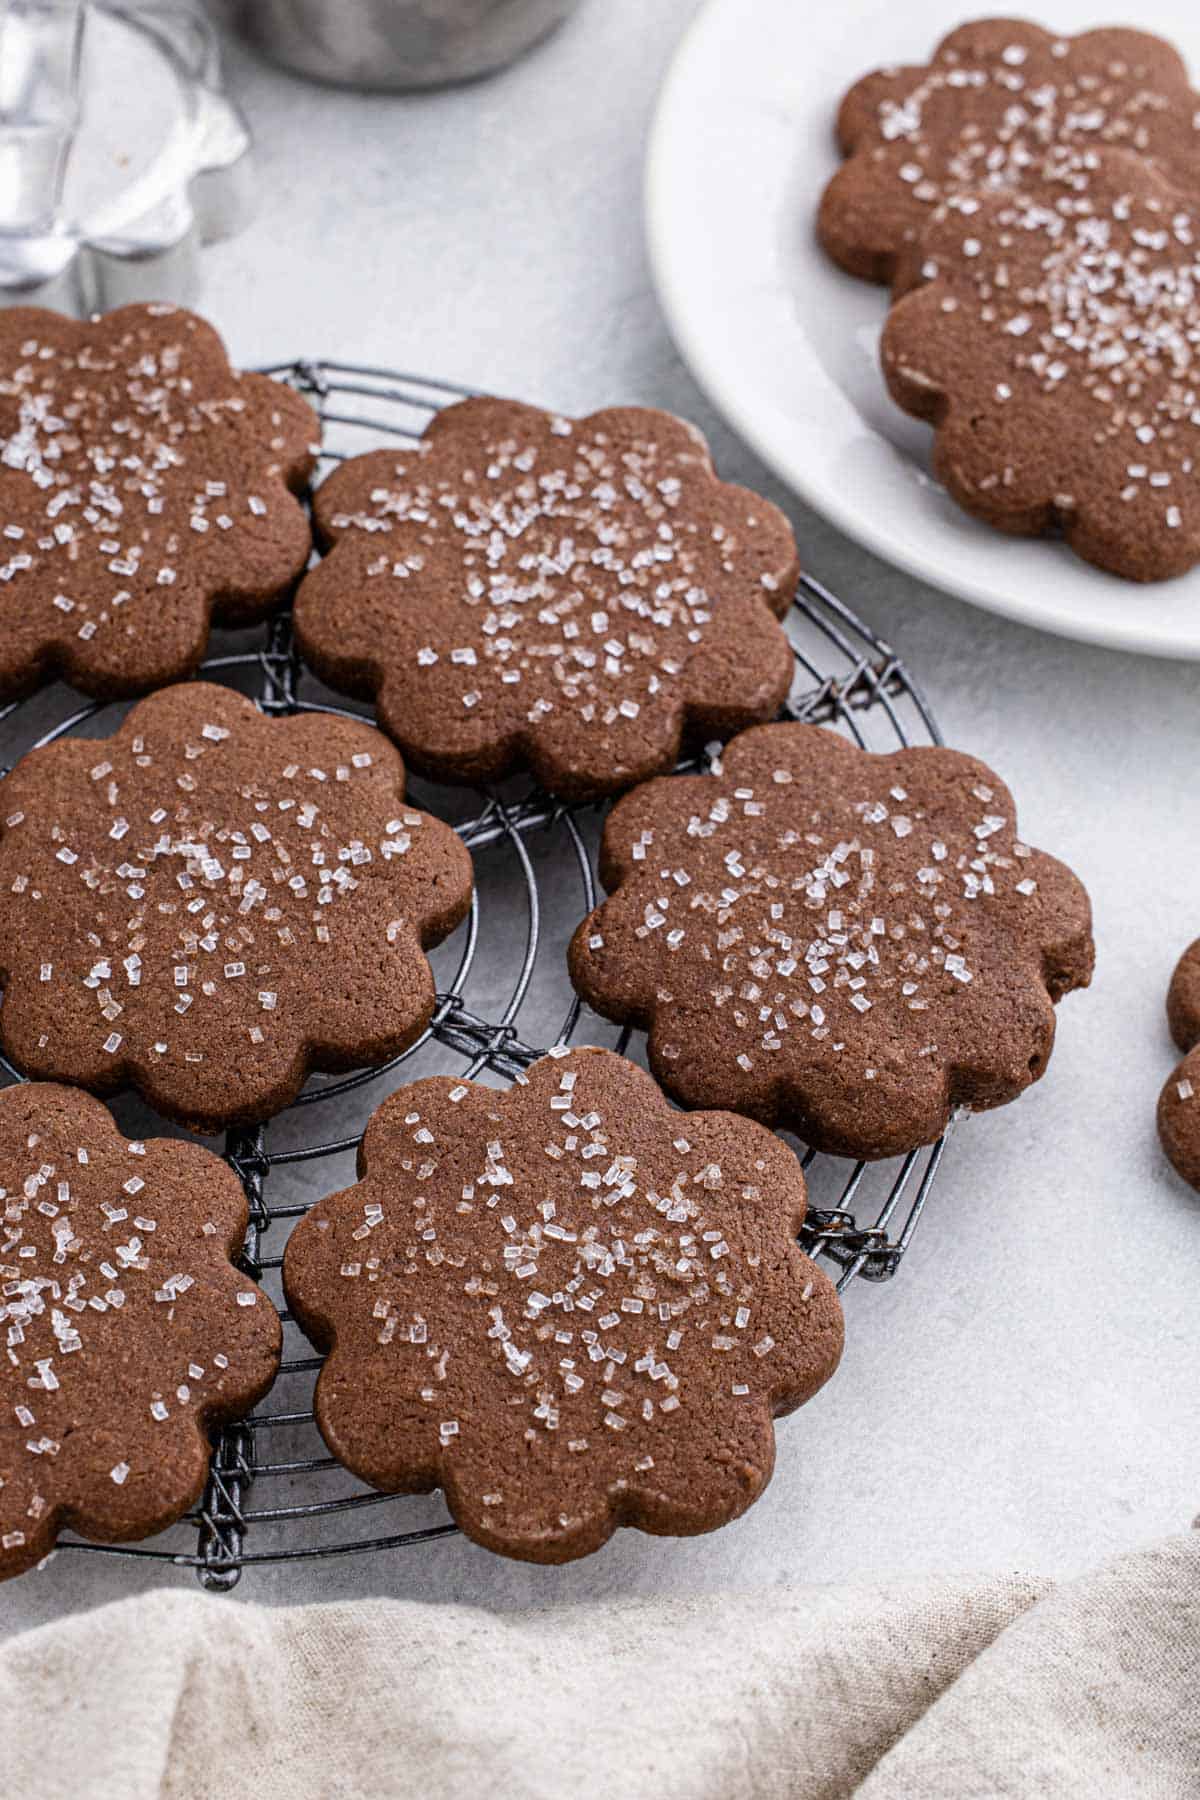
This one is for when you want a cut-out cookie but you're slightly bored of the classic vanilla version. These are full-on chocolate — cocoa powder right in the dough — and they still hold a clean edge when cut, which is harder to achieve with chocolate cookies than you'd think. I've tried other chocolate sugar cookie recipes where the dough got crumbly or the cookies spread into blobs in the oven. This version chills properly and bakes up with sharp, defined edges you can actually decorate. Top them with white or pink icing and a few red sprinkles and they look stunning — the contrast against the dark chocolate base is really striking.
Ingredients
- 1 cup (2 sticks) unsalted butter, softened
- 1½ cups granulated sugar
- 2 eggs
- 2 teaspoons vanilla extract
- 3 cups all-purpose flour
- ¾ cup Dutch-process cocoa powder (regular unsweetened cocoa works too)
- 1 teaspoon baking powder
- ½ teaspoon salt
- White or pink royal icing and Valentine's sprinkles, for decorating
Instructions
- Beat butter and sugar together until light and fluffy, about 3 minutes. Add eggs one at a time, then vanilla, and beat until combined.
- Whisk together flour, cocoa powder, baking powder, and salt. Gradually add to the butter mixture, mixing until a smooth dough forms. Divide dough in half, flatten into discs, wrap in plastic, and refrigerate for at least 2 hours or overnight.
- Preheat oven to 350°F. Roll one disc of dough on a lightly floured surface (or between two sheets of parchment) to ¼-inch thickness. Cut into heart shapes and transfer to a parchment-lined baking sheet.
- Bake 9–11 minutes, until the edges look set and the tops are no longer shiny. Cool on the pan for 5 minutes, then transfer to a wire rack to cool completely before decorating.
- Once completely cool, decorate with white or pink icing and add sprinkles. Let icing set for at least an hour before stacking or packaging.
Tips
- Tip: Rolling the dough between two sheets of parchment prevents it from sticking to the counter without adding extra flour, which can dry out the cookies.
- Tip: The dough gets very firm after overnight chilling — let it sit at room temperature for 10 minutes before trying to roll it, or it'll crack at the edges.
- Tip: White icing against the dark chocolate cookie base looks especially striking — keep the decoration simple and let the contrast do the work.
25. Easy Strawberry Crinkle Cookies

These soft, pillowy strawberry crinkle cookies rolled in powdered sugar are one of the prettiest things to come out of my oven around Valentine's Day. The crinkled exterior happens naturally as the cookies spread and crack — no special technique needed, which I genuinely appreciate. They bake up pale pink and look almost too pretty to eat, and the strawberry flavor comes through in a way that's sweet without being artificial. I've made these for Zainab's class treats and they were gone before I even got a photo.
Ingredients
- 1 box (15.25 oz) strawberry cake mix (Betty Crocker or Duncan Hines both work)
- 2 large eggs
- ⅓ cup vegetable oil
- 1 teaspoon vanilla extract
- ½ cup powdered sugar, for rolling
Instructions
- Preheat your oven to 350°F and line two baking sheets with parchment paper.
- In a large bowl, stir together the cake mix, eggs, oil, and vanilla until a soft dough forms. It will be slightly sticky — that's normal.
- Scoop the dough into 1-tablespoon balls and roll each one generously in powdered sugar until fully coated.
- Place on the prepared baking sheets about 2 inches apart and bake for 10–12 minutes, until the edges are set but the centers still look slightly underdone. They firm up as they cool.
- Let cool on the baking sheet for 5 minutes before transferring to a wire rack. The crinkle pattern sets as they cool.
Tips
- Tip: If the dough is too sticky to roll, refrigerate it for 20–30 minutes — it makes handling so much easier.
- Tip: Be generous with the powdered sugar coating — a thin coat will disappear during baking and you won't get that classic crinkle look.
- Tip: Don't overbake. Pull them when the centers look underdone — they continue cooking on the hot pan after you take them out.
26. Valentine's Day Sugar Cookies
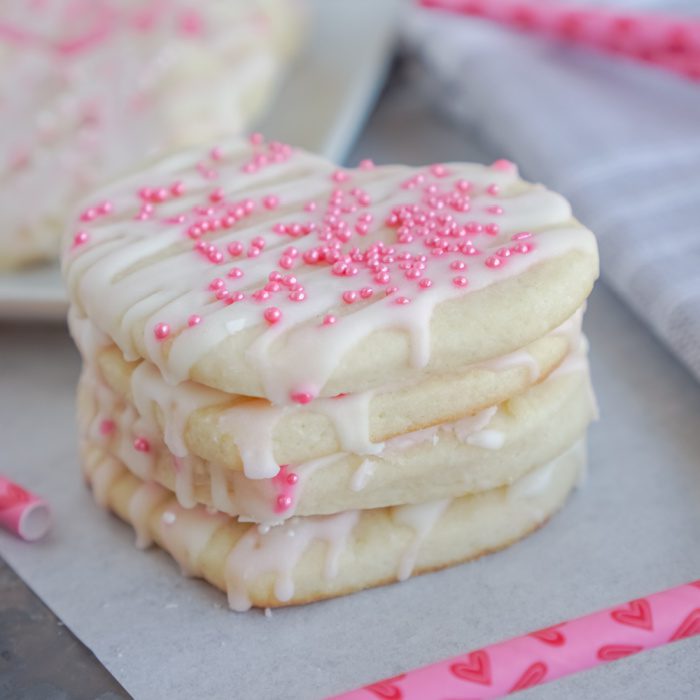
Classic heart-shaped sugar cookies decorated with royal icing in pink, red, and white — these are the Valentine's Day cookie. I'll be honest, the decorating part takes patience, but the cookie base itself is straightforward and holds its shape beautifully after baking, which matters a lot when you're cutting out hearts and expecting them to look like hearts. The royal icing dries firm, so they stack and package well — great if you're boxing them up as gifts or sending them to school with the kids.
Ingredients
- 2 ¾ cups all-purpose flour
- 1 teaspoon baking powder
- ¼ teaspoon salt
- 1 cup (2 sticks) unsalted butter, softened
- 1 cup granulated sugar
- 1 large egg
- 1 ½ teaspoons vanilla extract
- For Royal Icing: 2 cups powdered sugar, 1½ tablespoons meringue powder, 3–4 tablespoons water, pink and red gel food coloring
Instructions
- Whisk together flour, baking powder, and salt in a bowl. In a separate large bowl, beat butter and sugar together until light and fluffy, then mix in the egg and vanilla.
- Gradually stir the flour mixture into the butter mixture until a soft dough forms. Divide in half, flatten into discs, wrap in plastic wrap, and refrigerate for at least 1 hour.
- Preheat oven to 375°F. Roll chilled dough out on a lightly floured surface to ¼-inch thickness and cut with heart-shaped cookie cutters. Place on parchment-lined baking sheets.
- Bake for 8–10 minutes until the edges are just barely golden. Cool completely on a wire rack before decorating.
- For royal icing, whisk together powdered sugar, meringue powder, and water until smooth and thick. Divide and tint with gel food coloring, then pipe or spread onto cooled cookies. Allow to set fully before stacking.
Tips
- Tip: Don't skip the chilling step — cold dough holds its shape in the oven and your hearts will actually look like hearts.
- Tip: Gel food coloring gives you a more vibrant color than liquid drops without thinning out the icing — worth picking up at Walmart or a craft store.
- Tip: If you don't have meringue powder, royal icing can be made with pasteurized egg whites instead — use 3 tablespoons in place of the meringue powder and water.
27. Red Velvet Sugar Cookies
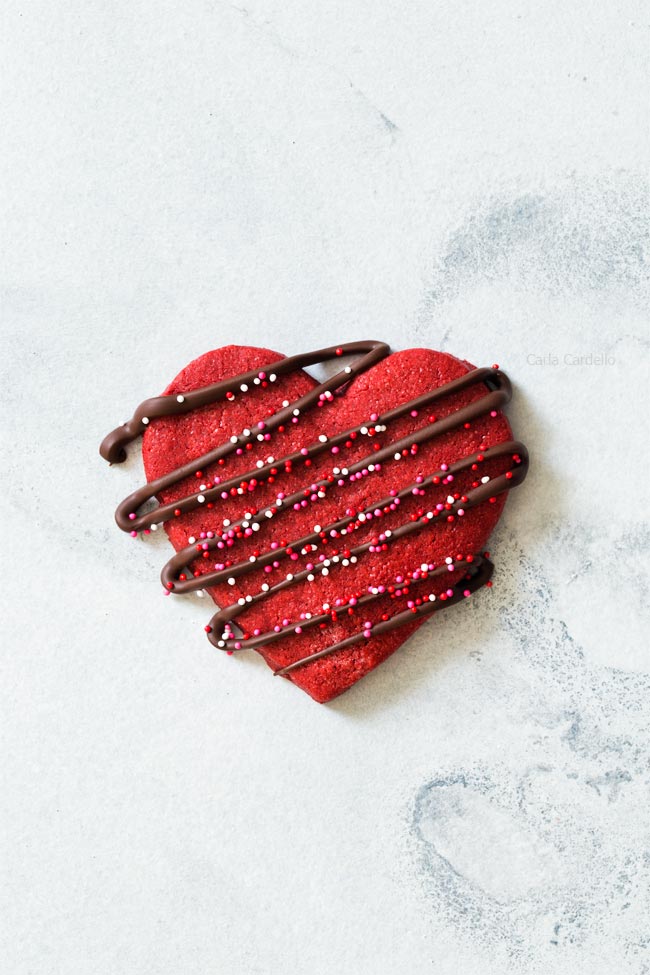
Red velvet in cookie form, topped with a generous swipe of cream cheese frosting — this is the kind of Valentine's cookie that gets requested by name. The deep red color makes them unmistakably festive, and the subtle cocoa flavor in the cookie base pairs beautifully with tangy cream cheese. They're a cut-out cookie, so they hold heart shapes well, but honestly they look stunning even as simple rounds. My husband, who doesn't usually go for decorated cookies, finished four of these in one sitting without saying a word — which is the highest compliment he gives.
Ingredients
- 2 ½ cups all-purpose flour
- 2 tablespoons unsweetened cocoa powder
- ½ teaspoon baking powder
- ¼ teaspoon salt
- ¾ cup (1½ sticks) unsalted butter, softened
- 1 cup granulated sugar
- 1 large egg
- 1 tablespoon red gel food coloring
- 1 teaspoon vanilla extract
- For Cream Cheese Frosting: 4 oz cream cheese (softened), 1 cup powdered sugar, 2 tablespoons butter (softened), ½ teaspoon vanilla
Instructions
- Whisk flour, cocoa powder, baking powder, and salt together in a bowl and set aside.
- Beat softened butter and sugar together until fluffy. Add the egg, red food coloring, and vanilla, and mix until combined and evenly red throughout.
- Stir in the flour mixture gradually until a soft dough forms. Wrap in plastic and refrigerate for at least 1 hour.
- Preheat oven to 350°F. Roll dough to ¼-inch thickness on a floured surface, cut into hearts or rounds, and bake on parchment-lined sheets for 9–11 minutes. Cool completely.
- Beat cream cheese, butter, powdered sugar, and vanilla together until smooth. Spread or pipe onto cooled cookies.
Tips
- Tip: Use gel food coloring rather than liquid — you'll get that deep, true red with much less product and without affecting the dough texture.
- Tip: The cream cheese frosting is soft, so frost cookies only after they're fully cooled and serve or refrigerate within a few hours of frosting.
- Tip: Unfrosted cookies can be baked a day ahead and stored at room temperature in an airtight container — frost the day you plan to serve them.
28. Strawberry Cookies
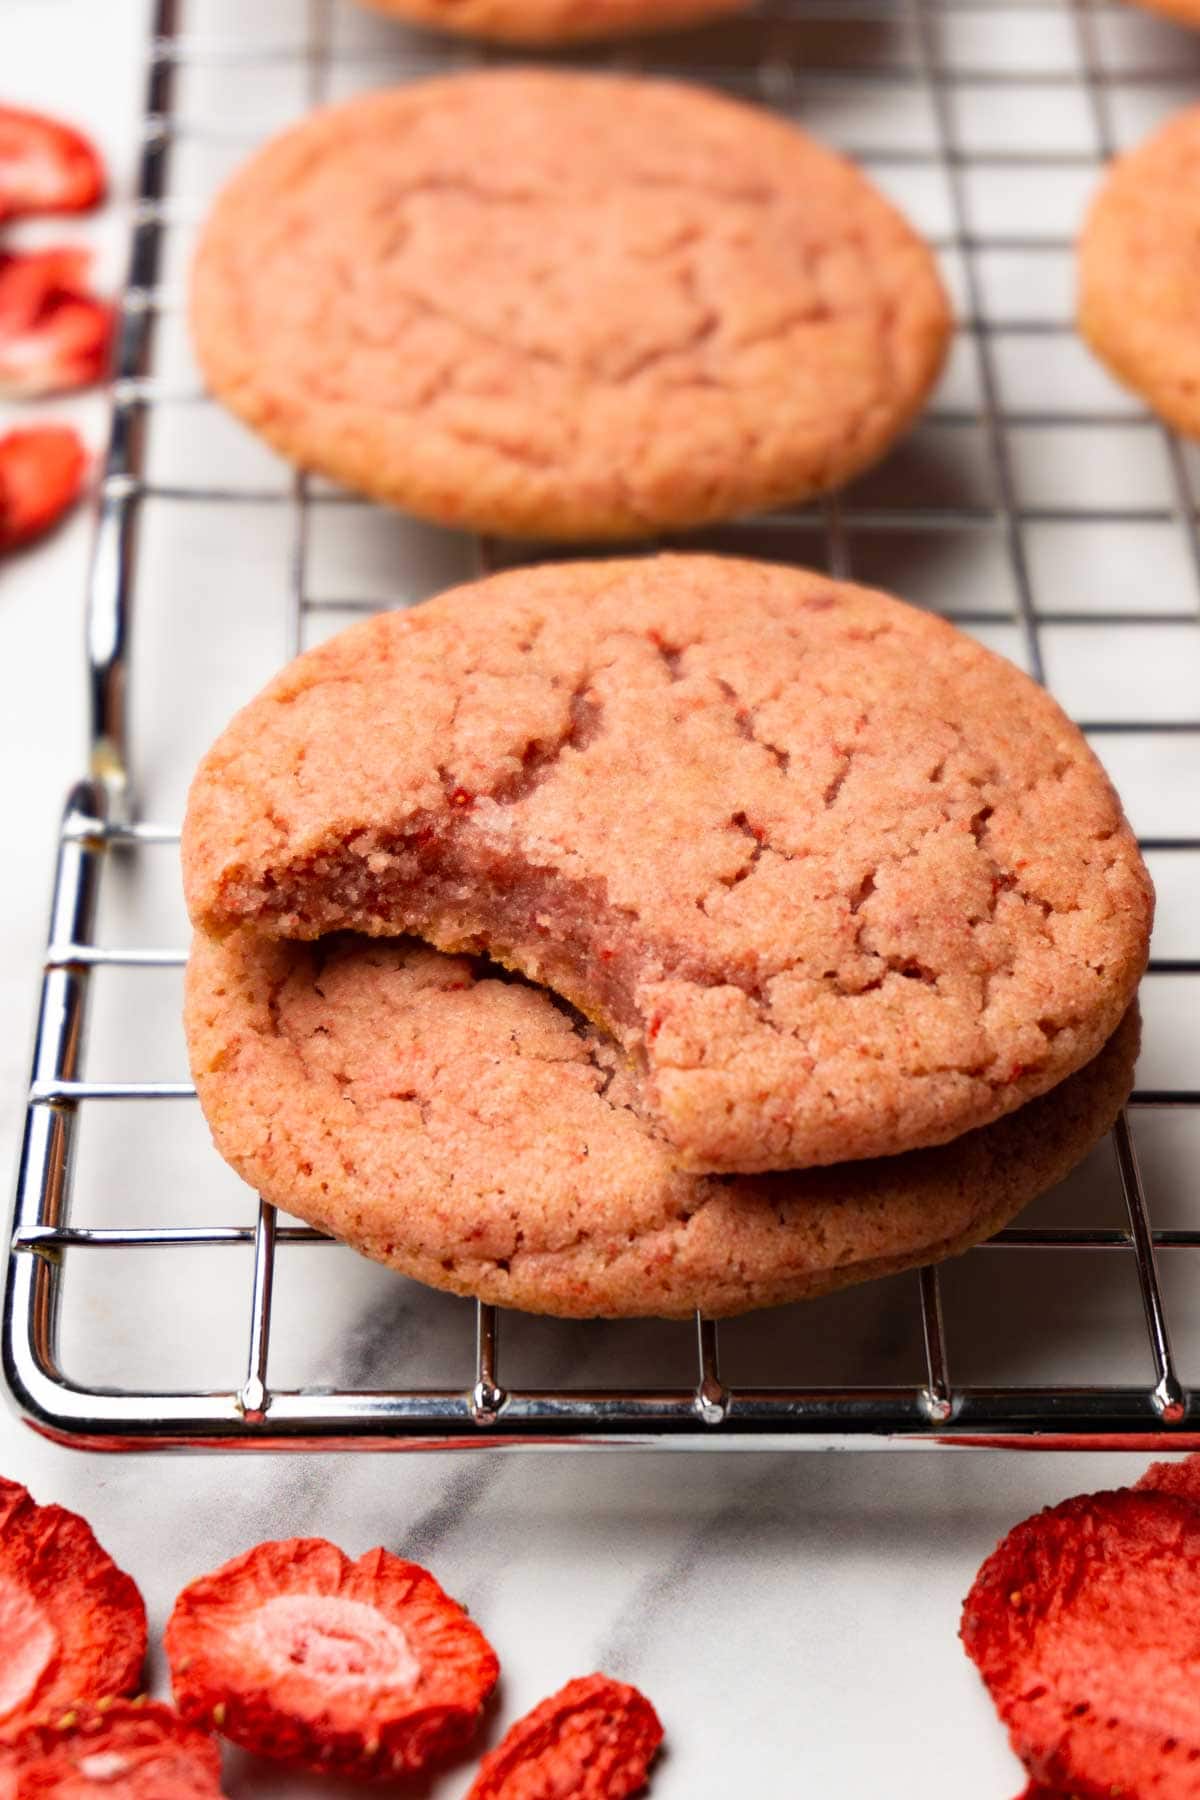
Chewy, vibrantly pink strawberry cookies that get their flavor from real strawberry — freeze-dried strawberries ground into the dough give you a natural, intense berry taste without relying on artificial flavoring. The texture lands somewhere between a chewy sugar cookie and a soft drop cookie, and the color is genuinely stunning on a Valentine's Day plate. These are simpler than they look, and you don't need any special equipment beyond a bowl and a sheet pan. I make a double batch because they disappear fast and I always want one for myself the next morning with coffee.
Ingredients
- 1 cup freeze-dried strawberries, blended to a fine powder (about ½ cup powder)
- 2 cups all-purpose flour
- ½ teaspoon baking soda
- ¼ teaspoon salt
- ¾ cup (1½ sticks) unsalted butter, softened
- ¾ cup granulated sugar
- ¼ cup powdered sugar
- 1 large egg
- 1 teaspoon vanilla extract
- Pink or red sanding sugar for rolling (optional)
Instructions
- Blend freeze-dried strawberries in a food processor or blender until you have a fine powder. If you don't have a food processor, seal them in a zip-lock bag and crush with a rolling pin — works just as well.
- Whisk together the strawberry powder, flour, baking soda, and salt in a bowl.
- Beat butter with both sugars until light and creamy. Mix in the egg and vanilla extract until combined.
- Stir the flour mixture into the butter mixture until a soft dough forms. Refrigerate for 30 minutes.
- Preheat oven to 350°F. Scoop dough into balls, roll in sanding sugar if using, and place 2 inches apart on parchment-lined baking sheets. Bake for 11–13 minutes until edges are just set. Cool on the pan for 5 minutes.
Tips
- Tip: Freeze-dried strawberries are available at Trader Joe's, Target, and most Walmart stores — they're usually in the snack aisle near the dried fruit.
- Tip: For a more intense pink color, add a tiny drop of pink gel food coloring to the dough — the strawberry powder gives flavor but the color can vary batch to batch.
- Tip: These cookies keep well in an airtight container at room temperature for up to 5 days, though they rarely last that long in my kitchen.
29. Valentine Cookies
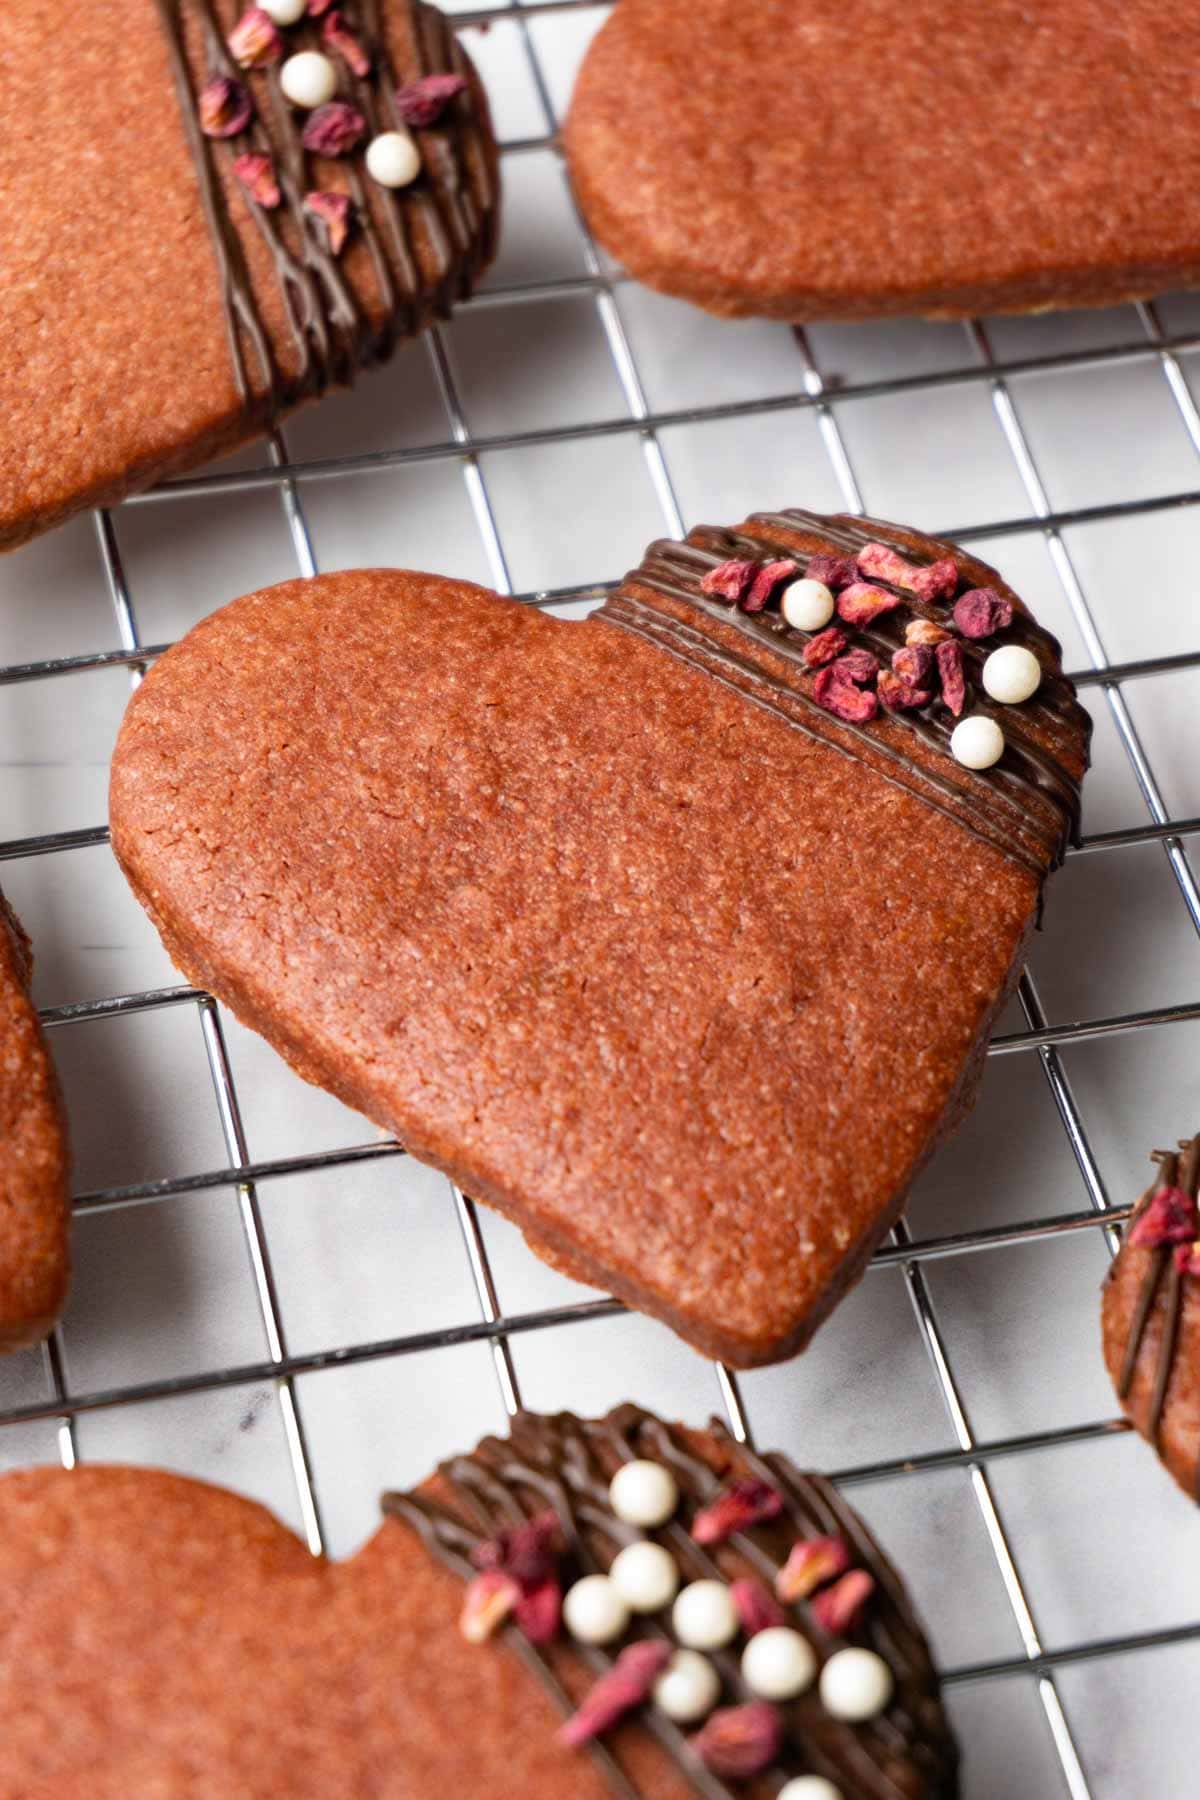
This final recipe is the one I think of as the "celebration cookie" — decorated in multiple shapes and designs, painted with colored icing, sprinkled with sugar, and made to look as festive as possible. It's the kind of cookie you put on a plate and someone says "did you make these?" The base is a reliable butter cookie that keeps its edges sharp when baked, so your shapes actually look like what you cut them out to be. This is also a great one to make with kids — Saad has zero patience for piping bags, but he loves pressing sprinkles into wet icing and calling himself a chef.
Ingredients
- 3 cups all-purpose flour
- ½ teaspoon baking powder
- ¼ teaspoon salt
- 1 cup (2 sticks) unsalted butter, softened to room temperature
- 1 cup powdered sugar
- 1 large egg
- 1 ½ teaspoons almond extract (or vanilla extract if you prefer)
- For Decorating: Royal icing (see recipe #26), Valentine sprinkles, red and pink sanding sugar, heart-shaped cookie cutters in various sizes
Instructions
- Whisk flour, baking powder, and salt together in a bowl. In a large bowl, beat butter and powdered sugar until smooth and creamy — about 2 minutes by hand with a wooden spoon.
- Mix in the egg and almond extract until fully incorporated. Add the flour mixture and stir until a firm dough comes together. Flatten into a disc, wrap, and refrigerate for 1 hour minimum.
- Preheat oven to 375°F. On a lightly floured surface, roll chilled dough to ¼-inch thickness and cut out shapes with cookie cutters. Transfer to parchment-lined baking sheets.
- Bake for 7–9 minutes until the edges are just set and the bottoms are very lightly golden. The cookies should not brown on top. Cool completely on a wire rack.
- Decorate cooled cookies with royal icing in your choice of colors. Add sprinkles or sanding sugar while the icing is still wet, then let set at room temperature for at least 1 hour before stacking or packaging.
Tips
- Tip: Powdered sugar in the dough (instead of granulated) gives these a more tender, melt-in-your-mouth texture that holds up beautifully to decorating.
- Tip: For a simple no-piping-bag approach, spread icing with the back of a small spoon and drop sprinkles on top — it looks intentionally rustic and kids love doing it themselves.
- Tip: Baked and cooled undecorated cookies freeze well for up to 2 months — thaw at room temperature and decorate the day you need them.
That's the roundup. Pick whichever fits your week. 🍽️





Comments
No Comments