
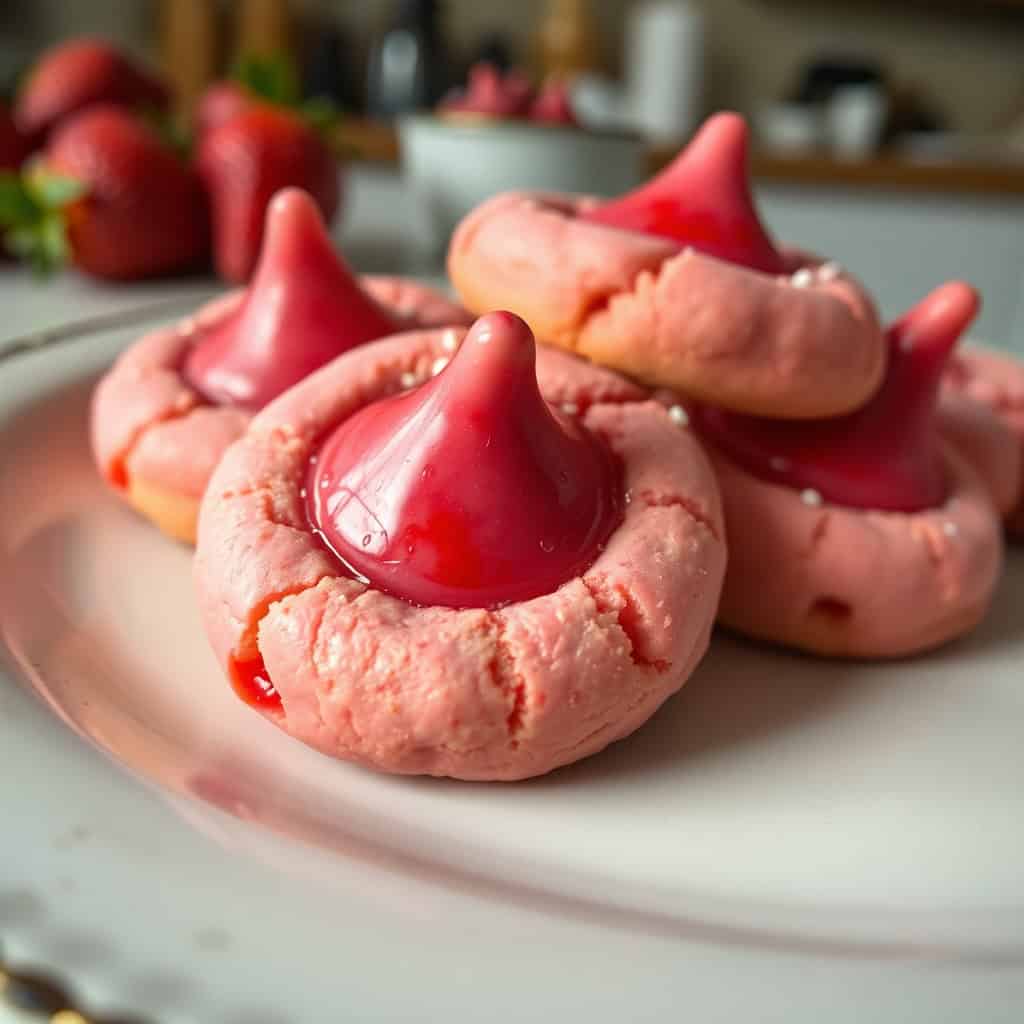
Strawberry Kiss Cookies are the epitome of sweet, simple joy.
These charming cookies are a delightful combination of a soft, buttery sugar cookie base and a bright, strawberry-flavored kiss candy nestled perfectly in the center.
Imagine biting into a melt-in-your-mouth cookie with just the right amount of sweetness, followed by the smooth, fruity burst of a strawberry kiss.
These cookies are not only incredibly delicious but also visually irresistible, making them the perfect treat for Valentine's Day, holiday celebrations, birthday parties, or simply a fun baking project with the family.
This recipe is designed to be easy to follow, making it a great baking project for all skill levels and even a fun activity to involve kids in the kitchen!

Why You'll Love This Recipe
- Cute and Festive: These cookies are visually appealing and perfect for any celebration, especially Valentine's Day.
- Easy to Make: This recipe is straightforward and simple, even for beginner bakers.
- Fun for Kids: Involving kids in the baking process makes this recipe even more special.
- Perfect for Gifting: These cookies make a wonderful homemade gift for friends and family.
- Delicious Flavor: The combination of buttery cookie and sweet strawberry kiss is simply irresistible.
Ingredients
For the Cookies:
- ½ cup (1 stick) unsalted butter, softened
- ½ cup granulated sugar
- 1 large egg
- 1 teaspoon vanilla extract
- 1 ½ cups all-purpose flour
- ½ teaspoon baking powder
- ¼ teaspoon salt
- Red food coloring (optional, for a pink hue)
For the Topping:
- 1 bag of strawberry kiss candies, unwrapped
- Sprinkles (optional for added decoration)
Directions
- Step 1: Cream Butter and Sugar
In a large bowl, cream together the softened butter and granulated sugar until light and fluffy.
- Step 2: Add Egg and Vanilla
Beat in the egg and vanilla extract until well combined.
- Step 3: Combine Dry Ingredients
In a separate bowl, whisk together the flour, baking powder, and salt.
- Step 4: Combine Wet and Dry Ingredients
Gradually add the dry ingredients to the wet ingredients, mixing until just combined. Do not overmix.
- Step 5: Add Food Coloring (Optional)
If desired, add a few drops of red food coloring to the dough and mix until the color is evenly distributed.
- Use gel food coloring for a more intense color with less liquid.
- Step 6: Chill the Dough
Cover the dough with plastic wrap and refrigerate for at least 30 minutes or up to 2 hours.
- Chilling the dough makes it easier to handle and prevents the cookies from spreading too much.
- Step 7: Shape the Cookies
Preheat oven to 375°F (190°C). Line baking sheets with parchment paper. Roll the dough into 1-inch balls.
- Place the dough balls on the prepared baking sheets, leaving some space between them.
- Step 8: Bake
Bake for 8-10 minutes or until the edges are lightly golden. The cookies should still be slightly soft in the center.
- Step 9: Add Kisses
Immediately after removing the cookies from the oven, gently press a strawberry kiss candy into the center of each cookie. If desired, add sprinkles around the kiss before it sets.
- Step 10: Cool
Let the cookies cool completely on the baking sheets before serving or storing.
Serving and Storage
Serving Suggestions
Strawberry Kiss Cookies are best served at room temperature. They are perfect for Valentine's Day, holiday parties, or as a sweet treat any time of year.
Storage
- Storing at Room Temperature: Store cooled cookies in an airtight container at room temperature for up to 5 days.
- Freezing: You can freeze baked cookies in an airtight container for up to 3 months. Thaw at room temperature before serving.
- You can also freeze the cookie dough. Roll the dough into balls and place them on a baking sheet lined with parchment paper.
- Freeze until solid, then transfer the frozen dough balls to a freezer-safe bag. Bake from frozen, adding a few extra minutes to the baking time.
Tips for Success
- Use Softened Butter: Softened butter is essential for creaming properly and achieving the right texture.
- Don't Overmix: Overmixing can lead to tough cookies. Mix until just combined.
- Chill the Dough: Chilling the dough makes it easier to handle and prevents the cookies from spreading too much.
- Don't Overbake: Overbaking will result in dry cookies. The cookies should be slightly soft in the center.
- Add Kisses Immediately: Press the kisses into the cookies immediately after removing them from the oven while they are still warm.
Variations
- Use Different Candies: Experiment with different types of Hershey's Kisses or other small candies.
- Add Sprinkles: Add sprinkles to the dough or roll the dough balls in sprinkles before baking for added decoration.
- Flavor the Dough: Add lemon zest, almond extract, or other flavorings to the dough for a different taste.
- Use Different Cookie Cutters: Use cookie cutters to create different shapes.
- Frost the Cookies: Add a simple glaze or buttercream frosting to the cooled cookies before adding the kisses.
FAQs
Yes, you can use a stand mixer for this recipe.
Yes, you can make the dough ahead of time and chill it in the refrigerator for up to 2 days.
Store them in an airtight container with a slice of bread.
Yes, you can freeze baked cookies.
This can be caused by using melted butter, overmixing the dough, or not chilling the dough long enough.
These Strawberry Kiss Cookies are a delightful and festive treat, perfect for any occasion.
The combination of soft, buttery cookie and sweet strawberry kiss is simply irresistible.
They are easy to make, fun for kids to help with, and make a wonderful homemade gift.
Enjoy the sweetness, the cuteness, and the joy of sharing these delightful cookies with your loved ones.
They're a perfect way to spread a little sweetness and make any day a little more special.

STRAWBERRY KISS COOKIES
Ingredients
- 1 cup (2 sticks) unsalted butter, softened
- ½ cup granulated sugar
- 1 teaspoon vanilla extract
- 2 ¼ cups all-purpose flour
- ¼ teaspoon salt
- 1 bag (10-12 ounces) strawberry kiss candies, unwrapped
Instructions
- Cream butter and sugar: In a large bowl, cream together the softened butter and granulated sugar until light and fluffy, about1 2-3 minutes using an electric mixer.
- Add vanilla: Stir in the vanilla extract.
- Combine dry ingredients: In a separate bowl, whisk together the flour and salt.
- Combine wet and dry ingredients: Gradually add the dry ingredients to the wet ingredients, mixing on low speed until just combined. Do not overmix.
- Chill the dough: Cover the dough and refrigerate for at least 1 hour, or preferably overnight. This chilling period is crucial for preventing spreading and making the dough easier to handle.
- Preheat and prepare: Preheat oven to 375°F (190°C). Line baking sheets with parchment paper.
- Shape the cookies: Roll the dough into 1-inch balls. Place the balls on the prepared baking sheets, leaving about 2 inches between cookies.
- Bake: Bake for 8-10 minutes, or until the edges are lightly golden brown. Be careful not to overbake.
- Add kisses: Immediately after removing the cookies from the oven, press a strawberry kiss candy firmly into the center of each cookie.
- Cool: Let the cookies cool completely on the baking sheets before transferring them to a wire rack.
Notes
- Chilling: Chilling the dough is essential for preventing the cookies from spreading too much and for making the dough easier to handle. Don't skip this step!
- Cookie Size: The size of the cookie balls will affect the baking time. Smaller balls will bake faster, and larger balls will take longer.
- Kiss Placement: Pressing the kisses into the cookies while they are still hot is important. This will allow the kisses to adhere to the cookies as they cool.
- Candy Variations: You can use other types of Hershey's kisses or similar candies in different flavors or colors.
- Storage: Store cooled cookies in an airtight container at room temperature for up to 5 days.






Comments
No Comments