
Weeknight dinners in my house are never simple. Saad wants something crispy, Zainab wants pasta, my husband is quietly hoping I make something Pakistani, and I'm standing in the kitchen at 5pm trying to figure out how to make everyone happy without spending three hours cooking. Over the years I've built up a rotation of dinners that actually work — fast enough for weeknights, interesting enough that nobody complains, and varied enough that we don't eat the same five things on repeat. This list is that rotation.
A good dinner recipe, in my opinion, earns its place by doing at least two things well: it has to come together without requiring you to babysit the stove the entire time, and it has to actually taste like something — not just "fine." I've tested hundreds of recipes over the years (and abandoned a lot of them halfway through when I realized they weren't worth the effort). The ones that made it onto this list are the ones I keep coming back to, week after week. If you're looking for more weeknight inspiration, I've also put together my easy chicken dinner recipes collection that pairs well with several of these.
What I love about this particular collection is how much ground it covers. There's Palak Chicken for the nights I'm craving something from home, Creamy Tuscan Chicken Pasta for when the kids are in a restaurant mood, Chickpea Curry Soup for a lighter option, and 15-Minute Spaghetti Aglio e Olio for when I genuinely have nothing left in me. There's also a Restaurant-Style Chicken Seekh Kabab at the end that my husband asks for more than almost anything else I make. You'll find air fryer recipes, one-pan dinners, pasta nights, curry nights — the whole spread. My easy pasta recipes roundup and air fryer chicken recipes post have even more ideas if you want to go deeper after this one.
Here are the 28 dinner recipes I keep coming back to — pick whichever one fits your week.
Top 28 Best Dinner Recipes
27. BBQ Chicken Pasta

BBQ chicken pasta sounds like it shouldn't work — smoky, tangy BBQ sauce mixed into creamy pasta — but it absolutely does. I made this on a weeknight when I had leftover rotisserie chicken in the fridge and a half-used bottle of BBQ sauce sitting on the shelf, and it came together in about 25 minutes. The sauce is rich without being heavy, and the smokiness from the BBQ cuts through the cream in a way that keeps it interesting. My husband asked what was in it three times because he couldn't place the flavor — that's always a good sign.
Ingredients
- 12 oz penne or rotini pasta
- 2 cups cooked chicken, shredded or chopped (rotisserie works great)
- ¾ cup BBQ sauce (I like a smoky variety — Sweet Baby Ray's or similar)
- 1 cup heavy cream (or half-and-half for a lighter version)
- 1 tablespoon olive oil
- 3 cloves garlic, minced
- ½ teaspoon smoked paprika
- Salt and black pepper to taste
- 1 cup shredded mozzarella or cheddar, for topping
- 2 tablespoons fresh parsley or green onion, chopped (optional)
Instructions
- Cook pasta according to package directions in well-salted water. Reserve ½ cup of pasta water before draining.
- In a large skillet over medium heat, warm the olive oil and sauté the garlic for about 1 minute until fragrant — don't let it brown.
- Add the BBQ sauce, heavy cream, and smoked paprika to the skillet. Stir to combine and let it simmer for 3-4 minutes until the sauce thickens slightly.
- Add the shredded chicken and cooked pasta to the skillet. Toss everything together, adding a splash of reserved pasta water if the sauce feels too thick.
- Top with shredded cheese, cover the pan for 2 minutes to let it melt, then garnish with parsley or green onion and serve immediately.
Tips
- Tip: The smokiness of your BBQ sauce matters here — a thin, sweet sauce won't give you that depth. Go for one labeled "smoky" or "original" rather than honey BBQ.
- Tip: Leftover rotisserie chicken from Costco or Walmart is perfect for this — no extra cooking needed and the seasoning adds even more flavor.
- Tip: Don't skip the reserved pasta water — it's the trick to getting the sauce to cling to the pasta instead of pooling at the bottom of the bowl.
26. Vegan Hamburger Helper (Gluten-Free, Dairy-Free)

I grew up in Pakistan with no concept of Hamburger Helper — I didn't even try the original until a few years after we started cooking more American food at home. But this vegan, gluten-free version is honestly the one I reach for now because it works for so many people at the table. It uses plant-based ground meat (the kind you find at Trader Joe's or Walmart these days) and a creamy tomato-based sauce that comes together in one pan. No one in my house has realized it's vegan unless I tell them.
Ingredients
- 12 oz gluten-free pasta (elbow or shells work best)
- 12 oz plant-based ground meat (Beyond Meat or similar)
- 1 tablespoon olive oil
- 1 small onion, diced
- 3 cloves garlic, minced
- 1 can (14 oz) crushed tomatoes
- 1½ cups vegetable broth
- 1 cup unsweetened coconut milk or oat milk (for creaminess)
- 1 teaspoon smoked paprika
- ½ teaspoon onion powder
- Salt and black pepper to taste
- 2 tablespoons nutritional yeast (optional, adds a cheesy depth)
Instructions
- Cook the gluten-free pasta separately according to package directions, drain, and set aside. Gluten-free pasta can get mushy if you cook it directly in the sauce, so this step matters.
- Heat olive oil in a large skillet over medium-high heat. Add the onion and cook for 3 minutes until softened, then add garlic and cook another minute.
- Add the plant-based ground meat and break it apart with a spoon. Cook for 5-6 minutes until browned and heated through.
- Stir in the crushed tomatoes, vegetable broth, plant milk, smoked paprika, onion powder, and nutritional yeast if using. Bring to a simmer and cook for 8-10 minutes until the sauce thickens.
- Add the cooked pasta to the skillet, stir to coat, season with salt and pepper, and serve hot.
Tips
- Tip: Nutritional yeast is worth finding — most Walmart and Whole Foods stores carry it, and it adds a savory, slightly cheesy note that makes the sauce feel richer without any dairy.
- Tip: If plant-based ground meat isn't your thing or it's not available nearby, cooked lentils work surprisingly well as a substitute — same texture, more budget-friendly.
- Tip: This keeps well in the fridge for up to 3 days — add a splash of broth when reheating to loosen the sauce back up.
25. Whole Chicken in the Air Fryer

The first time I cooked a whole chicken in my air fryer, I was genuinely skeptical — I kept checking on it every ten minutes like something was going to go wrong. But it came out with the crispiest skin I've ever made at home, and the meat stayed juicy all the way through. The key is knowing your timing: for a 4-pound chicken, you're looking at about 60-65 minutes at 360°F, flipping halfway. A meat thermometer is non-negotiable here — you want 165°F in the thickest part of the thigh. This is the kind of Sunday dinner that looks impressive but barely needs any work from you.
Ingredients
- 1 whole chicken, 3½ to 4½ lbs (patted completely dry)
- 2 tablespoons olive oil or melted butter
- 1 teaspoon garlic powder
- 1 teaspoon smoked paprika
- 1 teaspoon onion powder
- ½ teaspoon dried thyme or Italian seasoning
- 1 teaspoon salt
- ½ teaspoon black pepper
Instructions
- Pat the chicken completely dry with paper towels — this is the step that gives you crispy skin, so don't rush it. Mix together the olive oil, garlic powder, paprika, onion powder, thyme, salt, and pepper into a paste.
- Rub the seasoning paste all over the chicken, including under the skin on the breast where you can reach. Let it sit at room temperature for 15 minutes while the air fryer preheats to 360°F.
- Place the chicken breast-side down in the air fryer basket. Cook at 360°F for 30 minutes.
- Carefully flip the chicken breast-side up using tongs and a spatula (it's hot and slippery — be careful). Cook for another 30-35 minutes until the skin is deep golden and a meat thermometer inserted into the thigh reads 165°F.
- Let the chicken rest for 10 minutes before carving — this keeps the juices inside rather than running all over your cutting board.
Tips
- Tip: Chicken size matters in an air fryer — anything over 5 lbs may not fit or cook evenly. Check that the basket lid closes fully before you start.
- Tip: A basic instant-read meat thermometer costs under $15 at Walmart and takes all the guesswork out of poultry — it's the one kitchen tool I'd tell every home cook to own.
- Tip: The drippings that collect at the bottom of the air fryer are liquid gold — pour them over the carved chicken or use them to make a quick pan sauce.
24. Chickpea Curry Soup
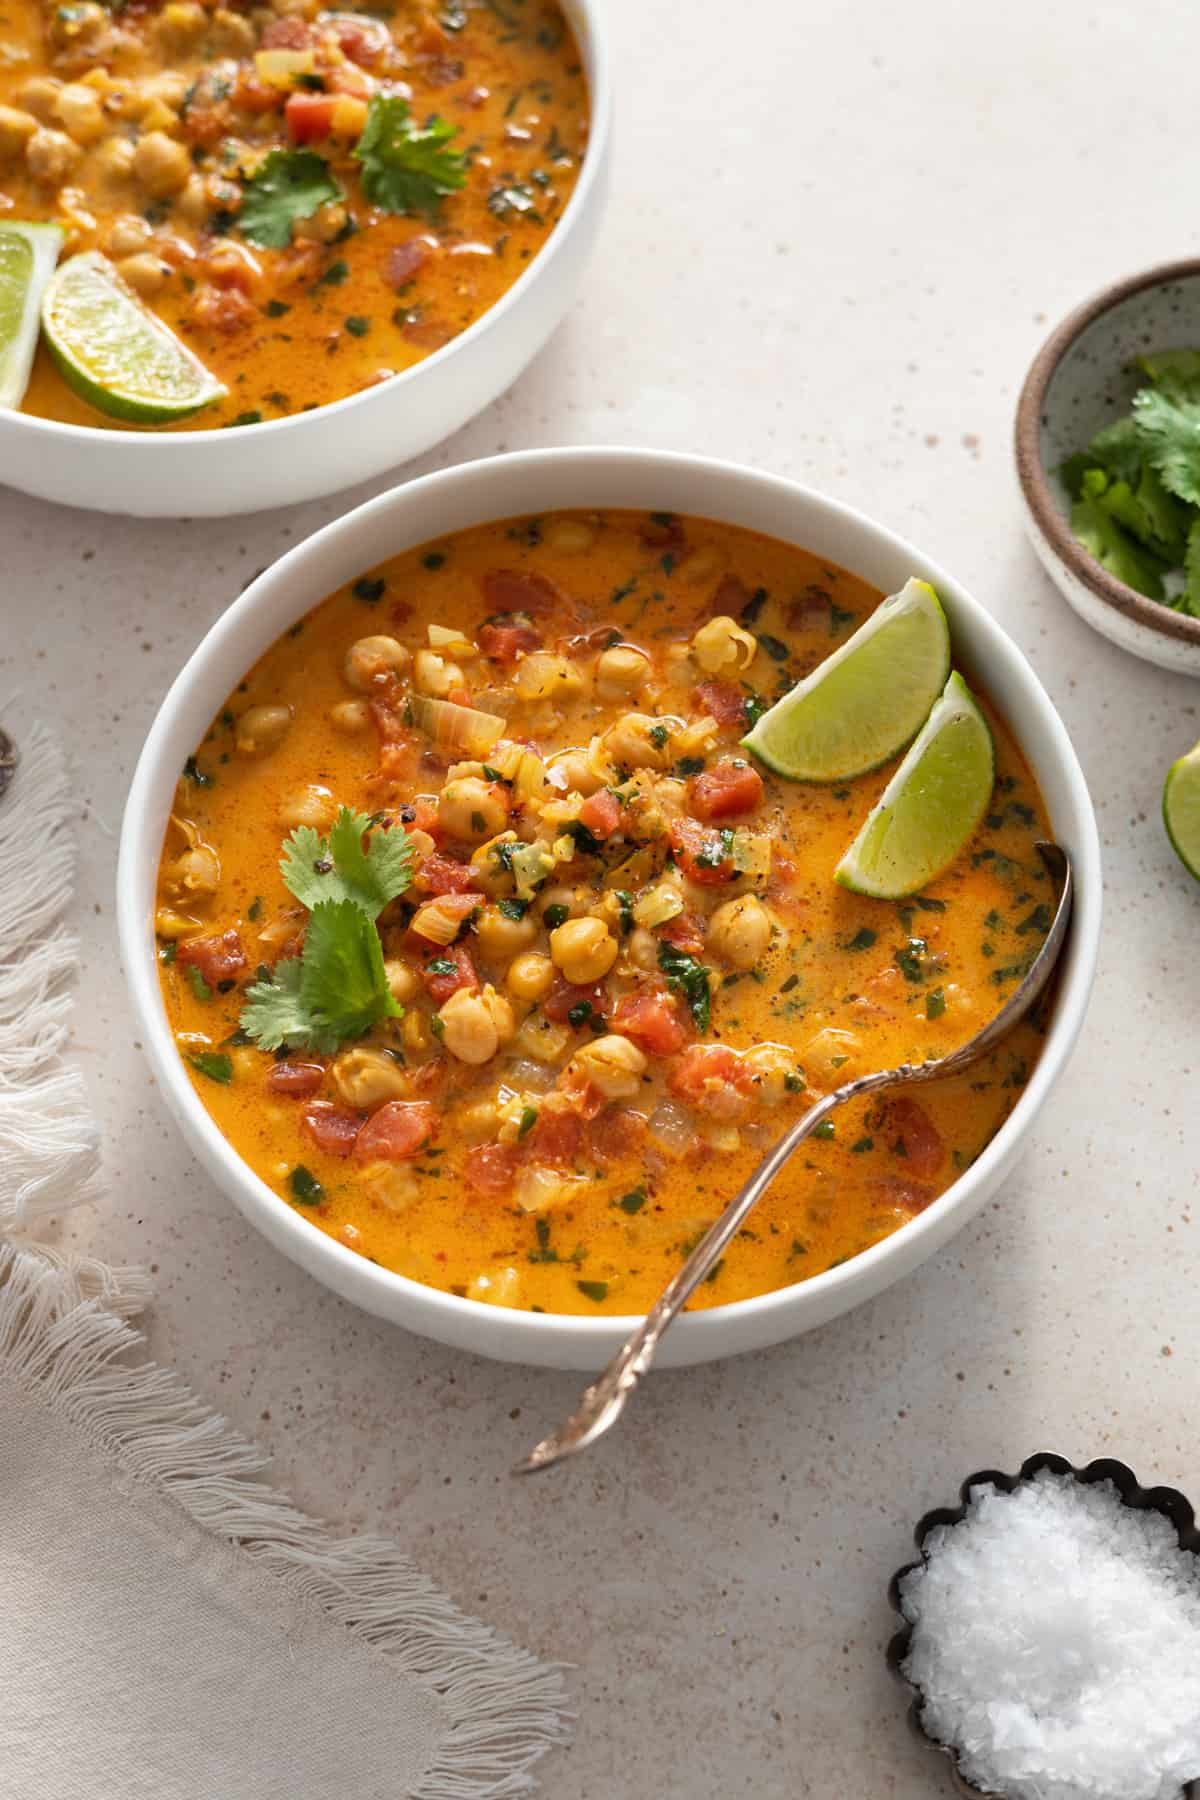
Chickpea curry is something I grew up eating in a completely different form — in Pakistan we call it chana masala and it's thicker, drier, and served with naan. This soup version is a gentler, brothier take that I actually make more often on weeknights because it's faster and needs nothing on the side to be a complete meal. The coconut milk rounds out the spice beautifully, and canned chickpeas mean this is genuinely on the table in under 30 minutes. If you want a vegan dinner that doesn't feel like a compromise, this is the one.
Ingredients
- 2 cans (15 oz each) chickpeas, drained and rinsed
- 1 tablespoon olive oil or coconut oil
- 1 medium onion, diced
- 4 cloves garlic, minced
- 1 tablespoon fresh ginger, grated (or ½ teaspoon ground ginger)
- 2 tablespoons curry powder
- ½ teaspoon cumin
- 1 can (14 oz) diced tomatoes
- 1 can (13.5 oz) full-fat coconut milk
- 2 cups vegetable broth
- Salt to taste
- Fresh cilantro and a squeeze of lemon for serving
Instructions
- Heat oil in a large pot over medium heat. Add the onion and cook for 4-5 minutes until soft and translucent. Add the garlic and ginger and cook for another minute until fragrant.
- Add the curry powder and cumin, stir into the onion mixture, and let the spices toast for 60 seconds — this blooms the spices and deepens the flavor significantly.
- Pour in the diced tomatoes and stir, scraping up anything stuck to the bottom of the pot. Cook for 3 minutes until the tomatoes break down a little.
- Add the chickpeas, coconut milk, and vegetable broth. Stir to combine and bring to a gentle boil, then reduce heat and simmer for 15 minutes so everything melds together.
- Taste and adjust salt. Serve in bowls topped with fresh cilantro and a squeeze of lemon juice — that acid at the end makes a real difference.
Tips
- Tip: Full-fat coconut milk gives you a richer, creamier soup — lite coconut milk works but the broth will be thinner and less satisfying.
- Tip: I make a double batch of this every time because it disappears fast and the leftovers are even better the next day once the spices have had time to settle in.
- Tip: Stir in a big handful of fresh spinach in the last two minutes of cooking if you want to add some greens — it wilts right in and you barely notice it's there.
23. Chicken Chickpea Curry
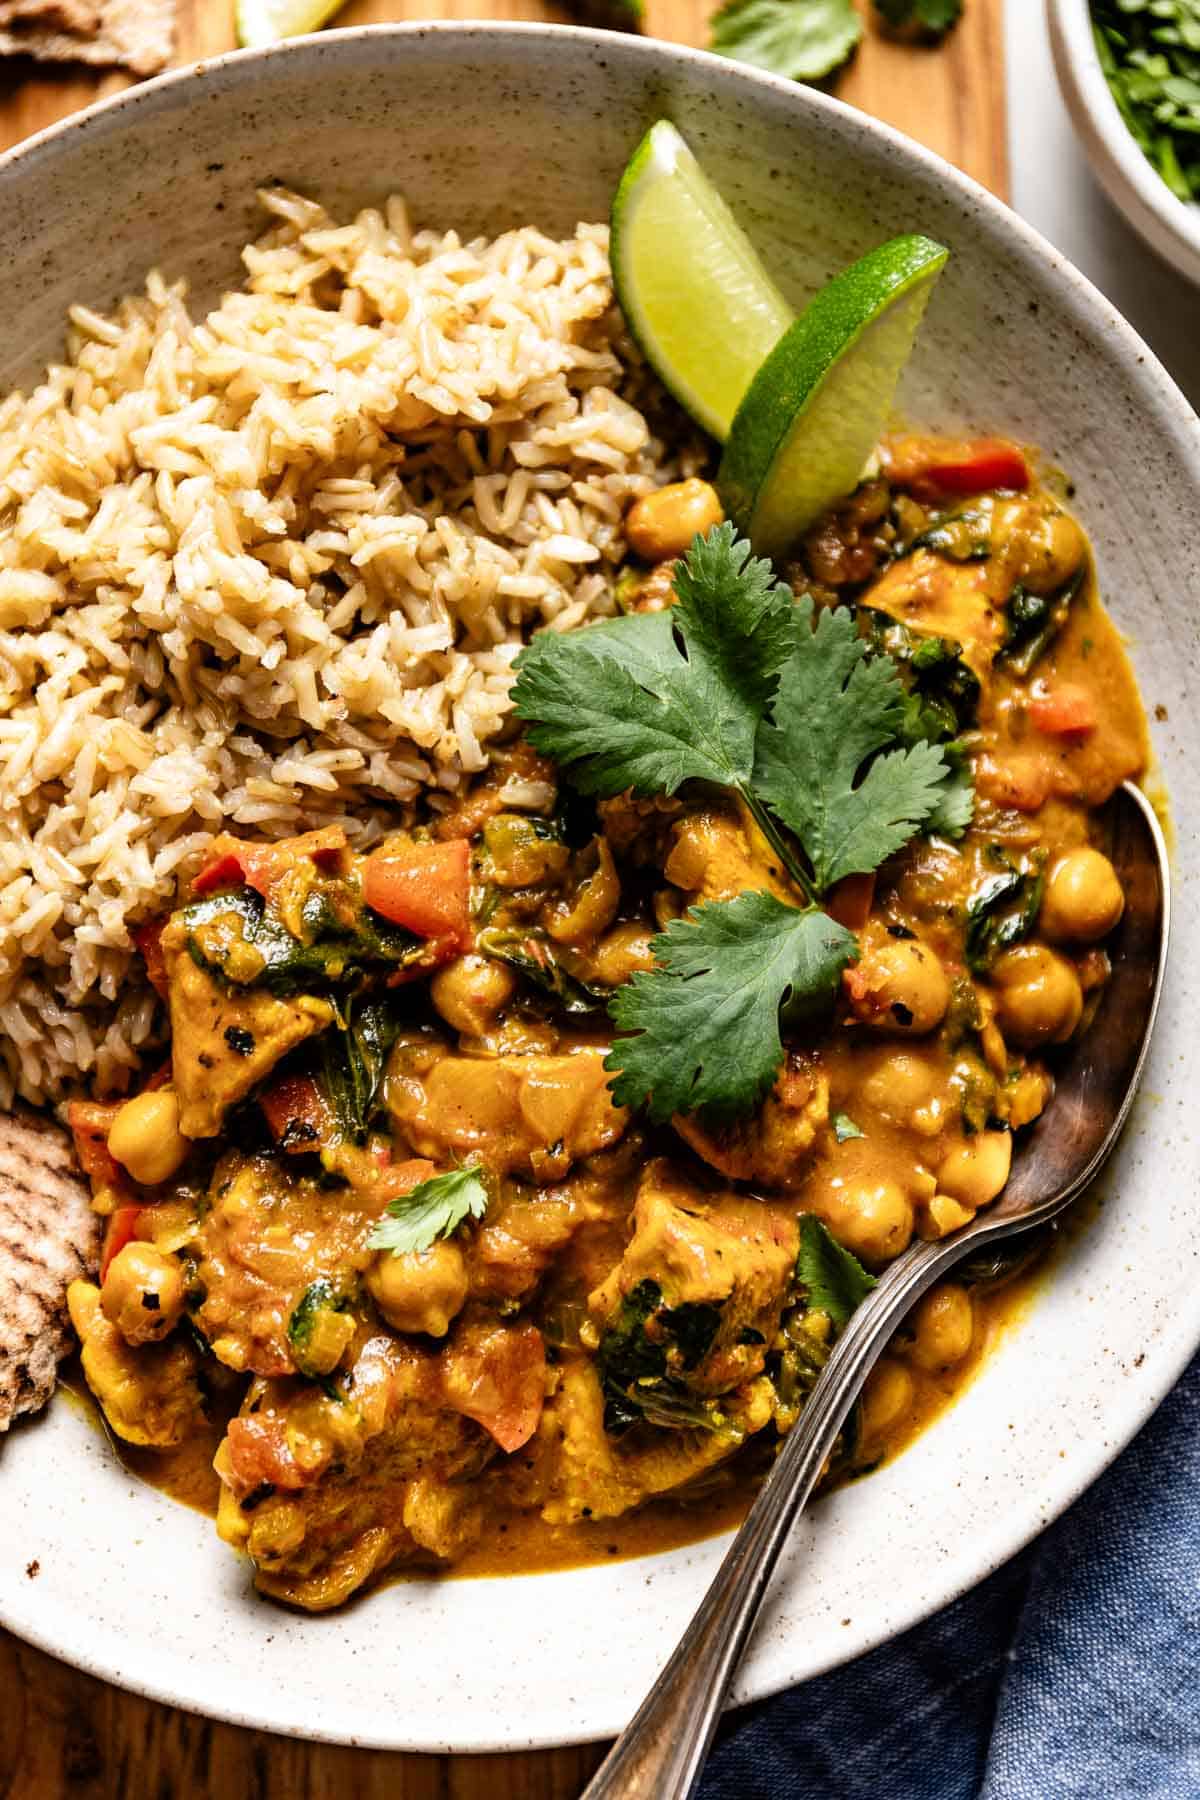
Growing up in Pakistan, curry was just Tuesday. So I have strong opinions about what makes a good one — and this chicken chickpea version earns its place on this list. The chickpeas do something really useful here: they bulk up the dish without adding cost, and they absorb the sauce in a way that makes every bite feel substantial. It comes together in about 35 minutes, which means it's genuinely weeknight-friendly. I usually serve it over basmati rice, but it works just as well with store-bought naan from Trader Joe's or Walmart.
Ingredients
- 1½ lbs boneless skinless chicken thighs, cut into 1-inch pieces
- 1 can (15 oz) chickpeas, drained and rinsed
- 1 can (14 oz) diced tomatoes
- 1 medium yellow onion, finely diced
- 4 cloves garlic, minced
- 1 tablespoon fresh ginger, grated (or ½ teaspoon ground ginger)
- 1 teaspoon cumin
- 1 teaspoon coriander
- 1 teaspoon turmeric
- ½ teaspoon paprika (or mild chili powder)
- ¾ cup coconut milk or plain whole-milk yogurt
- 2 tablespoons oil, salt to taste, fresh cilantro for garnish
Instructions
- Heat oil in a large skillet or pot over medium-high heat. Add the diced onion and cook for 5-6 minutes until softened and starting to turn golden.
- Add garlic and ginger, stir for 1 minute, then add all the dry spices. Stir constantly for 30 seconds so the spices bloom in the oil — this step matters, don't skip it.
- Add the chicken pieces and cook for 4-5 minutes, turning occasionally, until they're mostly cooked through and coated in the spice mixture.
- Pour in the diced tomatoes and chickpeas. Stir everything together, reduce heat to medium-low, and simmer uncovered for 12-15 minutes until the sauce thickens slightly.
- Stir in the coconut milk (or yogurt), let it heat through for 2-3 minutes, taste for salt, and serve over rice with fresh cilantro on top.
Tips
- Tip: Chicken thighs stay juicier than breasts in this recipe — if you only have breasts, reduce the simmering time by 3-4 minutes so they don't dry out.
- Tip: If you use yogurt instead of coconut milk, take the pan off the heat first before stirring it in, otherwise it can curdle.
- Tip: I make a double batch of this every time because it disappears in one meal at our house — it also reheats beautifully the next day.
22. Air Fryer Panko Shrimp

I got an air fryer two years ago and honestly, shrimp is where it shines brightest. The panko crust gets genuinely crispy — not soggy, not oily — in about 8 minutes. This is the kind of dinner that feels like more effort than it actually is, which I appreciate on a Thursday night. Serve it with a simple garlic aioli or even just bottled cocktail sauce, and you've got a meal that feels restaurant-level without the restaurant bill. Zainab calls it "fancy shrimp" and requests it constantly.
Ingredients
- 1 lb large shrimp (31-40 count), peeled and deveined, tails on or off
- 1 cup panko breadcrumbs
- ½ cup all-purpose flour (use rice flour for gluten-free)
- 2 large eggs, beaten
- 1 teaspoon garlic powder
- 1 teaspoon smoked paprika
- ½ teaspoon onion powder
- Salt and black pepper to taste
- Cooking spray or olive oil spray
Instructions
- Pat shrimp completely dry with paper towels — this is the single most important step for crispiness. Set up three shallow bowls: flour in the first, beaten eggs in the second, and panko mixed with all the spices, salt, and pepper in the third.
- Dredge each shrimp in flour, shake off excess, dip in egg, then press firmly into the seasoned panko. Set breaded shrimp on a plate while you work through the batch.
- Preheat your air fryer to 400°F for 3 minutes. Arrange shrimp in a single layer in the basket — don't overlap or they'll steam instead of crisp. Spray generously with cooking spray.
- Air fry for 4 minutes, flip each shrimp, spray again lightly, and cook another 3-4 minutes until golden and cooked through. Serve immediately.
Tips
- Tip: Frozen shrimp from Costco works great here — just thaw completely and dry them really well before breading.
- Tip: If you don't have an air fryer, bake at 425°F on a wire rack set over a sheet pan for 10-12 minutes, flipping halfway through.
- Tip: Don't skip the cooking spray on the panko — without it, the coating stays pale and dry instead of turning that satisfying golden color.
21. Gluten-Free Chili Mac (Dairy-Free & Keto Options)

Chili mac is one of those American comfort food dishes I came to late — we definitely didn't have it growing up in Pakistan — but once I made it the first time, I understood immediately why people love it. This version uses gluten-free pasta (I use Barilla's GF elbows from Walmart, they hold up really well) and has a keto swap using cauliflower if that's your situation. It's the kind of one-pot dinner that feeds a crowd without requiring much thinking, which is exactly what Wednesday nights call for.
Ingredients
- 1 lb ground beef (or ground turkey)
- 8 oz gluten-free elbow pasta (or 2 cups cauliflower florets for keto)
- 1 can (15 oz) kidney beans, drained and rinsed (omit for keto)
- 1 can (14 oz) diced tomatoes
- 1 cup beef or chicken broth
- 1 small yellow onion, diced
- 3 cloves garlic, minced
- 2 tablespoons chili powder
- 1 teaspoon cumin, ½ teaspoon smoked paprika, salt and pepper to taste
- 1 cup shredded cheddar cheese (dairy-free shreds work fine)
Instructions
- In a large deep skillet or Dutch oven over medium-high heat, cook the ground beef with the diced onion, breaking up the meat as it browns, about 6-7 minutes. Drain excess fat. Add garlic and cook 1 more minute.
- Stir in chili powder, cumin, and paprika, then add the diced tomatoes, beans, and broth. Bring to a boil, then add the dry gluten-free pasta directly into the pot (or add the cauliflower florets if going keto).
- Reduce heat to medium, cover, and cook for 10-12 minutes (8 minutes for cauliflower), stirring every few minutes so the pasta doesn't stick to the bottom. GF pasta can get mushy fast, so check it at the 10-minute mark.
- Once the pasta is just tender and most of the liquid has been absorbed, taste for salt and pepper. Sprinkle cheese over the top, cover for 2 minutes until melted, and serve straight from the pot.
Tips
- Tip: Gluten-free pasta absorbs liquid differently than regular pasta — keep extra broth nearby and add a splash if things look too dry before the pasta is cooked through.
- Tip: This reheats really well with a small splash of water stirred in — GF pasta tends to thicken up overnight in the fridge.
- Tip: For the dairy-free version, Violife or Daiya shredded cheddar both melt reasonably well — just give them an extra minute under the lid.
20. Creamy Tuscan Chicken Pasta
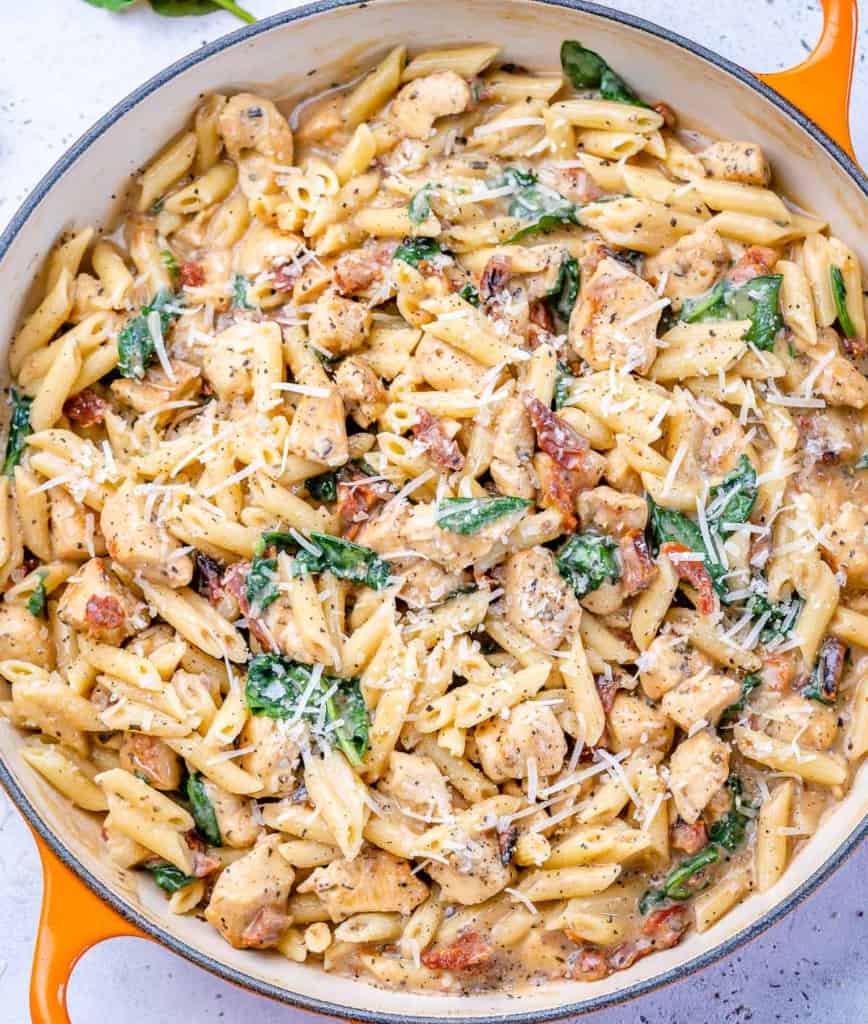
This is not authentic Italian — I want to say that upfront — but it is deeply satisfying, and my husband asks for it at least twice a month. The sun-dried tomatoes and spinach do real work in this dish: the tomatoes give a concentrated, almost jammy richness, and the spinach wilts down into the cream sauce in a way that makes you feel slightly virtuous about eating a bowl of pasta loaded with heavy cream. It comes together in about 30 minutes and uses ingredients you can find at any Walmart or Aldi.
Ingredients
- 1½ lbs boneless skinless chicken breasts, sliced thin
- 12 oz penne or rigatoni pasta
- ½ cup sun-dried tomatoes in oil, drained and roughly chopped
- 3 cups fresh baby spinach
- 4 cloves garlic, minced
- 1 cup heavy cream (or half-and-half for a lighter version)
- ½ cup chicken broth
- ½ cup grated Parmesan cheese, plus more for serving
- 1 teaspoon Italian seasoning, ½ teaspoon paprika, salt and pepper to taste
- 2 tablespoons olive oil
Instructions
- Cook pasta according to package directions in well-salted water. Reserve ½ cup pasta water before draining — you might need it to loosen the sauce later.
- Season the sliced chicken with Italian seasoning, paprika, salt, and pepper. Heat olive oil in a large skillet over medium-high heat and cook chicken for 3-4 minutes per side until golden and cooked through. Remove to a plate.
- In the same pan, add the sun-dried tomatoes and garlic. Cook for 1-2 minutes until the garlic is fragrant, then pour in the chicken broth to deglaze, scraping up any browned bits from the bottom.
- Pour in the heavy cream and bring to a gentle simmer. Stir in Parmesan until melted, then add the spinach and stir until wilted, about 1-2 minutes.
- Add the cooked pasta and chicken back into the pan. Toss everything together, adding a splash of reserved pasta water if the sauce seems too thick. Taste for salt, serve immediately with extra Parmesan.
Tips
- Tip: Let the Parmesan come to room temperature before stirring it in — cold cheese straight from the fridge tends to clump instead of melting smoothly into the sauce.
- Tip: Sun-dried tomatoes packed in oil have better flavor than the dry-packed kind for this recipe — the oil also adds a little extra richness to the sauce.
- Tip: If you only have chicken thighs, use those — they're actually harder to overcook and stay juicier in the finished dish.
19. Ritz Cracker Chicken

I was genuinely skeptical the first time I heard about coating chicken in crushed Ritz crackers. Crackers? For dinner? But the buttery, slightly salty crust they create is something breadcrumbs honestly can't replicate. The crackers have enough fat in them already that you barely need extra butter, and the result is this golden, shatteringly crisp coating around juicy baked chicken that takes maybe 10 minutes to pull together before it goes in the oven. It's become the answer to "what's easy but not boring" in my house.
Ingredients
- 4 boneless skinless chicken breasts (about 6-8 oz each)
- 1 sleeve (about 35 crackers) Ritz crackers, finely crushed
- ½ cup sour cream (or plain Greek yogurt)
- 1 teaspoon garlic powder
- ½ teaspoon onion powder
- ½ teaspoon paprika
- Salt and black pepper to taste
- 2 tablespoons melted butter
Instructions
- Preheat oven to 400°F. Line a baking sheet with foil and lightly grease it or place a wire rack on top for extra crispiness on the bottom of the chicken.
- Crush the Ritz crackers into fine crumbs — a zip-lock bag and a rolling pin works perfectly if you don't have a food processor. Mix in garlic powder, onion powder, paprika, and a pinch of pepper, then drizzle in the melted butter and toss to combine.
- Season chicken breasts lightly with salt and pepper. Spread a thin, even layer of sour cream over each breast — this acts as the "glue" for the cracker coating and keeps the chicken moist as it bakes.
- Press the cracker mixture firmly onto the top and sides of each chicken breast. Place on the prepared baking sheet and bake for 22-26 minutes, until the coating is deep golden and the internal temperature reaches 165°F. Let rest 5 minutes before serving.
Tips
- Tip: If your chicken breasts are thick, pound them to an even thickness of about ¾ inch — they'll cook more evenly and the crust won't burn before the inside is done.
- Tip: Don't skip the resting time after baking — cutting in immediately lets all the juices run out and you end up with drier chicken than you started with.
- Tip: This works just as well with chicken thighs — reduce the oven temp to 375°F and bake for 30-32 minutes instead.
14. Easy Miso Salmon

I was nervous about miso the first time I bought it — I had no idea what to do with that little tub sitting in my fridge. Then I tried it on salmon and honestly, it changed how I think about weeknight fish dinners. The glaze is salty, slightly sweet, and it caramelizes beautifully under the broiler in under ten minutes. If you can find white miso paste at a Walmart or Whole Foods (Trader Joe's usually carries it too), this one's worth making on a Tuesday when you want something that feels a little special without much effort.
Ingredients
- 4 salmon fillets (about 6 oz each), skin-on or skinless
- 3 tablespoons white miso paste
- 2 tablespoons soy sauce
- 1 tablespoon honey
- 1 tablespoon rice vinegar
- 1 teaspoon sesame oil
- 1 teaspoon freshly grated ginger (or ¼ teaspoon ground ginger)
- Sesame seeds and sliced green onions, to garnish
Instructions
- In a small bowl, whisk together the miso paste, soy sauce, honey, rice vinegar, sesame oil, and ginger until smooth.
- Place salmon fillets in a shallow dish and coat them all over with the miso glaze. Let them marinate for at least 15 minutes at room temperature, or up to 1 hour in the fridge.
- Set your oven broiler to high and line a baking sheet with foil. Place the salmon fillets on the prepared sheet.
- Broil for 8–10 minutes, watching closely — the glaze should bubble and turn deep golden at the edges. The salmon is done when it flakes easily with a fork.
- Garnish with sesame seeds and green onions. Serve immediately over steamed rice or alongside roasted vegetables.
Tips
- Tip: Watch it under the broiler — the honey in the glaze means it can go from caramelized to burnt quickly. Stay close after the 6-minute mark.
- Tip: White miso is milder and sweeter than red miso. If you only have red, use 2 tablespoons instead of 3 and add an extra half teaspoon of honey.
- Tip: This glaze also works great on cod or tilapia if salmon isn't your thing or it's not on sale that week.
15. Air Fryer Teriyaki Chicken
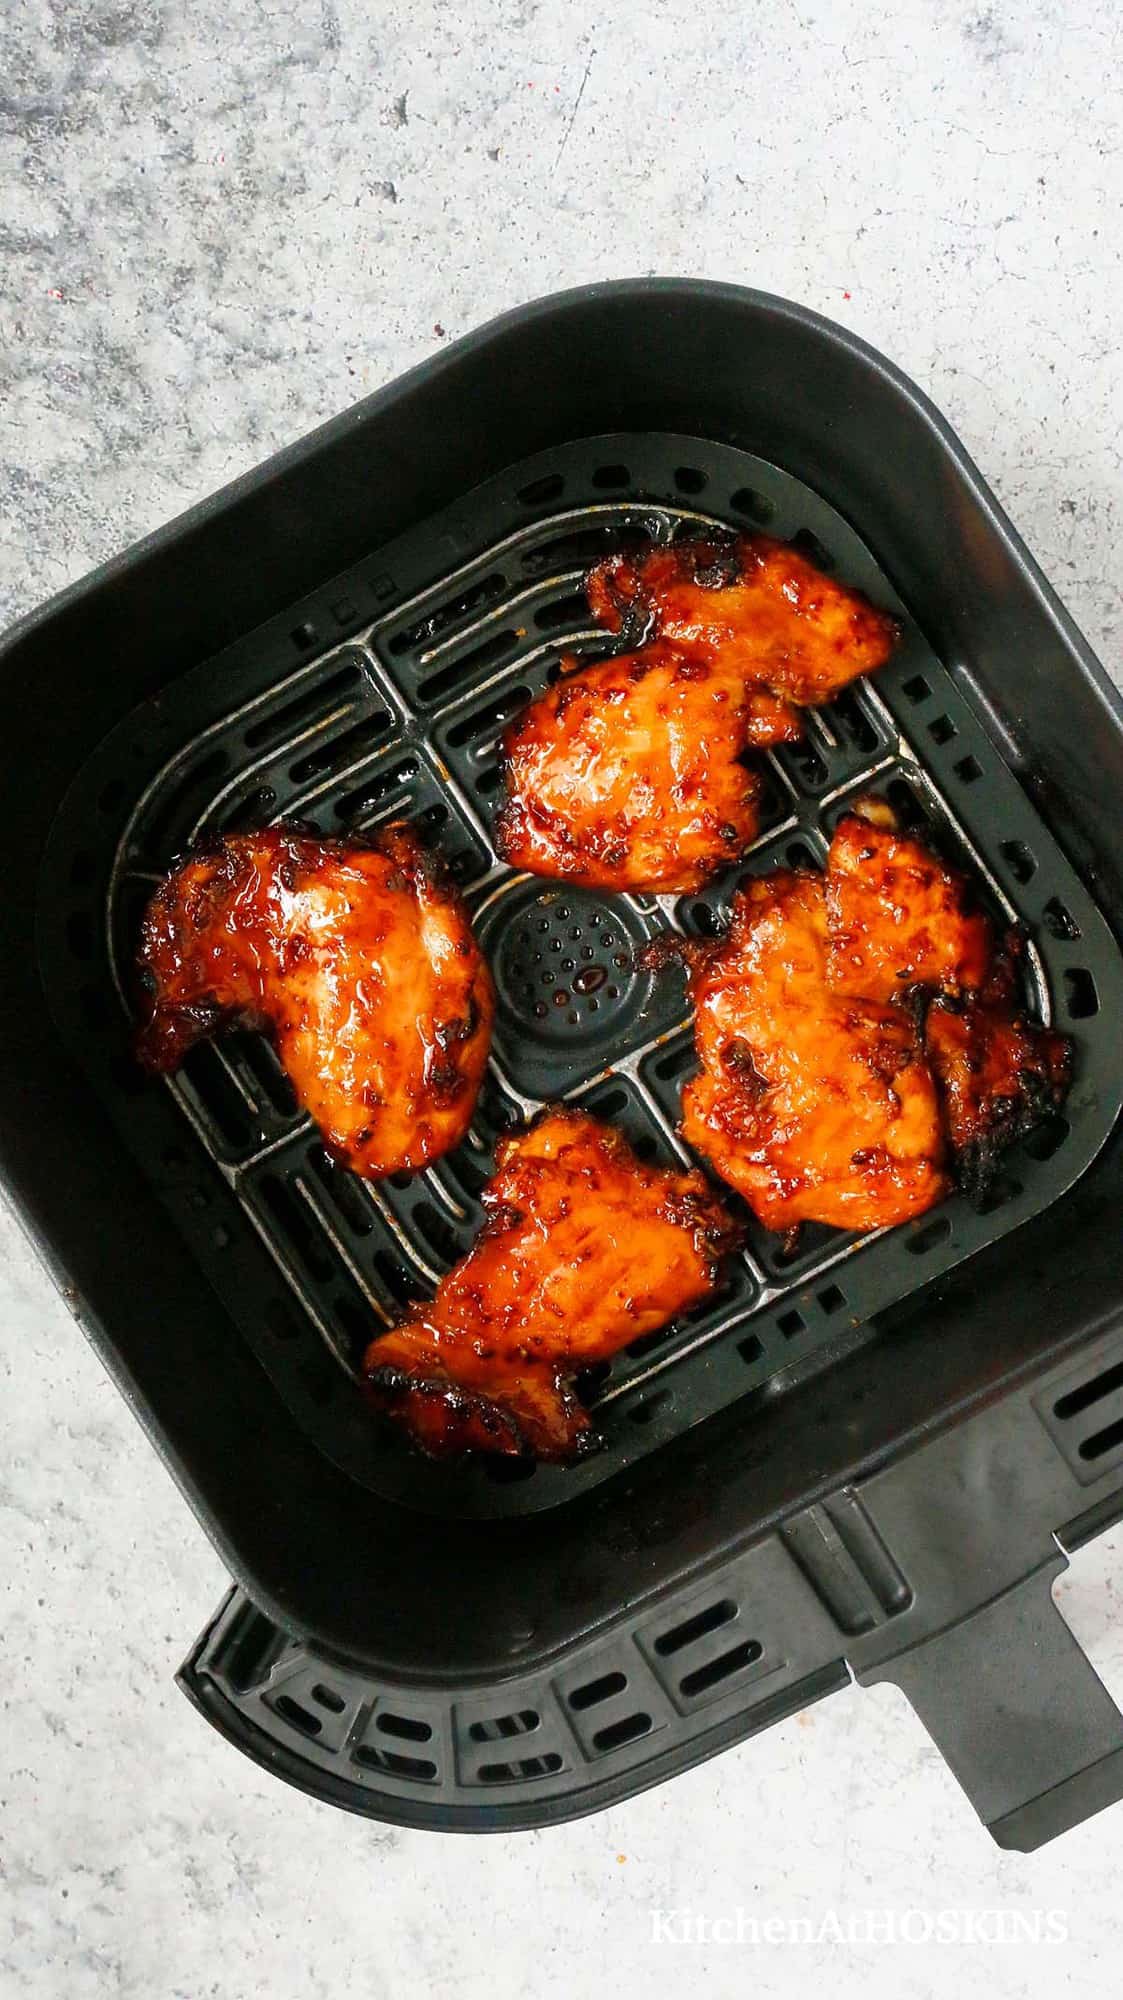
Teriyaki chicken used to be a takeout order in our house until I figured out the air fryer version — and now I can't justify spending that much for something that takes me twenty minutes at home. The outside gets this gorgeous lacquered finish while the inside stays juicy, which is harder to pull off in a regular oven. The sauce is pantry-friendly: soy sauce, brown sugar, garlic, and a little cornstarch to thicken. My husband eats this over rice, Zainab dips the chicken pieces like nuggets, and somehow everyone's happy.
Ingredients
- 1½ lbs boneless, skinless chicken thighs (or breasts, cut into large chunks)
- ¼ cup soy sauce
- 3 tablespoons brown sugar
- 1 tablespoon rice vinegar
- 2 cloves garlic, minced
- 1 teaspoon freshly grated ginger
- 1 teaspoon sesame oil
- 1 teaspoon cornstarch mixed with 1 tablespoon cold water (slurry)
- Sesame seeds and sliced green onions, to serve
Instructions
- In a small saucepan, combine soy sauce, brown sugar, rice vinegar, garlic, ginger, and sesame oil. Bring to a gentle simmer over medium heat, then stir in the cornstarch slurry and cook for 1–2 minutes until the sauce thickens slightly. Remove from heat.
- Reserve about 3 tablespoons of the sauce for glazing later. Toss the chicken in the remaining sauce and let it marinate for at least 15 minutes (or overnight in the fridge for deeper flavor).
- Preheat your air fryer to 380°F. Arrange the chicken in a single layer in the basket — don't crowd it or it steams instead of caramelizes.
- Air fry for 10 minutes, flip the pieces, brush with the reserved sauce, and cook another 5–8 minutes until the chicken reaches an internal temperature of 165°F and the glaze is sticky and dark.
- Scatter sesame seeds and green onions on top. Serve over steamed white rice or noodles.
Tips
- Tip: Chicken thighs stay juicier than breasts in the air fryer — if you use breasts, pull them out as soon as they hit 165°F so they don't dry out.
- Tip: The sauce thickens more as it cools, so don't panic if it looks a little thin right off the stove.
- Tip: No air fryer? Use a grill pan or cast iron skillet over medium-high heat — about 5 minutes per side, basting with the reserved sauce in the last couple of minutes.
16. Palak Chicken (Spinach Chicken Curry)
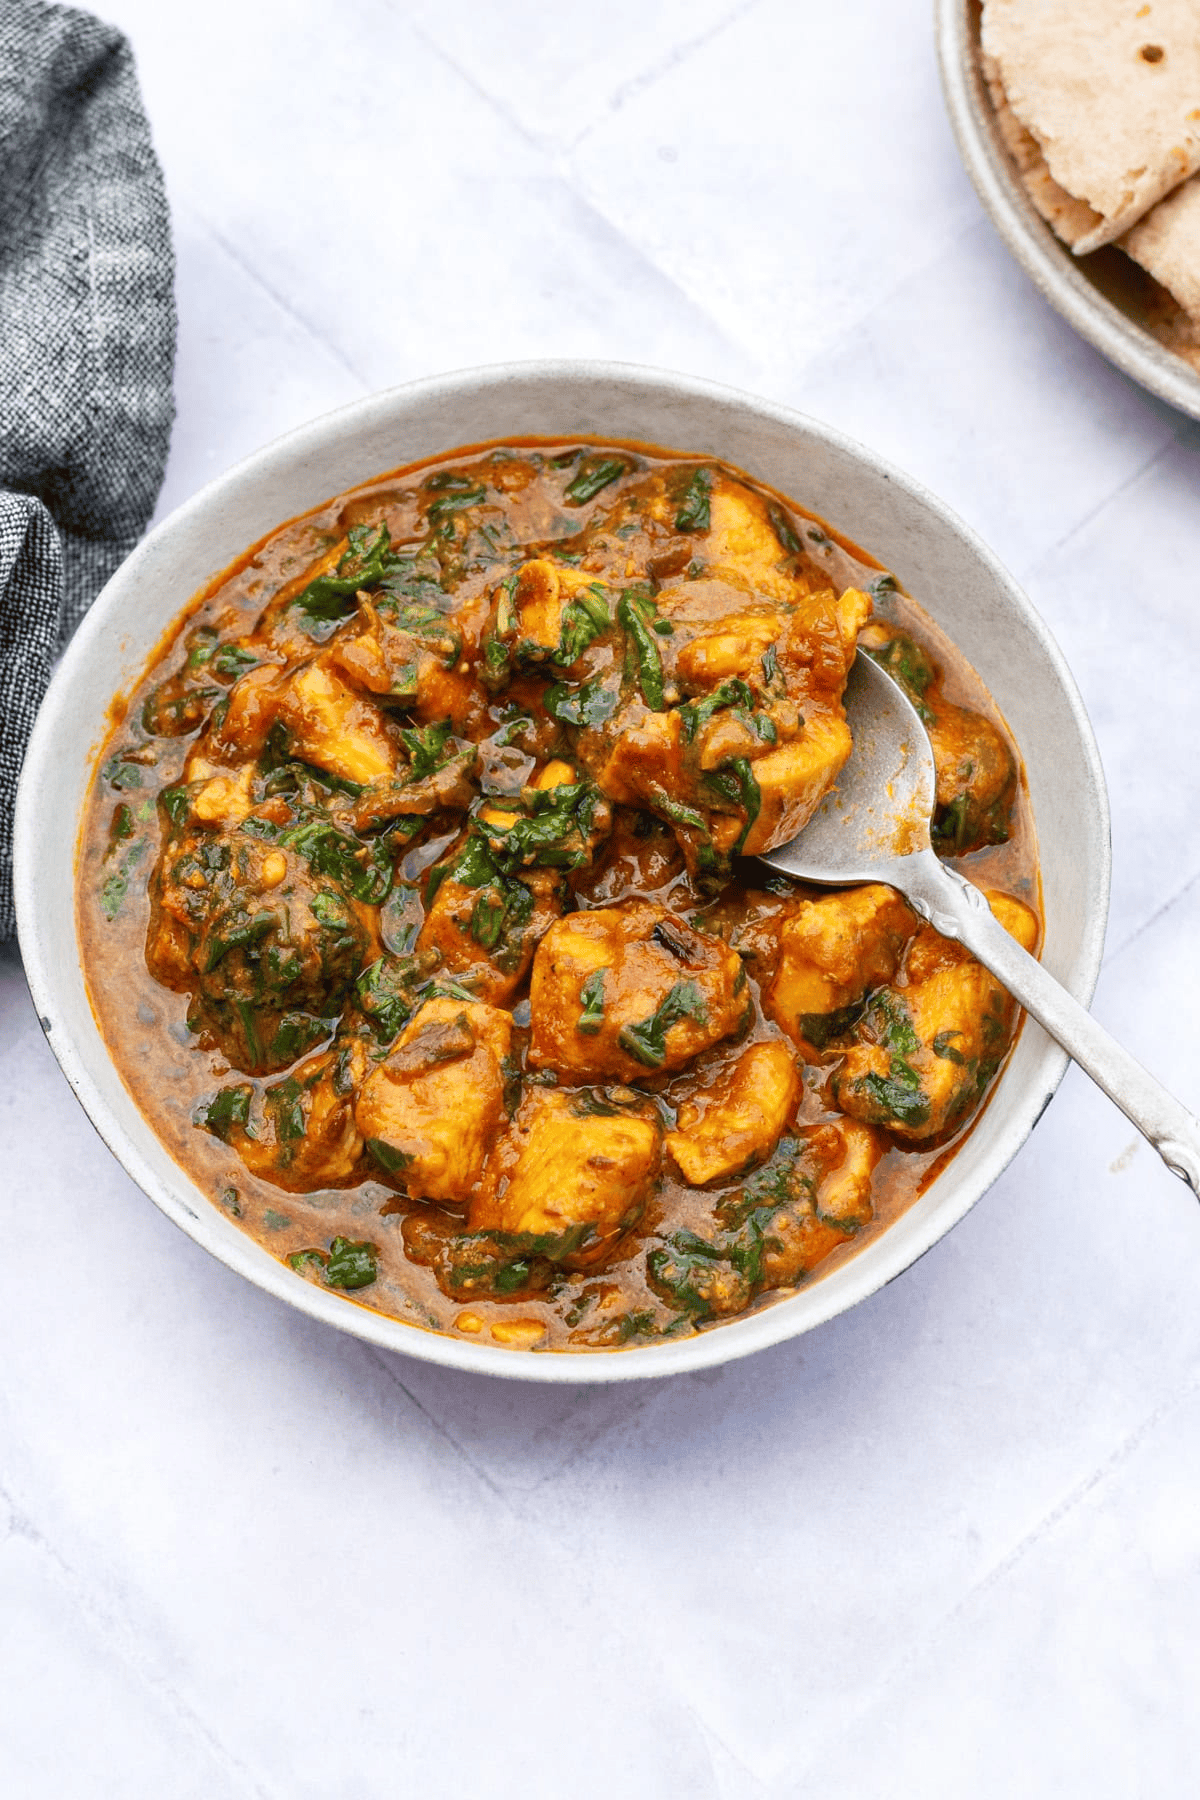
Palak chicken is something I grew up eating, and it's one of those curries that looks a little intimidating because of the green color but is genuinely one of the easiest things to pull together on a weeknight. You're essentially making a spiced spinach purée and cooking chicken right in it — the result is rich, deeply savory, and not spicy-hot unless you want it to be. If you're cooking for someone unfamiliar with Pakistani food, this is a good starting point. Serve it with naan from the store or plain basmati rice — either works.
Ingredients
- 1½ lbs boneless chicken thighs or breasts, cut into 1½-inch pieces
- 10 oz fresh baby spinach (or one 10 oz box frozen spinach, thawed and squeezed dry)
- 1 medium onion, finely chopped
- 3 cloves garlic, minced
- 1 teaspoon freshly grated ginger
- 2 medium tomatoes, roughly chopped
- 3 tablespoons neutral oil or ghee
- 1 teaspoon cumin seeds
- 1 teaspoon coriander powder
- ½ teaspoon turmeric
- ½ teaspoon red chili flakes (adjust to taste)
- Salt to taste
- 2 tablespoons plain yogurt or heavy cream, to finish
Instructions
- Blanch the fresh spinach in boiling water for 2 minutes, then drain and blend it into a smooth purée with a hand blender or regular blender. Set aside. (If using frozen spinach, just blend it directly after squeezing out the water.)
- Heat oil in a deep skillet or pot over medium-high heat. Add cumin seeds and let them sizzle for 30 seconds. Add the onion and cook until golden brown, about 8–10 minutes — don't rush this step, it builds the base of the curry.
- Stir in the garlic and ginger, cook for 1 minute, then add the tomatoes. Cook until the tomatoes break down completely, about 5–6 minutes. Add coriander, turmeric, and chili flakes and stir to combine.
- Add the chicken pieces and cook over medium-high heat, stirring often, until the chicken is no longer pink on the outside, about 5 minutes.
- Pour in the spinach purée, season with salt, and stir everything together. Reduce heat to medium-low, cover, and simmer for 15 minutes until the chicken is cooked through.
- Stir in the yogurt or cream, taste for seasoning, and serve hot with rice or naan.
Tips
- Tip: The browning of the onion is what gives this curry its depth — pale onions mean a flat-tasting curry. Give it time.
- Tip: Frozen spinach works just as well as fresh here and saves you the blanching step — it's what I use on busy weeknights.
- Tip: A tablespoon of butter stirred in at the very end makes the sauce silky and restaurant-style without much extra effort.
17. Schezwan Chicken Fried Rice
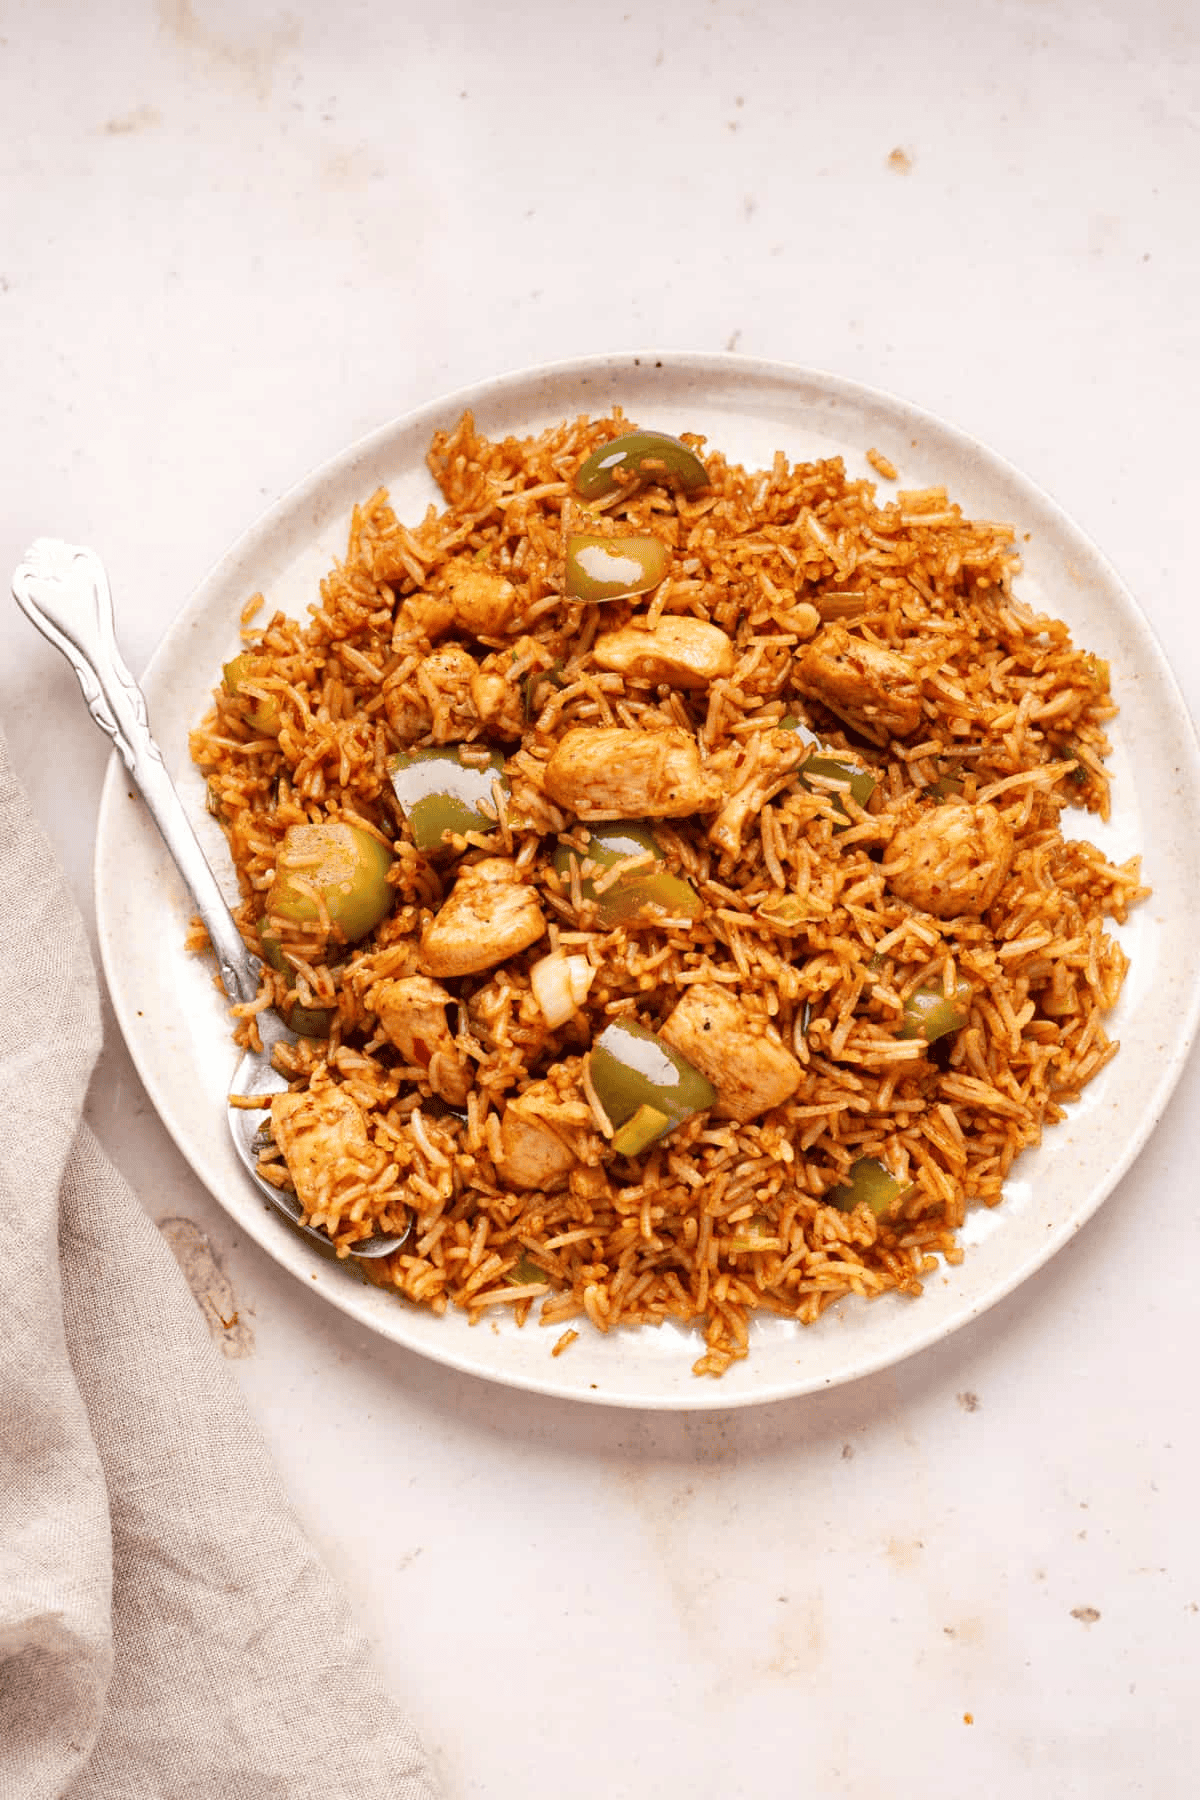
Regular fried rice is good. Schezwan fried rice is regular fried rice after it decided to have a personality. The Schezwan sauce — made from dried red chilies, garlic, and vinegar — gives the whole dish this smoky, tangy heat that you can't get from soy sauce alone. I make a double batch of this because it disappears in one meal at our house, and reheated fried rice the next day never quite hits the same. You can find Schezwan sauce at most Asian grocery stores, or look for it in the international aisle at Walmart.
Ingredients
- 3 cups cooked rice, preferably day-old (day-old rice fries much better than fresh)
- 1 lb boneless chicken breast or thighs, cut into small bite-sized pieces
- 3 tablespoons Schezwan sauce (store-bought or homemade)
- 2 tablespoons soy sauce
- 1 tablespoon oyster sauce
- 3 cloves garlic, minced
- 1 cup mixed vegetables (carrots, peas, corn — frozen works fine)
- 3 green onions, sliced
- 2 eggs, lightly beaten
- 3 tablespoons neutral oil (vegetable or avocado oil)
- Salt and white pepper to taste
Instructions
- Heat 1 tablespoon of oil in a large wok or skillet over high heat until smoking. Add the chicken pieces, season lightly with salt and white pepper, and stir-fry until golden and cooked through, about 5–6 minutes. Remove from the pan and set aside.
- Add another tablespoon of oil to the same pan. Add the garlic and stir-fry for 30 seconds, then add the mixed vegetables and cook for 2 minutes until just tender.
- Push everything to the side and add the beaten eggs to the center of the pan. Scramble them quickly, then break them up and mix into the vegetables.
- Add the final tablespoon of oil, then add the cold rice. Press it into the pan and let it sit undisturbed for 1 minute to get some color on the bottom, then toss and repeat. This gives you that slightly crispy texture.
- Add the cooked chicken back to the pan along with the Schezwan sauce, soy sauce, and oyster sauce. Toss everything together over high heat for 2–3 minutes until well combined and fragrant.
- Scatter the green onions over the top, taste for salt, and serve immediately.
Tips
- Tip: High heat is non-negotiable for fried rice. A medium flame steams the rice instead of frying it — you want the wok as hot as your stove will go.
- Tip: If you forget to make day-old rice, spread freshly cooked rice on a sheet pan and refrigerate it for 30 minutes — it dries out enough to work.
- Tip: Start with 2 tablespoons of Schezwan sauce if you're unsure about the heat level — you can always add more at the table.
18. Chicken Spaghetti
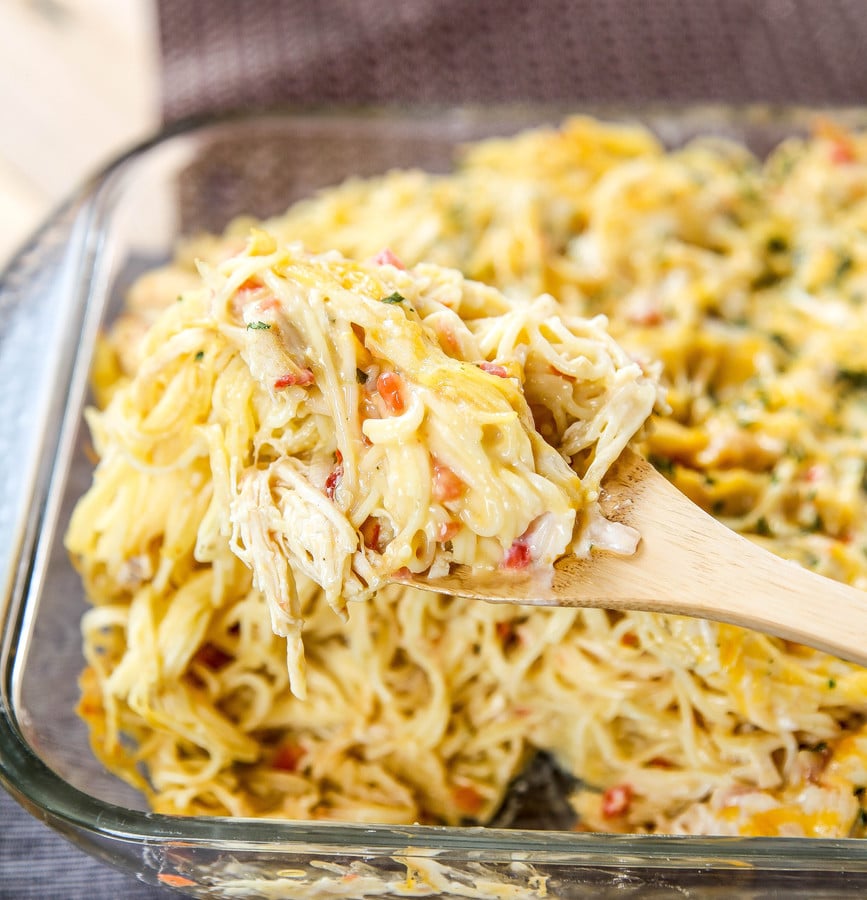
This isn't your standard red-sauce pasta — chicken spaghetti is a Southern American casserole-style dish where spaghetti, shredded chicken, and a creamy cheesy sauce all get baked together into something that's deeply comforting and impossible to stop eating. Growing up in Pakistan, we didn't have this, and I remember the first time I made it I wasn't sure what to expect. It's now one of Saad's top requests. The cream of mushroom soup does most of the heavy lifting on the sauce — it's practical, it works, and I'm not going to apologize for that.
Ingredients
- 12 oz spaghetti, broken in half
- 2½ cups cooked shredded chicken (rotisserie chicken works perfectly here)
- 1 can (10.5 oz) cream of mushroom soup
- 1 can (10.5 oz) cream of chicken soup
- 1 cup sour cream
- 1 cup chicken broth
- 1 cup diced green bell pepper
- ½ cup diced onion
- 2 cups shredded cheddar cheese, divided
- ½ teaspoon garlic powder
- Salt and black pepper to taste
Instructions
- Preheat your oven to 350°F. Cook the spaghetti according to package directions until just al dente — it will continue cooking in the oven so don't go past that point. Drain and set aside.
- In a large mixing bowl, combine the cream of mushroom soup, cream of chicken soup, sour cream, chicken broth, garlic powder, salt, and pepper. Stir until smooth.
- Add the shredded chicken, bell pepper, onion, 1½ cups of the cheddar, and the cooked spaghetti to the bowl. Toss everything together until the pasta is well coated.
- Transfer the mixture into a greased 9x13-inch baking dish and spread it out evenly. Sprinkle the remaining ½ cup of cheddar over the top.
- Cover tightly with foil and bake for 35 minutes. Remove the foil and bake for another 10–15 minutes until the top is bubbly and the cheese has some golden spots.
- Let it rest for 5 minutes before serving — it holds together better and you won't burn your mouth.
Tips
- Tip: This casserole freezes really well — assemble it, cover tightly, and freeze before baking. Thaw overnight in the fridge then bake as directed.
- Tip: Let your cheese sit out for 15 minutes before mixing it in — cold cheese straight from the fridge doesn't melt as evenly into the sauce.
- Tip: Add a can of diced Rotel tomatoes (drained) to the mix if you want a little kick — it's a classic addition that takes this from mild to interesting.
13. 15-Minute Spaghetti Aglio E Olio
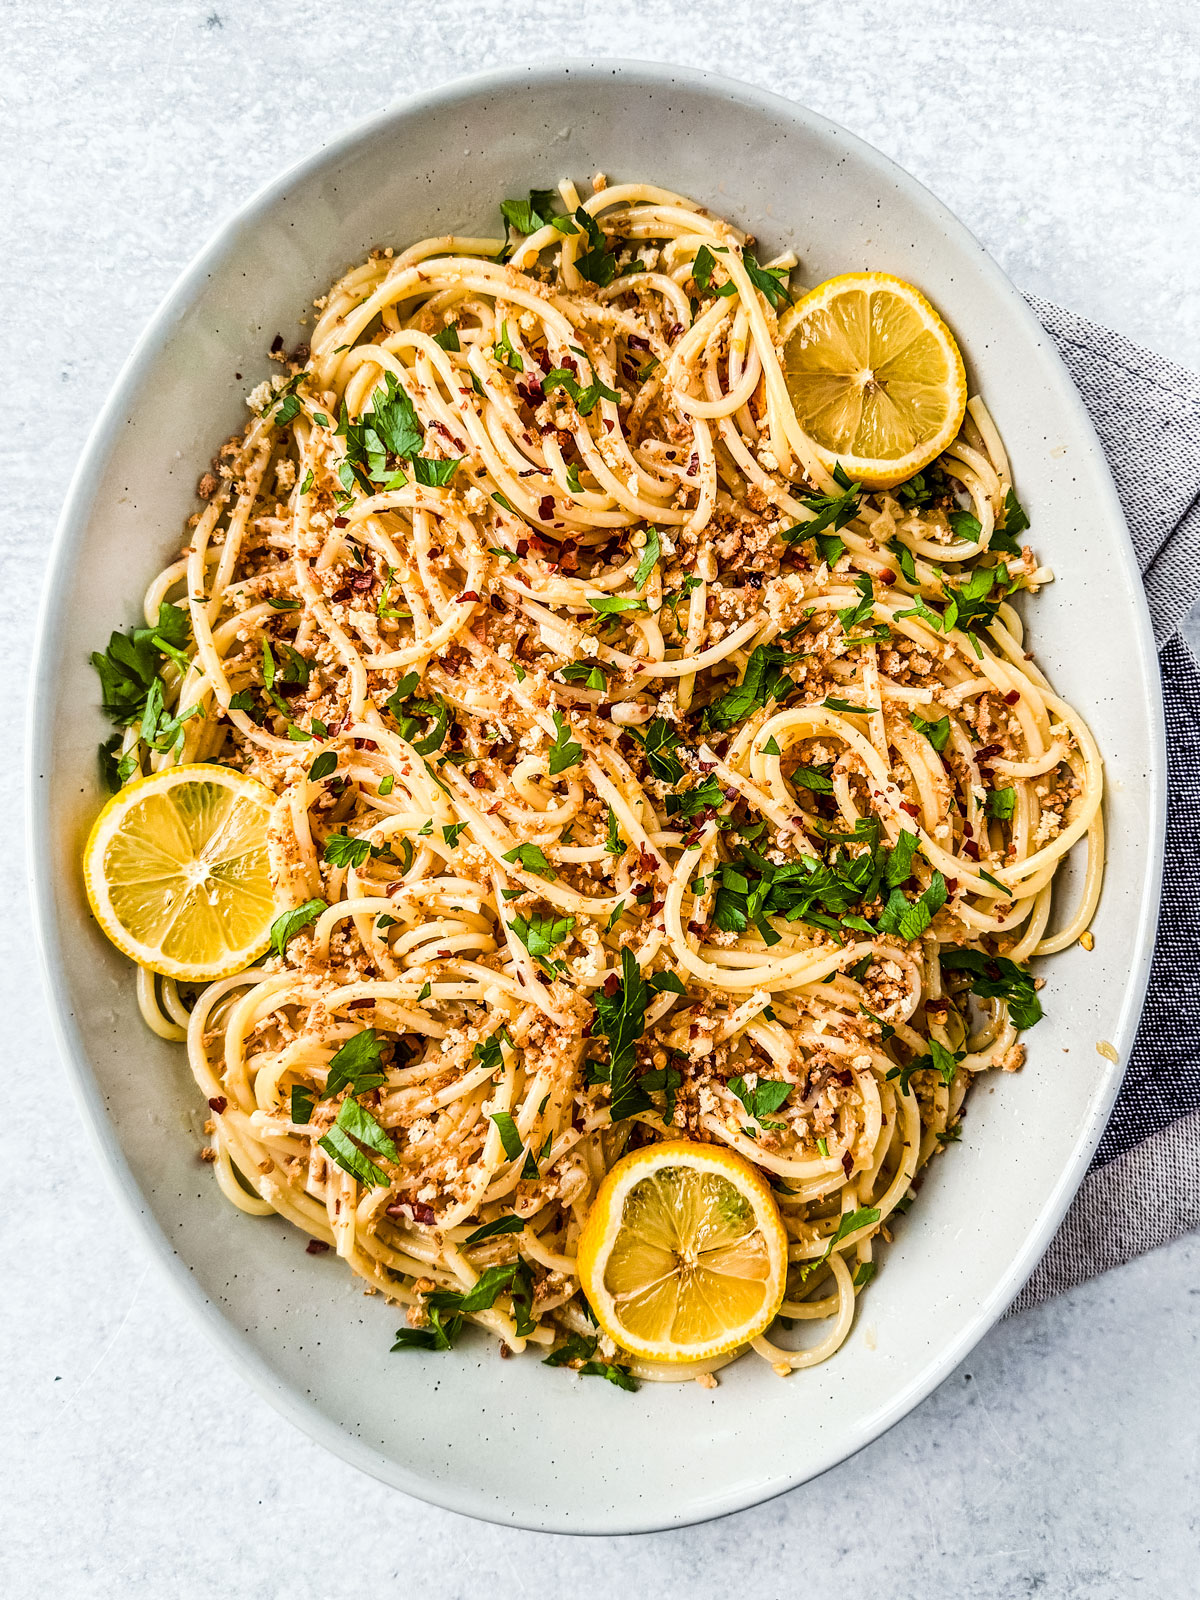
There are nights when I open the fridge and there's almost nothing there — but there's always pasta, garlic, and olive oil. That's exactly what this recipe is built for. Aglio e olio is one of those Italian classics that sounds fancy but is really just about getting the basics right: slow-toasted garlic in good olive oil, tossed through al dente spaghetti with a little pasta water to make it silky. I've made this probably a hundred times and it still feels like a reward at the end of a tired day.
Ingredients
- 12 oz spaghetti
- ⅓ cup good-quality extra virgin olive oil
- 6 cloves garlic, thinly sliced
- ½ teaspoon red pepper flakes (adjust to taste)
- ½ cup reserved pasta water
- Salt, to taste
- ¼ cup fresh parsley, roughly chopped
- Freshly grated Parmesan, for serving (optional)
Instructions
- Cook spaghetti in a large pot of well-salted boiling water until al dente according to package directions. Before draining, scoop out at least ½ cup of pasta water and set aside.
- While pasta cooks, warm olive oil in a large skillet over medium-low heat. Add sliced garlic and cook slowly, stirring often, for 4–5 minutes until golden but not brown — burnt garlic will make the whole dish bitter.
- Add red pepper flakes to the oil and stir for 30 seconds. Add drained spaghetti directly to the skillet.
- Pour in reserved pasta water a splash at a time, tossing constantly, until the pasta is coated in a light, glossy sauce. Season with salt.
- Remove from heat, toss in fresh parsley, and serve immediately with Parmesan if using.
Tips
- Tip: Don't rush the garlic — low and slow is the whole point. Medium-low heat, patience, and you'll get golden and fragrant instead of bitter and burnt.
- Tip: The pasta water is not optional — the starch in it is what makes the oil cling to the noodles instead of pooling at the bottom of the bowl.
- Tip: This is traditionally made without Parmesan, but I always put it on the table anyway. My husband says it doesn't need it. He's right, but I still add it.
12. Easy Pan Fried Fish

Pan-fried fish intimidated me for years — I kept either undercooking it or flipping too early and watching it fall apart in the pan. Once I figured out the trick (hot skillet, dry fish, and the patience to leave it alone), it became one of my most-reached-for weeknight dinners. You just need a simple seasoning blend, a well-heated pan, and a couple of minutes per side. Use whatever white fish looks good at your store — tilapia, cod, mahi-mahi, or snapper all work here. Check out this pan-fried red snapper recipe for more on fish technique.
Ingredients
- 4 fish fillets (tilapia, cod, or mahi-mahi), about 6 oz each
- 1 teaspoon garlic powder
- 1 teaspoon smoked paprika
- ½ teaspoon onion powder
- ½ teaspoon salt
- ¼ teaspoon black pepper
- 2 tablespoons olive oil or neutral cooking oil
- Lemon wedges, for serving
Instructions
- Pat fish fillets completely dry with paper towels — this is the most important step for getting a good sear instead of steaming.
- Mix garlic powder, smoked paprika, onion powder, salt, and pepper in a small bowl. Sprinkle evenly over both sides of each fillet and press gently to adhere.
- Heat oil in a large heavy skillet (cast iron or stainless) over medium-high heat until shimmering. Add fillets and do not move them for 3–4 minutes, until the edges look opaque and the bottom is golden.
- Flip once and cook another 2–3 minutes until fish flakes easily with a fork. Serve immediately with lemon wedges.
Tips
- Tip: Dry fish = crispy crust. Wet fish = sad, steamed fish that sticks to the pan. Never skip the paper towel step.
- Tip: Only flip once. I know it's tempting to check underneath, but every time you lift it too early you're risking it tearing. Wait until it releases on its own.
- Tip: Frozen fish fillets work fine here — just make sure they're fully thawed and dried before seasoning.
11. 10-Minute Sticky Ginger Beef Mince
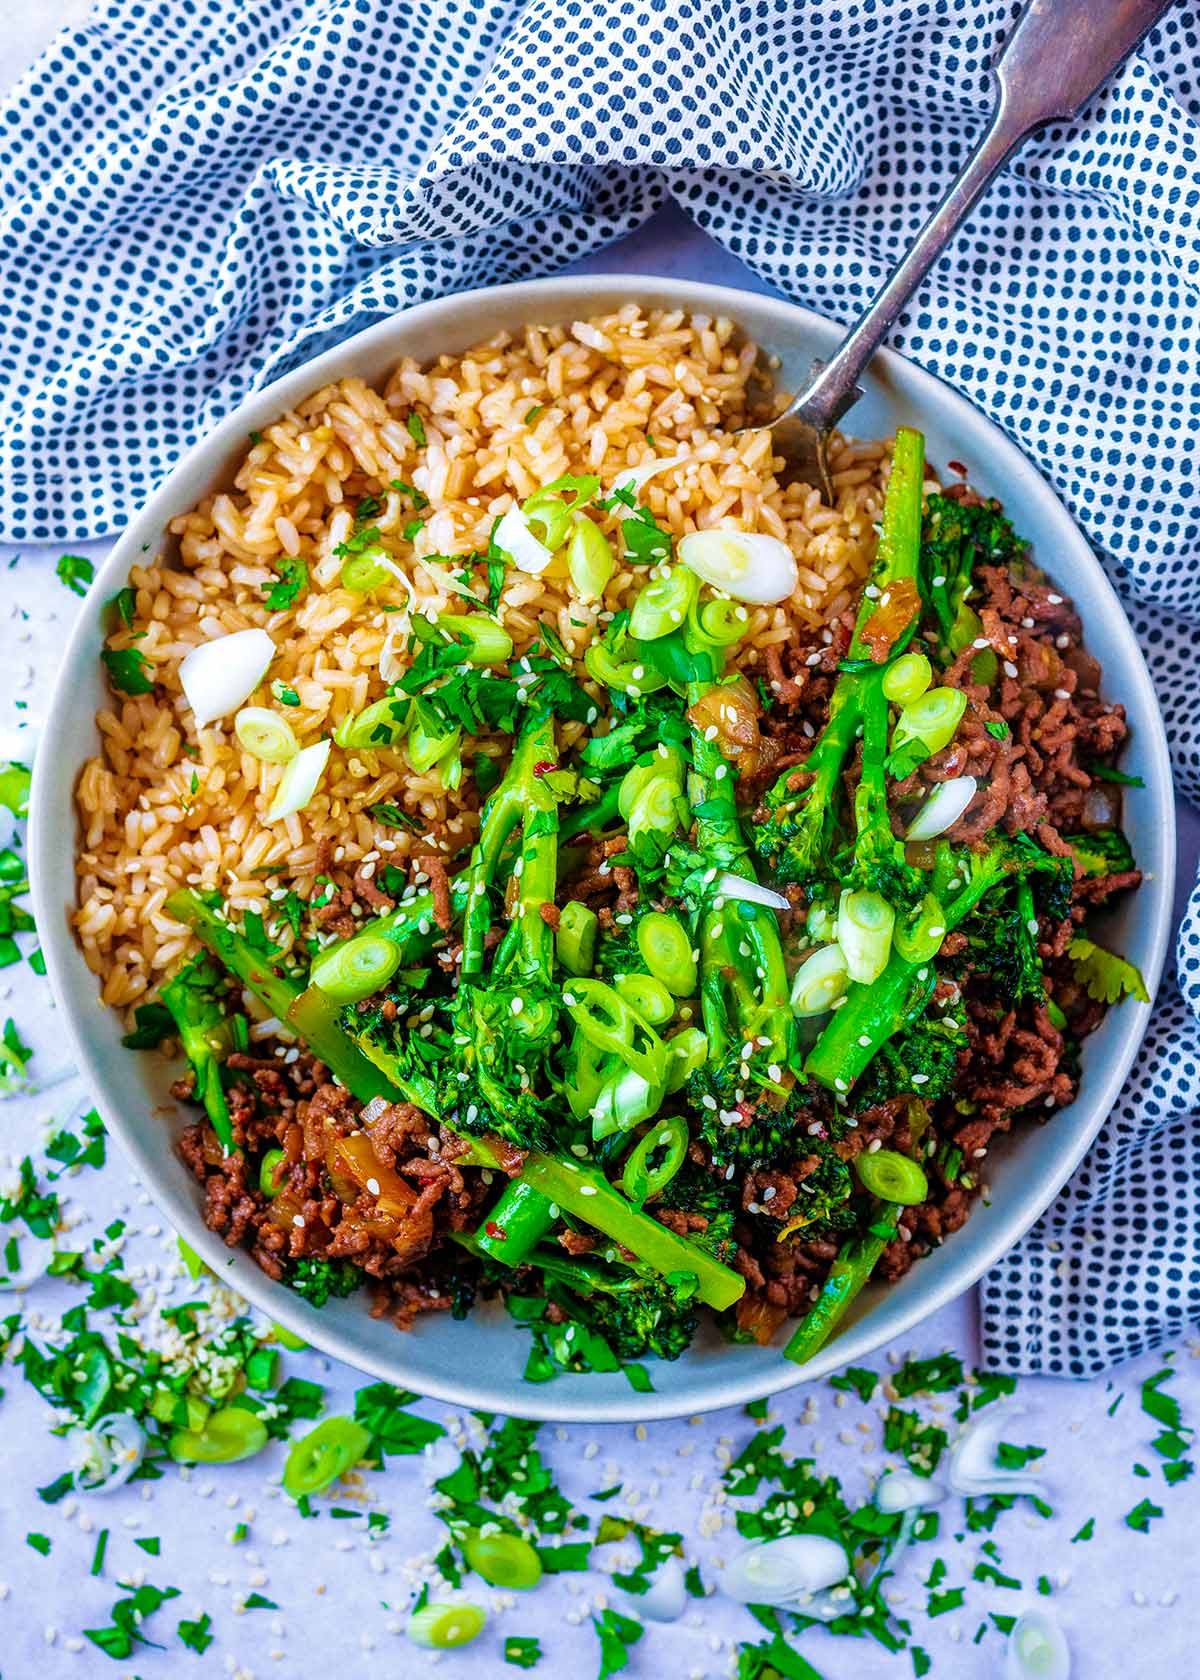
This one is what I make when I need dinner on the table before anyone can complain they're hungry. Ground beef goes into the pan, a quick sticky sauce comes together in a bowl, and ten minutes later you have something that tastes like it came from a takeout spot. The combination of fresh ginger, soy sauce, and a little honey creates that glossy, clingy coating that makes you want to eat it straight from the pan. Saad piles it over rice and calls it "the beef noodle thing" — he's not wrong about the rice pairing.
Ingredients
- 1 lb ground beef (80/20 or leaner)
- 1 tablespoon neutral oil
- 4 cloves garlic, minced
- 1 tablespoon fresh ginger, grated (or 1 teaspoon ground ginger)
- 3 tablespoons soy sauce
- 2 tablespoons honey
- 1 tablespoon rice vinegar (or apple cider vinegar)
- 1 teaspoon sesame oil
- 2 green onions, sliced, for garnish
- Sesame seeds, for garnish (optional)
Instructions
- Whisk together soy sauce, honey, rice vinegar, and sesame oil in a small bowl. Set aside.
- Heat oil in a large skillet over high heat. Add ground beef and break it up with a wooden spoon. Cook for 4–5 minutes, stirring occasionally, until browned. Drain excess fat if needed.
- Push beef to one side, add garlic and ginger to the empty space, and stir for 30 seconds until fragrant.
- Pour the sauce over the beef and toss everything together. Cook for 1–2 more minutes until the sauce thickens and coats the meat.
- Serve over steamed rice and top with green onions and sesame seeds.
Tips
- Tip: High heat is key here — you want the beef to brown and caramelize, not steam. Don't crowd the pan.
- Tip: Fresh ginger makes a real difference in this recipe. A small knob keeps in the freezer for months and grates easily from frozen.
- Tip: This also works well with ground turkey or chicken if you want something lighter.
10. Quick Air Fryer Blackened Chicken Tenders

My air fryer gets more use than almost any other appliance in my kitchen, and chicken tenders are a big reason why. These blackened ones have a deeply seasoned, slightly charred crust from a blend of smoked paprika, cayenne, and dried herbs — and the inside stays juicy every single time because the air fryer circulates heat so evenly. The whole thing is done in about 12 minutes, which is faster than delivery and considerably cheaper. This is the recipe that converted my kids from plain chicken strips to actually wanting spice on their food.
Ingredients
- 1½ lbs chicken tenders (or chicken breasts cut into strips)
- 2 tablespoons olive oil
- 1½ teaspoons smoked paprika
- 1 teaspoon garlic powder
- 1 teaspoon onion powder
- ½ teaspoon dried thyme
- ½ teaspoon dried oregano
- ¼–½ teaspoon cayenne pepper (adjust to your heat preference)
- ½ teaspoon salt
Instructions
- Preheat your air fryer to 400°F for 3 minutes.
- Mix all spices together in a small bowl. Toss chicken tenders with olive oil, then coat evenly with the spice mixture.
- Arrange tenders in a single layer in the air fryer basket — don't overlap them or they won't crisp properly. Work in batches if needed.
- Air fry at 400°F for 10–12 minutes, flipping halfway through, until the outside is dark and deeply spiced and the internal temperature reaches 165°F.
- Serve immediately with ranch, a squeeze of lemon, or just as they are.
Tips
- Tip: No air fryer? These work on a sheet pan at 425°F for 18–20 minutes, flipped once halfway. Not quite the same crust but still very good.
- Tip: The spice mix looks dark and charred once cooked — that's the point. Don't pull them early thinking something went wrong.
- Tip: Leftovers reheat well in the air fryer at 375°F for 3–4 minutes. They stay crispy, unlike microwave reheated chicken which goes rubbery.
9. Easy Shrimp Scampi Linguine
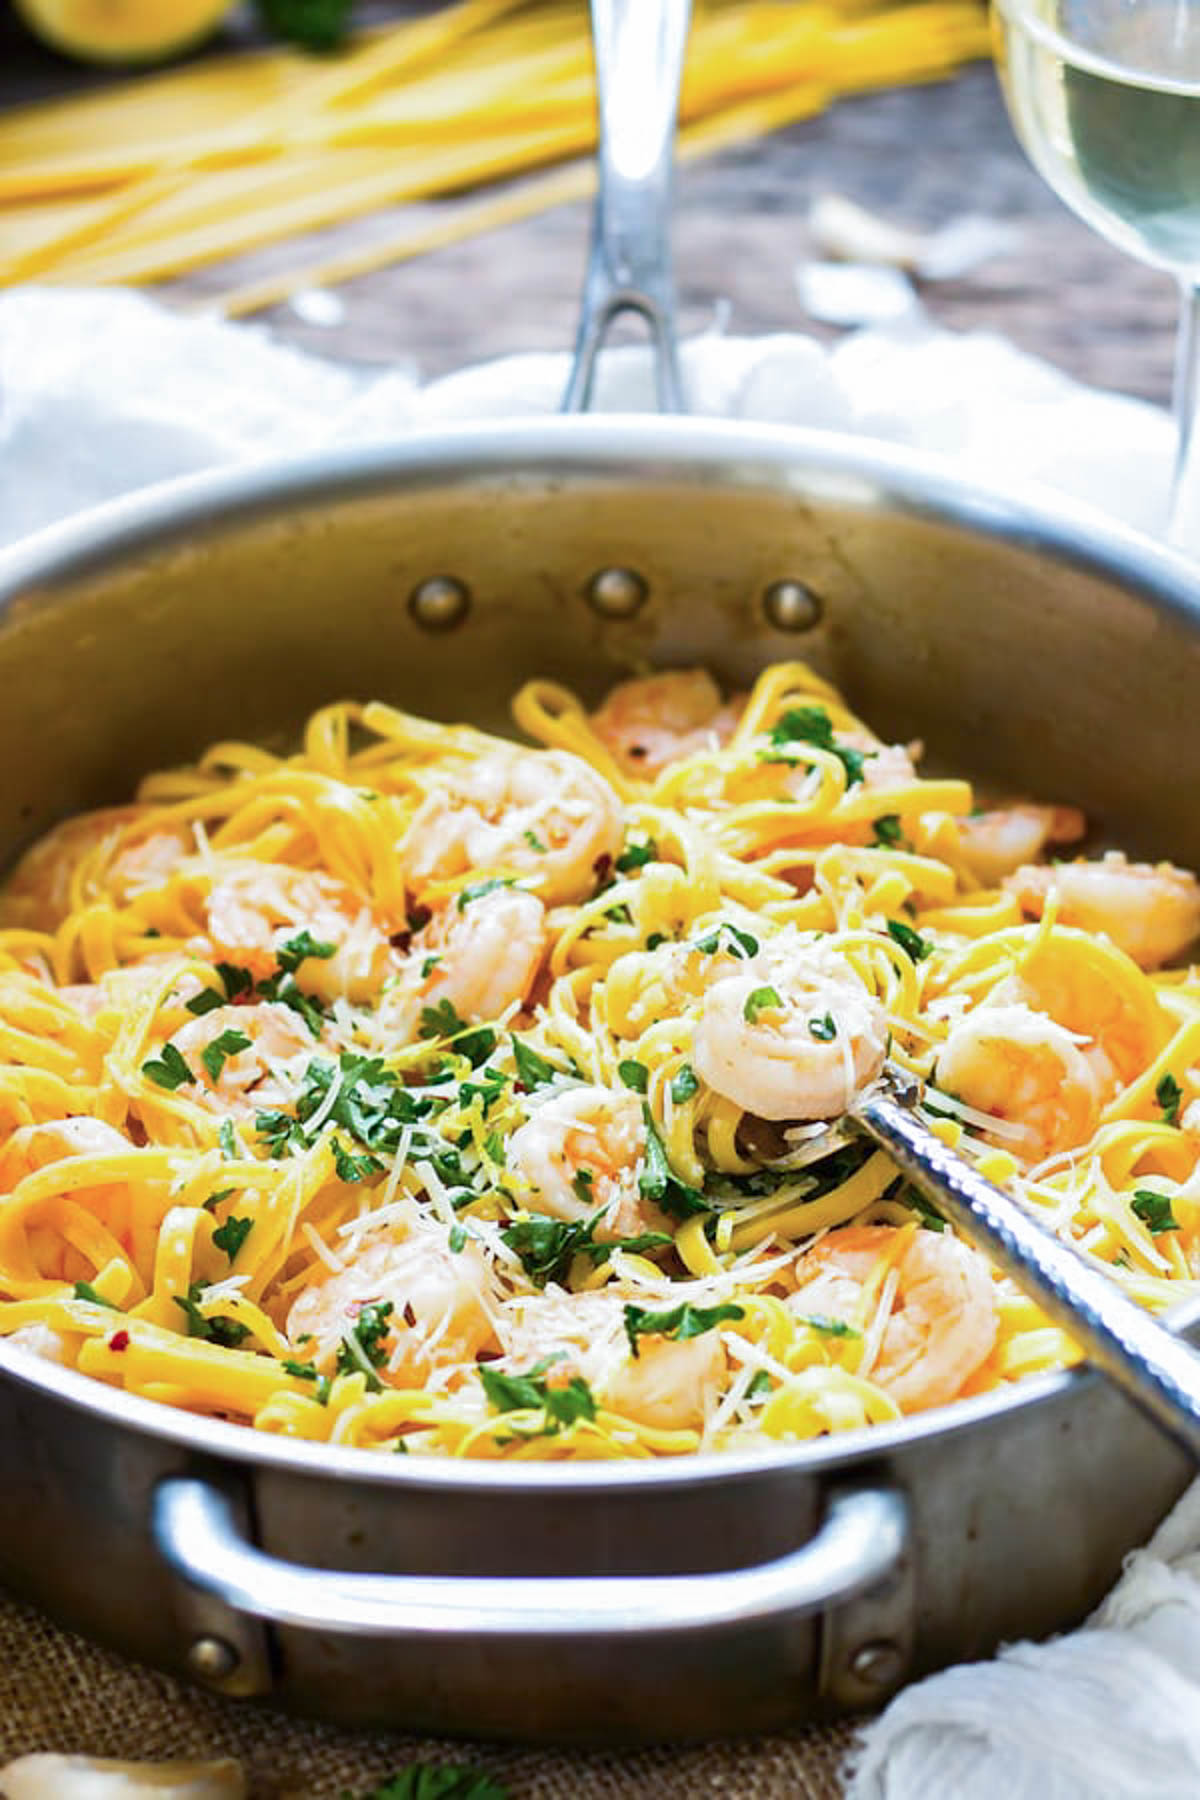
Shrimp scampi is one of those dinners that feels like it belongs in a restaurant but comes together in about 20 minutes at home. The sauce is built on butter, garlic, white wine, and fresh lemon — simple ingredients that reduce into something bright and rich at the same time. I use frozen shrimp from Costco for this most of the time; they're already peeled and deveined, which saves a ton of prep. The linguine soaks up that buttery sauce from the bottom of the bowl, which is honestly the best part of the whole dish.
Ingredients
- 12 oz linguine
- 1 lb large shrimp, peeled and deveined (fresh or thawed frozen)
- 4 tablespoons unsalted butter, divided
- 2 tablespoons olive oil
- 5 cloves garlic, minced
- ½ cup dry white wine (or low-sodium chicken broth)
- Juice of 1 lemon (about 3 tablespoons)
- ¼ teaspoon red pepper flakes
- Salt and black pepper, to taste
- ¼ cup fresh parsley, chopped
- Grated Parmesan, for serving
Instructions
- Cook linguine in salted boiling water until al dente. Reserve ¼ cup pasta water before draining.
- Pat shrimp dry. Heat 2 tablespoons butter and olive oil in a large skillet over medium-high heat. Add shrimp in a single layer, season with salt, pepper, and red pepper flakes, and cook 1–2 minutes per side until pink and just opaque. Remove shrimp and set aside.
- In the same skillet, add garlic and cook 30 seconds until fragrant. Pour in white wine and lemon juice, scraping up any bits from the bottom. Let it simmer for 2–3 minutes until slightly reduced.
- Add remaining 2 tablespoons of butter and swirl until melted into the sauce. Add drained linguine and toss to coat, adding a splash of pasta water if needed to loosen.
- Return shrimp to the pan, toss everything together, and finish with fresh parsley. Serve right away with Parmesan.
Tips
- Tip: Shrimp overcook in seconds — pull them from the pan the moment they curl into a C shape and turn pink. If they curl into a tight O, they're already overdone.
- Tip: No white wine at home? Chicken broth works as a substitute — the flavor is slightly different but still really good.
- Tip: This dish doesn't hold well — the pasta absorbs the sauce quickly. Make it right before you're ready to eat and serve immediately.
8. Arroz con Pollo (Latin One Pot Chicken and Yellow Rice)
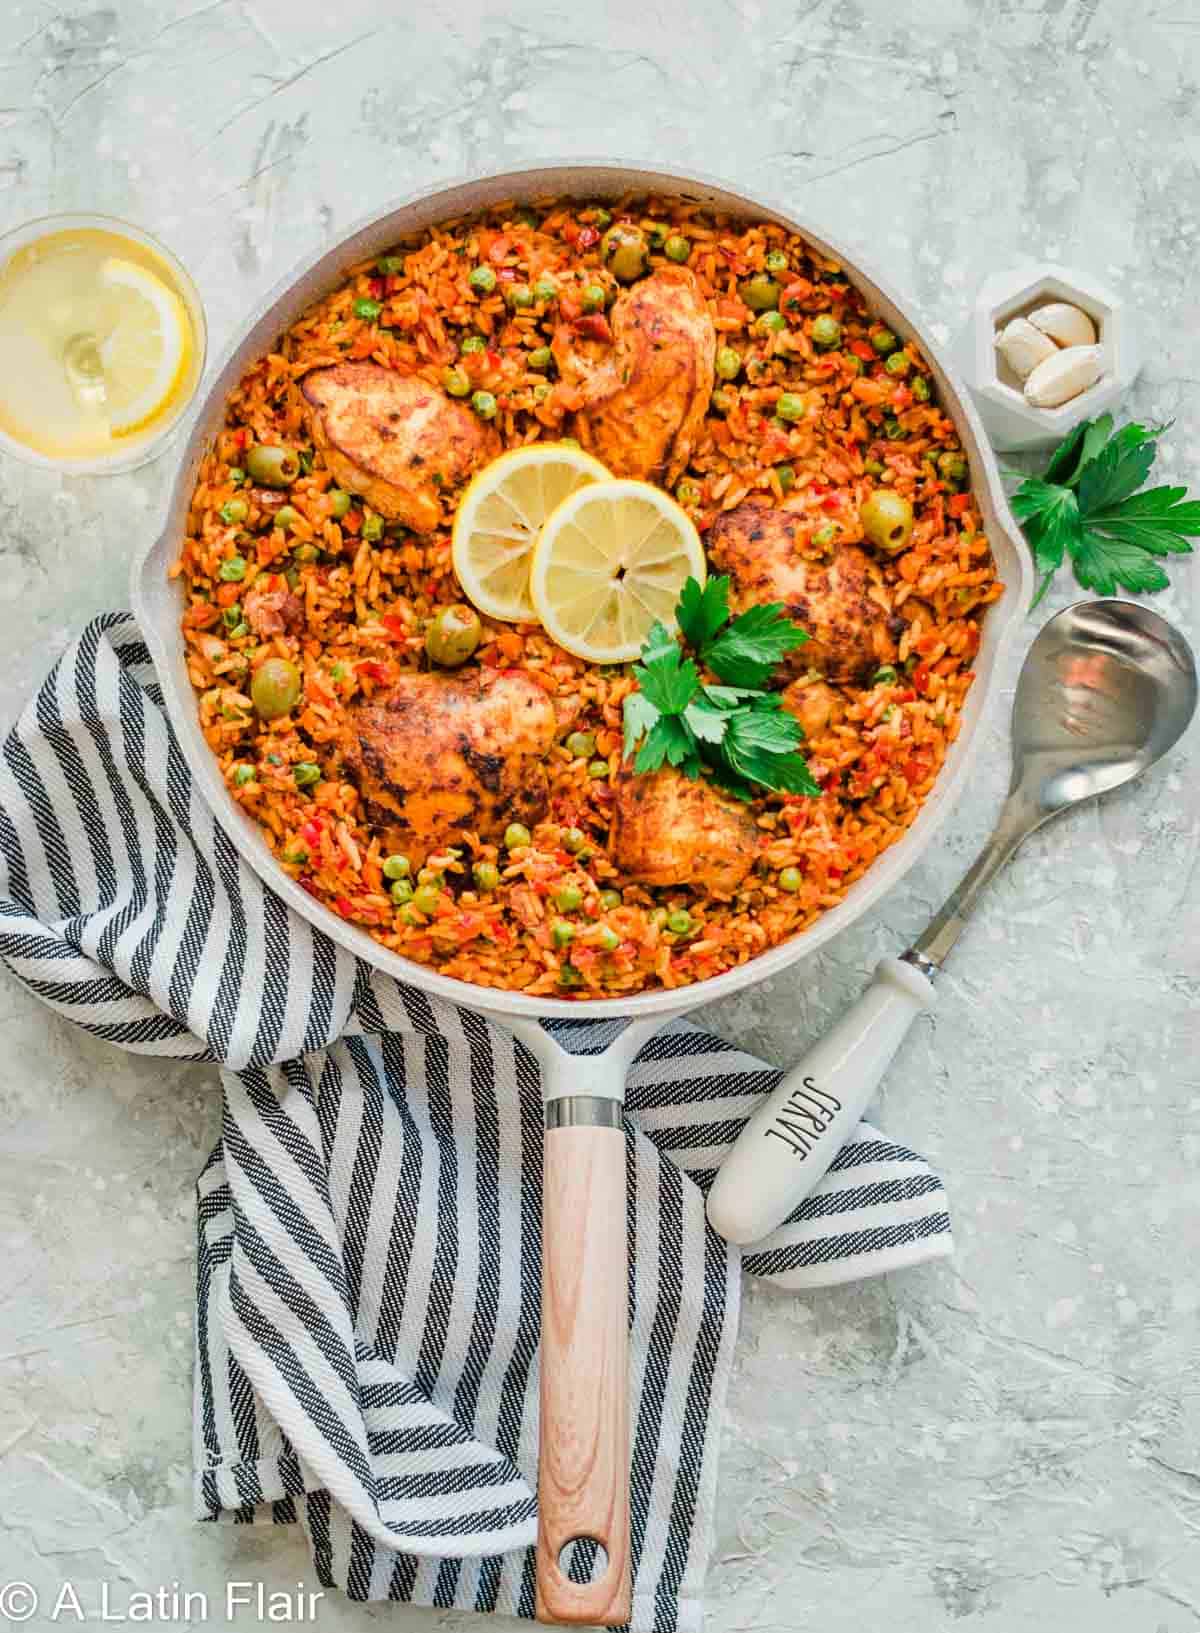
Arroz con Pollo is the kind of one-pot dinner I wish I'd discovered years earlier. Chicken thighs braise right in the pan with seasoned yellow rice, bell peppers, and tomatoes — everything soaks up the same broth, and by the time it's done, the rice is deeply flavored in a way that plain rice on the side never is. It reminds me a lot of how we cook rice back home in Pakistan, where the grain does all the heavy lifting by absorbing whatever's been cooking around it. This is my go-to when I want something substantial that doesn't require standing over the stove the whole time.
Ingredients
- 4 bone-in, skin-on chicken thighs
- 1½ cups long-grain white rice
- 1 teaspoon ground cumin
- 1 teaspoon smoked paprika
- ½ teaspoon turmeric (this is what gives the rice its yellow color)
- 1 teaspoon garlic powder
- Salt and black pepper to taste
- 2 tablespoons olive oil
- 1 medium onion, diced
- 1 red bell pepper, diced
- 3 garlic cloves, minced
- 1 can (14.5 oz) diced tomatoes, drained
- 2½ cups chicken broth
Instructions
- Season chicken thighs on both sides with cumin, paprika, garlic powder, salt, and pepper. Heat olive oil in a large deep skillet or Dutch oven over medium-high heat and sear the chicken, skin-side down, for 4-5 minutes until golden. Flip and sear another 2 minutes, then remove and set aside.
- In the same pan, sauté the onion and bell pepper for 3-4 minutes until softened. Add the garlic and cook for 1 minute more.
- Stir in the drained diced tomatoes and turmeric, then add the rice and stir to coat in the oil and vegetables for about 1 minute.
- Pour in the chicken broth and bring to a boil. Nestle the seared chicken thighs on top, skin-side up, reduce heat to low, cover tightly, and cook for 25 minutes without lifting the lid.
- Check that the rice is cooked through and the chicken has reached 165°F internally. Let it rest uncovered for 5 minutes before serving.
Tips
- Tip: Drain your canned tomatoes well — I skipped this once and ended up with soggy, undercooked rice because there was too much liquid in the pan.
- Tip: Don't lift the lid while the rice is cooking. Every time you do, you lose steam and the rice won't cook evenly.
- Tip: Bone-in thighs work best here because they stay juicy through the long braise. Boneless thighs will work in a pinch but reduce the cooking time to about 18-20 minutes.
7. Crispy Oven Baked Cornflake Chicken

I was skeptical the first time I saw cornflakes used as a chicken coating — it sounded like something you do when you've run out of breadcrumbs and don't want to admit it. But the crunch you get from crushed cornflakes is genuinely better than panko in some ways. It's lighter, crispier, and holds up well even as leftovers. The oven does all the work, so there's no hot oil splattering across your stovetop. Saad, who normally turns his nose up at anything that isn't fried, cleaned his plate without a single complaint.
Ingredients
- 1½ lbs boneless, skinless chicken breasts or thighs, cut into strips
- 3 cups cornflakes, crushed (plain, not the sugary kind)
- ½ cup all-purpose flour
- 2 large eggs, beaten
- 1 teaspoon garlic powder
- 1 teaspoon onion powder
- 1 teaspoon smoked paprika
- ½ teaspoon salt
- ¼ teaspoon black pepper
- Cooking spray or 2 tablespoons olive oil for drizzling
Instructions
- Preheat oven to 400°F. Line a baking sheet with parchment paper and place a wire rack on top if you have one — this helps the bottom get crispy too.
- Set up a breading station: flour mixed with garlic powder, onion powder, paprika, salt, and pepper in one shallow bowl; beaten eggs in a second; crushed cornflakes in a third.
- Dredge each chicken strip in the seasoned flour, shake off the excess, dip in egg, then press firmly into the cornflake crumbs to coat all sides well.
- Arrange on the prepared rack, spray lightly with cooking spray or drizzle with a little olive oil, and bake for 20-25 minutes, flipping halfway through, until golden and cooked through to 165°F.
Tips
- Tip: Crush the cornflakes inside a zip-lock bag using a rolling pin — you want some texture left, not fine powder. Coarse crumbs give you the best crunch.
- Tip: The wire rack is worth using if you have one. Without it, the bottom of the chicken sits in its own moisture and goes soft. I skipped it the first time and the difference was noticeable.
- Tip: Serve with honey mustard or a simple garlic mayo — the crunch of the coating holds up well against creamy dipping sauces.
6. Crispy Pan Fried Gnocchi
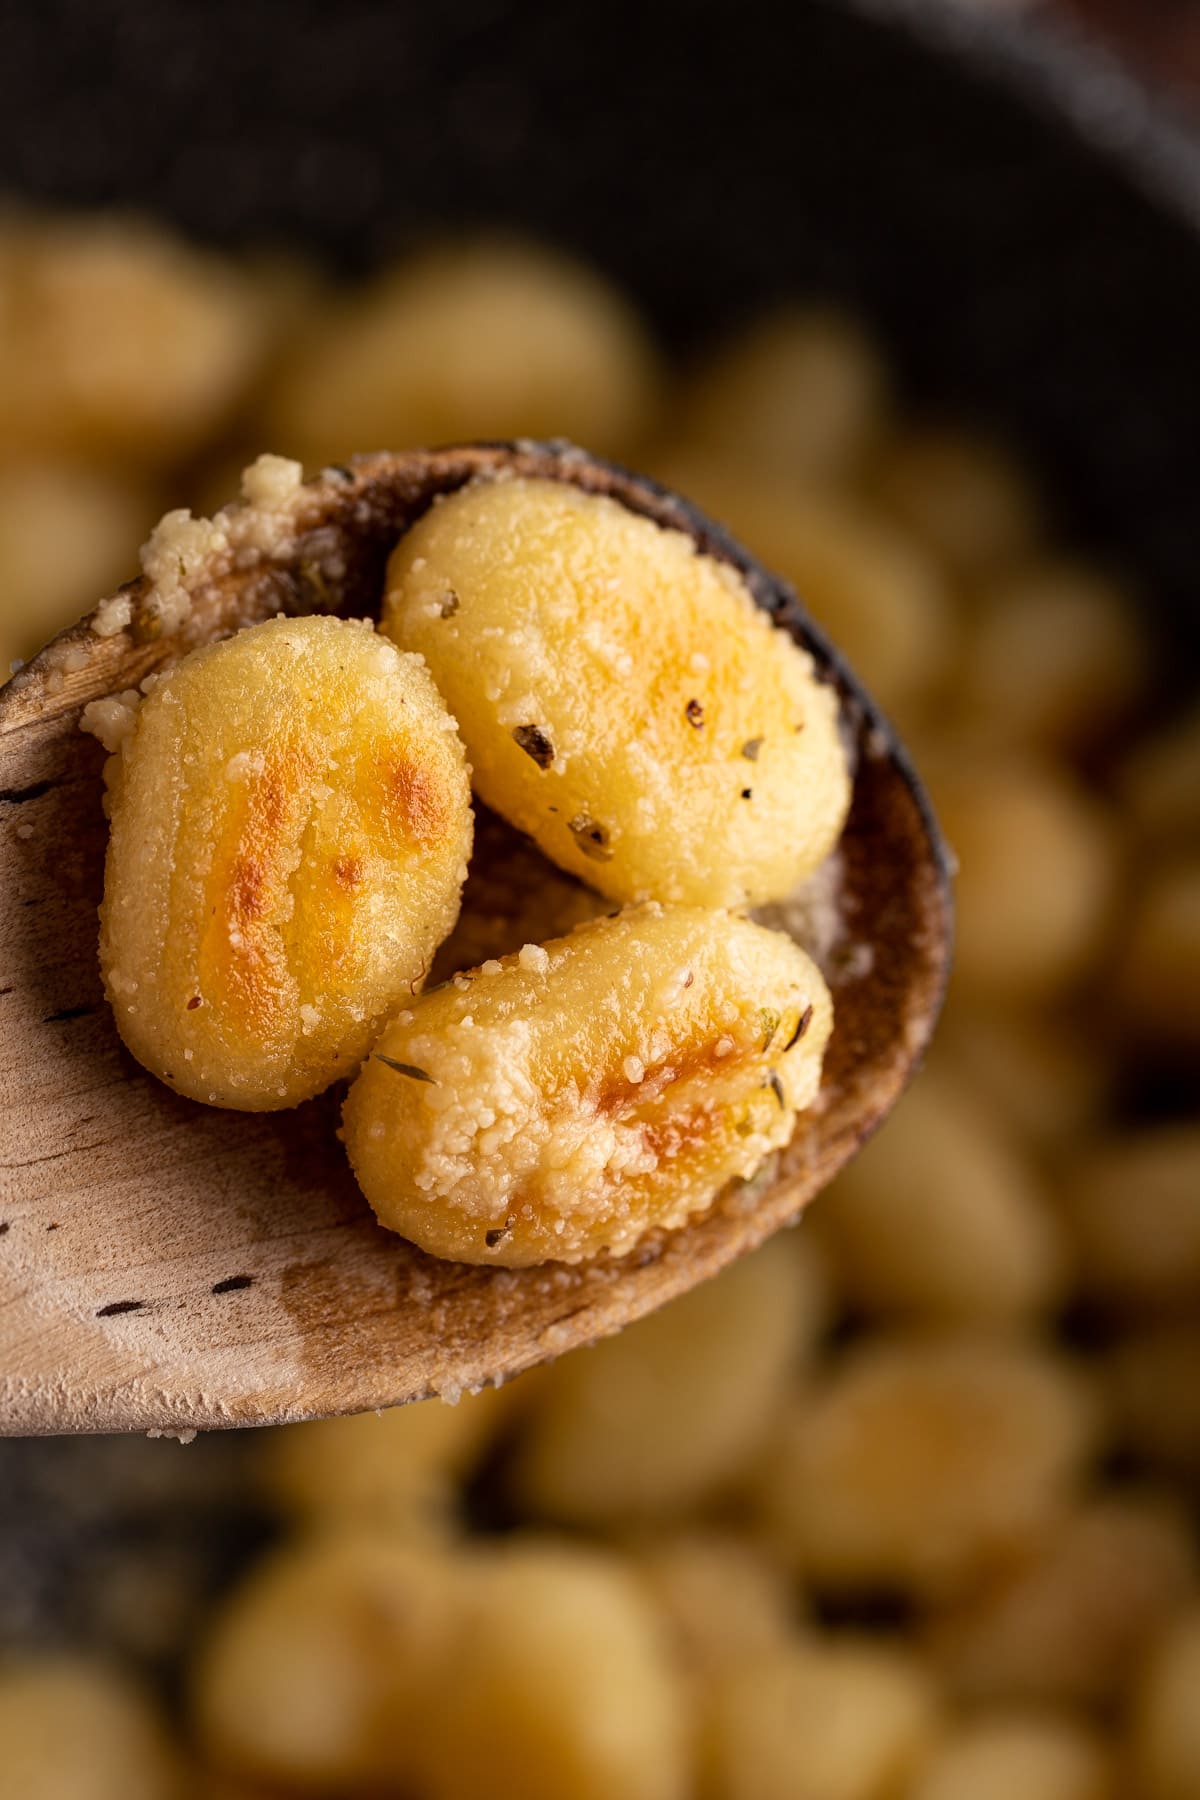
Before I tried pan-frying gnocchi, I only ever boiled it — and honestly, boiled gnocchi is fine but not exciting. When you toss shelf-stable gnocchi straight into a hot skillet with butter, the outside turns golden and slightly crisp while the inside stays pillowy and soft. It takes about 10 minutes from start to finish. I add garlic, a handful of cherry tomatoes, and whatever fresh herbs I have on hand, and it becomes a dinner that feels way more effort-intensive than it actually is. This isn't authentic Italian — it's just a very useful weeknight trick.
Ingredients
- 1 lb shelf-stable potato gnocchi (found near pasta at most grocery stores)
- 2 tablespoons butter
- 1 tablespoon olive oil
- 3 garlic cloves, minced
- 1 cup cherry tomatoes, halved
- ½ teaspoon red pepper flakes (optional)
- Salt and black pepper to taste
- ¼ cup grated Parmesan
- Fresh basil or parsley to finish
Instructions
- Heat butter and olive oil together in a large skillet over medium-high heat until the butter is foamy. Add the gnocchi in a single layer — do not crowd the pan or they'll steam instead of crisp.
- Cook undisturbed for 3-4 minutes until the bottom is golden and slightly crisp, then toss and cook another 2-3 minutes on the other sides. Remove to a plate.
- In the same pan, add the garlic and cherry tomatoes and cook for 2-3 minutes until the tomatoes start to blister and release their juices. Season with salt, pepper, and red pepper flakes.
- Return the gnocchi to the pan, toss everything together, then plate and top with Parmesan and fresh herbs.
Tips
- Tip: Use shelf-stable gnocchi straight from the packet — no boiling needed. Fresh refrigerated gnocchi has more moisture and won't crisp the same way.
- Tip: Resist the urge to stir too early. The crust forms when the gnocchi sits still — moving it around too soon just makes it stick and tear.
- Tip: Add a handful of spinach or a few sun-dried tomatoes to the pan with the garlic if you want to stretch this into a more complete dinner.
5. Quick and Easy One Pan Tuna Fried Rice
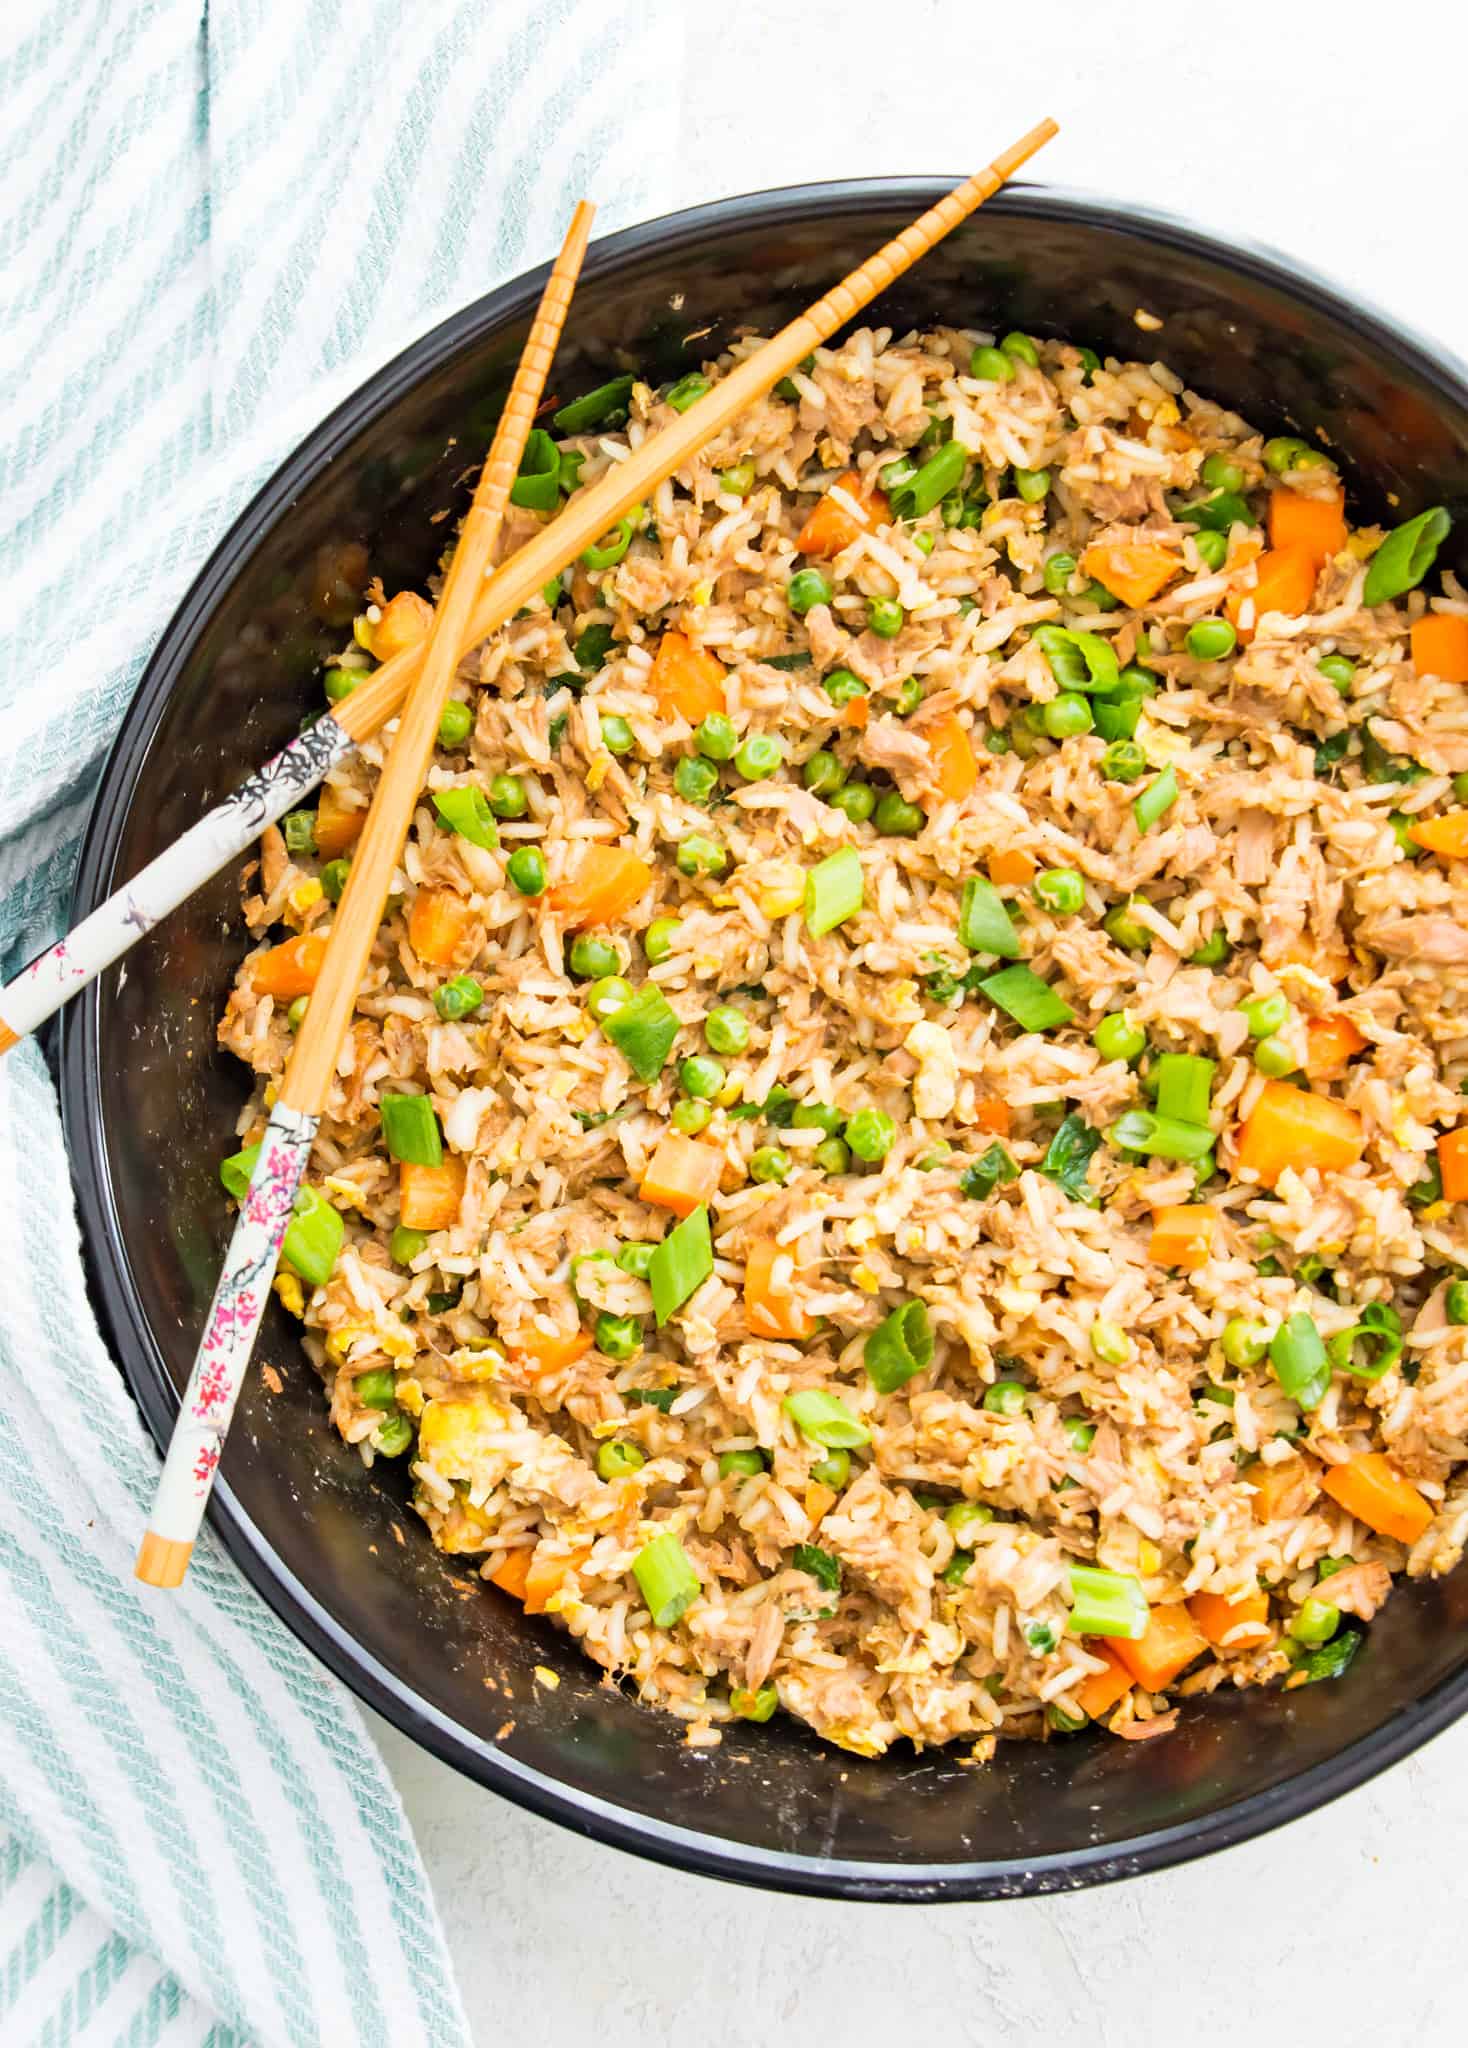
Fried rice is one of those things I make specifically when there's leftover rice sitting in the fridge and nothing obvious planned for dinner. Tuna fried rice takes that pantry-staple logic even further — a couple cans of tuna from Walmart, day-old rice, soy sauce, eggs, and frozen peas, and you have a genuinely filling meal in under 15 minutes. I was skeptical about canned tuna in fried rice the first time, expecting it to taste like a sad desk lunch. It doesn't. The tuna gets a little crispy around the edges when it hits the hot pan, and the flavor is much better than you'd expect. I make a double batch because it disappears fast.
Ingredients
- 2 cans (5 oz each) tuna in water, drained well
- 3 cups cooked rice, preferably day-old and cold
- 2 tablespoons vegetable oil, divided
- 3 eggs, lightly beaten
- 3 garlic cloves, minced
- ½ cup frozen peas (no need to thaw)
- 3 tablespoons soy sauce
- 1 teaspoon sesame oil
- 2 green onions, sliced
- Salt and white pepper to taste
Instructions
- Heat 1 tablespoon of oil in a large skillet or wok over high heat. Add the drained tuna and press it into the pan without stirring for about 2 minutes, letting it get a little golden on the bottom. Break it up and cook for another minute, then push it to one side of the pan.
- Add the remaining oil, then pour in the beaten eggs. Scramble them until just set, breaking them into pieces as they cook.
- Add the garlic and frozen peas and stir everything together for 1 minute.
- Add the cold rice, breaking up any clumps, and stir-fry over high heat for 3-4 minutes until the rice is heated through and starting to get a little toasty in spots.
- Pour in the soy sauce and sesame oil, toss to combine, taste and adjust salt. Finish with sliced green onions and serve immediately.
Tips
- Tip: Cold, day-old rice is non-negotiable for good fried rice. Freshly cooked rice is too moist and will clump and steam instead of fry. If you only have fresh rice, spread it on a sheet pan and refrigerate for 30 minutes first.
- Tip: Drain the tuna really well and press out as much liquid as possible before it hits the pan. Too much moisture means it steams instead of crisps.
- Tip: High heat is important here. Don't be afraid of a hot pan — that's what gives fried rice its slightly smoky, restaurant-style flavor.
4. Baked Ravioli
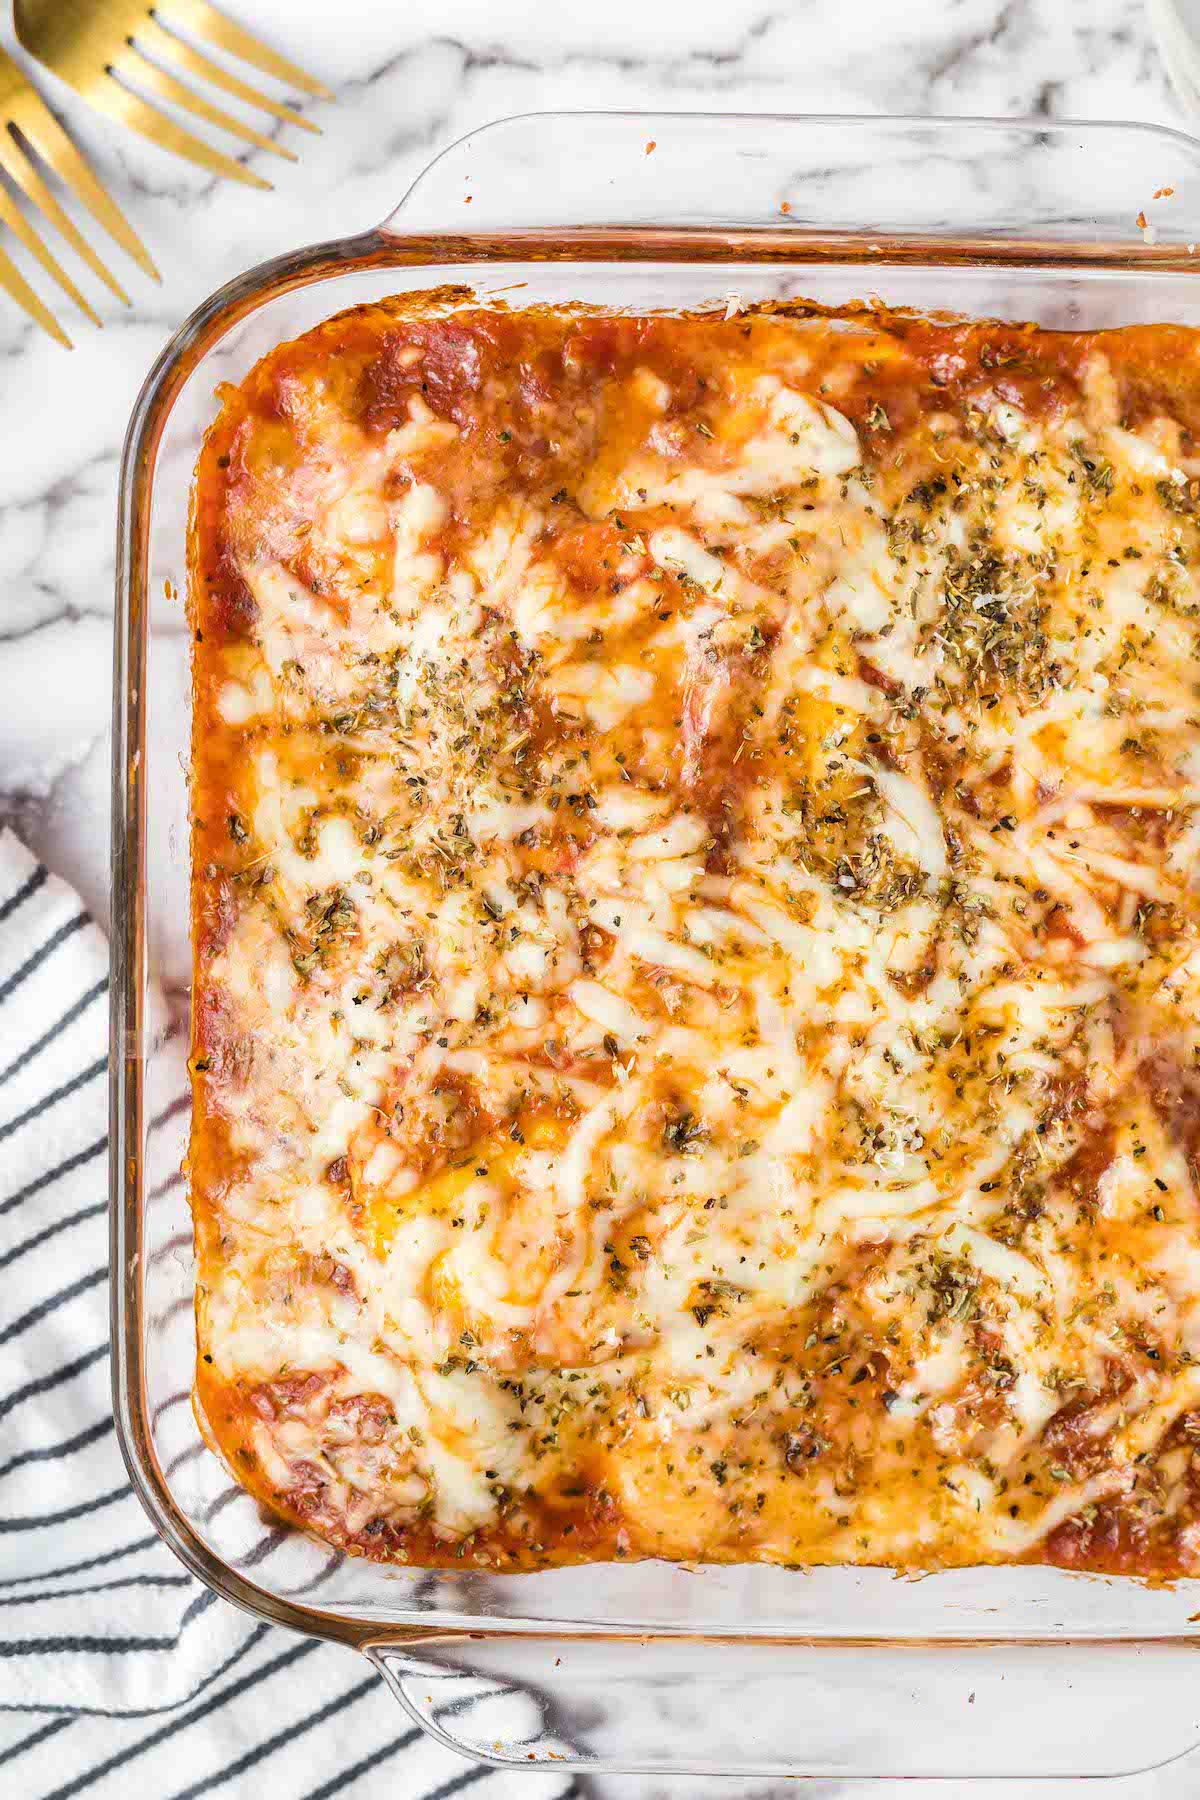
Baked ravioli is one of those ideas that sounds almost too simple to be worth making — you're essentially layering frozen or refrigerated ravioli with marinara and cheese and baking it like a lasagna. But the results are genuinely good. The ravioli cooks right in the sauce in the oven, the edges get a little chewy and crisp where they poke out, and the cheese on top bubbles up golden. It's a real weeknight shortcut: no boiling a separate pot of pasta, no draining, no mess. I grab a bag of cheese ravioli from Trader Joe's or Aldi and this comes together in about 40 minutes with almost no active work.
Ingredients
- 1 bag (20-25 oz) frozen or refrigerated cheese ravioli (uncooked)
- 2½ cups marinara sauce (jarred is fine)
- ½ cup water (to thin the sauce so the ravioli cooks through)
- 1½ cups shredded mozzarella
- ¼ cup grated Parmesan
- 1 teaspoon Italian seasoning
- ½ teaspoon garlic powder
- Red pepper flakes to taste (optional)
- Fresh basil to garnish
Instructions
- Preheat oven to 400°F. Mix the marinara sauce with the water and stir in the Italian seasoning and garlic powder. Spread about ½ cup of the thinned sauce across the bottom of a 9x13 inch baking dish.
- Arrange the uncooked ravioli in a single layer over the sauce — it's okay if they overlap slightly. Pour the remaining sauce evenly over the top, making sure all the ravioli are covered.
- Cover the dish tightly with aluminum foil and bake for 30 minutes. The steam trapped inside is what cooks the ravioli through.
- Remove the foil, scatter the mozzarella and Parmesan evenly over the top, and bake uncovered for another 10-12 minutes until the cheese is melted and golden in spots.
- Let it sit for 5 minutes before serving — it's very hot straight from the oven and the filling will burn your mouth if you dig in immediately. Garnish with fresh basil.
Tips
- Tip: Don't skip the water added to the sauce — it might seem wrong but it's what creates enough steam to cook the ravioli through without pre-boiling. I skipped it once and the ravioli were tough in the middle.
- Tip: Meat lovers ravioli works just as well as cheese — use whatever your family prefers. You can also add a layer of cooked Italian sausage between the ravioli and sauce for a heartier version.
- Tip: Cover the dish tightly with foil — any gaps will let steam escape and you'll end up with dried-out edges before the center is cooked through.
25. Perfectly Crispy Falafel
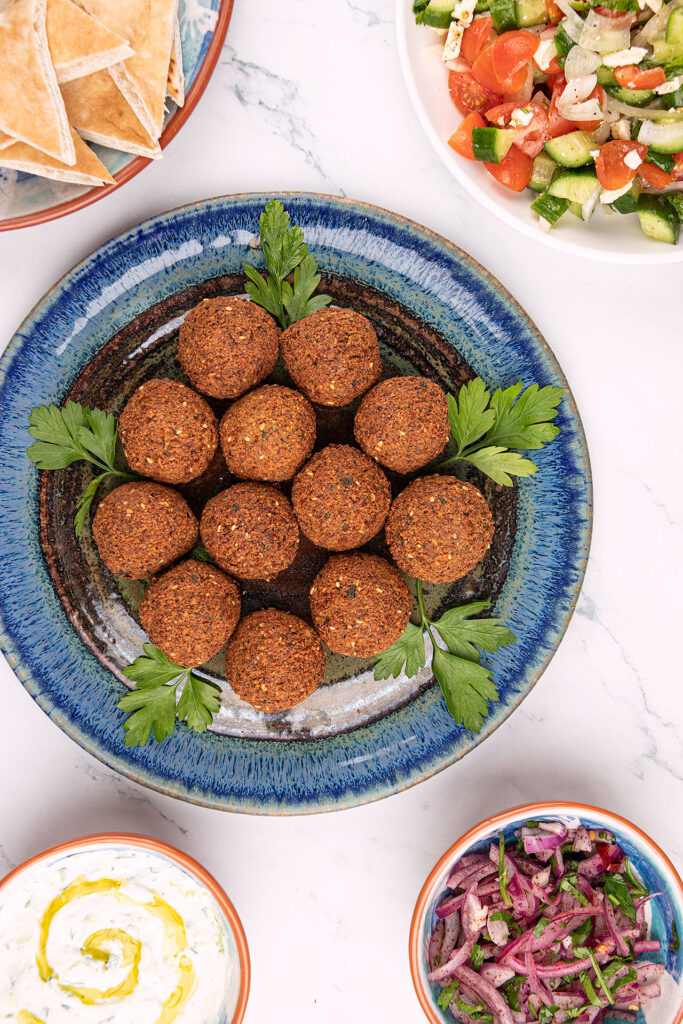
I tried falafel from a can mix once and it fell apart in the oil — never again. Making it from scratch with dried chickpeas (not canned — this matters) gives you that crispy shell with a soft, herb-flecked center that actually holds together. This is the version I keep coming back to when I want something plant-based that feels genuinely satisfying, not like a compromise. Serve it stuffed in pita with tahini sauce and pickled cucumbers and nobody at the table misses the meat.
Ingredients
- 1½ cups dried chickpeas, soaked overnight (do NOT use canned)
- ½ cup fresh parsley, roughly chopped
- ½ cup fresh cilantro, roughly chopped
- 5 cloves garlic
- 1 small onion, quartered
- 1½ teaspoons ground cumin
- 1 teaspoon ground coriander
- ½ teaspoon cayenne pepper
- 1 teaspoon salt
- 1 teaspoon baking powder
- 3 tablespoons all-purpose flour
- Oil for frying (vegetable or canola)
Instructions
- Drain and rinse the soaked chickpeas well. Add them to a food processor with the parsley, cilantro, garlic, onion, cumin, coriander, cayenne, and salt. Pulse until the mixture is coarse and grainy — not smooth. You want texture, not hummus.
- Transfer to a bowl and stir in the baking powder and flour. The mixture should hold together when you squeeze a small amount in your palm. If it's too wet, add flour one tablespoon at a time. Refrigerate for 30 minutes — this helps the patties hold their shape.
- Shape into small balls or patties, about 1½ inches across. Heat about 2 inches of oil in a heavy pot or deep skillet to 350°F. Fry in batches of 4-5 for about 3-4 minutes per side until deep golden brown. Don't crowd the pot — it drops the oil temperature and makes them greasy.
- Remove with a slotted spoon and drain on a paper towel-lined plate. Serve immediately with pita bread, tahini sauce, chopped tomatoes, and cucumber.
Tips
- Tip: The overnight soak is non-negotiable. Canned chickpeas have too much moisture and the falafel will fall apart in the oil every single time.
- Tip: If you don't have a food processor, a blender works — just do it in small batches and pulse rather than blend continuously so you don't overprocess.
- Tip: The uncooked mixture keeps in the fridge for up to 24 hours, so you can mix it the night before and fry fresh at dinnertime.
26. Vegan Avocado Pasta
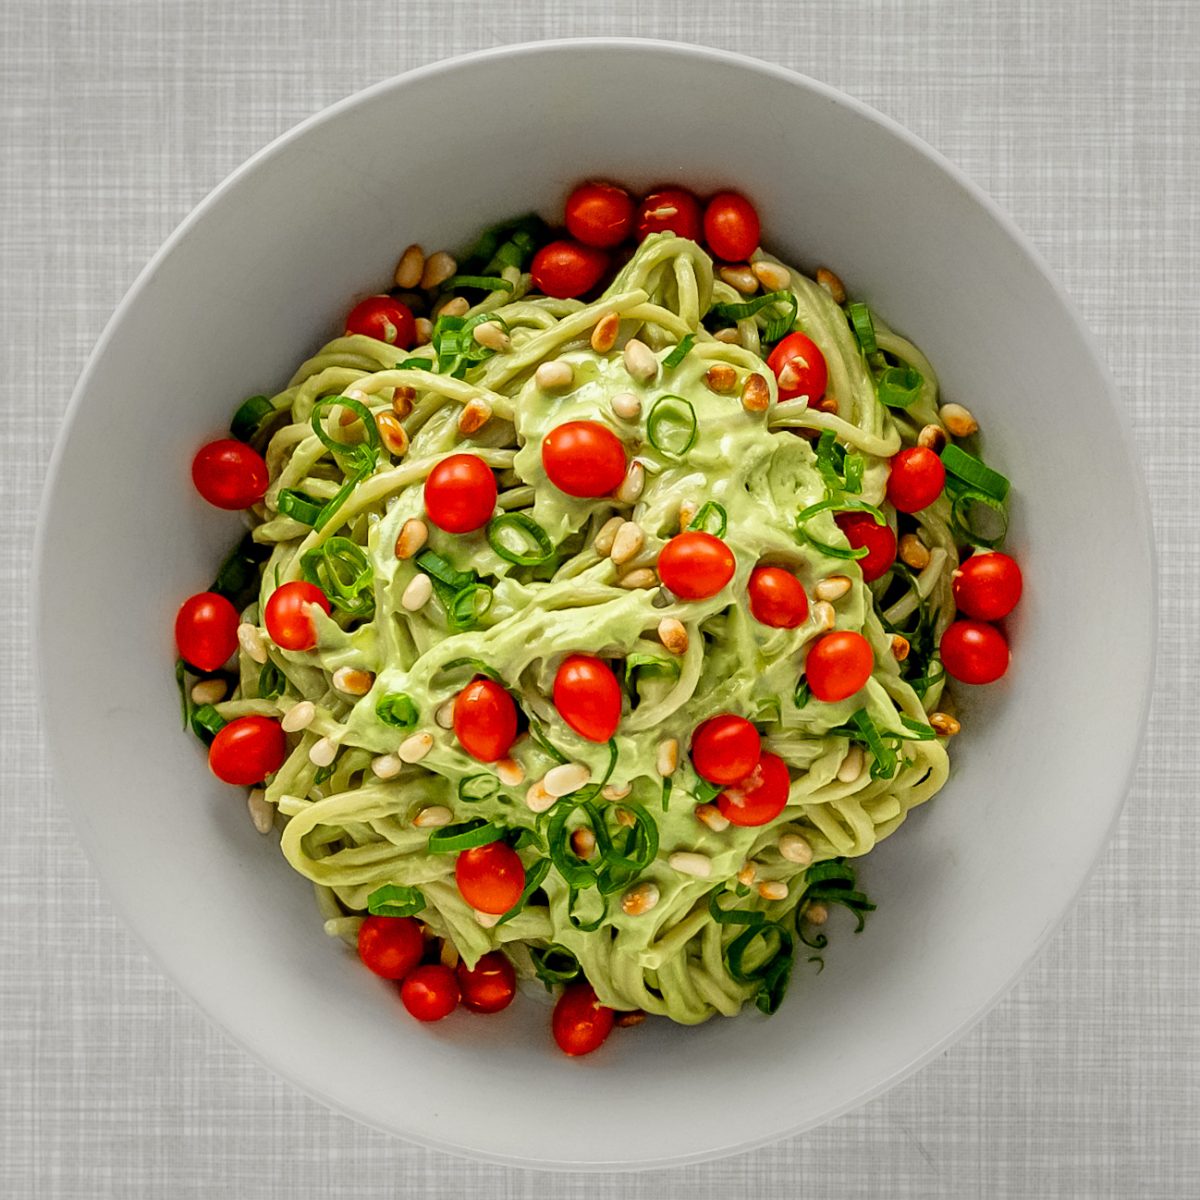
This one caught me off guard the first time I made it — I expected it to taste like a salad tossed with pasta, but the blended avocado sauce turns genuinely creamy without a drop of dairy. It comes together in about 20 minutes, which makes it one of the fastest dinners on this entire list. The lemon and garlic cut through the richness of the avocado so it never feels heavy. It's become my go-to on nights when I haven't planned anything and need something real on the table fast.
Ingredients
- 12 oz spaghetti or linguine
- 2 ripe avocados, pitted and peeled
- 3 cloves garlic
- 3 tablespoons fresh lemon juice (about 1 large lemon)
- ¼ cup fresh basil leaves
- 2 tablespoons olive oil
- ½ teaspoon salt, plus more to taste
- ¼ teaspoon black pepper
- ¼ cup pasta water (reserved before draining)
- Cherry tomatoes and red pepper flakes for serving (optional)
Instructions
- Cook pasta in well-salted boiling water according to package directions until al dente. Before draining, scoop out ¼ cup of pasta water and set it aside — this is what loosens the sauce later.
- While the pasta cooks, add the avocados, garlic, lemon juice, basil, olive oil, salt, and pepper to a blender or food processor. Blend until completely smooth. Taste and adjust salt — avocado needs more salt than you think.
- Drain the pasta and return it to the pot (off the heat). Pour the avocado sauce over and toss immediately, adding pasta water a little at a time until the sauce coats every strand and reaches your desired consistency.
- Serve right away topped with cherry tomatoes, a pinch of red pepper flakes, and extra basil if you have it. This dish does not hold well — avocado oxidizes quickly, so eat it fresh.
Tips
- Tip: Use avocados that are fully ripe — slightly soft when pressed. Underripe avocados make the sauce taste bitter and grainy rather than smooth and creamy.
- Tip: Don't skip the pasta water — the starch in it helps the sauce cling to the pasta instead of sliding off to the bottom of the bowl.
- Tip: If you don't have fresh basil, a tablespoon of pesto works as a substitute and adds a nice depth to the sauce.
27. Restaurant-Style Chicken Seekh Kabab
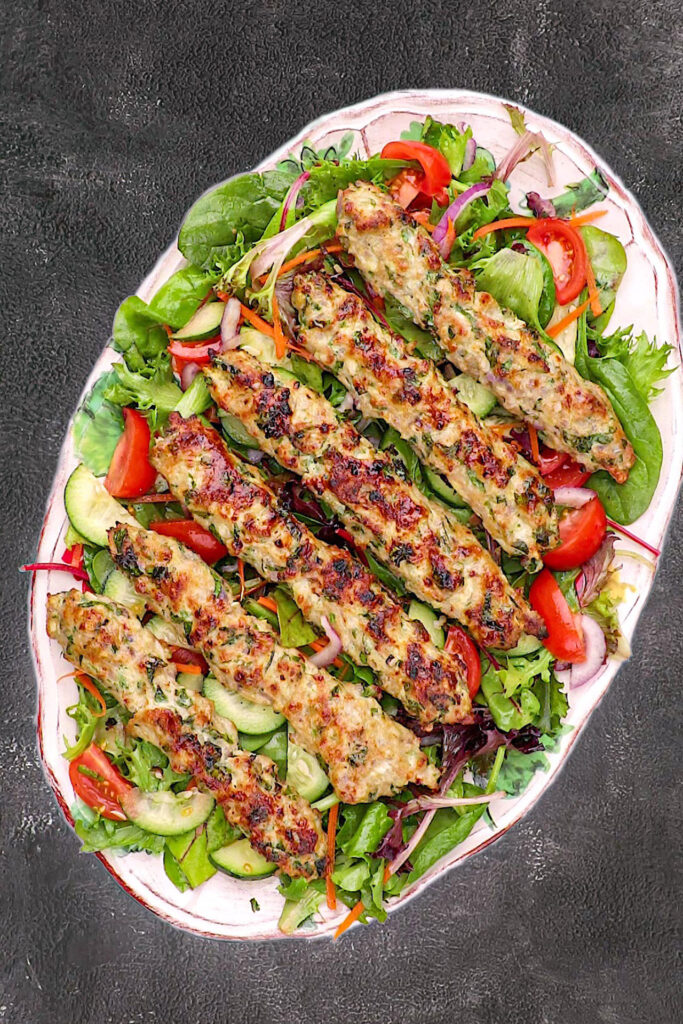
I saved this one for last because it's close to my heart — seekh kabab is something I grew up eating at roadside dhabas in Pakistan, and recreating that smoky, juicy, deeply spiced flavor at home felt impossible for a long time. The secret I eventually figured out is using ground chicken thighs (not breast — too dry) and adding raw onion that you squeeze completely dry before mixing in. Zainab calls these "the special kababs" and honestly, she's not wrong. They work on a grill, under a broiler, or in a cast iron pan — no tandoor required.
Ingredients
- 1 lb ground chicken thighs (ask the butcher, or pulse bone-in thighs yourself)
- 1 small onion, grated and squeezed completely dry in a clean towel
- 3 cloves garlic, minced
- 1 teaspoon fresh ginger, grated
- 2 tablespoons fresh cilantro, finely chopped
- 1 teaspoon cumin powder
- 1 teaspoon coriander powder
- ½ teaspoon garam masala
- ½ teaspoon red chili flakes (or more to taste)
- 1 teaspoon salt
- 2 tablespoons chickpea flour (besan) — helps bind without making them dense
- 1 tablespoon neutral oil, for cooking
Instructions
- Combine the ground chicken, squeezed-dry onion, garlic, ginger, cilantro, all the spices, salt, and chickpea flour in a bowl. Mix thoroughly with your hands until everything is fully incorporated and the mixture feels slightly sticky. Cover and refrigerate for at least 30 minutes — this rest period is what lets the kababs hold their shape on the skewer.
- Divide the mixture into 8 equal portions. With wet hands, mold each portion around a flat metal skewer (or wooden skewer soaked in water for 20 minutes) into a long sausage shape about 4-5 inches long. Press firmly so there are no gaps — air pockets cause them to break during cooking.
- To cook on a grill: brush with oil and grill over medium-high heat for 4-5 minutes per side until charred in spots and cooked through. To cook under a broiler: place on a foil-lined baking sheet, brush with oil, and broil 6 inches from the heat for 5-6 minutes per side. To pan-cook: heat oil in a cast iron skillet over medium-high and cook 4-5 minutes per side, turning gently.
- Rest for 2-3 minutes before serving. Serve with naan, raita, sliced onions, and a squeeze of lemon. In my house we also put out green chutney — non-negotiable.
Tips
- Tip: Squeezing the onion completely dry is the most important step — if there's excess moisture in the mixture, the kababs will slide off the skewer and fall apart while cooking.
- Tip: If you can't find chickpea flour at a regular grocery store, Walmart and Whole Foods usually carry it in the international or natural foods aisle. All-purpose flour works as a substitute in a pinch, though the texture won't be quite the same.
- Tip: I make a double batch and freeze the uncooked shaped kababs on a sheet pan, then transfer to a zip-lock bag. Cook straight from frozen under the broiler — just add 3-4 extra minutes per side.
Twenty-eight dinner recipes later and I still come back to the same truth: a good dinner doesn't have to be complicated. It just has to be real food made with some intention. Whether you're pulling together a quick weeknight stir-fry or going all-in on a slow-cooked weekend meal, this list covers the range. I've made all of these in my own kitchen — some took a few attempts to get right, some came together on the first try, but every single one earned its place here.
My husband eats through this list without complaint, which in our house is the highest possible endorsement. Saad has his favorites (anything with rice and a sauce he can drown it in), Zainab has hers (the cheesier the better), and I have mine. The beautiful thing about a list this long is that there's genuinely something for every kind of evening — the nights you have 20 minutes, the nights you want to cook something that actually feels like an event, and all the ordinary nights in between.
Bookmark this page, save it to Pinterest, text it to whoever's always asking "what should I make for dinner tonight?" — and then just pick one and start. That's the whole point. Here are a few more places on the blog to keep your dinner rotation going strong: check out my easy chicken dinner recipes, one-pan dinner recipes, and quick weeknight dinners for even more ideas. 🍽️ ✨
More Dinner Ideas from the Blog
- Easy Chicken Dinner Recipes — weeknight chicken dishes that actually get used on repeat
- One-Pan Dinner Recipes — fewer dishes, full meals, no drama
- Quick Weeknight Dinners — ready in 30 minutes or under, no shortcuts on flavor
- Ground Beef Dinner Recipes — budget-friendly meals that go further than you'd think
- Pasta Dinner Recipes — the kind of pasta dishes that make everyone show up to the table on time
Frequently Asked Questions
Which of these dinner recipes is best for a busy weeknight?
Anything that comes together in one pan or uses ground meat is your friend on a busy night. I'd point you toward the stir-fries, the pasta dishes, or any recipe tagged under 30 minutes. The trick is having your pantry stocked with the basics — garlic, canned tomatoes, a good broth — so you're not running out mid-recipe.
Can I meal prep any of these recipes ahead of time?
Most of them, yes. Braised dishes, soups, and anything with a sauce actually taste better the next day once the flavors settle. I usually make a double batch on Sunday and we eat off it Monday and Tuesday without anyone complaining. Just store in an airtight container in the fridge and reheat gently on the stovetop with a splash of water or broth.
Are these dinner recipes family-friendly for picky eaters?
I have two kids with very different opinions on dinner, so yes — I built this list with that reality in mind. Most of these recipes are customizable: you can dial the spice down, leave out the onions if someone at your table has opinions about onions, or serve the sauce on the side. The cheesier pasta and rice dishes tend to be the safest bets if you're feeding little people with strong preferences.
What's the easiest recipe on this list for someone who doesn't cook much?
Start with anything that has five ingredients or fewer, or any recipe that's just "brown the meat, add the sauce, simmer." One-pan pasta dishes and sheet pan dinners are genuinely forgiving — even if your timing is off by a few minutes, they usually turn out fine. Don't let the longer ingredient lists intimidate you; most of those extra items are just pantry staples you measure and pour in.
How do I store and reheat leftover dinners from these recipes?
For most of these, cool the food down to room temperature first, then transfer to an airtight container and refrigerate for up to 3-4 days. Pasta is best reheated in a pan with a small splash of water or broth to loosen the sauce. Soups and braises reheat beautifully on low heat on the stovetop. Anything breaded or crispy (like baked chicken) is better reheated in the oven at 350°F for 10 minutes than in the microwave, which makes it soggy.
Share This Post!
If this list helped you figure out what's for dinner tonight — or gave you a week's worth of ideas — save it to Pinterest or share it with someone who needs it. 🍽️ ✨





Comments
No Comments