
Prepare to add a tart wind to your dinners with these 23 flavorful pickling recipes!
From customary dill pickles to prepared treats, this assortment has something for everybody.
Find that making pickles in the fridge, an extraordinarily fast bite or side dish, is so natural.
Cured jalapenos or Kool-Help pickles taste really exceptional. Partake in the pleasantness of cured beets, the mash of salted red onions, and the tartness of salted zucchini.
Mexican pickled onions, cowboy candy (candied jalapenos), and marinated feta cheese are three international flavors to try. Pickled red cabbage, carrots, and pineapple add flavor and color to dishes.
These simple to-put-forth recipes require insignificant fixings and attempts, making them ideal for amateurs and experienced picklers.
This collection has what you need to make a quick snack, a side dish, or a topping for your favorite meals.
So why not check pickling out? You won't have to deal with the hassle of traditional canning if you use these recipes to enjoy the delicious taste of homemade pickles.
Additionally, many of these recipes can be prepared quickly, allowing you to begin enjoying your pickled treats immediately!
Perfect Easy Refrigerator Pickles in No Time

23. Kool-Aid Pickles

A wildly fun, vibrant, and completely addictive Southern treat — dill pickle spears soaked in a bold Kool-Aid and sugar brine for three days until they turn a vivid colour and develop a sweet, tangy, and slightly sour flavour that is totally unlike anything else. A beloved snack particularly popular in the American South. A wonderful addition to our best pickle recipes.
Ingredients:
- 1 (46 oz) jar whole dill pickles
- 2 packages unsweetened Kool-Aid (cherry, tropical punch, or your favourite flavour)
- 2 cups sugar
- The reserved pickle brine from the jar
Instructions:
- Drain the pickles, reserving all the brine from the jar. Slice the whole pickles into spears or leave whole depending on preference. Return them to the jar.
- Combine the reserved pickle brine, Kool-Aid powder packets, and sugar in a bowl. Stir vigorously until the sugar completely dissolves — this is important for even flavour distribution.
- Pour the Kool-Aid brine back over the pickles in the jar. The brine should cover the pickles completely. Seal the jar tightly.
- Refrigerate for at least 3 days, turning the jar upside down once a day to ensure even distribution of the brine. The pickles will turn a vivid colour and develop their distinctive sweet-tangy flavour. Store refrigerated for up to 2 months.
22. Easy Pickled Beets

A beautifully simple, sweet, and tangy pickled beet recipe that comes together effortlessly with canned beets, apple cider vinegar, sugar, and warming spices. Wonderful on salads, as a side dish, or straight from the jar. Stores in the refrigerator for up to two months with no canning required. A wonderful addition to our best preserves recipes.
Ingredients:
- 2 (15 oz) cans sliced beets, drained and liquid reserved
- ½ cup apple cider vinegar
- ¼ cup reserved beet liquid
- ¼ cup sugar
- ½ teaspoon whole cloves
- ½ teaspoon whole allspice
- ½ teaspoon cinnamon
- ¼ teaspoon salt
Instructions:
- Combine the apple cider vinegar, reserved beet liquid, sugar, cloves, allspice, cinnamon, and salt in a small saucepan. Bring to a boil over medium heat, stirring until the sugar dissolves. Reduce to a simmer for 3 minutes.
- Place the drained beets in a clean glass jar or airtight container.
- Pour the hot spiced brine over the beets, ensuring they are completely submerged. Cool to room temperature.
- Seal and refrigerate for at least 24 hours before eating — the flavour develops significantly overnight. Store refrigerated for up to 2 months.
21. Quick and Crunchy Pickled Jalapeños
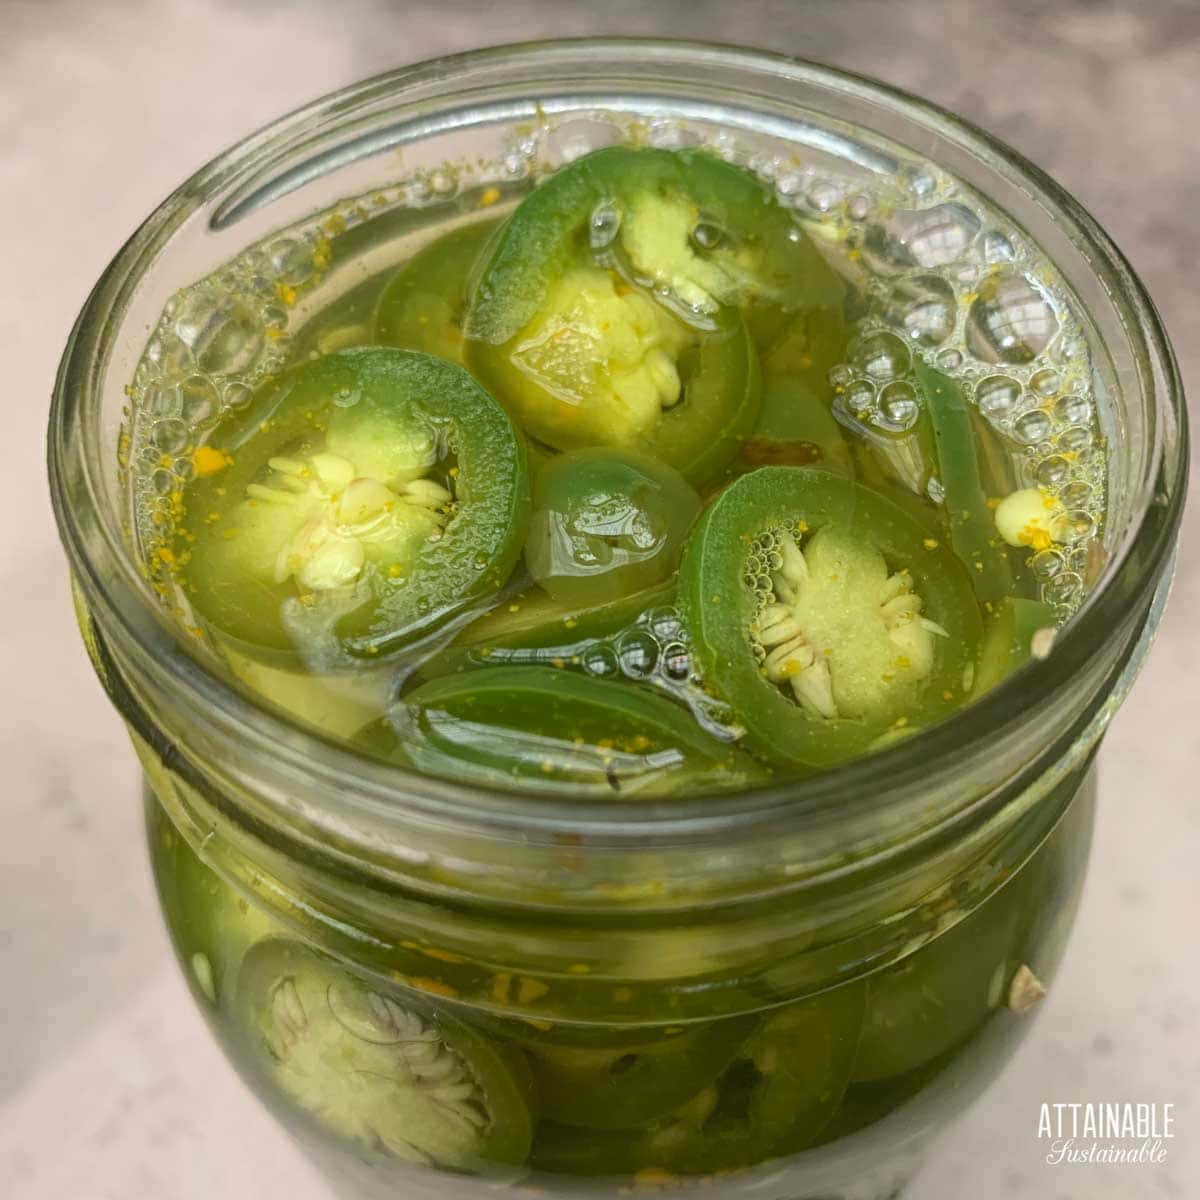
A quick, simple, and incredibly useful refrigerator pickle — fresh jalapeño rounds soaked in a seasoned vinegar brine with garlic and spices until perfectly tangy and crunchy. The ideal topping for tacos, pizza, sandwiches, burgers, and nachos. Ready to eat in 30 minutes and keeps refrigerated for months. A wonderful addition to our best pickle recipes.
Ingredients:
- 8–10 fresh jalapeños, sliced into rounds
- 1 cup white vinegar
- 1 cup water
- 2 tablespoons sugar
- 1 tablespoon salt
- 3 cloves garlic, smashed
- ½ teaspoon cumin seeds (optional)
- ½ teaspoon black peppercorns
Instructions:
- Slice the jalapeños into ¼-inch rounds. Pack them tightly into a clean glass jar along with the smashed garlic, cumin seeds, and peppercorns.
- Combine the vinegar, water, sugar, and salt in a small saucepan. Bring to a boil over medium heat, stirring until the sugar and salt dissolve completely. Remove from heat.
- Pour the hot brine over the jalapeños in the jar. The jalapeños should be completely submerged — press down if needed. Cool to room temperature.
- Seal and refrigerate for at least 30 minutes before eating for quick pickles, or 24 hours for the best flavour. Store refrigerated for up to 3 months.
20. Quick Pickled Red Onions
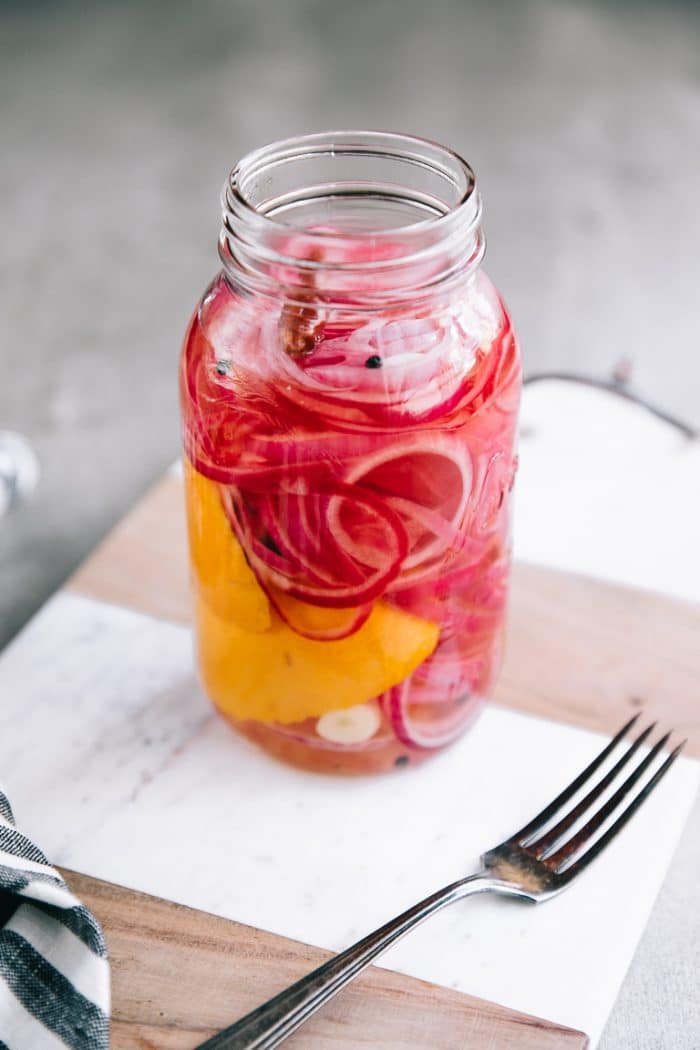
The most versatile and useful quick pickle you can make — thinly sliced red onions soaked in a simple brine of vinegar, sugar, and salt for 30 minutes until they turn a vivid pink and develop a bright, tangy flavour that enhances virtually every dish they touch. Essential for tacos, sandwiches, salads, and grain bowls. A wonderful addition to our best pickle recipes.
Ingredients:
- 1 large red onion, very thinly sliced into rounds or half-moons
- ¾ cup red wine vinegar or apple cider vinegar
- ¾ cup warm water
- 1 tablespoon sugar
- 1½ teaspoons salt
- Optional: 1 clove garlic and ½ teaspoon black peppercorns
Instructions:
- Slice the red onion as thinly as possible — a mandoline is ideal but a sharp knife works well. Pack the sliced onion into a clean glass jar or container.
- Whisk together the vinegar, warm water, sugar, and salt until the sugar and salt completely dissolve. Add garlic and peppercorns if using.
- Pour the brine over the onions, pressing them down to ensure they are fully submerged. Cool to room temperature.
- For quick pickles, let sit at room temperature for 30 minutes — the onions will turn pink almost immediately. For the best flavour, refrigerate overnight. Store refrigerated for up to 2–3 weeks.
19. Refrigerator Dill Zucchini Pickles
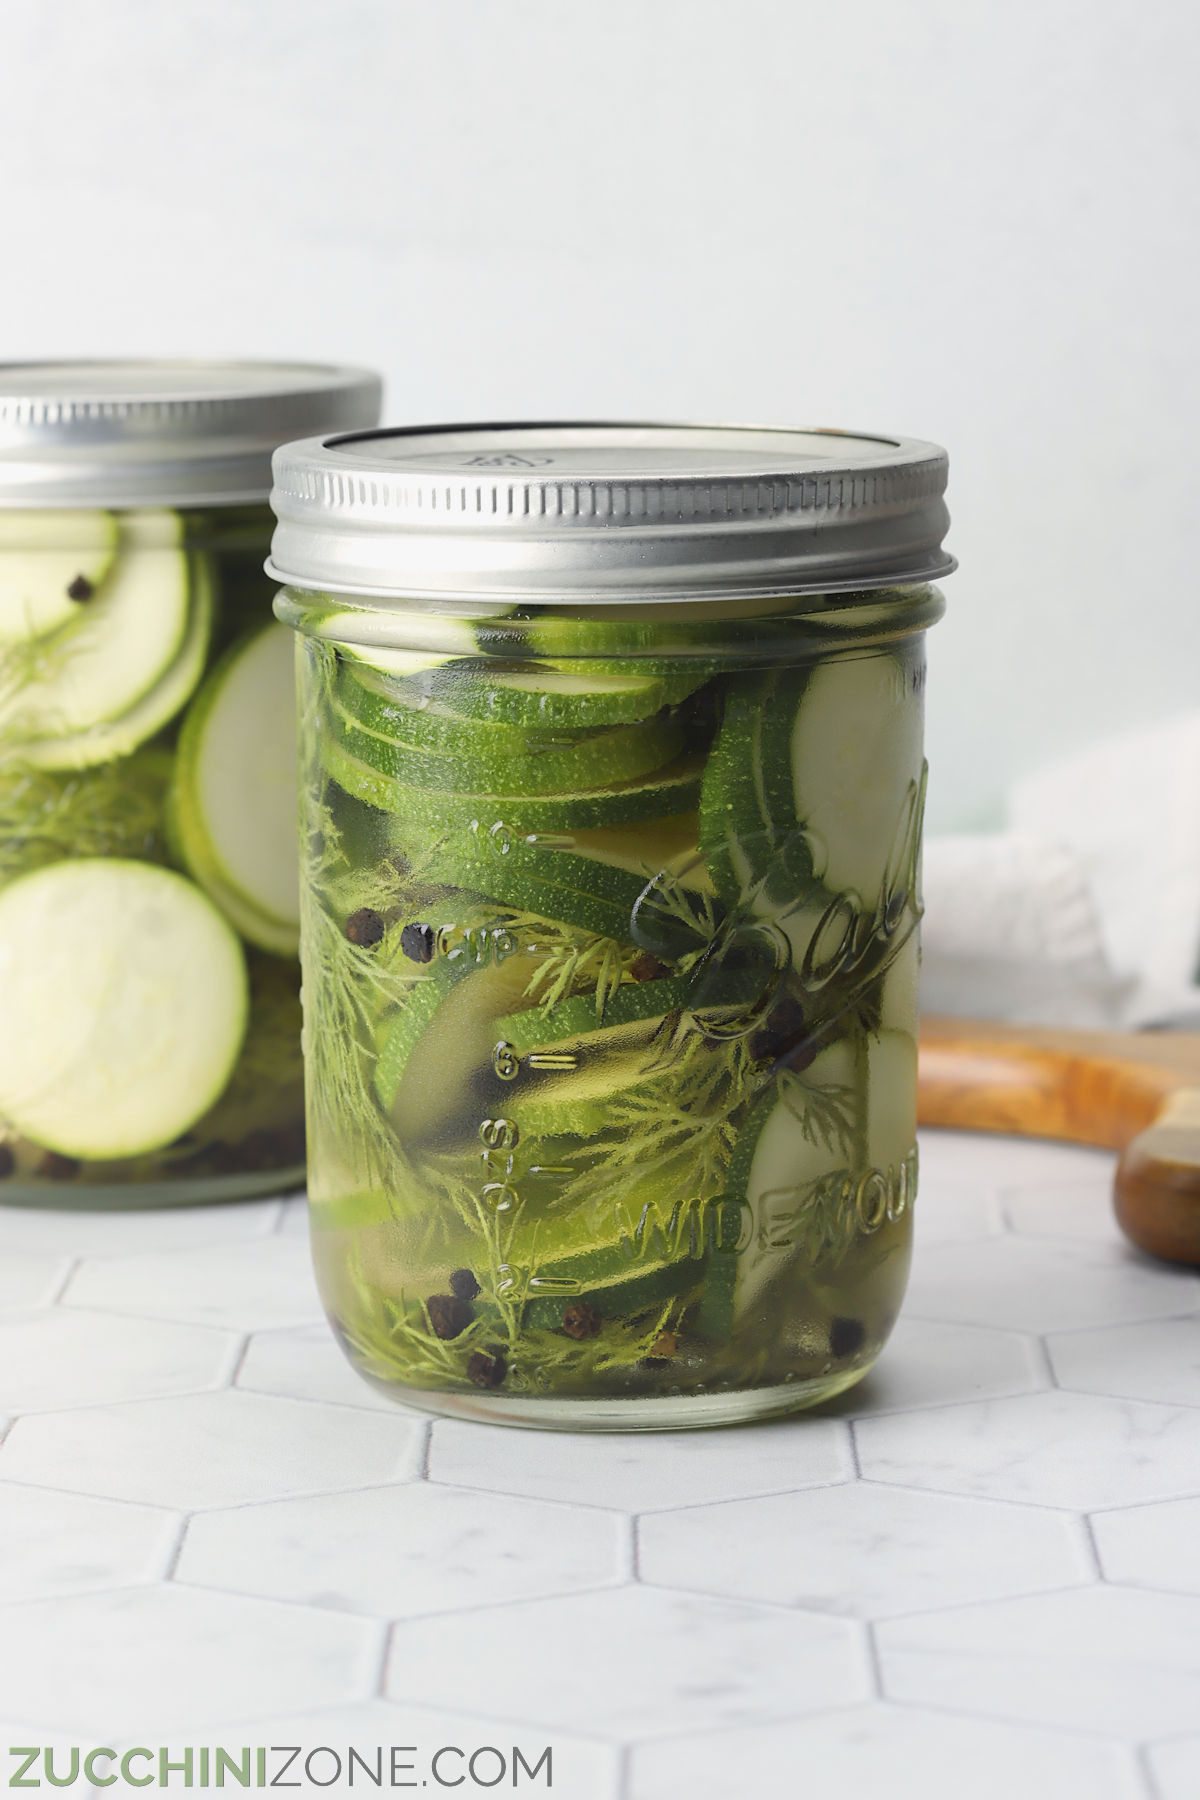
A brilliant no-cook, no-canning way to use up a glut of summer zucchini — thinly sliced zucchini with fresh dill, garlic, and peppercorns soaked in a tangy dill brine until perfectly crunchy and flavourful. Ready in just 10 minutes of prep and stores in the fridge for up to two months. A wonderful addition to our best zucchini recipes.
Ingredients:
- 2 medium zucchini, sliced into ¼-inch rounds or spears
- 1 cup white vinegar
- 1 cup water
- 1 tablespoon salt
- 1 tablespoon sugar
- 3 cloves garlic, smashed
- 4 sprigs fresh dill (or 1 tablespoon dried dill)
- 1 teaspoon black peppercorns
- ½ teaspoon mustard seeds (optional)
Instructions:
- Pack the sliced zucchini tightly into clean glass jars. Add the garlic, fresh dill, peppercorns, and mustard seeds to the jar.
- Combine the vinegar, water, salt, and sugar in a saucepan. Bring to a boil, stirring until the salt and sugar dissolve. Remove from heat and cool for 5 minutes.
- Pour the warm brine over the zucchini, ensuring the vegetables are completely submerged.
- Cool to room temperature, then seal and refrigerate. The pickles are ready to eat after 24 hours and are best after 48 hours. Store refrigerated for up to 2 months.
18. Classic Pickled Beets
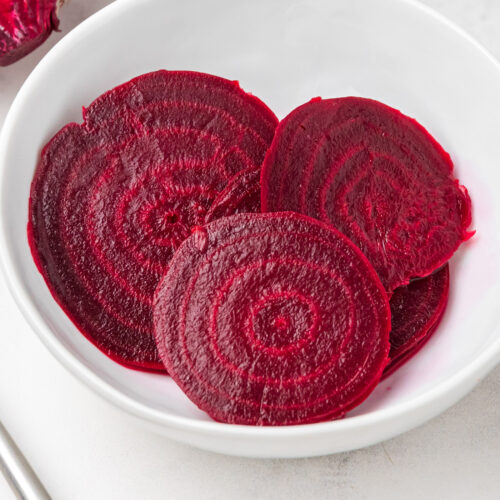
A classic, no-fuss pickled beet recipe — roasted or canned beets preserved in a sweet and tangy spiced vinegar brine with no pressure canning required. Beautiful as a snack, on salads, or alongside any meal. Stores in the refrigerator for up to six weeks. A wonderful addition to our best preserves recipes.
Ingredients:
- 2 lbs fresh beets (roasted, peeled, and sliced) or 2 (15 oz) cans sliced beets, drained
- 1 cup white vinegar or apple cider vinegar
- ½ cup water
- ½ cup sugar
- 1 teaspoon salt
- ½ teaspoon whole cloves
- ½ teaspoon whole allspice berries
- 1 cinnamon stick
Instructions:
- If using fresh beets: wrap in foil and roast at 400°F for 45–60 minutes until tender. Cool, peel, and slice into rounds or wedges. If using canned beets, simply drain them.
- Combine the vinegar, water, sugar, salt, cloves, allspice, and cinnamon stick in a saucepan. Bring to a boil, stirring until the sugar dissolves. Simmer 5 minutes. Remove the cinnamon stick.
- Pack the beet slices into clean glass jars. Pour the hot spiced brine over the beets, ensuring they are fully submerged.
- Cool to room temperature, then seal and refrigerate. The pickled beets are ready after 24 hours and flavour deepens over several days. Store refrigerated for up to 6 weeks.
17. Refrigerator Dill Pickles

The best homemade dill pickles you can make without any canning equipment — fresh cucumbers packed with dill, garlic, and peppercorns in a classic dill pickle brine that creates perfectly crunchy, tangy pickles that keep refrigerated for up to a month. A wonderful addition to our best pickle recipes.
Ingredients:
- 4–5 medium pickling cucumbers, sliced into spears or rounds
- 1½ cups white vinegar
- 1½ cups water
- 2 tablespoons salt (non-iodised pickling salt works best)
- 1 tablespoon sugar
- 4 cloves garlic, smashed
- 6 sprigs fresh dill
- 1 teaspoon black peppercorns
- ½ teaspoon red chilli flakes (optional)
- ½ teaspoon mustard seeds
Instructions:
- Place the garlic, dill, peppercorns, mustard seeds, and chilli flakes in the bottom of clean glass jars. Pack the cucumber spears or rounds tightly into the jars over the aromatics.
- Combine the vinegar, water, salt, and sugar in a saucepan. Bring to a boil, stirring until the salt and sugar completely dissolve. Cool for 10 minutes.
- Pour the warm brine over the cucumbers, ensuring they are completely submerged. Press down to remove any air pockets.
- Cool to room temperature, then seal and refrigerate. The pickles are ready after 24 hours but are best after 48–72 hours. Store refrigerated for up to 1 month.
16. Homemade-Taste from Store-Bought Pickles

A brilliant shortcut that transforms an ordinary jar of store-bought dill pickles into something that tastes genuinely homemade — the store-bought brine is replaced with a sweet and tangy custom brine that completely revamps the flavour. Zero effort, extraordinary results. A wonderful addition to our best pickle recipes.
Ingredients:
- 1 large jar store-bought dill pickles (whole or spears)
- 1 cup sugar
- ½ cup white vinegar
- ¼ cup water
- 1 teaspoon red chilli flakes (optional, for a sweet-spicy version)
- 3 cloves garlic, smashed
- ½ teaspoon celery seed
Instructions:
- Drain the store-bought pickles completely and discard all the original brine. Return the pickles to the jar along with the smashed garlic.
- Combine the sugar, white vinegar, water, chilli flakes, and celery seed in a saucepan. Heat over medium heat, stirring until the sugar completely dissolves. Do not boil. Cool for 5 minutes.
- Pour the new sweet brine over the pickles in the jar. The brine should cover the pickles — if not, add a splash more vinegar and water.
- Seal and refrigerate for at least 24 hours, turning the jar occasionally. The pickles will absorb the new brine and develop an entirely different, more complex flavour. Store refrigerated for up to 3 months.
15. Candied Jalapeños (Cowboy Candy)
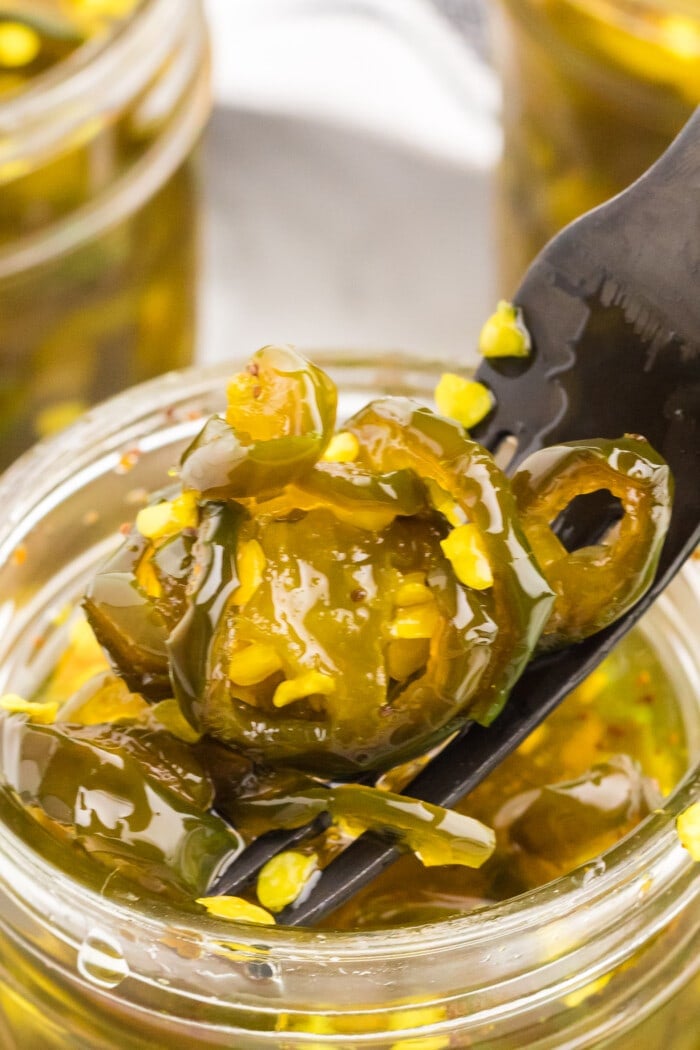
The most irresistible condiment you will ever make — fresh jalapeño rounds simmered in a sticky, sweet apple cider vinegar and sugar syrup until perfectly glazed and intensely flavourful. Sweet, hot, and completely addictive on everything from cream cheese and crackers to burgers, tacos, and sandwiches. Cowboy Candy is a revelation. A wonderful addition to our best preserves recipes.
Ingredients:
- 1 lb fresh jalapeños, sliced into ¼-inch rounds
- ⅔ cup apple cider vinegar
- 2 cups sugar
- ½ teaspoon turmeric
- ½ teaspoon celery seed
- ½ teaspoon garlic powder
- ¼ teaspoon cayenne pepper
Instructions:
- Combine the apple cider vinegar, sugar, turmeric, celery seed, garlic powder, and cayenne in a large saucepan. Bring to a boil over medium-high heat, stirring until the sugar dissolves. Boil for 5 minutes.
- Add the sliced jalapeños to the boiling syrup and stir to coat. Return to a simmer and cook for exactly 4 minutes — no longer, or the jalapeños will become too soft.
- Using a slotted spoon, transfer the jalapeños into clean glass jars. Return the syrup to a boil and cook for 6–8 more minutes until it reduces and thickens slightly.
- Pour the reduced syrup over the jalapeños in the jars. Cool to room temperature, then seal and refrigerate for at least 1 week before eating for the best flavour. Store refrigerated for up to 2 months.
14. Mexican Pickled Onions
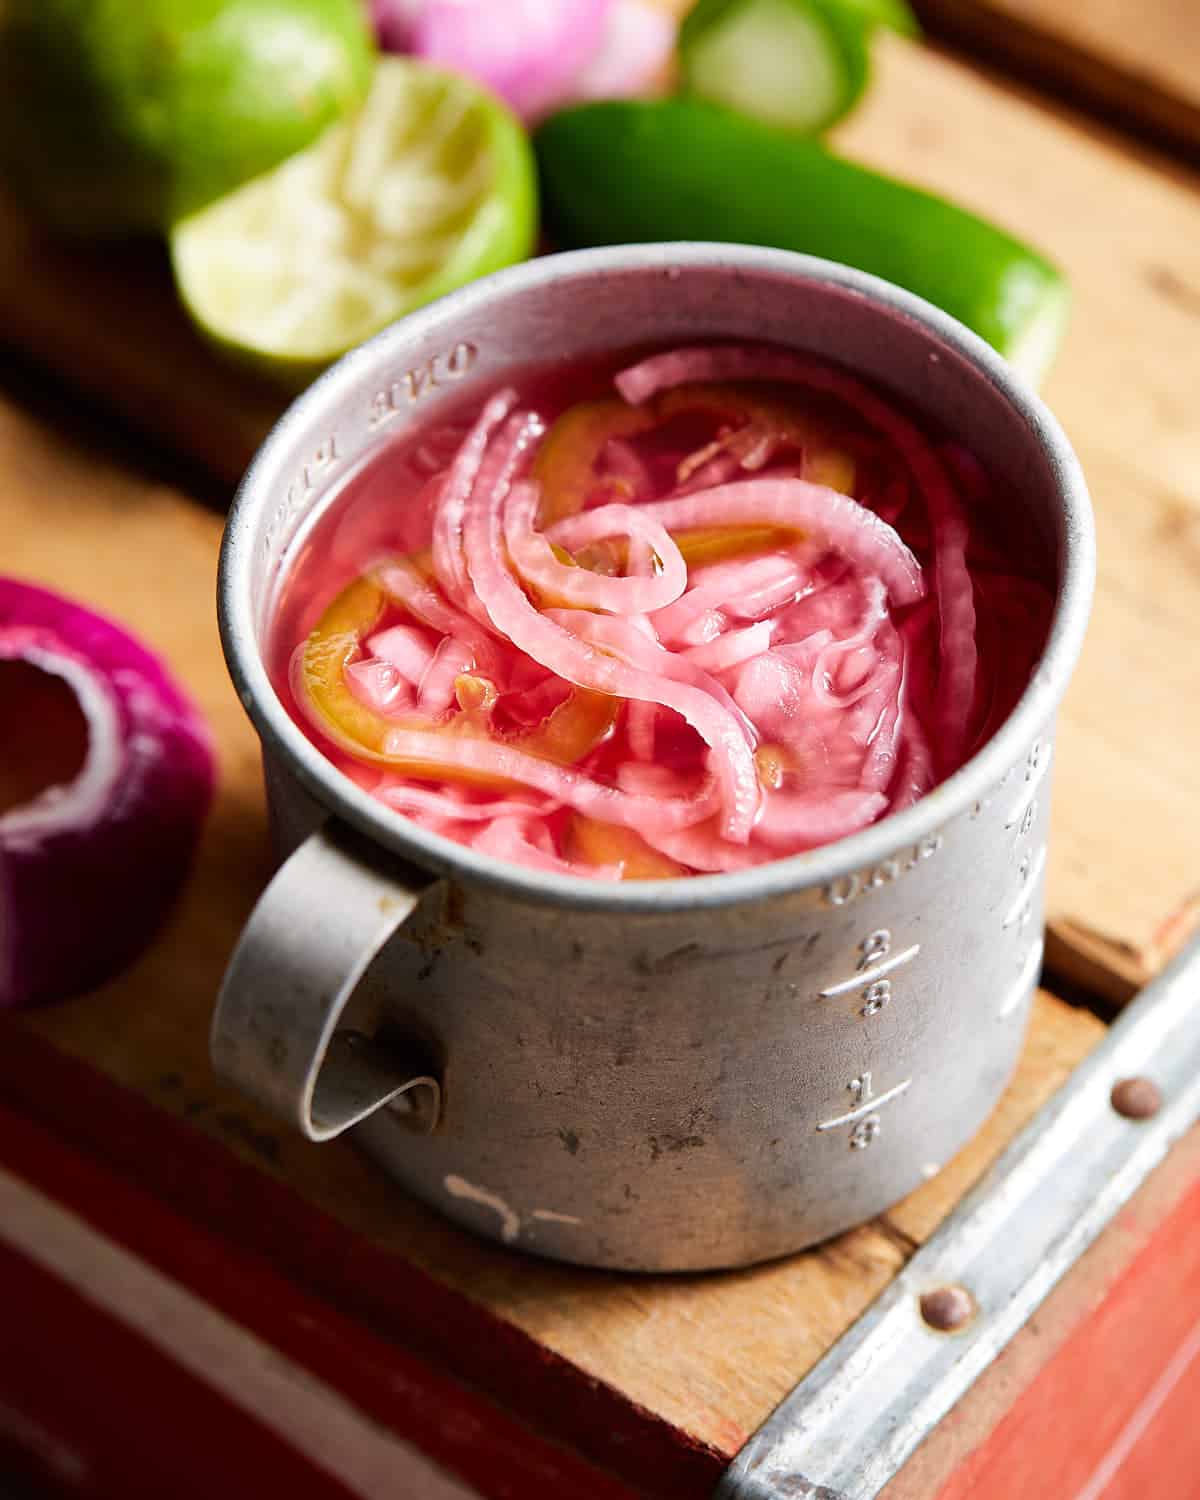
The essential Mexican condiment — red onions pickled with lime juice and jalapeño into a bright pink, tangy, and lightly spicy topping that is completely transformative on tacos, sandwiches, grain bowls, and salads. Ready in just 30 minutes with three ingredients. A wonderful addition to our best Mexican recipes.
Ingredients:
- 1 large red onion, very thinly sliced
- Juice of 3 limes (about ⅓ cup)
- 2 tablespoons apple cider vinegar
- 1 teaspoon salt
- ½ teaspoon sugar
- 1 jalapeño, thinly sliced
- 1 clove garlic, minced
- Fresh oregano or cilantro (optional)
Instructions:
- Slice the red onion as thinly as possible. To reduce the sharpness, submerge the sliced onion in boiling water for 10 seconds, then drain immediately — this softens the bite while keeping the crunch.
- Pack the blanched onion slices and sliced jalapeño into a clean jar.
- Combine the lime juice, apple cider vinegar, salt, and sugar. Stir until the salt and sugar dissolve. Pour over the onions. Add the garlic and herbs if using.
- Let sit at room temperature for 30 minutes — the onions will begin turning pink almost immediately. For the best flavour, refrigerate overnight. Store refrigerated for 2–3 weeks.
13. Quick Pickled Jalapeños
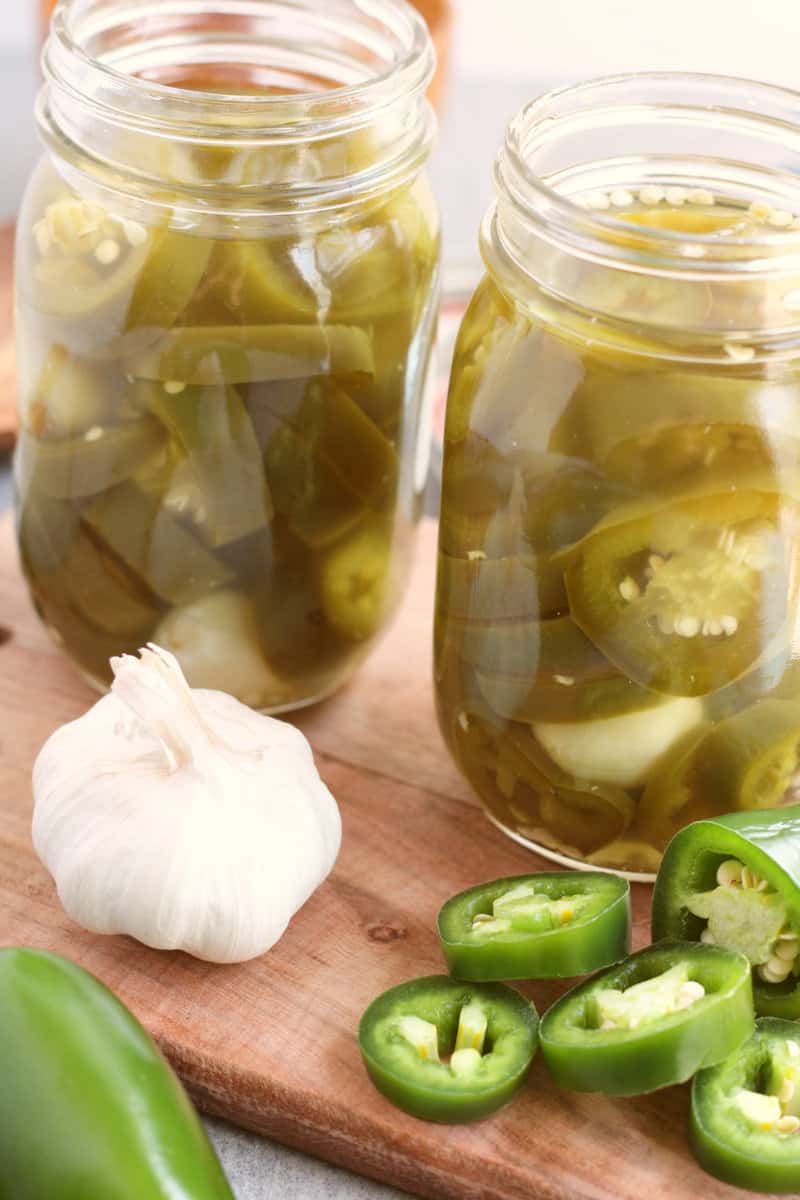
A quick, versatile, and deeply flavourful pickled jalapeño recipe — sliced jalapeños in a tangy, lightly sweet vinegar brine with garlic, ready in under 15 minutes and keeping in the refrigerator for months. The definitive topping for tacos, burgers, sandwiches, nachos, and pizza. A wonderful addition to our best pickle recipes.
Ingredients:
- 10–12 fresh jalapeños, sliced into rounds
- 1 cup distilled white vinegar
- 1 cup water
- 1 tablespoon sugar
- 2 teaspoons salt
- 4 cloves garlic, smashed
- 1 teaspoon black peppercorns
Instructions:
- Slice the jalapeños into ¼-inch rounds. Pack tightly into clean glass jars with the smashed garlic and peppercorns.
- Combine the white vinegar, water, sugar, and salt in a saucepan. Bring to a boil over medium heat, stirring until the sugar and salt dissolve completely.
- Pour the hot brine over the jalapeños, ensuring they are fully submerged. Press down with a spoon to remove any air pockets.
- Cool to room temperature, then seal and refrigerate. Ready to eat in as little as 30 minutes for a quick pickle, or 24 hours for the best flavour. Store refrigerated for up to 2 months.
12. Heirloom Cherry Tomato Confit
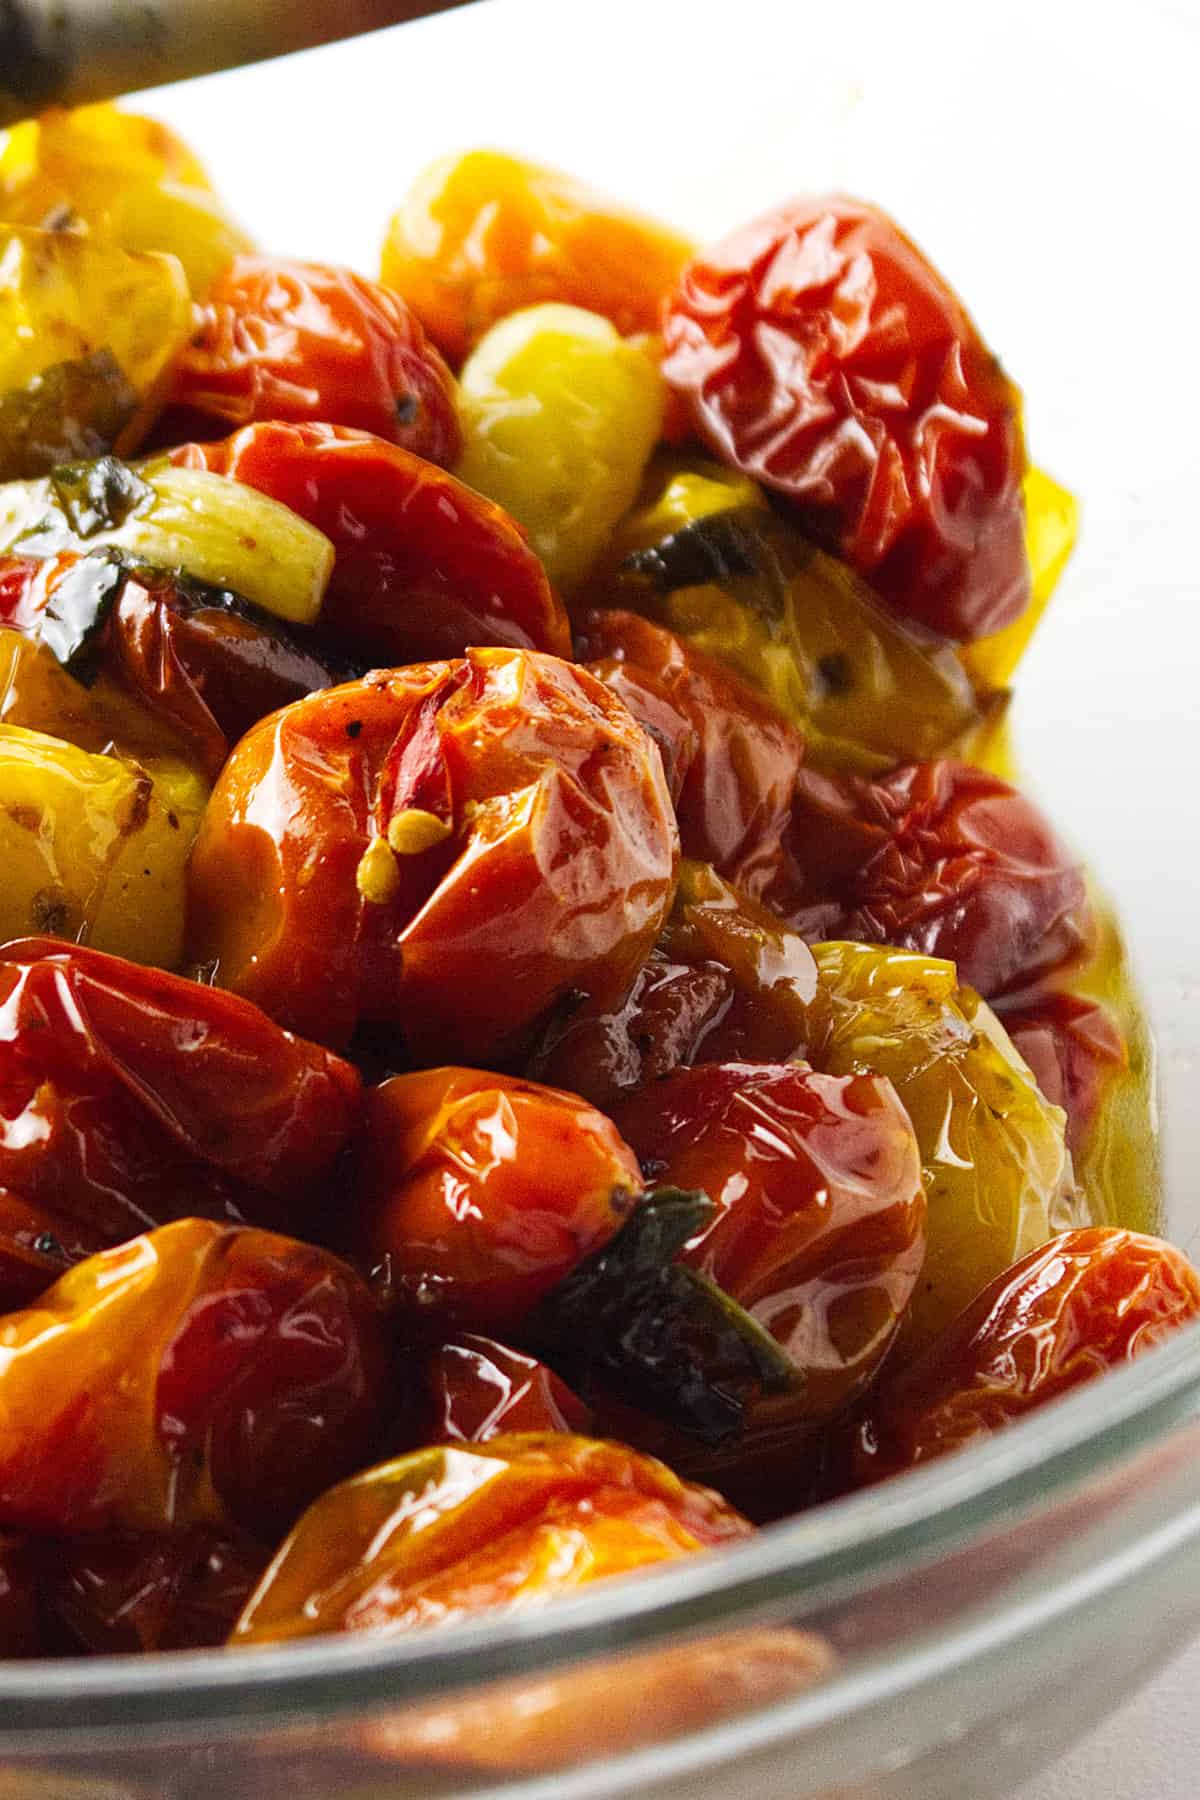
One of the finest things you can make with summer tomatoes — heirloom cherry tomatoes slow-cooked in olive oil with garlic, fresh basil, and a drizzle of balsamic until they are jammy, sweet, and deeply concentrated in flavour. Spread on pasta, pizza, crostini, or straight from the jar. Keeps refrigerated for one month. A wonderful addition to our best preserves recipes.
Ingredients:
- 2 lbs heirloom cherry tomatoes, mixed colours
- ½ cup good extra-virgin olive oil
- 6 cloves garlic, smashed
- 6 sprigs fresh thyme or rosemary
- 8 fresh basil leaves
- 1 tablespoon balsamic vinegar
- 1 teaspoon sugar
- Salt and black pepper, to taste
- ½ teaspoon red chilli flakes (optional)
Instructions:
- Preheat oven to 300°F. Place the cherry tomatoes in a single layer in a baking dish or oven-safe skillet. Nestle the garlic and herb sprigs among the tomatoes.
- Drizzle the olive oil and balsamic vinegar over everything. Sprinkle with sugar, salt, pepper, and chilli flakes. Toss gently to coat.
- Roast for 1.5–2 hours until the tomatoes have collapsed, are deeply caramelised, and the oil is fragrant and infused with all the aromatics. The tomatoes should be jammy but not completely falling apart.
- Cool slightly. Add fresh basil leaves. Transfer to a clean jar and cover with all the infused oil — the oil must cover the tomatoes completely to preserve them. Store refrigerated for up to 1 month. Bring to room temperature before serving.
11. Marinated Feta Cheese
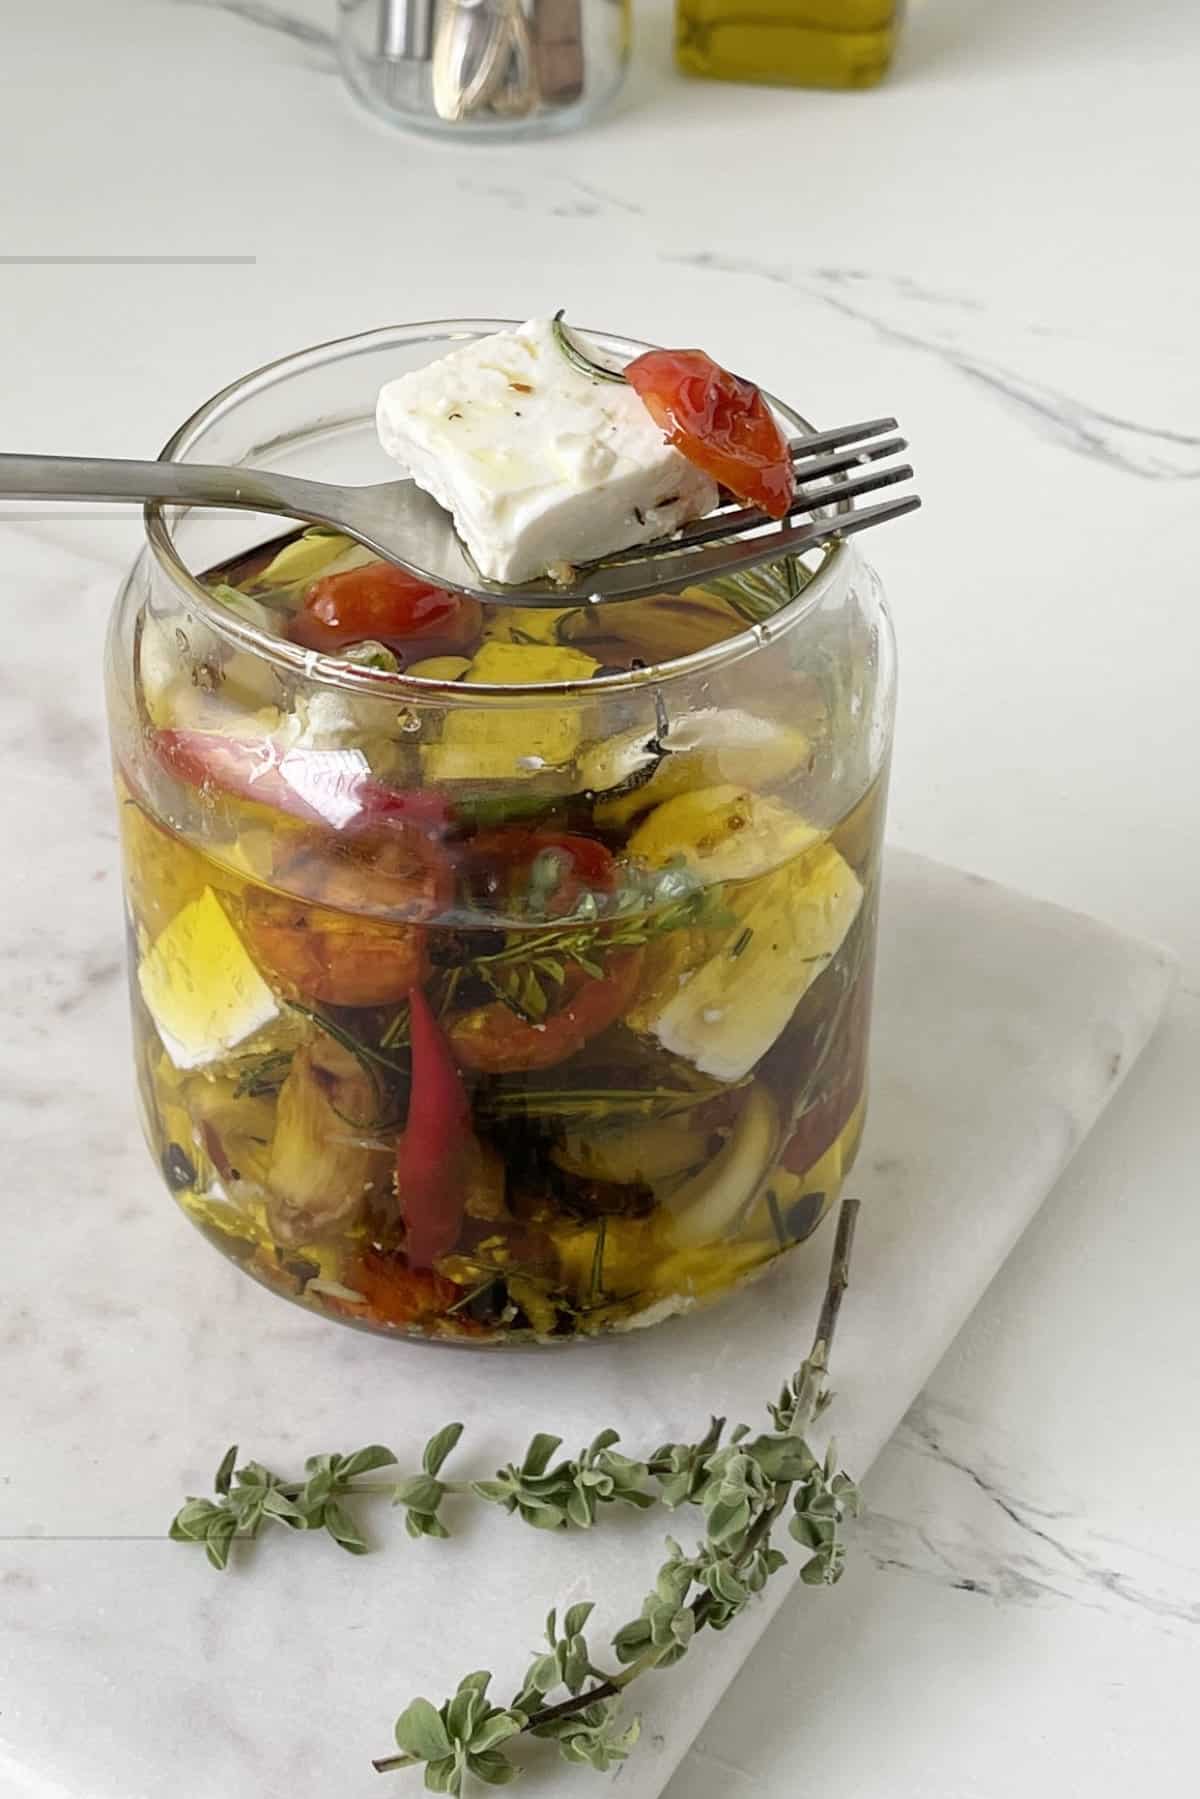
An effortless, stunning appetizer that looks far more impressive than the minimal effort involved — cubed feta cheese marinated in olive oil with sun-dried tomatoes, garlic, fresh herbs, and warming spices for at least 24 hours until the cheese absorbs all the flavours. Served with crackers and bread as part of a charcuterie board or meze platter. A wonderful addition to our best appetizer ideas.
Ingredients:
- 8 oz good quality feta cheese, cut into 1-inch cubes
- ¾ cup good extra-virgin olive oil
- 4 cloves garlic, thinly sliced
- ¼ cup sun-dried tomatoes, roughly chopped
- 6 sprigs fresh thyme
- 1 tablespoon fresh rosemary, roughly chopped
- 1 teaspoon black peppercorns
- ½ teaspoon red chilli flakes
- Zest of ½ lemon
Instructions:
- Place the feta cubes in a clean glass jar or airtight container. Add the garlic slices, sun-dried tomatoes, thyme sprigs, rosemary, peppercorns, chilli flakes, and lemon zest.
- Pour the olive oil over everything — the feta should be completely submerged in oil. The oil preserves the cheese and becomes infused with extraordinary flavour.
- Seal and refrigerate for at least 24 hours — 48–72 hours gives the deepest, most developed flavour. The feta softens slightly and the oil becomes fragrant and complex.
- Bring to room temperature for 30 minutes before serving — the oil solidifies when cold. Serve with crusty bread, crackers, and fresh vegetables. Store refrigerated for up to 2 weeks.
10. Easy Pickled Radishes
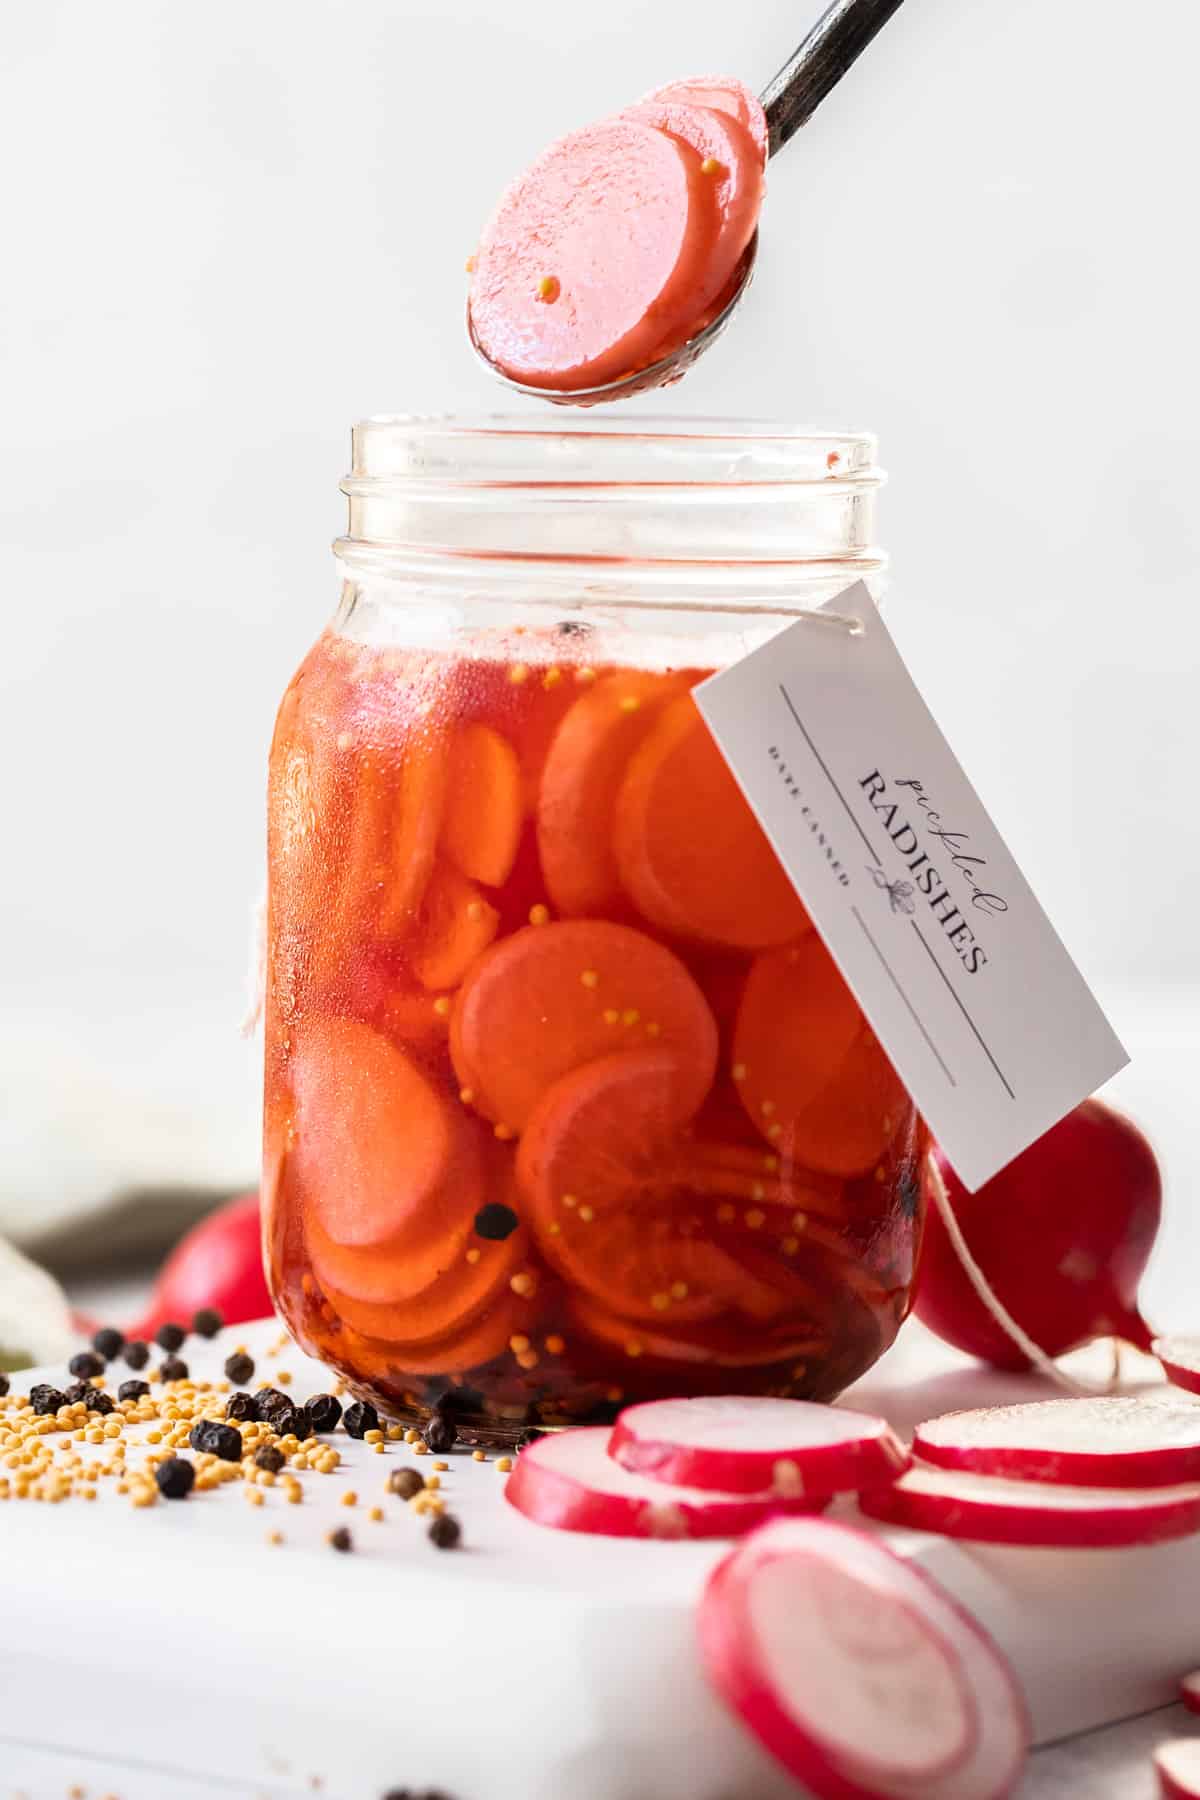
A quick and completely beautiful quick pickle — thinly sliced radishes soak in a tangy, lightly sweet brine and turn a vivid, jewel-like pink within hours. Crunchy, bright, and versatile — they add colour, crunch, and flavour to tacos, grain bowls, salads, and charcuterie boards. Stores refrigerated for up to three weeks. A wonderful addition to our best pickle recipes.
Ingredients:
- 1 bunch fresh radishes (about 8–10), very thinly sliced into rounds
- ½ cup white vinegar or rice vinegar
- ½ cup warm water
- 1 tablespoon sugar
- 1 teaspoon salt
- Optional additions: 1 clove garlic (sliced), ½ teaspoon peppercorns, ½ teaspoon coriander seeds
Instructions:
- Slice the radishes as thinly as possible using a mandoline or sharp knife — thin slices pickle faster and have the best texture.
- Pack the sliced radishes into a clean glass jar with any optional additions.
- Whisk together the vinegar, warm water, sugar, and salt until the sugar and salt completely dissolve.
- Pour the brine over the radishes. They will begin turning pink within minutes. Cool to room temperature, then seal and refrigerate. Ready to eat after 1 hour, best after 24 hours. Store refrigerated for up to 3 weeks.
9. Quick Pickled Serrano Peppers
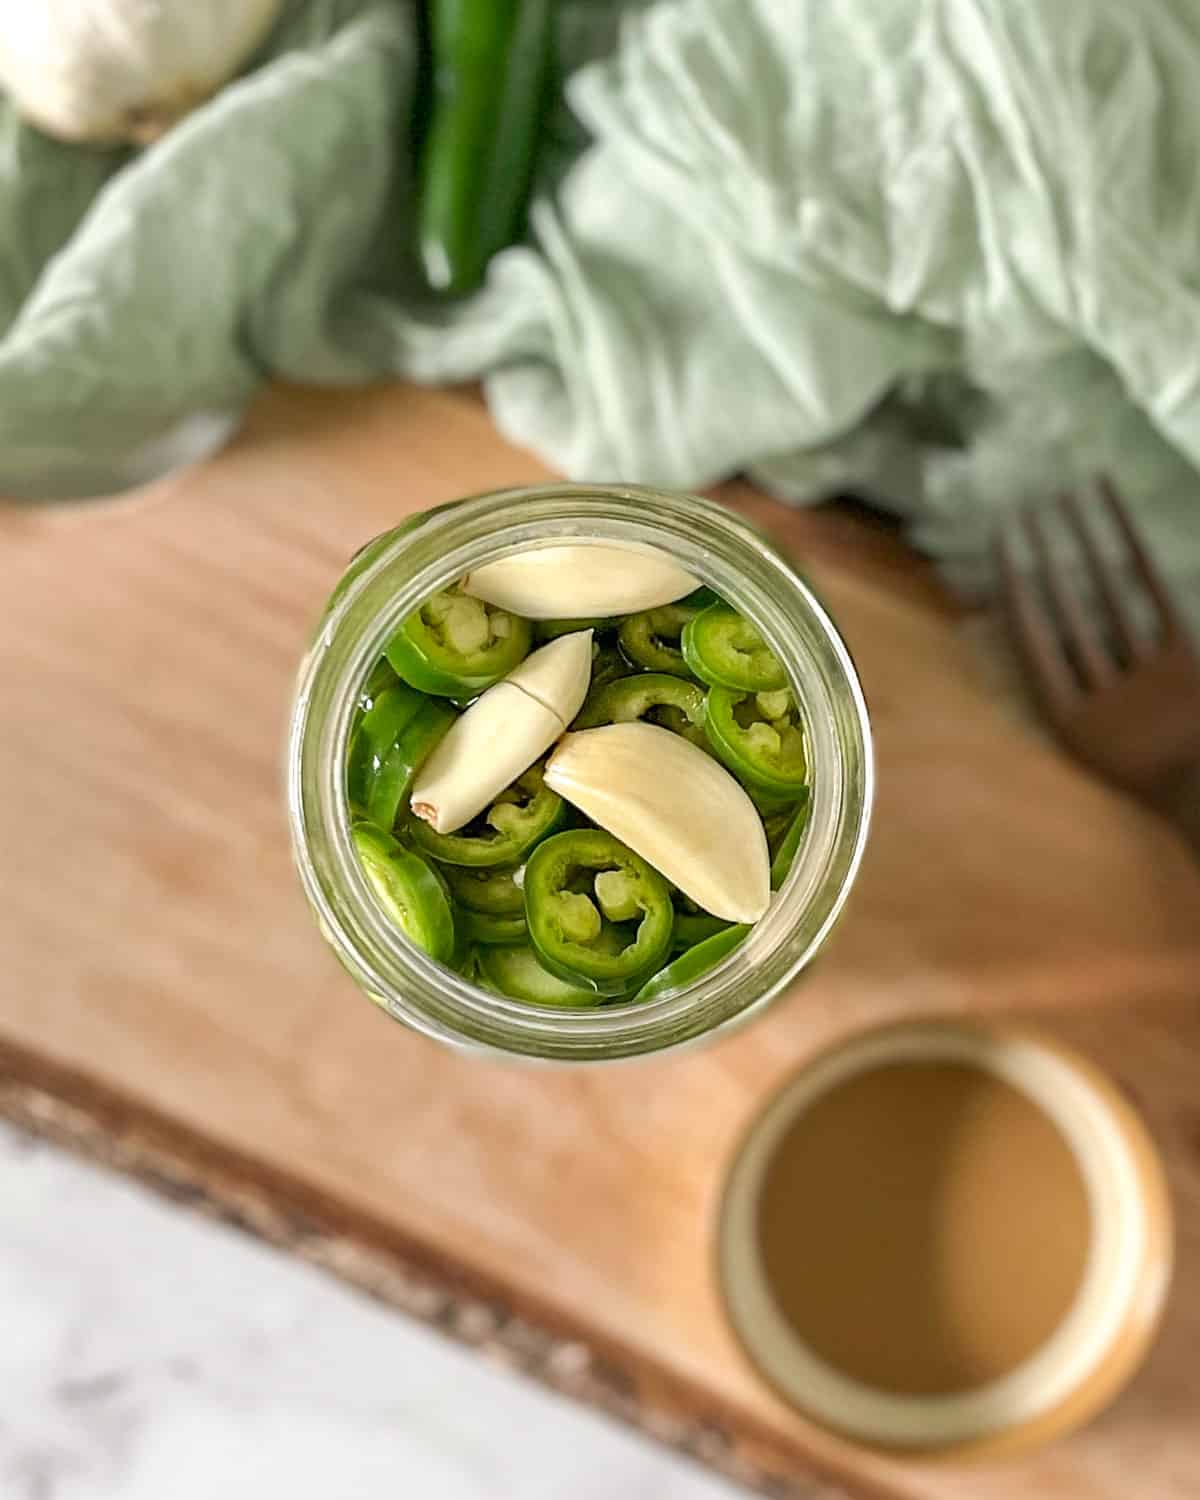
A fiery, tangy, and completely addictive pickled pepper — serrano peppers sliced and soaked in a flavourful brine of vinegar, sugar, and garlic until perfectly sharp and spicy. Serranos are hotter than jalapeños and create a more intensely spiced pickle that is perfect for Mexican food, sandwiches, and anywhere you want a bold hit of heat. A wonderful addition to our best pickle recipes.
Ingredients:
- 10–12 fresh serrano peppers, sliced into rounds
- ¾ cup white vinegar
- ¾ cup water
- 1 tablespoon sugar
- 1½ teaspoons salt
- 3 cloves garlic, smashed
- ½ teaspoon black peppercorns
- ½ teaspoon cumin seeds (optional)
Instructions:
- Slice the serrano peppers into ¼-inch rounds. Handle carefully and avoid touching your eyes — serranos are significantly hotter than jalapeños. Pack tightly into a clean glass jar with the smashed garlic and spices.
- Combine the white vinegar, water, sugar, and salt in a small saucepan. Bring to a boil, stirring until the sugar and salt dissolve. Remove from heat and cool for 5 minutes.
- Pour the brine over the serrano peppers. The peppers should be completely submerged.
- Cool to room temperature. Seal and refrigerate for at least 30 minutes for quick pickles, or 24 hours for fully developed flavour. Store refrigerated for up to 2 weeks.
8. Easy Pickled Pineapple

A completely unexpected and extraordinary condiment — fresh pineapple cubes pickled in a tangy apple cider vinegar and lime brine with jalapeños for a sweet-sour-spicy topping that is sensational on fish tacos, pulled pork, grilled chicken, and avocado toast. A wonderful addition to our best Mexican recipes.
Ingredients:
- 2 cups fresh pineapple, cut into 1-inch pieces
- ½ cup apple cider vinegar
- ½ cup warm water
- 2 tablespoons sugar
- 1 teaspoon salt
- Juice of 1 lime
- 1 jalapeño, thinly sliced
- ¼ teaspoon red chilli flakes
- ½ teaspoon cumin seeds (optional)
Instructions:
- Pack the pineapple pieces and sliced jalapeño tightly into a clean glass jar.
- Whisk together the apple cider vinegar, warm water, sugar, salt, and lime juice until the sugar and salt dissolve completely. Add the chilli flakes and cumin seeds.
- Pour the brine over the pineapple. The pineapple should be completely submerged — press down gently.
- Cool to room temperature, then seal and refrigerate. The pickled pineapple is ready after 2 hours but is best after 24 hours when the flavours have fully developed. Store refrigerated for up to 2 weeks.
7. Easiest Pickled Beets with Balsamic
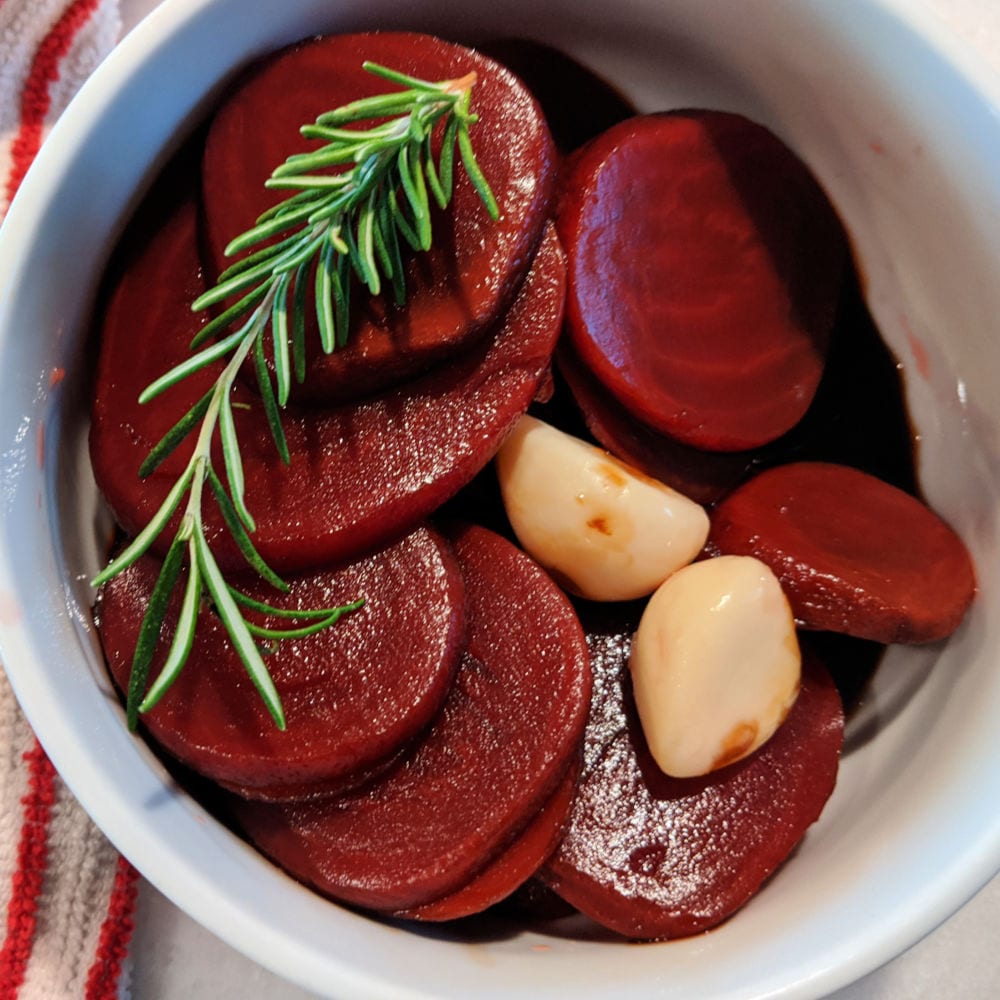
The absolute fastest and most effortless pickled beet recipe — canned beets dressed with aged balsamic vinegar, garlic, and rosemary for a sophisticated, quick pickle that requires only 5 minutes of work and 30 minutes in the refrigerator. No cooking, no canning, no fuss. A wonderful addition to our best preserves recipes.
Ingredients:
- 2 (15 oz) cans whole or sliced beets, drained
- 3 tablespoons aged balsamic vinegar
- 2 tablespoons olive oil
- 1 tablespoon red wine vinegar
- 1 tablespoon sugar
- ½ teaspoon salt
- 2 cloves garlic, thinly sliced
- 1 sprig fresh rosemary
- ½ teaspoon black pepper
Instructions:
- Drain the canned beets and slice if using whole beets. Place in a clean jar or airtight container with the sliced garlic and rosemary sprig.
- Whisk together the balsamic vinegar, olive oil, red wine vinegar, sugar, salt, and black pepper until the sugar dissolves completely.
- Pour the balsamic dressing over the beets. Toss gently to coat all the beets in the dressing.
- Seal and refrigerate for at least 30 minutes before serving. The beets are immediately delicious and improve with overnight refrigeration. Store refrigerated for up to 3 weeks.
6. Pickled Red Cabbage

A beautiful, crunchy, and completely versatile pickled cabbage — thinly shredded red cabbage soaked in a sweet and tangy vinegar brine until it becomes perfectly tender-crisp and brilliantly coloured. A wonderful topping for tacos, burgers, salads, and sandwiches that keeps refrigerated for 2–3 weeks. A wonderful addition to our best pickle recipes.
Ingredients:
- ½ medium red cabbage, very finely shredded (about 4 cups)
- 1 cup red wine vinegar or apple cider vinegar
- ½ cup warm water
- 2 tablespoons sugar
- 1½ teaspoons salt
- 2 cloves garlic, smashed
- ½ teaspoon caraway seeds or fennel seeds (optional)
- ½ teaspoon black peppercorns
Instructions:
- Shred the red cabbage as finely as possible. Place in a large bowl and sprinkle with the salt. Massage the salt into the cabbage for 2 minutes — this helps soften it slightly and draw out moisture.
- Pack the salted cabbage tightly into clean glass jars with the garlic, seeds, and peppercorns.
- Whisk together the vinegar, warm water, and sugar until the sugar dissolves. Pour over the cabbage — the brine should cover it completely. Press down firmly.
- Cool to room temperature, then seal and refrigerate. Ready after 2 hours, best after 24 hours. Store refrigerated for 2–3 weeks.
5. Spicy Pickled Carrots
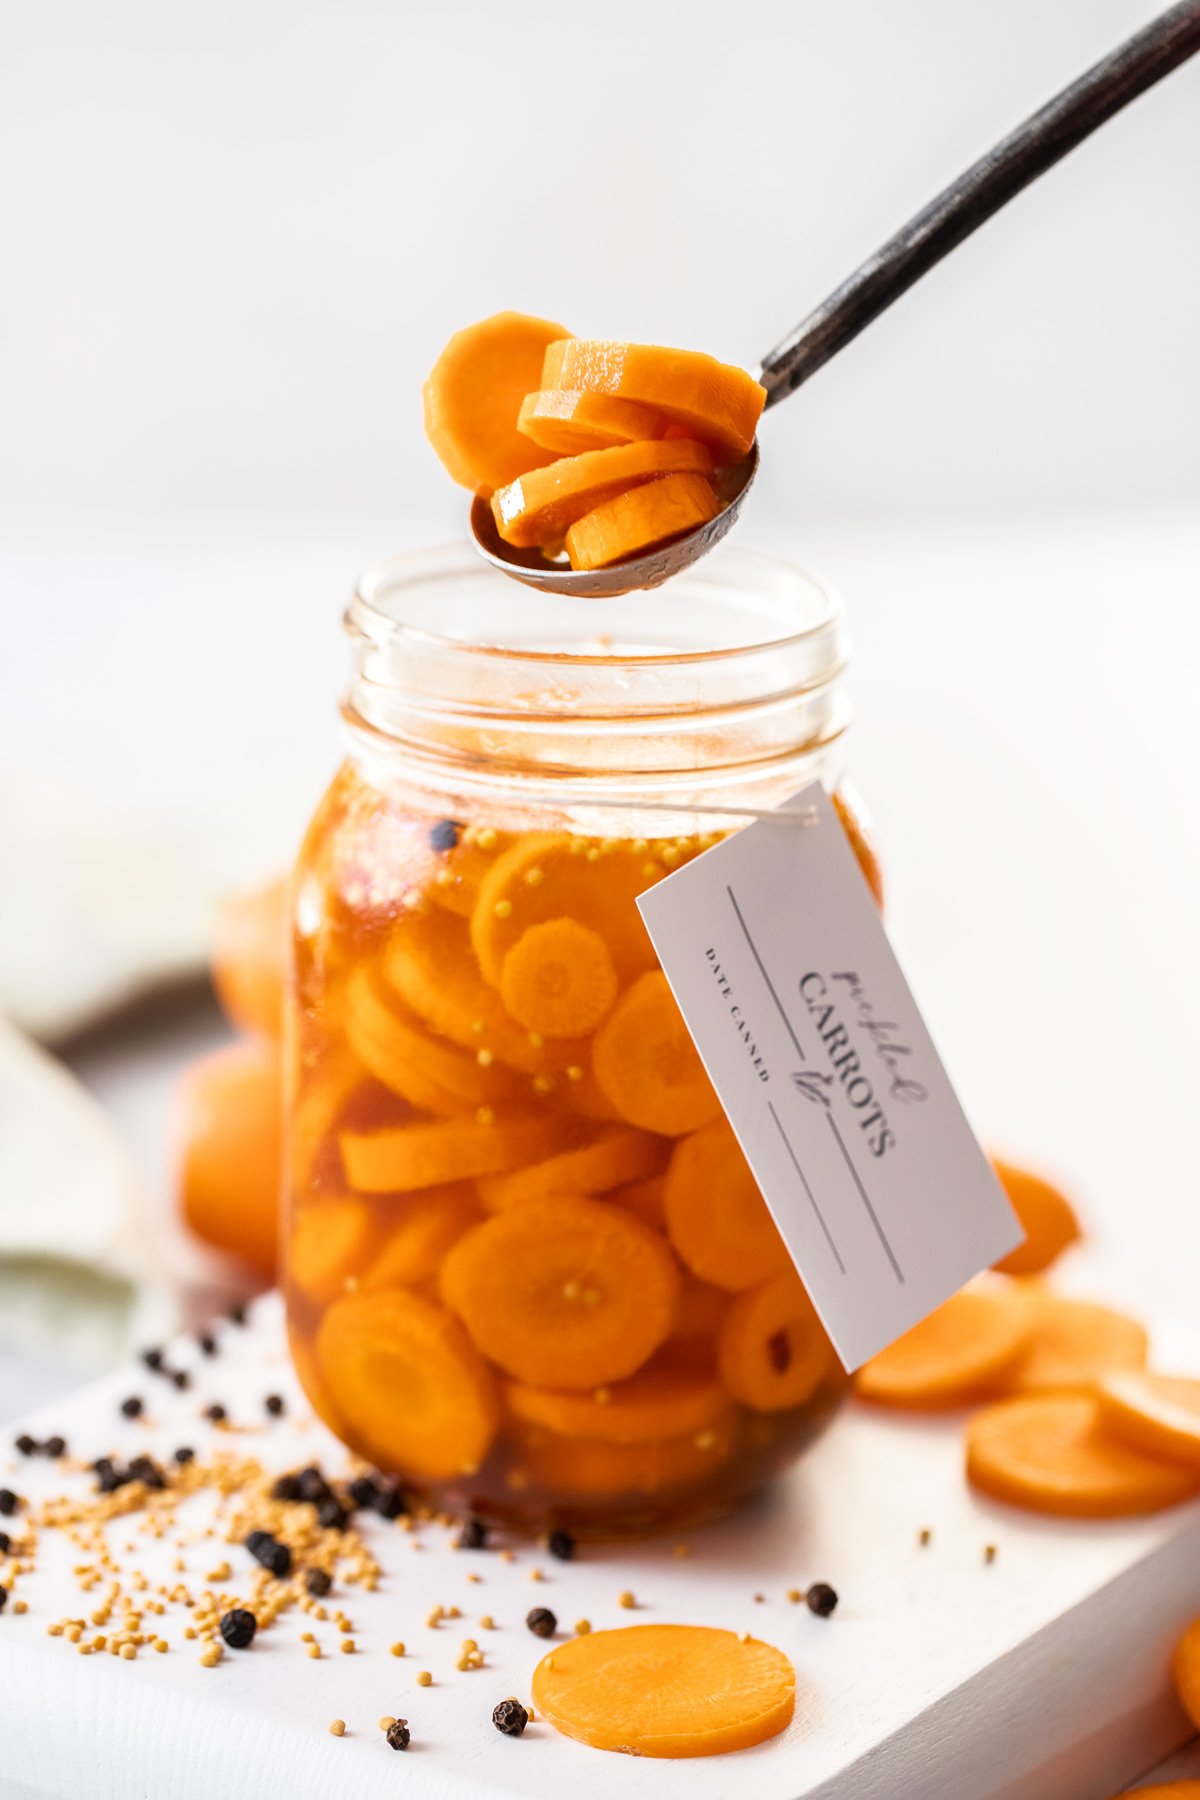
A crunchy, spicy, and deeply satisfying pickled vegetable — carrot rounds or sticks soaked in a zesty vinegar brine with mustard seeds and chilli flakes until perfectly tangy and crisp. Wonderful alongside grilled meats, on burgers and sandwiches, or straight from the jar as a healthy snack. Keeps refrigerated for up to three weeks. A wonderful addition to our best pickle recipes.
Ingredients:
- 4 large carrots, peeled and sliced into rounds or sticks
- 1 cup white vinegar
- 1 cup water
- 2 tablespoons sugar
- 1 tablespoon salt
- 3 cloves garlic, smashed
- 1 teaspoon mustard seeds
- ½ teaspoon red chilli flakes
- ½ teaspoon black peppercorns
- 1 bay leaf
Instructions:
- Pack the sliced carrots tightly into clean glass jars with the garlic, mustard seeds, chilli flakes, peppercorns, and bay leaf.
- Combine the vinegar, water, sugar, and salt in a saucepan. Bring to a boil, stirring until the sugar and salt dissolve completely. Remove from heat and cool 5 minutes.
- Pour the hot brine over the carrots. The carrots should be completely submerged — press down if needed.
- Cool to room temperature, then seal and refrigerate. The pickled carrots need at least 24 hours to develop proper flavour — 48 hours is ideal. Store refrigerated for up to 3 weeks.
4. 30-Minute Refrigerator Zucchini Pickles

An incredibly fast sweet-tangy zucchini pickle ready in just 30 minutes — sliced zucchini in a boldly spiced mustard and turmeric brine that creates a zesty, golden-tinged pickle with beautiful flavour. Perfect for charcuterie boards, sandwiches, and burgers and keeps refrigerated for about one month. A wonderful addition to our easy zucchini recipes.
Ingredients:
- 2 medium zucchini, sliced into ¼-inch rounds
- ½ small onion, thinly sliced
- 1 cup apple cider vinegar
- ½ cup water
- 3 tablespoons sugar
- 1 teaspoon salt
- 1 teaspoon yellow mustard seeds
- ½ teaspoon turmeric
- ½ teaspoon celery seeds
- ¼ teaspoon red chilli flakes
Instructions:
- Pack the sliced zucchini and onion into a clean glass jar.
- Combine the apple cider vinegar, water, sugar, salt, mustard seeds, turmeric, celery seeds, and chilli flakes in a saucepan. Bring to a boil, stirring until the sugar and salt dissolve. Simmer 2 minutes.
- Pour the hot brine over the zucchini and onion, pressing down to ensure they are fully submerged. The turmeric will turn the brine a beautiful golden colour.
- Cool to room temperature. For a 30-minute pickle, leave at room temperature for 30 minutes — the zucchini will have absorbed significant flavour. Seal and refrigerate for up to 1 month for full-flavoured pickles.
3. Sweet and Spicy Refrigerator Pickles
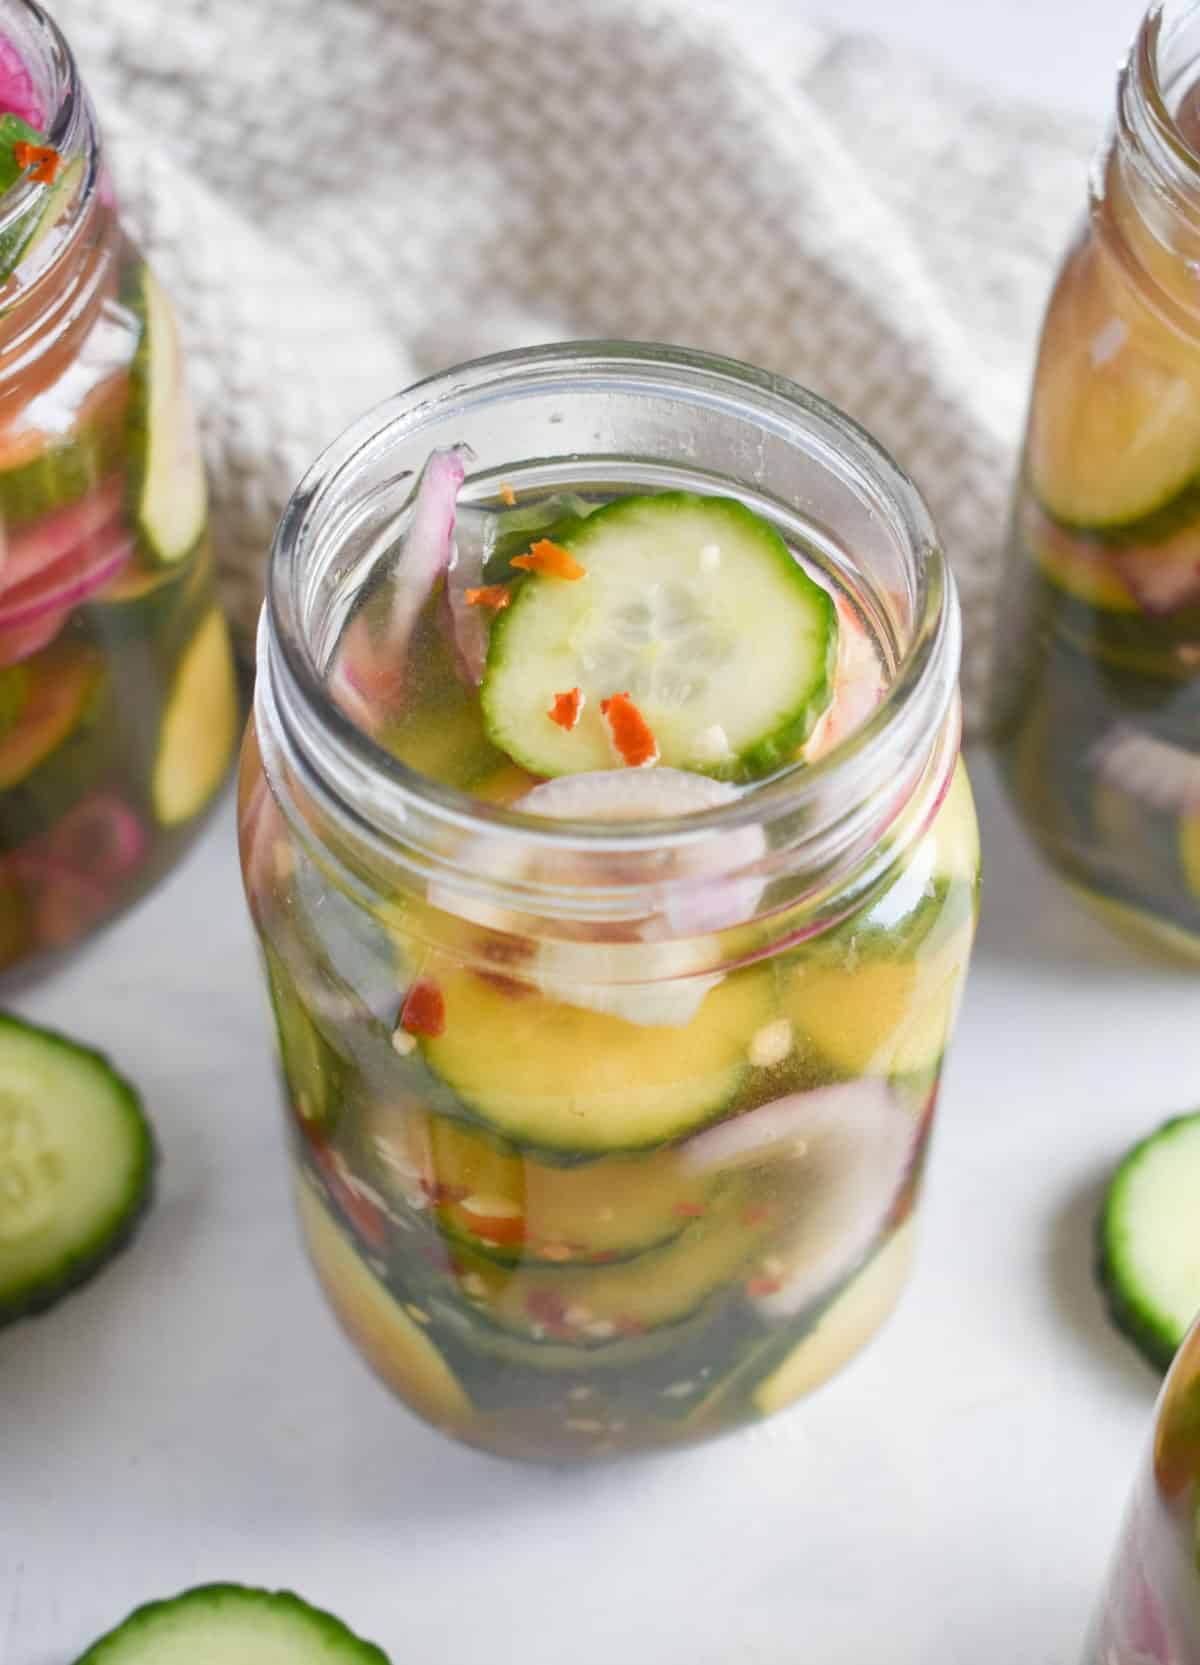
A perfectly balanced sweet-heat refrigerator pickle — cucumber slices soaked in a lightly sweet honey and garlic brine with red chilli flakes for a complex, crunchy pickle that is simultaneously sweet, tangy, and spicy. Ideal for sandwiches, burgers, and grazing boards. Stores refrigerated for up to three months. A wonderful addition to our best pickle recipes.
Ingredients:
- 3–4 cucumbers, sliced into rounds or spears
- 1 cup white vinegar
- 1 cup water
- 3 tablespoons honey (or substitute sugar)
- 1 tablespoon salt
- 4 cloves garlic, smashed
- ½ teaspoon red chilli flakes
- ½ teaspoon black peppercorns
- Fresh dill sprigs (optional)
Instructions:
- Pack the cucumber slices tightly into clean glass jars with the garlic, chilli flakes, peppercorns, and dill if using.
- Combine the white vinegar, water, honey, and salt in a saucepan. Warm over medium heat, stirring until the honey and salt completely dissolve — do not boil honey, just warm until dissolved. Cool for 10 minutes.
- Pour the brine over the cucumbers. The cucumbers should be completely submerged.
- Cool to room temperature, then seal and refrigerate. Ready after 24 hours. Store refrigerated for up to 3 months — the flavour improves significantly over the first week.
2. Quick Easy Pickled Jalapeños
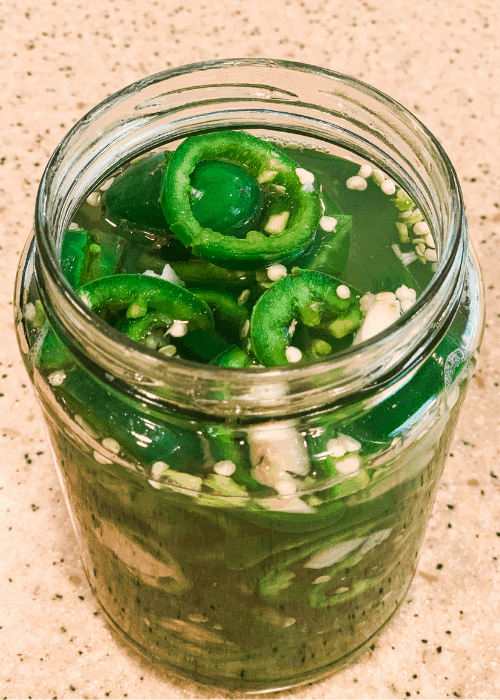
A quick, simple, and completely reliable pickled jalapeño recipe — jalapeño rounds soaked in a tangy, lightly spiced garlic brine for a versatile condiment that takes under 10 minutes to prepare and stores for months. The perfect topping for tacos, burgers, nachos, and pizza. A wonderful addition to our best pickle recipes.
Ingredients:
- 10–15 fresh jalapeños, sliced into ¼-inch rounds
- 1 cup distilled white vinegar
- 1 cup water
- 2 tablespoons sugar
- 1 tablespoon salt
- 3 cloves garlic, smashed
- ½ teaspoon black peppercorns
- ½ teaspoon cumin seeds (optional)
Instructions:
- Slice the jalapeños and pack tightly into clean glass jars with the smashed garlic, peppercorns, and cumin seeds.
- Bring the vinegar, water, sugar, and salt to a boil in a saucepan, stirring until the sugar and salt dissolve. Remove from heat.
- Pour the hot brine directly over the jalapeños, ensuring they are fully submerged. The heat slightly softens the jalapeños while preserving their crunch.
- Cool to room temperature uncovered for 15 minutes, then seal and refrigerate. Ready to eat in 30 minutes as a quick pickle, best after 24 hours when fully flavoured. Store refrigerated for up to 2 months.
1. Fermented Pickles (Without Vinegar)
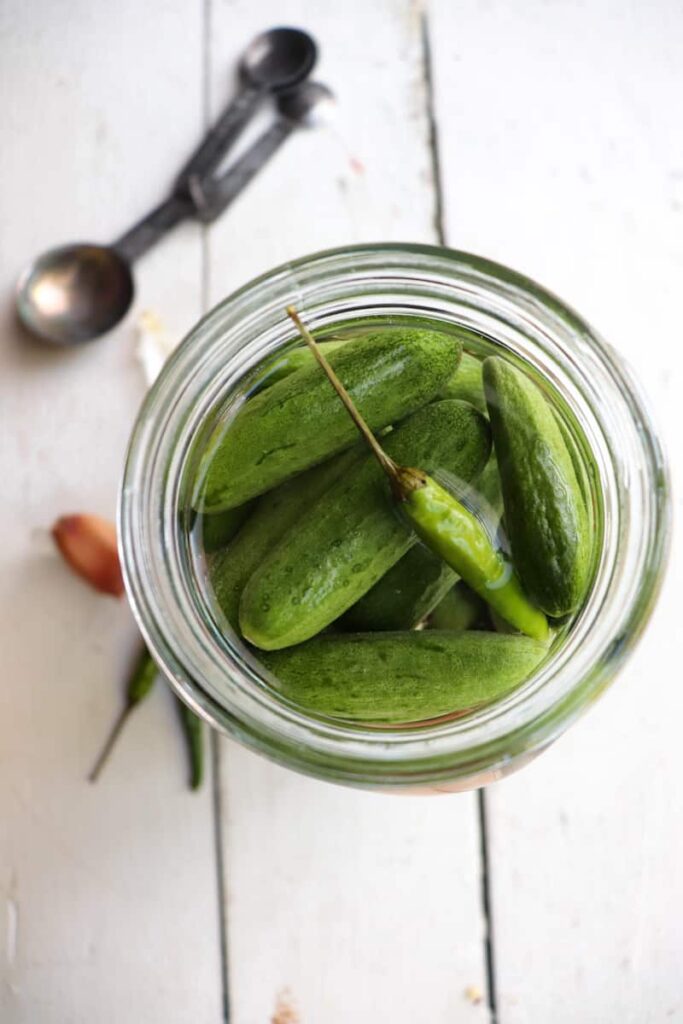
The original pickle — naturally lacto-fermented cucumbers in a simple salt water brine with garlic, dill, and chilli peppers, using only water and salt to create crunchy, probiotic-rich pickles with a complex, naturally sour flavour that no vinegar pickle can replicate. The fermentation takes 3–5 days and the results are extraordinary. A wonderful addition to our best pickle recipes.
Ingredients:
- 1 lb small pickling cucumbers (Kirby variety is ideal)
- 2 cups filtered or non-chlorinated water (tap water with chlorine can inhibit fermentation)
- 1 tablespoon non-iodised salt (pickling salt or kosher salt — iodised salt inhibits fermentation)
- 4 cloves garlic, smashed
- 4 sprigs fresh dill
- 1–2 hot chilli peppers or ½ teaspoon red chilli flakes
- 1 teaspoon black peppercorns
- Optional: 2 oak, grape, or horseradish leaves (natural tannins keep the pickles crisp)
Instructions:
- Dissolve the salt completely in the water to make the brine — stir until no grains remain. Place the optional grape or oak leaves in the bottom of a clean quart jar. Add the garlic, dill, chilli, and peppercorns.
- Pack the cucumbers tightly into the jar, standing upright. They must be completely submerged in the brine — use a small zip-lock bag filled with water to weigh them down if needed. Pour the salt brine over to completely cover. Leave 1 inch of headspace.
- Cover the jar loosely with a lid or cloth to allow gas to escape. Leave at room temperature (65–75°F) for 3–5 days. Taste starting from day 3 — the pickles will be lightly sour and crunchy. The longer they ferment, the more sour and complex they become.
- Once they reach your preferred sourness, seal tightly and transfer to the refrigerator — this stops the fermentation. They will keep refrigerated for 2–3 months and continue developing flavour slowly in the cold.
FAQs
What is the difference between quick pickles and fermented pickles?
Quick pickles (also called refrigerator pickles) use vinegar as the preserving acid — the vegetables are submerged in a ready-made acidic brine and become pickled through direct contact with the acid, usually within hours to days. They are fast, reliable, and very consistent in flavour. Fermented pickles (like the lacto-fermented recipe above) use no vinegar at all — instead, naturally occurring bacteria on the vegetables and in the environment convert the vegetable sugars into lactic acid through fermentation over 3–7 days. The resulting flavour is more complex, nuanced, and genuinely sour in a way that vinegar cannot replicate. Fermented pickles are also naturally rich in probiotics since they contain live cultures. The main practical difference: quick pickles can be ready in 30 minutes and keep for months, while fermented pickles take several days and require more attention but reward with superior flavour.
What is the best salt to use for pickling?
Pickling salt or canning salt is the gold standard — it is pure sodium chloride with no additives, anti-caking agents, or iodine. Iodine is particularly important to avoid as it inhibits the beneficial bacteria needed for fermentation and can turn pickles dark. Kosher salt (without added iodine) is an excellent and widely available alternative. Regular table salt works for vinegar-based quick pickles but should be avoided for fermented pickles as the additives can interfere with fermentation. Sea salt without additives also works well. When substituting, be aware that different salts have different grain sizes and therefore different weights by volume — if using kosher salt instead of pickling salt, use 1.5 times the amount called for since kosher salt grains are larger and less dense.
How do I keep my pickles crunchy?
Crunchiness is the most important quality in a good pickle and there are several key techniques for achieving it. First, use the freshest, firmest cucumbers possible — cucumbers that have been sitting for days will make soft pickles. Second, cut off the blossom end of each cucumber before pickling — the blossom end contains an enzyme that causes softness. Third, soaking the sliced vegetables in ice water for 30–60 minutes before pickling firms them up significantly. Fourth, do not pour boiling brine directly onto delicate vegetables — let it cool for 5–10 minutes first. For fermented pickles, tannin-rich leaves (grape, oak, horseradish, or cherry leaves) added to the jar provide natural tannins that maintain crispness. Finally, refrigerating pickles as soon as they reach the desired flavour stops further softening from ongoing acid exposure.
Share This Post!
If you loved these pickle and preserves recipes, share this post with every food lover in your life! Pin it, share it on Facebook, or send it to whoever wants to make their own incredible condiments at home. 🥒🫙✨





Comments
No Comments