
Camping mornings have a way of making everyone hungry at the same time — Saad wants something sweet, Zainab wants eggs, my husband wants something hot, and I want something that requires zero effort before I've had my coffee. Getting breakfast on the table at a campsite is a completely different challenge from cooking at home, and the first few trips we took, I completely underestimated it. I'd pack raw ingredients with big plans and then stand there at 7am trying to figure out how to crack eggs into a pan on a single-burner camp stove while the kids were already complaining. That's when I started making almost everything before we even left the house.
A good make-ahead camping breakfast needs to check a few boxes for me. It should hold up in a cooler or a bag for at least a day or two, reheat easily over a camp stove or on a grill grate, or — even better — need no heat at all. It also needs to actually be filling, because hiking and fresh air burn through a granola bar in about an hour. I've tried a lot of recipes that looked great at home but fell apart completely once they were packed, jostled around in the car, and then expected to feed four hungry people in the woods.
This list covers all the formats I actually rely on now — overnight oats and chia pudding jars that travel perfectly in the cooler, foil pack meals that go straight onto the fire, make-ahead egg muffin cups and quiche wedges you prep on Sunday, and grab-and-go bars and wraps for mornings when you're up early to hit the trail. If you've been putting together your outdoor meal plan, you might also want to check out my roundup of Recipe Roundups for more ideas to fill the rest of your camp menu.
Here are the 15 recipes I keep coming back to — mix and match them based on how long your trip is and how much cooler space you're working with.
Easy Recipes To Try
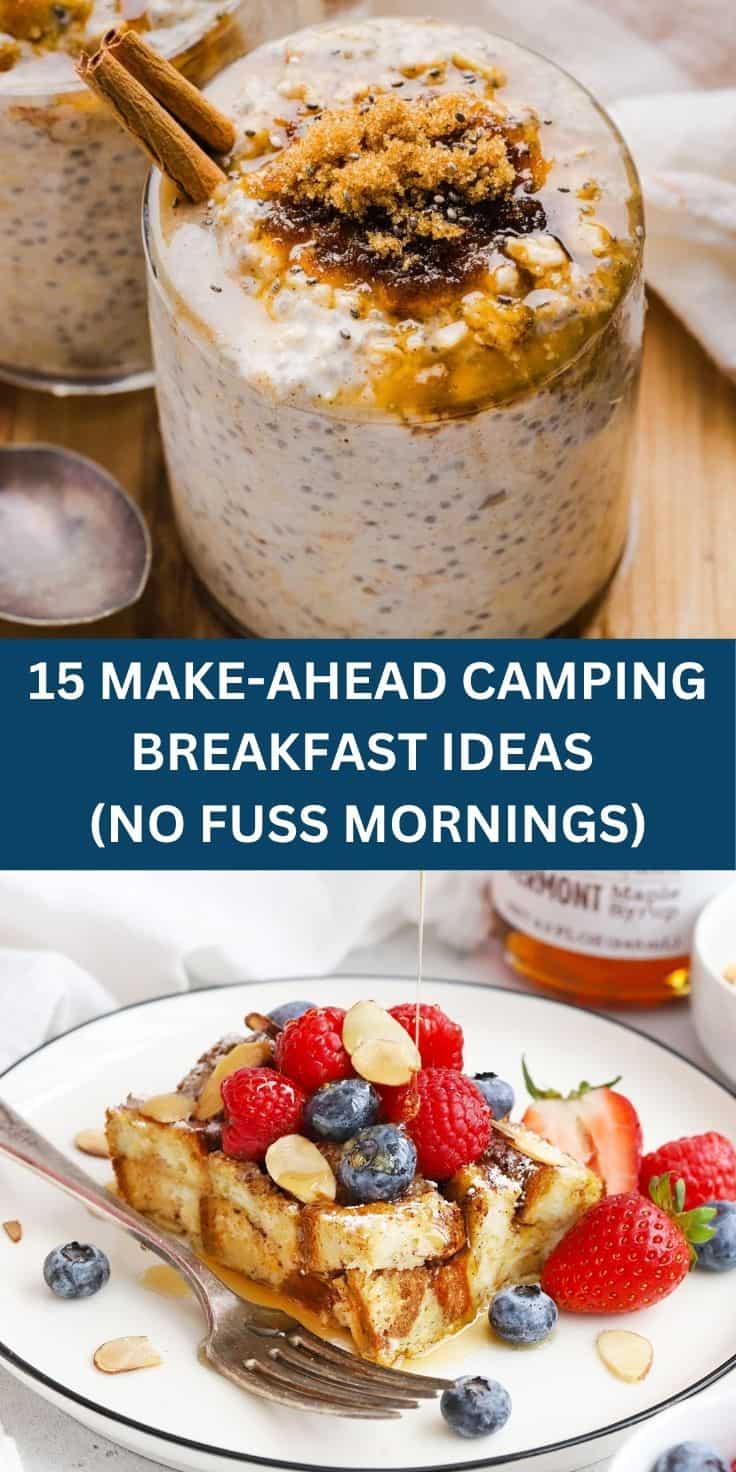
15. Overnight Oats with Maple Brown Sugar
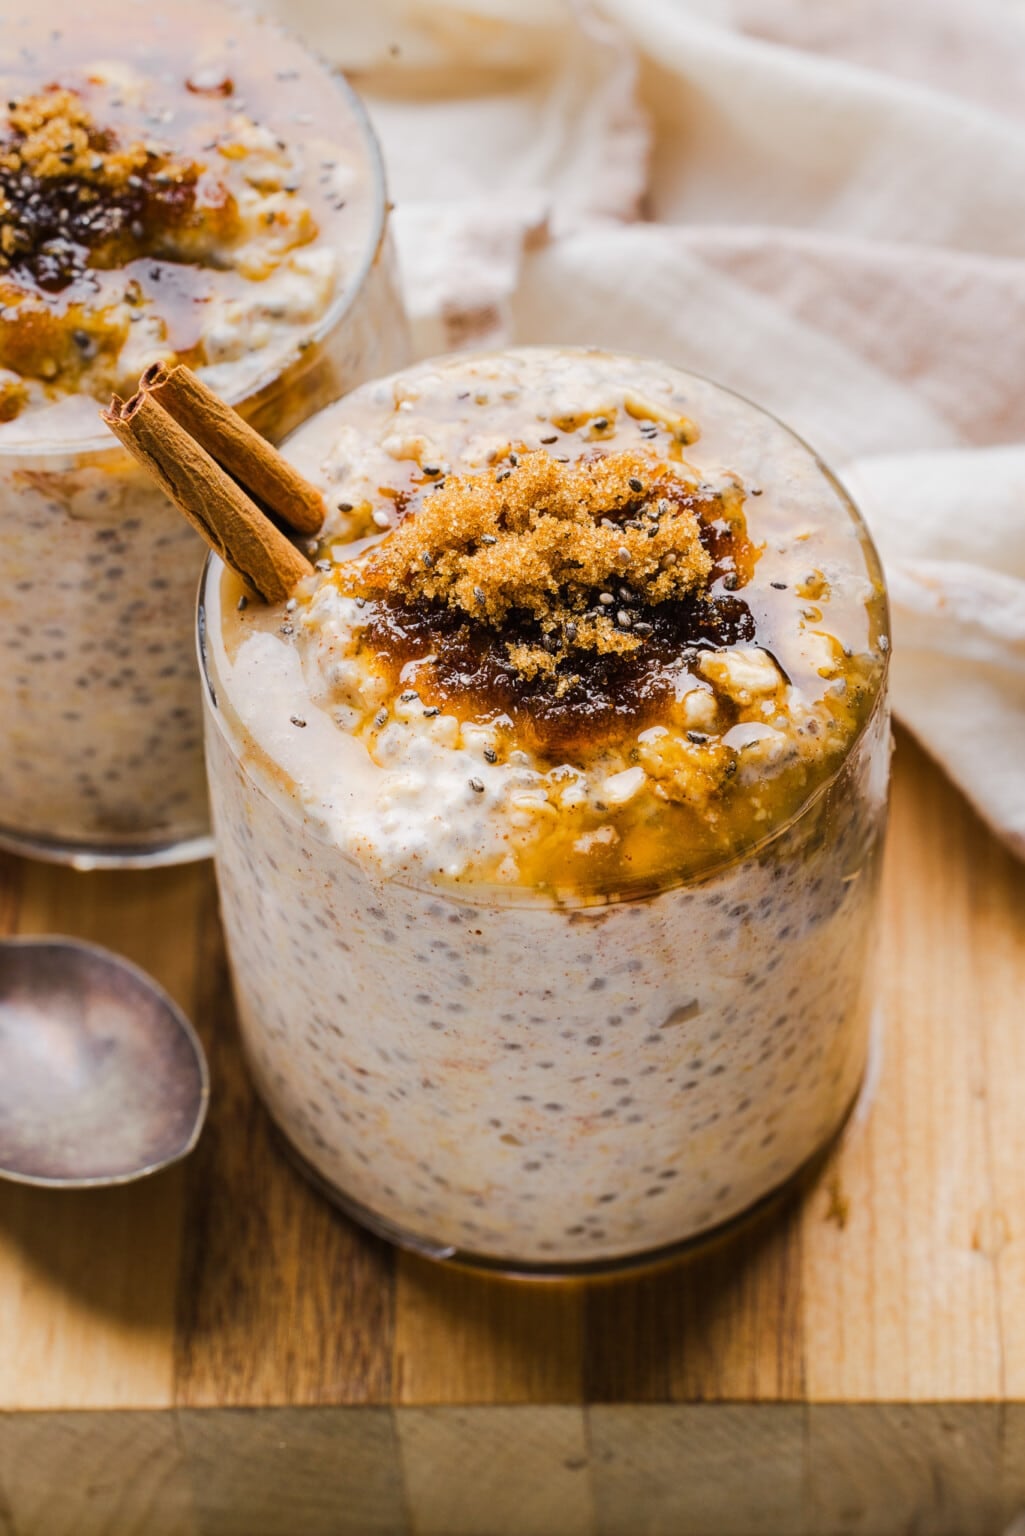
Camping mornings don't have to mean standing over a stove half-awake while everyone waits for food. These overnight oats get made the night before you even leave home — pack them in mason jars, keep them in the cooler, and breakfast is literally done before the tent is even pitched. The maple brown sugar combo is warm and cozy in a way that feels more intentional than a granola bar, and the oats stay thick and creamy overnight without going soggy. I make a double batch because one jar disappears before I've even poured my coffee.
Ingredients
- ½ cup old-fashioned rolled oats (not instant)
- ½ cup milk (dairy or oat milk both work fine)
- ¼ cup plain Greek yogurt
- 1 tablespoon chia seeds
- 1½ tablespoons pure maple syrup
- 1 tablespoon brown sugar
- ¼ teaspoon cinnamon
- Pinch of salt
- Optional toppings: sliced banana, chopped pecans, extra maple syrup
Instructions
- Add the oats, chia seeds, cinnamon, brown sugar, and salt to a wide-mouth mason jar (16 oz works perfectly) and stir to combine the dry ingredients.
- Pour in the milk and Greek yogurt, then drizzle in the maple syrup. Stir everything together until well mixed — make sure no dry oats are hiding at the bottom.
- Seal the jar tightly and refrigerate overnight, or for at least 6 hours. The oats will absorb the liquid and thicken up considerably.
- Pack the sealed jars in your cooler before heading out. They'll keep safely for up to 3 days in a cooler with ice.
- At camp, eat straight from the jar cold, or if you want them warm, transfer to a small pot and heat gently over the camp stove for 3–4 minutes, adding a splash of milk to loosen them up.
14. Sausage Egg Muffin Cups Meal Prep
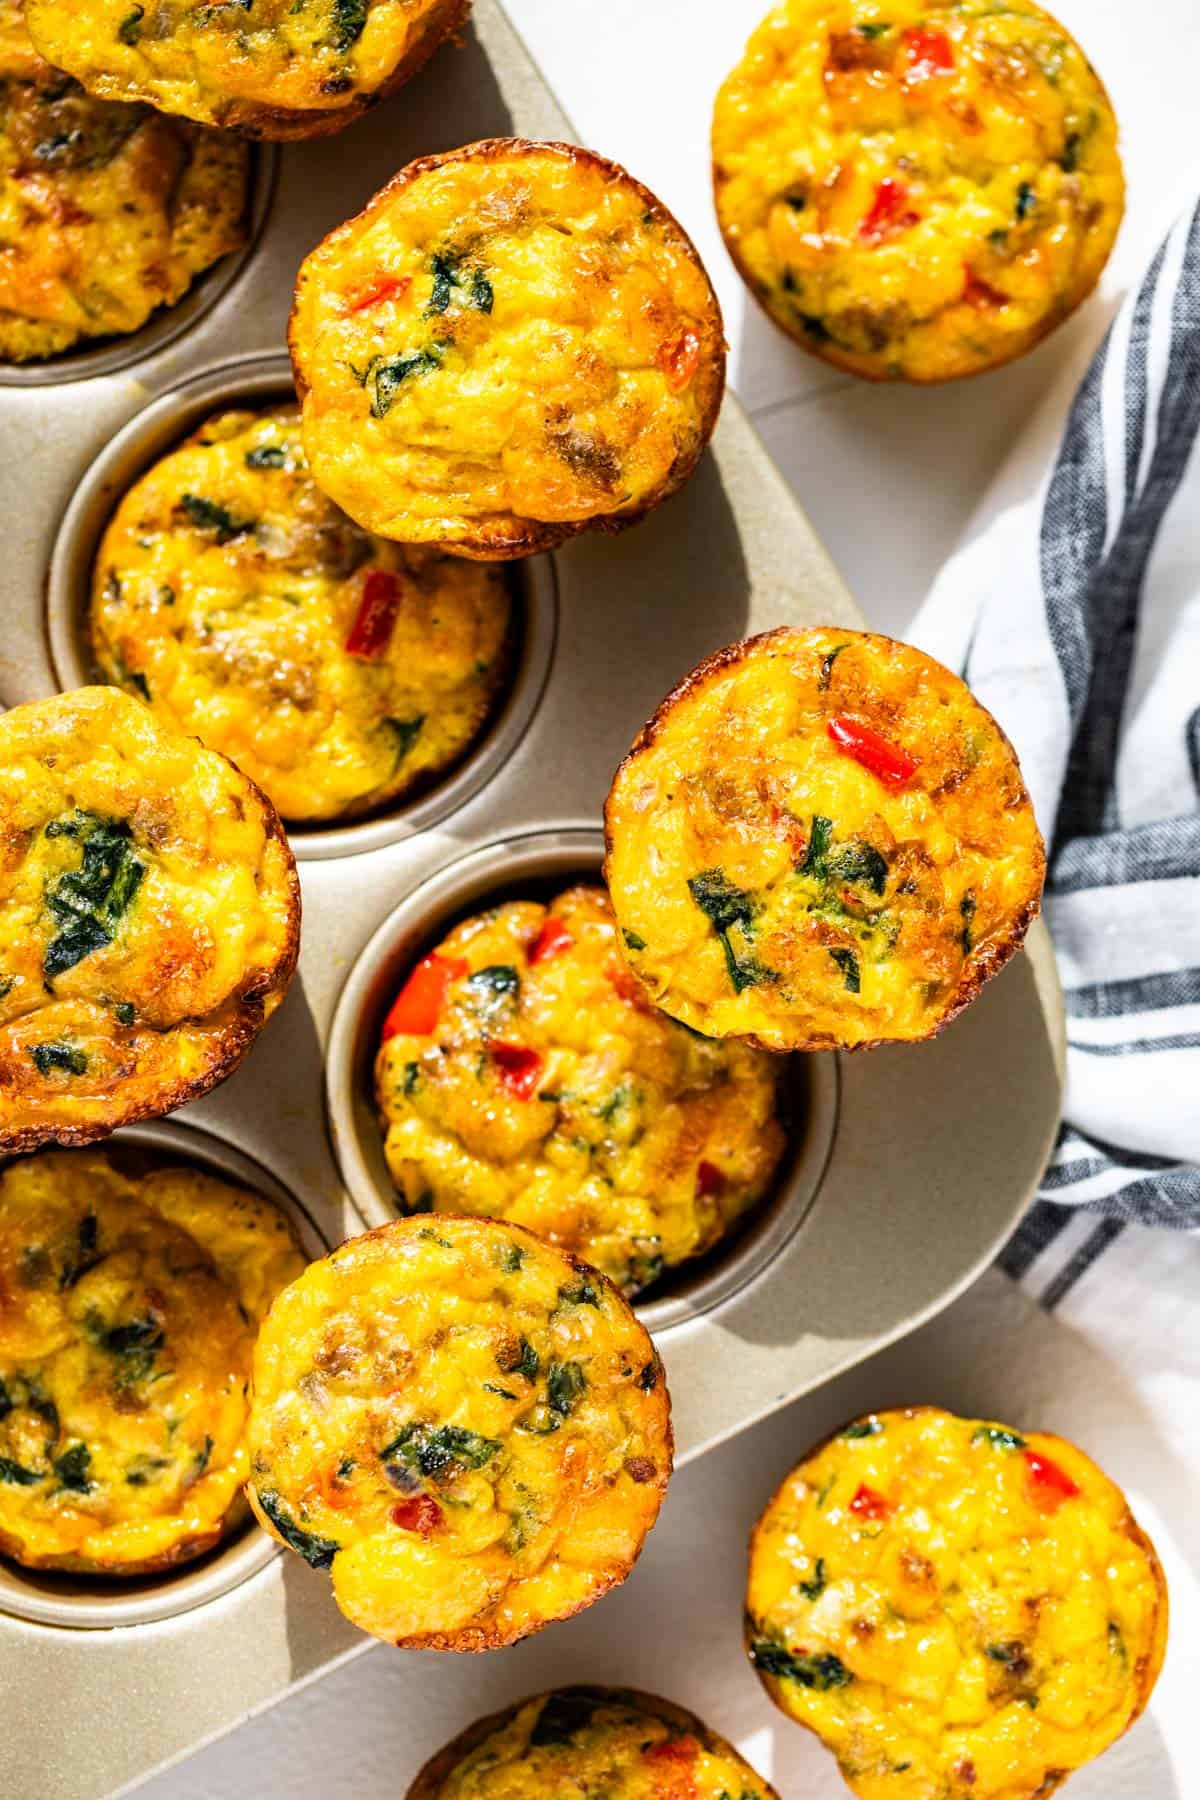
These little egg cups are one of the most practical things I've figured out for camping trips. Bake them at home, stack them in a container, and they reheat in minutes over a camp stove or even a pan with a lid. Each one is basically a full breakfast — eggs, sausage, cheese — in a single bite-sized package that even Zainab will eat without negotiating. The key is not overbaking them at home; pull them when the centers are just barely set so they don't turn rubbery when you reheat. They also freeze well, so I usually make a batch of 12 two days before a trip.
Ingredients
- 8 large eggs
- ½ lb breakfast sausage (Jimmy Dean or similar), casings removed
- ¼ cup milk
- ½ cup shredded cheddar cheese
- ¼ cup diced bell pepper (any color)
- 2 tablespoons diced onion
- ½ teaspoon garlic powder
- Salt and black pepper to taste
- Cooking spray or butter for greasing
Instructions
- Preheat your oven to 350°F. Grease a 12-cup muffin tin generously with cooking spray, making sure to get the sides — egg sticks badly if you miss a spot.
- Brown the sausage in a skillet over medium heat, breaking it into small crumbles. Drain the fat well and set aside to cool slightly.
- In a large bowl, whisk together the eggs, milk, garlic powder, salt, and pepper until smooth.
- Divide the sausage, bell pepper, and onion evenly among the muffin cups (about 1 tablespoon of filling per cup). Pour the egg mixture over the top, filling each cup about ¾ full.
- Sprinkle shredded cheddar on top of each cup and bake for 18–22 minutes, until the eggs are just set and the tops are lightly golden. Don't overbake.
- Cool completely before storing. Refrigerate in an airtight container for up to 4 days, or freeze for up to 1 month. At camp, reheat in a covered pan over low heat for 5–6 minutes.
13. Freezer Breakfast Burritos with Salsa Verde

Freezer burritos are the camping breakfast I always wish I'd made more of. You wrap them tight at home, freeze them solid, toss them in the cooler, and they're mostly thawed by morning — then five minutes in a skillet and you have a real, hot, satisfying breakfast that doesn't taste like it came out of a vending machine. The salsa verde here is what makes these feel less generic; it has a brightness that wakes everything up. Use store-bought Herdez salsa verde and nobody needs to know you didn't make it yourself.
Ingredients
- 6 large flour tortillas (burrito size, 10-inch)
- 8 large eggs, scrambled
- ½ lb breakfast sausage or chorizo, cooked and crumbled
- 1 cup shredded pepper jack or Monterey Jack cheese
- 1 cup canned black beans, drained and rinsed
- ½ cup salsa verde (Herdez works great)
- ¼ cup sour cream
- ½ teaspoon cumin
- Salt to taste
Instructions
- Scramble the eggs over medium-low heat until just cooked through — slightly underdone is intentional here since they'll cook again when reheated. Season with cumin and salt.
- Warm the tortillas briefly in a dry skillet or microwave so they're pliable and won't crack when you roll them.
- Lay a tortilla flat and layer in the center: a spoonful of eggs, sausage, black beans, a drizzle of salsa verde, a small dollop of sour cream, and a good pinch of cheese.
- Fold in the sides, then roll tightly from the bottom, pressing as you go to keep everything compact. Wrap each burrito in aluminum foil, then in plastic wrap for an extra seal.
- Freeze on a flat surface for at least 4 hours before the trip, or up to 3 months ahead. Transfer to your cooler the night before camping so they can thaw slowly.
- At camp, unwrap and heat in a skillet over medium heat for 4–5 minutes per side until the outside is crispy and the center is hot all the way through.
12. No-Bake Peanut Butter Granola Bars

Some mornings at camp, no one wants to cook — not even me. On those days, these bars are the whole plan. They're made entirely on the stovetop, pressed into a pan, and chilled until firm. No oven required. The peanut butter and honey hold everything together into something that's genuinely filling, not just a glorified snack. I wrap each bar individually in parchment so they're easy to grab and go, which is also useful because my kids eat them for trail snacks, not just breakfast. Honest limitation: if it's very hot out, store them in the cooler or they'll get soft.
Ingredients
- 2½ cups old-fashioned rolled oats
- ½ cup creamy peanut butter (not natural — it separates)
- ⅓ cup honey
- 3 tablespoons brown sugar
- 2 tablespoons unsalted butter
- ½ teaspoon vanilla extract
- ¼ teaspoon salt
- ⅓ cup mini chocolate chips
- ¼ cup chopped roasted peanuts or sunflower seeds
Instructions
- Line an 8x8-inch baking pan with parchment paper, leaving some overhang on the sides so you can lift the bars out easily later.
- In a medium saucepan over medium heat, combine the peanut butter, honey, brown sugar, and butter. Stir constantly until the butter melts and everything is smooth and just beginning to bubble, about 3–4 minutes. Remove from heat and stir in the vanilla and salt.
- Add the oats and peanuts to the pan and stir quickly to coat everything evenly in the peanut butter mixture.
- Let the mixture cool for about 5 minutes, then fold in the chocolate chips (if you add them while it's too hot, they'll melt completely — which is fine but messier).
- Press the mixture firmly and evenly into the prepared pan. Use the back of a spoon or a flat spatula to compact it well — the bars won't hold together if they're loose.
- Refrigerate for at least 2 hours until fully set, then lift out using the parchment and cut into 10–12 bars. Wrap individually and store in the cooler.
11. Banana Chocolate Chip Camping Muffins
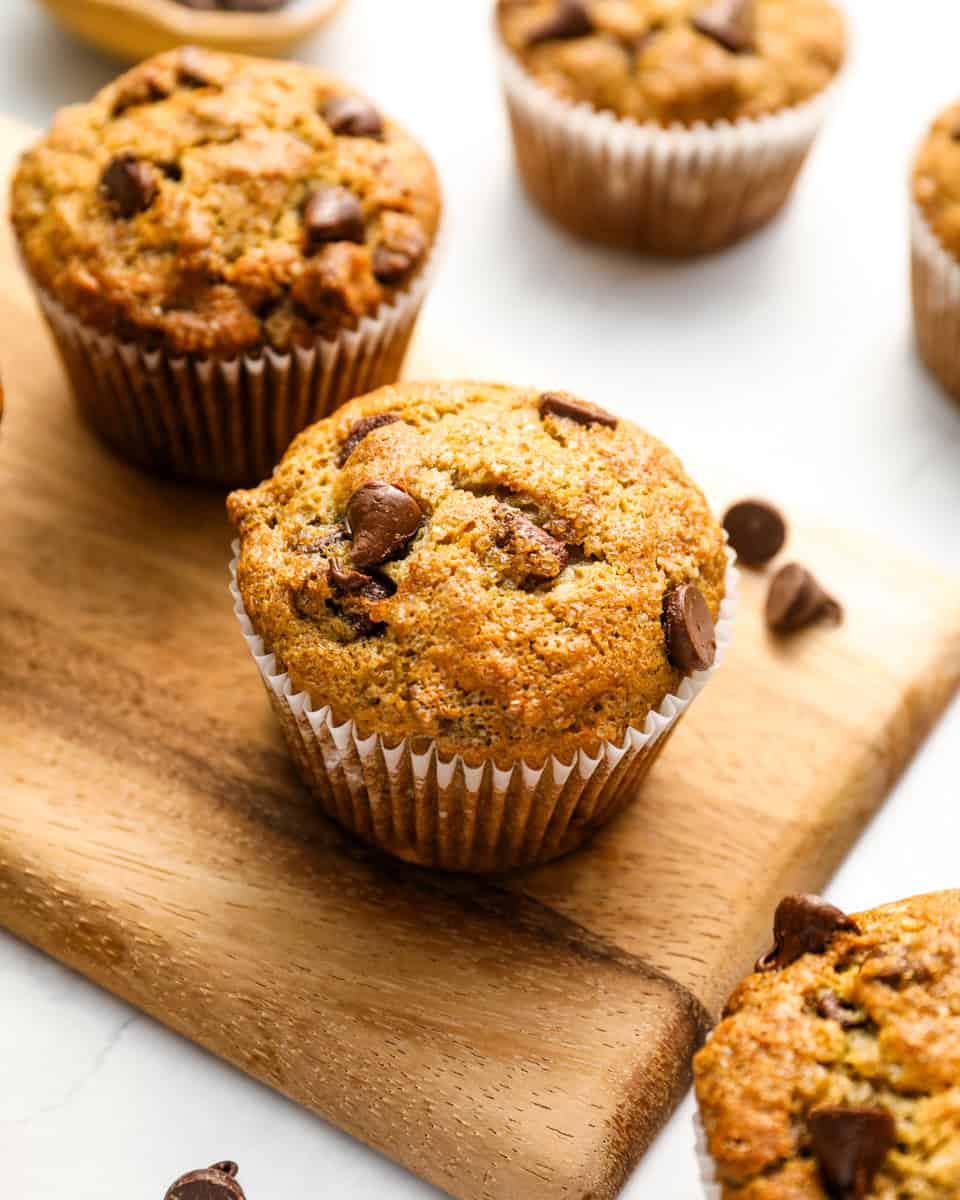
Ripe bananas have a way of appearing right before a camping trip, and this is exactly where they belong. These muffins bake up moist and dense — in a good way — which means they hold up in a bag or backpack without turning to crumbs. The chocolate chips are non-negotiable as far as Saad is concerned; he's asked me to double them more than once and honestly he's not wrong. Bake them the day before you leave, let them cool completely, and pack in a zip-lock bag or an airtight container. They're good for two days at room temperature and even better slightly warmed over a camp stove in a covered pan.
Ingredients
- 3 very ripe bananas, mashed (about 1 cup)
- 1¾ cups all-purpose flour
- ⅓ cup vegetable oil (or melted coconut oil)
- ½ cup granulated sugar
- 2 large eggs
- 1 teaspoon vanilla extract
- 1 teaspoon baking soda
- ½ teaspoon baking powder
- ¼ teaspoon salt
- ½ teaspoon cinnamon
- ¾ cup semi-sweet chocolate chips
Instructions
- Preheat oven to 375°F. Line a 12-cup muffin tin with paper liners or grease well with cooking spray.
- In a large bowl, mash the bananas until mostly smooth — a few small lumps are fine and actually add texture. Whisk in the oil, sugar, eggs, and vanilla until combined.
- Add the flour, baking soda, baking powder, salt, and cinnamon directly to the wet ingredients. Stir until just combined — overmixing makes muffins tough, so stop as soon as you don't see dry flour streaks.
- Fold in the chocolate chips, then divide the batter evenly among the muffin cups, filling each about ¾ full.
- Bake for 18–22 minutes until a toothpick inserted in the center comes out clean (a melted chocolate chip on the toothpick doesn't count as batter — check near the edge of a muffin instead).
- Cool in the pan for 5 minutes, then transfer to a wire rack to cool completely before packing. Don't pack them warm or they'll steam and get gummy.
10. Foil Packet Denver Omelet Hash
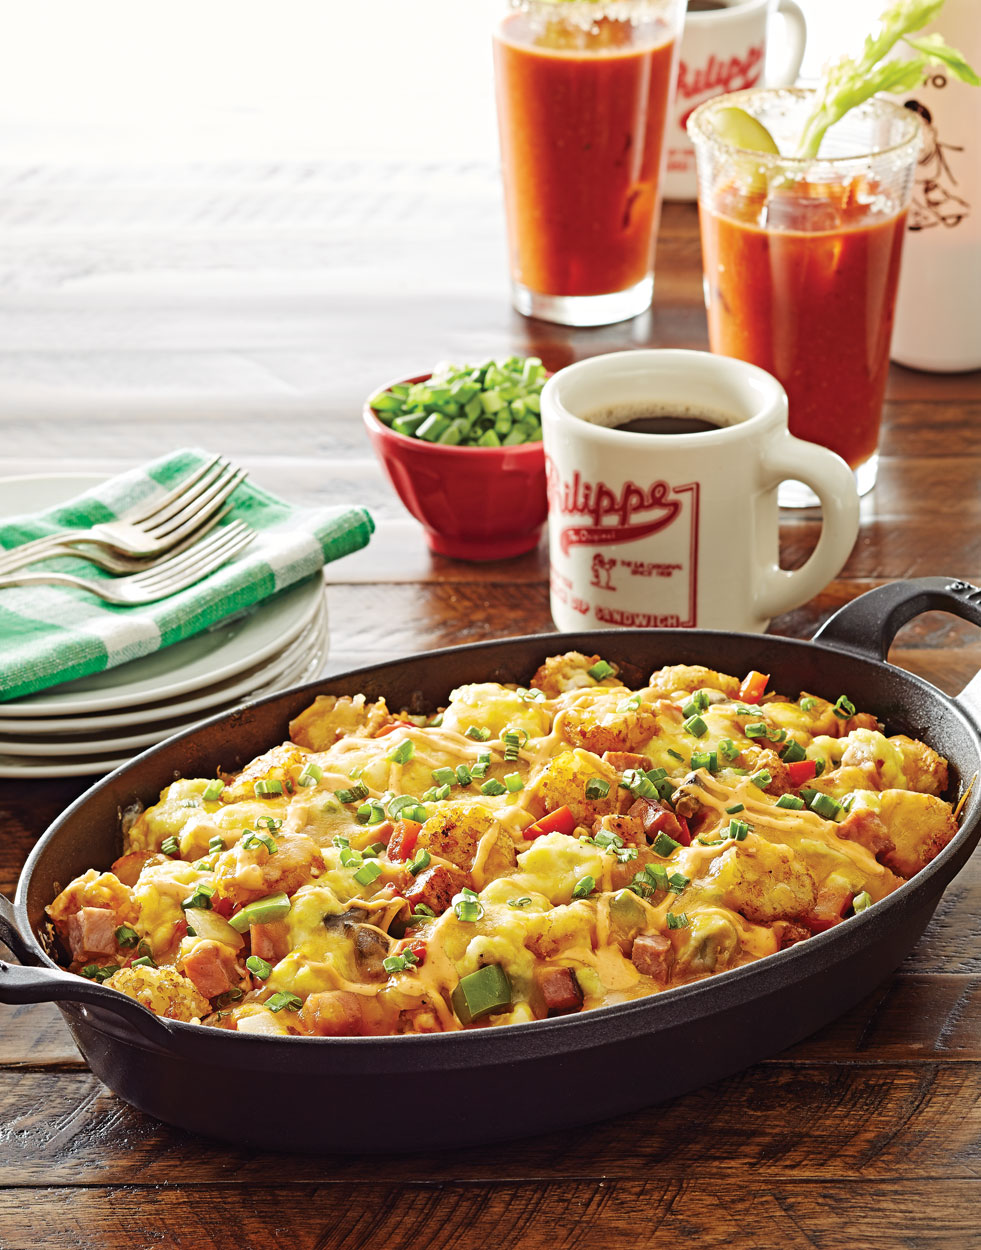
This one sits right on the line between make-ahead and cook-at-camp — and that's exactly what makes it work. The prep happens at home: dice everything, pre-cook the ham and peppers, portion into individual foil packets, and refrigerate or freeze. At camp you crack an egg into each packet, seal it back up, and set it on the fire grate or camp stove. The whole thing cooks in about 15 minutes with zero dishes. Denver omelet flavors — ham, bell pepper, onion, cheese — hold up beautifully in foil because the steam keeps everything from drying out. I learned the hard way to double-layer the foil so nothing leaks into the fire.
Ingredients
- 1½ cups diced ham (about ½ lb)
- 1 cup diced bell peppers (mixed red and green)
- ½ cup diced white or yellow onion
- 1½ cups frozen diced hash browns, thawed
- 4 large eggs (cracked at camp)
- ½ cup shredded cheddar cheese
- 1 tablespoon benefits of olive oil or butter
- ½ teaspoon garlic powder
- Salt and black pepper to taste
Instructions
- At home, sauté the diced ham, bell peppers, and onion in olive oil over medium-high heat for 5–6 minutes until softened and lightly browned. Season with garlic powder, salt, and pepper. Let cool completely.
- Cut 4 large sheets of heavy-duty aluminum foil (about 12x14 inches each). Double-layer them for strength. Divide the hash browns evenly among the 4 packets, then top with the ham and vegetable mixture.
- Fold the packets up loosely but seal the edges tightly by folding them over twice. Leave some air space inside so there's room for steam. Refrigerate for up to 2 days, or freeze for up to 3 weeks.
- At camp, open each packet slightly and crack one egg directly on top of the hash mixture. Re-seal the packet tightly.
- Place packets over medium campfire coals or on a camp stove grate over medium heat for 12–15 minutes, until the egg white is fully set. The yolk will still be slightly soft — cook 2–3 minutes longer if you prefer it fully cooked.
- Open carefully (steam will escape), top with shredded cheddar, and eat straight from the foil.
9. Make-Ahead French Toast Casserole Slices
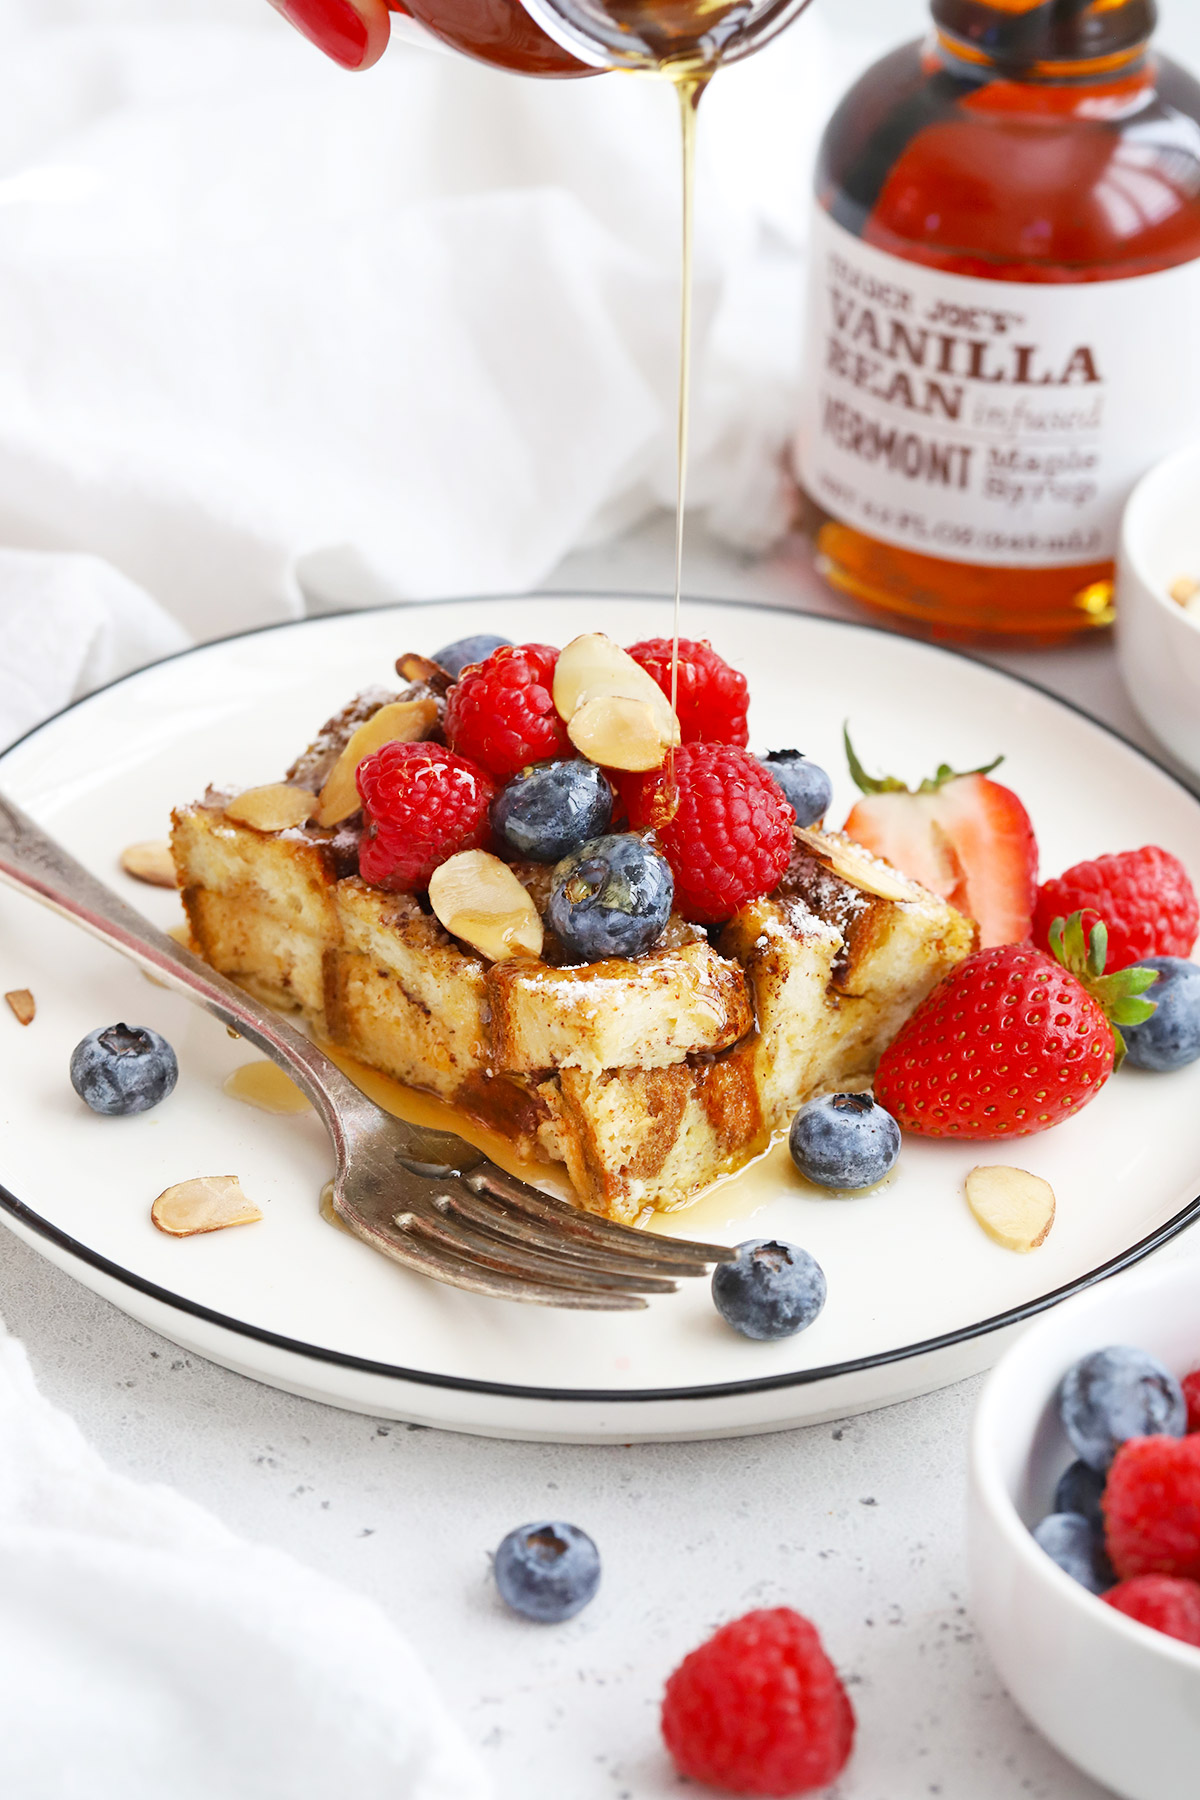
French toast at a campsite sounds like a ridiculous amount of effort until you make it this way. Bake a full casserole at home, slice it into thick slabs, wrap them individually, and refrigerate or freeze. At camp all you're doing is browning the slices in butter on a skillet for a few minutes per side — the hard work is already done and the result genuinely tastes like proper French toast, not the sad soggy version I tried to make directly at camp the first time. Brioche or challah bread makes a noticeably better casserole than sandwich bread, so it's worth grabbing a loaf from Trader Joe's or Costco before the trip.
Ingredients
- 1 loaf brioche or challah bread (about 12–14 oz), cut into 1½-inch slices
- 4 large eggs
- 1 cup whole milk
- ¼ cup heavy cream
- 3 tablespoons sugar
- 1½ teaspoons vanilla extract
- 1 teaspoon cinnamon
- ¼ teaspoon nutmeg
- 2 tablespoons unsalted butter (for reheating at camp)
- Maple syrup, for serving
Instructions
- Grease a 9x13-inch baking dish with butter. Arrange the bread slices in the dish in a single layer, slightly overlapping if needed.
- Whisk together the eggs, milk, heavy cream, sugar, vanilla, cinnamon, and nutmeg in a large bowl until smooth. Pour the custard evenly over the bread, pressing the slices gently to help them absorb the liquid. Cover and refrigerate for at least 4 hours, or overnight — the longer soak makes for a custardy interior.
- Preheat oven to 350°F. Bake uncovered for 35–40 minutes until the top is golden brown and the custard is set. A knife inserted in the center should come out mostly clean.
- Cool completely, then cut into individual portions (each roughly 3x4 inches). Wrap tightly in plastic wrap or foil, then store in a zip-lock bag. Refrigerate for up to 3 days or freeze for up to 1 month.
- At camp, melt butter in a skillet over medium heat and cook the slices for 3–4 minutes per side until heated through and golden on the outside. Serve with maple syrup.
8. Blueberry Greek Yogurt Parfait Jars
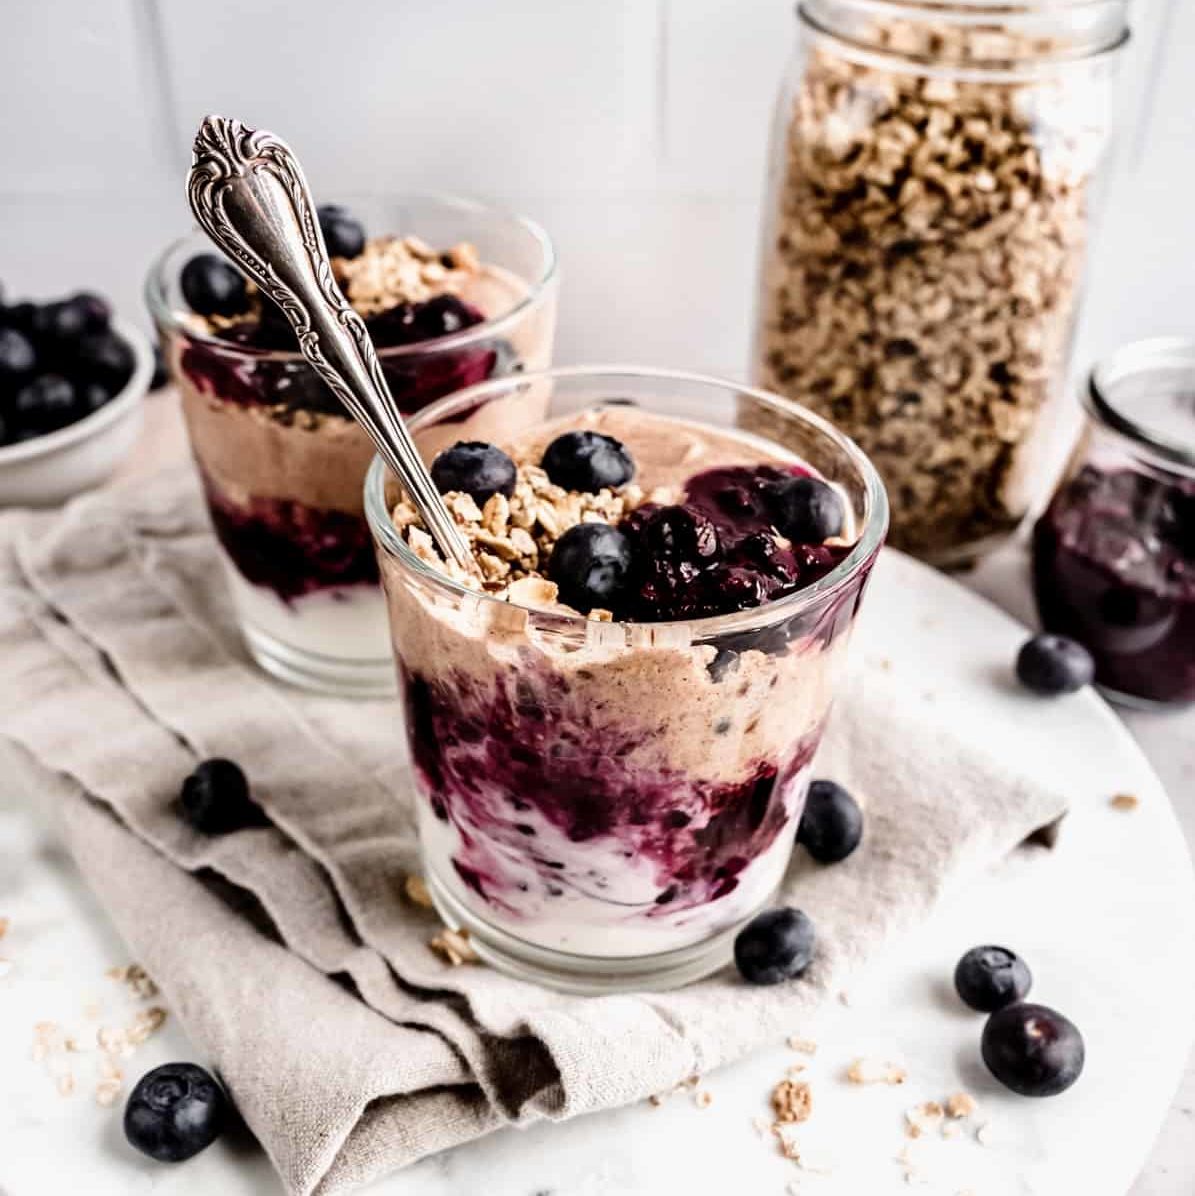
When you want something that feels a little fresh and not just carbs and sausage, these parfait jars are the answer. Layer granola, Greek yogurt, and blueberries into mason jars the night before you leave, seal them tight, and they keep beautifully in the cooler for two days. The granola will soften by day two — which some people actually prefer, so it's not necessarily a problem. Use full-fat Greek yogurt; it's more stable and doesn't get watery the way low-fat versions can. A drizzle of honey in each jar before you seal it makes a real difference in flavor. These are also endlessly adjustable — swap blueberries for whatever fruit you're packing.
Ingredients
- 2 cups full-fat plain Greek yogurt
- 1 cup fresh or frozen blueberries (thaw frozen ones first and drain)
- 1 cup granola (store-bought or homemade — Nature Valley clusters work great)
- 3 tablespoons honey, divided
- ½ teaspoon vanilla extract
- Pinch of cinnamon
- 4 wide-mouth 8 oz mason jars with lids
Instructions
- Stir the vanilla and cinnamon into the Greek yogurt until combined. Taste and add a small drizzle of honey if you want it sweeter — this is also good left unsweetened since the toppings add plenty of sugar.
- Add a layer of granola to the bottom of each mason jar (about 2 tablespoons per jar). This bottom granola layer acts as a slight barrier and stays crunchier longer than if it were on top.
- Spoon a layer of yogurt over the granola (about ¼ cup per jar), then add a layer of blueberries. Repeat the layers — granola, yogurt, blueberries — until each jar is nearly full.
- Finish with a final layer of blueberries on top and drizzle each jar with about 2 teaspoons of honey. Seal tightly with the lids.
- Refrigerate at home overnight, then transfer directly to the cooler. Eat within 2 days for best texture. No reheating needed — eat cold, straight from the jar.
7. Smoked Sausage and Potato Foil Packs
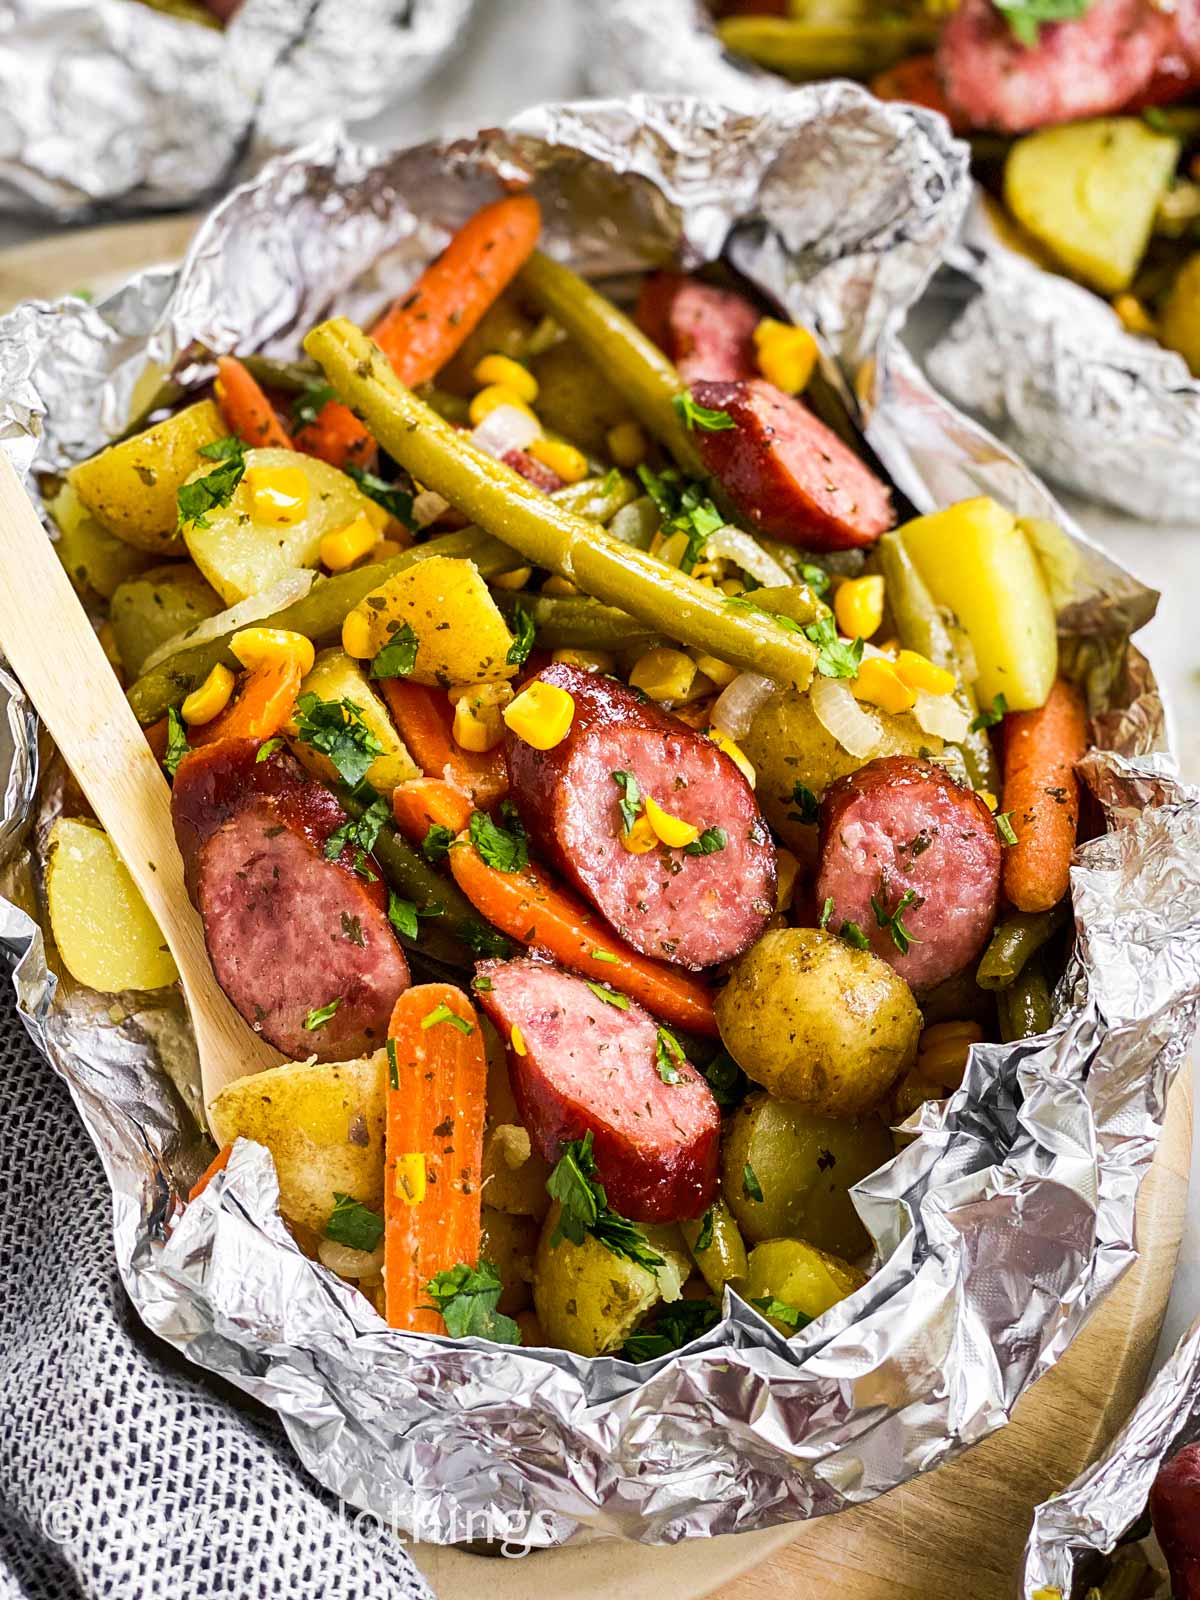
Foil packs are one of those camping things that just make sense — you prep everything at home, seal it up, and cook it straight on the coals in the morning with zero dishes. For these, I slice the sausage and potatoes the night before, toss everything with oil and seasoning, then wrap it tight in heavy-duty foil. By morning all you're doing is throwing the pack on the fire. The potatoes come out tender and slightly crisp at the edges, the sausage gets that good char on it, and the whole thing tastes like you actually put in effort.
Ingredients
- 12 oz smoked sausage (kielbasa or Hillshire Farm rope sausage), sliced into ½-inch rounds
- 1 lb baby potatoes, halved (or 2 medium Yukon Gold potatoes, diced into ¾-inch cubes)
- 1 green bell pepper, diced
- 1 small yellow onion, sliced
- 2 tablespoons olive oil
- 1 teaspoon garlic powder
- 1 teaspoon smoked paprika
- ½ teaspoon onion powder
- ½ teaspoon salt
- ¼ teaspoon black pepper
- Heavy-duty aluminum foil
Instructions
- In a large bowl, combine the sliced sausage, potatoes, bell pepper, and onion. Drizzle with olive oil and toss to coat evenly.
- Sprinkle in the garlic powder, smoked paprika, onion powder, salt, and pepper. Toss again until everything is well seasoned.
- Divide the mixture evenly between 2 large sheets of heavy-duty foil (about 18 inches each). Pile the filling in the center of each sheet.
- Fold the long sides of the foil up and over the filling, then fold in the ends to create a tight sealed packet. For extra security, wrap each packet in a second layer of foil. Refrigerate overnight.
- At the campsite, place foil packs directly on hot coals or over a medium-high camp grill grate. Cook for 20–25 minutes, flipping halfway through, until potatoes are fork-tender. Open carefully — steam will escape.
6. Cinnamon Raisin Overnight Chia Pudding
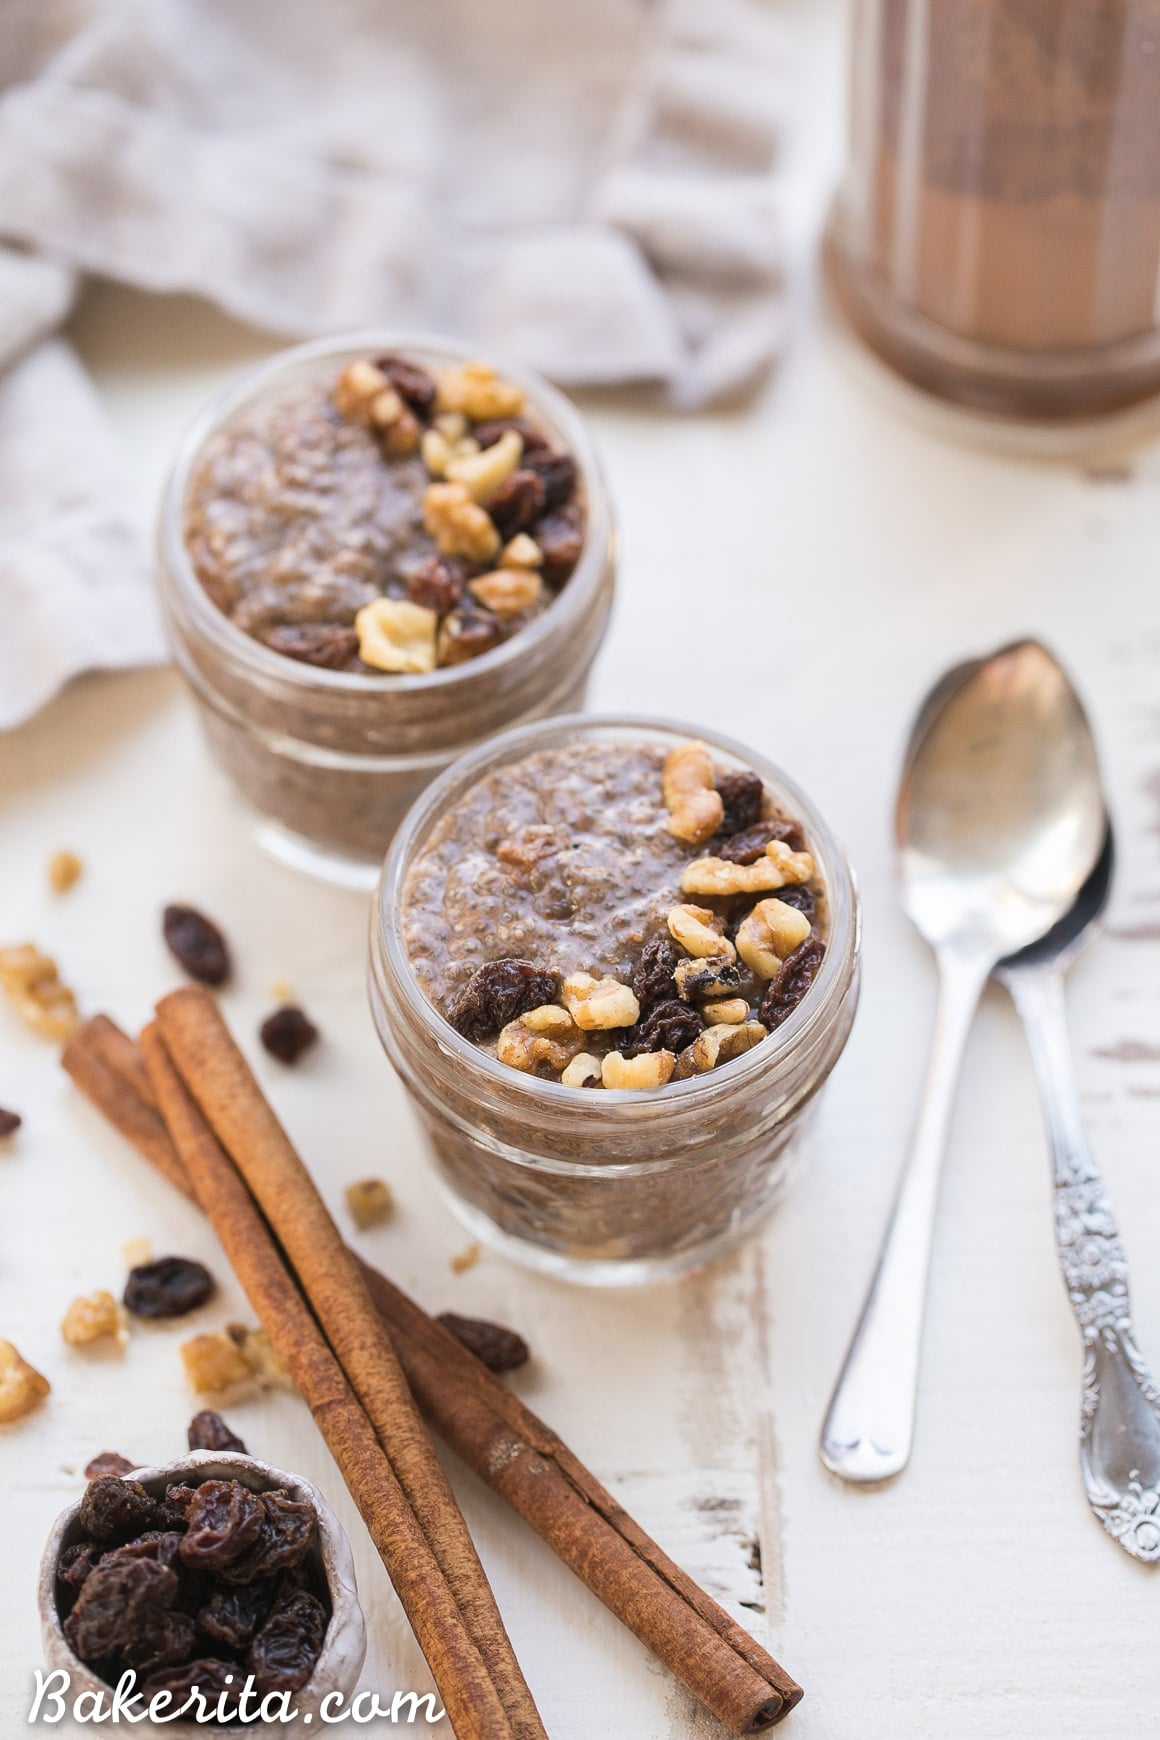
Chia pudding is one of those no-cook breakfasts I was skeptical about until I actually tried it — and now I make a double batch every time we go camping because it disappears fast. The chia seeds absorb all the liquid overnight and turn into this creamy, almost rice-pudding-like texture. With cinnamon and raisins, it tastes like the inside of a cinnamon roll without any of the work. Pack it into individual lidded jars before you leave home, and it stays good in the cooler for up to three days. Saad eats it straight from the jar with a long spoon and calls it dessert for breakfast, which honestly isn't wrong.
Ingredients
- 2 cups whole milk (or oat milk for dairy-free)
- ½ cup chia seeds
- 2 tablespoons maple syrup or honey
- 1 teaspoon vanilla extract
- 1½ teaspoons ground cinnamon
- ¼ teaspoon nutmeg
- ⅓ cup raisins
- Pinch of salt
- Optional toppings: chopped walnuts, sliced banana, a drizzle of honey
Instructions
- In a large bowl or measuring pitcher, whisk together the milk, maple syrup, vanilla extract, cinnamon, nutmeg, and salt until combined.
- Stir in the chia seeds and raisins. Let the mixture sit for 5 minutes, then stir again — this prevents the chia seeds from clumping at the bottom.
- Divide the mixture evenly between 4 small mason jars or lidded containers (about ½ cup each). Seal with lids.
- Refrigerate for at least 6 hours or overnight. The pudding is ready when it has thickened to a creamy, spoonable consistency. Pack jars directly into the cooler for camping.
- Serve cold, straight from the jar. Add any toppings you packed along — nuts and banana slices work great if you have them.
5. Hard-Boiled Egg and Avocado Protein Box

Some mornings at the campsite, you don't want to cook anything at all — and that's completely valid. These protein boxes are my answer to that. Everything gets prepped at home: hard-boil the eggs, slice the cheese, pack the crackers, and bring a couple of avocados that will ripen perfectly by the time you need them. It's high-protein, genuinely filling, and requires exactly zero camp cooking. I learned the hard way that avocados go from rock-hard to overripe fast in a warm car, so I pack slightly underripe ones and let them sit out at camp the night before.
Ingredients
- 6 large eggs
- 2 ripe avocados
- 1 tablespoon lemon juice (to keep avocado from browning)
- 4 oz cheddar or pepper jack cheese, cubed or sliced
- 1 cup whole grain crackers (like Triscuits or Wheat Thins)
- ½ teaspoon everything bagel seasoning (or salt and pepper)
- Optional: cherry tomatoes, baby carrots, or cucumber slices
Instructions
- Hard-boil the eggs at home: place eggs in a saucepan, cover with cold water by 1 inch, bring to a boil, then cover and remove from heat. Let sit 10–12 minutes. Transfer to an ice bath to stop cooking, then peel once cooled. Store unpeeled eggs in a zip-lock bag in the cooler for up to 5 days — they keep better unpeeled.
- At camp, halve the avocados, remove the pit, and scoop the flesh into a small bowl or eat directly from the skin. Drizzle with lemon juice and sprinkle with everything bagel seasoning.
- Slice or halve the peeled hard-boiled eggs. Season lightly with salt and pepper.
- Assemble your daily protein needs box: eggs, avocado, cheese cubes, crackers, and any fresh vegetables you packed. Serve immediately.
4. Savory Cream Cheese Stuffed Bagels
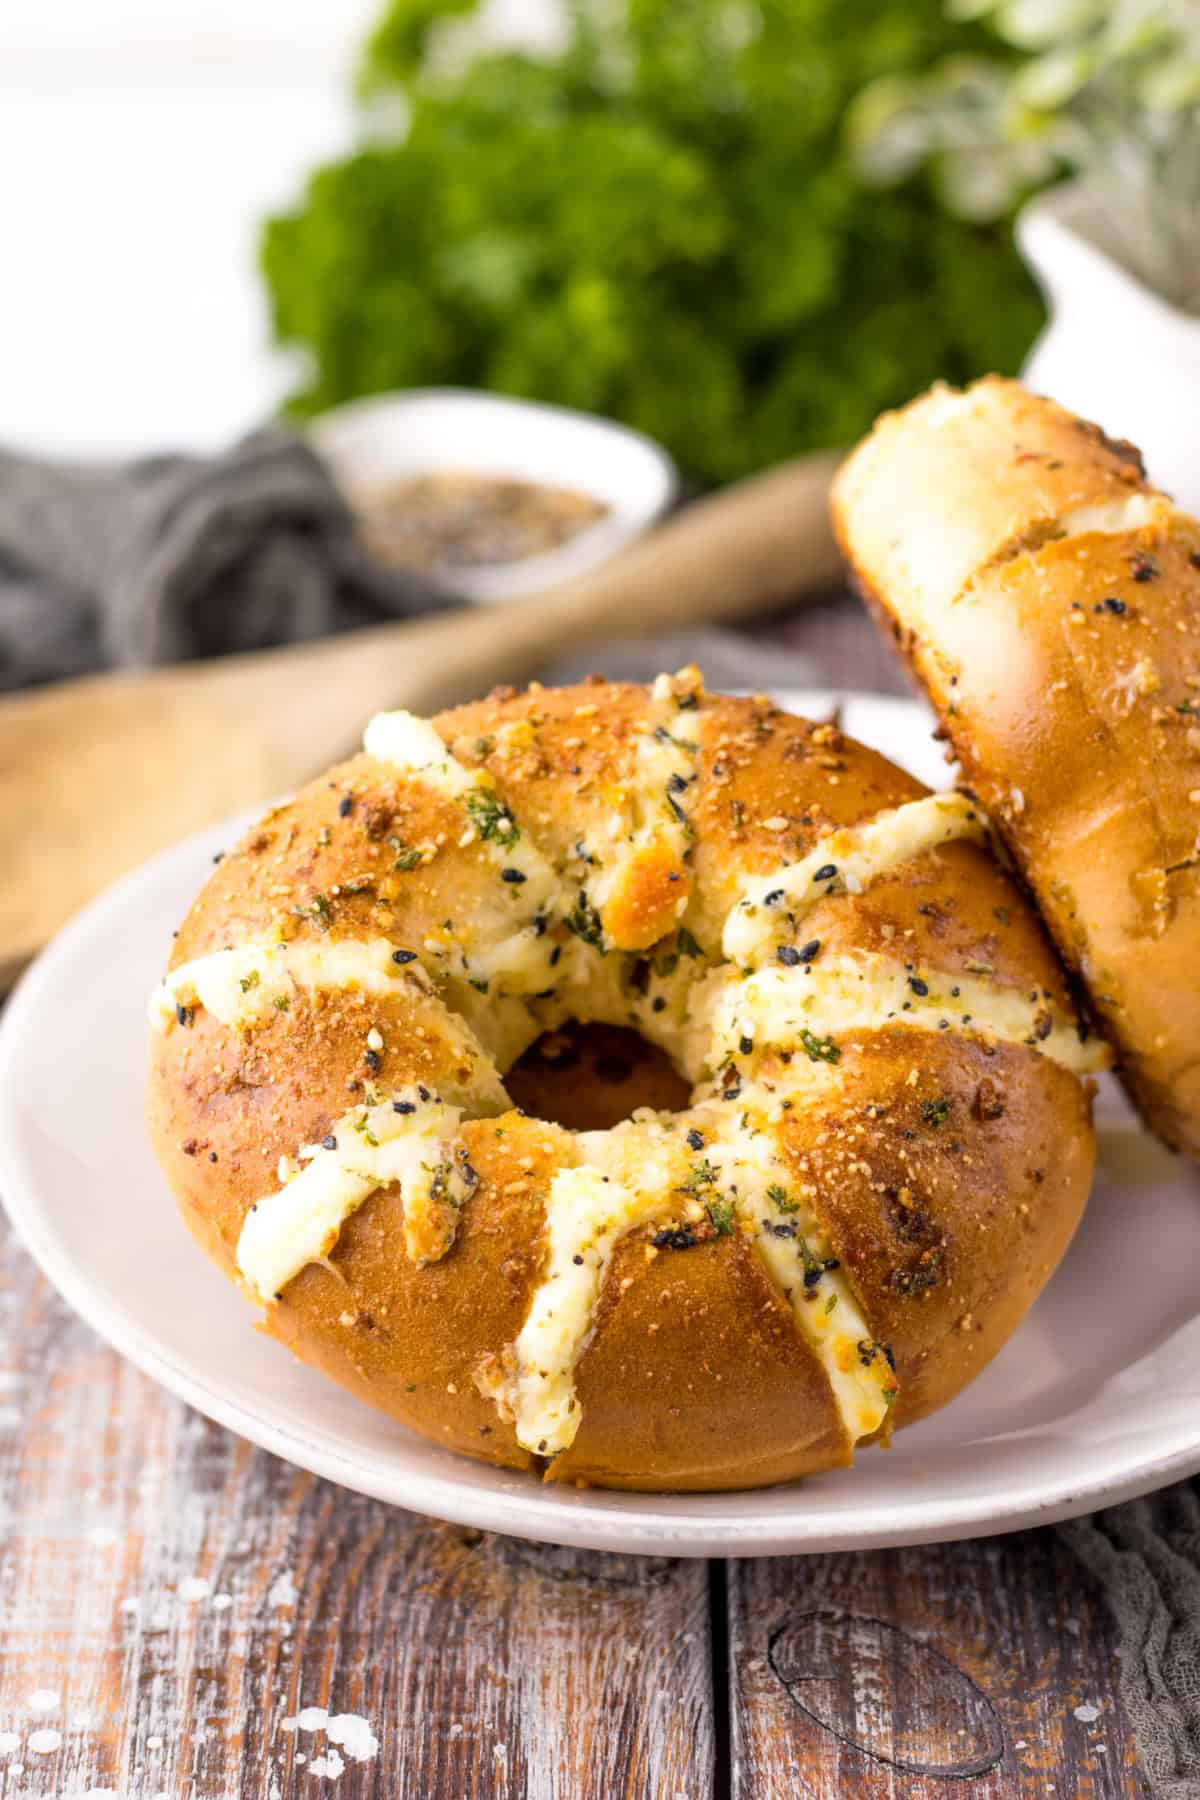
Pre-stuffed bagels sound too simple to be worth mentioning, but the difference between spreading cream cheese at camp versus having it already mixed and packed inside the bagel is honestly huge when you're half-awake and the kids are already asking about food. The trick here is making a seasoned herb cream cheese at home — garlic, chives, a little lemon zest — and slathering a thick layer on each bagel half before wrapping them individually. The cream cheese firms up in the cooler and the flavors deepen overnight. It's a proper breakfast with almost no effort at the campsite.
Ingredients
- 4 bagels (everything, sesame, or plain), sliced in half
- 8 oz cream cheese, softened to room temperature
- 2 tablespoons fresh chives, finely chopped (or 1 tablespoon dried)
- 1 small garlic clove, minced (or ¼ teaspoon garlic powder)
- 1 teaspoon lemon zest
- ½ teaspoon onion powder
- ¼ teaspoon salt
- ¼ teaspoon black pepper
- Optional add-ins: 2 tablespoons sun-dried tomatoes, finely chopped; or 2 tablespoons smoked salmon pieces
Instructions
- In a bowl, beat the softened cream cheese with a fork or spatula until smooth and fluffy. Add chives, garlic, lemon zest, onion powder, salt, pepper, and any optional add-ins. Mix until fully combined and taste for seasoning.
- Spread a generous layer of the seasoned cream cheese onto both halves of each sliced bagel. Don't be shy — a thick layer is what makes this worth it.
- Press the two halves of each bagel back together firmly so the cream cheese holds them in place. Wrap each assembled bagel tightly in plastic wrap or press-and-seal wrap.
- Refrigerate overnight or pack directly into the cooler. They keep well for up to 2 days.
- At the campsite, serve as-is from the cooler. If you have a camp grill going, you can also unwrap and toast the cut sides over the grate for 2–3 minutes for a warm version.
3. Brown Sugar Peach Baked Oatmeal Squares
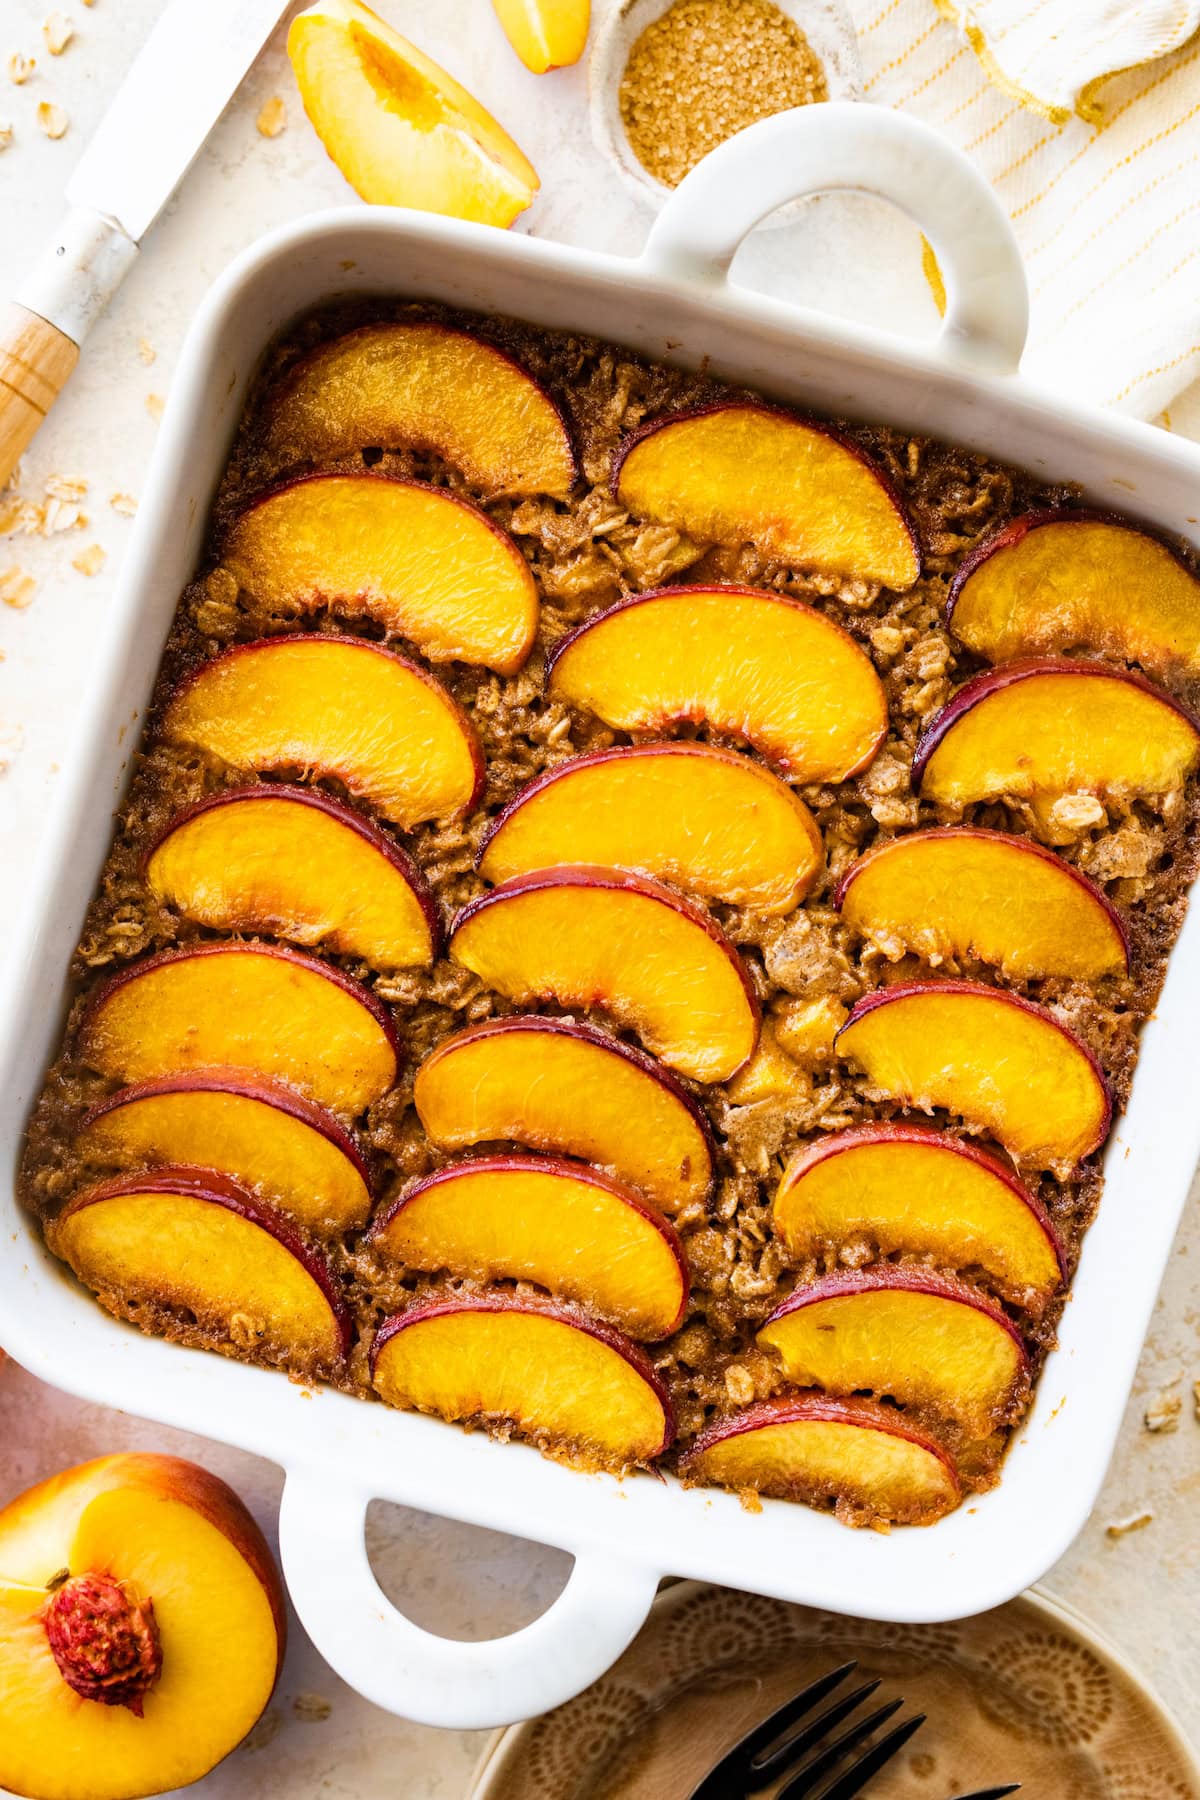
Baked oatmeal squares were a revelation for me when I first started camping with kids — they hold their shape, travel well, and taste genuinely good at room temperature or cold. The peach and brown sugar version is my favorite because the fruit softens into jammy pockets as it bakes and the top gets this lightly caramelized crust that makes the whole thing feel more like a treat than a responsible breakfast. Bake these the evening before you leave, cut them into squares once cooled, and stack them in a container. They're ready to pull out whenever someone wakes up hungry.
Ingredients
- 3 cups old-fashioned rolled oats
- ¼ cup packed brown sugar, plus 1 tablespoon for topping
- 1½ teaspoons baking powder
- 1½ teaspoons ground cinnamon
- ¼ teaspoon ground ginger
- ½ teaspoon salt
- 2 cups whole milk (or oat milk)
- 2 large eggs
- 3 tablespoons unsalted butter, melted
- 1 teaspoon vanilla extract
- 2 medium peaches, peeled and diced (about 1½ cups) — or 1½ cups canned peaches, drained and diced
Instructions
- Preheat your oven to 375°F. Grease an 8x8-inch or 9x9-inch baking pan with butter or cooking spray.
- In a large bowl, whisk together the oats, brown sugar, baking powder, cinnamon, ginger, and salt. In a separate bowl, whisk together the milk, eggs, melted butter, and vanilla extract.
- Pour the wet ingredients into the dry ingredients and stir to combine. Fold in the diced peaches gently so they don't break down too much.
- Pour the mixture into the prepared pan and spread evenly. Sprinkle the extra tablespoon of brown sugar over the top for a caramelized finish.
- Bake for 35–40 minutes, until the center is set and the top is golden. Let cool completely in the pan before cutting into squares. Store in an airtight container — they keep at room temperature for 1 day, or refrigerated in the cooler for up to 4 days.
2. Spinach Feta Crustless Quiche Wedges

No crust means this quiche is faster to make, easier to slice, and holds together better in a camping cooler than a traditional pastry-crusted version. The spinach and feta combination is one I keep coming back to because the feta melts into salty pockets throughout and the spinach disappears for anyone who'd otherwise pick it out (I'm not naming names, but one of my kids has very strong opinions about green things). Make this the night before, let it cool fully, then slice it into wedges and stack them in a container. It eats well cold, or you can warm a wedge in a foil packet over the fire for a few minutes.
Ingredients
- 6 large eggs
- 1 cup whole milk
- ½ cup heavy cream (or half-and-half)
- 5 oz fresh baby spinach, roughly chopped (or one 10-oz package frozen spinach, thawed and squeezed very dry)
- ¾ cup crumbled feta cheese
- ½ cup shredded mozzarella
- 1 small yellow onion, finely diced
- 2 garlic cloves, minced
- 1 tablespoon olive oil
- ½ teaspoon dried oregano
- ½ teaspoon salt
- ¼ teaspoon black pepper
- Pinch of nutmeg
Instructions
- Preheat oven to 375°F. Grease a 9-inch pie dish or round cake pan generously with butter or cooking spray.
- Heat olive oil in a skillet over medium heat. Sauté the onion for 3–4 minutes until softened, then add the garlic and cook 1 minute more. Add the fresh spinach and stir until wilted, about 2 minutes. Remove from heat and let cool slightly. If using frozen spinach, skip the wilting step and just sauté the onion and garlic, then stir in the squeezed-dry spinach.
- In a large bowl, whisk together the eggs, milk, heavy cream, oregano, salt, pepper, and nutmeg until smooth.
- Spread the spinach and onion mixture evenly across the bottom of the prepared pan. Scatter the feta and mozzarella over the top. Pour the egg mixture slowly over everything.
- Bake for 35–40 minutes until the center is just set — it should have a very slight wobble but not be liquid. Let cool completely before slicing into wedges. Refrigerate overnight in an airtight container and pack into the cooler for camping. Keeps for up to 3 days.
1. Frozen Peanut Butter Banana Breakfast Wraps
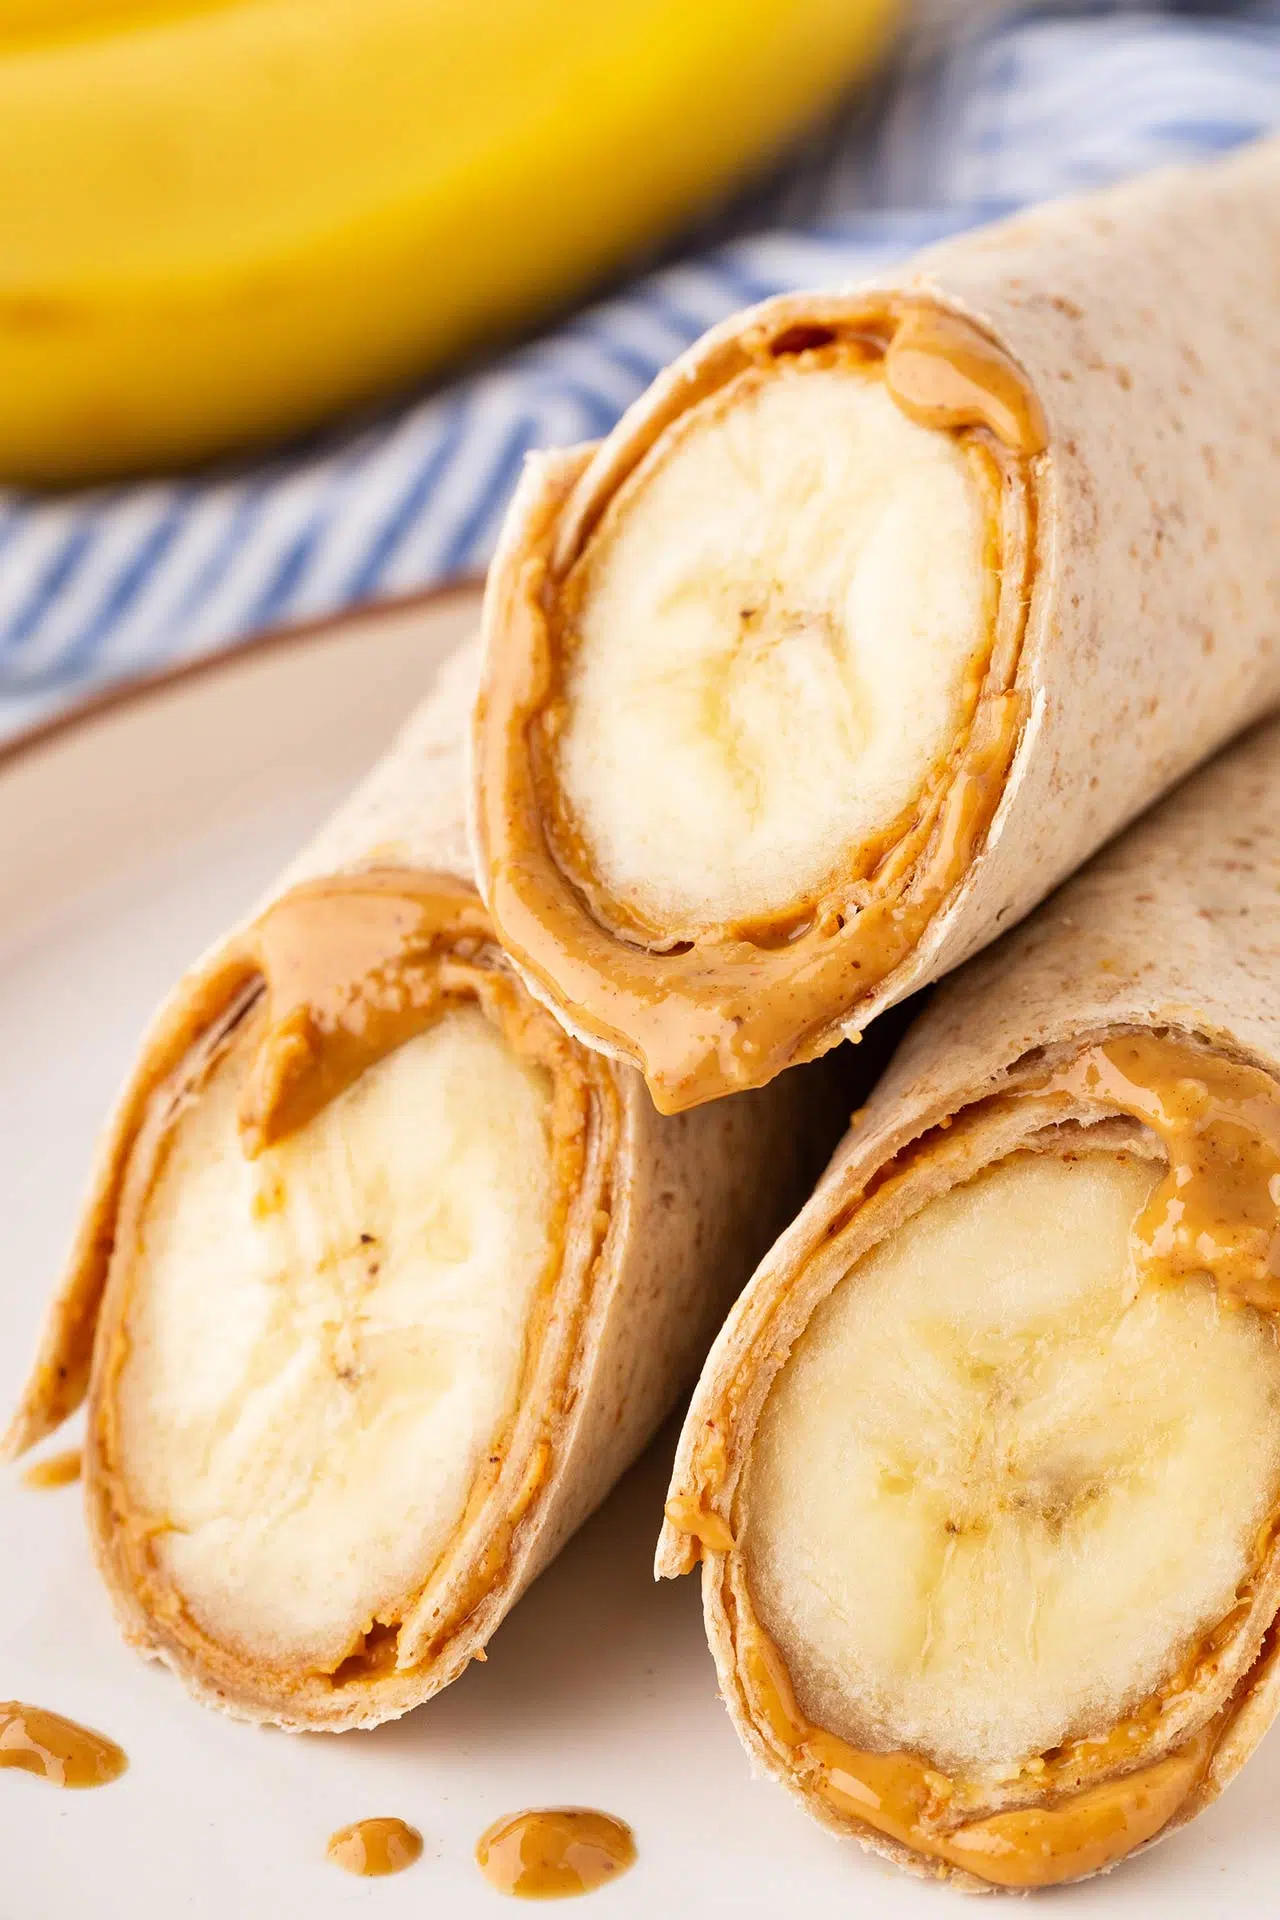
These land at number one for a reason: they require no cooking at camp, they're genuinely filling with real protein and carbs, and every single person in my family eats them without complaint — which is rarer than it should be. You make them at home, wrap them tight, freeze them solid, and pack them frozen into the cooler. They thaw slowly and are ready to eat within a couple of hours. By breakfast time, they're soft enough to eat but still cold and a little firm in the best way, almost like a breakfast ice cream wrap. The combination of peanut butter, banana, honey, and granola hits everything you need in the morning without requiring a single flame.
Ingredients
- 4 large flour tortillas (10-inch burrito size)
- ½ cup creamy peanut butter (or almond butter)
- 2 tablespoons honey
- 2 medium bananas, sliced into rounds
- ½ cup granola (any variety — I use Quaker Oats or store-brand from Aldi)
- 2 tablespoons mini chocolate chips (optional, but Zainab insists)
- ¼ teaspoon cinnamon
Instructions
- Lay out all four tortillas on a clean flat surface. In a small bowl, stir together the peanut butter and honey until smooth and easy to spread.
- Spread a generous layer of the peanut butter mixture across each tortilla, leaving a 1-inch border around the edges.
- Arrange the banana slices in a single layer over the peanut butter on each tortilla. Sprinkle the granola, cinnamon, and chocolate chips evenly across all four.
- Fold in the sides of each tortilla, then roll up tightly from the bottom like a burrito, making sure the filling is fully enclosed. Wrap each roll tightly in plastic wrap, then in a layer of aluminum foil for extra protection.
- Place the wrapped rolls flat in a single layer in a freezer-safe bag or container and freeze for at least 4 hours or overnight. Transfer directly to the cooler when packing for your trip — they act as extra ice packs and are ready to eat once thawed, in about 2–3 hours.
There you have it — 15 make-ahead camping breakfasts that actually make mornings outside feel manageable instead of chaotic. Whether you're pulling a foil packet out of the cooler at 7am or slicing into an overnight oat jar while the fire gets going, the whole point is that you're not standing around hungry trying to figure out what to cook. Prep happens at home. Mornings happen at camp. That's the deal.
I always make at least two or three of these before any camping trip, and I usually double the batch because somehow food disappears faster outdoors. Saad and Zainab eat more at a campsite in one morning than they do at home in an entire day — I don't know what it is about fresh air and a fire, but it works. Pick two or three recipes from this list that match your group size and your cooler space, and you'll be set.
If you found something you want to try, save this post or share it with whoever's doing the packing for your next trip. And if you want more ideas for easy outdoor eating or prep-ahead meals, check out the links below — there's plenty more where this came from. 🏕️🔥🍳
Related Recipes
- Browse All Recipe Roundups on Forfoodiefriends.com
- Easy Make-Ahead Breakfast Ideas for Busy Mornings
- Overnight Oats Recipes You Can Prep the Night Before
- Easy Foil Packet Meals for Camping and Grilling
- Meal Prep Breakfast Recipes for the Whole Week
Frequently Asked Questions
How far in advance can I prep these camping breakfasts?
Most of these can be prepped 1 to 2 days before your trip without any issues. Things like overnight oats, egg muffins, and foil packets hold up really well in a cooler for up to 48 hours. Just make sure anything with egg or dairy stays cold — pack your cooler with plenty of ice and keep it in the shade.
Do I need a fire or camp stove to reheat these?
It depends on the recipe. Some of these — like overnight oats or energy balls — are totally no-heat, eat-straight-from-the-container situations. Others, like foil packet breakfasts or breakfast burritos, warm up best over a camp stove or right on the fire grate. I try to pack at least one no-heat option for the mornings when getting the fire going feels like too much work.
What's the easiest recipe on this list for a first-time camper?
Overnight oats or no-bake energy balls — hands down. You make them at home the night before, toss them in the cooler, and eat them straight from the container at camp. No reheating, no utensils beyond a spoon, no mess. Perfect for figuring out camping logistics for the first time without also having to figure out breakfast.
How do I keep food cold enough in a cooler for a camping trip?
Pre-chill your cooler with ice for a few hours before you pack it — this makes a bigger difference than most people realize. Use block ice instead of cubed if you can find it; it melts slower. Keep the cooler in a shaded spot at the campsite and try not to open it more than you need to. For a 2-day trip, a good cooler with proper ice should keep eggs and dairy completely safe.
Can I make these recipes if I'm camping with kids?
That's literally who most of this list is designed for. Kids are hungry the second they wake up at a campsite, and they do not want to wait 30 minutes for something to cook. Having grab-and-go options prepped ahead — muffins, wraps, oat jars — means they can eat while you're still finding your coffee. Almost everything on this list is kid-friendly and most of it can be eaten without a plate or fork.





Comments
No Comments