
Lunch in our house used to be an afterthought — whatever was left in the fridge, a sad sandwich, or skipping it entirely because I was too busy chasing after Saad and Zainab to think about it. Then I started noticing something: the days I actually ate a proper, high protein lunch were the days I didn't raid the pantry at 4pm or feel completely wiped out by dinner time. That shift changed how I plan my midday meals entirely.
A good high protein lunch isn't just grilled chicken on lettuce. It should actually taste like something you want to eat — food that keeps you full for hours without being heavy, and that you can realistically pull together on a busy weekday. I look for real flavor, a reasonable ingredient list, and meals that won't have me standing at the stove for an hour at noon. If you're also trying to build better lunch habits, my post on meal prep ideas is a good place to start alongside this one.
This list covers a lot of ground — there's the Blackened Cod Tacos that I make when I want something that feels like a restaurant meal without the fuss, the Buffalo Chicken Meal Prep that I batch-cook on Sundays so lunch is handled for three days straight, and the Salmon Sushi Bowls that my husband requests constantly. There's also a Pesto Chicken Quinoa Bowl and a seriously underrated Tofu Gnocchi with Creamy Sundried Tomato Sauce for when I want something a little different. If you're into bowl-style meals, my healthy dinner recipes roundup has more ideas in that direction.
Here are the 15 high protein lunch ideas I keep coming back to — pick whichever fits your week.
Top 15 High Protein Lunch Ideas

15. Cauliflower Crustless Pizza Bowl
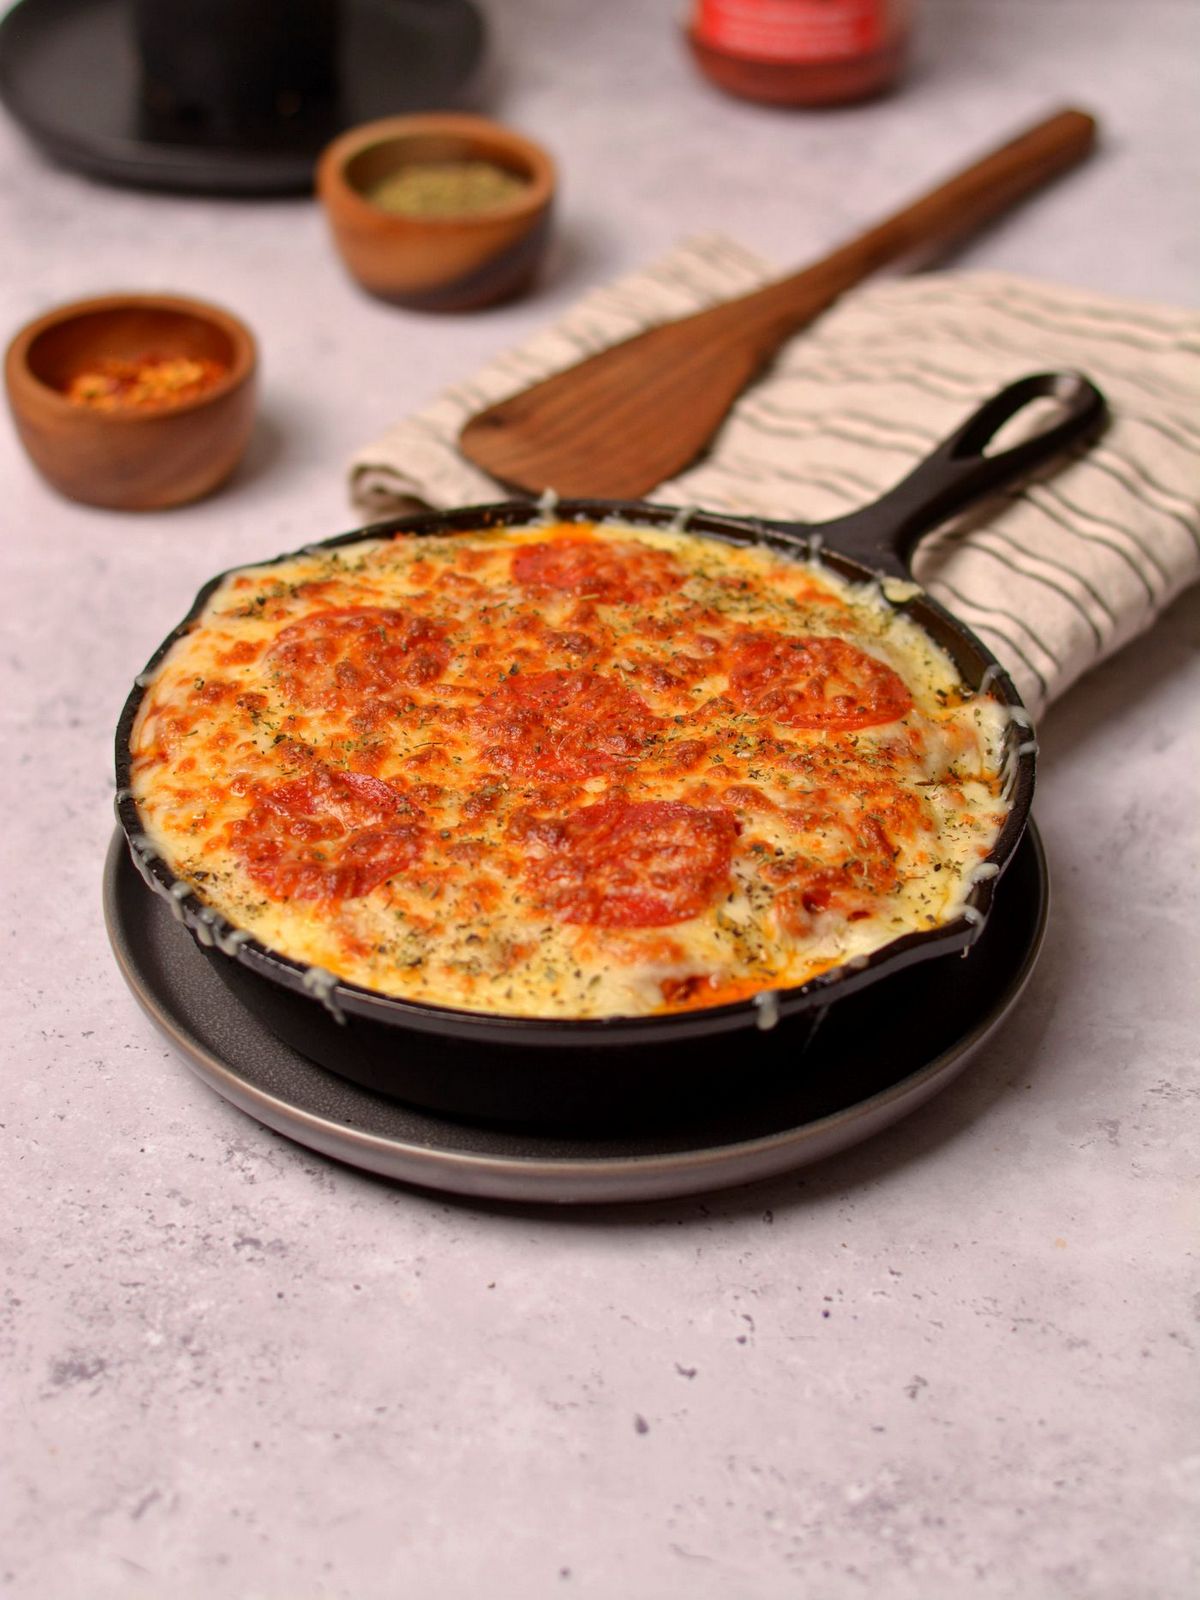
This is one of those recipes I was skeptical about the first time I made it — pizza without a crust sounds like a consolation prize, not a real meal. But once I tried it, I got it. You get all the flavors you actually want from pizza — the savory sausage, the melted cheese, the tomato — without the carb-heavy base that leaves you sluggish at 2pm. It's grain-free, genuinely filling, and the cauliflower does a surprisingly good job of carrying everything. I make a batch on Sundays and it reheats well all week.
Ingredients
- 1 medium head cauliflower, cut into small florets (about 4 cups)
- ½ lb Italian sausage (hot or mild, casings removed)
- 1 cup marinara sauce (jarred is fine)
- 1 cup shredded mozzarella cheese
- ¼ cup grated Parmesan
- ½ teaspoon garlic powder
- ½ teaspoon dried oregano
- Salt and black pepper to taste
- Optional toppings: sliced olives, red pepper flakes, fresh basil
Instructions
- Preheat oven to 400°F. Toss cauliflower florets with a drizzle of olive oil, garlic powder, salt, and pepper. Spread on a sheet pan and roast for 20 minutes until the edges start to brown.
- While the cauliflower roasts, cook the sausage in a skillet over medium-high heat, breaking it up as it cooks, until browned and cooked through — about 8 minutes. Drain any excess fat.
- Divide the roasted cauliflower between oven-safe bowls or a baking dish. Top with marinara sauce, cooked sausage, mozzarella, and Parmesan. Sprinkle with oregano.
- Return to the oven for 8–10 minutes until the cheese is melted and bubbling. Add any optional toppings and serve immediately, or let cool before storing for meal prep.
Tips
- Tip: Don't skip roasting the cauliflower first — steaming it makes the bowl watery. You want some browning for texture.
- Tip: To reheat from the fridge, use the oven at 350°F for 10 minutes rather than the microwave — it keeps the cheese from getting rubbery.
- Tip: Swap sausage for ground turkey or chicken if you want to keep the fat lower without losing the protein.
14. California Chicken Salad

Chicken salad with Greek yogurt instead of straight mayo sounds like a health-food compromise, but this one genuinely doesn't taste like one. The grapes add a sweetness that works, the cashews give it crunch, and the celery keeps it fresh. I usually pile it onto crackers for myself and stuff it into a croissant for the kids — it works both ways. It's the kind of lunch that takes 10 minutes if you have rotisserie chicken on hand, which I almost always do.
Ingredients
- 2 cups cooked chicken, shredded or diced (rotisserie chicken works great)
- ⅓ cup plain Greek yogurt
- 2 tablespoons mayonnaise
- 1 cup red or green grapes, halved
- 2 stalks celery, finely chopped
- ⅓ cup roasted cashews (roughly chopped)
- 1 tablespoon lemon juice
- ½ teaspoon garlic powder
- Salt and black pepper to taste
Instructions
- In a large bowl, whisk together the Greek yogurt, mayonnaise, lemon juice, garlic powder, salt, and pepper until smooth.
- Add the chicken, grapes, celery, and cashews to the bowl. Fold everything together gently until evenly coated in the dressing.
- Taste and adjust salt, pepper, or lemon juice. Refrigerate for at least 15 minutes before serving to let the flavors settle — it's noticeably better cold.
- Serve in croissants, scooped onto crackers, in lettuce cups, or over a bed of greens. Keeps in the fridge for up to 3 days.
Tips
- Tip: Add the cashews right before serving if you're making this ahead — they soften in the dressing overnight and lose their crunch.
- Tip: No cashews? Slivered almonds or chopped walnuts work just as well here.
- Tip: For a dairy-free version, skip the Greek yogurt and go full mayo — still good, just a little richer.
13. Roasted Turkey Avocado BLT

A BLT is one of those sandwiches that seems too simple to be worth writing about — until you make a really good one and remember why people love it so much. Adding roasted turkey and avocado turns it into a proper high-protein lunch rather than just a bacon sandwich. The Sriracha aioli is what ties it together — creamy, slightly spicy, and much better than plain mayo. My husband asks for this one regularly, which is saying something because he's not usually a sandwich person.
Ingredients
- 2 slices sourdough or whole grain bread, toasted
- 4 oz sliced roasted turkey breast (deli or homemade)
- 3 strips bacon, cooked until crisp
- ½ ripe avocado, sliced
- 2 slices tomato
- 2–3 leaves romaine or butter lettuce
- 2 thin slices red onion
- 2 tablespoons mayonnaise
- 1 teaspoon Sriracha (adjust to your heat preference)
- Salt and black pepper to taste
Instructions
- Mix the mayonnaise and Sriracha together in a small bowl to make the aioli. Taste and add more Sriracha if you want more heat.
- Toast the bread to your liking. Spread the Sriracha aioli generously on both slices.
- Layer the bottom slice with turkey, bacon, avocado, tomato, red onion, and lettuce. Season the avocado and tomato lightly with salt and pepper.
- Top with the second slice of bread, press down gently, and cut in half. Serve immediately — this one doesn't hold well if you build it too far ahead.
Tips
- Tip: Pat the tomato slices dry with a paper towel before adding them — wet tomatoes make the bread soggy fast.
- Tip: If you're packing this for work, keep the aioli and avocado separate and assemble when you're ready to eat.
- Tip: No Sriracha? A little hot sauce stirred into mayo works the same way — Frank's RedHot is a good substitute.
12. Tofu Gnocchi with Creamy Sundried Tomato Sauce
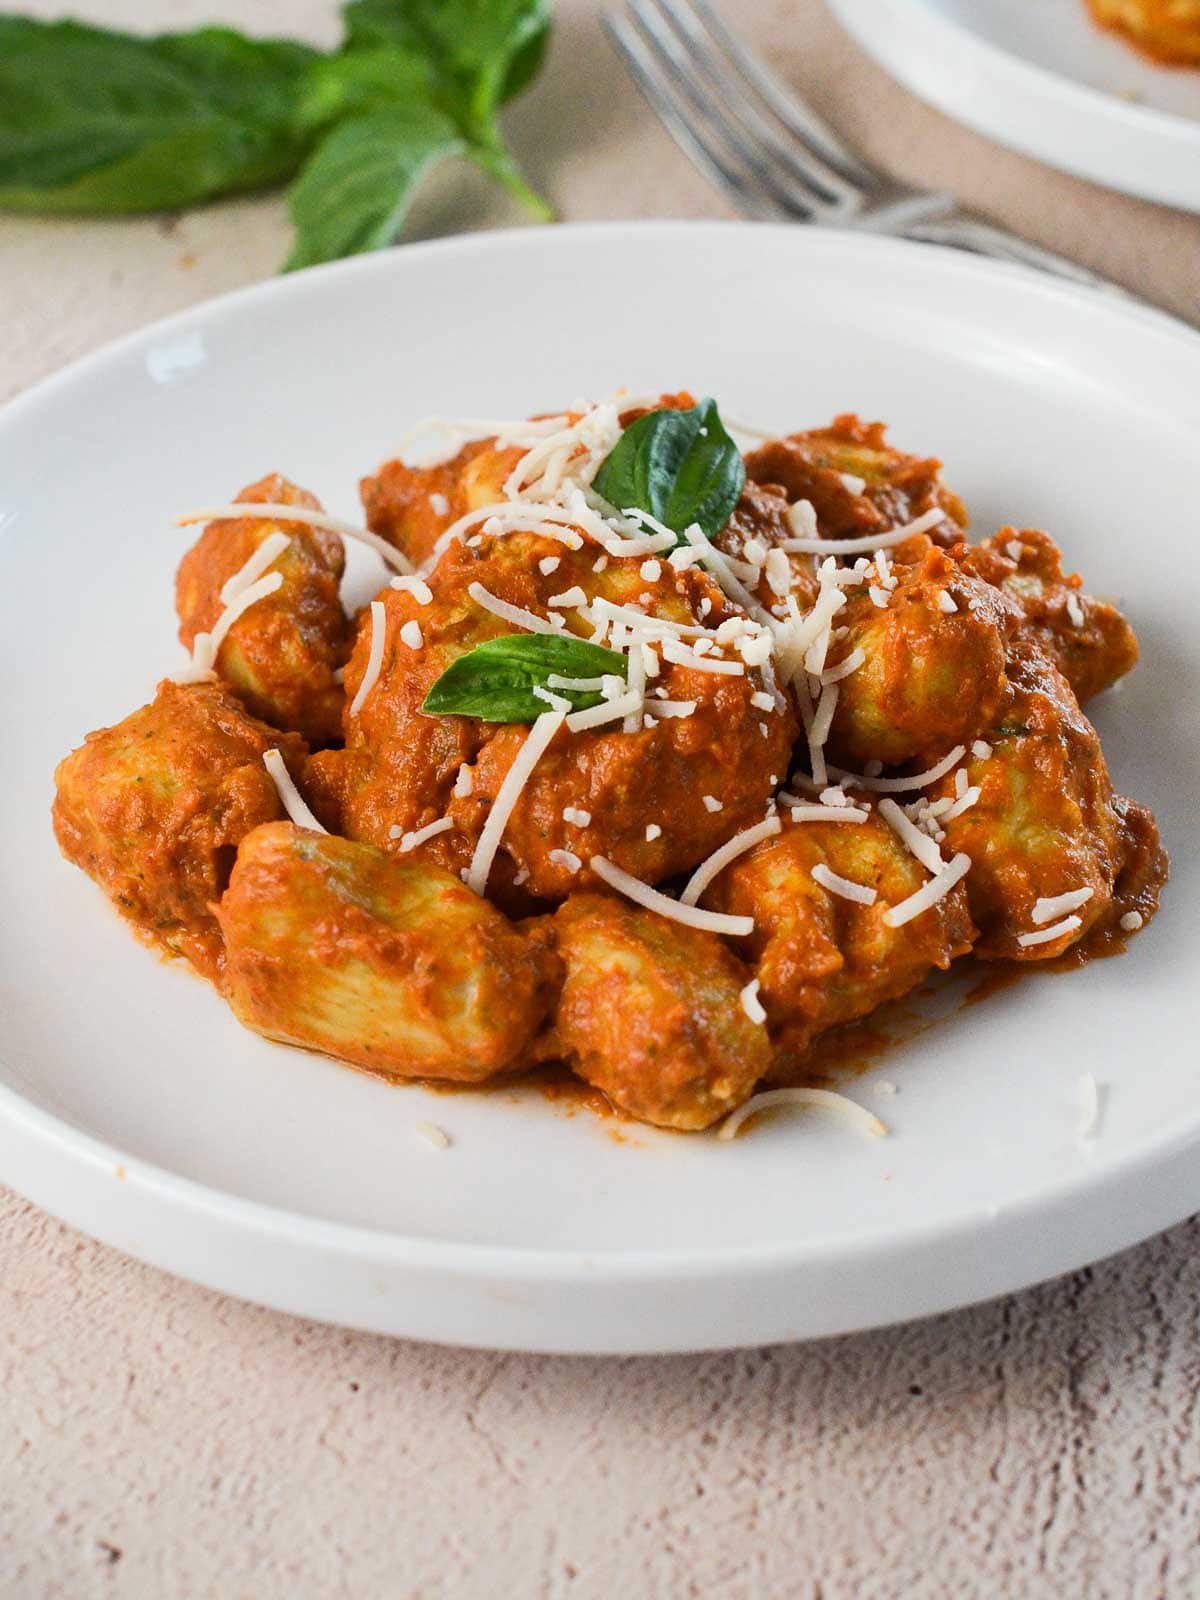
I'll be honest — I didn't think homemade tofu gnocchi would actually work. Gnocchi already feels fiddly with potato, so making it with tofu sounded like a project I'd abandon halfway through. I was wrong. Extra-firm tofu, pressed well, gives you a dough that comes together quickly, and the nutritional yeast adds a subtle savory depth that plays nicely with the sundried tomato sauce. This is the one on this list I'd recommend if you're cooking for someone plant-based who's tired of salads and wants something that actually feels like a meal.
Ingredients
- 14 oz block extra-firm tofu, pressed and drained for at least 30 minutes
- 1 cup all-purpose flour (plus extra for dusting)
- 2 tablespoons nutritional yeast
- ½ teaspoon salt
- ½ cup sundried tomatoes in oil, roughly chopped (reserve 1 tablespoon of the oil)
- 3 cloves garlic, minced
- 1 cup full-fat coconut milk (or heavy cream if not vegan)
- ¼ teaspoon red pepper flakes
- Fresh basil for serving
Instructions
- Crumble the pressed tofu into a large bowl and mash it with a fork until smooth. Add flour, nutritional yeast, and salt. Mix until a soft dough forms — it should hold together when pressed. If it's sticky, add flour a tablespoon at a time.
- On a lightly floured surface, roll the dough into long ropes about ¾-inch thick. Cut into 1-inch pieces. Press each piece lightly with a fork if you want the classic ridges — this helps the sauce cling.
- Bring a large pot of salted water to a boil. Cook the gnocchi in batches — they're done when they float to the surface, about 2–3 minutes. Remove with a slotted spoon.
- In a skillet over medium heat, warm the reserved sundried tomato oil. Add garlic and sauté for 1 minute. Add the sundried tomatoes, red pepper flakes, and coconut milk. Simmer for 5 minutes until the sauce thickens slightly.
- Add the cooked gnocchi to the skillet and toss gently to coat. Serve with fresh basil on top.
Tips
- Tip: Pressing the tofu properly is the most important step — if there's too much moisture in the dough, the gnocchi will fall apart in the boiling water.
- Tip: You can pan-fry the cooked gnocchi in a little olive oil for 2–3 minutes per side to get crispy edges before adding the sauce — highly recommend it.
- Tip: Find sundried tomatoes in oil at Trader Joe's or in the pasta aisle at most grocery stores — the ones packed in oil are much better here than the dry-packed kind.
11. Curry Chicken Salad with Grapes and Celery

Growing up in Pakistan, curry was always a warm dish — something you ate over rice with naan on the side. So the first time I tried curry powder stirred into a cold chicken salad, I wasn't sure what to think. Turns out it's one of those combinations that just works. The curry gives the mayo-based dressing a warmth and depth that regular chicken salad doesn't have, and the grapes cut through the richness in the best way. Saad thinks the grapes are weird, so I usually set aside a plain portion for him — but the rest of us fight over the bowl.
Ingredients
- 2 cups cooked chicken breast, diced or shredded
- ⅓ cup mayonnaise
- 1½ teaspoons curry powder
- 1 cup red grapes, halved
- 2 stalks celery, finely diced
- 2 tablespoons plain Greek yogurt (optional, lightens the dressing)
- 1 teaspoon lemon juice
- ¼ teaspoon sea salt, or more to taste
- Black pepper to taste
Instructions
- In a medium bowl, whisk together the mayonnaise, Greek yogurt (if using), curry powder, lemon juice, salt, and pepper until smooth and evenly combined.
- Add the chicken, grapes, and celery. Fold everything together until the chicken is well coated. Taste and adjust the curry powder or salt — the flavor should be noticeable but not overpowering.
- Chill for at least 20 minutes before serving. The dressing absorbs into the chicken as it sits and the flavor improves significantly after resting.
- Serve on bread, in lettuce wraps, scooped over greens, or with crackers. Keeps refrigerated for up to 3 days.
Tips
- Tip: Start with 1 teaspoon of curry powder if you're unsure about the flavor — you can always stir in more after tasting.
- Tip: Rotisserie chicken from Costco or Walmart makes this a 10-minute lunch — no cooking required.
- Tip: Add a small handful of raisins or dried cranberries if you want even more sweetness — it's an easy variation that works well.
10. Salmon Sushi Bowls
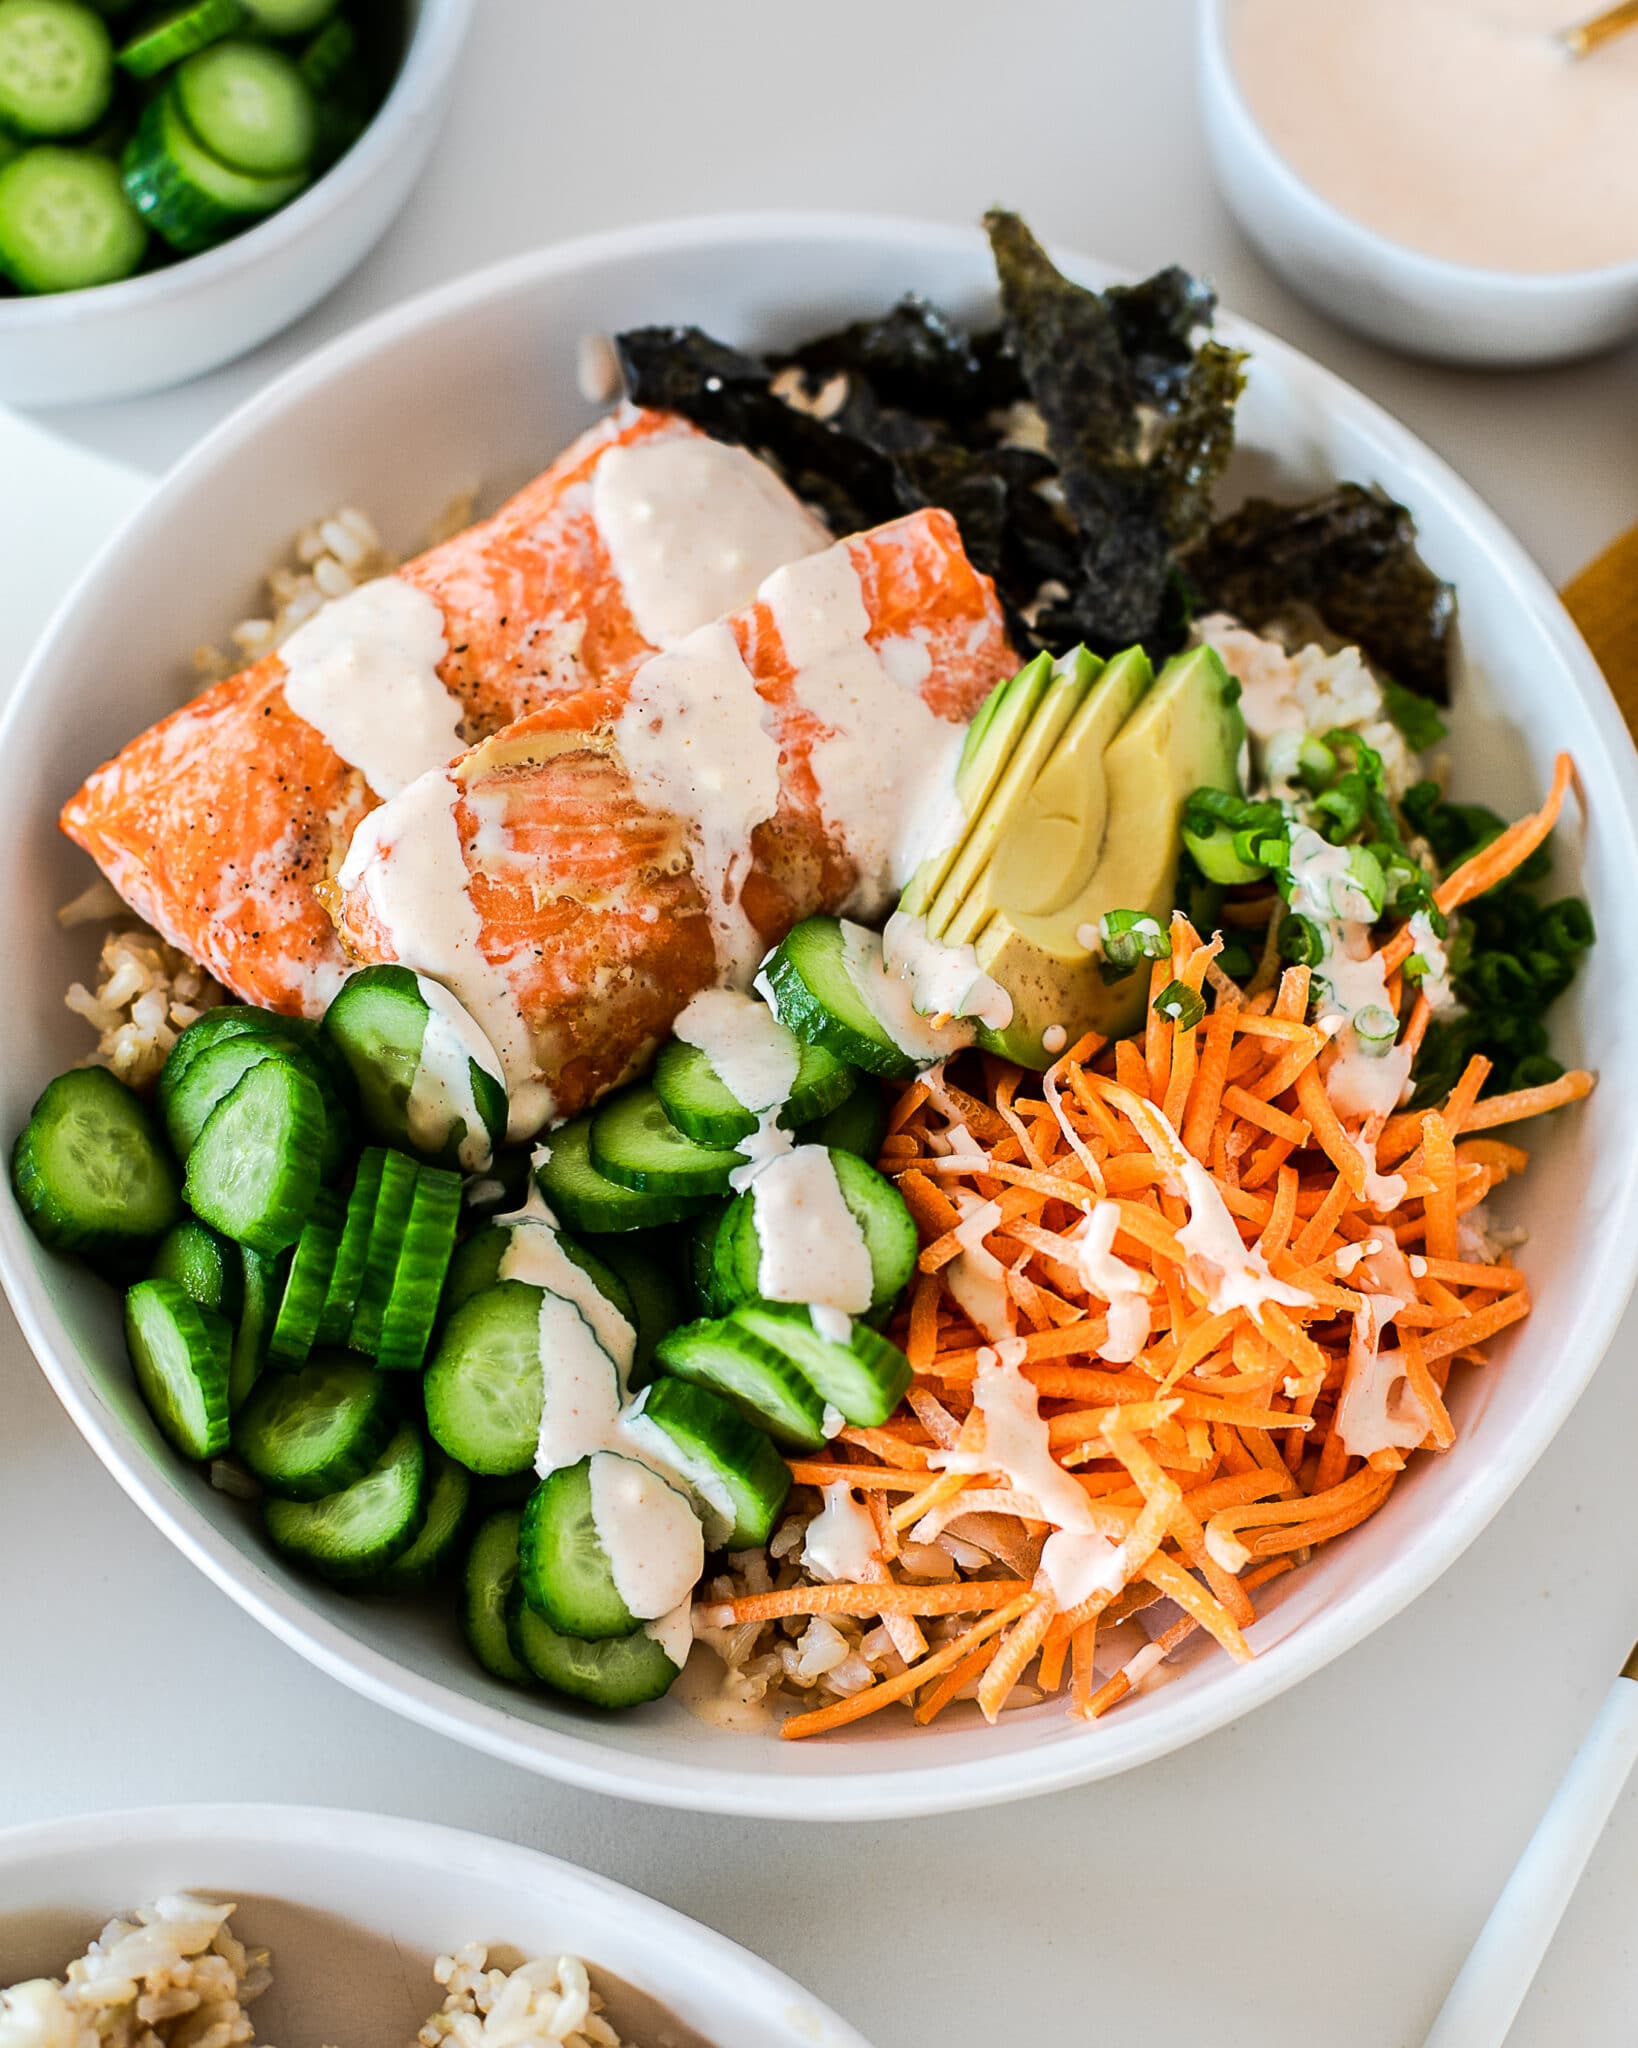
Sushi bowls are one of those things I started making when I realized I was never going to roll actual sushi neatly — and honestly, the bowl version is better for lunch anyway. You get all the same flavors: flaky salmon, creamy avocado, crunchy cucumbers, shredded carrot, and that sriracha mayo drizzle that makes everything taste intentional. The whole thing comes together in about 20 minutes if your rice is already cooked, which in my house it usually is because I keep a pot going on weekends. High protein, actually filling, and no chopstick skills required.
Ingredients
- 1 lb salmon fillet (skin-on or skinless)
- 2 cups cooked jasmine rice (brown or white)
- 1 tablespoon soy sauce
- 1 tablespoon sesame oil
- 1 mini cucumber, thinly sliced
- ½ cup shredded carrot
- 1 avocado, sliced
- 2 sheets nori, cut into strips
- 3 tablespoons mayonnaise
- 1–2 teaspoons sriracha (adjust to taste)
- 1 teaspoon sesame seeds, for topping
Instructions
- Season the salmon with soy sauce and sesame oil. Cook it in a nonstick skillet over medium-high heat for 4–5 minutes per side until cooked through, then flake into large chunks with a fork.
- Mix the mayonnaise and sriracha together in a small bowl until smooth. Taste and adjust the heat level — I usually go heavy on the sriracha.
- Divide the cooked rice between two bowls. Arrange the flaked salmon, cucumber, shredded carrot, avocado slices, and nori strips on top.
- Drizzle the sriracha mayo over everything and finish with sesame seeds. Serve immediately.
Tips
- Tip: Canned salmon works here in a pinch — drain it well and it still tastes great with the toppings doing most of the work.
- Tip: For meal prep, keep all the components separate and assemble at lunchtime so the rice doesn't get soggy.
- Tip: No nori? Skip it or swap in a sprinkle of furikake seasoning — you can find it at most Asian grocery stores or on Amazon.
9. Spicy Thai Chicken Salad

I made this for the first time using leftover rotisserie chicken and I couldn't believe how good it was — the peanut dressing alone is worth writing home about. It's crunchy, a little spicy, and the kind of salad that actually keeps you full because the shredded chicken and peanuts together pack a serious protein punch. Zainab won't touch it (too spicy for her), but my husband asked me to make it twice in one week, which says everything. If you have a bag of coleslaw mix sitting in your fridge, this comes together in about 10 minutes flat.
Ingredients
- 2 cups cooked chicken breast, shredded
- 2 cups green cabbage, thinly shredded (or a 10 oz bag of coleslaw mix)
- 1 mini cucumber, thinly sliced
- ½ cup matchstick carrots
- 1 jalapeño, thinly sliced (remove seeds for less heat)
- ¼ cup roasted peanuts
- 3 tablespoons peanut butter (creamy)
- 2 tablespoons soy sauce
- 1 tablespoon lime juice
- 1 tablespoon honey
- 1 teaspoon sriracha (or more to taste)
- 1 tablespoon warm water (to thin the dressing)
Instructions
- Whisk together the peanut butter, soy sauce, lime juice, honey, sriracha, and warm water in a small bowl until smooth. The warm water helps loosen the peanut butter — keep adding a little at a time until it's pourable.
- In a large bowl, combine the shredded chicken, cabbage, cucumber, carrots, and jalapeño.
- Pour the peanut dressing over the salad and toss well to coat everything evenly.
- Top with roasted peanuts right before serving so they stay crunchy. Taste and adjust lime or sriracha as needed.
Tips
- Tip: Rotisserie chicken from Costco or Walmart is perfect here — shred it while it's still warm and it pulls apart easily.
- Tip: If you have a peanut allergy in the house, sunflower seed butter works as a substitute for the dressing and sunflower seeds replace the peanuts on top.
- Tip: This salad holds up better than most — the cabbage doesn't wilt quickly, so it's a solid meal prep option. Just store the dressing separately until you're ready to eat.
8. Homemade Grilled Chicken Nuggets

My kids think nuggets only come from a drive-through window, so the first time I made these at home Saad was deeply skeptical — then he ate seven of them and asked if we could have them again tomorrow. These are grilled instead of fried, which means they're genuinely high in protein without a heavy breading situation. The marinade is simple: lemon juice, olive oil, garlic, and a few spices that you almost certainly already have. The key is not skipping the marinating time — 30 minutes minimum, but if you can manage an hour, the chicken stays juicy and doesn't dry out on the grill.
Ingredients
- 1½ lbs boneless skinless chicken breast, cut into nugget-sized pieces
- 3 tablespoons olive oil
- 2 tablespoons lemon juice
- 2 cloves garlic, minced
- 1 teaspoon paprika
- ½ teaspoon garlic powder
- ½ teaspoon onion powder
- ½ teaspoon salt
- ¼ teaspoon black pepper
Instructions
- Combine olive oil, lemon juice, minced garlic, paprika, garlic powder, onion powder, salt, and pepper in a bowl. Add the chicken pieces and toss to coat. Cover and marinate in the fridge for at least 30 minutes.
- Heat a grill pan or outdoor grill over medium-high heat. Lightly oil the grates or pan so the nuggets don't stick.
- Grill the chicken pieces for 4–5 minutes per side until cooked through and lightly charred on the outside. The internal temperature should reach 165°F.
- Let them rest for 2–3 minutes before serving. Pair with your favorite dipping sauce — we usually do honey mustard or a simple yogurt dip.
Tips
- Tip: Cut your chicken pieces as evenly as possible so they all cook at the same rate — nothing worse than some pieces overcooked and dry while others are still pink in the middle.
- Tip: No grill? A cast iron skillet works just as well — get it nice and hot before adding the chicken and you'll still get that slight char on the outside.
- Tip: These reheat really well in an air fryer at 375°F for 3–4 minutes, so make a double batch for the week and thank yourself later.
7. Pasta With Coconut Milk
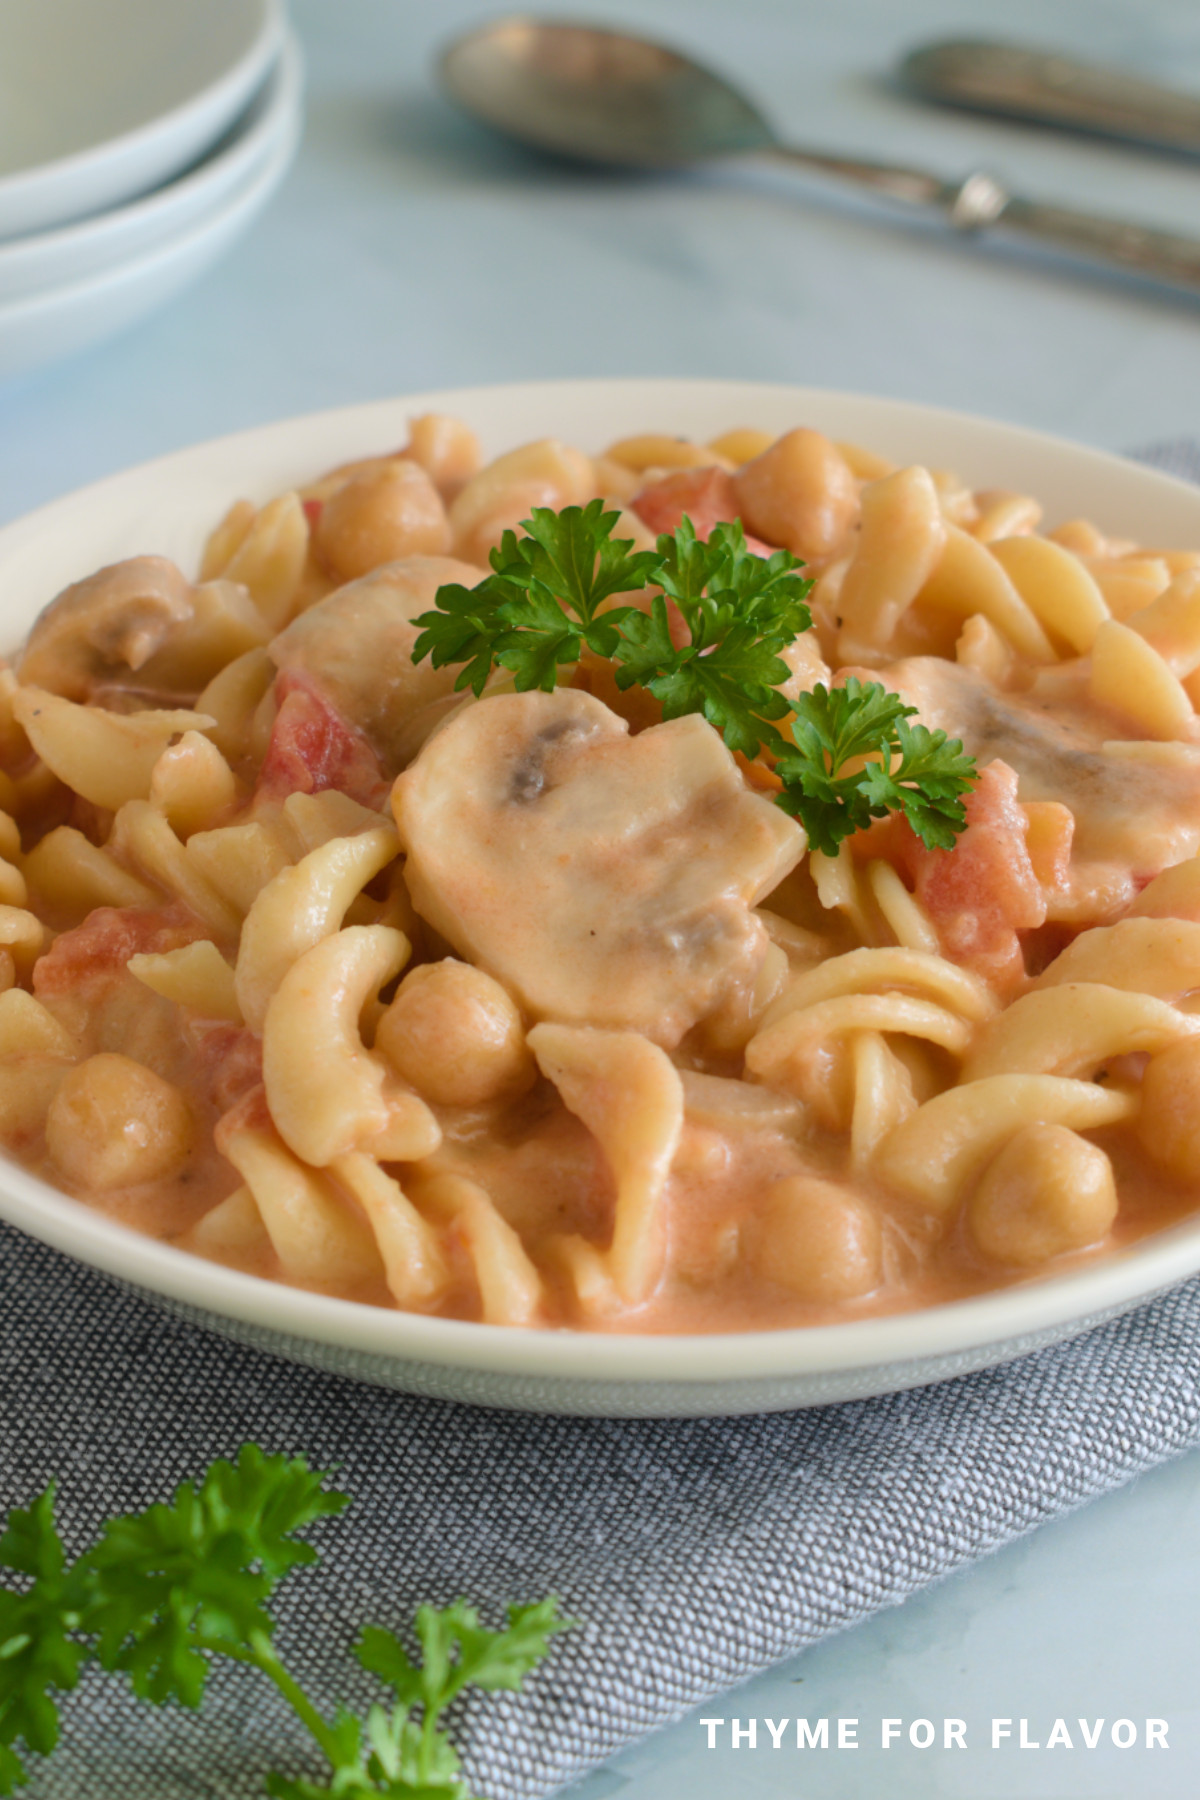
I was skeptical about coconut milk in pasta the first time I saw the concept — it sounded like it would taste like a dessert gone wrong. It doesn't. The coconut milk makes the sauce silky and rich without being heavy, and when you add chickpeas or white beans for protein it turns into a genuinely satisfying lunch. This is also dairy-free, which matters in my house because I have days where I'm trying to cook lighter. The trick is seasoning it properly — coconut milk needs salt and a little acid (I use diced tomatoes) to stop it from tasting flat. Get those two things right and this pasta is legitimately good.
Ingredients
- 8 oz pasta (penne or rigatoni work well)
- 1 tablespoon olive oil
- 3 cloves garlic, minced
- 1 can (14 oz) diced tomatoes, drained
- 1 can (13.5 oz) full-fat coconut milk
- 1 can (15 oz) chickpeas, drained and rinsed (or white beans)
- 1 teaspoon paprika
- ½ teaspoon cumin
- Salt and black pepper to taste
- Fresh parsley or basil, for topping
Instructions
- Cook the pasta according to package directions in well-salted water. Reserve ¼ cup of pasta water before draining — you may need it to loosen the sauce later.
- While the pasta cooks, heat olive oil in a large skillet over medium heat. Add the garlic and cook for 1 minute until fragrant. Add the drained diced tomatoes and cook for 3–4 minutes, stirring occasionally.
- Pour in the coconut milk and stir to combine. Add the paprika, cumin, salt, and pepper. Let the sauce simmer for 5 minutes until it thickens slightly.
- Add the chickpeas and cooked pasta. Toss everything together and add a splash of reserved pasta water if the sauce is too thick. Taste and adjust salt.
- Serve topped with fresh parsley or basil.
Tips
- Tip: Drain the tomatoes well — if you skip this, the sauce gets watery and thin and doesn't cling to the pasta properly. I learned that the hard way.
- Tip: Full-fat coconut milk gives you a much creamier result than light coconut milk. It's worth the extra few calories for a sauce that actually coats the pasta.
- Tip: Want more protein? Add cooked shrimp or diced chicken breast along with the chickpeas — it works well with the coconut base.
6. Rose Tteokbokki

Rose tteokbokki is the creamier, milder cousin of the fiery red Korean street food version, and it's the one I actually cook at home because my family can handle the heat level. The chewy rice cakes in a gochujang-cream sauce are genuinely unlike anything else — the texture is so satisfying that this dish has become a regular in my lunch rotation. You can find Korean rice cakes (tteok) at most Asian grocery stores, and if you're near a Hmart or H Mart, you'll definitely spot them frozen. Adding a soft-boiled egg or some fish cakes bumps the protein up significantly, which is why it belongs on this list.
Ingredients
- 2 cups Korean rice cakes (tteok), fresh or thawed from frozen
- 1 tablespoon gochujang (Korean chili paste)
- 1 tablespoon soy sauce
- 1 teaspoon sugar
- ½ cup chicken broth
- ½ cup heavy cream
- 2 cloves garlic, minced
- 2 soft-boiled eggs, halved (for protein)
- ½ cup shredded mozzarella, for topping
- 1 teaspoon sesame oil
- Sliced green onions, for garnish
Instructions
- If using frozen rice cakes, soak them in warm water for 10 minutes first so they soften and cook evenly.
- In a skillet over medium heat, sauté the minced garlic in a small drizzle of oil for about 30 seconds. Add the gochujang, soy sauce, and sugar and stir together for 1 minute.
- Pour in the chicken broth and bring to a simmer. Add the rice cakes and cook for 5–7 minutes, stirring occasionally, until they start to soften and absorb the sauce.
- Reduce the heat to low and pour in the heavy cream. Stir and let it simmer for another 3–4 minutes until the sauce is thick and coats the rice cakes. Finish with a drizzle of sesame oil.
- Top with shredded mozzarella and let it melt (cover the pan for 1 minute to help it along). Add the soft-boiled egg halves and green onions, and serve immediately.
Tips
- Tip: Gochujang varies a lot by brand in terms of spice level — start with 1 tablespoon and taste before adding more. The cream mellows it out significantly.
- Tip: This dish doesn't store well once assembled — the rice cakes get stiff and chewy in a bad way when refrigerated. Make it fresh and eat it immediately.
- Tip: Can't find tteok? Some Asian grocery stores sell them labeled as "rice cake sticks" or "Korean rice cakes" — they're usually in the refrigerated or frozen section near the tofu.
11. Pesto Chicken Quinoa Bowl
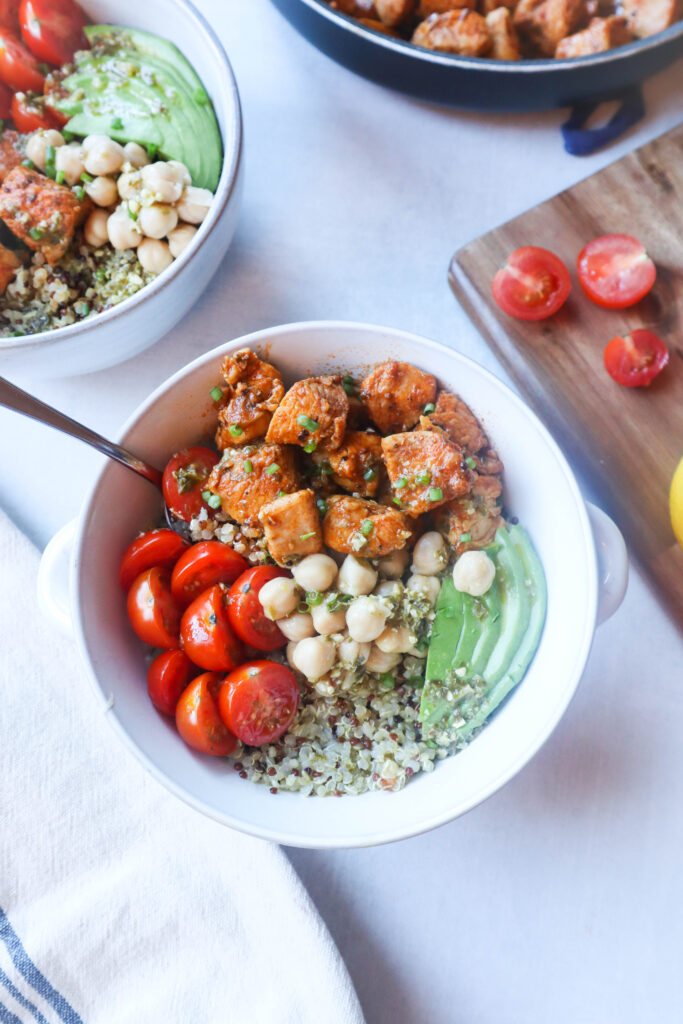
Quinoa bowls get a bad reputation for being bland, but this one changed my mind completely. The pesto ties everything together — chicken, quinoa, roasted cherry tomatoes — in a way that actually makes lunch feel worth looking forward to. I make a double batch of the quinoa on Sundays and it disappears before Wednesday. If you're new to quinoa and not sure how to make it taste like something, this is the recipe to start with — the pesto does the heavy lifting. It's also genuinely filling, which matters when you're trying to get through an afternoon without raiding the snack drawer. Check out my meal prep lunch ideas for more ways to build your week around bowls like this.
Ingredients
- 1 cup dry quinoa, rinsed
- 2 cups chicken broth (or water)
- 2 boneless skinless chicken breasts (about 1 lb total)
- 3 tablespoons store-bought basil pesto
- 1 cup cherry tomatoes, halved
- 1 cup baby spinach or arugula
- ¼ cup shaved or shredded Parmesan
- 1 tablespoon olive oil
- Salt and black pepper to taste
Instructions
- Cook quinoa in chicken broth over medium heat according to package directions (usually about 15 minutes). Fluff with a fork and let it cool slightly.
- Season chicken breasts with salt and pepper. Heat olive oil in a skillet over medium-high heat and cook chicken 6-7 minutes per side until cooked through (internal temp 165°F). Let rest 5 minutes, then slice.
- Toss the warm quinoa with 2 tablespoons of pesto until evenly coated.
- Divide pesto quinoa into bowls. Top with sliced chicken, cherry tomatoes, and spinach. Drizzle the remaining tablespoon of pesto over the top and finish with Parmesan.
Tips
- Tip: Use rotisserie chicken to cut the prep time in half — just shred it and toss with pesto.
- Tip: Store the components separately if meal prepping — the quinoa gets soggy if it sits with the tomatoes too long.
- Tip: No pesto on hand? A tablespoon of olive oil mixed with a little garlic powder and dried basil gets you close enough on a busy day.
12. Fish Meal Prep
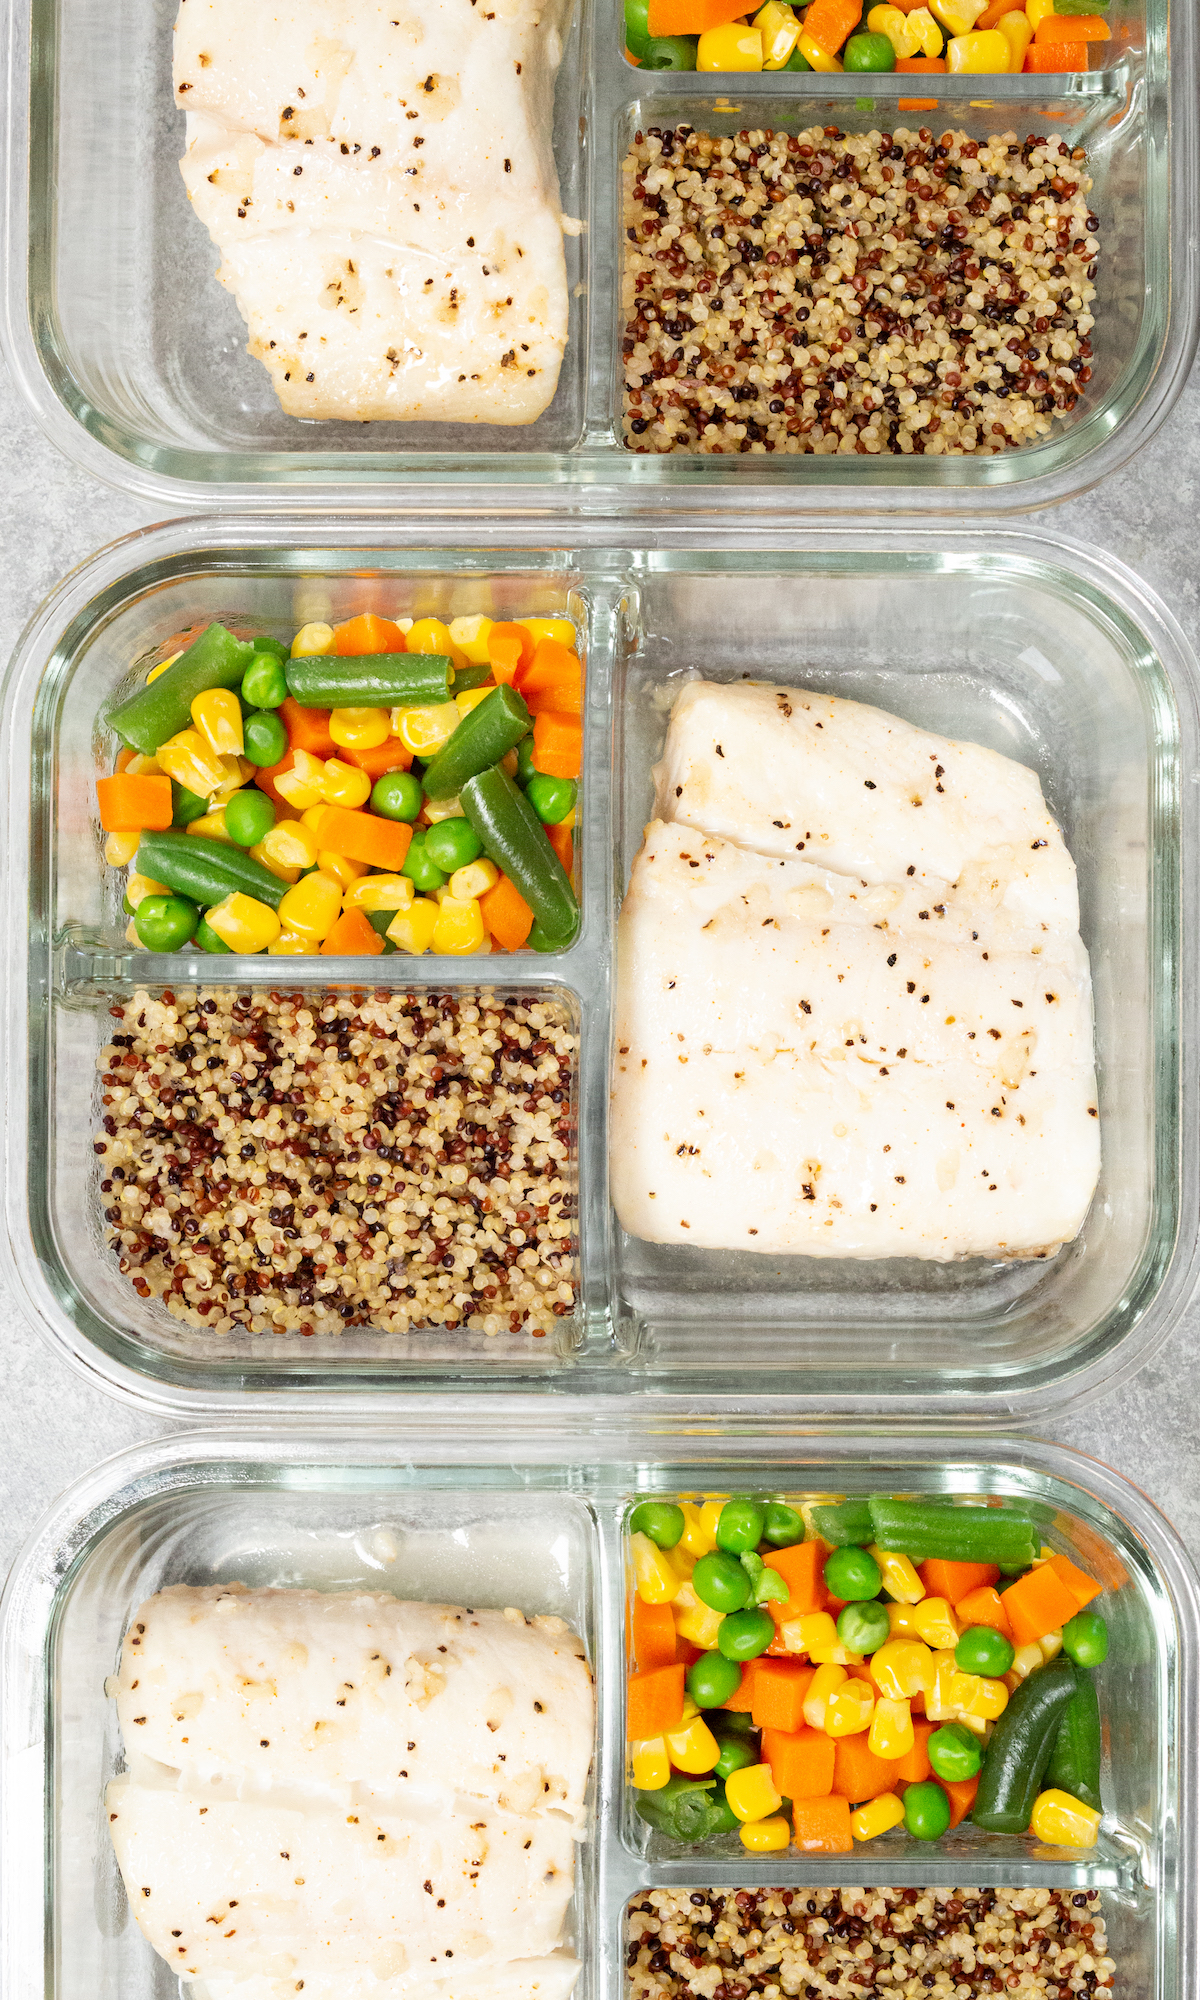
I used to avoid fish in meal prep because I was convinced it would turn rubbery by day two. Then I started baking cod at a lower temperature and keeping the quinoa and veg separate in the containers — total game changer. White fish like cod or tilapia is some of the leanest protein you can buy, and a fillet from Walmart or Aldi costs next to nothing. The lemon-herb seasoning keeps it light without being boring, and paired with roasted vegetables and quinoa, it's one of those lunches that genuinely doesn't feel like diet food. This one earns its place on the list because it's practical, filling, and actually holds up through the week.
Ingredients
- 4 white fish fillets (cod or tilapia, about 5-6 oz each)
- 2 tablespoons olive oil
- 1 teaspoon garlic powder
- 1 teaspoon dried Italian seasoning
- Juice of 1 lemon
- Salt and black pepper to taste
- 1 cup dry quinoa, rinsed
- 2 cups mixed vegetables (broccoli, zucchini, bell pepper), chopped
- 1 tablespoon olive oil (for vegetables)
Instructions
- Preheat oven to 375°F. Cook quinoa according to package directions and set aside.
- Toss chopped vegetables with 1 tablespoon olive oil, salt, and pepper. Spread on one half of a sheet pan and roast for 20 minutes.
- Pat fish fillets dry and place on the other half of the sheet pan. Drizzle with 2 tablespoons olive oil, garlic powder, Italian seasoning, lemon juice, salt, and pepper.
- Add the fish to the pan for the last 12-15 minutes of roasting, until the fish flakes easily with a fork.
- Divide quinoa, vegetables, and fish evenly into 4 meal prep containers. Refrigerate for up to 3 days.
Tips
- Tip: Keep the fish in a separate section of the container from the quinoa — it stays firmer and reheats better that way.
- Tip: Reheat gently in the microwave at 70% power — fish goes rubbery fast on high heat.
- Tip: Salmon works here too if you want a richer flavor and more omega-3s — just add 3-4 extra minutes of cook time.
13. Buffalo Chicken Meal Prep
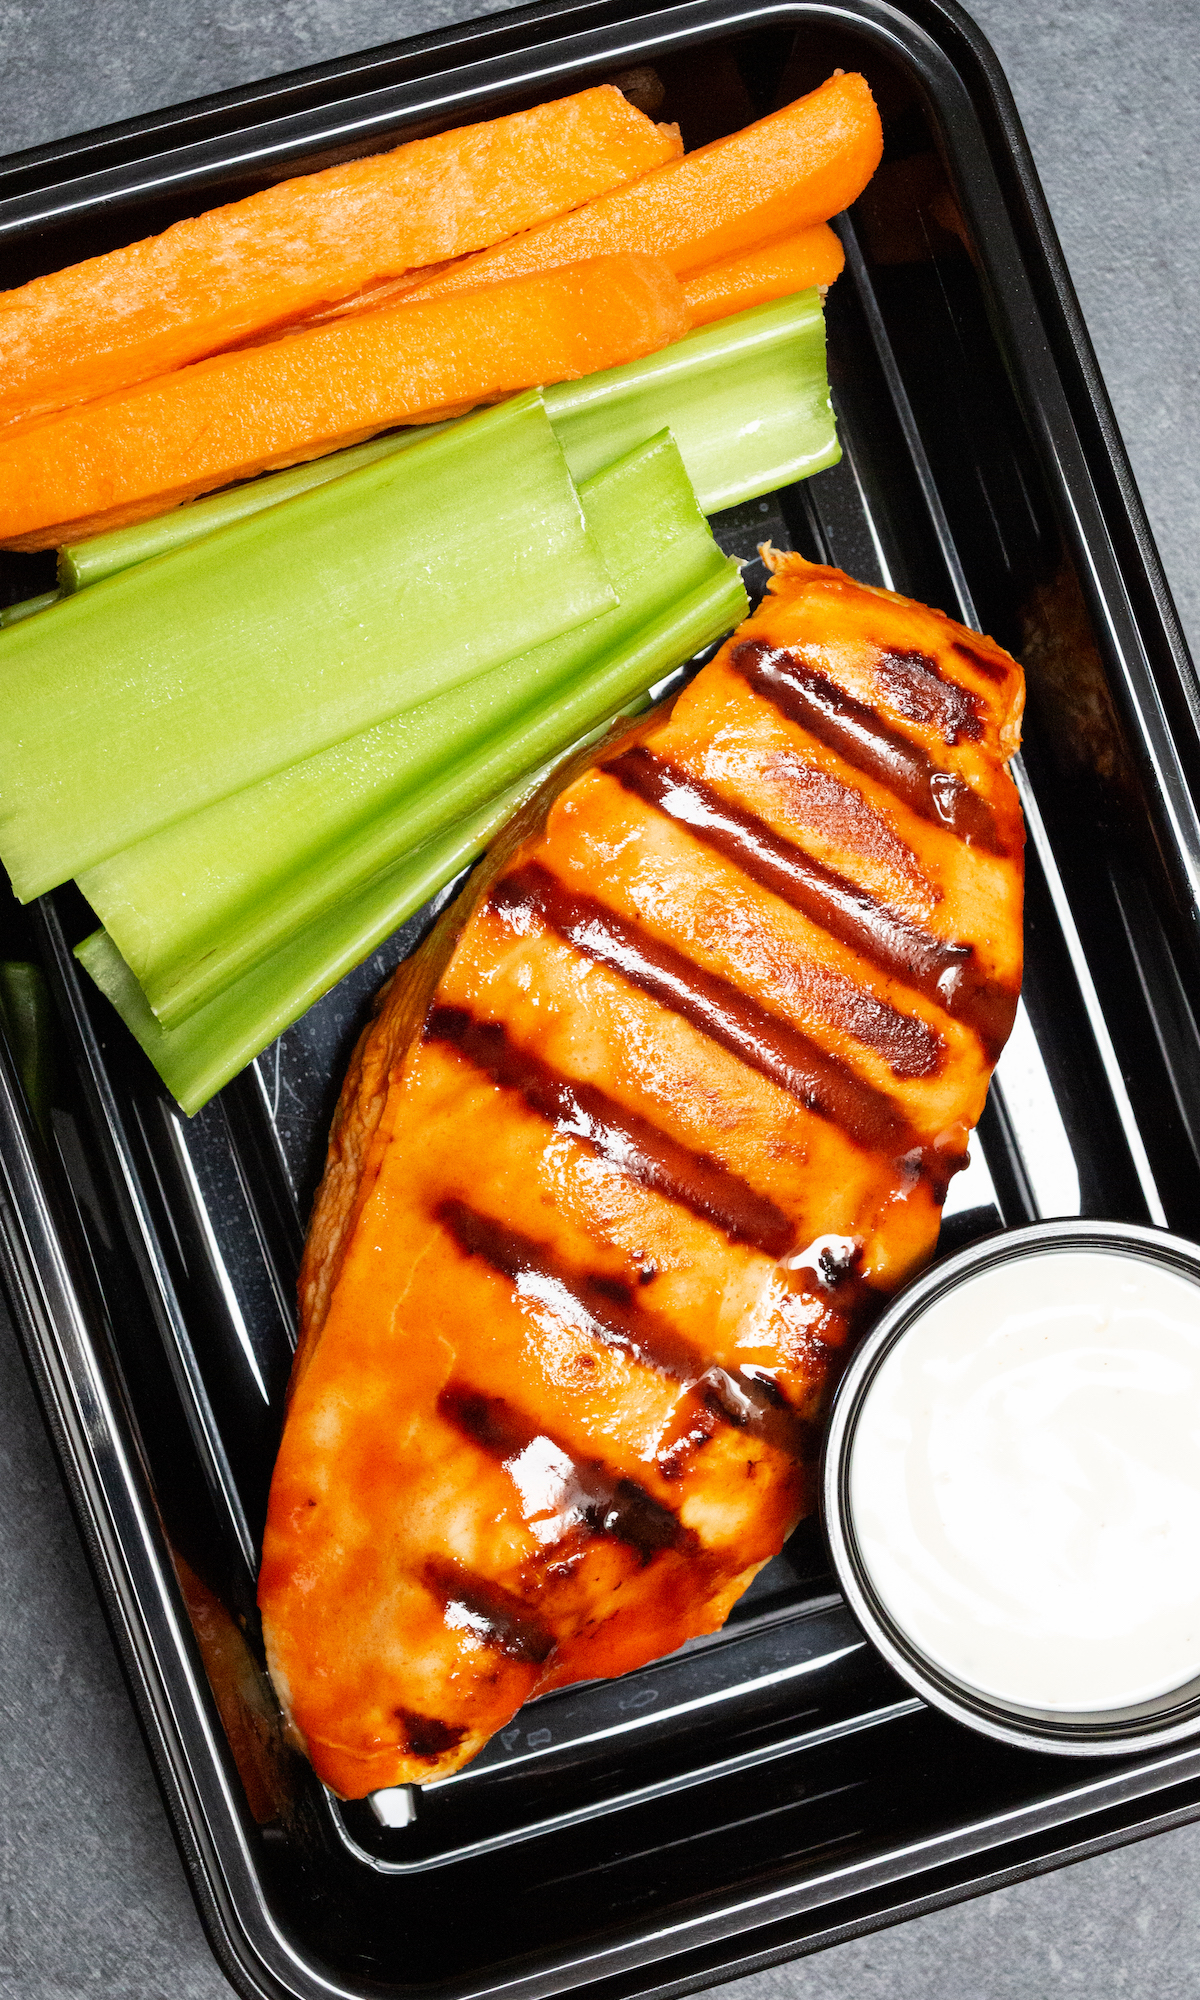
My husband would eat buffalo chicken in any form — on pizza, in a wrap, straight off a plate. When I started making this meal prep version for him, he stopped complaining about eating the same lunch four days in a row, which is saying something. Grilled chicken tossed in Frank's RedHot, served alongside crisp celery, carrots, and a tangy Greek yogurt ranch dip — it's everything buffalo wing craving without the deep-frying. It's also naturally low-carb and gluten-free, so it works for a lot of different eating goals. The Greek yogurt ranch adds real protein too, which most people don't think about when they're building their lunch boxes.
Ingredients
- 1½ lbs boneless skinless chicken breasts
- ⅓ cup Frank's RedHot sauce (or any buffalo sauce)
- 1 tablespoon olive oil
- 1 teaspoon garlic powder
- Salt and black pepper to taste
- 4 stalks celery, cut into sticks
- 2 large carrots, peeled and cut into sticks
- 1 cup plain Greek yogurt
- 1 packet (1 oz) dry ranch seasoning mix
Instructions
- Mix Greek yogurt with ranch seasoning packet. Stir well, cover, and refrigerate while you prepare everything else — it thickens up as it sits.
- Season chicken with garlic powder, salt, and pepper. Heat olive oil in a skillet or grill pan over medium-high heat and cook chicken 6-7 minutes per side until done (165°F internal). Let rest 5 minutes.
- Slice or chop chicken and toss immediately with Frank's RedHot sauce while still warm so the sauce soaks in.
- Divide buffalo chicken, celery sticks, and carrot sticks into 4 containers. Add a small portion cup of Greek yogurt ranch to each. Refrigerate up to 4 days.
Tips
- Tip: If you want less heat, mix the buffalo sauce with a tablespoon of melted butter before tossing — it mellows the spice without losing the flavor.
- Tip: Add a small portion of brown rice or cauliflower rice to the container if you need more carbs or volume in your lunch.
- Tip: Keep the ranch dip in a separate small container so the celery stays crisp and doesn't get watery.
14. Grilled Chicken with Cilantro Crema
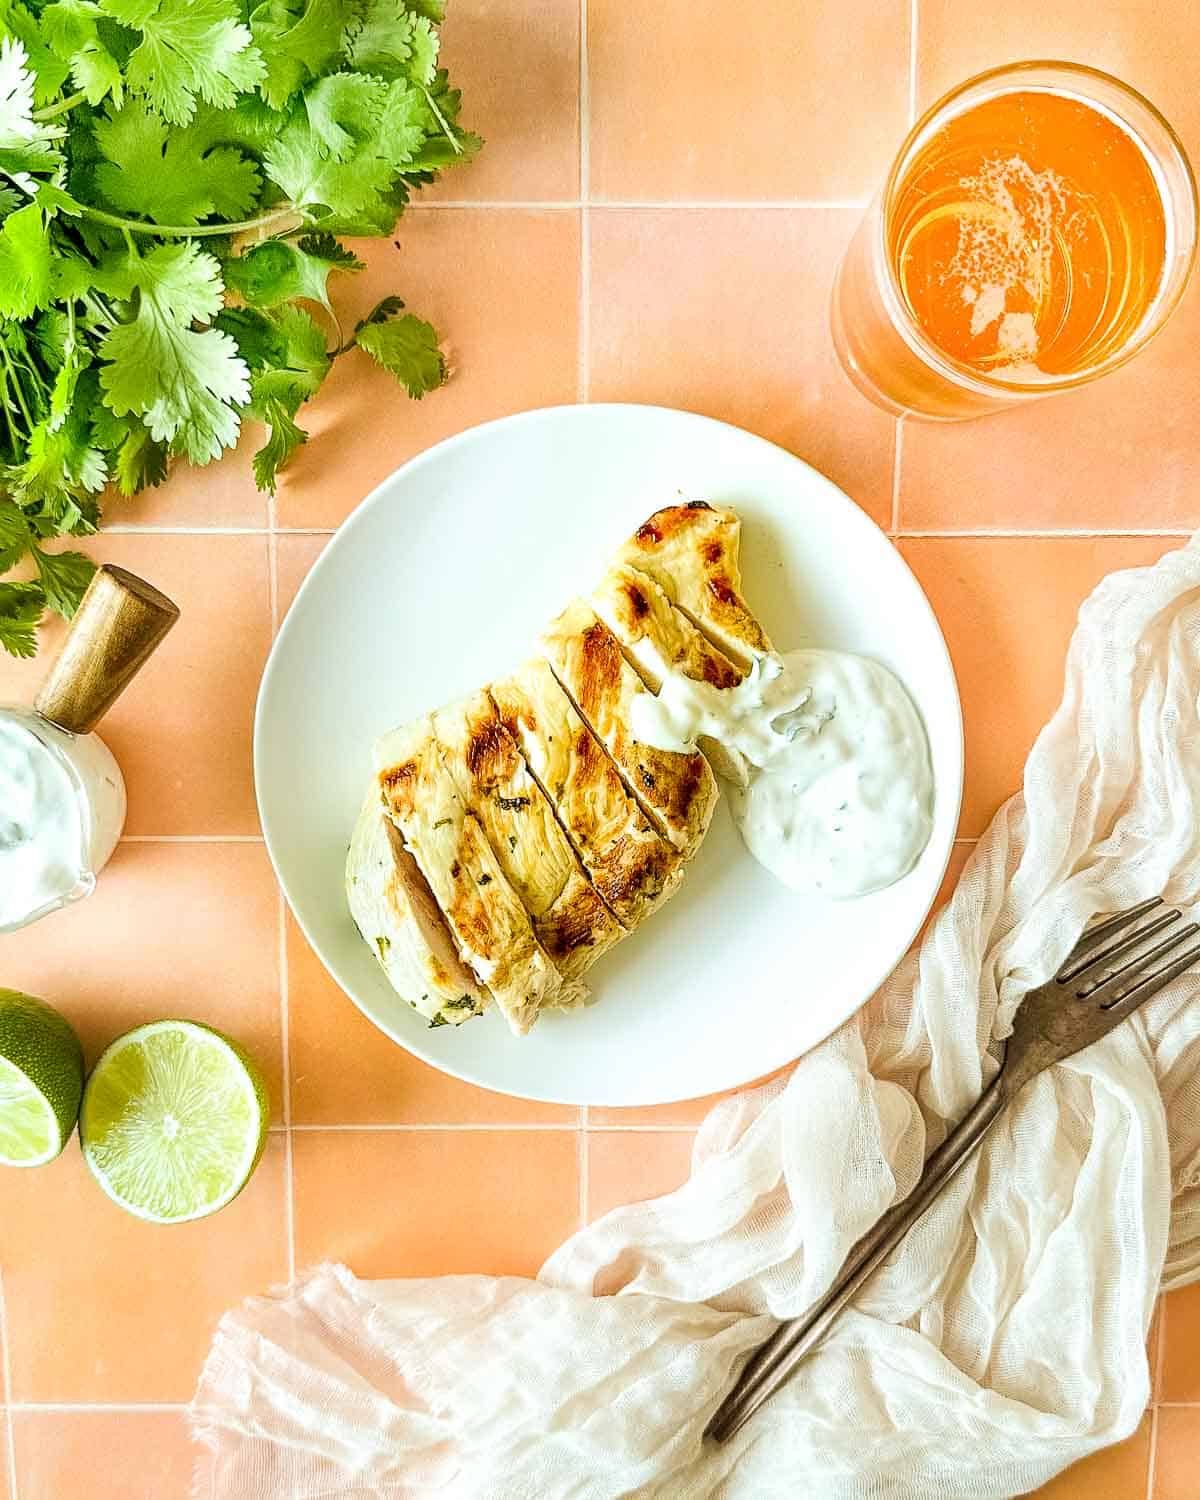
Zainab refuses to eat plain grilled chicken, and honestly, I don't blame her — it can be so dull without the right sauce. This cilantro crema fixes that problem entirely. The chicken marinates in lime juice, garlic, and a little cumin, then grills up juicy with good char, and the crema — blended cilantro, Greek yogurt, lime, and a hint of jalapeño — goes on top and makes the whole thing feel special. It's a high-protein lunch that tastes like you put in way more effort than you actually did. Serve it over rice, tucked into a lettuce wrap, or just with some sliced avocado on the side.
Ingredients
- 4 boneless skinless chicken breasts (about 1½ lbs total)
- Juice of 2 limes, divided
- 3 cloves garlic, minced
- 1 teaspoon ground cumin
- 2 tablespoons olive oil
- Salt and black pepper to taste
- 1 cup fresh cilantro leaves and stems
- ½ cup plain Greek yogurt (or sour cream)
- ½ jalapeño, seeds removed (optional)
- 1 small clove garlic (for the crema)
Instructions
- Combine juice of 1 lime, minced garlic, cumin, olive oil, salt, and pepper in a bowl or zip-lock bag. Add chicken, coat well, and marinate for at least 30 minutes (up to 4 hours in the fridge).
- Make the cilantro crema: blend cilantro, Greek yogurt, juice of the second lime, jalapeño (if using), garlic clove, and a pinch of salt until smooth. Refrigerate until ready to serve.
- Heat a grill pan or outdoor grill over medium-high. Grill chicken 6-7 minutes per side until cooked through (165°F). Let rest 5 minutes before slicing.
- Plate the sliced chicken and spoon cilantro crema generously over the top. Serve with rice, salad, or avocado slices.
Tips
- Tip: No blender? Finely chop the cilantro and whisk everything together — the crema will be chunkier but just as good in flavor.
- Tip: Pound the chicken breasts to an even thickness before marinating — they cook more evenly and stay juicier.
- Tip: The crema keeps in the fridge for 3 days, so make extra and use it as a dip for vegetables or a drizzle for tacos throughout the week.
15. Blackened Cod Tacos

Fish tacos were not something I grew up with — in Pakistan, fish and flatbread don't really meet that way. But the first time I made these for a Friday lunch, Saad was skeptical and then ate three of them, so they've been on regular rotation ever since. The blackening spice rub gives the cod a dark, slightly smoky crust that holds up in a corn tortilla without falling apart, and the pico de gallo and cabbage add crunch and freshness that cuts right through the richness. Cod is a lean, high-protein fish that you can usually find fresh or frozen at Walmart or Trader Joe's without spending much. These come together in under 20 minutes, which makes them one of the most practical entries on this list.
Ingredients
- 1 lb cod fillets (fresh or thawed from frozen)
- 1 teaspoon smoked paprika
- 1 teaspoon garlic powder
- ½ teaspoon onion powder
- ½ teaspoon cayenne pepper (reduce to ¼ teaspoon for less heat)
- ½ teaspoon dried oregano
- Salt and black pepper to taste
- 1 tablespoon olive oil or neutral oil
- 8 small corn tortillas
- 1½ cups shredded green cabbage
- ½ cup store-bought pico de gallo (or fresh salsa)
- Lime wedges and fresh cilantro for serving
Instructions
- Mix smoked paprika, garlic powder, onion powder, cayenne, oregano, salt, and pepper together in a small bowl. Pat cod fillets completely dry with paper towels, then press the spice rub firmly onto both sides of each fillet.
- Heat oil in a heavy skillet (cast iron works best) over medium-high heat until it just starts to smoke. Add cod and cook 3-4 minutes per side without moving it — this is how you get that proper blackened crust.
- While the fish cooks, warm corn tortillas directly over a gas burner for 20-30 seconds per side, or wrap in a damp paper towel and microwave for 30 seconds.
- Break the cooked cod into rough chunks and divide among the warm tortillas. Top with shredded cabbage, pico de gallo, fresh cilantro, and a squeeze of lime. Serve immediately.
Tips
- Tip: The fish needs to be completely dry before the spice rub goes on — any moisture and it steams instead of blackens. Don't skip the paper towel step.
- Tip: Tilapia or halibut work just as well here if cod isn't available — same cook time, same technique.
- Tip: For a creamy element, add a spoonful of the Greek yogurt cilantro crema from recipe #14 — they're basically made for each other.
These 15 lunches are the ones I actually rotate through — not just the ones that look good in a photo. When I started paying more attention to protein at lunch, I noticed I wasn't raiding the pantry at 4pm anymore. That alone was worth the effort. Whether you're packing something for work, feeding kids after school, or just trying to get through a busy afternoon without crashing, having a few of these in your back pocket makes a real difference.
My honest advice: don't try to overhaul everything at once. Pick two or three from this list that feel doable for your week, make them on repeat until they feel easy, then add more. Saad is convinced the chicken rice bowls are the only lunch worth eating right now — he's been requesting them three times a week. Zainab is firmly in the egg wrap camp. My husband will eat anything I put in front of him, which makes my life easier. The point is, everyone finds their favorites. You'll find yours too.
If you try any of these, I'd genuinely love to know which ones worked for you. High protein lunches get a bad reputation for being bland or boring, and I hope this list proves otherwise. Good food and good nutrition don't have to be separate things. 🥗💪✨
More Recipes You Might Like
- High Protein Meal Prep Ideas — batch cook once, eat well all week
- Easy Chicken Dinner Recipes — if you're already cooking chicken for lunch, double the batch for dinner
- Healthy Salad Recipes — salads that actually fill you up, not just lettuce and dressing
- Easy Lunch Ideas — quick, no-fuss options for when you need something fast
- Meal Prep for the Week — my go-to system for getting ahead on weeknights
Frequently Asked Questions
How much protein should a lunch actually have?
Most nutrition guidelines suggest aiming for 25–40 grams of protein at lunch if you want to stay full until dinner. The recipes in this list generally land in that range, especially the ones built around chicken, eggs, or legumes. That said, I'm not a dietitian — I'm just a home cook who noticed she felt better when lunch had some actual substance to it.
Can I meal prep these lunches ahead of time?
Most of them, yes. The grain bowls, egg-based dishes, and anything with cooked chicken hold up really well in the fridge for 3–4 days. I'd hold off on assembling wraps or anything with fresh greens until the day you're eating them — those go soggy fast. The soups and stews in the list actually taste better on day two.
Which of these lunches is the easiest for a beginner?
Anything involving canned tuna, eggs, or rotisserie chicken is your safest starting point. Those ingredients are already cooked or require almost no technique — it's mostly assembly. The Greek-style dishes and rice bowls are also very forgiving. If something goes slightly wrong with the seasoning, a squeeze of lemon or an extra pinch of salt usually fixes it.
Are any of these lunches good for kids too?
Quite a few of them, actually. The wraps, rice bowls, and anything with mild seasoning tend to work well for kids — you can pull back on spice and they'll usually eat it. I do adjust the heat level for Saad and Zainab when I'm packing their school lunches. Egg dishes and anything cheesy are almost always a safe bet with kids in my experience.
What if I don't eat meat — can I still get enough protein at lunch?
Absolutely. Eggs, Greek yogurt, cottage cheese, chickpeas, lentils, edamame, and tofu are all solid protein sources that show up in this list. Pairing two of them in one meal — say, chickpeas and Greek yogurt in a grain bowl — gets you to a good number without any meat at all. I've made plenty of these meatless for days when I haven't had time to cook chicken, and they hold up fine.
Share This Post!
If this list helped you figure out what to make for lunch this week, save it or share it with someone who's been stuck in the sad desk lunch rut. Pin it for later — that's what I always forget to do and then regret. 📌💪
View More Recipes here Recipe Roundups





Comments
No Comments