
Keto eating used to intimidate me. I'd look at the ingredient lists — almond flour, MCT oil, erythritol — and think, this is not cooking, this is a chemistry experiment. But after my husband's doctor suggested he cut back on carbs a few years ago, I started digging in seriously, and what I found surprised me: most of the best keto recipes are just real food, cooked simply. Eggs. Good meat. Vegetables that don't need hiding. A few clever swaps that actually work.
What makes a keto recipe worth keeping isn't just the macros — it's whether your family will actually eat it without complaining. That's my filter. If I have to convince Saad it's "just as good" as the real thing, it doesn't make the list. The recipes I kept coming back to are the ones where nobody noticed anything was different, or where the dish was so good on its own terms that the low-carb angle felt beside the point. If you're newer to this way of eating, my post on keto diet for beginners is a good place to get oriented before you start cooking.
This list covers a real range — from a 4-ingredient guacamole that takes five minutes to a Parmesan crusted lemon garlic salmon that looks like restaurant food, a cauliflower bibimbap that genuinely surprised me the first time I made it, and a keto cheesecake in the Instant Pot that my husband asked for on his birthday. There's also a Filipino chicken adobo in here that I've made on rotation for years, keto or not. If you're also trying to work more low-carb dinners into your week, my roundup of easy low-carb dinner recipes has even more ideas, and I pull from it constantly.
Here are the 15 I keep coming back to — pick whatever fits your week.
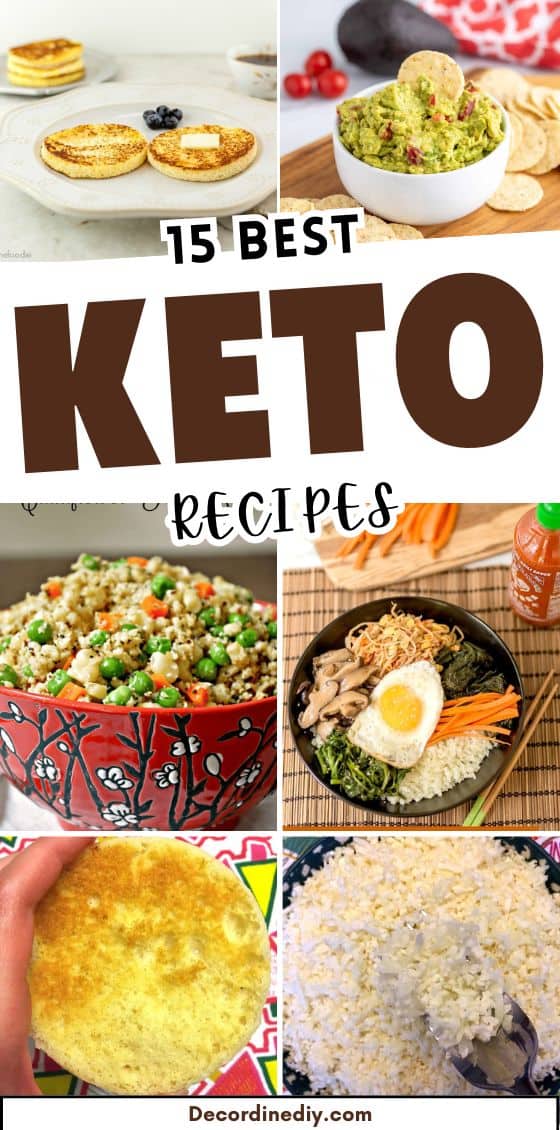
15. 4-Ingredient Guacamole
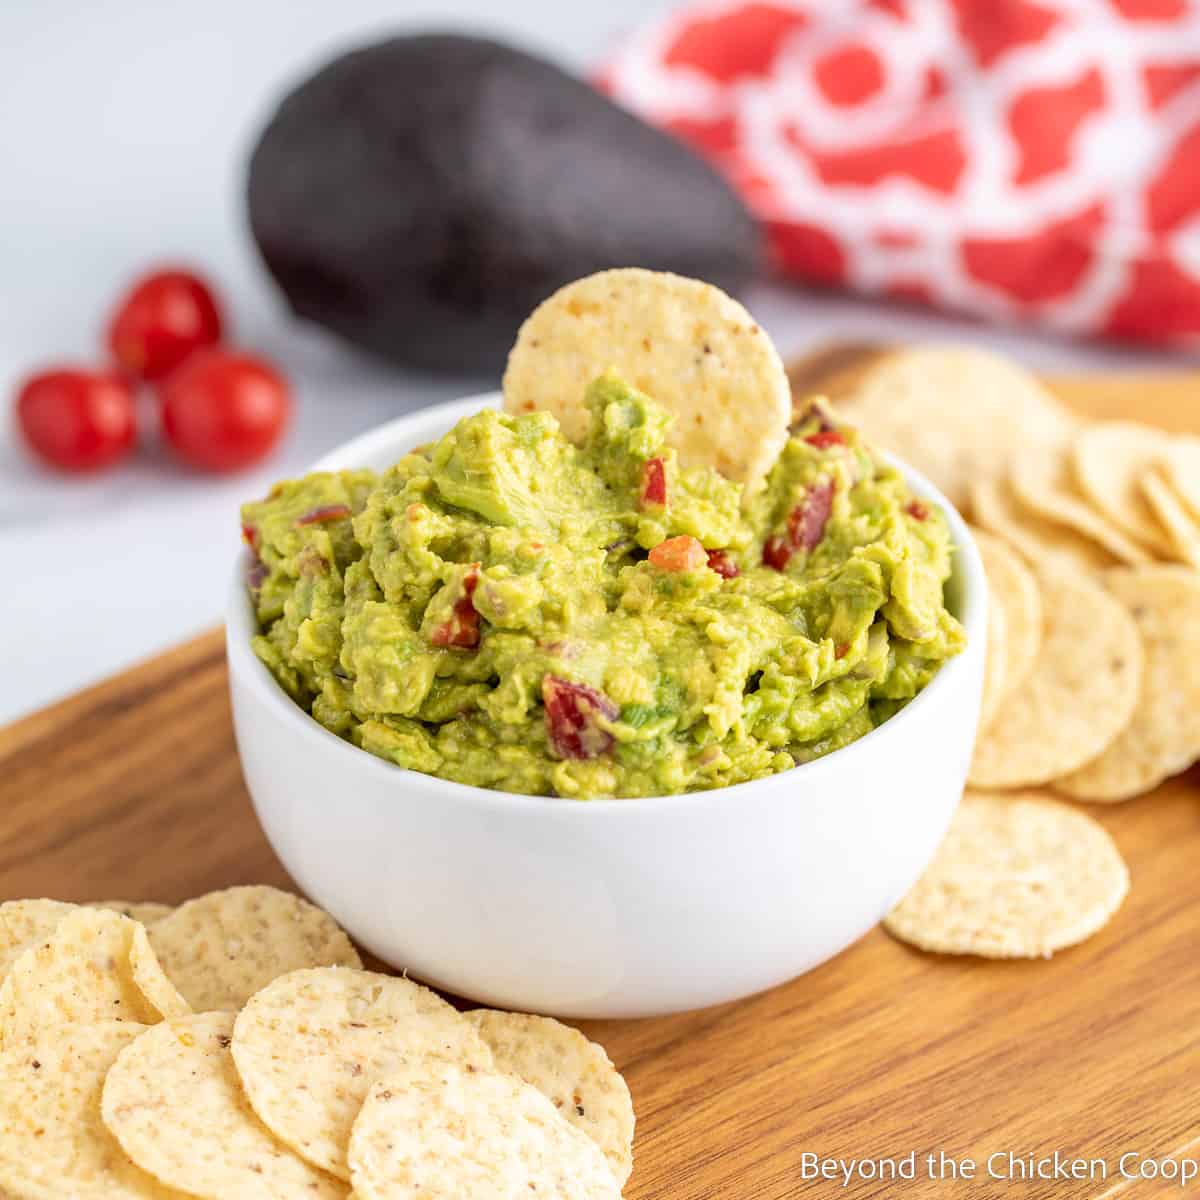
Guacamole has always been in my kitchen because avocados are one of those rare things that are genuinely good for a keto diet and also just genuinely delicious. This version keeps it honest — four ingredients, no fillers, no overthinking it. The key is using ripe avocados: press gently on the skin and if there's a little give, you're good. I make a double batch because it disappears before I even get chips on the table.
Ingredients
- 3 ripe avocados, halved and pitted
- 2 tablespoons fresh lime juice (about 1 lime)
- ½ teaspoon salt, or to taste
- 2 cloves garlic, minced (or ½ teaspoon garlic powder in a pinch)
Instructions
- Scoop the avocado flesh into a bowl and mash with a fork to your preferred texture — I like mine a little chunky, not completely smooth.
- Add the lime juice, salt, and minced garlic. Stir everything together and taste — adjust salt or lime as needed.
- Serve immediately, or press plastic wrap directly against the surface of the guacamole (touching it, not just covering the bowl) to slow browning. To freeze, portion into zip-lock bags, squeeze out air, and freeze for up to 3 months.
Tips
- Tip: The lime juice does double duty — it adds flavor AND slows browning, so don't skip it even if you're low on limes.
- Tip: If your avocados aren't quite ripe, leave them on the counter for a day or two — don't refrigerate them until they're soft.
- Tip: Serve with cucumber slices or bell pepper strips instead of chips to keep it fully keto-friendly.
14. Keto-Friendly Low Carb Rolls (Also Gluten Free!)
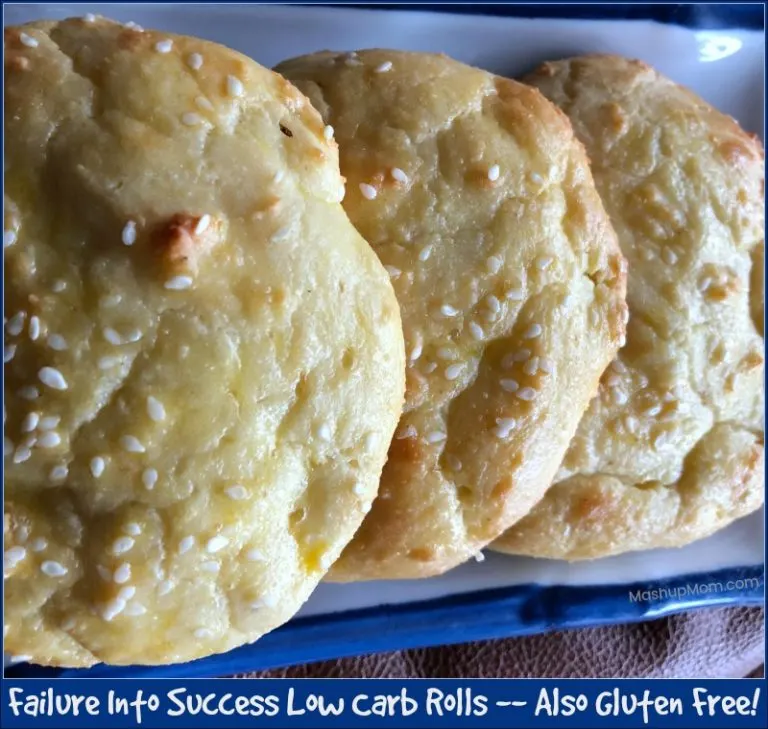
I was skeptical of keto bread for a long time — most versions I tried came out eggy and flat and sad. These low-carb rolls are different. The full-fat Greek yogurt gives them a slight tang that actually makes them taste like they belong at a dinner table, and they hold together well enough to use as hamburger buns or sandwich rolls without falling apart in your hands. They're built on almond flour and eggs, so they're naturally gluten-free too.
Ingredients
- 1½ cups almond flour (fine-ground, not almond meal)
- 1 tablespoon baking powder
- ¼ teaspoon salt
- 3 large eggs
- ¾ cup full-fat Greek yogurt
- 1 tablespoon sesame seeds or everything bagel seasoning (optional, for topping)
Instructions
- Preheat your oven to 375°F. Line a baking sheet with parchment paper.
- In a large bowl, whisk together the almond flour, baking powder, and salt. In a separate bowl, beat the eggs and stir in the Greek yogurt until smooth.
- Combine the wet and dry ingredients and mix until a thick dough forms. It will be sticky — that's normal. Wet your hands slightly to shape the dough into 6 equal rounds on the prepared baking sheet.
- Sprinkle sesame seeds or everything bagel seasoning on top if using. Bake for 20–22 minutes until golden on top and firm to the touch. Let cool for at least 10 minutes before slicing — they firm up as they cool.
Tips
- Tip: Use fine-ground almond flour, not coarse almond meal — the texture makes a real difference in how these rise and hold together.
- Tip: Don't skip the cooling time. I made that mistake once and the rolls seemed underdone when they were actually perfect — they just needed a few minutes to set.
- Tip: Store leftovers in an airtight container in the fridge for up to 4 days. Warm them in a toaster oven for 3–4 minutes and they taste freshly baked.
13. Easy Bacon Wrapped Egg Cups

Zainab started eating these on school mornings and now I make a full tray every Sunday as part of my meal prep routine. The concept is simple: you line a muffin tin with bacon strips, crack an egg into each cup, and bake. What comes out is this neat little protein-packed breakfast that reheats in 60 seconds. No skillet, no flipping, no mess — just the oven doing the work while you get everyone ready in the morning.
Ingredients
- 12 strips of bacon (thin-cut works best for lining the cups)
- 12 large eggs
- Salt and black pepper to taste
- ¼ cup shredded cheddar cheese (optional)
- Fresh chives or parsley for garnish (optional)
Instructions
- Preheat oven to 375°F. Lightly grease a 12-cup muffin tin with cooking spray or a little butter.
- Wrap one strip of bacon around the inside of each muffin cup, pressing it against the sides to form a ring. If your bacon is long, you may be able to wrap it around 1.5 times for better coverage.
- Crack one egg into each bacon-lined cup. Season with salt and pepper, then sprinkle cheese on top if using.
- Bake for 12–15 minutes for a runny yolk, or 17–18 minutes for a fully set yolk. Let cool in the tin for 2 minutes, then run a butter knife around the edges to release each cup. Serve immediately or refrigerate for up to 4 days.
Tips
- Tip: Pre-cook the bacon for 3–4 minutes in the oven before lining the cups if you want extra-crispy bacon — otherwise it steams slightly from the egg moisture.
- Tip: To reheat from the fridge, microwave for 45–60 seconds. They hold their shape well and don't get rubbery the way scrambled eggs do.
- Tip: Try adding a spoonful of sautéed spinach or diced bell pepper inside each cup before the egg for a little extra nutrition without adding carbs.
12. Bacon Wrapped Pork Chops

Pork chops can dry out fast — that's the main complaint I hear from people who've given up on them. Wrapping them in bacon solves that problem almost completely. The bacon fat bastes the chop as it cooks, keeping the inside juicy and tender while the outside gets this gorgeous, slightly crispy wrap. Three ingredients, one pan, dinner done in under 30 minutes. My husband requests these regularly and I never argue with that.
Ingredients
- 4 boneless pork chops (about 1 inch thick)
- 8 strips of bacon (2 per chop)
- 1 teaspoon garlic powder
- Salt and black pepper to taste
Instructions
- Preheat oven to 400°F. Pat the pork chops dry with paper towels — this helps the bacon stick and ensures a better sear. Season both sides lightly with garlic powder, salt, and pepper.
- Wrap 2 strips of bacon around each pork chop, overlapping slightly. Secure with a toothpick if needed to keep everything in place while cooking.
- Heat an oven-safe skillet over medium-high heat. Sear the chops for 2–3 minutes per side until the bacon starts to brown, then transfer the entire skillet to the oven.
- Bake for 12–15 minutes until the internal temperature of the pork reaches 145°F. Rest for 5 minutes before serving — don't skip the rest or the juices run right out.
Tips
- Tip: Use thick-cut pork chops if you can find them — thin chops cook faster than the bacon crisps up, which means you end up with limp bacon and overcooked pork.
- Tip: A meat thermometer is the only reliable way to know these are done. Pull them at 145°F internal temp — the pork can look a little pink in the middle and still be safe and perfectly cooked.
- Tip: If you don't have an oven-safe skillet, sear on the stovetop then transfer to a lined baking sheet to finish in the oven — works just as well.
11. Keto Hot Chocolate

Cold evenings in our house call for something warm in a mug, and regular hot chocolate is loaded with sugar and carbs. This keto version uses unsweetened cocoa powder, heavy cream, and a sugar-free sweetener to get you that same rich, chocolatey comfort without knocking you out of ketosis. The heavy cream makes it genuinely thick and satisfying — this isn't a watery diet drink, it's a proper hot chocolate that also happens to count toward your daily fat intake.
Ingredients
- 1 cup unsweetened almond milk (or full-fat coconut milk for extra richness)
- 2 tablespoons heavy whipping cream
- 1½ tablespoons unsweetened cocoa powder
- 1–2 tablespoons powdered erythritol or monk fruit sweetener (adjust to taste)
- ¼ teaspoon vanilla extract
- Pinch of salt
- Sugar-free whipped cream for topping (optional)
Instructions
- Add the almond milk and heavy cream to a small saucepan over medium heat. Warm until steaming but not boiling — about 3–4 minutes.
- Whisk in the cocoa powder, sweetener, vanilla extract, and salt. Keep whisking for about 1 minute until everything is fully dissolved and the mixture looks smooth and slightly frothy.
- Pour into a mug and top with sugar-free whipped cream if you want. Drink it while it's hot — it thickens as it cools and becomes more like a pudding, which is also honestly not bad.
Tips
- Tip: Use powdered erythritol rather than granulated — it dissolves much more cleanly in hot liquid and you won't get that slight grittiness at the bottom of your mug.
- Tip: For a bulletproof-style version, add 1 tablespoon of coconut oil or MCT oil and blend it with an immersion blender for 20 seconds — it gets frothy and adds a real fat boost.
- Tip: A pinch of cinnamon or a tiny drop of peppermint extract changes this completely — two very different drinks from the same base recipe.
6. Parmesan Crusted Baked Lemon Garlic Salmon Recipe
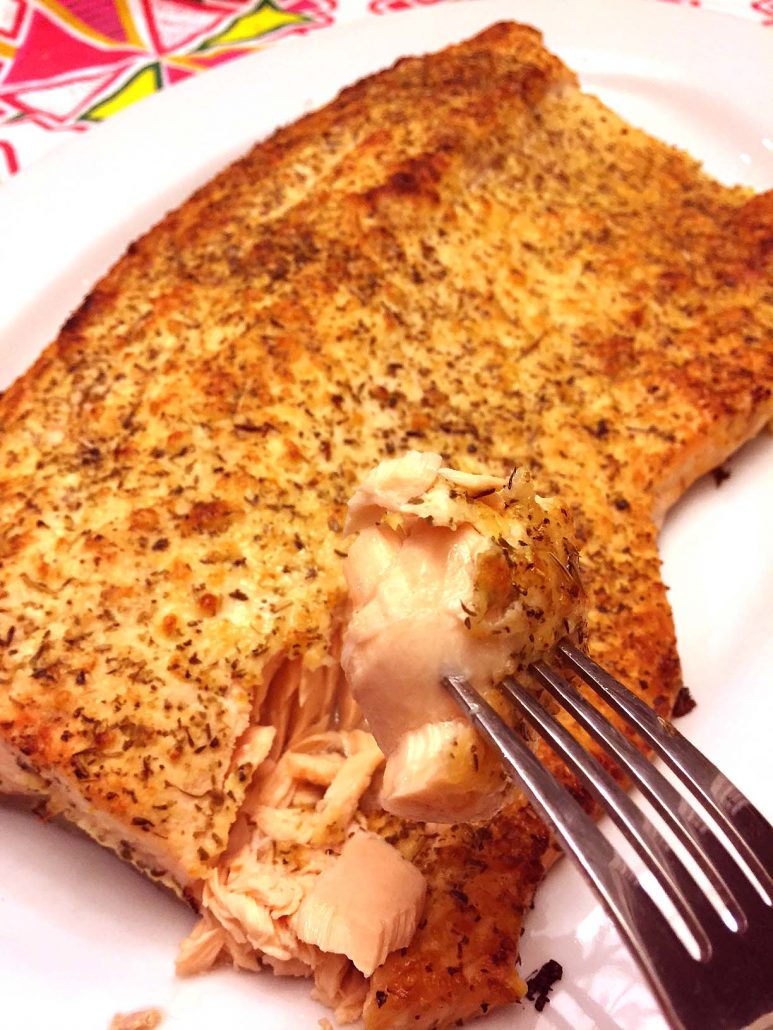
Salmon is one of those things I was honestly scared to make for years — I kept overcooking it into a dry, sad mess. This version fixed that for me. The Parmesan and lemon garlic crust forms a thin, golden layer on top that keeps the fish underneath moist and flavorful, and the oven does most of the work. It's keto without trying to be keto, which is exactly what I want. Pair it with cauliflower rice (recipe #9 in this list) and you have a full dinner in under 30 minutes.
Ingredients
- 4 salmon fillets (about 6 oz each), skin-on or skinless
- ½ cup finely grated Parmesan cheese
- 3 cloves garlic, minced
- 2 tablespoons fresh lemon juice
- 1 teaspoon lemon zest
- 2 tablespoons olive oil
- 1 tablespoon fresh parsley, chopped (optional)
- Salt and black pepper to taste
Instructions
- Preheat your oven to 400°F. Line a baking sheet with foil and lightly grease it with cooking spray or a little olive oil.
- Pat the salmon fillets dry with paper towels — this helps the crust stick properly. Season both sides with salt and black pepper, then place fillets on the prepared baking sheet.
- In a small bowl, mix together the Parmesan, minced garlic, lemon juice, lemon zest, and olive oil until it forms a rough paste.
- Spread the Parmesan mixture evenly over the top of each salmon fillet, pressing it down gently so it adheres.
- Bake for 12–15 minutes, depending on thickness, until the crust is golden and the salmon flakes easily with a fork. Scatter fresh parsley on top before serving.
Tips
- Tip: For an extra golden crust, switch the oven to broil for the last 2 minutes — just watch it closely so the Parmesan doesn't burn.
- Tip: Salmon is done when it reaches an internal temperature of 145°F, or when it flakes easily at the thickest part — don't go past that or it dries out fast.
- Tip: Pre-grated Parmesan from a can won't give you the same crust — grab a block and grate it yourself, even if it takes an extra two minutes. It makes a real difference.
7. Filipino Chicken Adobo (Classic & Crockpot Recipe Versions)
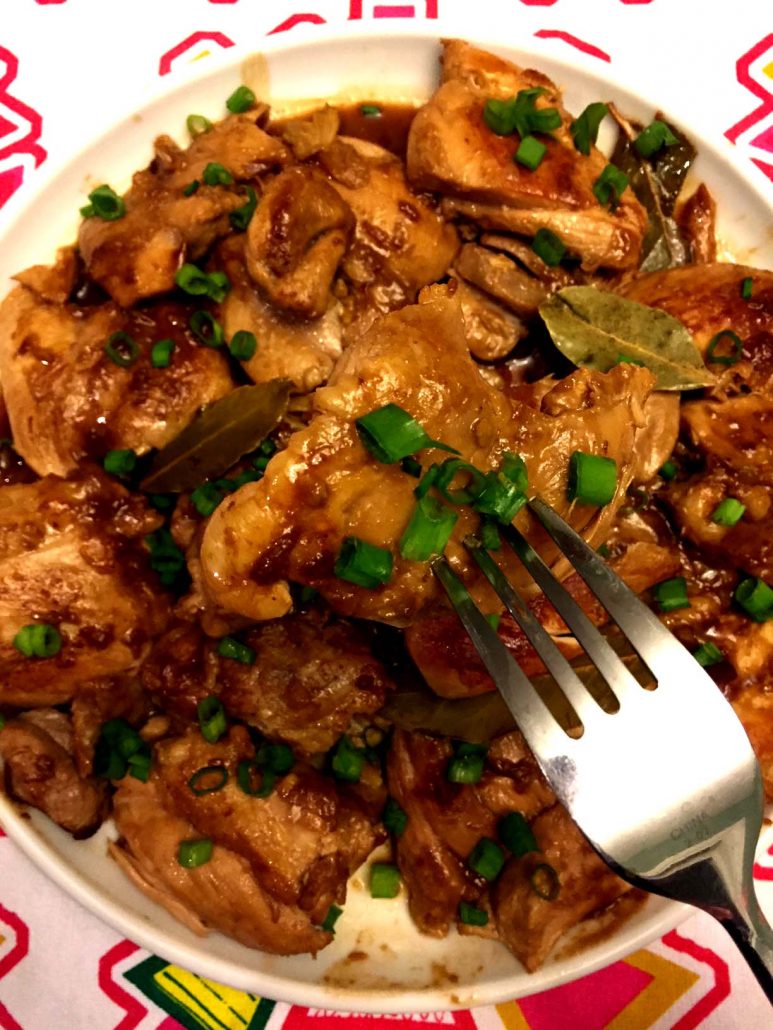
I grew up eating Pakistani chicken karahi and nihari, so Filipino adobo wasn't on my radar until a friend brought it to a potluck. I went home and made it that same week. The combination of soy sauce, vinegar, garlic, and bay leaves creates this deeply savory, slightly tangy braising liquid that makes the chicken incredibly tender — and it's naturally low-carb without any modifications. The crockpot version is what I make on Mondays so dinner is basically done by the time school pickup rolls around.
Ingredients
- 2 lbs bone-in chicken thighs and drumsticks
- ⅓ cup soy sauce (use tamari for gluten-free)
- ⅓ cup white vinegar (or cane vinegar if you can find it)
- 6 cloves garlic, smashed
- 3 bay leaves
- 1 teaspoon whole black peppercorns
- 1 tablespoon neutral oil (vegetable or avocado)
- ½ cup water
Instructions
- Classic stovetop method: Combine chicken, soy sauce, vinegar, garlic, bay leaves, peppercorns, and water in a heavy pot or Dutch oven. Bring to a boil over medium-high heat, then reduce to a simmer. Cover and cook for 30 minutes.
- Remove the lid and continue simmering for another 15–20 minutes, turning the chicken occasionally, until the sauce reduces and thickens and the chicken is deeply golden.
- Optional but worth it: heat oil in a separate skillet and sear the cooked chicken pieces skin-side down for 2–3 minutes for extra crispiness.
- Crockpot method: Add all ingredients to the slow cooker. Cook on LOW for 6–7 hours or HIGH for 3–4 hours. In the last 30 minutes, remove the lid to let the sauce reduce slightly.
- Discard bay leaves. Serve with cauliflower rice for a full keto meal, or regular rice if carbs aren't a concern that day.
Tips
- Tip: Don't be tempted to reduce the vinegar — it mellows out completely during cooking and is what makes adobo taste like adobo.
- Tip: Bone-in chicken gives you much better flavor here than boneless. If you only have boneless thighs, reduce the cooking time by about 10 minutes on the stovetop.
- Tip: This tastes even better the next day — the sauce thickens in the fridge overnight and the flavors deepen. I always make a double batch for this reason.
8. Keto Bread In A Mug With Almond Flour – Microwave Recipe
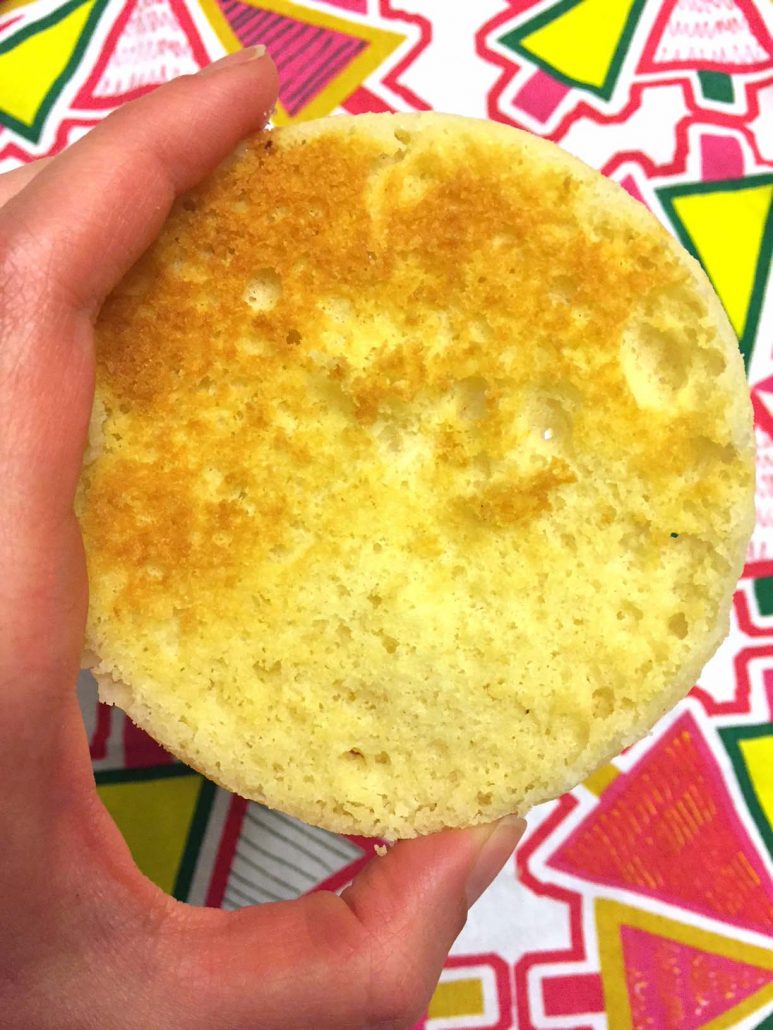
Missing bread on keto is real, and this mug recipe is the most practical fix I've found. You mix everything directly in a mug — almond flour, egg, butter, and a pinch of salt — microwave it for 90 seconds, and pop it out. It's dense and a bit eggy the first time you make it, which threw me off, but once you toast a slice in a dry skillet for two minutes, it actually tastes like bread. Saad tried a piece thinking it was regular bread and didn't notice until I told him. That was a good day.
Ingredients
- 3 tablespoons almond flour (blanched, not almond meal)
- 1 large egg
- 1 tablespoon butter, melted (or coconut oil)
- ¼ teaspoon baking powder
- ⅛ teaspoon salt
- Optional: ½ teaspoon garlic powder or everything bagel seasoning for savory flavor
Instructions
- Grease a large microwave-safe mug (at least 12 oz capacity) with butter or cooking spray so the bread doesn't stick to the sides.
- Add almond flour, baking powder, and salt to the mug and stir to combine. Add the egg and melted butter and mix until smooth with no dry flour pockets remaining.
- Microwave on HIGH for 60–90 seconds. Start checking at 60 seconds — the top should look set and not wet. Every microwave is different so adjust by 10-second increments if needed.
- Let it cool in the mug for 1 minute, then run a knife around the edges and tip it out onto a plate. Slice horizontally into 2–3 rounds.
- Optional but recommended: toast the slices in a dry skillet over medium heat for 1–2 minutes per side until golden. This dramatically improves the texture.
Tips
- Tip: Use blanched almond flour, not almond meal — almond meal is coarser and gives you a grittier texture that's much less bread-like.
- Tip: Don't overcook it — an extra 30 seconds makes it rubbery and dry. Pull it out when the top looks just set.
- Tip: Top the finished slices with cream cheese and smoked salmon, or butter and a fried egg — both work really well with the slightly nutty flavor of the almond flour base.
9. How To Make Cauliflower Rice
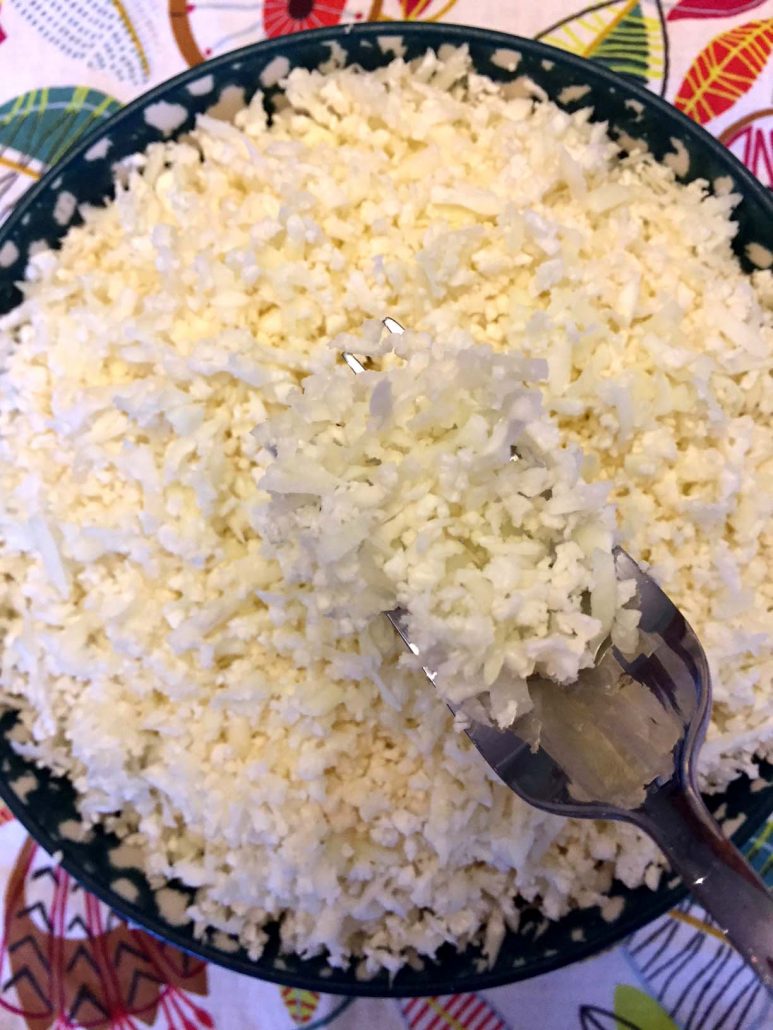
I'll be honest — I was skeptical about cauliflower rice for a long time. Rice is rice. Cauliflower is cauliflower. But after making it properly, with the right technique, I understood what the fuss was about. The key is cooking it over high heat without a lid so the moisture evaporates fast — if you cover the pan, you get soggy mush, and that's where most people go wrong. Done right, it's light, fluffy, and takes on whatever seasoning you put on it. It's not a replacement for basmati, but as a keto base for curries, stir-fries, or chicken adobo, it actually works.
Ingredients
- 1 medium head of cauliflower (about 2 lbs), or 4 cups pre-riced cauliflower from Costco or Trader Joe's
- 1 tablespoon olive oil or butter
- 2 cloves garlic, minced (optional but good)
- Salt and pepper to taste
- Fresh parsley or green onions for garnish (optional)
Instructions
- If using a whole cauliflower, cut it into florets, discarding the thick stem. Working in batches, pulse in a food processor until it resembles rice grains — about 8–10 short pulses. Don't over-process or it turns to mush. No food processor? Use a box grater on the large holes.
- Spread the riced cauliflower on a clean kitchen towel and press firmly to absorb as much moisture as possible. This step takes 2 minutes and makes a huge difference in the final texture.
- Heat oil in a large skillet over medium-high heat. Add garlic if using and stir for 30 seconds until fragrant. Add the cauliflower rice in an even layer.
- Cook uncovered for 5–7 minutes, stirring every minute or so, until the cauliflower is tender and any excess moisture has cooked off. Season generously with salt and pepper.
- Taste and adjust seasoning. Serve immediately as a base for any protein or curry.
Tips
- Tip: The frozen pre-riced cauliflower bags at Walmart or Costco are genuinely good and save you 10 minutes — just thaw and squeeze out moisture before cooking.
- Tip: Don't crowd the pan — if your skillet is small, cook in two batches. Overcrowding steams the cauliflower instead of sautéing it, which leads to the soggy result people complain about.
- Tip: Season it boldly — cauliflower is mild and needs more salt than you think. Add a squeeze of lemon at the end if you're serving it under fish or grilled chicken.
10. Green Shakshuka
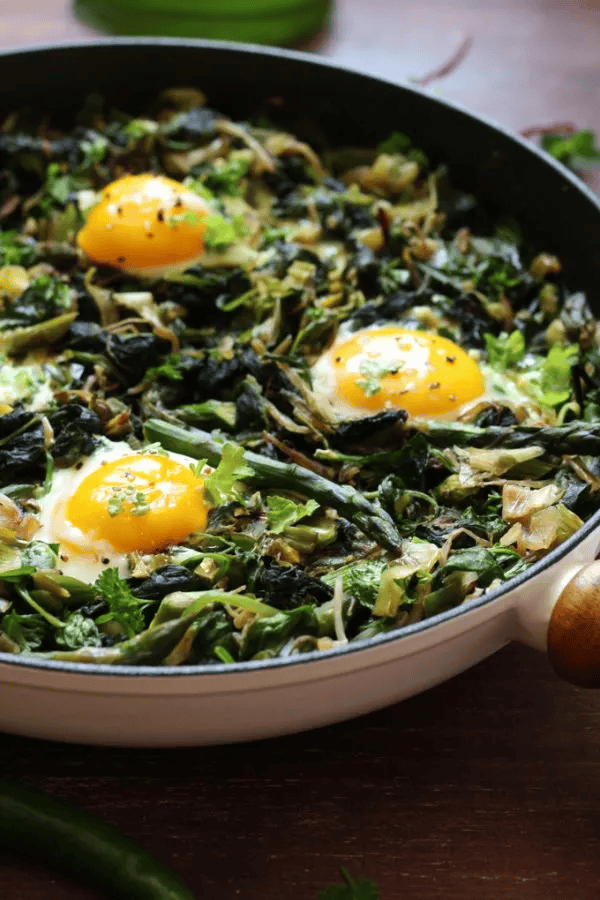
Classic shakshuka — the red tomato version — is something I grew up eating for weekend breakfasts. The green version was new to me, and the first time I made it I was genuinely surprised by how well it worked. Instead of a tomato base, you build a sauce from spinach, zucchini, and green herbs, then nestle eggs into it and let them set. It's lighter and brighter than the red version, and it's one of those dishes that looks far more impressive than the effort involved. The whole thing comes together in one pan in under 30 minutes, which makes it perfect for a weeknight dinner when you want something warm and real without a lot of cleanup.
Ingredients
- 2 tablespoons olive oil
- 1 medium onion, diced
- 3 cloves garlic, minced
- 1 medium zucchini, diced small
- 1 jalapeño or serrano pepper, finely chopped (remove seeds for less heat)
- 4 cups fresh baby spinach (or 1 cup frozen spinach, thawed and squeezed dry)
- ½ cup vegetable or chicken broth
- ¼ cup fresh parsley or cilantro, roughly chopped
- 1 teaspoon cumin
- Salt and pepper to taste
- 4–6 large eggs
- ¼ cup crumbled feta cheese, for serving
Instructions
- Heat olive oil in a large skillet over medium heat. Add the onion and cook for 4–5 minutes until softened. Add garlic, jalapeño, and cumin, and stir for another minute until fragrant.
- Add the diced zucchini and cook for 3–4 minutes until slightly tender. Pour in the broth and add the spinach in handfuls, stirring until wilted. Season with salt and pepper.
- Stir in the fresh parsley or cilantro. Taste the sauce and adjust seasoning — it should be well-seasoned before the eggs go in.
- Use the back of a spoon to create 4–6 small wells in the sauce. Crack an egg into each well carefully. Reduce heat to medium-low, cover the skillet with a lid, and cook for 5–7 minutes until the whites are set but the yolks are still runny.
- Scatter crumbled feta over the top and serve straight from the pan with a spoon. Eat it on its own for a keto meal, or with warm pita if carbs aren't a concern.
Tips
- Tip: Keep the heat low once the eggs go in — high heat cooks the whites too fast and leaves the yolks completely set before you notice. Low and slow with a lid is the move.
- Tip: You can add other greens here — kale, Swiss chard, or even frozen peas work well. Just make sure anything leafy is wilted and the sauce isn't too watery before the eggs go in.
- Tip: Leftovers don't reheat well once the eggs are in — so if you're cooking for one or two, crack only as many eggs as you'll eat and save the green sauce base separately for tomorrow.
11. Instant Pot Keto Cheesecake
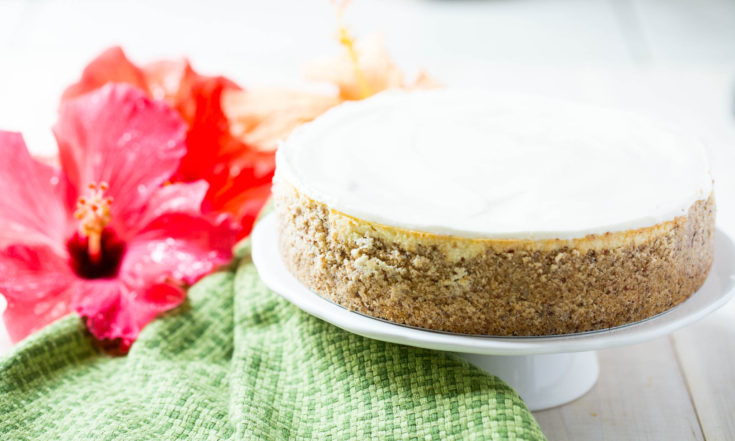
I was skeptical the first time I made cheesecake in the Instant Pot. It sounded like a shortcut that would end badly. But the result was genuinely creamy and set perfectly — and the fact that it's low-carb makes it even better for when I want something indulgent without completely derailing the week. The almond flour crust holds together well and gives you that classic cheesecake base without the graham crackers. This one is worth keeping in your regular rotation.
Ingredients
- 1 cup almond flour
- 3 tablespoons butter, melted
- 2 tablespoons granulated erythritol (or any keto sweetener)
- 16 oz cream cheese, softened to room temperature
- ½ cup powdered erythritol
- 2 large eggs
- ¼ cup sour cream
- 1 teaspoon pure vanilla extract
- 1 cup water (for the Instant Pot)
Instructions
- Mix almond flour, melted butter, and granulated erythritol together. Press firmly into the bottom of a greased 7-inch springform pan.
- Beat softened cream cheese and powdered erythritol together until smooth and lump-free. Add eggs one at a time, mixing gently after each — overmixing introduces air bubbles that can crack the top.
- Stir in sour cream and vanilla extract. Pour the filling over the crust and smooth the top.
- Cover the pan tightly with foil. Pour 1 cup water into the Instant Pot, place the trivet inside, and lower the cheesecake pan onto the trivet.
- Seal the lid and cook on High Pressure for 35 minutes. Allow a natural pressure release for 15 minutes, then remove carefully.
- Let the cheesecake cool to room temperature, then refrigerate for at least 4 hours (overnight is better) before slicing and serving.
Tips
- Tip: Cold cream cheese will leave lumps in the batter no matter how long you beat it. Let it sit out for at least 20 minutes before you start.
- Tip: The cheesecake will look slightly jiggly when you take it out — that's normal. It firms up completely in the fridge, so don't panic and don't skip the chilling time.
- Tip: Top with fresh berries or a drizzle of sugar-free caramel sauce just before serving if you want to dress it up a little.
12. Cauliflower Fried Rice
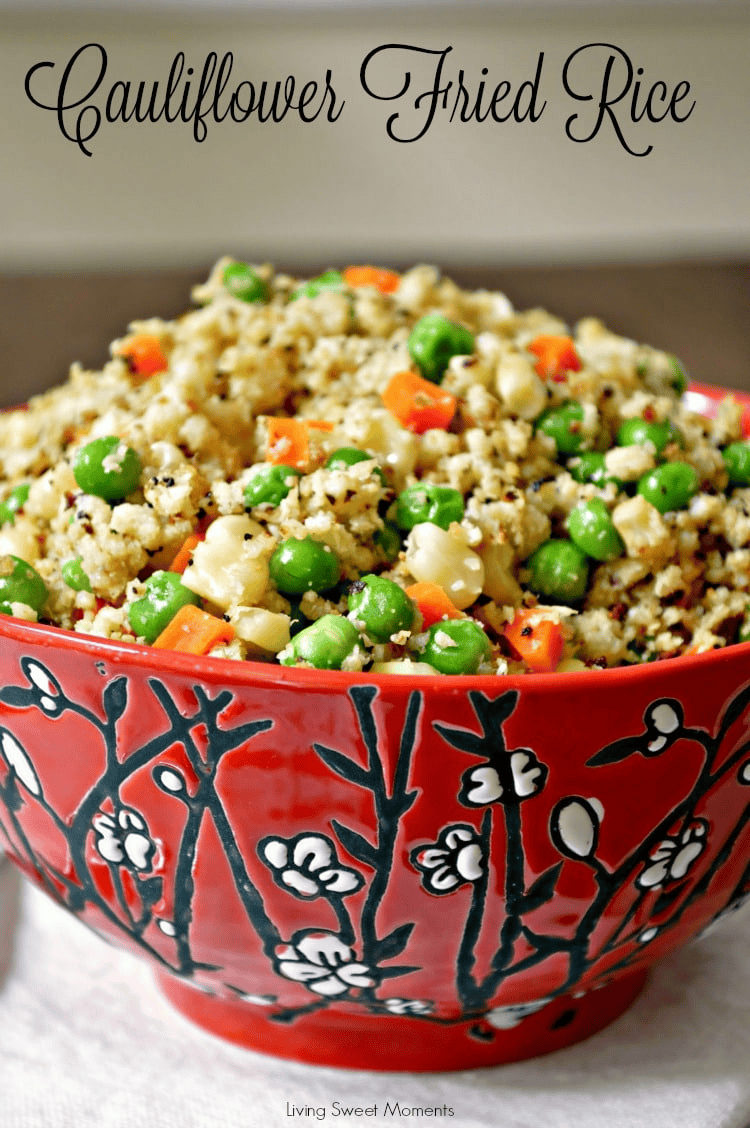
Growing up in Pakistan, rice was just part of every meal — the idea of swapping it for cauliflower sounded wrong to me for a long time. But this cauliflower fried rice genuinely works. The key is getting the cauliflower rice as dry as possible before it hits the pan, otherwise it steams instead of frying and you end up with mush. Done right, the texture is close enough to the real thing that Saad has eaten it without complaint, which is honestly the highest praise I can give a low-carb recipe in this house.
Ingredients
- 1 medium head cauliflower, grated or pulsed into rice (or one 12 oz bag frozen cauliflower rice)
- 2 tablespoons sesame oil (or vegetable oil)
- 3 cloves garlic, minced
- 1 teaspoon fresh ginger, grated
- 1 cup frozen peas and carrots, thawed
- 3 tablespoons soy sauce (or tamari for gluten-free)
- 3 large eggs, beaten
- 3 green onions, sliced
- Salt and pepper to taste
Instructions
- Spread cauliflower rice on a clean kitchen towel and squeeze out as much moisture as you can. This step is non-negotiable — wet cauliflower will ruin the texture.
- Heat sesame oil in a large skillet or wok over high heat. Add garlic and ginger and stir-fry for 30 seconds until fragrant.
- Add the peas and carrots, stir-fry for 2 minutes, then add the cauliflower rice. Spread it out and let it cook undisturbed for 2-3 minutes so it gets some color.
- Push everything to the sides, pour the beaten eggs into the center, and scramble them. Once just set, toss everything together.
- Add soy sauce and toss to coat evenly. Taste and adjust with salt and pepper. Top with sliced green onions and serve hot.
Tips
- Tip: Use the highest heat your stove has. Cauliflower fried rice needs high heat to fry properly — medium heat just steams it.
- Tip: Add shrimp, diced chicken, or tofu in step 2 to make this a complete meal rather than a side dish.
- Tip: A drizzle of chili oil or a few drops of fish sauce at the end takes the flavor to another level if you have either on hand.
13. Low-Carb Cauliflower Bibimbap
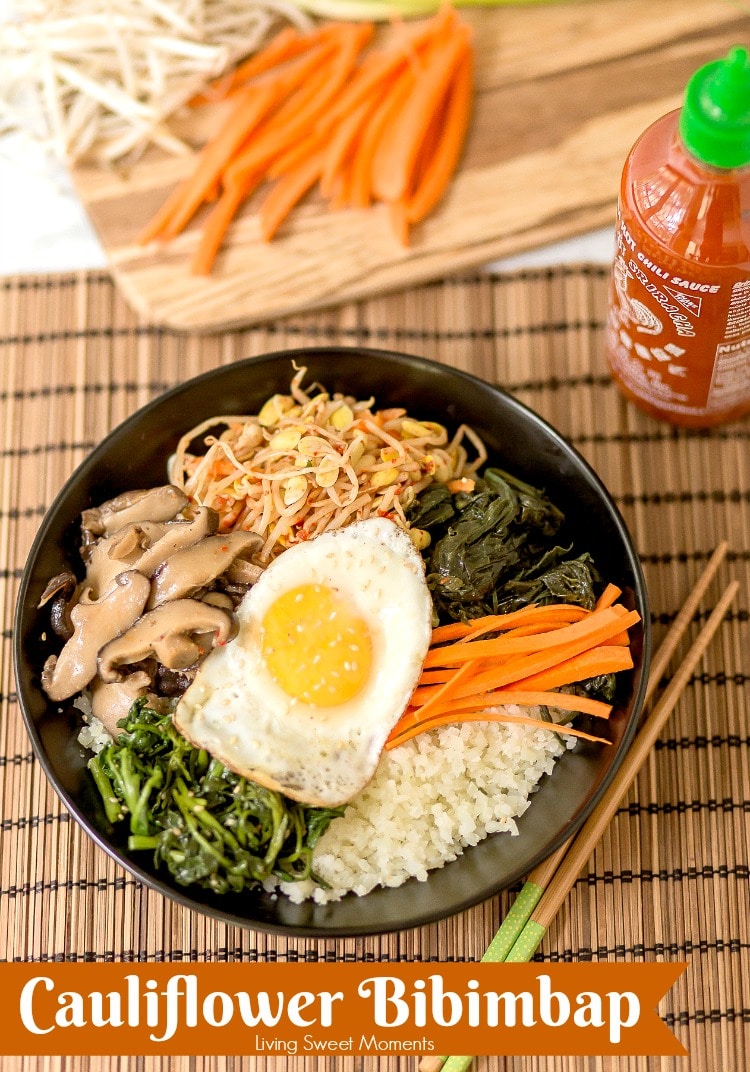
Bibimbap is one of those Korean dishes that looks complicated but is really just organized. You cook everything separately, arrange it over a base, and pour a punchy sauce on top. Swapping regular rice for cauliflower rice keeps it keto-friendly while keeping all the flavor that makes this dish worth making. The gochujang sauce is what holds everything together — don't skip it or water it down. If you want to explore more Korean-inspired cooking, I have a whole post on authentic Korean recipes that's worth a look.
Ingredients
- 3 cups cauliflower rice (fresh or frozen, thawed and dried)
- 1 cup baby spinach
- 1 medium zucchini, julienned
- 1 cup shredded carrots
- 1 cup bean sprouts
- 4 large eggs
- 3 tablespoons sesame oil, divided
- 2 tablespoons soy sauce
- 2 tablespoons gochujang (Korean chili paste, found at most large grocery stores or Walmart in the Asian aisle)
- 1 tablespoon rice vinegar
- 1 teaspoon garlic, minced
- 1 tablespoon sesame seeds for garnish
Instructions
- Make the sauce: whisk together gochujang, soy sauce, rice vinegar, minced garlic, and 1 tablespoon sesame oil. Set aside.
- Cook cauliflower rice in 1 tablespoon sesame oil over high heat for 4-5 minutes until lightly toasted. Season with a pinch of salt and divide between four bowls.
- In the same pan, quickly sauté the spinach, zucchini, and carrots separately with a little sesame oil — each only takes 1-2 minutes. Arrange them in sections over the cauliflower rice.
- Add bean sprouts to each bowl raw or briefly blanched, whichever you prefer.
- Fry the eggs sunny-side up in the remaining sesame oil and place one on top of each bowl. Drizzle with the gochujang sauce, sprinkle sesame seeds, and serve immediately.
Tips
- Tip: Can't find gochujang? Sriracha mixed with a little miso paste gets you close enough for a weeknight version.
- Tip: Prep all the vegetables ahead of time and refrigerate them separately — assembly takes under 10 minutes when everything is ready to go.
- Tip: Break the yolk into the bowl and mix everything together before eating — that's how it's meant to be eaten and it makes the sauce coat every bite.
14. Paleo Breakfast Pizza
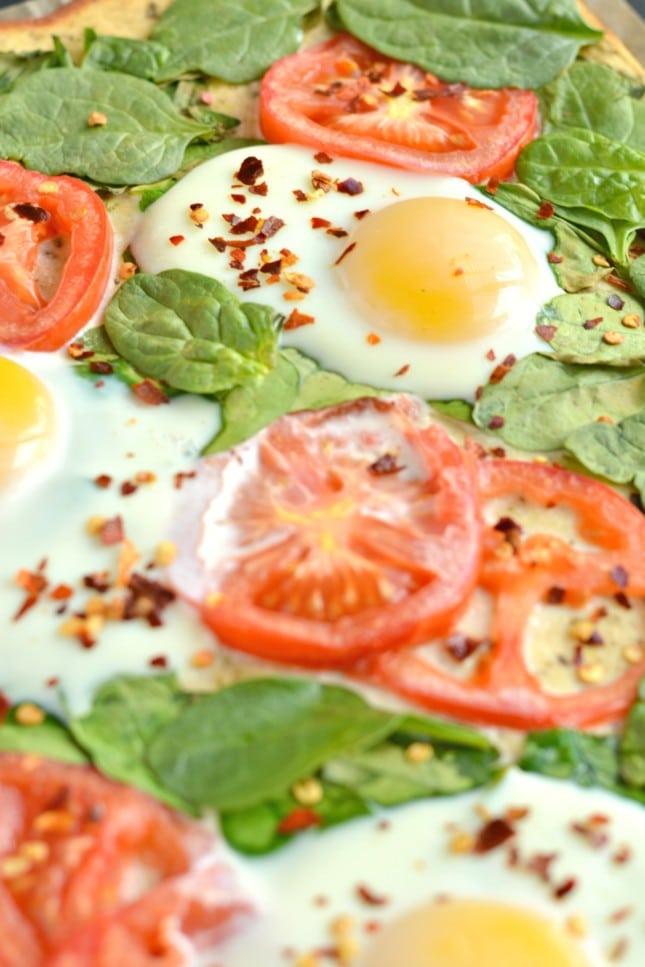
Pizza for breakfast sounds indulgent, but this paleo version is genuinely light and worth making on a slow weekend morning. The crust is built from coconut flour and eggs, which gives it a slightly dense, bread-like texture that holds toppings without falling apart. You crack eggs right on top and bake until the whites set — it's almost like a flatbread shakshuka if you think about it that way. My husband was completely on board with this one, which surprised me since he's protective of what counts as proper breakfast food.
Ingredients
- ½ cup coconut flour
- 4 large eggs, divided (2 for crust, 2 for topping)
- ¼ cup coconut oil, melted
- ½ teaspoon garlic powder
- ½ teaspoon salt
- ¼ cup diced bell pepper
- ¼ cup diced red onion
- ¼ cup sliced mushrooms
- Handful of fresh spinach or arugula
- Salt, pepper, and red pepper flakes to taste
Instructions
- Preheat oven to 375°F. Line a baking sheet with parchment paper and lightly grease it.
- Mix coconut flour, 2 beaten eggs, melted coconut oil, garlic powder, and salt together until a thick dough forms. Press it into a roughly 10-inch circle on the prepared baking sheet — aim for even thickness so it bakes uniformly.
- Bake the crust alone for 10 minutes until it's just set and lightly golden at the edges.
- Remove from oven and scatter bell pepper, red onion, mushrooms, and spinach over the top. Make two wells in the vegetables and crack an egg into each one.
- Return to the oven and bake for another 10-12 minutes until the egg whites are fully set but the yolks are still slightly runny. Season with salt, pepper, and red pepper flakes before serving.
Tips
- Tip: Coconut flour is much more absorbent than regular flour — don't substitute it 1:1 with almond flour. If using almond flour, you'll need closer to 1½ cups and one extra egg.
- Tip: Pre-cook any watery vegetables like mushrooms or zucchini in a dry pan for a couple of minutes before topping — this prevents the crust from going soggy.
- Tip: This works equally well for lunch or dinner with whatever vegetables you have in the fridge — it's not just a breakfast recipe despite the name.
15. Quick Paleo English Muffins
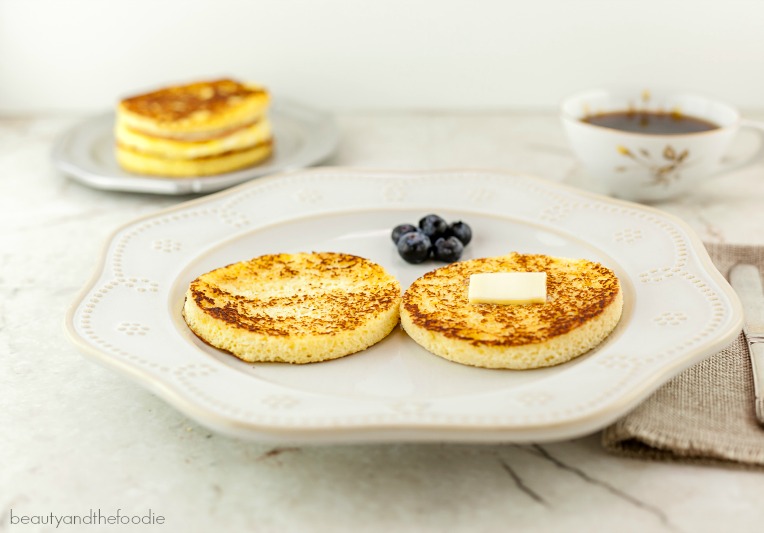
These are the recipe I reach for when I need something bread-like fast and don't have time to think about it. They're made in a mug in the microwave — the whole thing takes under two minutes from start to finish. I was honestly not expecting much the first time I tried them, but the texture is surprisingly close to an actual English muffin, especially once you split and toast them in a pan. They're sturdy enough for eggs, smashed avocado, or whatever you're putting on top. If you're following a keto diet and missing bread, this is the quickest fix I've found.
Ingredients
- 3 tablespoons almond flour
- ½ tablespoon coconut flour
- ¼ teaspoon baking powder
- Pinch of salt
- 1 large egg
- 1 teaspoon butter or coconut oil (plus extra for greasing the mug)
Instructions
- Grease a wide microwave-safe mug or ramekin with butter or coconut oil. A wider, flatter vessel gives you a better muffin shape than a tall narrow mug.
- Combine almond flour, coconut flour, baking powder, and salt in the mug. Stir together so there are no clumps.
- Add the egg and melted butter. Mix well until a smooth batter forms with no dry flour left at the bottom.
- Microwave on high for 90 seconds. Check — the center should be set and not wet. If it's still tacky, microwave in 15-second bursts until done.
- Let it cool for 1 minute, then pop it out, slice in half horizontally, and toast the cut sides in a dry pan over medium heat for 1-2 minutes until golden. Top with whatever you like and eat immediately.
Tips
- Tip: Don't skip toasting the cut sides — that's what gives you the slightly crispy exterior that makes these feel like an actual English muffin rather than a mug cake.
- Tip: Every microwave runs differently. Start at 90 seconds and check before adding more time — overcooked almond flour muffins go rubbery fast.
- Tip: Add a pinch of garlic powder and dried herbs to the batter if you're using these as a savory base, or a teaspoon of erythritol and a drop of vanilla if you want them slightly sweet.
These 15 keto recipes are the ones I actually cook — not just bookmark and forget. When I first started paying attention to lower-carb eating a couple of years ago, I thought it meant sad salads and plain grilled chicken forever. It took me a while to figure out that if you approach it like real cooking — good fat, bold seasoning, proper technique — the food can be genuinely satisfying. These recipes got me there.
My husband was the skeptical one. He grew up eating rice at every meal (same as me), so "keto dinner" sounded like punishment to him. But the cauliflower fried rice converted him faster than I expected, and the butter chicken — which is naturally very low-carb if you skip the naan — he barely noticed the difference. Saad still asks for naan on the side, so we make a small batch for him and keep the rest of the meal keto-friendly. That's just how it works in a house with picky eaters.
Whether you're strictly keto, just trying to cut back on carbs, or simply looking for meals that don't leave you reaching for a snack an hour later — these are worth keeping in your rotation. Pick one or two to start and go from there. 🥑🍳✨
More Recipes You Might Like
- Easy Chicken Dinner Recipes — quick weeknight proteins that fit a low-carb plate without any extra planning
- One Pan Dinner Recipes — fewer dishes, real food, and most of them are naturally low in carbs
- Ground Beef Dinner Recipes — ground beef is one of the most keto-friendly proteins out there, and these recipes make it interesting
- Healthy Dinner Recipes — a broader mix of nutritious meals when you want variety beyond strict keto
- Soup Recipes — several of these are naturally low-carb and hit differently on cold nights
Frequently Asked Questions
What exactly makes a recipe "keto"?
A keto recipe keeps net carbs very low — typically under 10g per serving — while being higher in fat and moderate in protein. Net carbs means total carbs minus fiber, so vegetables like zucchini, cauliflower, and leafy greens are usually fine even though they technically contain carbs. The goal is to keep your body burning fat for fuel instead of carbohydrates.
Can I meal prep these keto recipes ahead of time?
Most of them yes. The soups, stews, egg bakes, and meat-based dishes all reheat well and actually taste better the next day once the flavors settle. I usually cook a big batch on Sunday and portion it out for 3-4 days. The exception is anything with avocado or fresh greens — add those right before eating or they turn sad fast.
I'm not strictly keto — are these recipes still worth making?
Absolutely. I'm not strictly keto either — I still eat rice and naan regularly because I'm Pakistani and that's just not something I'm giving up. But I cook low-carb meals several nights a week because they're filling, lighter on digestion, and genuinely good. You don't need a dietary label to enjoy food that happens to be low in carbs.
Which recipe from this list is the easiest for a beginner?
Anything egg-based is where I'd start — a sheet pan egg bake or a simple scramble with vegetables and cheese comes together in under 20 minutes and requires almost no technique. From there, the garlic butter shrimp and the lettuce wrap tacos are both straightforward and hard to mess up. Build confidence with those before moving to the more involved recipes.
How do I know if a store-bought ingredient is keto-friendly?
Check the nutrition label for net carbs (total carbs minus dietary fiber) and watch out for added sugars, which hide in a lot of sauces and condiments. Things like soy sauce, some hot sauces, and pre-made spice blends from Walmart or Costco can sneak in sugar. A quick label read takes 10 seconds and saves you from accidentally knocking yourself out of ketosis without realizing it.
Share This Post!
If any of these recipes are going into your rotation, save this post to Pinterest or share it with someone who's been trying to eat lower carb — it's easier than it looks once you have a list like this to work from. 📌🥑
View More Recipes here Recipe Roundups





Comments
No Comments