
My husband ate half a double batch of this fudge standing at the kitchen counter before dinner last Christmas. I had made extra specifically to package as gifts, and I walked back into the kitchen to find him mid-square, looking only slightly guilty. That's the moment I stopped treating this as a casual holiday recipe and started making it in proper bulk every December.
What makes this recipe work is that it skips the candy thermometer entirely. I tried old-fashioned pulled fudge once — the kind where you monitor temperature obsessively and hope nothing seizes — and it turned into a grainy, crumbly mess I had to throw out. This version uses sweetened condensed milk and chocolate chips, which handle all the sugar chemistry for you. The result is smooth, dense, and creamy every single time, even if your stove runs hot or you're distracted by chaos in the background.
Saad used to help me make this when he was younger — he'd add the sprinkles on top with extreme seriousness, like he was measuring something very precise. These days he skips the decorating and goes straight to eating, which honestly tracks. I've also brought this fudge to holiday gatherings layered in small tins alongside my Brownie Crust Chocolate Cheesecake — that combination disappears faster than I expect every single time.
One thing I'll say before you start: don't cut into it early. I gave it barely an hour in the fridge the first time because I was impatient, and the middle was still soft and wouldn't hold its shape. Two hours minimum, three if your kitchen runs warm. Make it the night before if you can. The patience is genuinely worth it.
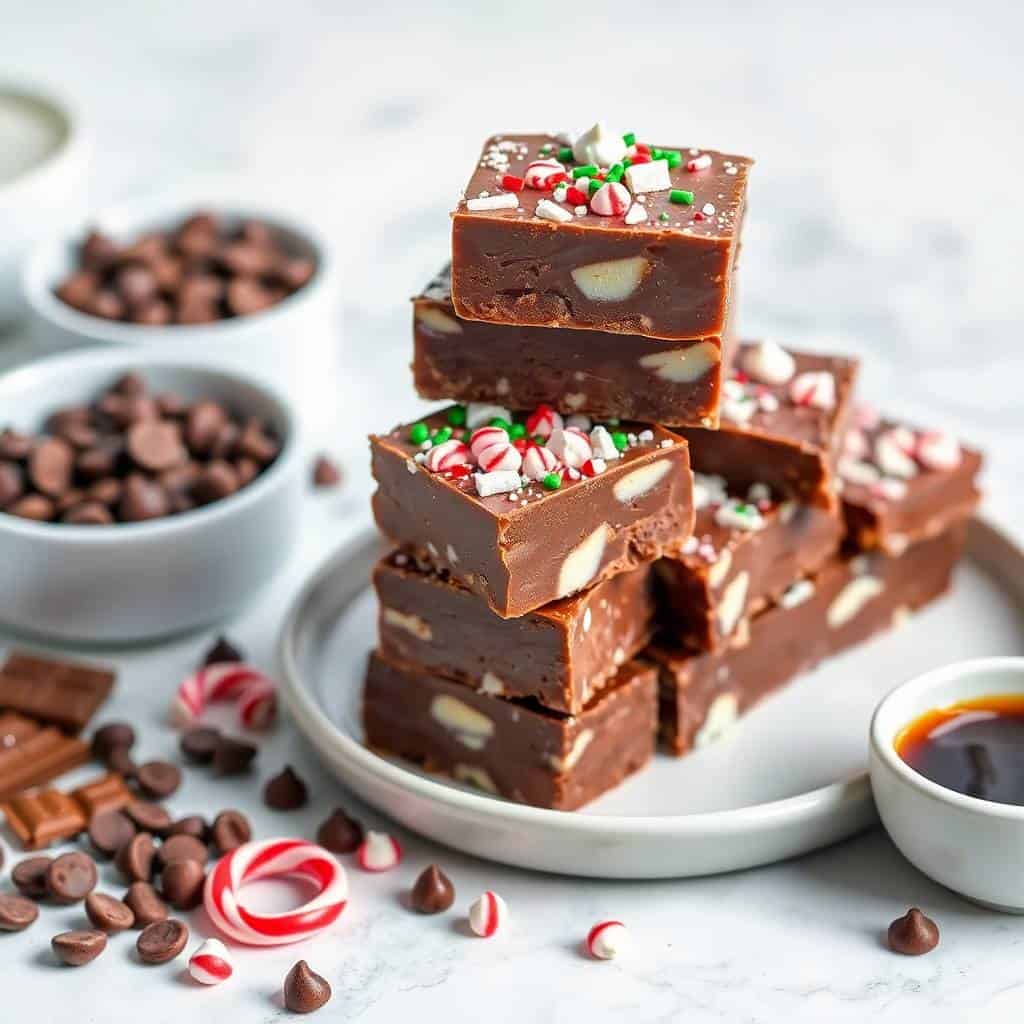
Why You'll Love This Recipe
- No candy thermometer, no stress: Traditional fudge recipes that require you to hit exactly 234°F are genuinely anxiety-inducing, and I've failed at them more than once. This recipe skips all of that — you're melting chocolate with condensed milk and butter in a saucepan, and the result is forgiving even if you've never made candy before. If you can stir a pot without walking away, you can make this.
- Sets up smooth and slices cleanly: The combination of semisweet chocolate chips and full-fat condensed milk gives you that dense, creamy texture that actually holds its shape at the knife. I've made fudge that crumbled and fudge that stuck to everything — this does neither. Run your knife under hot water, dry it off, and you get neat little squares every time.
- A genuinely good edible gift: I've given this as a neighbor gift, a teacher gift, and brought it to holiday gatherings, because good chocolate fudge doesn't need a specific occasion. It layers nicely in a small tin or holiday box, keeps for up to two weeks in the fridge, and looks like considerably more effort than it actually took. Nobody needs to know it came together in 15 minutes of active work.
- Five-ingredient base, endless toppings: The core recipe is just chocolate chips, condensed milk, butter, vanilla, and salt. Everything after that is your call — crushed candy canes, holiday sprinkles, chopped walnuts, a peanut butter swirl, mini marshmallows. I've used whatever was left in my pantry and it still looked festive. The base is neutral enough to take almost anything.
- Make it ahead and forget about it: December is already hectic enough. This fudge keeps in the fridge for up to two weeks, which means I make it on a quiet Sunday and have it ready for the rest of the month — gifts, drop-ins, last-minute holiday plates. I usually make one batch to eat immediately and freeze a second in early December so I always have something ready without any scrambling.
Ingredients
- 3 cups semisweet chocolate chips
- 1 (14 oz) can sweetened condensed milk — full-fat, this matters
- ¼ cup unsalted butter
- 1 teaspoon vanilla extract
- ¼ teaspoon salt
- Optional mix-ins: ½ cup chopped walnuts or pecans
- Optional toppings: crushed peppermint candy canes, holiday sprinkles, or mini marshmallows
Directions
- Prepare the pan: Line an 8×8-inch baking dish with parchment paper, leaving a couple of inches of overhang on two sides. That overhang is what lets you lift the whole slab out cleanly later — skipping it means trying to dig fudge out of a corner, which I've done once and don't recommend.
- Melt the base: In a medium saucepan over medium-low heat, combine the chocolate chips, sweetened condensed milk, butter, and salt. Stir constantly until everything is fully melted and completely smooth — this takes about 5 to 7 minutes. Don't turn up the heat to speed things along; chocolate scorches fast, and a burnt batch smells and tastes awful.
- Add vanilla and mix-ins: Pull the pan off the heat and stir in the vanilla extract. If you're adding chopped nuts or peppermint extract, do it now while the mixture is still warm but off direct heat. If you're using peppermint extract, start with ¼ teaspoon and taste before adding more — it's stronger than it seems.
- Pour and top: Pour the fudge mixture into your prepared pan and spread it into an even layer with a spatula. Work quickly because it starts to set as it cools. Add your toppings immediately — sprinkles, crushed peppermint, marshmallows — and press them in gently so they actually stick once it firms up.
- Chill until fully set: Refrigerate for at least 2 hours, and closer to 3 if your kitchen runs warm. Press the center gently — if it gives at all, give it another hour. This is the step I've rushed and regretted.
- Slice and serve: Lift the fudge out using the parchment overhang and place it on a cutting board. Run a sharp knife under hot water, dry it off completely, and cut into 1-inch squares. Wipe the knife between cuts for the cleanest edges. Store in an airtight container in the fridge.
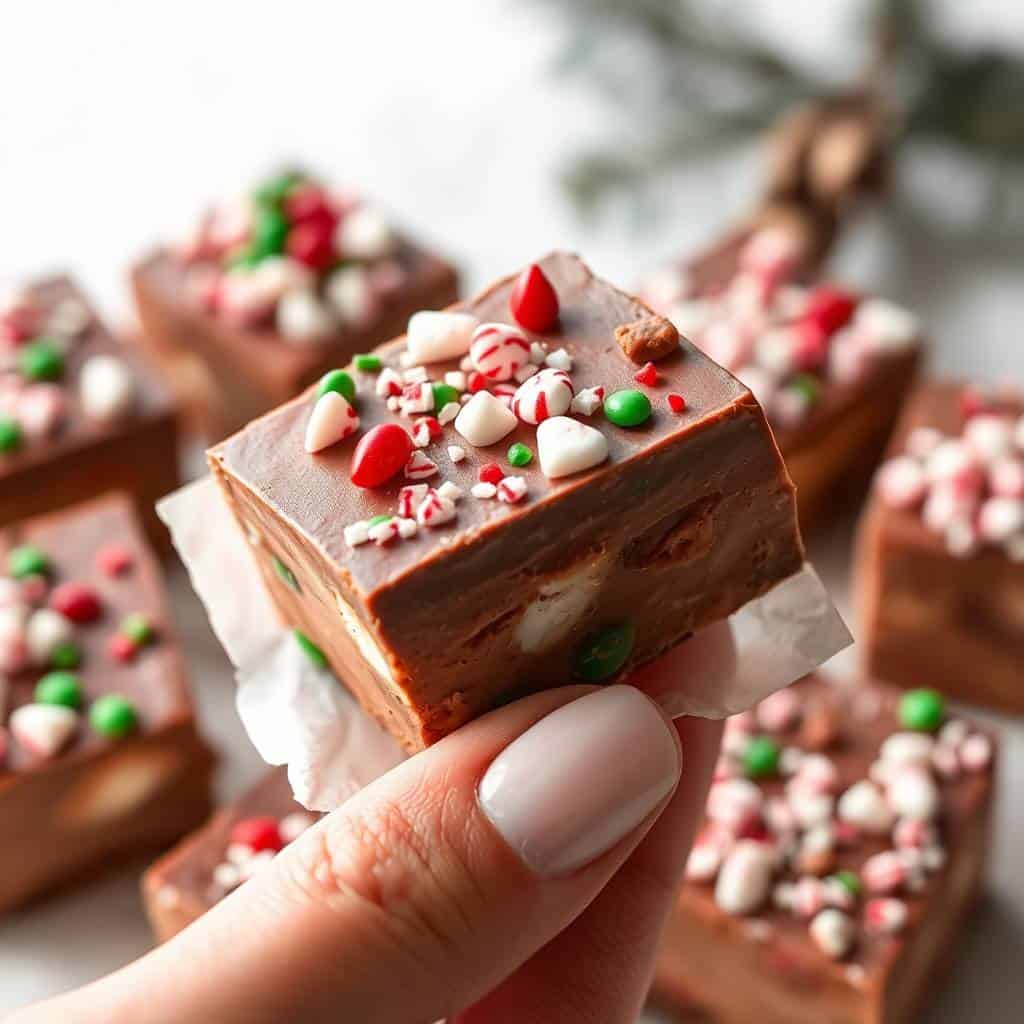
Tips for Success
- Use full-fat condensed milk: I made this once with a low-fat can I had leftover from something else, and the fudge never properly set — it stayed soft and tacky even after four hours in the fridge. Full-fat sweetened condensed milk is what gives the fudge structure and that dense, creamy texture. I usually grab whatever's at Walmart or Aldi, but check the label before you buy.
- Keep the heat on medium-low: Medium-low, not medium. Chocolate burns at the bottom of the pan if you push the heat, and once it's scorched you can taste it in every bite. Slow and steady with constant stirring gets you a smooth, glossy result. If you prefer the microwave, do it in 30-second bursts and stir between each one — never more than 30 seconds at a time.
- Use decent chocolate chips: You don't need expensive chocolate, but quality does affect the final flavor. I usually use Ghirardelli or Enjoy Life — both available at most grocery stores. Store-brand chips work too, but they tend to have more stabilizers, which can make the texture slightly less smooth. If your chips have been sitting in the pantry for a year, grab a fresh bag.
- Let it chill completely before cutting: I know the kitchen smells amazing and waiting is hard. But cutting early gives you soft, uneven squares that fall apart when you try to stack them. The full chill time makes a real difference to both texture and appearance. If you're giving this as a gift, make it the night before — overnight in the fridge is better than the minimum two hours.
- Warm knife trick for clean slices: Run your knife under hot tap water, then dry it completely before cutting. Do this between every few cuts. It sounds like a small thing but it makes a visible difference — a cold knife on cold fudge drags and cracks the edges, while a warm knife glides through cleanly. I use my regular chef's knife, nothing special required.
Variations
- Peppermint fudge: Add ¼ to ½ teaspoon of peppermint extract when you stir in the vanilla, then press crushed candy canes into the top before chilling. Start small — peppermint extract is stronger than you expect, and too much tips from festive into medicinal very quickly. This is the version I make most often for holiday tins because it's the most visually Christmas-y of all the options.
- Peanut butter swirl: Melt 3 tablespoons of smooth peanut butter in the microwave until loose, then drop spoonfuls across the top of the poured fudge and drag a toothpick through to swirl. My husband is the biggest fan of this version — he eats it like it's a Reese's cup in fudge form, which honestly isn't far off. Use smooth peanut butter rather than natural; the oil separation in natural peanut butter makes the swirl look greasy.
- White chocolate version: Swap the semisweet chips for white chocolate chips. The result is sweeter and paler, which looks beautiful under red and green sprinkles. White chocolate can be trickier to melt without seizing, so go even slower with the heat and add the condensed milk gradually. Add an extra pinch of salt to balance the sweetness — white chocolate without salt tastes one-dimensional.
- Mocha fudge: Stir 1 teaspoon of instant espresso powder into the chocolate mixture before pouring. You won't strongly taste coffee — it mostly deepens and intensifies the chocolate flavor in a way that's hard to pinpoint but very good. I make this version for adults at gatherings, usually alongside the peppermint version. If you're putting together a full holiday dessert table, pairing it with Cinnamon Sugar French Toast Muffins on the side makes a spread that covers everyone.
- Dairy-free version: Use dairy-free chocolate chips — Enjoy Life brand is easy to find at most grocery stores — and a can of sweetened condensed coconut milk in place of regular condensed milk. The texture comes out very slightly softer but still sets properly and tastes genuinely good. I've made this for a friend who doesn't eat dairy and she asked me for the recipe, so I'd call that a clear success.
Serving and Storage
Serving
I serve this cold or at room temperature depending on the day. Cold from the fridge it's firmer and slices very cleanly; at room temperature it softens slightly and almost melts on your tongue — both are good for different reasons. For a dessert table, I'll set it out about 15 minutes before guests arrive so it softens a little. Cut into small 1-inch squares; fudge is rich and small pieces go a long way. For gifting, stack the squares in a small tin or cellophane bag, keep refrigerated until you hand them off, and they'll hold up beautifully in transit.
Storage
Store in an airtight container in the refrigerator for up to 2 weeks — separate layers with parchment or wax paper so the squares don't stick together. For longer storage, wrap the uncut slab tightly in plastic wrap, then foil, and freeze for up to 2 months. Thaw overnight in the fridge rather than on the counter; counter thawing causes condensation on the surface which makes the top tacky and wet-looking. I usually make one batch to eat immediately and freeze a second batch in early December so I always have something ready without any last-minute scrambling.

Frequently Asked Questions
Can I make this fudge ahead of time?
Yes, and I'd actually recommend it. The fudge keeps in the fridge for up to 2 weeks in an airtight container, so you can make it well before the holidays and not think about it again. Making it at least a day ahead also gives it extra time to set, which improves the texture and makes slicing much cleaner.
Do I really not need a candy thermometer?
Really, truly, no. The reason this works without one is the sweetened condensed milk — it handles the sugar chemistry for you, so you're not trying to hit a specific temperature the way you would with traditional pulled fudge. As long as everything is fully melted and smooth before you pour, you'll get a properly set result.
Can I freeze this Christmas fudge?
Yes. Wrap the uncut slab tightly in plastic wrap and then foil, and freeze for up to 2 months. When you're ready to use it, move it to the fridge the night before and let it thaw slowly. Don't thaw at room temperature — the condensation that forms on the surface can make the top sticky and wet-looking.
Can I use milk chocolate chips instead of semisweet?
You can, but be aware it'll be noticeably sweeter and the fudge will set slightly softer since milk chocolate has a higher milk fat content. If you go this route, balance it by skipping very sweet toppings like candy canes and going with plain sprinkles or chopped nuts instead.
Why didn't my fudge set properly?
The two most common reasons are using low-fat condensed milk — always use full-fat — or not chilling long enough. If your fudge has been in the fridge for over 3 hours and still won't firm up, it's likely a condensed milk issue and there's not much you can do at that point. It'll still taste good though, so serve it warm over ice cream and call it intentional.

THE BEST CHRISTMAS FUDGE RECIPE
Ingredients
- 3 cups semi-sweet chocolate chips
- 1 14-ounce can sweetened condensed milk
- ¼ cup unsalted butter
- 1 teaspoon vanilla extract
- ¼ teaspoon salt
- Optional toppings: crushed peppermint sprinkles, chopped nuts
Instructions
Prepare the Pan:
- Line an 8x8-inch square baking dish with parchment paper, leaving some overhang for easy removal.
Melt Ingredients:
- In a saucepan over medium heat, combine chocolate chips, sweetened condensed milk, butter, and salt. Stir continuously until smooth and fully melted. Remove from heat and stir in vanilla extract.
Pour and Top:
- Pour the fudge into the prepared dish. Smooth the top with a spatula. Add desired toppings like sprinkles or crushed peppermint.
Chill:
- Refrigerate for at least 2 hours, or until firm.
Slice and Serve:
- Lift the fudge out using the parchment paper. Cut into bite-sized squares and serve or store.
Notes
- Make Ahead: Fudge stays fresh in the fridge for up to 2 weeks or can be frozen for longer storage.
- Flavor Variations: Add a few drops of peppermint or almond extract for a twist.
- Gift Idea: Wrap fudge squares in festive bags or boxes for homemade holiday gifts.
- Dairy-Free Tip: Use dairy-free chocolate chips and sweetened condensed coconut milk for a vegan option.
This fudge has become a December non-negotiable in my kitchen. I make at least two batches every year — one for us to eat at home over the course of the week, and one I freeze in early December to pull out when I suddenly need a gift or something to bring to a gathering. It's about 15 minutes of active work and then the fridge does everything else, which is exactly the kind of recipe I need when the rest of December is already demanding so much of my attention.
If you're building out a holiday dessert spread, this fudge sits really well next to my Brownie Crust Chocolate Cheesecake — one no-bake chocolate option and one showstopper baked dessert covers most of the bases. I've done that exact combination for the last two Christmases and it means I have one less thing to stress about on the actual day.
Make a batch, wrap some squares up for the people you like, keep the rest for yourself. You've spent maybe 15 minutes of actual effort — the fridge did the real work. 🍫✨
If you liked this recipe, here are a few more worth bookmarking:
- Brownie Crust Chocolate Cheesecake — another chocolate dessert that looks far more complicated than it is
- Cinnamon Sugar French Toast Muffins — great for holiday mornings when you need something easy and crowd-friendly
- Crockpot Tuscan Garlic Chicken — when you need a hands-off dinner while you're busy making fudge
- One





Comments
No Comments