
I made these strawberry cream chocolates for the first time around Valentine's Day, mostly because I wanted to give my kids something homemade instead of buying a box from the store. I wasn't sure how they'd turn out — candy-making felt intimidating to me, like something that required a professional setup. Turns out it doesn't.
What makes this recipe work is the freeze-dried strawberry powder in the filling. I tried an earlier version using fresh strawberry puree, and the centers never firmed up properly — they were too wet and just kind of slid around when I tried to dip them. Switching to freeze-dried strawberries fixed everything. The filling holds its shape, the flavor is concentrated and actually tastes like real strawberries, and the whole thing comes together without any fuss.
Zainab helped me roll the centers the second time I made these, and she was so proud of them she packed some in a little bag for her teacher. My husband ate four in one sitting without saying a word, which in this house means he liked them very much. I now make a double batch because one batch disappears before I even get around to packaging any for gifting.
You do not need a candy thermometer, a double boiler, or any special equipment. A microwave, a fork, and a sheet of parchment paper are all you need. If you've ever made chocolate chip cookies, you already have the patience and attention this recipe asks for. The only rule I'd insist on: freeze the centers before dipping. Don't skip that step.
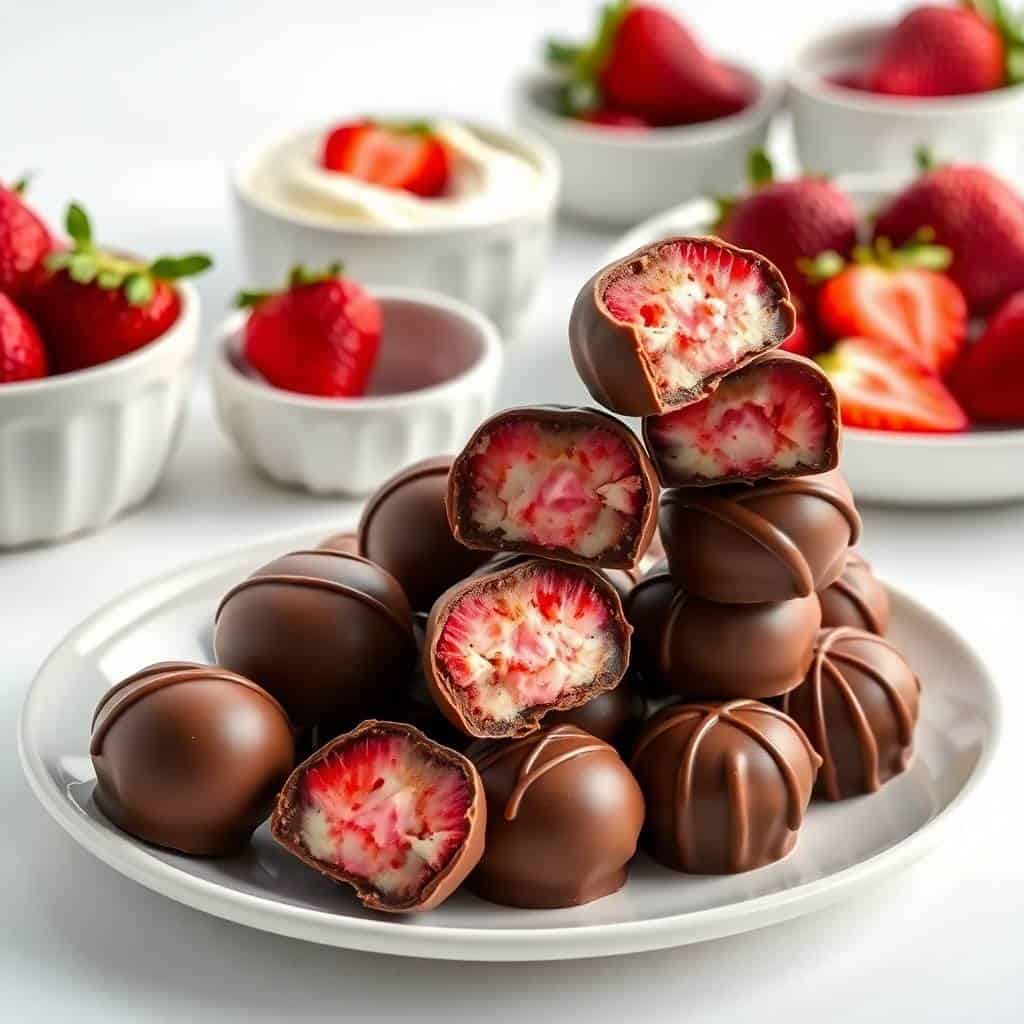
Why You'll Love This Recipe
- No candy thermometer needed: I was genuinely scared of candy-making before this recipe because everything I read online involved temperature probes and tempering and "soft ball stage." This recipe skips all of that. You melt chocolate in a microwave and mix filling with a spoon. That's really the extent of the technique involved.
- The filling actually tastes like strawberry: A lot of strawberry candy recipes taste artificial — like strawberry-flavored lip gloss. Using freeze-dried strawberries ground into powder gives this filling a real, bright strawberry flavor. It's the kind of taste you'd expect from something you paid a lot of money for at a chocolate shop.
- Great for gifting: I've boxed these up for Eid, for teacher appreciation, and for my neighbor who had a baby. They look genuinely impressive sitting in little paper candy cups inside a tin. Nobody believes they're homemade until I tell them, and even then some people don't believe me.
- You can make them ahead: These keep well in the fridge for up to two weeks in an airtight container. I often make them on a Sunday afternoon, pack them away, and pull them out when I need something for a gathering or a gift. Having something ready in the fridge that looks this put-together is a small life victory.
- Kids can help: The rolling and decorating parts are genuinely fun for kids. Zainab takes the job of rolling centers very seriously. She lines them up on the tray with this focused expression like she's defusing something. It's one of the better kitchen projects we've done together — low mess, clear steps, and a delicious payoff at the end.
Ingredients
- 1 cup freeze-dried strawberries (ground into powder — Trader Joe's and Walmart both carry these)
- 3 tablespoons heavy cream
- ¼ cup unsalted butter, softened
- 2 cups powdered sugar
- ½ teaspoon vanilla extract
- ¼ teaspoon salt
- 10 oz semi-sweet chocolate, chopped or chips
- 1 tablespoon coconut oil or vegetable shortening (optional — helps the chocolate coat more smoothly)
Directions
- Make the strawberry powder: Blend the freeze-dried strawberries in a blender or food processor until they become a fine pink powder. If you don't have a food processor, put them in a zip-lock bag and crush them with a rolling pin — takes about 3 minutes and works just as well. Set aside.
- Make the filling: Beat softened butter and heavy cream together in a bowl until smooth. Add the powdered sugar, strawberry powder, vanilla extract, and salt. Stir until you get a thick, creamy filling. It should hold its shape when you press it — if it feels too soft, add a little more powdered sugar a tablespoon at a time.
- Shape the centers: Scoop out small portions — about 1 teaspoon each — and roll them into balls between your palms. Place them on a parchment-lined baking sheet. Freeze for at least 30 minutes. Don't rush this step; cold centers are what keep everything from falling apart when you dip them.
- Melt the chocolate: Combine the chopped chocolate (or chips) and coconut oil in a microwave-safe bowl. Microwave in 30-second intervals, stirring between each one, until completely smooth. Usually takes about 90 seconds total. Don't overheat — chocolate goes from melted to scorched faster than you'd expect.
- Dip the centers: Working quickly, drop each frozen filling ball into the melted chocolate. Use a fork to lift it out, letting the excess chocolate drip back into the bowl. Set each dipped chocolate back on the parchment paper. If the chocolate in the bowl starts to thicken, microwave it for another 15 seconds and stir.
- Let them set: Leave them at room temperature for about 20 minutes, or refrigerate for 10–15 minutes if you want to speed it up. Once the shell is fully set, transfer to an airtight container. They'll keep in the fridge for up to two weeks.
Tips for Success
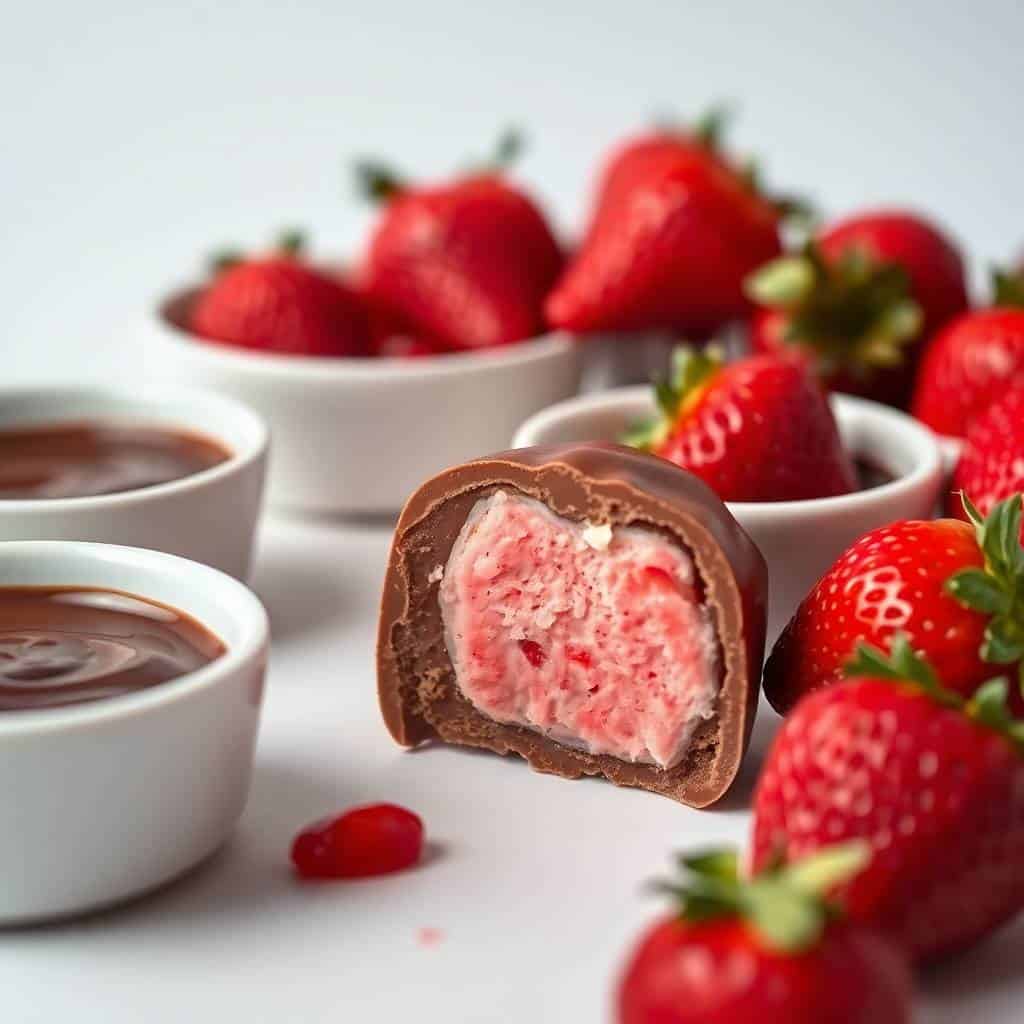
- Freeze-dried only, not fresh: I learned this the hard way the first time I made these. I used fresh strawberry puree in the filling thinking it would taste better, and the centers came out too soft and sticky to roll properly. Fresh berries add moisture that the filling can't absorb. Freeze-dried strawberries are already dry, so they blend into the sugar and butter without making everything wet. You'll find them at Trader Joe's, Walmart, and most Aldi stores — usually in the snack or dried fruit aisle.
- Freeze your centers fully before dipping: Thirty minutes is the minimum. I once got impatient and tried dipping after 15 minutes and the centers started to soften mid-dip, which meant the chocolate coating went on uneven and a couple fell apart entirely. The colder the center, the faster the chocolate shell sets around it, and the cleaner your finished chocolates look.
- Don't overheat the chocolate: Chocolate seizes when it gets too hot — it goes from smooth and glossy to grainy and thick, and there's no fixing it once that happens. Use 30-second microwave intervals, stir well between each one, and stop as soon as it's fully melted. The residual heat from stirring finishes the job. If you add the coconut oil, it helps keep things smooth and gives a nice sheen.
- Use a fork for dipping: I don't own a proper candy dipping tool. A regular dinner fork works fine. Drop the ball in, slide the fork underneath, lift it out, and tap the fork gently on the edge of the bowl to shake off the excess. Set it down by sliding it off the fork onto the parchment — don't drop it or you'll get a flat spot. It takes a couple of tries to get the motion right but it becomes easy fast.
- Work in batches: Take only about 6–8 centers out of the freezer at a time. If they sit out too long before dipping, they soften and become harder to handle. I keep the rest in the freezer and pull out a new batch every few minutes. It makes the whole dipping process much less stressful.
Variations
- White chocolate coating: Swap the semi-sweet chocolate for white chocolate melting wafers or good white chocolate chips. The pink of the filling shows through slightly at the bottom which looks beautiful. White chocolate is a little sweeter overall, so if you go this route I'd cut the powdered sugar in the filling by about 2 tablespoons to balance it out.
- Raspberry instead of strawberry: Use freeze-dried raspberries in place of the freeze-dried strawberries. The flavor is a bit more tart and the color of the filling turns a deeper pink. My husband actually prefers the raspberry version — he says it tastes less sweet. Both work equally well with the chocolate shell.
- Nutty finish: Roll the dipped chocolates in finely crushed pistachios, toasted almonds, or even shredded coconut before the shell sets. It adds a nice texture and makes them look more finished. Pistachios in particular give you that green-and-pink color combination that looks really striking on a gift tray.
- Dairy-free version: Use plant-based butter (Earth Balance works well) and swap the heavy cream for full-fat coconut cream. The filling comes out slightly softer but still rollable if you freeze it long enough. Use dairy-free chocolate chips for the coating. I haven't tried this version myself but a reader made it this way and said it worked fine.
- Silicone mold shapes: If you want uniform shapes instead of hand-rolled balls — hearts for Valentine's Day, rounds for Eid, whatever — press the filling into a silicone candy mold, freeze until firm, then pop them out and dip. Heart-shaped ones look especially good when you pair them with a cherry rose mudslide for a full dessert spread.
Serving and Storage
Serving
Serve them chilled straight from the fridge or let them sit at room temperature for about 10 minutes first — the filling softens slightly and tastes creamier that way. I put them in small paper candy cups on a tray when I'm serving them for guests. For gifting, a small tin or a clear treat bag tied with a ribbon looks nice. They pair well as a small sweet at the end of a dinner — nothing fussy, just two or three on a little plate alongside coffee.
Storage
Store in an airtight container in the refrigerator for up to two weeks. Layer them between sheets of parchment or wax paper so they don't stick together. Keep them away from anything strongly scented in the fridge — chocolate absorbs smells easily. If you want to freeze them, place in a single layer on a tray first until solid, then transfer to a freezer bag. They'll keep for up to 2 months frozen. Thaw in the fridge overnight rather than on the counter to avoid condensation forming on the shell.
Frequently Asked Questions
Can I use fresh strawberries instead of freeze-dried?
I tried this and it doesn't work well. Fresh strawberries add too much moisture to the filling, which makes it too soft to roll and freeze properly. Freeze-dried strawberries are what give the filling its structure and concentrated flavor. You'll find them at Walmart, Trader Joe's, and most major grocery stores in the dried fruit or snack aisle.
How far in advance can I make these?
Up to two weeks ahead if you store them in an airtight container in the fridge. I usually make them 2–3 days before I need them, which gives the flavors a little time to settle. They actually taste slightly better on day two than day one, I think.
Why is my chocolate coating cracking?
This usually happens when the frozen centers are too cold going into warm chocolate — the temperature difference causes the shell to contract as it cools and crack. Let the frozen centers sit out for just 2–3 minutes before dipping so they're not ice-cold. Also avoid moving them around a lot right after dipping before the shell has set.
Can I freeze the finished chocolates?
Yes. Freeze them in a single layer first until solid, then transfer to a zip-lock freezer bag with parchment between layers. They keep well for up to 2 months. When you're ready to eat them, thaw overnight in the fridge — don't put them straight on the counter because the condensation that forms can make the chocolate shell look streaky or dull.
What's the best chocolate to use for coating?
Semi-sweet chocolate chips work fine — I use whatever's in my pantry, usually Ghirardelli or the Walmart Great Value brand. If you want a thinner, shinier coating, add the tablespoon of coconut oil when melting. Chocolate melting wafers (sold at craft stores or Walmart near the baking supplies) are also easy to work with because they're specifically designed for dipping and set with a smooth finish.
STRAWBERRY CREAM CHOCOLATES
Ingredients
- 2 cups semi-sweet or milk chocolate chips for coating
- 2 tablespoons coconut oil or shortening
- ½ cup unsalted butter softened
- 3 cups powdered sugar
- 2 tablespoons strawberry puree or strawberry extract
- 2 –3 drops pink food coloring optional
Instructions
- Prepare Chocolate Coating: Melt chocolate chips with coconut oil in a microwave-safe bowl in 30-second intervals, stirring until smooth.
- Make Filling: In a bowl, beat softened butter until creamy. Add powdered sugar, strawberry puree (or extract), and food coloring. Mix until smooth and thick.
- Shape Centers: Roll filling into small balls or spoon into candy molds. Freeze for 15–20 minutes until firm.
- Dip in Chocolate: Using a fork, dip each strawberry cream ball into melted chocolate and place on parchment paper.
- Chill: Refrigerate until chocolate is set, about 30–40 minutes.
- Serve: Store in an airtight container in the fridge and enjoy chilled.
Notes
- Make Ahead: Can be made up to 1 week in advance and stored in the fridge.
- Customizations: Use white chocolate or dark chocolate for coating. Add sprinkles for a festive touch.
- Serving Suggestion: Wrap in candy foil for gifting or serve on a pretty tray for parties.
These strawberry cream chocolates have quietly become one of my most-requested things to make. Whenever I bring them somewhere, someone always asks for the recipe, and I love that it's genuinely simple enough to share without any caveats. No special skills, no expensive chocolate, no stand mixer — just a microwave and some patience while the centers freeze.
I've made them for Eid, for birthdays, for a friend who just had surgery and needed cheering up, and honestly, just for a Tuesday when I wanted something chocolatey. This is one of those recipes that doesn't belong to any single occasion — it just works whenever you need something that feels a little considered and a little generous.
If you're putting together a dessert spread, these go really well alongside something rich to drink. I sometimes set them out with a cherry rose mudslide for a full after-dinner moment. And if you're in full treat-making mode over a weekend, they store well while you sort out the rest of your menu — including something savory like my creamy tomato pasta for dinner before dessert.
Make them once and you'll understand why I always double the batch. They go fast. 🍓🍫✨
If you liked this recipe, here are a few more from the blog you might enjoy:
- Cherry Rose Mudslide — a gorgeous drink that pairs beautifully with chocolate desserts
- Creamy Tomato Pasta with Garlic and Parmesan — my go-to weeknight dinner before a sweet ending
- Jammy Hot Caramelized Onion Dip with Gruyère — for when you need a savory start before the chocolate finish
- Pizza Grilled Cheese — Saad's favorite thing to eat before he asks for dessert
- German Potato Salad — a crowd-friendly side if you're hosting a bigger spread





Comments
No Comments