
I made my first loaf of no-knead bread on a Tuesday night when I had nothing planned for dinner and a bag of flour sitting in the pantry. I mixed everything together in about five minutes, left it on the counter overnight, and woke up to a dough that had doubled and smelled faintly sour in the best possible way. When it came out of the oven an hour later — crackly crust, hollow thud when I tapped the bottom — I stood in the kitchen and just stared at it. I could not believe I had made that.
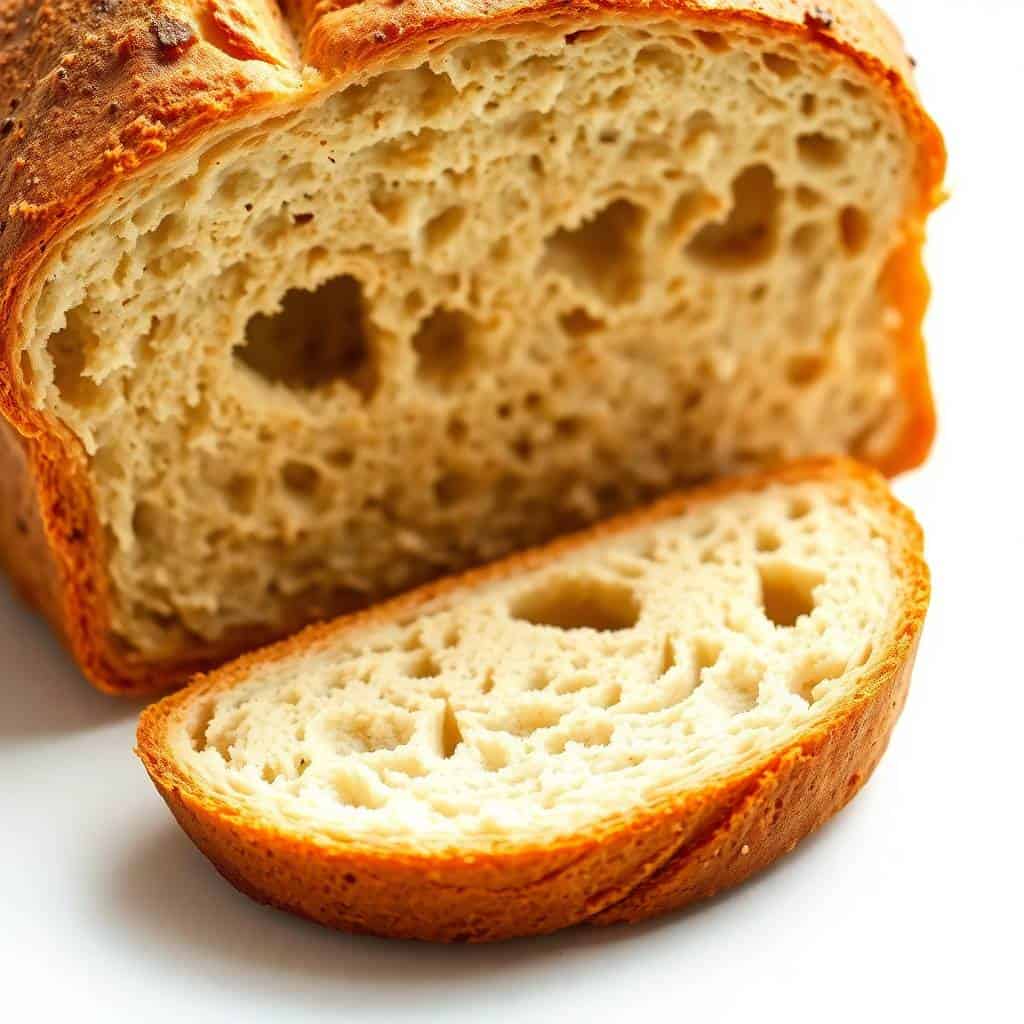
What makes this recipe work is the long, slow rise. That 12-hour rest does all the work that kneading normally would — it develops the gluten, builds the flavor, creates those irregular air pockets in the crumb. The original no-knead method has been around for years and it's genius in its simplicity: flour, water, salt, yeast. That's it. My version uses active dry yeast (easier to find at any Walmart or grocery store) and a small amount of sugar to help wake it up, but the core of the technique is unchanged. Wet dough, long rest, screaming hot pot.
I make this on nights before I know I'll want something good with dinner the next day. If I'm making my Crockpot Cream Cheese Chicken Chili, I'll mix the bread dough the night before so we have a fresh loaf ready to tear into alongside it. My husband has started requesting specific bread Fridays. Zainab likes it toasted with butter the next morning — she thinks cold leftover bread is better than fresh, which I find baffling but I'm not going to argue with a kid who eats bread.
One thing to set expectations on: this is not a 30-minute recipe. The hands-on time is genuinely about 10 minutes, but you need to plan for 12-18 hours of rise time plus about an hour in the oven. I almost always mix it before bed and bake it the next evening. The timing is flexible and forgiving — if it rises for 14 hours instead of 12, that's fine. If it goes to 18, also fine. Just don't rush the rise.
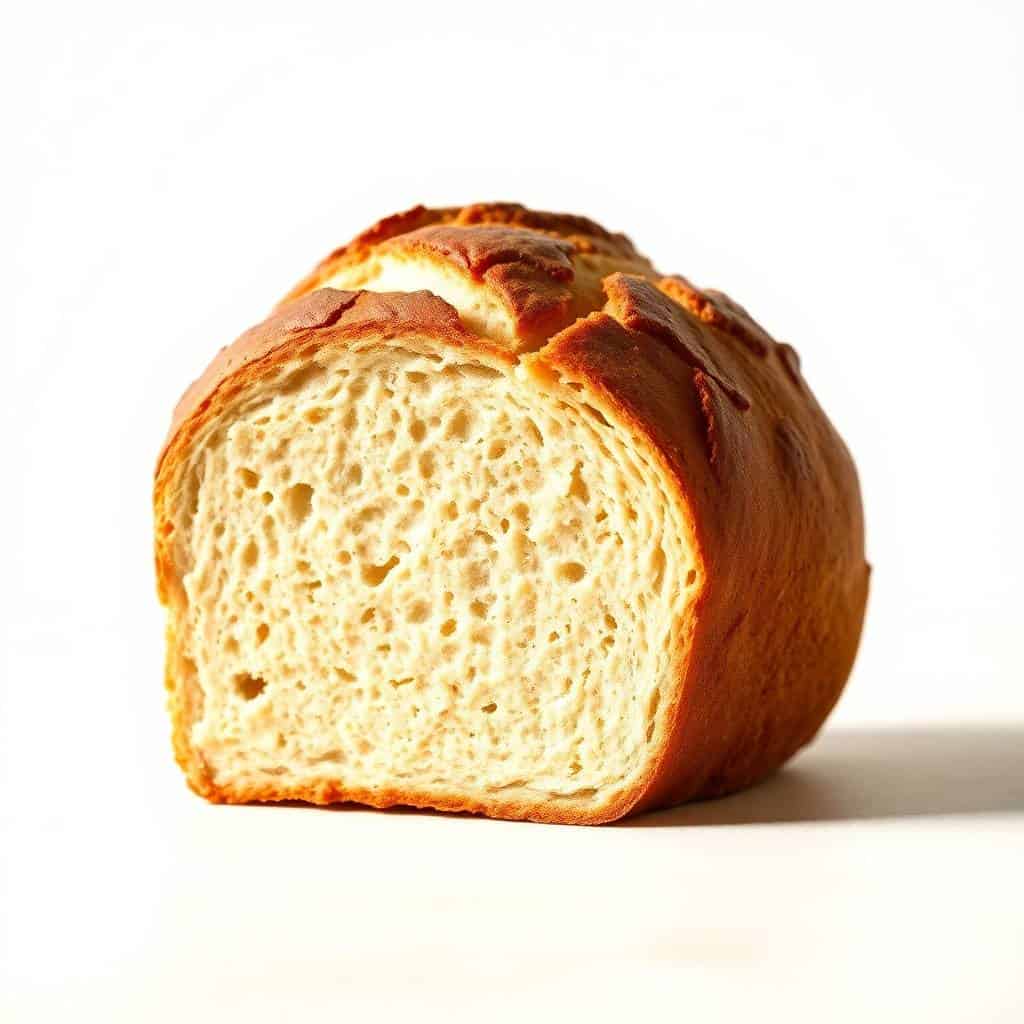
Why You'll Love This Recipe
- 10 minutes of actual work: I'm not exaggerating. You stir four ingredients together in a bowl, cover it, and walk away. The next morning you preheat an oven and shape the dough in about two minutes. That's genuinely the entire active cooking time. On weeknights when I can barely keep track of what's on the stove, knowing the bread is already handling itself is a relief.
- The crust is actually crusty: A lot of homemade bread comes out soft all the way around, which is fine but isn't what I want when I picture a real bakery loaf. The trick here is baking it in a covered pot — the steam trapped inside creates that shattery, crackly crust. When I first pulled the lid off at the 30-minute mark and saw the color starting to deepen, I understood why people get obsessed with baking bread.
- No special equipment (within reason): You do need an oven-safe pot with a lid that can handle 450°F — a Dutch oven is the classic choice, but any heavy pot works. I use a cheap cast iron Dutch oven I got for under $30. Beyond that, all you need is a large bowl and a wooden spoon. No stand mixer, no bread machine, no fancy shaping tools.
- The flavor from the long ferment is something else: Bread that rises for 12 hours tastes fundamentally different from bread that rises for 1 hour. You get this faint tanginess, a depth you can't get from a quick rise, and a chew in the crumb that feels almost chewy-bakery rather than soft-grocery-store. My husband couldn't figure out what I'd added to make it taste that way. I told him: time.
- The ingredients are already in your pantry: All-purpose flour, salt, sugar, yeast, water. If you bake anything at all, you probably have all of this right now. I've started keeping a packet of active dry yeast on the counter just so the barrier to making this is even lower. At roughly 25 cents a loaf in ingredients, it's hard to justify buying bread from the store after you've made this once.
Ingredients
- 3 cups all-purpose flour (plus extra for dusting)
- 1½ teaspoons salt
- 1 teaspoon sugar
- 2 teaspoons active dry yeast
- 1½ cups warm water (110°F / 43°C — warm like a comfortable bath, not hot)
Directions
- Activate the yeast: In a small bowl, combine the warm water, sugar, and yeast. Stir gently and let it sit for 5-10 minutes until it looks frothy and smells like bread. If nothing happens after 10 minutes, your water was too hot or the yeast is old — start over, because dead yeast means no rise.
- Mix the dough: In a large bowl, combine the flour and salt. Pour in the yeast mixture and stir with a wooden spoon until a shaggy, sticky dough forms. It will look rough and messy — that's exactly right. Just make sure all the flour is incorporated and there are no dry patches at the bottom.
- First rise (12–18 hours): Cover the bowl tightly with plastic wrap or a clean kitchen towel. Leave it at room temperature for 12 to 18 hours. When it's ready, it will have roughly doubled and the surface will look bubbly and slightly domed. I usually mix it around 9pm and come back to it the next morning or early evening.
- Preheat the oven and pot: About 45 minutes before you want to bake, place your Dutch oven or heavy lidded pot inside the oven and preheat to 450°F (230°C). The pot needs to be screaming hot — this is what creates the steam and the crust. Don't skip preheating the pot.
- Shape the dough: Turn the risen dough out onto a lightly floured surface. Gently fold the edges toward the center a few times to create a rough ball. Don't punch it down or work it hard — you want to keep those air bubbles. Set the shaped dough on a piece of parchment paper, seam-side down, and let it rest while the oven finishes preheating (about 30 minutes).
- Bake covered: Using oven mitts, carefully lift the dough by the parchment paper and lower it into the preheated pot. Cover with the lid and bake for 30 minutes. The lid traps steam inside, which keeps the crust soft enough to expand before it sets.
- Finish uncovered: Remove the lid and bake for another 10–15 minutes, until the crust is a deep golden brown and the loaf sounds hollow when you tap the bottom. If it looks pale, give it a few more minutes — you want real color here.
- Cool before slicing: Lift the bread out of the pot using the parchment and set it on a wire rack. Let it cool for at least 30 minutes before cutting. I know this is the hardest part. But the inside is still setting up during this time — slice it too early and you'll get a gummy crumb.
Tips for Success
- Check your water temperature: This tripped me up the first time I made yeasted bread. Too cold and the yeast stays dormant; too hot and you kill it. 110°F is the target — if you don't have a thermometer, it should feel warm on your wrist, like bathwater for a baby. I ruined a batch once by using water straight from a very hot tap and wondering why the dough never bubbled.
- The wet, sticky dough is correct: The first time I made this I kept adding flour because the dough seemed too wet to possibly work. Don't do that. No-knead dough is much wetter than kneaded bread dough, and that wetness is part of why it works — it allows the gluten to develop on its own during the long rise. Lightly flour your hands when shaping but resist the urge to work more flour into the dough itself.
- Preheat the pot — no shortcuts: I've tried putting the dough into a cold pot just to see what would happen. The crust was soft and the bottom didn't brown properly. A hot pot is what creates that instant burst of steam and the crust you're going for. Give it at least 30 minutes inside the oven to fully heat through.
- Don't rush the rise for flavor: If you're in a hurry and the dough has only risen for 8 hours, it'll bake into bread — but it won't have that depth of flavor. The long fermentation is where most of the taste comes from. If I know I want this for a Sunday dinner, I mix it Saturday night. Planning ahead is the only real skill this recipe requires.
- Let it cool fully before slicing: I know I said this in the directions but I'm saying it again because I've ignored my own advice and regretted it every single time. The crumb needs that 30 minutes off the heat to finish setting. If you cut in while it's still steaming, the inside compresses and gets gummy. Wait. Make tea. It's worth it.
Variations
- Rosemary and garlic: Stir 1 teaspoon of dried rosemary and 2 cloves of minced garlic into the flour before adding the water. This is my most-made variation — the garlic mellows during the long bake and the whole house smells extraordinary. I made this version last winter alongside a pot of soup and my husband asked me to write down the recipe, which I count as a very high compliment.
- Cheddar and jalapeño: Fold ½ cup of shredded sharp cheddar and 2 tablespoons of diced pickled jalapeños into the dough after mixing. The cheese melts into pockets inside the bread and the jalapeño gives it just enough heat. This is the version I'd serve alongside my Easy Hamburger Rice Casserole if I wanted to make dinner feel a little more special.
- Seeded top: Before the dough goes into the oven, brush the surface with a little water and press on sesame seeds, poppy seeds, or sunflower seeds. They toast during baking and give the crust a nice crunch and a bakery look. Saad thinks the seeded version looks "fancy" and is therefore more likely to eat it, which I'll take.
- Whole wheat: Swap 1 cup of the all-purpose flour for whole wheat flour. The loaf will be slightly denser and the flavor has more depth — a little earthier, slightly nutty. I wouldn't go beyond 1 cup of whole wheat or the crumb gets too heavy, but at that ratio it works well and feels a little more filling.
- Olive and herb: Roughly chop ⅓ cup of Kalamata olives and fold them into the dough along with 1 teaspoon of dried thyme. This is not at all something my mother would recognize as bread, but it's wonderful sliced thin with a bowl of soup. This isn't a traditional recipe from any one place — it's just something I started doing because we always have olives in the fridge.
Serving and Storage
Serving
This bread is best still slightly warm, about 45 minutes out of the oven, sliced thick with butter. We eat it alongside soups and stews most often — it's what I reach for when I've made something saucy and need something to soak it up with. It also makes excellent toast the next morning; the crumb crisps up beautifully and the crust gets even crunchier. For sandwiches, let it cool completely first so it slices cleanly without tearing.
Storage
Store the cooled loaf wrapped in a clean kitchen towel or paper bag at room temperature for up to 2 days. I don't recommend plastic bags for the first day or two — they trap moisture against the crust and soften it. If you're going past 2 days, wrap it tightly in plastic wrap or put it in a zip bag and freeze for up to 2 months. To refresh a frozen slice, pop it directly in a toaster or a 350°F oven for 8-10 minutes straight from frozen.

Frequently Asked Questions
Do I have to use a Dutch oven?
A Dutch oven gives the best results because it holds heat evenly and traps steam, but any heavy oven-safe pot with a tight-fitting lid that can handle 450°F will work. I've used a cast iron pot and a heavy stainless stockpot with a lid — both came out well. Just make sure the lid seals reasonably well so the steam stays inside during that first 30 minutes.
Can I refrigerate the dough to bake later?
Yes — after the dough has done its room temperature rise and looks bubbly, you can cover and refrigerate it for up to 2 days before baking. The cold slows the fermentation without stopping it, and some people find the flavor gets even better with a long cold rest. Just let the dough come back to room temperature for about an hour before shaping.
Why is my dough so sticky and wet?
That's exactly how it should be. No-knead dough is much wetter than most bread doughs, and that high hydration is what enables the gluten to develop during the long rise without any kneading. Resist the urge to add more flour — it'll change the texture of the finished loaf. Flour your hands lightly when shaping and work quickly.
Can I speed up the rising time?
You can, but you lose flavor. If you need to move faster, turn your oven on for 1-2 minutes, then turn it off, and place the covered bowl inside the warm oven. The ambient warmth will speed things up to about 4-6 hours. The bread will still bake up fine but won't have the same depth of flavor as the long overnight rise. I only do this when I completely forgot to mix the dough the night before.
How do I know when the bread is fully baked?
Two signs: the crust should be a deep golden brown (not pale or tan — genuinely brown), and when you tap the bottom of the loaf with your knuckles it should sound hollow rather than dense and thuddy. If you have an instant-read thermometer, the interior should read around 200-210°F. When in doubt, give it an extra 5 minutes — this bread is hard to overbake.
QUICK AND EASY NO-KNEAD BREAD
Ingredients
- 3 cups all-purpose flour
- 1 ½ teaspoons salt
- 1 teaspoon sugar
- 2 teaspoons active dry yeast
- 1 ½ cups warm water 110°F/43°C
Instructions
Activate the Yeast:
- In a small bowl, combine warm water, sugar, and yeast. Stir gently and let it sit for 5-10 minutes until it becomes frothy.
Mix the Dough:
- In a large bowl, mix the flour and salt. Add the yeast mixture and stir with a wooden spoon until a sticky dough forms. The dough should be shaggy and rough but well combined.
Let the Dough Rise:
- Cover the bowl with a clean kitchen towel or plastic wrap. Let it rest in a warm place for 1 to 2 hours, or until it has doubled in size.
Preheat the Oven:
- About 30 minutes before baking, preheat your oven to 450°F (230°C). Place a Dutch oven or a large oven-safe pot with a lid inside to heat up.
Shape the Dough:
- After the dough has risen, turn it out onto a floured surface. Gently shape it into a ball, folding the edges toward the center to create a round shape. Place the dough into the preheated pot, cover it, and let it rest for another 30 minutes.
Bake the Bread:
- Carefully place the pot in the oven and bake for 40-45 minutes, or until the bread is golden brown and sounds hollow when tapped on the bottom.
Cool:
- Remove the bread from the pot and let it cool on a wire rack for at least 30 minutes before slicing.
Serve:
- Slice and serve this rustic, no-knead bread warm with butter, or use it to make sandwiches or toast.
Notes
The dough can be prepared ahead of time and stored in the refrigerator for up to 24 hours. The bread will develop a deeper flavor with a longer rise. Customizing the Flavor:
For extra flavor, you can add herbs like rosemary or thyme, or sprinkle in a bit of grated cheese before baking. Serving Suggestions:
Enjoy with soups, salads, or as a side with your favorite main course. This bread also makes excellent toast for breakfast. Allergy-Friendly Options:
For a gluten-free version, use a gluten-free flour blend that is designed for baking. Storage Tips:
Store the bread in an airtight container or plastic bag at room temperature for up to 3 days. For longer storage, slice and freeze for up to 1 month.
I've made a lot of bread over the years — naan on the stovetop, roti almost every day growing up, enriched doughs for sweet rolls that took half a Sunday — and this no-knead loaf has become the one I make most often. There's something satisfying about the ratio of effort to result. Ten minutes of work, one night of patience, and you get a loaf that looks like it took real skill. It didn't. It just





Comments
No Comments