
Zainab spotted polar bears at the zoo last December and came home asking if we could make polar bear cookies for her class holiday party. I said yes without thinking, then spent an evening figuring out how exactly that was going to work. What I landed on was genuinely one of the easiest things I've made in my kitchen — no oven, no complicated techniques, just dipping and decorating and a lot of giggling.
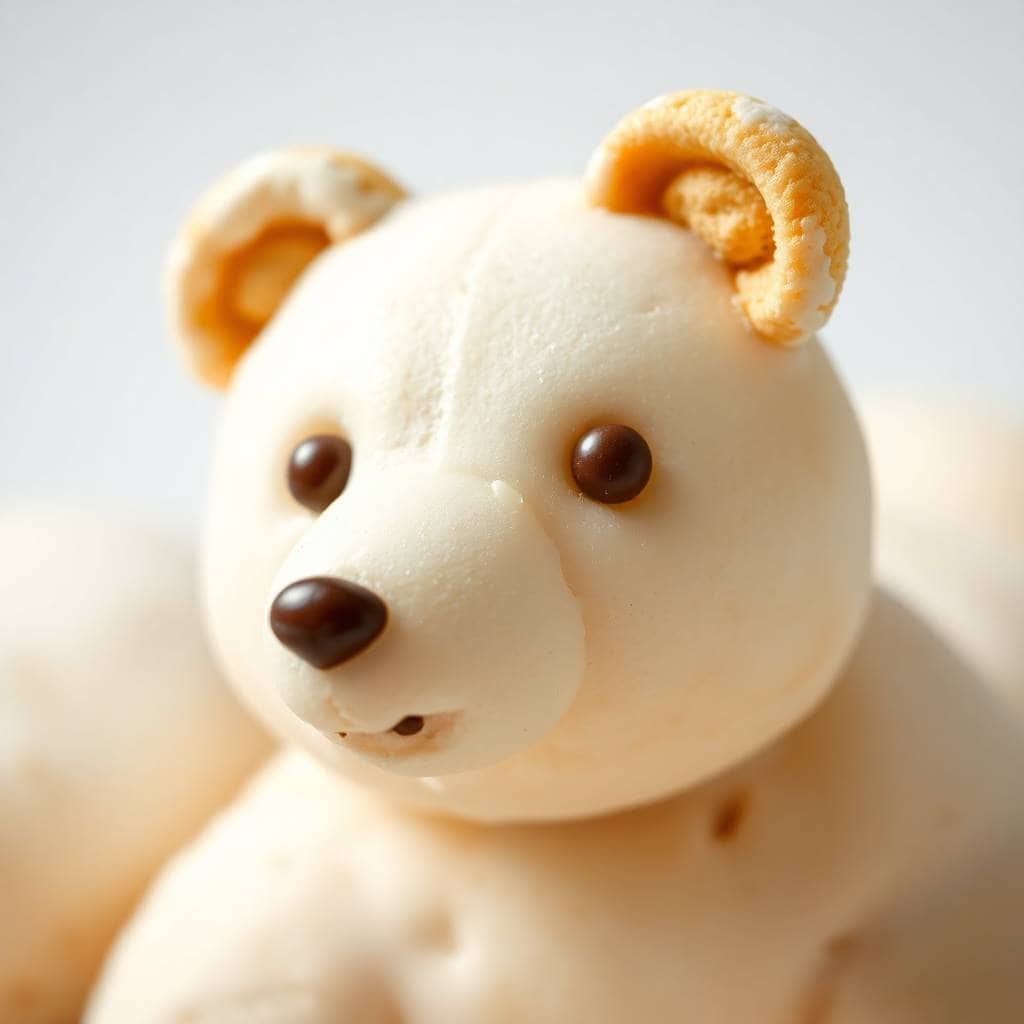
The base is a vanilla sandwich cookie — Golden Oreos are what I use, and you can find them at Walmart, Target, or most grocery stores — dipped in melted white chocolate, then decorated with candy eyes, mini marshmallows for ears, and a small brown M&M for the nose. That's genuinely the whole recipe. What makes it work is the sequence: you dip, set it down, and then you have maybe 60–90 seconds to get the face on before the chocolate starts setting. It sounds stressful but it's actually kind of a fun race.
Zainab took over the decorating after the first two cookies and didn't give the job back. Her polar bears were slightly chaotic — one had an eye higher than the other — but she was so proud of every single one. If you're looking for something to do with kids over winter break, this is genuinely it. I'd say it's more decorating project than recipe, and that's not a complaint.
One thing I'll tell you upfront: white chocolate can be finicky. If you overheat it or get even a drop of water in the bowl, it seizes up and becomes grainy and lumpy. Microwave in short 30-second bursts, stir between each one, and keep your bowl completely dry. I ruined a batch once by using a bowl that wasn't quite dry — the chocolate went chalky and thick and I had to start over. Now I dry the bowl with a paper towel before I even start. If you want more baking projects to do with kids, my Soft and Chewy M&M Chocolate Chip Cookies are another one that always gets them involved.

Why You'll Love This Recipe
- No oven required: The whole thing happens on your countertop in under 30 minutes, which matters a lot when your kitchen is already full of other holiday baking. You melt, dip, decorate, and wait — that's it. No preheating, no timers, no worrying about anything burning.
- Kids can do most of the work: I supervised the melting step, but Zainab handled everything else. The decorating is tactile and forgiving — even if an eye goes on slightly crooked, the bear still looks adorable. It's one of those activities where the messier it gets, the more fun it is.
- They hold up well for gifting: I packed a dozen of these into clear treat bags tied with ribbon and sent them with Zainab to her class party. They survived the school bag, the car ride, and about 20 minutes on a table before disappearing. White chocolate sets firm once it hardens, so they travel better than you'd expect.
- The ingredients are easy to find: Everything on this list — Golden Oreos, white chocolate chips, candy eyes, mini marshmallows, brown M&Ms — is available at a regular grocery store. No specialty baking shops, no ordering online. I got everything in one Walmart run.
- They look much more impressive than the effort involved: These are the cookies that get photographed at parties. People assume you spent way more time on them than you did. I made a double batch — 24 cookies — in about 45 minutes including set time, and they looked like something from a bakery window.
Ingredients
- 24 vanilla sandwich cookies (Golden Oreos work great — find them near the regular Oreos)
- 1 ½ cups white chocolate chips or white candy melts (candy melts are more forgiving if you're new to melting chocolate)
- 48 mini marshmallows (for the ears — regular marshmallows cut in half also work)
- 48 candy eyes (find these in the baking aisle or at a craft store like Michaels)
- 24 mini brown M&Ms (for noses — or use small brown chocolate chips)
- Optional: sweetened shredded coconut (for a fuzzy snowy effect)
Directions
- Step 1: Melt the white chocolate — Place your white chocolate chips or candy melts in a completely dry microwave-safe bowl. Microwave in 30-second bursts, stirring well after each one, until the chocolate is fully smooth and pourable. Don't rush this — overheating white chocolate makes it seize and go grainy, so stop microwaving as soon as it's melted.
- Step 2: Set up your decorating station — Before you start dipping, lay out a sheet of parchment paper or wax paper on your counter and have all your decorations — eyes, marshmallows, M&Ms — within arm's reach. Once a cookie is dipped, you have about 60–90 seconds to decorate before the chocolate starts setting, so you want everything ready to go.
- Step 3: Dip the cookies — Using a fork, lower each sandwich cookie into the melted white chocolate and turn it to coat completely. Lift it out and tap the fork gently against the side of the bowl a few times to shake off the excess chocolate — this keeps the coating smooth rather than thick and blobby. Set the dipped cookie on your parchment paper.
- Step 4: Add the face — Working quickly while the chocolate is still wet, press two candy eyes onto the lower half of the cookie, one mini M&M in the center below the eyes for the nose, and two mini marshmallows at the top edge for ears. If you want the coconut snow effect, sprinkle a small pinch over the wet chocolate before adding the face pieces.
- Step 5: Let them set — Leave the decorated cookies on the parchment paper at room temperature for 15–20 minutes, or refrigerate them for about 30 minutes if you're in a hurry. The white chocolate should go from glossy to matte as it fully hardens. Once set, they're ready to serve or pack.
Tips for Success
- Keep the bowl completely dry: I ruined my first batch because I used a bowl that had a little water in it from washing. Even one drop of water can cause melted chocolate to seize — it goes from smooth and glossy to thick and clumpy almost instantly. Dry your bowl with a paper towel before you start, and make sure your spatula or spoon is dry too.
- Work in small batches: Don't dip 12 cookies and then try to decorate them all — the chocolate will have hardened on half of them before you get to the decorating. I do 4–5 cookies at a time: dip them, set them down, decorate all five, then go back and dip the next batch. This keeps the pace manageable, especially if you have a kid helping.
- Use candy melts if you're nervous about white chocolate: White chocolate chips can be temperamental because of their cocoa butter content. Candy melts (Wilton makes them, and you can find them at Walmart, Michael's, or most craft stores) are specifically designed for dipping and coating — they melt more smoothly, set faster, and are harder to ruin. The flavor is slightly less rich than real white chocolate, but for a cookie this cute, it doesn't matter much.
- Use a toothpick for placing small decorations: Tiny candy eyes are hard to pick up with fingers, especially for little kids. A toothpick lets you pick them up and place them exactly where you want them. I kept a toothpick on the counter throughout the whole session and it made the process so much neater.
- Make a double batch — these go faster than you think: I made 24 cookies thinking that was plenty for a class party, and they were gone within minutes. If you're bringing these somewhere or packing them as gifts, make more than you think you need. The extra time is maybe 15 minutes and the ingredients are cheap.
Variations
- Peppermint polar bears: Add ¼ teaspoon of peppermint extract to the melted white chocolate before dipping. It gives the whole cookie a cool, minty flavor that feels very winter-appropriate. My husband is a big peppermint fan and he actually preferred this version over the plain ones.
- Chocolate bear version: Swap the white chocolate for milk chocolate or dark chocolate and you've got brown bears instead of polar bears. Use white chocolate chips or white candy buttons for the ears instead of marshmallows, and the same candy eyes and nose. Saad actually liked this version better — he's not as big on white chocolate as Zainab is.
- Reindeer version: Press two small pretzel pieces into the top of the cookie before the chocolate sets for antlers. Swap the brown M&M nose for a red one and you've got Rudolph. These are honestly just as cute as the polar bears and a nice way to mix up a holiday cookie tray.
- Different cookie base: Golden Oreos are my go-to but any vanilla or shortbread sandwich cookie works. For a slightly spicier, more complex flavor, try ginger snap sandwich cookies — the ginger plays really nicely against the sweetness of the white chocolate. If you need a gluten-free option, use your preferred gluten-free sandwich cookies and check that your candy melts are also certified GF.
- Snowy coconut bears: While the chocolate is still wet, sprinkle sweetened shredded coconut all over the cookie before adding the face. It gives a fuzzy, snowy texture and makes each bear look like it just came in from a blizzard. Zainab called these ones "fluffy bears" and insisted on making half the batch this way.
Serving and Storage
Serving
Arrange these on a white or light-colored plate so the polar bear faces stand out — they get lost on a dark tray. For a holiday dessert spread, I line them up in rows so each little face is visible. They pair really well alongside something warm and chocolatey, like my Double Chocolate Orange Cupcakes, if you're building a full winter dessert table. For gifting, stack 3–4 cookies flat in a clear cellophane bag and tie with a white or silver ribbon.
Storage
Store finished cookies in a single layer in an airtight container — if you stack them, the faces can smudge or the decorations can press into the chocolate coating of the cookie below. They'll keep at room temperature in a cool, dry spot for up to a week. Avoid storing near heat sources (don't leave them on a counter near a warm stove) because white chocolate softens easily. Refrigerating works too, but let them come to room temperature before serving or the chocolate can develop condensation and look sweaty.

Frequently Asked Questions
Can I make these ahead of time?
Yes — these are actually great for making ahead. I made them two days before Zainab's party and they were in perfect condition. Store them in an airtight container at room temperature, away from heat, and the chocolate stays set and the decorations stay put.
Why did my white chocolate turn thick and clumpy?
This is called seizing, and it happens when moisture gets into melted chocolate — even steam from a nearby pot can do it. It can also happen if you microwave it too long and overheat it. Start fresh with a new batch, make sure your bowl and tools are completely dry, and microwave in strict 30-second intervals, stirring between each one. If you want a more forgiving option, use candy melts instead of white chocolate chips.
Can I freeze these?
I'd skip the freezer for these. When frozen chocolate thaws, it tends to develop condensation on the surface, which makes it look streaky or sweaty. The cookie base also softens unevenly. They keep well enough at room temperature for a full week that there's really no need to freeze them.
What can I use instead of candy eyes?
Mini chocolate chips pressed point-down into the wet chocolate work well as eyes. You can also use small black nonpareils or a tiny dot of dark chocolate piped with a toothpick. Candy eyes are the easiest and you can usually find them in the baking aisle at Walmart, but you definitely have options if you can't find them.
My kids want to help — which parts are safe for them?
The melting step should be adult-supervised because the bowl gets hot. Everything else — setting cookies on the parchment paper, placing the eyes and ears and nose — is completely kid-friendly. Zainab was doing all the decorating by the third cookie and didn't want to stop. Give them their own little bowls of each decoration so they can grab what they need without knocking everything over.

POLAR BEAR COOKIES
Ingredients
- 24 vanilla sandwich cookies e.g., Golden Oreos
- 1 ½ cups white chocolate chips or white candy melts
- 48 mini marshmallows for ears
- 48 candy eyes
- 24 mini brown M&M’s for noses
- Optional: sweetened shredded coconut for texture
Instructions
Melt Chocolate:
- Place white chocolate chips in a microwave-safe bowl. Microwave in 30-second intervals, stirring until smooth and fully melted.
Dip the Cookies:
- Use a fork to dip each sandwich cookie into the melted chocolate. Tap off the excess and place on a parchment-lined tray.
Decorate Faces:
- Quickly add two mini marshmallows on top for ears, candy eyes for eyes, and one M&M in the center for a nose.
Optional Fur:
- Sprinkle shredded coconut over the cookies for a fuzzy bear effect.
Chill:
- Refrigerate for 30 minutes or until the coating is fully set.
Notes
- Make Ahead: Prepare these cookies up to 3 days in advance.
- Custom Ideas: Add food coloring to make blue or pink polar bears.
- Kid Activity: This is a perfect no-bake project for kids during the holidays.
- Storage: Store in an airtight container at room temperature or in the fridge for up to a week.
These polar bear cookies have become our unofficial start-of-December tradition. Zainab asks about them as soon as the weather turns cold, and I've stopped trying to suggest other holiday baking projects because this is the one she wants. I like that it's a recipe where she can do almost everything herself — the melting step takes me maybe five minutes, and then she takes over and I just watch.
What I appreciate most about this recipe is that it delivers results that genuinely look festive and handmade without requiring any particular skill. If you can hold a fork and place a marshmallow, you can make these. They're also one of those treats that photographs well without any effort — set them on a white plate and they look like something you'd see in a magazine. If you're building out a full holiday dessert spread, they'd sit nicely next to something like my Cream Cheese Banana Bread sliced into rounds — different textures, both crowd-friendly.
Whether you're making these for a school party, packing them into gift bags for neighbors, or just spending a slow afternoon in the kitchen with your kids — I hope these little bears bring as much happy chaos to your kitchen as they do to mine. 🐻❄️🍫✨
If you're in a cookie mood, here are a few more recipes from the site worth exploring:
- Soft and Chewy M&M Chocolate Chip Cookies — another kid-favorite that comes together fast
- Double Chocolate Orange Cupcakes — for when you want something a little more dramatic on the dessert table
- Cream Cheese Banana Bread — a reliable bake that works for gifting too
- Soft and Chewy M&M Chocolate Chip Cookies — great for decorating alongside these polar bears at a cookie-making party





Comments
No Comments