
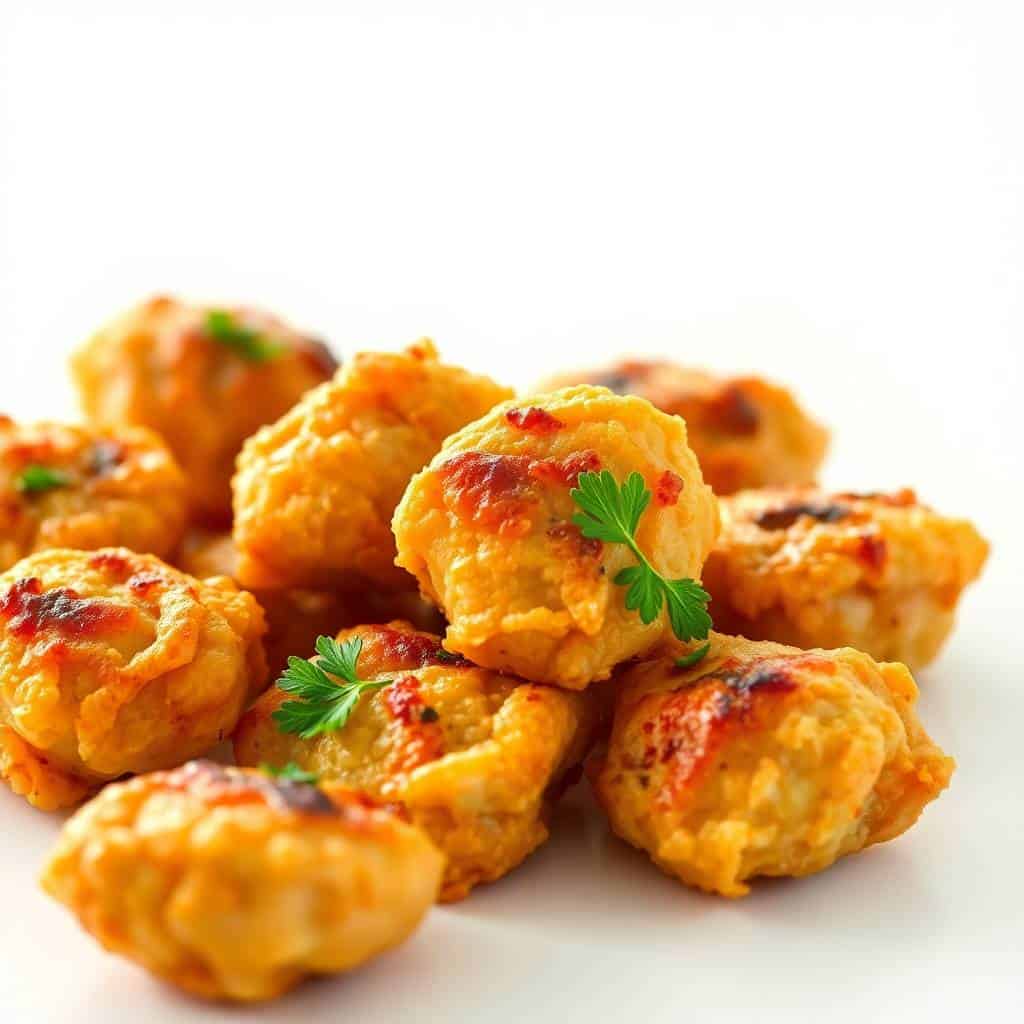
I make these oven baked chicken bites at least twice a month, and every single time I pull the tray out of the oven, my kids are already standing in the kitchen waiting. There's something about that golden, crackly parmesan crust that gets everyone moving toward the table faster than any dinner bell I could ring.
What I love about this recipe is that it's genuinely simple — not "simple" the way some recipes claim to be and then have you dirtying six bowls. Three bowls, a sheet pan, and about 30 minutes is all you need. The parmesan in the breadcrumb coating is the real secret here. It adds this salty, nutty depth that plain breadcrumbs just can't match. I tried this without the parmesan once when I ran out, and even my husband noticed something was missing.
My kids eat these like they're chicken nuggets — which honestly, they kind of are, except I feel a lot better about serving them because nothing is swimming in oil. Saad dips his in ranch, Zainab goes straight for honey mustard. On nights when I'm making these as a main, I'll usually throw together a quick marinated cucumber, tomato, and onion salad on the side — the freshness balances the crispy richness really well.
One thing to know going in: don't skip the flip halfway through. I made that mistake the first time I tested this — I was distracted and forgot — and the bottoms got a little too dark while the tops stayed pale. Not a disaster, but not what you want. Set a timer for 10 minutes and flip. You'll be glad you did.
Why You'll Love This Recipe
- On the table in 30 minutes: I can get these in the oven before my husband even gets home from work and they're ready by the time he's washed his hands. There's minimal prep — the longest part is just waiting for the oven to preheat. It's one of those recipes where the oven does most of the work for you.
- No frying, but still genuinely crispy: I was skeptical the first time I tried baking instead of frying chicken. I assumed baked would just mean sad and soggy. But the combination of panko breadcrumbs, parmesan, and a light drizzle of olive oil on top gives you real crunch — the kind that crackles when you bite into it. My family didn't even miss the frying.
- Works as a weeknight dinner or a party snack: I've served these as a main dish with salad on a Tuesday, and I've also piled them on a platter for a casual get-together alongside some salami rolls with cream cheese as part of a snack spread. They work in both situations without any modification — just change what you serve alongside them.
- Kids actually eat it without negotiation: There's no coating technique I've found that my kids respond to better than this one. The parmesan gives it a slightly cheesy flavor, the pieces are small enough to pick up, and the crunch is satisfying. It's one of the rare dinners where I'm not being asked "what's that brown stuff on it?"
- Endlessly easy to customize: Once you have the base technique down, you can take it in a lot of directions. Buffalo sauce tossed on right after baking, a pinch of cayenne in the coating, some Italian seasoning mixed in — it's a flexible recipe that doesn't fall apart when you experiment with it. I've been making small tweaks to this for over a year and I still haven't gotten bored.
Ingredients
- 1 lb (450g) boneless, skinless chicken breasts, cut into bite-sized pieces
- ¼ cup all-purpose flour
- 1 teaspoon garlic powder
- 1 teaspoon paprika
- Salt and pepper, to taste
- 1 large egg, beaten
- ½ cup breadcrumbs or panko (panko preferred for extra crunch)
- ½ cup grated parmesan cheese
- 2 tablespoons olive oil or melted butter (for drizzling)
- Optional: dipping sauce — honey mustard, ranch, or barbecue
Directions
- Preheat the oven: Set your oven to 400°F (200°C) and line a baking sheet with parchment paper. If you have a wire rack that fits inside your sheet pan, set that up now — it helps the heat circulate underneath the chicken so you get crispier bottoms without flipping as much.
- Mix your coating: In one bowl, combine the flour, garlic powder, paprika, salt, and pepper. Beat the egg in a second bowl. In a third bowl, mix together the breadcrumbs (or panko) and grated parmesan cheese. The parmesan goes in the breadcrumb bowl, not the flour bowl — I mixed it up once and the result was noticeably less flavorful.
- Coat the chicken: Working one piece at a time, dredge the chicken in the flour mixture, then dip it in the egg, then press it into the breadcrumb-parmesan mix until well coated. Shake off any excess before placing it on the baking sheet. Crowding will cause pieces to stick together and lose their coating.
- Drizzle with oil and bake: Arrange the coated pieces in a single layer on the prepared sheet, leaving a little space between each one. Drizzle lightly with olive oil or brush with melted butter — this step is what helps the coating turn golden rather than just dry and pale. Bake for 18–20 minutes, flipping halfway through.
- Check for doneness and serve: The chicken is done when the coating is deep golden and the internal temperature reads 165°F (74°C) on a meat thermometer. Pull them out and let them rest for two or three minutes before serving. Serve hot with your dipping sauce of choice.

Tips for Success
- Cut the pieces as evenly as you can: I know it sounds fussy but this one actually matters. If some pieces are twice the size of others, the small ones dry out before the large ones cook through. I aim for pieces roughly 1 to 1.5 inches — close enough to bite-size that they cook evenly. I use a sharp chef's knife and cut the chicken while it's still slightly cold from the fridge; it holds its shape better.
- Don't skip the flour step: The original recipe I was working from had flour in the coating, and I once tested a batch without it to save a step. The egg slid right off the chicken without much grip, and the breadcrumbs barely stuck. The flour layer is the glue between the chicken and the egg. It's only a quarter cup — don't skip it.
- Give each piece space on the pan: I learned this the hard way during my first attempt — I crammed everything onto one pan to avoid washing a second one, and half the batch came out steamed and soggy instead of crispy. If your pieces are touching, they trap moisture. Use two sheet pans if you need to, or cook in batches. A little extra time is worth it.
- Use a meat thermometer: I know not everyone has one, but if you're going to buy one cheap kitchen tool, make it this — you can find a decent instant-read thermometer for under $15 at Walmart or Amazon. It takes the guesswork out of whether the chicken is cooked through. The target is 165°F (74°C) at the thickest part of the piece. Guessing by color alone has led me to cut open perfectly good bites unnecessarily.
- Let them rest before eating: Two or three minutes out of the oven makes a real difference. The coating firms up slightly as they cool, and the inside stays juicier because the liquid redistributes. I always serve them a couple minutes after they come out rather than immediately — it's an easy habit that improves the texture noticeably.
Variations
- Buffalo style: After the bites come out of the oven, toss them straight into a bowl with a few tablespoons of buffalo sauce and stir to coat. The hot sauce clings to the crispy coating without making it soggy if you serve them right away. This is my husband's favorite version — he asks for it more often than the plain parmesan version. Serve with extra ranch or blue cheese dipping sauce on the side.
- Spicy coating: Add ½ teaspoon of cayenne pepper and a pinch of chili flakes directly to the breadcrumb-parmesan mix. This gives you heat that's baked into the crust rather than just added as a sauce after. It's a subtler, more even heat than the buffalo version. Saad likes this one drizzled with a little honey after it comes out of the oven — sweet and spicy together works really well.
- Italian herb version: Mix a teaspoon of Italian seasoning into the breadcrumb coating along with the parmesan. It gives the bites a more herby, savory flavor that works really well over pasta or alongside a simple tomato dipping sauce. This version feels a little more dinner-table than snack-table, if that makes sense. I've served it over spaghetti with marinara and it went down well.
- Chicken thighs instead of breasts: Boneless skinless thighs work beautifully here and they're a bit more forgiving — the extra fat content keeps them juicy even if you overbake by a few minutes. If you like the slow-cooked, saucy version of chicken thighs, check out my honey garlic slow cooker chicken thighs too. But for these bites, thighs cut into similar-sized pieces bake up just as well as breasts.
- Gluten-free swap: Use gluten-free breadcrumbs (Bob's Red Mill makes a good one you can find at most larger grocery stores, including Walmart) and swap the all-purpose flour for a gluten-free blend or rice flour. Everything else stays the same. I've made this version for a friend who has a gluten sensitivity and she said she couldn't tell the difference in texture.
Serving and Storage
Serving
These are best served hot, right after they've rested a few minutes from the oven. Put out a couple of dipping sauces — we always have ranch and honey mustard on the table, and my husband usually wants something spicy nearby too. If you're making them as a main dish rather than a snack, they go really well with a fresh salad on the side. I also like stuffing a few into a warm pita with some lettuce and sauce for a quick wrap situation on busy nights. If you're thinking about building a proper snack spread around them, something like the sausage gravy biscuit cups would round it out nicely alongside these.
Storage
Store leftovers in an airtight container in the fridge for up to 3 days. To reheat and keep the crunch, put them back in the oven at 375°F (190°C) for about 8–10 minutes rather than the microwave — the microwave makes the coating soft and a little rubbery. If you want to freeze them, let them cool completely first, then freeze in a single layer on a sheet pan before transferring to a freezer bag. Reheat straight from frozen at 400°F for about 12–15 minutes, flipping halfway.

Frequently Asked Questions
Can I bread the chicken ahead of time and bake later?
Yes — you can coat the chicken pieces and refrigerate them on the sheet pan for up to 24 hours before baking. I do this when I want dinner ready fast on a busy evening. The coating actually adheres a little better after sitting in the fridge, so it's not a bad move even when you're not rushing.
Can I use chicken thighs instead of breasts?
Absolutely. Boneless skinless thighs work great here and they're actually a bit more forgiving because of the higher fat content. They tend to stay juicier if you accidentally overbake by a couple of minutes. Cut them into similar-sized pieces to your breasts and bake at the same temperature and time.
How do I know when the chicken bites are fully cooked?
The most reliable way is a meat thermometer — you're looking for 165°F (74°C) at the thickest part of a piece. Visually, the coating should be deep golden and the edges of the chicken visible at the sides should no longer look pink. If you don't have a thermometer, cut one of the larger pieces open to check; there should be no pink inside and the juices should run clear.
Can I freeze these after baking?
Yes. Cool them completely, freeze in a single layer on a sheet pan first so they don't stick together, then transfer to a freezer bag. They keep well for up to 2 months. Reheat straight from frozen in a 400°F oven for 12–15 minutes, flipping once. They come back crispier than you'd expect for a frozen reheat.
What dipping sauces work best with these?
Ranch and honey mustard are the go-to in my house. Buffalo sauce works if you like heat. I've also used a quick garlic aioli (just mayonnaise, garlic, a squeeze of lemon) and that's become a favorite. If you want something a little different, a smoky homemade enchilada sauce used as a dipping sauce is surprisingly good with the parmesan coating.

OVEN BAKED CHICKEN BITES
Ingredients
- 1 lb 450g boneless, skinless chicken breasts, cut into bite-sized pieces
- ¼ cup all-purpose flour
- 1 teaspoon garlic powder
- 1 teaspoon paprika
- Salt and pepper to taste
- 1 large egg beaten
- ½ cup breadcrumbs or panko
- 2 tablespoons olive oil or melted butter
- Optional: dipping sauce honey mustard, ranch, or barbecue
Instructions
- Preheat Oven: Preheat oven to 400°F (200°C). Line a baking sheet with parchment paper.
- Prepare Coating: In a bowl, mix flour, garlic powder, paprika, salt, and pepper. Place beaten egg in a separate bowl and breadcrumbs in another.
- Coat Chicken: Dredge chicken pieces in flour mixture, dip in egg, then coat with breadcrumbs. Arrange on the baking sheet. Drizzle or brush with olive oil.
- Bake: Bake 18–20 minutes, flipping halfway, until chicken bites are golden and cooked through (internal temperature 165°F / 74°C).
- Serve: Serve hot with your choice of dipping sauce.
Notes
- Make Ahead: Coat chicken bites in advance and refrigerate; bake when ready.
- Flavor Variations: Add Parmesan, Italian seasoning, or smoked paprika for extra flavor.
- Serving Suggestions: Pair with salad, roasted veggies, or fries for a complete meal.
- Storage Tips: Store leftovers in an airtight container in the fridge for up to 2 days; reheat in the oven to maintain crispiness.
These chicken bites have quietly become one of my most-used recipes. I keep coming back to them because they're genuinely low-effort and the result is consistently good — not "good for baked chicken" but actually good, full stop. The parmesan crust is what makes the difference, and once you've made them a few times the whole process becomes second nature.
I've made them for quick weeknight dinners, I've made them as part of a snack spread when friends came over, and I've made a double batch on a Sunday and packed them into lunchboxes through the week. They reheat well enough from the fridge (oven only, not microwave) that I genuinely don't mind making extra. If you're in the mood for another easy weeknight chicken dinner, my salsa chicken and cauliflower rice skillet is similarly unfussy and comes together in one pan.
The beauty of a recipe like this is that it doesn't ask much from you on the days when you have nothing left to give. Three bowls, one pan, 30 minutes. That's the whole deal. 🍗✨
If you liked this recipe, here are a few others you might want to try next:
- Honey Garlic Slow Cooker Chicken Thighs — for when you want chicken but the oven can stay off
- Salsa Chicken and Cauliflower Rice Skillet — a one-pan weeknight dinner that comes together fast
- Marinated Cucumber, Tomato, and Onion Salad — the perfect fresh side to serve alongside these bites
- Salami Filled with Cream Cheese and Dill Pickles — great alongside these on a snack spread
- Sausage Gra




Comments
No Comments