
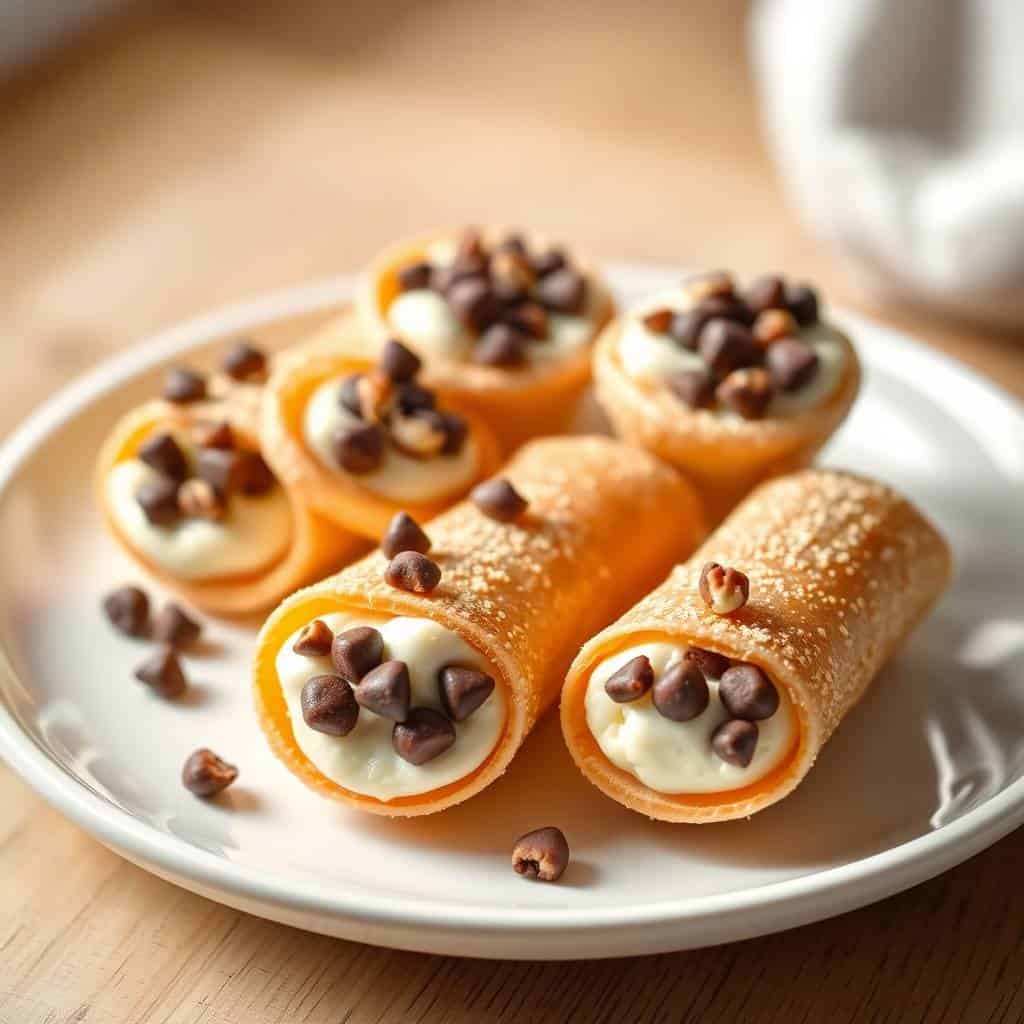
I made these for the first time when I had a dinner party coming up and absolutely no desire to deep-fry anything. I'd been craving cannoli — that creamy, slightly sweet ricotta filling inside a shell with just enough crunch — but traditional cannoli tubes weren't happening on a Tuesday night. So I grabbed a pack of refrigerated pie crust from Walmart, pressed little circles into my mini muffin tin, and figured out what I was doing from there.
What makes this version work is that the baked pie crust cups actually hold their shape really well, and the filling — ricotta plus mascarpone, powdered sugar, vanilla, folded with mini chocolate chips — is rich enough that you don't miss the fried shell at all. I know that sounds like a big claim. But I've made these probably eight or nine times now, and I genuinely don't feel like anything's missing. The mascarpone makes the ricotta filling a little smoother and creamier than using ricotta alone.
I usually make these for dessert when we have guests, but I've also made a batch just for the family on a Friday night. Zainab loves them — she asks to add the chocolate chips herself. My husband prefers the ones with chopped pistachios on top. The cups are small enough that everyone grabs two or three without feeling like they've overdone it. If you're hosting something and want a dessert that looks impressive without requiring much technical skill, this is it. For another Italian-inspired recipe worth trying, my Pastina Italian Comfort Food post is a cozy companion to have in your back pocket.
One thing I'll tell you upfront: the ricotta needs to be well-drained before you use it. I skipped this step the first time and ended up with a filling that was too loose to pipe neatly. It still tasted fine, but it looked sloppy. Drain it through a fine mesh strainer or cheesecloth for at least an hour — or even overnight in the fridge. It makes a real difference.
Why You'll Love This Recipe
- No frying required: I don't own a deep fryer and I'm not heating up a pot of oil just for dessert. These cups bake in a 375°F oven for about 10 to 12 minutes and come out golden and crispy. The baked pie crust shell gives you just enough crunch to feel like you're getting the real cannoli experience without any of the mess or danger of hot oil on your stovetop.
- No special equipment: You need a mini muffin tin, a bowl, and a spoon. That's basically it. If you want to pipe the filling instead of spoon it, a zip-lock bag with a small corner snipped off works perfectly — I've never bothered buying a proper piping bag for this. A regular mini muffin tin from any grocery store or Walmart does the job.
- Make-ahead friendly: The shells can be baked two or three days ahead and stored in an airtight container at room temperature. The filling can be mixed a day ahead and kept in the fridge. I assemble them about 30 minutes before serving so the shells stay crispy but the filling is cold. This is how I handle it when I have people coming over and I don't want to be scrambling in the kitchen at the last minute.
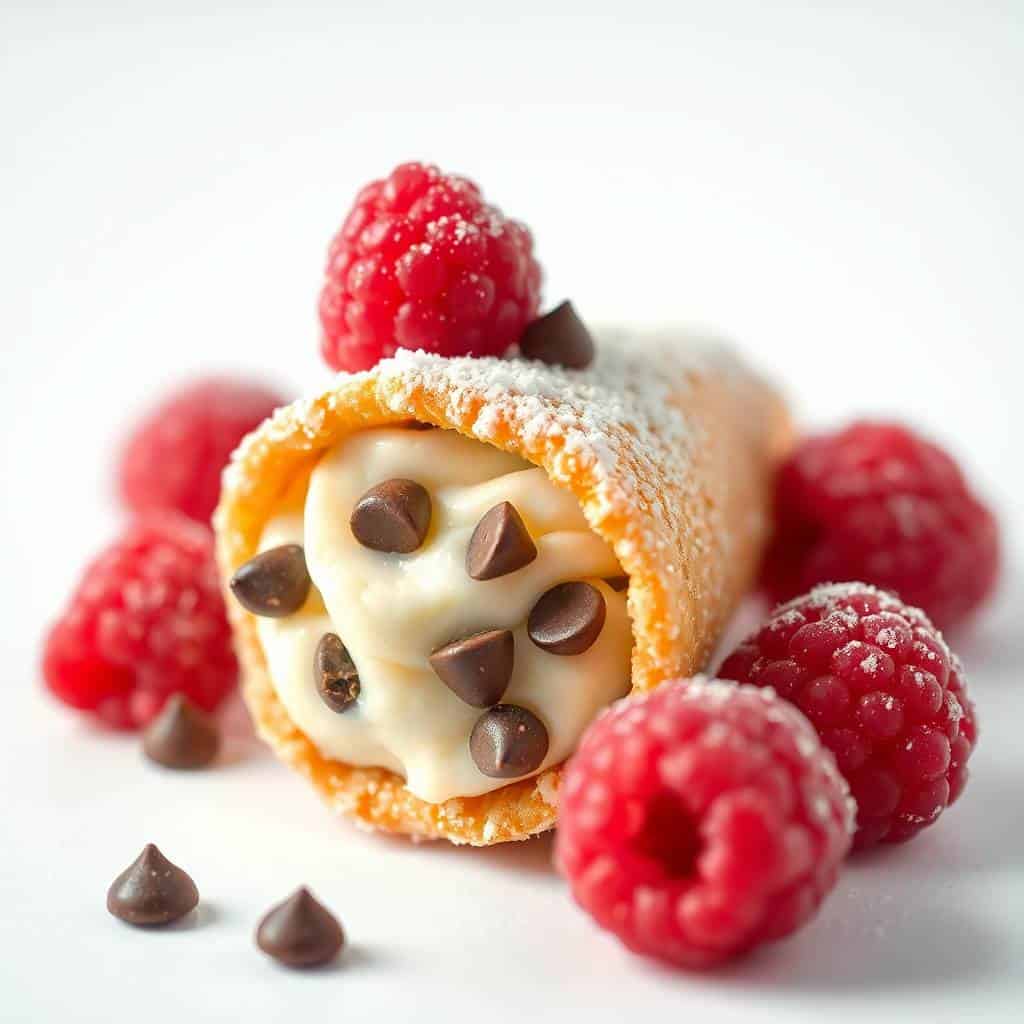
- Genuinely customizable: You can go classic with mini chocolate chips and a dusting of powdered sugar, or do chopped pistachios, candied orange peel, a drizzle of honey, or even fresh raspberries. My husband and I always do one tray a few different ways — it makes the dessert spread look like you put in a lot more effort than you actually did.
- The filling is genuinely good: Ricotta and mascarpone together is a combination I'd eat on its own with a spoon. The mascarpone adds a richness that straight ricotta doesn't have, and the powdered sugar dissolves into it smoothly — no grainy texture. A little vanilla, a little cinnamon, and the mini chocolate chips folded in at the end. It tastes like a proper Italian dessert, not a shortcut version of one.
Ingredients
- 2 refrigerated pie crusts (like Pillsbury, found in the dairy aisle) or phyllo shells if you want an even lighter shell
- 2 tablespoons granulated sugar
- 1 teaspoon ground cinnamon
- 1 ½ cups whole milk ricotta cheese, well-drained
- ½ cup mascarpone cheese (find it near the specialty cheeses at most grocery stores; cream cheese works in a pinch but the flavor changes slightly)
- ½ cup powdered sugar
- 1 teaspoon vanilla extract
- ½ cup mini chocolate chips, plus extra for topping
- Optional toppings: chopped pistachios, candied orange peel, fresh raspberries, chocolate shavings, or extra powdered sugar for dusting
Directions
- Drain the ricotta: Line a fine mesh strainer with cheesecloth or a few layers of paper towel, add the ricotta, and let it drain over a bowl for at least 1 hour (or overnight in the fridge). This is non-negotiable — wet ricotta will give you a runny filling that makes the shells soggy before you've even served them.
- Prepare and bake the shells: Preheat your oven to 375°F (190°C) and lightly grease a mini muffin tin. Unroll the pie crust on a flat surface and use a round cookie cutter or the rim of a small glass to cut circles slightly larger than the muffin cups — about 3 inches works well. Press each circle gently into a cup, letting it form a little bowl shape. Mix the sugar and cinnamon together and sprinkle lightly over each shell. Bake for 10 to 12 minutes until golden brown. Let them cool completely in the tin before removing — they crisp up more as they cool.
- Make the filling: In a medium bowl, combine the drained ricotta, mascarpone, powdered sugar, and vanilla extract. Stir until completely smooth — I use a rubber spatula and it takes about 2 minutes of mixing. Taste it and adjust the sugar if you want it a little sweeter. Fold in the mini chocolate chips gently so you don't break them down.
- Chill the filling: Cover the bowl and refrigerate for at least 30 minutes. This firms up the filling so it's easier to pipe or spoon neatly, and it also helps the flavors come together. Don't skip this step — I tried assembling immediately once and everything just slid around.
- Assemble the cups: Transfer the filling to a piping bag or a zip-lock bag with a small corner cut off. Pipe the filling into each cooled shell, filling it generously. Top with mini chocolate chips, pistachios, a dusting of powdered sugar, or whatever toppings you're using.
- Serve: These are best served immediately or within 30 minutes of assembling so the shells stay crispy. If you need to refrigerate assembled cups, do so for no more than a few hours — the shells will soften over time but they'll still taste great.
Tips for Success
- Drain the ricotta properly: I know I already said this, but I'm saying it again because the first time I made these I thought it wouldn't matter that much. It matters. Whole milk ricotta from the grocery store holds a lot of moisture, and that moisture will make your filling soupy. An hour of draining is minimum — overnight is better. If you're short on time, press the ricotta firmly in the strainer with a spoon to push out as much liquid as you can.
- Don't overbake the shells: I burned my first batch because I walked away and forgot about them. The shells go from golden to overdone fast in those last two minutes. Start checking at the 8-minute mark. They should be just golden at the edges — they'll continue to crisp up as they cool in the tin, so pull them when they look slightly underdone to you.
- Let the shells cool completely before filling: If you fill warm shells, the filling melts slightly and the shell softens from the steam. I've made this mistake more than once when I was impatient. Give them at least 15 to 20 minutes out of the oven, or speed it up by setting the tin on a wire rack.
- Use a zip-lock bag if you don't have a piping bag: Scoop the filling into a zip-lock bag, press out the air, seal it, and snip a small corner off. This gives you way more control than a spoon and makes the cups look clean and neat. The opening should be small — about ½ inch — so you can build up the filling in layers rather than it all falling out at once.
- Assemble close to serving time: The shells stay crispy for about an hour after filling if left at room temperature, and a few hours if refrigerated. If you're making these for a party, bake the shells the day before, keep them in an airtight container, mix the filling the morning of, and assemble an hour before guests arrive. That's my system and it works every time.
Variations
- Lemon ricotta version: Swap the cinnamon for ¼ teaspoon lemon zest and use lemon zest instead of orange zest in the filling. Skip the chocolate chips and top with a fresh raspberry instead. The citrus makes the filling taste lighter and brighter — my husband actually prefers this version in summer. It pairs well with the buttery pie crust shell.
- Pistachio and orange: Add ¼ teaspoon orange zest to the filling along with the vanilla, and top each cup with a small pile of finely chopped pistachios. This is the closest I've gotten to traditional Sicilian cannoli flavor — the combination of orange and pistachio is classic for a reason. If you can find good-quality pistachios at Trader Joe's or Costco, use those.
- Espresso chocolate chip: Stir ½ teaspoon instant espresso powder into the filling along with the powdered sugar. It doesn't make the filling taste strongly of coffee — it just deepens the chocolate flavor and adds a slight bitterness that makes the whole thing taste more grown-up. Top with chocolate shavings. I made this version for a dinner party once and it went first.
- Phyllo shell version: If you can find pre-made mini phyllo shells in the freezer section (Athens brand is common in most US grocery stores), use those instead of the pie crust. They're even crispier and lighter than the baked pie crust cups, and they save you the step of cutting and baking the shells. Just thaw them and fill — that's it. The texture is more delicate, so fill these even closer to serving time.
- Fruit-topped summer version: Leave out the chocolate chips and top each cup with a small fresh raspberry, blueberry, or thin slice of strawberry. A light drizzle of honey over the top finishes it nicely. This version feels less like a heavy dessert and more like something you'd find at a brunch spread. I've served these alongside my Grilled Peach and Burrata Crostini as part of a summer appetizer table and they complemented each other well.
Serving and Storage
Serving
These are best served at room temperature or slightly chilled — not straight from a warm kitchen, and not ice cold from the fridge. I usually pull assembled cups out of the fridge about 15 minutes before serving so the filling softens slightly and the flavors are more pronounced. Arrange them on a flat plate or a tiered dessert stand if you want them to look nice. Dust with a little powdered sugar right before serving — it settles into the filling if you do it too early. For a bigger dessert spread, these go well alongside something like Blueberry Jammy Cookies — the two together cover a nice range of textures and flavors.
Storage
Unfilled baked shells keep well in an airtight container at room temperature for up to 3 days. The filling keeps in the fridge for up to 2 days — just give it a quick stir before using it if it's been sitting overnight. Once assembled, filled cups should be eaten within a few hours for the best shell texture, or refrigerated and consumed within 24 hours. I don't recommend freezing assembled cups — the shells get soggy on thawing. You can freeze the baked shells on their own for up to a month; just re-crisp them in a 350°F oven for 3 to 4 minutes before filling.

Frequently Asked Questions
Do I really need to drain the ricotta?
Yes, and I learned this the hard way. Whole milk ricotta from the supermarket contains a lot of water, and if you skip draining it, your filling will be too loose to pipe neatly and the shells will turn soggy fast. Line a fine mesh strainer with cheesecloth or paper towels, add the ricotta, and let it sit for at least an hour. Overnight in the fridge is even better. It takes almost no effort and makes a big difference in the final texture.
Can I make these ahead of time?
Yes — this is actually how I prefer to handle them for parties. Bake the shells up to 3 days ahead and store them in an airtight container at room temperature. Mix the filling the day before and keep it covered in the fridge. Assemble 30 to 60 minutes before serving. This way you're not rushing around in the kitchen when guests arrive, and the shells will still be crispy.
Can I substitute cream cheese for mascarpone?
You can, but the flavor will be slightly tangier and the texture a little denser. Mascarpone is richer and milder, which is why it works so well with ricotta here. If you can't find mascarpone, use full-fat cream cheese softened to room temperature — the filling will still be good, just a bit different. Some stores like Trader Joe's and Aldi carry mascarpone near the specialty cheese section, so it's worth checking before you substitute.
Can I freeze the cannoli cups?
I wouldn't freeze assembled cups — the filling changes texture when frozen and thawed, and the shells go soft. However, you can freeze the baked, unfilled shells in an airtight container or zip-lock bag for up to a month. When you're ready to use them, pop them in a 350°F oven for 3 to 4 minutes to re-crisp them, let them cool, then fill as normal. The filling doesn't freeze well, so always make that fresh.
What if I don't have a mini muffin tin?
A regular-size muffin tin will work — just cut your pie crust circles bigger (about 4 to 5 inches) and expect the shells to take a minute or two longer to bake. The cups will be larger, more like individual desserts than bite-sized pieces. You could also use pre-made mini phyllo shells from the freezer section of most grocery stores, which don't require any baking at all — just thaw and fill.

MINI CANNOLI CUPS
Ingredients
For the Cups:
- 2 refrigerated pie crusts or phyllo shells
- 2 tablespoons sugar
- 1 teaspoon cinnamon
For the Filling:
- 1 ½ cups ricotta cheese well-drained
- ½ cup mascarpone cheese
- ½ cup powdered sugar
- 1 teaspoon vanilla extract
- ½ cup mini chocolate chips
- Optional: chopped pistachios or candied fruit for garnish
Instructions
- Prepare Cups: Preheat oven to 375°F (190°C). Cut pie crusts into small circles and press into mini muffin tins. Sprinkle with cinnamon-sugar. Bake 10–12 minutes until golden. Cool completely.
- Make Filling: In a bowl, mix ricotta, mascarpone, powdered sugar, and vanilla until smooth. Fold in chocolate chips.
- Fill Cups: Spoon or pipe filling into cooled cups.
- Garnish: Top with pistachios, extra chocolate chips, or candied fruit if desired. Serve immediately or chill briefly before serving.
Notes
- Make Ahead: Prepare cups and filling separately; assemble just before serving for best crispness.
- Flavor Variations: Add orange zest, almond extract, or swap chocolate chips for crushed nuts.
- Serving Suggestions: Perfect for dessert buffets, parties, or holiday gatherings.
- Storage Tips: Store filled cups in the fridge for up to 1 day; unfilled cups can be stored in an airtight container for 3 days.
These cannoli cups have become one of my go-to desserts when I want something that feels a little special without requiring a lot of time or skill. I'm not a pastry chef — I'm just someone who wanted cannoli on a weeknight and didn't want to fuss with tubes and hot oil. This version gets the job done, and honestly, nobody I've served them to has ever complained that they weren't fried.
What I appreciate most is how well they suit a table spread. I've served them at Eid gatherings where most of the food was Pakistani, and people still went back for seconds. The filling is sweet and creamy enough to stand on its own, and the shell gives it just enough structure. It's one of those desserts that travels across cultural lines pretty easily — which in our house matters, because we eat everything.
If you make a batch and have leftover filling (which sometimes happens if your shells crack or you just made too much), it's excellent spread on crackers or stirred into oatmeal in the morning. I realize that sounds strange, but ricotta with a little powdered sugar and vanilla is genuinely a good breakfast situation. If you're looking for more Italian-inspired recipes to go alongside these, my Pastina Italian Comfort Food is one I keep coming back to — simple, honest, and deeply satisfying in a completely different way.
Make a double batch if





Comments
No Comments