
Saad asked me to make these cookies three weekends in a row before I finally wrote down exactly what I was doing. He'd seen a reel about Levain Bakery in New York — those absurdly thick, gooey, almost cake-sized cookies — and decided that was the only cookie he would accept from that point forward. No pressure.
What makes these work isn't magic — it's a few very specific things: cold butter (not softened, not melted, cold), a mix of all-purpose and cake flour for that tender crumb, and a hot oven so the outside sets fast while the inside stays soft. I also add a teaspoon of cornstarch, which sounds odd but genuinely helps with that thick, chewy texture. I've made enough batches now to know that skipping any one of these steps changes the whole cookie.
I make these on weekends when I have a little extra time. This recipe makes 8 large cookies — and I mean large, about 6 oz of dough each — so it's not a small batch. If you're looking for something to bring to a gathering or just want something impressive on the counter, these do the job. My husband eats them with coffee. Saad eats them still warm from the pan with a glass of cold milk. Zainab picks out all the walnuts and eats those separately first, which is honestly a very Zainab thing to do.
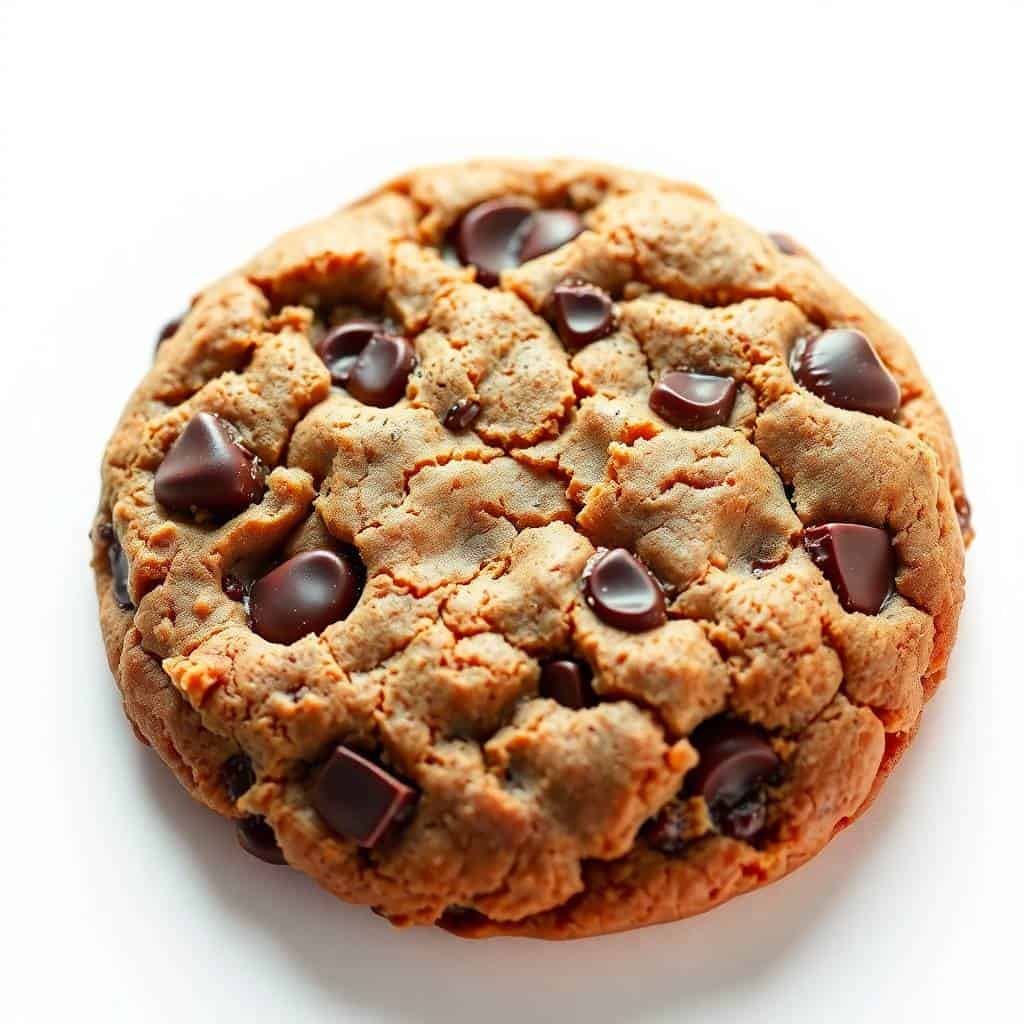
One thing to set expectations on: these cookies look underdone when you pull them out. The tops will barely be set and the edges will just be turning golden. That's correct. Don't add more time. They keep cooking on the hot tray for another 10 minutes after you pull them, and that's where the gooey center happens. If you wait for them to look fully done in the oven, you'll get a dry cookie — and I know this because I did exactly that my first attempt. If you love cookies as much as we do, you might also want to check out these Peanut Butter Chocolate Chip Cookie Cups — different texture entirely, but equally dangerous to have in the house.

Why You'll Love This Recipe
- They actually stay thick: Most chocolate chip cookie recipes I've tried spread flat in the oven, which drives me crazy. This one doesn't, because the butter goes in cold and the oven runs hot. The cookie sets before it has a chance to spread out. You get a tall, domed cookie that looks like it came from an actual bakery shelf.
- The center stays gooey even the next day: I was surprised by this. Day-two cookies reheated in the microwave for 10–12 seconds come right back to life. The inside goes molten again. This doesn't happen with thinner cookies — the mass of dough here is what holds the moisture in.
- No special equipment needed: I don't have a stand mixer. I use a wooden spoon and a large bowl and it works completely fine. The dough is thick, so your arm gets a workout on the final fold, but nothing here requires anything fancier than a basic hand mixer or just some elbow grease.
- No chilling required (though you can): You can bake these immediately after mixing, which is what I do most of the time because waiting is hard. The cold butter does the work that a fridge chill would normally do. That said, if you mix the dough the night before and refrigerate it, the flavor does get a little deeper — more caramel-y from the brown sugar.
- Genuinely customizable mix-ins: I've made these with dark chocolate chunks instead of semi-sweet chips and they were incredible. I've also done a version with pecans instead of walnuts when walnuts weren't in the house. The base dough is forgiving — it holds up to whatever you want to fold in.
Ingredients
- 1 cup cold unsalted butter, cubed
- ¾ cup light brown sugar, packed
- ½ cup granulated sugar
- 2 large eggs
- 1½ cups all-purpose flour
- 1½ cups cake flour (see Tips if you can't find it)
- 1 teaspoon cornstarch
- 1 teaspoon baking soda
- ½ teaspoon salt
- 2 cups semi-sweet chocolate chips
- 1½ cups chopped walnuts
Directions
- Step 1: Preheat the oven — Set your oven to 410°F (210°C) and line a baking sheet with parchment paper. The high temperature is not a typo — it's what creates those crispy edges while keeping the center soft.
- Step 2: Cream the butter and sugars — Beat the cold cubed butter with both sugars until just combined. You're not going for light and fluffy here — the mixture should look a little rough and dense, and that's exactly right. Overmixing at this stage warms the butter up too much.
- Step 3: Add the eggs — Mix in the eggs one at a time, beating just until each one is incorporated. Don't go longer than you need to — overmixing after the eggs go in toughens the dough.
- Step 4: Mix the dry ingredients — In a separate bowl, whisk together the all-purpose flour, cake flour, cornstarch, baking soda, and salt. Add this to the wet mixture gradually, stirring until a thick dough comes together.
- Step 5: Fold in the chocolate and walnuts — Add the chocolate chips and walnuts and fold them in with a wooden spoon or spatula until they're evenly distributed. The dough will be very thick — this is normal.
- Step 6: Portion the dough — Divide the dough into 8 large balls, roughly 6 oz each (about ¾ cup of dough per cookie). Place them on your baking sheet with plenty of space between — these spread a little even though they're thick. I usually do 4 per tray.
- Step 7: Bake — Bake for 10–12 minutes, until the edges are just golden and the tops look barely set. Pull them when they look underdone. I cannot stress this enough — they will finish cooking on the tray.
- Step 8: Cool on the tray — Let the cookies sit on the hot baking sheet for 10 full minutes before moving them. This is part of the baking process. The residual heat from the tray finishes the centers. Move them too early and they fall apart; leave them too long and the bottom gets too hard. Ten minutes is the sweet spot.
Tips for Success
- Keep the butter cold — seriously: This is the single most important thing in the whole recipe. If your kitchen is warm, cut the butter and pop it back in the fridge for 10 minutes before you start. Softened butter means the fat coats the flour differently, the dough warms up too fast, and you end up with a flat cookie. Cold butter is what keeps these tall.
- Don't overbake them: My first batch I left in for 14 minutes because I was nervous they weren't done. They were dry and disappointing. Pull them at 10–12 minutes when the edges are golden and the center looks underset. The carryover heat finishes the job on the tray. Trust the process.
- Use a kitchen scale if you have one: Portioning by weight (6 oz per cookie) gives you 8 even cookies that all bake at the same rate. If you're eyeballing it, use a ¾ cup measure. Uneven sizes mean some cookies will overbake while others are still raw in the center, which is exactly as frustrating as it sounds.
- No cake flour? Here's what I do: For every 1 cup of cake flour the recipe needs, measure 1 cup of all-purpose flour, remove 2 tablespoons of it, and replace those 2 tablespoons with cornstarch. It's not exactly the same, but it gets you most of the way there — the cookies will still be tender, just slightly less delicate in crumb. Most US grocery stores do carry cake flour (look for Swan's Down or Softasilk), but this workaround is fine in a pinch.
- Bake one test cookie first: Every oven runs a little differently. I always bake one cookie solo before the full batch. If it spreads too much, my butter was too warm and I'll chill the remaining dough for 20 minutes. If the edges brown too fast, I'll lower the oven by 10 degrees. One test cookie saves an entire batch.
Variations
- Dark chocolate and sea salt: Swap the semi-sweet chips for chopped dark chocolate (70% or higher) and add a pinch of flaky sea salt on top of each dough ball before baking. The salt hits first, then the bitter chocolate, then the sweetness of the dough. My husband prefers these over the original version — he's not a sweet tooth the way the kids are.
- Peanut butter chocolate: Replace the walnuts with peanut butter chips and use milk chocolate chips instead of semi-sweet. If you want to go further, drizzle a little melted peanut butter over the cooled cookies. It's a lot, in a good way. Pairs well with a glass of cold milk — very much a Saad-approved combination.
- Double chocolate: Replace ¼ cup of the all-purpose flour with Dutch-process cocoa powder and use dark chocolate chunks instead of chips. The cookie dough itself becomes chocolatey rather than plain, and the chunks give you pockets of melted chocolate throughout. This version is very rich — one cookie is genuinely enough.
- White chocolate and macadamia: Replace the chocolate chips with white chocolate chips and swap the walnuts for roughly chopped macadamia nuts. This is a lighter, butterier version — almost tropical-feeling. I made this once for a school fundraiser and the cookies were gone before everything else on the table.
- S'mores style: Add a handful of mini marshmallows, crushed graham crackers, and milk chocolate chips in place of the semi-sweet. The marshmallows melt and get slightly toasty in the oven. The graham cracker pieces add a little crunch. This one is messy and chaotic and the kids absolutely love it.
Serving and Storage
Serving
These are best eaten 10–15 minutes after they come out of the oven — that's the window where the center is still molten but the cookie holds together when you pick it up. Serve them plain, or with a glass of cold milk if you're feeding kids, or with coffee if you're feeding adults. They also sit well on a plate for a few hours at room temperature if you're putting them out for company. If you want a full dessert spread, these alongside a slice of Strawberry Lemonade Poke Cake makes for a pretty impressive table.
Storage
Store cooled cookies in an airtight container at room temperature for up to 3 days. Put a small piece of parchment between layers so they don't stick together. To reheat, microwave for 10–15 seconds and the center goes gooey again. For longer storage, freeze baked cookies in a zip bag for up to 2 months — pull one out and reheat from frozen in the microwave for about 30 seconds. You can also freeze raw dough balls on a tray, then transfer to a bag once solid. Bake from frozen at 410°F, adding 2–3 minutes to the bake time.

Frequently Asked Questions
Can I use only all-purpose flour instead of cake flour?
Yes, you can. The cookies will still be good — they'll just be slightly less tender in the center. If you want to get closer to the cake flour texture, remove 2 tablespoons per cup of all-purpose flour and replace them with cornstarch. It's a reasonable workaround when you don't have cake flour on hand.
Why does the recipe use cold butter instead of softened butter?
Cold butter is what keeps the cookies thick and tall. When you use softened butter, the dough warms up quickly, the fat spreads during baking, and you end up with a flat cookie. Cold butter takes longer to melt in the oven, which gives the cookie structure time to set before it spreads. Don't skip this step.
Can I make these without walnuts?
Absolutely. Leave them out entirely or replace them with more chocolate chips, pecans, or even dried cranberries. The dough holds up well without the nuts — you'll just get a slightly softer, more uniform bite throughout. Zainab picks her walnuts out anyway, so we've made the nut-free version plenty of times.
Can I freeze the cookie dough?
Yes, and I do this regularly. Portion the dough into balls, freeze them on a tray until solid, then transfer to a freezer bag. They keep for up to 2 months. Bake directly from frozen at 410°F — just add 2–3 minutes to the bake time. Pulling a couple of frozen dough balls out on a weeknight and having fresh cookies in 15 minutes is genuinely one of the better decisions you can make.
How do I reheat leftover cookies so they taste fresh?
The microwave works surprisingly well here — 10 to 15 seconds for a room-temperature cookie, about 30 seconds for a frozen one. The center goes soft and melty again and it tastes close to fresh out of the oven. Don't go longer than 15–20 seconds or you'll overshoot and end up with a tough cookie.
Final Thoughts
I'm not going to tell you these taste exactly like sitting inside the actual Levain Bakery in New York — I've never been there, and I'm making these in a home kitchen in Pakistan with a standard oven. What I can tell you is that they're genuinely very good, they look impressive, and they disappear fast in my house. My double batch was gone within 24 hours the last time I made them, which I think says everything.
The thing I keep coming back to with this recipe is how much technique matters more than any fancy ingredient. Cold butter. Hot oven. Pull early. Rest on the tray. Those four things are really the whole recipe. Get those right and everything else is just details. I've made these with cheap store-brand chocolate chips and they were just as good as the batch I made with the fancy ones from Trader Joe's.
If you make them, don't skip the 10-minute rest on the tray. I know it's hard to wait — the smell alone will make you want to grab one immediately. But those 10 minutes are doing real work. Let them finish. They're worth it. 🍪✨

LEVAIN BAKERY NYC COOKIES
Ingredients
- 1 cup cold unsalted butter cubed
- ¾ cup light brown sugar packed
- ½ cup granulated sugar
- 2 large eggs
- 1½ cups all-purpose flour
- 1½ cups cake flour
- 1 teaspoon cornstarch
- 1 teaspoon baking soda
- ½ teaspoon salt
- 2 cups semi-sweet chocolate chips
- 1½ cups chopped walnuts
Instructions
Preheat Oven:
- Preheat oven to 410°F (210°C). Line a baking sheet with parchment paper.
Cream Butter and Sugars:
- In a large bowl, cream together cold butter cubes, brown sugar, and granulated sugar until just combined.
Add Eggs:
- Mix in the eggs one at a time, beating until incorporated.
Mix Dry Ingredients:
- In a separate bowl, whisk together both flours, cornstarch, baking soda, and salt. Add to the wet mixture and stir until a thick dough forms.
Fold in Add-ins:
- Fold in chocolate chips and walnuts until evenly distributed.
Shape the Cookies:
- Divide dough into 8 large balls (about 6 oz each). Place on baking sheet, leaving space between cookies.
Bake:
- Bake for 10–12 minutes until the edges are golden and the tops are just set. Do not overbake—cookies will continue to cook as they cool.
Cool and Serve:
- Let cookies rest on the tray for 10 minutes before serving warm or storing.
Notes
Flavor Tip: Use dark chocolate chips for a richer twist or sub pecans for walnuts.
Serving Suggestions: Best served warm with a glass of cold milk.
Storage Tips: Store in an airtight container for up to 3 days or freeze for up to 2 months.
If you liked these, here are a few more things worth making:
- Peanut Butter Chocolate Chip Cookie Cups — if you want something in cookie cup form with the same kind of gooey center energy
- Fried Strawberry Cheesecake Sandwiches — over-the-top dessert that's easier than it looks
- Strawberry Lemonade Poke Cake — a summer sheet cake that feeds a crowd without much fuss
- Crock Pot Crack Potato Soup — for when you need something savory and comforting after all these sweets





Comments
No Comments