
Every October without fail, I end up with more apples than my family can eat before they go soft. Last fall I grabbed a big bag of Granny Smiths from the grocery store thinking we'd just snack on them, and then I remembered I'd been meaning to try proper homemade caramel apples for years. Not the sad, plasticky ones you get wrapped in cellophane at the gas station — real ones, with a thick, buttery caramel that actually sticks and doesn't slide off in one dramatic sheet the moment you take a bite.
The caramel in this recipe uses sweetened condensed milk and brown sugar instead of granulated sugar and cream, and honestly that's the whole trick. It makes the caramel richer, more fudge-like, and it clings to the apple instead of pooling at the bottom. I've made both versions — the original post I worked from used granulated sugar and heavy cream, which is a more classic confectioner's approach — but for home cooking with no special equipment, the condensed milk version is more forgiving and harder to mess up.
Zainab helped me make these last Halloween and she was absolutely in charge of the toppings station. She rolled half the apples in rainbow sprinkles and declared the other half "boring" even though those were the ones loaded with crushed pecans and mini M&Ms. If you're planning a fall party or just want a project to do with kids on a Saturday afternoon, this is a good one. The active time is short — maybe 20 minutes — and most of the wait is just the caramel setting in the fridge. If you love baking with apples this time of year, my apple butter cookies are another fall staple in my kitchen that are worth making the same week.
One thing to know before you start: you need a candy thermometer. I tried guessing the temperature once using the cold water test and my caramel came out either too runny or too hard to bite through. A basic candy thermometer costs about $8 at Walmart and it makes the whole thing actually work. Get one if you don't have one — it's worth it.
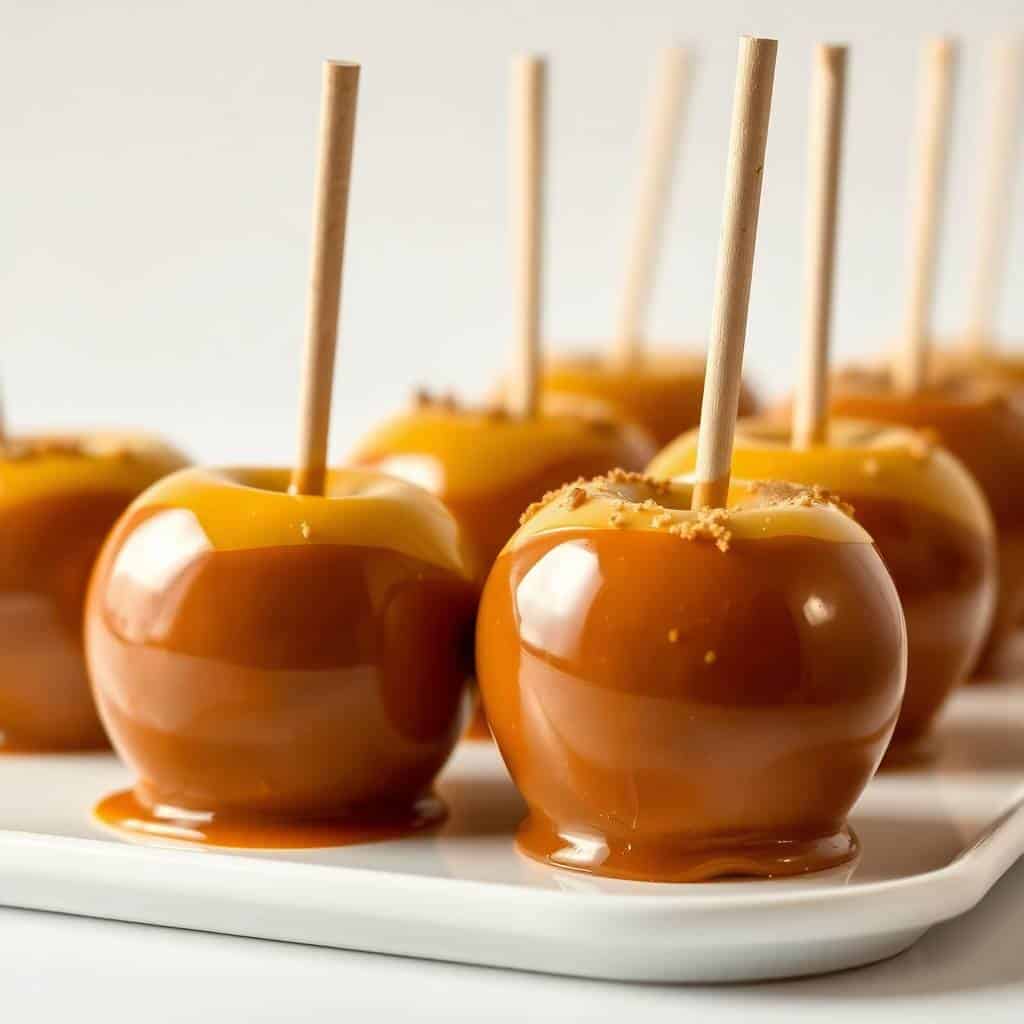
Why You'll Love This Recipe
- The caramel actually stays on the apple: This was my biggest frustration with other recipes I'd tried — the caramel would look perfect right after dipping and then slowly slide down into a puddle on the parchment. The condensed milk base here gives you a caramel that grips. Once it sets in the fridge it stays put, even after you take it out and let it come to room temperature before serving.
- You don't need a professional candy kitchen: I made these in my regular kitchen with a heavy saucepan I've had for years, a wooden spoon, and an $8 candy thermometer. No stand mixer, no double boiler, no special molds. The technique is straightforward once you understand what temperature you're aiming for and why it matters.
- They make genuinely nice gifts: I wrapped four of these in cellophane bags tied with orange ribbon last October and brought them to a neighbor. She texted me an hour later asking for the recipe. Storebought caramel apples at fall fairs can cost $8–$12 each — these cost a fraction of that and look just as good, if not better, once you get your toppings setup going.
- The toppings are completely flexible: Crushed pretzels, mini M&Ms, chopped pecans, white chocolate drizzle, graham cracker crumbs — you can go in a dozen directions. I usually set up small bowls of four or five options and let everyone roll their own apple. It turns into a fun activity and you end up with a platter that looks like it came from a gourmet candy shop.
- Make-ahead friendly for parties: I make a double batch the night before because one batch disappears before I've even finished cleaning up the saucepan. They keep well in the fridge overnight, which means you're not scrambling to make dessert the day of your party. Take them out 20–30 minutes before serving so the caramel softens slightly.
Ingredients
- 6 medium Granny Smith or Honeycrisp apples
- Wooden sticks or craft sticks
- 1 cup (2 sticks) unsalted butter
- 2 cups packed brown sugar
- 1 cup light corn syrup
- 1 can (14 oz) sweetened condensed milk
- 1 teaspoon vanilla extract
- Pinch of salt
- Optional toppings:
- Melted chocolate (white, dark, or milk)
- Chopped nuts (pecans, peanuts, or almonds)
- Crushed cookies or pretzels
- Sprinkles
- Mini M&Ms or candies
Directions
- Prepare the apples: Wash each apple thoroughly under warm water — this removes the wax coating that grocery store apples often have, which can prevent caramel from sticking. Dry them completely with a clean towel, then insert a wooden stick firmly into the stem end. Set them on a parchment-lined tray and let them come to room temperature while you make the caramel. Cold apples cause the caramel to set too fast before you can swirl it evenly.
- Make the caramel: In a heavy saucepan over medium heat, melt the butter. Add the brown sugar, corn syrup, and sweetened condensed milk all at once. Stir constantly — and I mean constantly, don't walk away — as the mixture heats up and comes to a boil. Clip your candy thermometer to the side of the pan and cook until it reads 245°F (firm ball stage). This usually takes about 15–20 minutes. At 245°F the caramel will hold its shape on the apple without being so hard it's painful to bite through.
- Add vanilla and salt: Remove the saucepan from heat and stir in the vanilla extract and a pinch of salt. The caramel will bubble up when you add these, so stir carefully. Let it sit for about 4–5 minutes so it thickens slightly — this makes dipping much easier and gives you better coating.
- Dip the apples: Tilt the saucepan slightly (I prop one side on a folded dish towel) to create a deeper pool of caramel. Hold each apple by the stick and dip it in, swirling slowly to coat all sides. Lift it out and let the excess drip back into the pan for 10–15 seconds before placing on the parchment. Work reasonably quickly because the caramel thickens as it cools — if it gets too thick, set the saucepan back on low heat for 30 seconds.
- Add toppings: Immediately after dipping each apple, roll or press your chosen toppings into the warm caramel before it sets. I find it easiest to have the toppings in shallow bowls so I can roll the apple directly through them. If you're drizzling with melted chocolate, let the caramel set for 5 minutes first so the drizzle sits on top rather than sinking in.
- Chill and set: Place the finished apples on the parchment-lined tray and refrigerate for at least 30 minutes. This firms up the caramel fully and helps the toppings bond. If you're making these the night before, leave them uncovered in the fridge — covering them can cause condensation that makes the caramel sticky and soft.
Tips for Success
- Dry the apples completely — no shortcuts: The first time I made these I was impatient and left a little moisture on the apples. The caramel slid right off in patches. Water and caramel don't get along. After washing, I now pat them dry and then let them air dry for 10 minutes on a clean towel before dipping. It makes a real difference.
- Use a heavy saucepan, not a thin one: I learned this after scorching a batch in a lightweight pan — the bottom got too hot too fast and the caramel burned before the temperature even reached 245°F. A thick-bottomed stainless steel or enameled pot distributes heat evenly. Any heavy pot from your regular kitchen cupboard will work; you don't need anything fancy.
- Trust the thermometer, not the color: Caramel at 230°F and 245°F can look almost identical, but the texture difference is significant. At 230°F it's too soft and will droop off the apple. At 250°F it starts going toward hard candy territory. Hit 245°F and you're in the sweet spot. If you don't have a thermometer, a $7–$8 one from Walmart is worth picking up — I've used mine for everything from caramel to fudge to jam.
- Set up your toppings before you start dipping: Once the caramel is ready, you need to move fast. I line up all my topping bowls, the parchment tray, and everything I need before I even start the caramel. There's nothing worse than scrambling to unwrap the M&Ms while your freshly dipped apple is already setting on the counter.
- Let caramel drip for a full count of 15: Right after you lift the apple out of the caramel, hold it over the pot and count to 15 before putting it down. This prevents that thick ring of caramel from pooling around the base of the apple on the parchment. The first few apples I made had little caramel "feet" that hardened into a mess. The drip-waiting step fixed it completely.
Variations
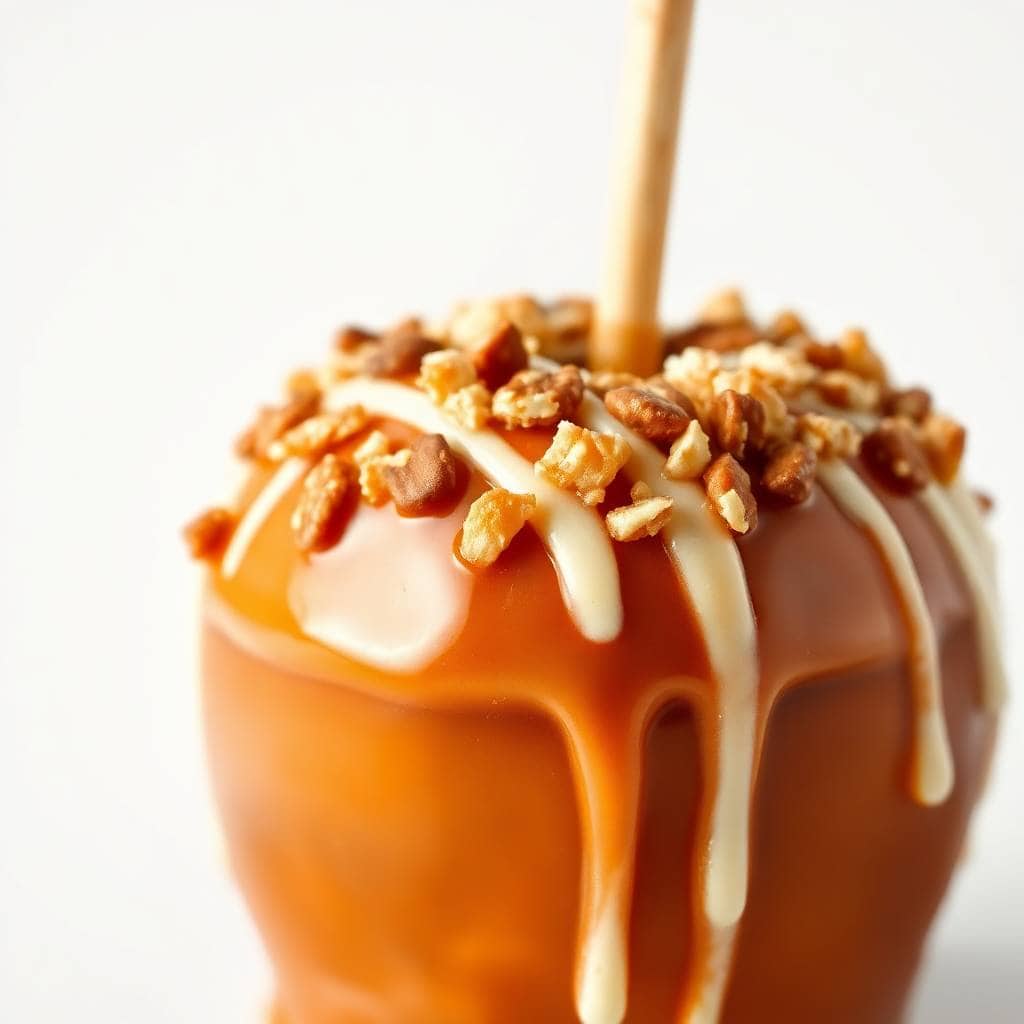
- Double chocolate: After the caramel sets, dip or drizzle the apple in melted dark or milk chocolate. Let that set in the fridge for another 15 minutes, then drizzle white chocolate over the top in thin lines. It looks like something from a candy boutique and takes maybe 10 extra minutes. My husband prefers these over the nut-rolled version every single time.
- Apple pie style: Stir 1 teaspoon of cinnamon and a pinch of nutmeg directly into the caramel right before dipping. Then roll the dipped apple in a mix of crushed graham crackers and a little brown sugar. The flavor combination is exactly what you'd expect — warm, spiced, nostalgic. I serve these sliced on a platter alongside my country apple fritter bread for a full apple-themed spread in October.
- Candy bar crunch: Press chopped Snickers, Twix, or Reese's Cups into the warm caramel right after dipping. The candy pieces stick and give you these chunky, indulgent bites that are impossible to put down. Zainab discovered this variation by accident when she couldn't decide between sprinkles and candy and just used both.
- Salted caramel: Add ½ teaspoon of flaky sea salt (like Maldon) to the caramel just before dipping, or sprinkle it over the dipped apples while the caramel is still tacky. The salt cuts through the sweetness in a way that makes these taste more sophisticated — these are the ones adults at a party will reach for first.
- Vegan version: Swap the butter for vegan butter (I've used Earth Balance successfully) and use coconut milk-based sweetened condensed milk in place of the dairy version. The caramel comes out slightly softer and has a faint coconut undertone, which actually works nicely with the apple. It won't set quite as firm, so chill it longer — at least an hour in the fridge.
Serving and Storage
Serving
Take the apples out of the fridge about 20–30 minutes before serving so the caramel softens just slightly — it makes them much easier to bite into. I stand them upright on a wooden board or platter, or slice them into wedges if I'm serving a crowd at a party. Sliced works especially well if you've got a mix of toppings and want everyone to try different versions. For gifting, wrap each apple individually in cellophane and tie with a ribbon — they look genuinely lovely and hold their shape for transport.
Storage
Store caramel apples uncovered in the refrigerator — covering them traps moisture and makes the caramel tacky. They keep well for up to 3 days. If you need to stack them or transport them, wrap each one individually in wax paper first. I wouldn't freeze these; the caramel gets grainy when thawed and the apple texture suffers. Make them fresh and enjoy them within a few days.

Frequently Asked Questions
Can I make the caramel ahead of time and reheat it?
Yes, you can make the caramel a day ahead and store it in a jar in the fridge. When you're ready to dip, reheat it gently in a saucepan over low heat, stirring until it's fluid and warm again. Don't crank the heat — caramel can go from warm to scorched pretty quickly. I'd still dip the apples on the same day you plan to serve them for the best result.
Why does my caramel keep sliding off the apple?
Two likely culprits: moisture on the apple, or caramel that didn't reach the right temperature. Even a small amount of water on the apple surface breaks the caramel's grip. Make sure your apples are bone dry before dipping. And if the caramel didn't hit 245°F, it'll be too loose to hold on. Use a thermometer — eyeballing it is how I ruined my first batch.
What apples work best for this recipe?
Granny Smith is the classic choice because the tartness balances the very sweet caramel really well, and the firm flesh holds up to dipping without getting mushy. Honeycrisp is my second favorite — slightly sweeter but still crisp. I'd avoid Red Delicious or Gala for this; they tend to be softer and the sweetness gets lost under all that caramel.
Can I freeze caramel apples?
I wouldn't recommend it. Freezing changes the texture of both the apple and the caramel — when they thaw, the apple releases water which makes the caramel soft and grainy, and the whole thing ends up a bit sad. These are best made fresh and eaten within 2–3 days. The good news is the recipe comes together quickly enough that making a fresh batch isn't a big project.
How do I stop toppings from falling off?
You need to add toppings while the caramel is still warm and tacky — there's maybe a 60-second window after dipping where it's perfectly grippy. If you wait too long, the surface skins over and toppings won't bond. I press nuts and larger pieces in gently with my fingers rather than just rolling, which gives them better contact with the caramel. Once chilled, everything locks in solid.

HOW TO MAKE GOURMET CARAMEL APPLES
Ingredients
- 6 medium Granny Smith or Honeycrisp apples
- Wooden sticks or craft sticks
- 1 cup 2 sticks unsalted butter
- 2 cups packed brown sugar
- 1 cup light corn syrup
- 1 14 oz can sweetened condensed milk
- 1 teaspoon vanilla extract
- Pinch of salt
Optional Toppings:
- Melted chocolate white, dark, or milk
- Chopped nuts pecans, peanuts, almonds
- Crushed cookies or pretzels
- Sprinkles
- Mini M&Ms or candies
Instructions
Prepare the Apples:
- Wash apples thoroughly to remove wax. Dry completely and insert sticks into the stem end. Set aside on a parchment-lined tray.
Make the Caramel:
- In a heavy saucepan over medium heat, melt butter. Add brown sugar, corn syrup, and sweetened condensed milk. Stir constantly and bring to a boil. Cook until the mixture reaches 245°F (firm ball stage) using a candy thermometer. Remove from heat, stir in vanilla and salt.
Dip the Apples:
- Let caramel cool slightly (about 5 minutes). Dip each apple into the caramel, swirling to coat. Let excess drip off, then place on parchment to set.
Decorate:
- Before the caramel fully sets, roll or drizzle apples with desired toppings. Chill briefly to firm up.
Notes
- Make Ahead: Caramel apples can be made a day in advance. Store in the fridge uncovered and bring to room temperature before serving.
- Customizing the Flavor: Add a dash of cinnamon to the caramel for a warm twist, or drizzle with sea salt for a salted caramel version.
- Serving Suggestions: Wrap in cellophane with ribbon for gifts, or slice and serve on a platter for parties.
- Allergy-Friendly Options: Use dairy-free butter and coconut milk-based condensed milk for a vegan version.
- Storage Tips: Keep apples in a cool, dry place or refrigerate. Best eaten within 2–3 days.
I've made these caramel apples three times now — once for Halloween, once for a neighbor's fall get-together, and once just because we had apples sitting on the counter and I wanted an excuse to make caramel. Each time I find myself standing at the stove stirring and thinking this is genuinely one of the more satisfying things I make in October. There's something about watching the caramel thicken and darken and then seeing it wrap around an apple that feels almost old-fashioned in the best way.
If you're putting together a fall dessert spread,





Comments
No Comments