
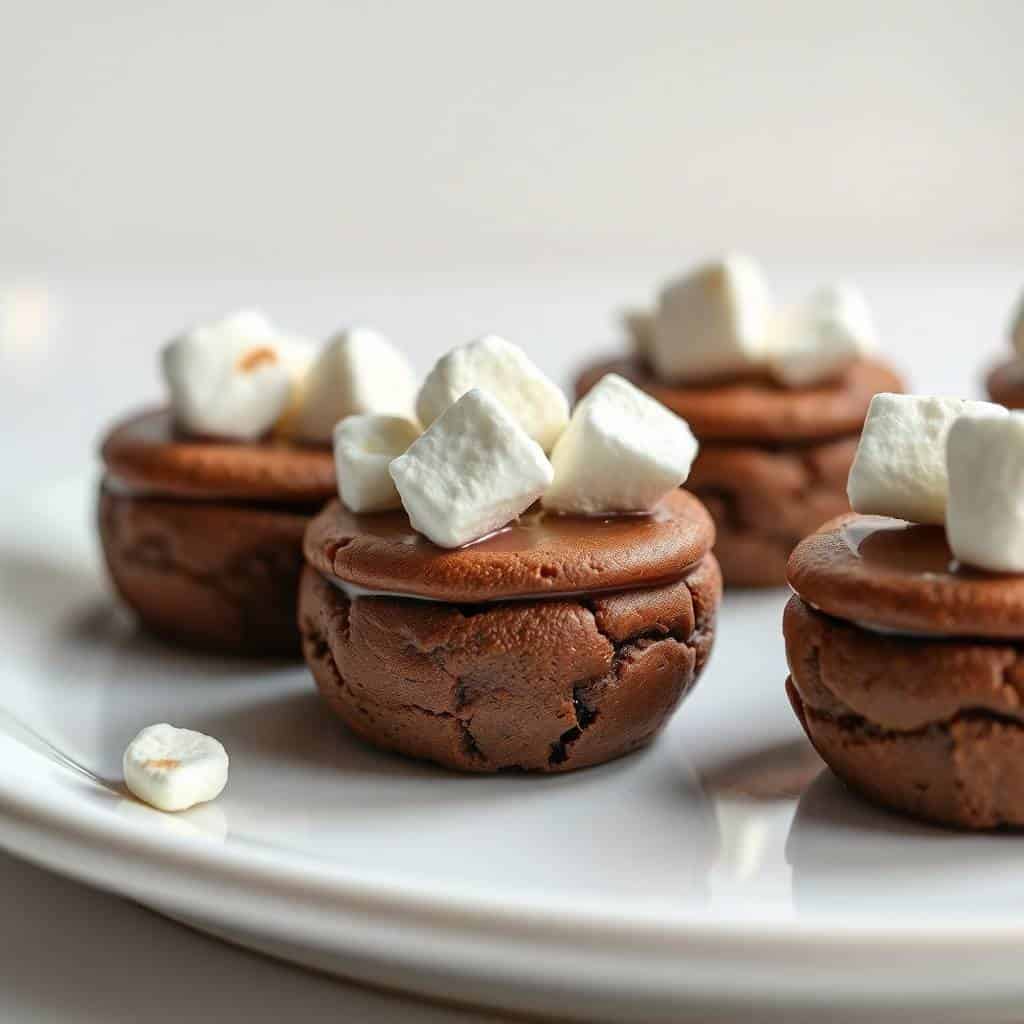
Saad asked me to make these three weeks in a row before I finally sat down and wrote the recipe out properly. The idea is simple: a chocolate cookie baked into a mini muffin tin so it holds a cup shape, then filled with a fudgy chocolate ganache and topped with mini marshmallows. It looks exactly like a tiny mug of hot cocoa, and honestly, the first time I pulled them out of the oven I stood there for a minute just looking at them.
What makes these work is the filling. I tested the original version with a heavy cream ganache, but I kept coming back to the sweetened condensed milk version — it sets firmer, scoops cleaner, and doesn't pool at the bottom of the cup when it warms up. It also has this fudge-like richness that pairs really well with the slightly bitter cocoa cookie base. If you've ever made peppermint snowball cookies at Christmas, you know that the right filling-to-cookie ratio is everything — same principle here.
I make these every December. They go on the holiday cookie tray, they go in little bags for the kids' teachers, and a few always disappear before they even make it out of the kitchen. Saad picks off the marshmallows first. Zainab eats hers whole in one bite, which I don't recommend but I also don't argue with.
One thing I'll warn you about upfront: you have to press the centers down the second they come out of the oven. Not after they cool. Not in five minutes. Right away, while the cookie is still puffed and soft. I learned that the hard way — waited too long the first time and ended up with chocolate domes instead of cups. Use a small spoon or the handle of a wooden spoon and just press firmly. They'll hold the shape as they cool.
Why You'll Love This Recipe
- They look impressive but aren't complicated: The hardest part is pressing the centers down fast enough after baking. Everything else — the dough, the filling, the assembly — is very straightforward. I've made these on a weeknight with both kids running around the kitchen and still had them done in under an hour.
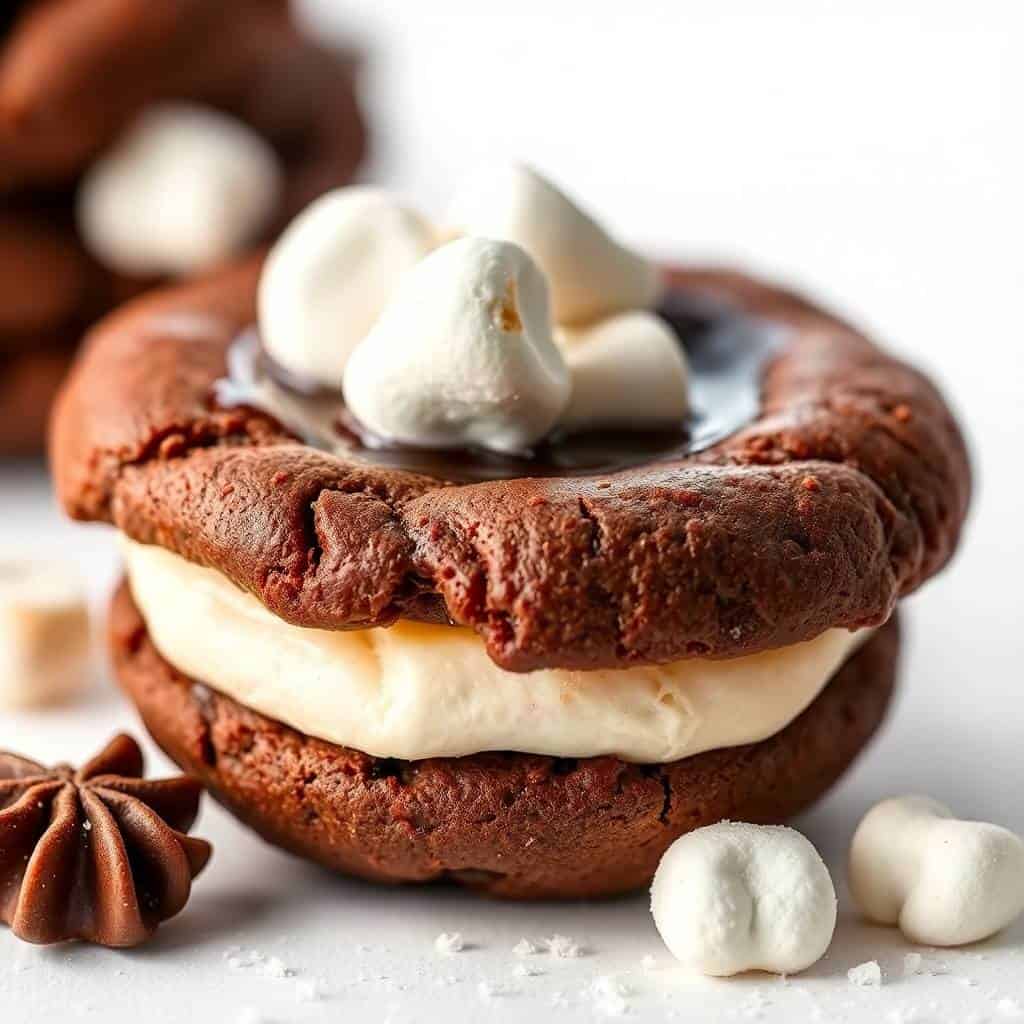
- The filling is fudge, essentially: Melted chocolate chips mixed with sweetened condensed milk and vanilla. It sets into something dense and glossy — not runny, not crumbly. It stays put when you pick the cookie up, which matters a lot if you're putting these on a tray or packing them as gifts.
- The cocoa cookie base is genuinely good on its own: I ate several of these unfilled straight from the pan. They're soft, slightly chewy around the edges, and chocolatey without being too sweet. The cup shape is fun but the cookie itself is worth making regardless.
- They're great for gifting: These stack well in a little box once the filling is set. I wrap mine in a square of parchment, drop them into a small gift bag, and they travel better than most cookies. A dozen of these go fast at a cookie swap — people always want to know how you made them.
- Kids can actually help: The dough rolling and the marshmallow topping are genuinely kid-friendly tasks. Zainab helps me press the marshmallows in. It takes a little longer when she's involved but she's very proud of the ones she decorated.
Ingredients
- For the Cookie Cups:
- ½ cup (1 stick) unsalted butter, softened
- ½ cup granulated sugar
- ½ cup light brown sugar, packed
- 1 large egg
- 1 teaspoon vanilla extract
- 1½ cups all-purpose flour
- ½ cup unsweetened cocoa powder
- ½ teaspoon baking soda
- ¼ teaspoon salt
- For the Filling:
- 1 cup semi-sweet chocolate chips
- ½ cup sweetened condensed milk
- 1 teaspoon vanilla extract
- Mini marshmallows, for topping
- Optional Decorations:
- Mini candy canes, cut to look like handles
- Melted white chocolate, for drizzling
Directions
- Make the cookie dough: Cream softened butter with both sugars until light and fluffy — about 2 minutes of good mixing. Add the egg and vanilla and mix until combined. In the same bowl, add the flour, cocoa powder, baking soda, and salt, and stir until a soft dough forms. Don't overmix once the flour goes in.
- Shape into cups: Roll the dough into 1-inch balls and press each one into a well of a greased mini muffin tin. Use your thumb or a small spoon to press a dent into the center. If your kitchen is warm and the dough feels sticky, chill the whole tin for 20–30 minutes before baking — it helps them hold their shape.
- Bake: Preheat your oven to 350°F (175°C). Bake for 8–10 minutes, until the edges look set. The moment you pull them out of the oven, press the centers down again immediately with a small spoon — they puff up during baking and you need to reclaim that cup shape before they cool. Let them cool completely in the pan before you even think about the filling.
- Make the filling: Combine the chocolate chips and sweetened condensed milk in a microwave-safe bowl. Microwave in 30-second bursts, stirring between each, until the chocolate is fully melted and smooth. Stir in the vanilla extract. The mixture should be thick and glossy — almost like a soft fudge.
- Fill and decorate: Spoon the fudge filling into each cooled cookie cup. Don't overfill — just enough to come level with the top of the cookie. Press a few mini marshmallows into the filling while it's still soft. Add candy cane handles or a drizzle of white chocolate if you want to go the extra mile. Let everything set at room temperature for 20–30 minutes before serving or packing up.
Tips for Success
- Press the centers the second they come out: This is the one step that can't wait. I set a small spoon right next to the oven so I'm not scrambling for one when the timer goes off. If you let the cookies cool before pressing, they'll crack instead of indent — I've done it, it's frustrating. Ten seconds of urgency saves the whole batch.
- Don't overbake: These should look slightly underdone when you pull them out. The edges should be set but the centers will still look soft — that's fine. They continue cooking in the hot pan for another minute or two. An overbaked cookie cup will crack when you press the center and end up crumbly instead of chewy.
- Grease the tin generously: Even a nonstick mini muffin tin needs a good spray of cooking oil for these. The cocoa in the dough makes it stickier than a standard sugar cookie. I spray mine, then run a finger around each well just to make sure every surface is coated. You want these to pop out cleanly once they're cool.
- Let the filling cool slightly before spooning: Right out of the microwave, the condensed milk filling is very fluid and will slosh around. Give it 3–5 minutes to thicken up a bit before you spoon it in. It should be thick enough to mound slightly but still pourable. If it seizes up while you're working, a few seconds back in the microwave loosens it right up.
- Chill the dough if your kitchen is warm: Summer kitchens (or just warm houses) make the dough sticky and hard to roll. Twenty minutes in the fridge fixes this completely. The cookies also hold their cup shape better when they go into the oven cold. This isn't essential in a cool kitchen, but if you're struggling with sticky dough, refrigerating it is the answer.
Variations
- Peppermint hot cocoa version: Add ¼ teaspoon of peppermint extract to the filling and top with crushed candy canes instead of plain marshmallows. This is my favorite variation for Christmas — the peppermint cuts through the richness of the chocolate and the crushed candy cane on top looks genuinely festive. Goes beautifully next to a plate of peppermint snowball cookies on a holiday tray.
- White hot chocolate version: Swap the semi-sweet chips in the filling for white chocolate chips. The filling goes pale and creamy, which looks stunning against the dark cocoa cookie. Top with white mini marshmallows and a dusting of powdered sugar. My husband actually prefers this version — he says it's less intense.
- Peanut butter filling: Mix ¼ cup of creamy peanut butter into the chocolate filling along with the condensed milk. It adds a nuttiness that plays really well against the cocoa cookie. Top with a mini Reese's cup instead of marshmallows if you want to go all in.
- Gluten-free option: Swap the all-purpose flour for a 1:1 gluten-free baking blend — I've had good results with the Bob's Red Mill and King Arthur versions available at most Walmart and Target stores. The texture is slightly more delicate, so handle the cups gently when releasing them from the pan.
- Toffee drizzle version: After the marshmallows are on, drizzle the tops with a little melted caramel or toffee sauce. It sounds like too much but it isn't — the saltiness in most caramel sauces balances the sweetness of the filling really well. If you like that combination, you might also like my graham cracker toffee bars which work on the same principle.
Serving and Storage
Serving
Serve these at room temperature — the filling is at its best when it's not cold and stiff from the fridge. If you've refrigerated them, pull them out 20 minutes before serving and they'll come back to that soft, fudgy texture. They look great arranged on a tiered dessert stand or lined up on a platter. Paired alongside a warm drink, a mug of actual hot cocoa, or even just a cup of tea, they make a genuinely cozy dessert.
Storage
Store in an airtight container at room temperature for up to 4–5 days. If your kitchen runs warm, or if you want to keep them longer, the fridge works fine — the filling will firm up more, almost like a truffle center, which some people actually prefer. Don't stack them directly on top of each other without a layer of parchment between them, or the marshmallows will stick together and make a mess when you try to separate them.

Frequently Asked Questions
Can I make these a day ahead?
Yes, and honestly they're better the next day. The filling has time to set fully and the cookie softens slightly where it meets the filling — in a good way. Bake, fill, decorate, then store covered at room temperature overnight. Add the marshmallows right before serving if you want them to look freshest.
Do they need to be refrigerated?
Not for short-term storage — 4 to 5 days at room temperature in an airtight container is fine. If your house is very warm or you're storing them longer than that, refrigerate them. Just bring them back to room temperature before serving so the filling softens up again.
Can I freeze the baked cookie cups before filling?
Yes — this is actually a great make-ahead strategy. Bake the cups, let them cool completely, then freeze them in a single layer in a zip-lock bag for up to 6 weeks. Thaw at room temperature for an hour, then make the filling fresh and fill them. The cookies taste like they were just baked.
What if I don't have a mini muffin tin?
A regular muffin tin works but the cups come out much bigger — more like individual desserts than bite-sized treats. Increase the baking time to 12–14 minutes and use more filling per cup. The presentation is different but the flavor is the same. You could also bake the cookies flat and just use them as a base for a puddle of filling, which is less fussy and still tastes great.
Can I use store-bought cookie dough?
You can, but look for a chocolate or brownie-style refrigerated dough rather than plain sugar cookie dough — plain dough won't give you the cocoa flavor that makes these taste like hot chocolate. The homemade dough here is genuinely easy and worth the extra 10 minutes, but in a pinch, a good chocolate cookie dough from the store works.
A Few Final Thoughts
These cookie cups have become one of my non-negotiable December recipes — the kind I make every year without anyone having to ask. They take about an hour start to finish, the ingredient list is short, and most of what you need is probably already in your pantry. The cocoa cookie dough and the condensed milk filling are both forgiving recipes, which means they're good for baking with kids or for when you're tired and don't have the bandwidth for anything fussy.
I'm not going to claim these are some traditional Pakistani holiday treat — they're not. They're squarely an American Christmas cookie, and I came to them through trial and error over several holiday seasons. But that's part of what I love about them. Our holiday table has biryani on one end and cookie trays on the other, and somehow it all works. These cookie cups fit right in alongside everything else.
If you want more holiday baking inspiration, the graham cracker toffee bars are another one I make every December — they come together even faster and are just as good for gifting. And if you're building out a full dessert spread, the no-bake pineapple heaven cheesecake is a nice bright counterpoint to all the chocolate.
Make a double batch if you're bringing these anywhere. I say that from experience — one batch disappears faster than you'd expect. 🍫☕🎄

HOT CHOCOLATE COOKIE CUPS
Ingredients
For the Cookie Cups:
- ½ cup unsalted butter softened
- ½ cup granulated sugar
- ½ cup brown sugar packed
- 1 large egg
- 1 teaspoon vanilla extract
- 1 ½ cups all-purpose flour
- ½ cup unsweetened cocoa powder
- ½ teaspoon baking soda
- ¼ teaspoon salt
For the Filling:
- 1 cup semi-sweet chocolate chips
- ½ cup sweetened condensed milk
- 1 teaspoon vanilla extract
- Mini marshmallows for topping
Optional Decorations:
- Mini candy canes cut to look like handles
- Melted white chocolate for drizzling
Instructions
Make the Cookie Dough:
- In a bowl, cream butter and sugars until light and fluffy. Add egg and vanilla. Mix in flour, cocoa, baking soda, and salt.
Shape into Cups:
- Roll dough into 1-inch balls. Press each into a greased mini muffin tin to form a cup shape. Chill for 30 minutes if desired.
Bake:
- Preheat oven to 350°F (175°C). Bake for 8–10 minutes. Immediately press the center down again to maintain the cup shape. Cool completely.
Make the Filling:
- In a microwave-safe bowl, melt chocolate chips with sweetened condensed milk. Stir until smooth. Add vanilla extract.
Fill and Decorate:
- Spoon fudge mixture into cooled cookie cups. Top with mini marshmallows. Add a candy cane handle or drizzle with melted chocolate if desired.
Notes
- Store in an airtight container for up to 5 days.
- Use white chocolate chips for a white hot chocolate version.
- Perfect for cookie trays and edible gifting.
If you liked these, here are a few more recipes worth bookmarking:
- Peppermint Snowball Cookies — another holiday cookie tray staple
- Graham Cracker Toffee Bars — fast, easy, and dangerously addictive
- No-Bake Pineapple Heaven Cheesecake Dessert — great when you want something no-oven
- Cheesy Thumbprint Appetizers with Hot Pepper Jelly — if you're building a full party spread, these are the savory counterpart





Comments
No Comments