
Saad asked me to put these on the Christmas dessert table three years ago after I made them once as a test batch — and now they're basically non-negotiable in December. That's how these gingerbread Oreo no-bake mini cheesecakes became a holiday tradition in our house, not through any grand plan, just one kid's very strong opinion.
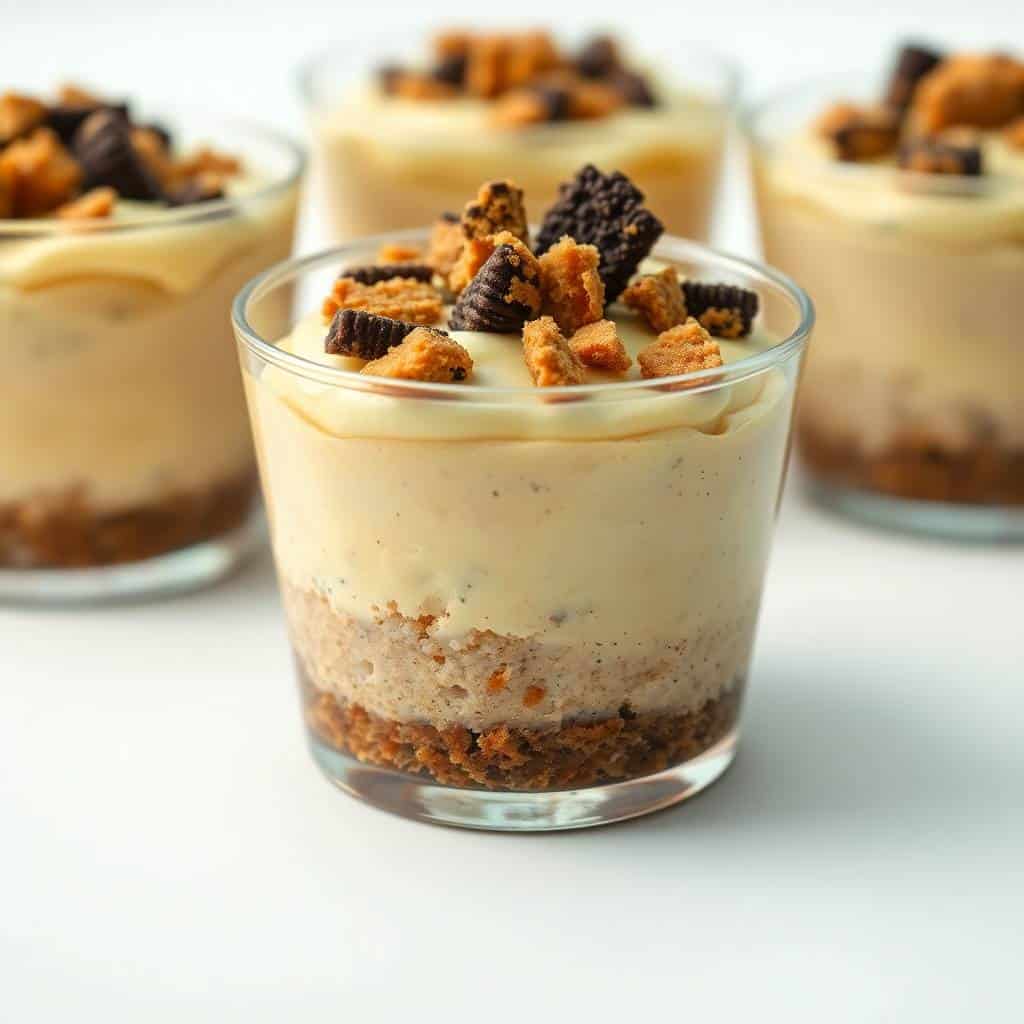
What I like about this recipe is that it doesn't ask much of you. You press Oreos into muffin liners, beat a simple cream cheese filling with warm spices, fold in whipped topping, and refrigerate. That's genuinely the whole thing. The gingerbread Oreos do a lot of the heavy lifting — they already have that warm molasses-spice flavor built in, so you don't need to do much to the filling to get something that tastes properly festive. A bit of cinnamon and ginger in the cream cheese is all you need on top of that.
I make these the night before any holiday gathering because they need a few hours in the fridge anyway. That's actually what I love most about no-bake desserts in December — the oven is already occupied with something else, and these just quietly set in the fridge while I'm doing everything else. If you're making a full holiday spread, pair these alongside something like my Rice Krispie Christmas Puddings for a no-bake dessert section that keeps the kitchen stress low.
One thing to know before you start: the cream cheese absolutely needs to be at room temperature. I skipped that step once when I was in a hurry and ended up with lumpy filling — still edible, but not the smooth, creamy texture you're going for. Pull it out of the fridge at least 30 minutes early. Everything else in this recipe is forgiving, but that part matters.
Why You'll Love This Recipe
- No oven needed: In December my oven is always claimed by something — roasts, cookies, casseroles. These cheesecakes go entirely in the fridge, which means I can make them while something else is baking and not compete for oven space. That alone makes them worth keeping in the rotation every holiday season.
- The gingerbread Oreo does the work for you: You don't need a long list of spices or a complicated filling when you start with a gingerbread Oreo as your base. The cookie itself already has that warm, spiced, molasses-forward flavor, so a little cinnamon and ginger in the cream cheese is all you need to pull it together. It's one of those cases where using the right ingredient up front makes everything simpler.
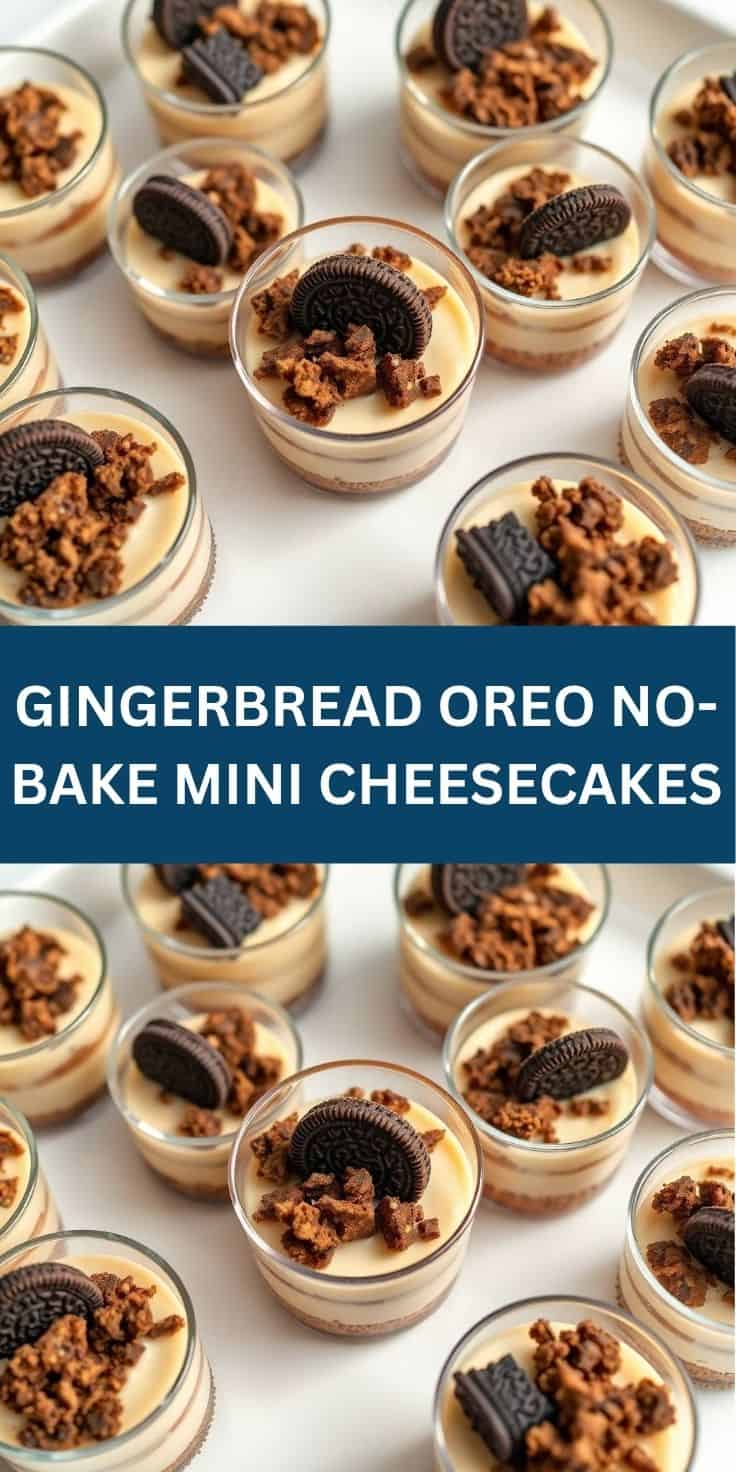
- Individual portions, no slicing required: Each cheesecake is already in its own liner, which means no cutting, no serving mess, no one getting a weird corner piece. At a party, people can just grab one off a tray. It's genuinely easier than making a single large cheesecake that you have to cut and plate.
- Make-ahead friendly: These actually get better after sitting overnight in the fridge. The filling firms up, the flavors settle, and everything holds together cleanly when you peel the liner. I make mine the evening before any holiday gathering and they're perfect by the next afternoon.
- The topping is completely up to you: Whipped cream and sprinkles is the classic move, but you can go as simple or as dressed-up as you want. Crushed Oreos, a drizzle of caramel, a dusting of cinnamon — whatever fits your table. My kids always want sprinkles. My husband wants extra crushed cookie on top. I just make a bowl of each and let people do their own.
Ingredients
- 12 Gingerbread Oreos (whole, one per cheesecake)
- 8 oz cream cheese, softened to room temperature
- ¼ cup granulated sugar
- 1 teaspoon vanilla extract
- ½ teaspoon ground cinnamon
- ¼ teaspoon ground ginger
- 1 cup whipped topping, like Cool Whip (thawed if frozen)
- Crushed gingerbread cookies or Oreos for garnish (optional)
- Whipped cream and festive sprinkles for topping
Directions
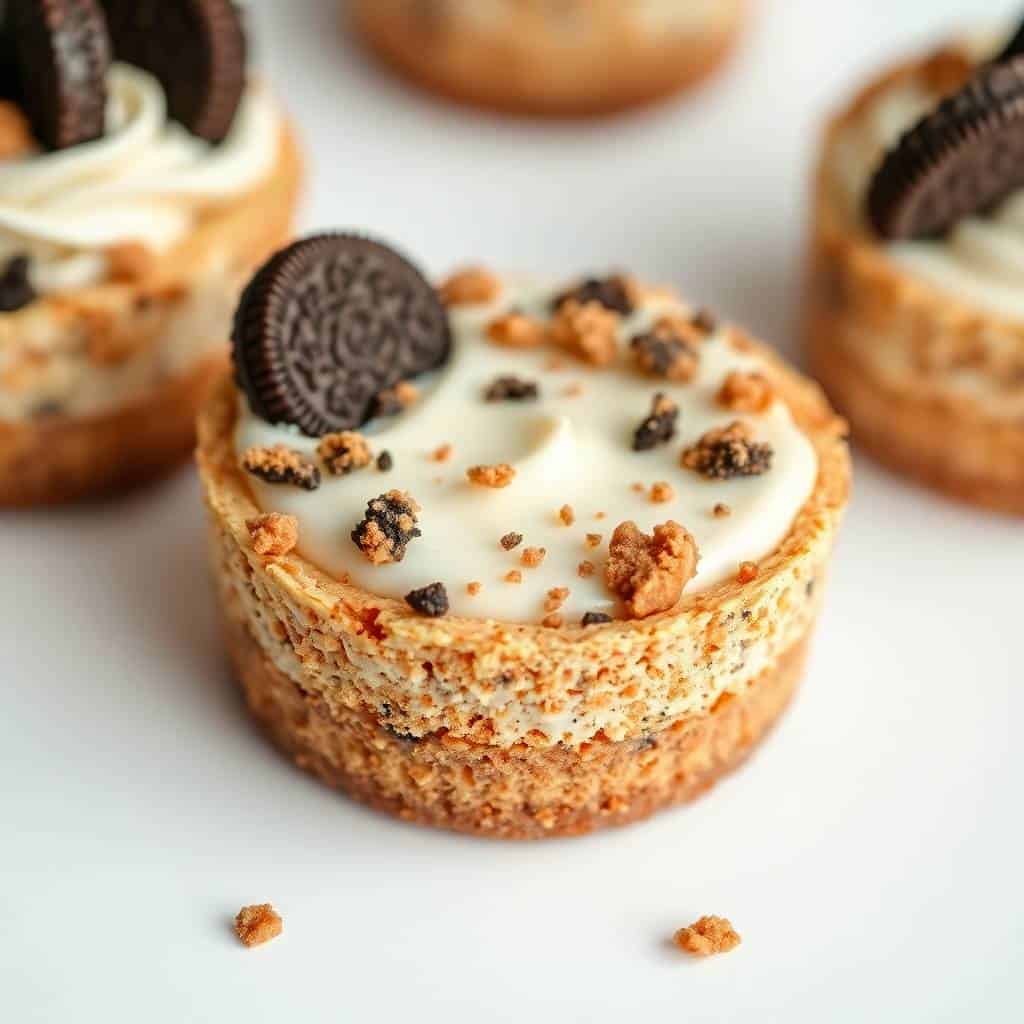
- Prepare the crust: Line a standard 12-cup muffin tin with cupcake liners. Place one Gingerbread Oreo flat at the bottom of each liner. That's the entire crust — no crumbling, no butter, just one whole cookie sitting at the base. It softens slightly as it chills and holds everything together perfectly.
- Make the filling: In a large bowl, beat the softened cream cheese, sugar, vanilla extract, cinnamon, and ground ginger together until completely smooth. Scrape down the sides of the bowl a couple of times to make sure there are no cream cheese lumps hiding. This is where room-temperature cream cheese really matters — cold cream cheese will stay chunky no matter how long you beat it.
- Fold in the whipped topping: Add the Cool Whip to your cream cheese mixture and fold it in gently with a spatula. Don't stir or beat it in — you want to keep the air in the whipped topping, which is what gives the filling its light, mousse-like texture. Fold until just combined and no white streaks remain.
- Fill the cups: Spoon or pipe the filling over each Oreo base, dividing it evenly among the 12 cups. Smooth the tops with the back of a spoon or a small offset spatula. They don't need to look perfect at this stage — the toppings cover any rough spots.
- Refrigerate to set: Cover the muffin tin with plastic wrap and refrigerate for at least 3 hours, or overnight if you're making them ahead. The longer they chill, the firmer and cleaner they'll be when you peel the liners.
- Top and serve: Just before serving, add whipped cream, crushed cookies, sprinkles, or whatever topping you like. Adding toppings right before serving keeps the whipped cream from weeping and the sprinkles from bleeding color into the filling.
Tips for Success
- Soften the cream cheese properly: I already mentioned this in the intro but it's worth saying again — cold cream cheese does not blend smooth, full stop. I've tried warming it in the microwave in 10-second bursts when I forgot to take it out early, and that works in a pinch, but leaving it on the counter for 30 to 45 minutes is the easier approach. You want it to dent easily when you press it with a finger.
- Use cupcake liners, not just a greased tin: I tried making these without liners once, thinking a well-greased muffin tin would work fine. Getting them out cleanly was a nightmare — two broke completely. Cupcake liners are what make these portable and presentable. Paper ones work great; foil ones are even sturdier if you're transporting them somewhere.
- Don't rush the chill time: Three hours is the minimum, but if you try to pull them after two hours because you're impatient (I have done this), the filling is still a bit soft and the whole thing slides around when you peel the liner. Overnight is honestly the sweet spot. The texture is much firmer and the flavor is better too, because the spices have time to settle into the filling.
- Fold, don't beat, the whipped topping: The first time I made a no-bake cheesecake filling, I just dumped the Cool Whip in and stirred it with a hand mixer. The filling came out dense and heavy instead of light and fluffy. The whole point of using whipped topping is the air it already contains — folding gently keeps it there. Use a wide spatula and fold in slow, sweeping motions.
- Add toppings at the last possible minute: Whipped cream starts to weep and deflate after an hour or two, especially in a fridge. Sprinkles bleed their color into white filling if they sit too long. Put the base cheesecakes in the fridge, then decorate right before you set them on the dessert table. Takes two minutes and they'll look much better.
Variations
- Gingerbread cookie crust instead of Oreo: If you can't find Gingerbread Oreos at your Walmart or grocery store (they're seasonal and sometimes sell out fast), swap the whole cookie base for a crushed gingerbread cookie crust. Mix about 1½ cups of crushed gingerbread cookies with 4 tablespoons of melted butter, press into the liners, and chill for 15 minutes before filling. You get an even more intense gingerbread flavor this way.
- Salted caramel drizzle: Before adding your whipped cream topping, drizzle a teaspoon of salted caramel sauce over each cheesecake. Store-bought caramel sauce from a jar works perfectly here — Trader Joe's has a good one, or you can find it at any Walmart or Costco. The salty-sweet contrast against the spiced filling is really good.
- Peppermint crunch version: Swap the cinnamon and ginger in the filling for ½ teaspoon of peppermint extract, and top with crushed candy canes instead of sprinkles. This turns them into a completely different holiday dessert — more candy cane cheesecake than gingerbread. My husband prefers this version, which surprised me because I didn't think peppermint was his thing.
- Deeper spice profile: If you want a stronger, more complex spice flavor, add ¼ teaspoon of ground cloves and a pinch of nutmeg to the filling, plus a tablespoon of molasses. The molasses gives it a darker color and that real old-fashioned gingerbread depth that you don't get from just cinnamon and ginger. This is not an authentic anything — it's just my tinkering — but it works.
- Dairy-free version: Use a dairy-free cream cheese (Philadelphia makes one, or you can find options at most major grocery stores) and swap the Cool Whip for coconut whipped cream. The texture is slightly different — a little softer — but it sets up well after a long chill. I haven't tested this version extensively, so give yourself a trial run before making it for guests.
Serving and Storage
Serving
Serve these straight from the fridge — they're meant to be eaten cold. Set them on a dessert tray and let people add their own toppings if you want it interactive, or decorate them ahead and arrange them for presentation. They look great on a tiered stand next to something like my Red Velvet Cupcakes with Cream Cheese Frosting if you're setting up a full holiday dessert table. A light dusting of cinnamon on top of the whipped cream is my favorite finishing touch — simple and it smells amazing.
Storage
Store the cheesecakes in an airtight container in the refrigerator for up to 4 days. If you've already added whipped cream toppings, they're best within the first 2 days before the whipped cream starts to break down. You can also freeze them (without toppings) in a single layer in a freezer-safe container for up to 1 month — just thaw overnight in the fridge before serving.
Frequently Asked Questions
Can I make these a day ahead?
Yes, and I'd actually recommend it. Making them the night before gives the filling a full overnight chill, which makes the texture firmer and cleaner when you peel the liner. Just store them covered in the fridge and add your toppings right before serving.
What if I can't find Gingerbread Oreos?
Gingerbread Oreos are seasonal, usually hitting shelves in October or November. If they're sold out, use regular Oreos for the base and add an extra pinch of cinnamon and ginger to the filling. Or swap in crushed gingerbread cookies mixed with melted butter — that actually gives you a stronger gingerbread flavor overall.
Can I freeze these mini cheesecakes?
Yes. Freeze them without toppings in a single layer in an airtight freezer container for up to 1 month. Thaw them overnight in the refrigerator — don't try to speed it up at room temperature or the filling gets too soft. Add toppings after they've thawed.
My cream cheese filling turned out lumpy — what went wrong?
Almost always this means the cream cheese wasn't soft enough. Even slightly cold cream cheese will leave lumps that don't beat out. If it happens, try setting your bowl over a larger bowl of warm water for a minute and beating again — sometimes that rescues it. Going forward, leave the cream cheese out for at least 30 to 45 minutes before you start.
Can I use freshly whipped cream instead of Cool Whip?
You can, but whip it to stiff peaks first, and fold it in gently. The filling will be slightly less stable than with Cool Whip (which has stabilizers in it), so if you're using fresh whipped cream, I'd keep the cheesecakes refrigerated right until serving and not freeze them. The flavor is a bit more delicate but genuinely good.
These gingerbread Oreo mini cheesecakes have become one of those recipes I don't need to think about anymore in December — I just make them. The ingredients are things I already have or can pick up anywhere, the method is genuinely simple, and the result looks like I put in way more effort than I did. That combination is rare and I appreciate it.
What I keep coming back to is how well the gingerbread Oreo does its job as a base. It softens just enough overnight to give you something between a crust and a cookie — not soggy, not hard, just right. I've made no-bake cheesecakes with crushed crumb crusts and with whole cookies, and for this particular recipe the whole cookie method is easier and honestly better. Less mess, more flavor, no butter math.
If you're putting together a holiday dessert spread, these pair really well with something like my Slow Cooker Cracker Barrel Fried Apples — the warm, cinnamon-spiced apples next to cold, creamy cheesecake is a genuinely good combination on a dessert table. And if you need a festive drink to go alongside, the Snowy Pineapple Punch is what I usually set out for guests.
December is chaotic in my kitchen. These cheesecakes are one thing that makes it a little less so. 🎄🍰✨

GINGERBREAD OREO NO-BAKE MINI CHEESECAKES
Ingredients
- 12 Gingerbread Oreos whole
- 8 oz cream cheese softened
- ¼ cup granulated sugar
- 1 teaspoon vanilla extract
- ½ teaspoon ground cinnamon
- ¼ teaspoon ground ginger
- 1 cup whipped topping like Cool Whip
- Crushed gingerbread cookies or Oreos for garnish optional
Instructions
Prepare Crust:
- Line a muffin tin with cupcake liners. Place one Gingerbread Oreo at the bottom of each liner.
Make Filling:
- In a bowl, beat cream cheese, sugar, vanilla, cinnamon, and ginger until smooth. Fold in whipped topping until fluffy.
Assemble Cheesecakes:
- Spoon the filling over each Oreo base, smoothing the tops.
Chill to Set:
- Refrigerate for at least 3 hours or until firm.
Garnish (Optional):
- Top with crushed cookies, whipped cream, or festive sprinkles before serving.
Notes
These cheesecakes can be made 1–2 days in advance and stored in the fridge. Customizing the Flavor:
Add a pinch of nutmeg or cloves for deeper spice or mix in a tablespoon of molasses for a stronger gingerbread flavor. Serving Suggestions:
Serve chilled with a dusting of cinnamon or on a dessert tray with other festive bites. Storage Tips:
Keep refrigerated in an airtight container for up to 4 days.
If you're putting together a holiday dessert lineup, here are a few more recipes from my kitchen that are worth bookmarking:
- Rice Krispie Christmas Puddings — another no-bake holiday treat that kids love making
- Red Velvet Cupcakes with Cream Cheese Frosting — moist, fluffy, and always the first thing to disappear
- Meltaway Brownie Cookies — fudgy, gooey, and one bowl to clean
- Snowy Pineapple Punch — a festive drink that pairs perfectly with a sweet dessert table
-
{"@context":"https://schema.org","@type":"Article","headline":"GINGERBREAD OREO NO-BAKE MINI CHEESECAKES","description":"Creamy, festive Gingerbread Oreo No-Bake Mini Cheesecakes combine spicy gingerbread and Oreo for a perfect holiday treat.","datePublished":"2025-06-14T09:45:13+00:00","dateModified":"2026-05-03T21:17:22+00:00","author":{"@type":"Person","name":"Sana Umer","url":"https://forfoodiefriends.com/about/","description":"Self-taught home cook with 10+ years of kitchen experience. Mom of two who develops every recipe in her own kitchen.","jobTitle":"Recipe Developer & Food Blogger","image":"https://forfoodiefriends.com/wp-content/uploads/sana-umer-author-photo.jpg"},"publisher":{"@type":"Organization","name":"For Foodie Friends","url":"https://forfoodiefriends.com/","logo":{"@type":"ImageObject","url":"https://forfoodiefriends.com/wp-content/uploads/forfoodiefriends-logo.png"}},"mainEntityOfPage":{"@type":"WebPage","@id":"https://forfoodiefriends.com/gingerbread-oreo-no-bake-mini-cheesecakes/"},"image":"https://forfoodiefriends.com/wp-content/uploads/2025/06/GINGERBREAD-OREO-NO-BAKE-MINI-CHEESECAKES.jpg"}



Comments
No Comments