
It took me four attempts before I got macarons right. The first batch cracked on top. The second had no feet at all. The third were hollow inside — which, if you've never experienced macaron heartbreak, is a special kind of frustration. The fourth batch finally looked the way they were supposed to, and I stood at my kitchen counter eating three of them before they even made it to the plate.
What I figured out through those failures is that macarons aren't hard because the ingredients are complicated — it's four things, basically — they're hard because the technique has a few specific moments where things can go wrong. The macaronage fold. The resting time. The oven temperature. Once I understood WHY each step mattered, instead of just following instructions blindly, everything clicked. That's what I want to give you here: not just what to do, but why you're doing it.
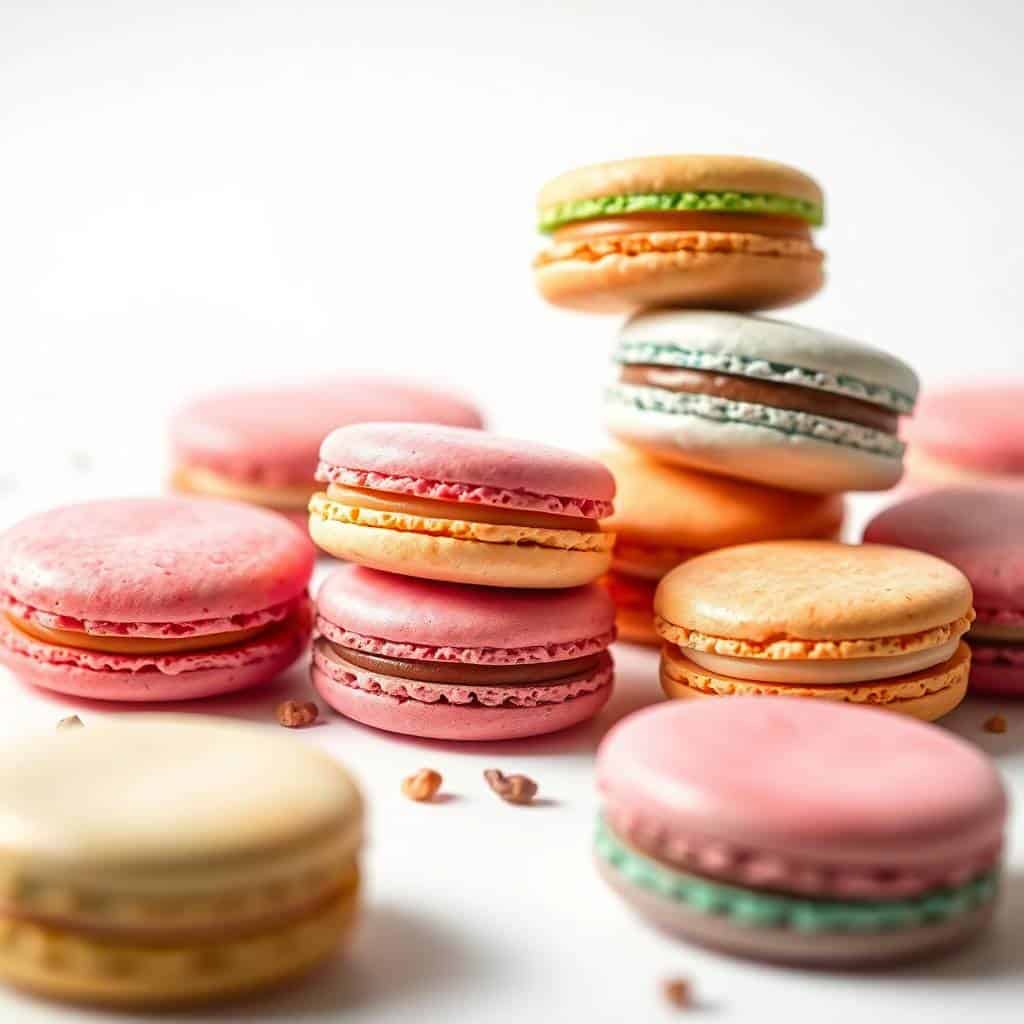
Zainab has become my macaron taste-tester. She lines them up by color and eats them in order from lightest to darkest, which is very much a seven-year-old way to eat a French pastry. I usually make a double batch now because one batch disappears before I can even get a photo. If you're baking for a celebration or making gifts, double batch is the move — these freeze beautifully. If you love baking for occasions, my Valentine's Day Chocolate Cake is another recipe that boxes up and gifts really well.
One expectation to set before we start: your first batch might not be perfect, and that's completely fine. Mine wasn't. What matters is that you understand what went wrong so you can fix it next time. I'll call out the common failure points as we go so you know what to watch for. Macarons reward attention and patience — and I'll tell you, when the feet rise in the oven for the first time and the shells come out smooth and glossy, it feels genuinely satisfying.
Why You'll Love This Recipe
- The ingredients list is genuinely short: Almond flour, powdered sugar, egg whites, granulated sugar. That's the shell. You probably have most of this already. The intimidating reputation of macarons comes from the technique, not the shopping list — which means you don't need to track down anything exotic at a specialty store. Bob's Red Mill almond flour from Walmart or Trader Joe's works perfectly.
- The texture is unlike anything else: There's a specific crunch when you bite through a properly made macaron shell, and then it gives way to a chewy, almost caramel-like interior. That combination doesn't happen by accident — it happens because of the resting step and the precise baking temperature, both of which I'll explain. Once you understand how the texture develops, you'll protect those steps fiercely.
- They're completely customizable: The base shell is neutral enough that you can take it in almost any direction — lemon, chocolate, pistachio, rose. The filling is where you get creative. I've filled these with raspberry jam when I didn't feel like making buttercream, and they were honestly some of my favorites. The recipe is a framework, not a rigid rule.
- They make an impressive gift: A box of homemade macarons looks like you spent a weekend at a French patisserie. The reality is you spent about two hours in your kitchen. I've gifted these for birthdays, Eid, and teacher appreciation, and every time people assume I bought them somewhere fancy. The gap between effort and impression is very wide with macarons.
- Each batch teaches you something: I know that sounds like something you'd put on a motivational poster, but with macarons it's genuinely true. Batch one might crack. Batch two might have no feet. Batch three starts coming together. By batch four you're reading the batter texture like you've been doing this for years. This recipe is written to help you understand what you're looking for at each stage, so the learning curve is shorter.
Ingredients
- For the Macaron Shells:
- ¾ cup (75g) almond flour — sifted, Bob's Red Mill works great
- 1 cup (120g) powdered sugar
- 2 large egg whites, at room temperature
- ¼ cup (50g) granulated sugar
- ¼ teaspoon cream of tartar
- Gel food coloring, optional (gel only — liquid food coloring will thin the batter)
- For the Basic Buttercream Filling:
- ½ cup (1 stick / 115g) unsalted butter, softened
- 1½ cups (180g) powdered sugar
- 1 teaspoon vanilla extract
- 1 tablespoon milk
Directions
- Step 1: Sift the dry ingredients. Sift together almond flour and powdered sugar into a large bowl, discarding any large almond pieces that won't pass through. I do this twice — it sounds fussy but it makes a real difference in getting smooth shells with no bumps on top.
- Step 2: Make the meringue. In a clean, completely grease-free bowl, beat the egg whites on medium speed until foamy. Add the cream of tartar, then gradually add the granulated sugar about a tablespoon at a time. Increase to high speed and beat until you have stiff, glossy peaks — the meringue should hold its shape firmly when you pull the beaters away. If you're adding gel food coloring, fold it in here.
- Step 3: Macaronage — the fold. This is the most critical step. Add the almond flour mixture to the meringue all at once and fold using a wide spatula. You want to deflate the meringue slightly — pressing the batter against the sides of the bowl as you fold. Keep going until the batter flows slowly like lava and falls off the spatula in a thick ribbon. You should be able to draw a figure-8 with the falling batter without it breaking. Undermixed means peaks and cracks; overmixed means flat, spreading shells.
- Step 4: Pipe the shells. Transfer the batter to a piping bag fitted with a round tip (a ½-inch opening works well). Pipe 1½-inch circles onto a parchment-lined baking sheet, holding the bag straight down and releasing pressure cleanly. Once piped, firmly tap the baking sheet against the counter several times to pop any air bubbles. If small peaks remain on top, wet your finger and gently press them down.
- Step 5: Rest — don't skip this. Leave the piped shells at room temperature for 30 to 60 minutes until the surface is dry to the touch and no longer sticky. This forms a skin on top, which is what forces the macaron to expand sideways and create the signature "feet" at the base. If you skip this step, you will not get feet. I learned this the hard way on batch number two.
- Step 6: Bake. Preheat your oven to 300°F (150°C). Bake for 15 to 18 minutes until the shells are set and the feet are visible. They should not wobble when you gently nudge them. Let them cool completely on the pan before attempting to remove them — pulling them off warm is how you break shells.
- Step 7: Make the buttercream. Beat the softened butter until smooth and pale, about 2 minutes. Add the powdered sugar gradually, then the vanilla and milk, and beat until fluffy. Taste it. If it needs more vanilla, add it. This is your filling and it should taste good on its own.
- Step 8: Fill and assemble. Match shells in pairs by size. Pipe buttercream onto the flat side of one shell and sandwich gently with its pair. Press just until the filling reaches the edge. Refrigerate the assembled macarons for at least an hour — ideally overnight. The shells soften slightly as they absorb the filling, and the texture improves significantly. This is called "maturing" and it's real.

Tips for Success
- Use a kitchen scale if you can: I know I said I cook without fancy equipment, and I mean it — but for macarons, a $10 kitchen scale from Walmart genuinely matters. Almond flour especially is inconsistent when measured by volume because it settles differently depending on how it was stored. Too much almond flour makes dense, dull shells. A scale removes the guesswork and costs less than a dinner out.
- Egg whites must be at room temperature: Cold egg whites don't whip to full volume and the meringue won't be as stable. I pull mine out of the fridge at least 30 minutes before I start. If you forget — and I have — set the sealed eggs in a bowl of warm (not hot) water for 10 minutes. Not perfect but much better than starting cold.
- Pick a dry day if you can: This one genuinely frustrated me before I understood it. Humidity in the air competes with the shell's ability to form a skin during resting. On a humid day the shells take longer to dry and sometimes never fully set. In Pakistan I have to choose my macaron days carefully. If you're baking in the UK in autumn, try running a fan near the baking tray during the resting period — it helps.
- Don't open the oven while they're baking: I know the temptation. I've given in to it and watched feet collapse in real time. Set a timer and walk away. The temperature drop from opening the door too early can undo everything the resting step set up. Peek through the oven glass if you need to — just don't crack the door until the timer goes off.
- A piping template makes even circles easier: Print a template with 1½-inch circles online, slide it under the parchment paper while you pipe, then pull it out before you tap the tray. Same-size shells pair up neatly and bake more evenly. Completely free, completely low-tech, and it makes the finished box look like you knew exactly what you were doing.
Variations
- Chocolate macarons: Substitute 2 tablespoons of the almond flour with 2 tablespoons of good cocoa powder — Dutch-process if you have it. Fill with a simple chocolate ganache (equal parts dark chocolate chips and heavy cream, melted together and cooled until thick). This is the version I make most often and the one that disappears fastest. My husband, who doesn't usually go for delicate sweets, will eat these.
- Lemon macarons: Add 1 teaspoon of lemon zest directly to the meringue before folding in the dry ingredients. Fill with lemon curd (store-bought is fine) or a lemon buttercream made by adding 2 teaspoons lemon juice and 1 teaspoon zest to the basic buttercream. These are the ones I'd serve alongside my Italian Lemon Pound Cake for a lemony dessert spread.
- Coffee macarons: Dissolve 1 teaspoon of instant espresso powder in ½ teaspoon of hot water, let it cool, then fold it into the meringue. Fill with a mocha buttercream — the basic recipe with 1 tablespoon of cocoa powder and ½ teaspoon of espresso added. Strong coffee flavor, slightly bitter against the sweet shell. If you're a coffee person, this one's for you.
- Jam-filled macarons: Skip the buttercream entirely and fill with good-quality raspberry, strawberry, or blackberry jam. This is my quick version when I don't want to make a separate filling. Use a jam that's thick enough to not run — if yours is loose, refrigerate it first to firm it up. The tartness of the jam against the sweet shell is genuinely good.
- Nut-free version: Replace the almond flour with sunflower seed flour (you can make your own by blending raw sunflower seeds in a food processor until fine, then sifting). The texture is slightly different — a bit denser — but the technique is the same. This is a good option if you're baking for someone with a tree nut allergy. I'll be honest: I haven't perfected this version yet, but it works well enough to be worth trying.
Serving and Storage
Serving
Macarons are actually better the day after you make them — this is something the original recipe notes correctly and I want to emphasize. The shells soften slightly overnight in the fridge as they absorb the filling, and the texture goes from crispy-all-the-way-through to that ideal crisp-outside-chewy-inside that you're aiming for. If you can make them the day before you need them, do it. Serve at room temperature — pull them from the fridge about 20 minutes before eating. They're lovely with coffee or tea, and they pair beautifully alongside something like this French Antilles Coconut Flan if you're building a full dessert spread.
Storage
Store assembled macarons in an airtight container in the fridge for up to 5 days. Layer them with parchment paper between layers so they don't stick or get marked. For longer storage, freeze them in a single layer first, then transfer to a freezer bag — they keep for up to a month. Thaw in the fridge overnight, not on the counter, to prevent condensation from making the shells sticky. Unfilled shells can also be stored in an airtight container at room temperature for 2 days, or frozen for up to 3 months.

Frequently Asked Questions
Why did my macarons crack on top?
Cracking almost always means the shells didn't rest long enough before baking — the skin hadn't fully formed, so the expanding batter broke through the surface instead of pushing sideways. It can also happen if your oven runs too hot. Give the shells a full 45 to 60 minutes of resting time, and if cracking keeps happening, drop your oven temperature by 10°F and try again.
Why are my macarons hollow inside?
Hollow shells usually come from underbaking or from over-whipped meringue. If the centers are hollow and slightly sticky, add 2 to 3 more minutes to your bake time. If the meringue was beaten past stiff peaks into a dry, clumpy texture before you started folding, that can also cause hollowness — the structure isn't stable enough to hold the interior. Stiff peaks should be glossy, not dry-looking.
My macarons have no feet. What went wrong?
No feet is usually a resting issue or an oven temperature issue. The skin that forms during resting is what forces the batter to expand sideways and create feet — if that skin didn't form (because humidity was too high or rest time was too short), there's nothing directing the expansion. Make sure the surface is completely dry and non-sticky before baking. Also check that your oven is actually reaching 300°F — oven thermometers are $10 and worth it if you bake frequently.
Can I make macarons without a stand mixer?
Yes — a hand mixer works perfectly well and that's what I use. You can technically whip egg whites by hand with a balloon whisk, but it takes a long time and a very strong arm. A basic hand mixer from any store gets you to stiff peaks in about 5 to 7 minutes. I don't own a stand mixer and I've made dozens of batches of macarons without one.
How far ahead can I make macarons?
Assembled macarons keep in the fridge for up to 5 days, and honestly the texture on days 2 and 3 is better than day 1. If you're making them for an event, baking two days ahead is ideal — they'll be at peak texture when you serve them. Unfilled shells can be made and frozen up to a month ahead, then thawed and filled the day before you need them. That's actually my preferred approach when I'm batch-baking for gifts.

EASY MACARON RECIPE FOR BEGINNERS
Ingredients
For the Macaron Shells:
- 1 cup powdered sugar
- ¾ cup almond flour
- 2 large egg whites at room temperature
- ¼ cup granulated sugar
- ¼ teaspoon cream of tartar
- Gel food coloring optional
For the Filling (Basic Buttercream):
- ½ cup unsalted butter softened
- 1½ cups powdered sugar
- 1 teaspoon vanilla extract
- 1 tablespoon milk
Instructions
Prepare Dry Ingredients:
- Sift together almond flour and powdered sugar into a bowl. Set aside.
Make the Meringue:
- In a clean mixing bowl, beat egg whites until foamy. Add cream of tartar. Gradually add granulated sugar and beat until stiff peaks form. Add food coloring if using.
Fold the Batter (Macaronage):
- Gently fold the dry mixture into the meringue with a spatula until the batter flows like lava and forms ribbons.
Pipe and Rest:
- Transfer batter to a piping bag with a round tip. Pipe small circles onto a lined baking tray. Tap tray to release air bubbles. Let rest 30–60 minutes until a skin forms.
Bake:
- Preheat oven to 300°F (150°C). Bake for 15–18 minutes until set and feet form. Let cool completely.
Make the Filling:
- Beat butter until smooth. Gradually add powdered sugar, vanilla, and milk until creamy.
Assemble:
- Pipe filling onto half the shells and top with remaining shells to form sandwiches.
Notes
- Make Ahead: Macarons taste better the next day! Store filled macarons in the fridge for up to 3 days.
- Customizing the Flavor: Add extracts, zest, or matcha powder to the shells or filling. Try chocolate ganache, jam, or flavoured buttercreams.
- Serving Suggestions: Perfect for afternoon tea, festive parties, edible gifts, or wedding showers.
- Allergy-Friendly Options: Use nut-free seed flour for shell alternatives or try dairy-free filling.
- Storage Tips: Store in an airtight container in the fridge for up to 5 days. Bring to room temperature before serving. Freeze for longer storage.





Comments
No Comments